Maginot Line
| Game Modes | ||||
|---|---|---|---|---|
Contents
Overview
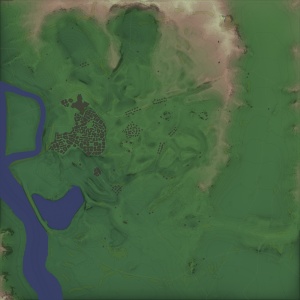
Maginot Line sometimes referred to as Sector Montmedy is a ground forces map available in all modes. It was added in Update 1.75 "La Résistance". The map is based off the area around a section of the Maginot Line; a series of concrete fortifications built by France in the 1930s, along the border between France and Germany, to deter a German invasion.
The north and south areas of the map are open fields with reasonably few trees, however many small hills, and the uneven nature of the terrain break up the map and provide cover from enemy tanks. The Maginot Line fortifications, consisting mostly of concrete pillboxes / bunkers, run west to east across the middle of the map. The clusters of fortifications provide areas for players to fight around and are generally used as capture zones. Battles in the middle and east of the map offer a mix of medium to long range engagements, with players shooting each other from the ridge lines of hills, as well as shorter range combat around the fortification clusters and small towns that litter the area.
The west of the map is radically different, consisting of a large town. The town is a tightly packed network of streets and residential buildings. There are also open slightly more open areas, in the form of plazas and park like areas. As is to be expected nearly all combat in the town takes place at very short range. The layout of the town allows for plenty of opportunities to get around the side / rear of (and if needed escape from) enemy tanks.
A smaller town is present in the middle of the map, forming part of the fortified line, which crosses the map.
The tank battles map is 4km x 4km (restricted to 3.3km x 3.3km in battle). The air battles map is 64km x 64km.
Game Description
Historical Background
The map is a reasonably accurate representation of the French town of Sedan, part of Fortified Sector of Montmédy, of the Maginot Line (the map is called "Sector Montmedy" in the game files). The flow of the Meuse River, and the Château de Sedan (the large castle overlooking the town) are modeled reasonably accurately; however the exact layout of the town itself, and the surrounding villages, may be off.
French defences in the Sedan sector of the Maginot Line were much weaker than in other areas of the line. The French believed that the terrain in the Ardennes region was impassable for tanks; and so the possibility of a German attack through the region was all but ruled out by the French General Staff in the 1930s; and so during the construction of the line most of the effort was spent fortifying other areas where an attack was deemed more likely. Military exercises in 1938 exposed the weakness of the area with French General André-Gaston Prételat estimating that German forces could break through and cross the Meuse River in less than 60 hours (in reality it took them 57 hours). In late 1939 approval was granted to reinforce the sector, however poor weather conditions slowed work.
The Battle of Sedan lasted from the 12th - 15th May 1940. The German Army advanced through southern Belgium on 12 May, reaching Sedan by nightfall. German forces reported no sign of French forces and the town was captured without resistance. In the following days the German forces attacked the French defences surrounding Sedan on the west bank of the Meuse, with the aim of securing the bridges over the river. On 14 May, the Royal Air Force (RAF) and Armée de l'Air (French Air Force) tried to destroy the bridges, and prevent German reinforcements reaching the west bank; however the Luftwaffe prevented them from doing so. In large air battles, the Allies suffered heavy losses. By the 15th May German forces had secured the Bridges, and crossed the river. The French launched a number of counter attacks between the 15th & 17th of May, but they all failed to dislodge the German forces from the bridgeheads. The fall of Sedan allowed German forces to avoid the Maginot Line and encircle allied forces, forcing the famous evacuation at Dunkirk.
Notable Landmarks
Castle
The Castle of Sedan located near the city, can be used to watch both the point A and B while being protected by it's walls.
City
The city can be used to trick enemies into it's maze like streets, since the city can make a challenge for any enemy trying to search for other players, it should be noted that it is a considerable defense for anti-airs and perfect for ambushes.
The Meuse (river)
The Meuse can be used by any amphibian tank to get to the other side and ambush any unsuspecting enemies.
Map configuration
Domination
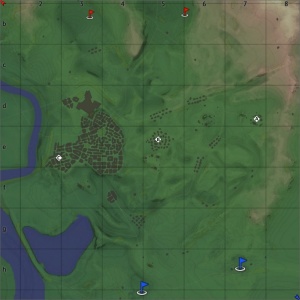
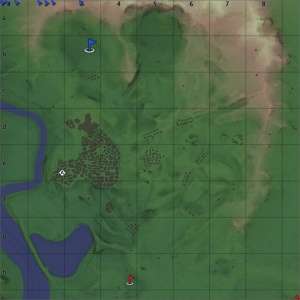
There are three Capture Points. In RB (the full map) point A is in the east most fortification cluster, B is in the smaller town, and C is in the west of the main town. In AB point A is in a fortification cluster between the smaller town and where it appears in RB, B is in the same place, and C is in the east of the main town.
Conquest
There are three configurations of the Conquest mode, each with one Capture Point. The point will be in one of the locations that appear in domination mode.
Battle
There are two capture points, each belonging to a team. The points are located in the west of the town and the east nost fortification cluster (in RB).
Strategy
Describe what focus a team should have when spawning into the map
Media
- Videos
See also
Links to the articles on the War Thunder Wiki that you think will be useful for the reader, for example:
- reference to related locations
External links
Paste links to sources and external resources, such as:
- topic on the official game forum;
- other literature.


