R3 T106 FA
Contents
Description
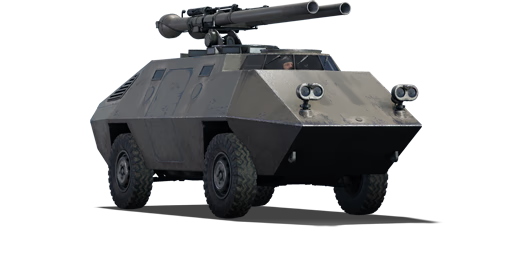
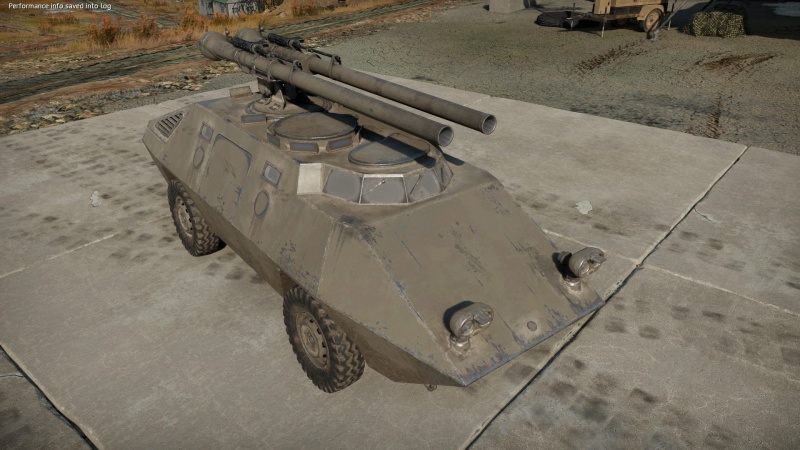
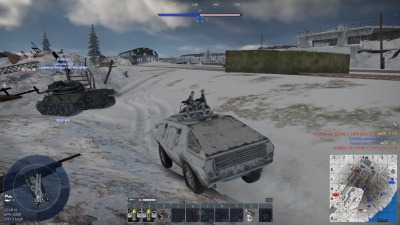
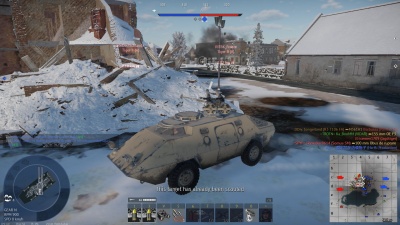
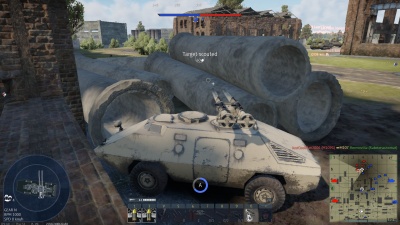
The OTO Melara R3 Capraia was a reconnaissance vehicle made mainly for the export market. The Italian army did also test it as they were interested in seeing if the Folgore regiment could have a use for it. The R3 Capraia was made in at least 7 prototypes, each with their own special configurations and armaments. Despite interest, no country ultimately put it into service due to a saturated market for light reconnaissance vehicles. The R3 Capraia was equipped with various armament options, including a 7.62 mm machine gun, a 12.7 mm machine gun, a 20 mm autocannon, and a TOW ATGM launcher.
Introduced in Update 1.85 "Supersonic", the R3 T106 FA is equipped with two American 106 mm recoilless rifles attached to a turret. The main munitions available are HESH and HEAT rounds; paired with its great speed, these allow the R3 to become a very nimble tank destroyer, able to inflict serious damage to the enemy team while taking to damage when used with situational awareness and map knowledge. When you are out of position, you can still support your team as a scout, much like with the FIAT. Scouting not only will bring more points but will make victory more likely than before. The R3 Capraia lacks smoke grenades and has relatively weak armour, it does not get access to thermals, night vision devices, or a gun stabiliser, but its overwhelming firepower and high speed allows it to stay on par with ATGM tank threat level in the eyes of others. As a wheeled vehicle, it can reach high speeds, allowing it to quickly pounce on enemies or rush capture zones. Unfortunately, sometimes the R3's speed can also be a drawback, as it is extremely unstable in turns and may appear to be too slow on maps with snow or mud. Despite its flaws, the R3 is effective even outside its own battle rating when used intelligently.
General info
Survivability and armour
Armour type:
- Aluminum alloy 7039 (hull)
- Armoured Glass (windows)
- Wheel (tires)
| Armour | Front (Slope angle) | Sides | Rear | Roof |
|---|---|---|---|---|
| Hull | 33 mm (62°) Upper Glacis 33 (56°) Lower Glacis |
15 mm (27-31°) Top 15 mm (16-20°) Bottom 15 mm Wheelwells |
15 mm (70°) Engine access panel 15 mm Lower Plate 5 mm Engine vent 15 mm (54°) Lower Glacis |
33 mm (28°) Front Glacis 15 mm Crew compartment 15 mm (20°) Engine access panel |
| Gun mount | 15 mm | |||
| Cupola | 15 mm | |||
Notes:
- All windows are 30 mm thick.
- The tires are 10 mm thick and the torsion bars are 1 mm thick.
- The belly is 15 mm thick.
The R3 T106 FA has the same chassis as the R3 T20 FA-HS. This means that it will have the same level of protection. Compared to the FIAT Chassis (FIAT 6614 / AUBL/74), the armour is a lot better. This is because the frontal plates are thick and angled, which allows the car to take a few hits from 12.7 mm machine guns, with driver window being the only real weak spot. The back is also decently protected against 12.7 mm, with radiator taking the brunt of damage in worst case scenario, but the armour will fail to protect against HMG attacks of tall tanks or from high ground in general.
However, this car is still vulnerable to heavy machine gun fire, as sides can't block it even at an extreme angle, so directly facing enemy heavier tanks with the front or the back at all the times is important. Sometimes enemies refuse to take Italian light tanks seriously and keep firing the MG instead of a cannon, which may give R3 enough time to fire rifles back at them.
Strafing aircraft will also have no issues with destroying the car as angled armour means nothing to them. Bombs and rockets also deal overpressure damage if the R3 T106 FA is standing in their destruction radius. Artillery is likely to destroy the car in a single hit, but sometimes it takes 3 close hits.
The survivability is still high, as the car has the ability to poke just the gun out of cover. This not only makes the tank very difficult to spot, but in case of a hit, only the barrel will be damaged (and often only 1 of them which allows you to fire with the other one). Unfortunately, compared to the FIAT, the dual guns are extremely easy to hit and damage, so literally staring at the enemy tanks is no longer safe.
Mobility
| Game Mode | Max Speed (km/h) | Weight (tons) | Engine power (horsepower) | Power-to-weight ratio (hp/ton) | |||
|---|---|---|---|---|---|---|---|
| Forward | Reverse | Stock | Upgraded | Stock | Upgraded | ||
| Arcade | 128 | 33 | 3.4 | 147 | 181 | 43.24 | 53.24 |
| Realistic | 115 | 29 | 84 | 95 | 24.71 | 27.94 | |
The mobility of the R3 T106 FA is exactly the same as the R3 T20 FA-HS. It has highest maximum speed in a straight line of all Italian light tanks of the rank, but has significant issues with its controls past 40 km/h.
In RB, on regular terrain speed will be at least 60 km/h, or 50 km/h when going up hills. It can do 30-35 km/h on terrain with movement penalty, and on a road it can accelerate towards the advertised maximum speed. In AB, the car can easily drive at 80 km/h and skyrocket into 110+ km/h, but driving past 65 km/h (cruise control 1) with remove all semblance of control over it and cause it to drift instead of turning.
Due to War Thunder's map sizes, the maximum speed that can be achieved before a significant turn has to be made is generally about 98 km/h. To take advantage of speed, car must move in a straight line. Almost intimate map knowledge is required to avoid all the smallest pot holes and ground inclines, as if the car turns even a little too much, it will start turning on its own. If the car hits any "rough" slope it will be sent flying, doing a random backflip, and then, hopefully, landing on its side to slowly recover. Sometimes, R3 lands on its roof and can no longer proceed without a teammate help, thus ignoring the problem is not an option.
Letting go of gas allows the driver to regain some control of the car, allowing to sustain some terrain imperfections, like a random 3 degree incline change or having to pass a shallow hill (which will make the car fly, but in a controllable way). If serious turn is required, slowing down is necessary. The R3 performs best on desert maps and on maps with railroads, as those provide the smoothest terrain possible for the car to thrive.
Despite its issues, the R3 T106 FA is one of the fastest armoured vehicles in the BR range. It is technically faster than the FIAT chassis on all terrains and faster than famous fast light tanks like the Ru 251 on hard and medium terrain. This generally allows the car to fire first as opponents won't be expecting it to be near them so soon.
Modifications and economy
Armaments
Main armament
| 106 mm Cannone da 106 s.r.M40A1 | Turret rotation speed (°/s) | Reloading rate (seconds) | |||||||||||
|---|---|---|---|---|---|---|---|---|---|---|---|---|---|
| Mode | Capacity | Vertical | Horizontal | Stabilizer | Stock | Upgraded | Full | Expert | Aced | Stock | Full | Expert | Aced |
| Arcade | 5 | -7°/+10° | ±180° | N/A | 28.6 | 39.5 | 48.0 | 53.1 | 56.5 | 13.00 | 11.50 | 10.60 | 10.00 |
| Realistic | 17.9 | 21.0 | 25.5 | 28.2 | 30.0 | ||||||||
The R3 T106 FA uses the same 106 mm recoilless rifles as the FIAT 6614 and the same ammunition, but on a different chassis and with a different turret. Even at its worst, the gun rotation speed is 20°/sec which is very good when reacting to new threats. This came at a cost of the gun stability and vertical traverse angles - the car can no longer use some of the cover that FIAT could and firing on the move is now risky. Use of the excellent speed to flank and get closer is something Italian tankers get very used to at the rank, but the rifles are extremely bouncy, which leads to a very long time before they are ready to be precisely fired, so additional practice is required to aim them on a move even in AB.
The left gun is fired through the "secondary armament" key. It is imperative to separate it from "fire primary armament" in settings to avoid vasting ammunition (Controls > Ground Vehicles > Weaponry > Fire from secondary guns). When aiming, remember that the secondary gun is offset half a meter to the left. If surgigal precision is required when aiming the left rifle, it is possible to use the secondary sight (Controls > Ground Vehicles > Weaponry > Select secondary weapon) to swap to its sniper scope and direct aim assist in AB, but remember to swap back with the same key after firing, as secondary sight cannot fire the "primary" rifle or rangefinder machine gun at all.
Each gun reloads with about 10 seconds on experted crew with maximum reloading skill, allowing for about 12 shots a minute (with both rifles) or a 5 second reload when chain firing. Unfortunately, the R3 T106 FA has only 5 rounds per gun, so it is essential that the player does not waste the ammo on engagements over 1,000 m and tries to aim for critical weakspots to save ammo.
On capture point, the main (right) cannon rearms first, the shell on the left of "ammo choice" UI is going to be supplied first. If you spend 5-th shell from the main rifle while rearming the left, it will rearm the right one again, ammo starving the left rifle further. It is important to have at least one shell left for the left rifle when going for a rearm, as otherwise the car only has one weapon to defend itself against onlookers.
The shells have quite a low velocity (500 m/s), making aiming quite difficult as range estimation has to be very accurate. The problem is generally solved by the rangefinding machine guns. Presence of another rifle allows to make a follow-up shot, making it quite easy to stop and subsequently obliterate even moving targets up to 1,000 m. Even so, having a second gun gives no guarantee of a hit, unless the targets are sitting still and not moving.
Ammunition
The R3 T106 FA gets access to both a HEAT round (433 mm flat penetration) and an all-out devastating HESH round (152 mm normal penetration, 30 mm overpressure penetration).
HEAT can deal with superheavy tanks that can ignore HESH. The HESH round often destroys enemies in one hit if used properly, though in AB it sometimes loses its edge due to the "crew replenishment" mechanic.
Normally HESH has issues with destroying tanks which have external shields, but due to having a secondary gun practically any tank can be "double tapped" with some effort, making HESH the primary ammunition for any commander with decent aim.
| Penetration statistics | |||||||
|---|---|---|---|---|---|---|---|
| Ammunition | Type of warhead |
Penetration @ 0° Angle of Attack (mm) | |||||
| 10 m | 100 m | 500 m | 1,000 m | 1,500 m | 2,000 m | ||
| M344A1 | HEAT | 433 | 433 | 433 | 433 | 433 | 433 |
| M361A1 | HESH | 152 | 152 | 152 | 152 | 152 | 152 |
| Shell details | ||||||||||||
|---|---|---|---|---|---|---|---|---|---|---|---|---|
| Ammunition | Type of warhead |
Velocity (m/s) |
Projectile mass (kg) |
Fuse delay (m) |
Fuse sensitivity (mm) |
Explosive mass (TNT equivalent) (kg) |
Ricochet | |||||
| 0% | 50% | 100% | ||||||||||
| M344A1 | HEAT | 503 | 7.96 | 0 | 0.01 | 1.65 | 65° | 72° | 77° | |||
| M361A1 | HESH | 498 | 7.95 | 0.1 | 4 | 5.04 | 73° | 77° | 80° | |||
Ammo racks
| Full ammo |
Rack empty | Visual discrepancy |
|---|---|---|
| 10 | 2 (+8) | No |
Notes:
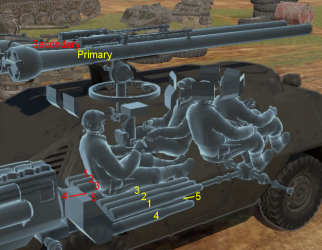
- The ammo rack has a capacity of 10 rounds in UI and X-ray because it is selected for both guns at once.
- You can only choose to load an even number of rounds (0/2/4/6/8/10).
- The actual ammo stowages are split between rifles (5 for each). The way ammo depletes is mirrored for the primary and the secondary gun.
- Rounds are modeled individually and disappear after having been shot or loaded.
- Full ammo load should be brought for the cannon (10 HESH or 8 HESH, 2 HEAT) because running out of shells is very common in this vehicle even with full ammunition load.
- The picture shows in which order rounds are fired.
Additional armament
| 106 mm Cannone da 106 s.r.M40A1 | Turret rotation speed (°/s) | Reloading rate (seconds) | |||||||||||
|---|---|---|---|---|---|---|---|---|---|---|---|---|---|
| Mode | Capacity | Vertical | Horizontal | Stabilizer | Stock | Upgraded | Full | Expert | Aced | Stock | Full | Expert | Aced |
| Arcade | 5 | -7°/+10° | ±180° | N/A | 28.6 | 39.5 | 48.0 | 53.1 | 56.5 | 13.00 | 11.50 | 10.60 | 10.0 |
| Realistic | 17.9 | 21.0 | 25.5 | 28.2 | 30.0 | ||||||||
Machine guns
| 12.7 mm M80 | ||||
|---|---|---|---|---|
| Mount | Capacity (Belt) | Fire rate | Vertical | Horizontal |
| Coaxial main gun (right) | 120 (5) | 300 | N/A | N/A |
| Coaxial secondary gun (right) | 120 (5) | 300 | N/A | N/A |
Much line on the FIAT, the rangefinding rifles are mounted on top of every recoilless rifle. They deal practically no damage and simply show where the shell of a corresponding cannon will fall. The presence of tracers in the belt makes the car easily detectable when used, as not many tanks have paired MGs.
Usage in battles
- Overall performance
In terms of gameplay, the R3 T106 FA is similar to the FIAT, but not necessarily identical.
Similar to most other light tanks, the best way to play this vehicle is either as an ambush vehicle or as a flanking vehicle. This helps to avoid sudden direct confrontations which in turn masks the vehicle's greatest weaknesses which are poor fire stability (gun bounce) and poor armour. Ambushing even in highly popular pathways can be very successful with this tank due to its dual rifles, reducing the chance you will be overwhelmed. Brawling can be done in this vehicle due to its fast acceleration and decent turret traverse, allowing it to duck in and out of cover to fire very quickly, though it should always be done carefully.
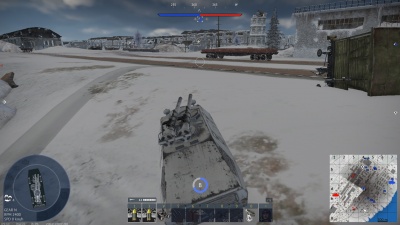
In majority of cases, medium sized rocks are no longer a feasible cover (unlike with FIAT), so only small ones are useable considering gun aiming angles. The small rocks and shallow hills are R3's best friends. If you are forced to guard from low ground on uneven terrain, make sure to look around, as standing on a tall hill is not ideal due to poor vertical aiming angles, while standing on a flat surface will allow you to fling shells over cover:
As mentioned in the armament section, using the right round can lead to great success against opponents. If you do not take even a bit of HEAT, knowing how to use the HESH round is imperative to success with this vehicle. Due to the nature of HESH, some tanks will require very precise targeting for effective use, so here are some aiming recommendations:
- Conqueror - Lower front plate, rear half of turret (front half may have external HEAT shield), cupola
- T34/T29 - Turret roof (unreliable), turret ring (unreliable), turret side (aim specifically away from the gun mask), anywhere on hull
- T44/100 - Panels on hull sides can deflect HESH, so either double tap it in the same spot or aim for the turret sides as far from the gun as possible
- M103 - Anywhere on the hull, turret side. Do not target the gun mantlet and other relatively unangled areas
- Caernarvon - Anywhere on turret except the gun mantlet (and even the sloped parts since 100% ricochet is at 80°)
- T32 - Anywhere on the hull, turret side
- T95 - Roof, upper front plate, sides, cupola
- IS-6 - Turret sides, anywhere on the hull
- IS-3- Anywhere on hull, upper half of side turret (lower half has 156 mm armour, which is more than 152 mm penetration), Turret ring
- T-54 - Turret side, upper front plate
- IS-4M - the toughest for the R3 T106 FA. The upper front plate is easily penetrated, but the angled plate and the hull sides as well as turret sides are all too tough. Even the rear is too tough except for the top half of the rear turret armour. Basically shoot the upper front plate, but anywhere else will be bounce or protected by tracks.
From the list, the recommended shot on most tanks with HESH is the turret side armour, as there is no tracks or side skirts to block your shell and armour there even on heavy tanks is usually less than 152 mm raw thickness.
Be careful when shooting an angled upper front plate of modern tanks, as many of them have compartment separators and you will only get the driver by shooting that part of the hull. However, if you aim towards the top half of the upper front plate, the shrapnel is powerful enough that it should incapacitate all of the turret crew anyways. Also, don't shoot the engines unless you have to, as a potent shot is rare and you won't one shot even with a solid hit.
In case of emergency, the two guns the R3 T106 FA can allow for one shot to go for the cannon barrel or tracks first, then the second gun can line up for a good shot on a weak spot.
- Arcade mode
In arcade mode, the R3 is much closer to FIAT in terms of BR and thus has to meet an overabundance of heavy tanks all the time, which require better aim. Additionally, it is less fitting for direct trench warfare role than FIAT due to poorer aiming angles, turret being easily targetable with aim assist and limited ammunition, so it must be used ever so slightly differently. It also drives significantly slower due to constantly drifting and flipping over if terrain is not perfectly smooth, so it sometimes fails to arrive on time. Fortunately, it has two weapons at once, so everyone need to treat you twice as seriously as soon as you get used to the bouncyness of the turret.
In comparison to FIAT, you want to arrive on point faster than at least medium tanks. You may be able to slap other light tanks away, but the majority of medium tanks require at least half-decent aim (or may just not fall to a single shot) and are just as likely to blow you up if you don't crash into some kind of cover immediately. Remember, on maps with a lot of turns and twists all you can do is drive at about 65 km/h if you don't want to risk flipping over some random small rock, so plan accordingly.
To have better chances at survival, try to be less apprehensive and at least have decency to move out of enemy sights after firing and try to not push your luck with tanks that cannot be one-shot. Sometimes, there isn't any cover that you could use, or you would simply run out of ammunition trying to shoehorn the R3 into a bastion defence role. In these cases you need to either assault enemy way ahead of the capture point (so that you can run away and reload at least one gun before they could catch up), or work as an area denial vehicle, controlling angles and corners, rather than trying to play as a flat out portable turret.
When doing area denial, be as obnoxious and difficult to hit as possible, while blocking the capture point. Try to always present the back of the car to minimize damage taken. It doesn't even have to be you who destroys the enemy targets, but you need to give the enemy team a message to slow down their assault. Always position yourself in a way that lets the enemy still see you, but doesn't let them touch you without driving into a "that's a double barrel, i will certainly die if i go there" zone:
Whenever possible, spam "scouting" at everything that moves to earn airstrike points. Chances are, while you are flying a bomber R3 will be able to reload one of the rifles completely, so not only it improves chances of winning, but helps to reduce idle time. Additionally, if you will be able to bomb enemy top players, they won't be able to earn a bomber themselves, futher improving your safety.
Pros and cons
Pros:
- Powerful dual 106 mm recoilless rifles
- The rifles are placed on the very top of the vehicle, so it is technically only vulnerable to overpressure damage in optimal conditions
- Insane top speed in a straight line; on some maps it can cut off enemy trying to leave their spawn
- Resilient to heavy machine gun fire from the front and the back (although not immune)
- Can swim
Cons:
- Will be prioritized as a target by the enemy team due to its notoriety
- Takes time to aim rifles due to the wobbly suspension and turret, especially when stock
- Drifts if turns past 40 km/h, flips over very often, on most maps it is slower than expected
- Thin armour overall, vulnerable to everything besides 7.62 mm
- Can be destroyed by simply ramming it at top speed
History
The Story of the OTO R3 Capraia begin during the late cold war, OTO Melara was looking to make a reconnaissance vehicle for Italy in the 1980's that would be able to be easy to manufacture and hopefully be picked up by the Italian army and put into service. During that era a lot of nations around the world would experiment with creating light, easily transportable, multi role vehicles. OTO Melara was no different and in the years leading up to this they had already some experience in the field. After some time designing the new vehicle, OTO Melara would finally first display the prototype of the R3 Capraia, (The Capraia received its production name after an island of the Tuscan archipelago.) which would be shown at an Italian Naval exhibition at Genoa in 1982. As previously mentioned they wanted a multi-role vehicle, so for this many different variants would begin to emerge. According to OTO Melara, the R3 Capraia was able to use multiple types of weapon systems, such as a TOW launcher and a dual M40 106 mm recoilless rifle (both of these versions likely weren't actually made but could be made if someone showed interest). The variant in game has access to the American made 106 mm recoilless rifle, 2 mounted on the turret. The vehicle was able to fire on the move and if there was no access to bridges, the R3 Capraia is amphibious. At the time not many vehicles of the era had the same ability. It was extensively tested by the Italian army, and even though it showed some great qualities, at the time there was not a need for that type of vehicle. It had high performance for the era mainly due to the possibility of integrating various weapon systems. Following the conclusion of its evaluation by the Italian army, the OTO R3 Capraia prototypes were put in storage inside of the OTO Melara factory.
A number of armament options were proposed by OTO Melara. These included:
- the R3 T12.7 FA, armed with an externally mounted 12.7 mm M2 HB machine gun in a turret with full 360° traverse and a maximum elevation of -10° to +50°;
- the R3 T7.65 FA, armed with an externally mounted 7.65 mm machine gun in a turret with full 360° traverse and a maximum elevation of -10° to +25°;
- the R3 T20 FA-HS, armed with an externally mounted Oerlikon KAD-B17 20 mm cannon in a turret with full 360° traverse and a maximum elevation of -10° to +60°;
- the R3 Folgore ×2 FA, armed with two externally mounted Breda Folgore anti-tank missiles and a secondary 7.65 mm machine gun;
- the R3 T106 FA, armed with two externally mounted 106 mm M40 type recoilless rifles; and
- the R3 TOW, armed with an externally mounted launcher for a Hughes TOW ATGM system. In the early 1980s, the OTO Melara company developed a new armoured car, called the OTO R 2.5 "Gorgona". Investing heavily into research and development efforts, OTO Melara continued developing the design into a "Special Task Vehicle" as part of a private venture. The resulting OTO R3, nicknamed in production as "Capraia" was first shown off at the Italian Naval Exhibition in Genoa in 1982. The new vehicle received increased armour protection around its body, protecting the crew from rifle-calibre fire and shrapnel. Furthermore, the vehicle could be armed with various weaponry, ranging from MGs, over cannons to ATGMs, depending on the version. Despite their very promising and versatile design, this family of combat vehicles were only built and used in very limited numbers. - From Devblog
Media
- Skins
- Videos
See also
- Vehicles equipped with the same chassis
- Other vehicles of similar configuration and role
External links
- [Devblog] OTO R3 T106: Double Barrel Mayhem
- [Topwar.ru] OTO Melara Gorgona R2.5 and R3 Capraia armored cars
| Italy light tanks | |
|---|---|
| Italy | |
| L6/40 | L6/40 · L6/40 (31 Rgt.) |
| M11/39 | M11/39 |
| Autoblindo | AB 41 · AB 43 |
| Fiat 6614/6616 | FIAT 6614 · AUBL/74 · AUBL/74 HVG |
| R3 Capraia | R3 T106 FA |
| Centauro | Centauro I 105 · Centauro I 105 R · Centauro I 120 · Centauro RGO · VRCC |
| Freccia | VBC (PT2) · Freccia |
| Dardo | Dardo · VCC-80/60 · VCC-80/30 |
| Other | C13 T90 |
| USA | ▄M3A3 · ▄M24 · ▄M18 |
| Hungary | |
| WWII | Csaba · Toldi IIA |
| Post | ◔BTR-80A · KF41 |


