Difference between revisions of "SARC MkIVa"
(Specs-Card image added) |
(New Specs-Card Artimage. Old picture moved to Media: Images) |
||
| (23 intermediate revisions by 8 users not shown) | |||
| Line 6: | Line 6: | ||
{{Specs-Card | {{Specs-Card | ||
|code=uk_sarc_mk4_a | |code=uk_sarc_mk4_a | ||
| − | |images={{Specs-Card-Image|GarageImage_{{PAGENAME}}.jpg| | + | |images={{Specs-Card-Image|GarageImage_{{PAGENAME}}.jpg|ArtImage2_{{PAGENAME}}.png}} |
}} | }} | ||
| Line 17: | Line 17: | ||
{{Specs-Tank-Armour}} | {{Specs-Tank-Armour}} | ||
<!-- ''Describe armour protection. Note the most well protected and key weak areas. Appreciate the layout of modules as well as the number and location of crew members. Is the level of armour protection sufficient, is the placement of modules helpful for survival in combat? If necessary use a visual template to indicate the most secure and weak zones of the armour.'' --> | <!-- ''Describe armour protection. Note the most well protected and key weak areas. Appreciate the layout of modules as well as the number and location of crew members. Is the level of armour protection sufficient, is the placement of modules helpful for survival in combat? If necessary use a visual template to indicate the most secure and weak zones of the armour.'' --> | ||
| − | + | The SARC MkIVa has poor survivability, with the 12 mm rounds able to penetrate the sides and 20 mm rounds the front. The crew is very tightly packed, meaning that any shot that hits one crew member it likely to knock out at least two. The SARC being open-topped leaves it highly vulnerable to even low calibre HE and aircraft bullets. | |
| + | |||
| + | The SARC MkIVa's manoeuvrability and good reverse gear should be used to avoid getting hit and ambush the enemy. Vehicles with 20 mm autocannons and enemy SPAAs are very dangerous for the SARC, as they can easily shred its armour. | ||
'''Armour type:''' <!-- The types of armour present on the vehicle and their general locations --> | '''Armour type:''' <!-- The types of armour present on the vehicle and their general locations --> | ||
| Line 41: | Line 43: | ||
{{Specs-Tank-Mobility}} | {{Specs-Tank-Mobility}} | ||
<!-- ''Write about the mobility of the ground vehicle. Estimate the specific power and manoeuvrability, as well as the maximum speed forwards and backwards.'' --> | <!-- ''Write about the mobility of the ground vehicle. Estimate the specific power and manoeuvrability, as well as the maximum speed forwards and backwards.'' --> | ||
| − | + | The MkIVa does not accelerate quickly. In a city fight or in a sniping match, this is a liability. | |
| + | |||
| + | This is offset by its very high top speed of 80 km/h, granting it unmatched speed on flat terrain. Combined with its smaller size, this gives the MkIVa the opportunity to sneak into a hidden location and get flanking shots on unsuspecting enemies. | ||
| + | |||
| + | In unflat or offroad conditions, the MkIVa's mobility is greatly reduced. The mediocre 15 hp/t power-to-weight ratio means that the vehicle might not even start on a slope and will slide down uncontrollably. Therefore, either avoid driving uphills, or gain some speed before reaching the hill. | ||
| − | {{tankMobility}} | + | {{tankMobility|abMinHp=147|rbMinHp=84}} |
=== Modifications and economy === | === Modifications and economy === | ||
{{Specs-Economy}} | {{Specs-Economy}} | ||
| + | |||
| + | The MKIVa depends on mobility. Due to the relatively low chance that the crew will survive getting shot, crew replacement is not an immediate priority. Instead, focus first on spare parts and FPE, then better ammunition, then mobility improvements. The strength of the MKIVa is its speed, so upgrades that facilitate that are important. Ignore brakes for last: you shouldn't need to stop better, you need to get to a hiding spot faster. | ||
== Armaments == | == Armaments == | ||
| Line 55: | Line 63: | ||
{{main|QF 2-pounder (40 mm)}} | {{main|QF 2-pounder (40 mm)}} | ||
| − | + | The QF 2-Pounder is a solid weapon for its tier. It can frontally penetrate most vehicles at its BR, but excels in flanking shots. The stock Shot MK. 1 AP shell has poor performance, so take effort to phase this out in favour of the better performing Shot MK IX APCBC. | |
| + | |||
| + | The slow rotation speed of the turret means that the gun should ideally used in an ambush role on the sides of enemy tanks. The relatively high fire rate also allows for consistent fires on enemy targets. | ||
| + | |||
| + | Be advised that the QF 2-pounder loses accuracy over 500 meters, so it is ill advised to use the gun for this purpose: leave the sniping for the tank destroyers and concentrate on ambushing. | ||
| + | |||
| + | The MkIVa doesn't have a vertical stabiliser or more than 5 degrees of gun depression, so it cannot utilise hills to ambush or respond quickly to a close quarter surprise encounter as good as some other vehicles like A13. This limits the opportunities it can maximise its firepower. However, with good situational awareness and map knowledge, this disadvantage can be countered to an extent. | ||
{| class="wikitable" style="text-align:center" width="100%" | {| class="wikitable" style="text-align:center" width="100%" | ||
| Line 66: | Line 80: | ||
|- | |- | ||
! ''Arcade'' | ! ''Arcade'' | ||
| − | | rowspan="2" | 37 || rowspan="2" | -5°/+20° || rowspan="2" | ±180° || rowspan="2" | - || | + | | rowspan="2" | 37 || rowspan="2" | -5°/+20° || rowspan="2" | ±180° || rowspan="2" | - || 15.6 || 21.6 || 26.2 || 29.0 || 30.9 || rowspan="2" | 3.64 || rowspan="2" | 3.22 || rowspan="2" | 2.97 || rowspan="2" | 2.80 |
|- | |- | ||
! ''Realistic'' | ! ''Realistic'' | ||
| − | | | + | | 9.8 || 11.5 || 13.9 || 15.4 || 16.4 |
|- | |- | ||
|} | |} | ||
| Line 77: | Line 91: | ||
==== [[Ammo racks]] ==== | ==== [[Ammo racks]] ==== | ||
| − | + | [[File:Ammoracks_SARC MkIVa.png|right|thumb|x250px|[[Ammo racks]] of the {{PAGENAME}}]] | |
| − | <!-- '''Last updated:''' --> | + | <!-- '''Last updated: 2.27.2.40''' --> |
{| class="wikitable" style="text-align:center" | {| class="wikitable" style="text-align:center" | ||
|- | |- | ||
| Line 85: | Line 99: | ||
! 2nd<br>rack empty | ! 2nd<br>rack empty | ||
! 3rd<br>rack empty | ! 3rd<br>rack empty | ||
| − | |||
| − | |||
| − | |||
! Visual<br>discrepancy | ! Visual<br>discrepancy | ||
|- | |- | ||
| − | | '''37''' || | + | | '''37''' || 33 ''(+4)'' || 28 ''(+9)'' || 1 ''(+36)'' || No |
|- | |- | ||
|} | |} | ||
| + | '''Notes''': | ||
| + | * Shells are modeled individually and disappear after having been shot or loaded. | ||
| + | * Turret empty: 28 ''(+9)'' shells. | ||
| + | {{Clear}} | ||
=== Machine guns === | === Machine guns === | ||
{{Specs-Tank-Weapon|2}} | {{Specs-Tank-Weapon|2}} | ||
<!-- ''Offensive and anti-aircraft machine guns not only allow you to fight some aircraft but also are effective against lightly armoured vehicles. Evaluate machine guns and give recommendations on its use.'' --> | <!-- ''Offensive and anti-aircraft machine guns not only allow you to fight some aircraft but also are effective against lightly armoured vehicles. Evaluate machine guns and give recommendations on its use.'' --> | ||
{{main|M1919A4 (7.62 mm)}} | {{main|M1919A4 (7.62 mm)}} | ||
| − | |||
| − | |||
{| class="wikitable" style="text-align:center" width="50%" | {| class="wikitable" style="text-align:center" width="50%" | ||
| Line 107: | Line 120: | ||
! Mount !! Capacity (Belt) !! Fire rate !! Vertical !! Horizontal | ! Mount !! Capacity (Belt) !! Fire rate !! Vertical !! Horizontal | ||
|- | |- | ||
| − | | || | + | | Coaxial || 1,000 (250) || 500 || N/A || N/A |
|- | |- | ||
|} | |} | ||
| + | |||
| + | The M1919A4 is a good machine gun, though it is only useful for knocking out lightly-armoured vehicles like trucks or the occasional half-tracks. The high ammo count per belt means that sustained fire can be used to check bushes and smoke for obscured targets. | ||
| + | |||
| + | In an emergency, it can be used as an anti-aircraft weapon, but the poor damage output and turret rotation speed makes this option less advisable. | ||
== Usage in battles == | == Usage in battles == | ||
| Line 117: | Line 134: | ||
=== Pros and cons === | === Pros and cons === | ||
<!-- ''Summarise and briefly evaluate the vehicle in terms of its characteristics and combat effectiveness. Mark its pros and cons in a bulleted list. Try not to use more than 6 points for each of the characteristics. Avoid using categorical definitions such as "bad", "good" and the like - use substitutions with softer forms such as "inadequate" and "effective".'' --> | <!-- ''Summarise and briefly evaluate the vehicle in terms of its characteristics and combat effectiveness. Mark its pros and cons in a bulleted list. Try not to use more than 6 points for each of the characteristics. Avoid using categorical definitions such as "bad", "good" and the like - use substitutions with softer forms such as "inadequate" and "effective".'' --> | ||
| − | |||
'''Pros:''' | '''Pros:''' | ||
| − | * | + | |
| + | * Narrow profile; difficult to hit at range, can navigate tight spaces well | ||
| + | * High top speed on paved surfaces; comparable to fast foes like [[BT-5]] | ||
| + | * Quick reload speed | ||
| + | * Fast acceleration; top speed can be reached fairly quickly | ||
| + | * Access to smoke grenades | ||
'''Cons:''' | '''Cons:''' | ||
| − | * | + | |
| + | * Low survivability; poor armour can be easily penetrated by anything | ||
| + | * Off-road mobility is lacklustre | ||
| + | * Difficult to control at high speeds | ||
| + | * High centre of mass, can tip over when operating on uneven ground | ||
| + | * No gun stabiliser compared to similar vehicles (e.g. [[Daimler Mk II]]) | ||
| + | * Below-average gun depression | ||
== History == | == History == | ||
<!-- ''Describe the history of the creation and combat usage of the vehicle in more detail than in the introduction. If the historical reference turns out to be too long, take it to a separate article, taking a link to the article about the vehicle and adding a block "/History" (example: <nowiki>https://wiki.warthunder.com/(Vehicle-name)/History</nowiki>) and add a link to it here using the <code>main</code> template. Be sure to reference text and sources by using <code><nowiki><ref></ref></nowiki></code>, as well as adding them at the end of the article with <code><nowiki><references /></nowiki></code>. This section may also include the vehicle's dev blog entry (if applicable) and the in-game encyclopedia description (under <code><nowiki>=== In-game description ===</nowiki></code>, also if applicable).'' --> | <!-- ''Describe the history of the creation and combat usage of the vehicle in more detail than in the introduction. If the historical reference turns out to be too long, take it to a separate article, taking a link to the article about the vehicle and adding a block "/History" (example: <nowiki>https://wiki.warthunder.com/(Vehicle-name)/History</nowiki>) and add a link to it here using the <code>main</code> template. Be sure to reference text and sources by using <code><nowiki><ref></ref></nowiki></code>, as well as adding them at the end of the article with <code><nowiki><references /></nowiki></code>. This section may also include the vehicle's dev blog entry (if applicable) and the in-game encyclopedia description (under <code><nowiki>=== In-game description ===</nowiki></code>, also if applicable).'' --> | ||
| − | + | The South African Reconnaissance Car (SARC), known in British service as the Marmon-Herrington<ref>David Fletcher, Tank Chat #129, The Tank Museum https://www.youtube.com/watch?v=MQmaXWPouno</ref>, had a remarkably diverse pedigree, as it combined components made in the United States, Canada, and the United Kingdom, put together in South Africa. The service record of its variants was similarly far-flung, despite its relatively small production numbers, as it saw service in WW2, Cyprus, across Africa, and even (from captured Japanese stock) Indonesia.<ref name=":0">[[wikipedia:Marmon-Herrington_Armoured_Car|[Wikipedia] Marmon-Herrington Armoured Car]]</ref> | |
| + | |||
| + | This variant, the Mark IV, fitted a 40 mm 2-pdr. gun in an artillery mounting, not the usual tank-style mantlet. It arrived rather late in WW2, but saw action post-war in Cyprus and with the Arab League. Earlier versions fought with the 1st King’s Dragoon Guards at the Siege of Tobruk in 1941.<ref name=":0" /> | ||
== Media == | == Media == | ||
<!-- ''Excellent additions to the article would be video guides, screenshots from the game, and photos.'' --> | <!-- ''Excellent additions to the article would be video guides, screenshots from the game, and photos.'' --> | ||
| − | '' | + | |
| + | ;Images | ||
| + | <gallery mode="packed-hover" heights="200"> | ||
| + | File:ArtImage SARC MkIVa.png| | ||
| + | </gallery> | ||
| + | |||
| + | ;Skins | ||
| + | |||
| + | * [https://live.warthunder.com/feed/camouflages/?vehicle=uk_sarc_mk4_a Skins and camouflages for the {{PAGENAME}} from live.warthunder.com.] | ||
| + | |||
| + | ;Videos | ||
| + | {{Youtube-gallery|MQmaXWPouno|'''Tank Chats #129 - Marmon-Herrington Mk. IV''' - ''The Tank Museum''}} | ||
== See also == | == See also == | ||
| Line 137: | Line 177: | ||
* ''reference to the series of the vehicles;'' | * ''reference to the series of the vehicles;'' | ||
* ''links to approximate analogues of other nations and research trees.'' --> | * ''links to approximate analogues of other nations and research trees.'' --> | ||
| − | + | ||
| − | + | ;Related development | |
| − | * | + | |
| + | * [[Marmon-Herrington Armoured Car (Family)]] | ||
== External links == | == External links == | ||
| Line 146: | Line 187: | ||
* ''other literature.'' --> | * ''other literature.'' --> | ||
''Paste links to sources and external resources, such as:'' | ''Paste links to sources and external resources, such as:'' | ||
| + | |||
* ''topic on the official game forum;'' | * ''topic on the official game forum;'' | ||
* ''other literature.'' | * ''other literature.'' | ||
| + | |||
| + | === References === | ||
| + | <references /> | ||
{{Britain light tanks}} | {{Britain light tanks}} | ||
[[Category:Wheeled ground vehicles]] | [[Category:Wheeled ground vehicles]] | ||
Latest revision as of 22:56, 16 March 2024
| This page is about the British light tank SARC MkIVa. For other versions, see Marmon-Herrington Armoured Car (Family). |


Contents
Description
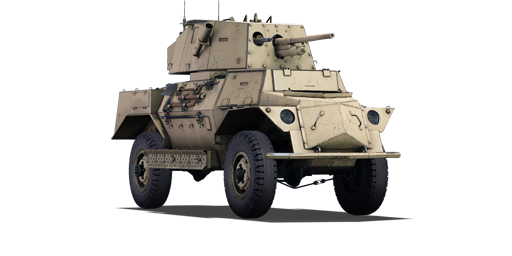
The SARC MkIVa is a rank I British light tank with a battle rating of 1.3 (AB/RB/SB). It was introduced in Update "La Royale".
General info
Survivability and armour
The SARC MkIVa has poor survivability, with the 12 mm rounds able to penetrate the sides and 20 mm rounds the front. The crew is very tightly packed, meaning that any shot that hits one crew member it likely to knock out at least two. The SARC being open-topped leaves it highly vulnerable to even low calibre HE and aircraft bullets.
The SARC MkIVa's manoeuvrability and good reverse gear should be used to avoid getting hit and ambush the enemy. Vehicles with 20 mm autocannons and enemy SPAAs are very dangerous for the SARC, as they can easily shred its armour.
Armour type:
| Armour | Front (Slope angle) | Sides | Rear | Roof |
|---|---|---|---|---|
| Hull | ___ mm | ___ mm Top ___ mm Bottom |
___ mm | ___ - ___ mm |
| Turret | ___ - ___ mm Turret front ___ mm Gun mantlet |
___ - ___ mm | ___ - ___ mm | ___ - ___ mm |
| Cupola | ___ mm | ___ mm | ___ mm | ___ mm |
Notes:
Mobility
The MkIVa does not accelerate quickly. In a city fight or in a sniping match, this is a liability.
This is offset by its very high top speed of 80 km/h, granting it unmatched speed on flat terrain. Combined with its smaller size, this gives the MkIVa the opportunity to sneak into a hidden location and get flanking shots on unsuspecting enemies.
In unflat or offroad conditions, the MkIVa's mobility is greatly reduced. The mediocre 15 hp/t power-to-weight ratio means that the vehicle might not even start on a slope and will slide down uncontrollably. Therefore, either avoid driving uphills, or gain some speed before reaching the hill.
| Game Mode | Max Speed (km/h) | Weight (tons) | Engine power (horsepower) | Power-to-weight ratio (hp/ton) | |||
|---|---|---|---|---|---|---|---|
| Forward | Reverse | Stock | Upgraded | Stock | Upgraded | ||
| Arcade | 94 | 15 | 6.3 | 147 | 181 | 23.33 | 28.73 |
| Realistic | 85 | 14 | 84 | 95 | 13.33 | 15.08 | |
Modifications and economy
| Mobility | Protection | Firepower | ||||||||||||||||||||
|---|---|---|---|---|---|---|---|---|---|---|---|---|---|---|---|---|---|---|---|---|---|---|
|
|
|
The MKIVa depends on mobility. Due to the relatively low chance that the crew will survive getting shot, crew replacement is not an immediate priority. Instead, focus first on spare parts and FPE, then better ammunition, then mobility improvements. The strength of the MKIVa is its speed, so upgrades that facilitate that are important. Ignore brakes for last: you shouldn't need to stop better, you need to get to a hiding spot faster.
Armaments
Main armament
The QF 2-Pounder is a solid weapon for its tier. It can frontally penetrate most vehicles at its BR, but excels in flanking shots. The stock Shot MK. 1 AP shell has poor performance, so take effort to phase this out in favour of the better performing Shot MK IX APCBC.
The slow rotation speed of the turret means that the gun should ideally used in an ambush role on the sides of enemy tanks. The relatively high fire rate also allows for consistent fires on enemy targets.
Be advised that the QF 2-pounder loses accuracy over 500 meters, so it is ill advised to use the gun for this purpose: leave the sniping for the tank destroyers and concentrate on ambushing.
The MkIVa doesn't have a vertical stabiliser or more than 5 degrees of gun depression, so it cannot utilise hills to ambush or respond quickly to a close quarter surprise encounter as good as some other vehicles like A13. This limits the opportunities it can maximise its firepower. However, with good situational awareness and map knowledge, this disadvantage can be countered to an extent.
| 40 mm QF 2-pounder | Turret rotation speed (°/s) | Reloading rate (seconds) | |||||||||||
|---|---|---|---|---|---|---|---|---|---|---|---|---|---|
| Mode | Capacity | Vertical | Horizontal | Stabilizer | Stock | Upgraded | Full | Expert | Aced | Stock | Full | Expert | Aced |
| Arcade | 37 | -5°/+20° | ±180° | - | 15.6 | 21.6 | 26.2 | 29.0 | 30.9 | 3.64 | 3.22 | 2.97 | 2.80 |
| Realistic | 9.8 | 11.5 | 13.9 | 15.4 | 16.4 | ||||||||
Ammunition
| Penetration statistics | |||||||
|---|---|---|---|---|---|---|---|
| Ammunition | Type of warhead |
Penetration @ 0° Angle of Attack (mm) | |||||
| 10 m | 100 m | 500 m | 1,000 m | 1,500 m | 2,000 m | ||
| Shot Mk.1 AP/T | AP | 72 | 68 | 52 | 37 | 27 | 19 |
| Shot Mk.IXB APCBC/T | APCBC | 89 | 86 | 77 | 66 | 57 | 50 |
| Shot Mk.1 APHV/T | AP | 80 | 75 | 58 | 41 | 30 | 21 |
| Shell Mk.1 AP/T | APHE | 66 | 62 | 49 | 36 | 26 | 20 |
| Shell details | ||||||||||||
|---|---|---|---|---|---|---|---|---|---|---|---|---|
| Ammunition | Type of warhead |
Velocity (m/s) |
Projectile mass (kg) |
Fuse delay (m) |
Fuse sensitivity (mm) |
Explosive mass (TNT equivalent) (g) |
Ricochet | |||||
| 0% | 50% | 100% | ||||||||||
| Shot Mk.1 AP/T | AP | 792 | 1.08 | - | - | - | 47° | 60° | 65° | |||
| Shot Mk.IXB APCBC/T | APCBC | 792 | 1.24 | - | - | - | 48° | 63° | 71° | |||
| Shot Mk.1 APHV/T | AP | 853 | 1.08 | - | - | - | 47° | 60° | 65° | |||
| Shell Mk.1 AP/T | APHE | 792 | 1.08 | 1.2 | 9 | 20.9 | 47° | 60° | 65° | |||
Ammo racks

| Full ammo |
1st rack empty |
2nd rack empty |
3rd rack empty |
Visual discrepancy |
|---|---|---|---|---|
| 37 | 33 (+4) | 28 (+9) | 1 (+36) | No |
Notes:
- Shells are modeled individually and disappear after having been shot or loaded.
- Turret empty: 28 (+9) shells.
Machine guns
| 7.62 mm M1919A4 | ||||
|---|---|---|---|---|
| Mount | Capacity (Belt) | Fire rate | Vertical | Horizontal |
| Coaxial | 1,000 (250) | 500 | N/A | N/A |
The M1919A4 is a good machine gun, though it is only useful for knocking out lightly-armoured vehicles like trucks or the occasional half-tracks. The high ammo count per belt means that sustained fire can be used to check bushes and smoke for obscured targets.
In an emergency, it can be used as an anti-aircraft weapon, but the poor damage output and turret rotation speed makes this option less advisable.
Usage in battles
Describe the tactics of playing in the vehicle, the features of using vehicles in the team and advice on tactics. Refrain from creating a "guide" - do not impose a single point of view but instead give the reader food for thought. Describe the most dangerous enemies and give recommendations on fighting them. If necessary, note the specifics of the game in different modes (AB, RB, SB).
Pros and cons
Pros:
- Narrow profile; difficult to hit at range, can navigate tight spaces well
- High top speed on paved surfaces; comparable to fast foes like BT-5
- Quick reload speed
- Fast acceleration; top speed can be reached fairly quickly
- Access to smoke grenades
Cons:
- Low survivability; poor armour can be easily penetrated by anything
- Off-road mobility is lacklustre
- Difficult to control at high speeds
- High centre of mass, can tip over when operating on uneven ground
- No gun stabiliser compared to similar vehicles (e.g. Daimler Mk II)
- Below-average gun depression
History
The South African Reconnaissance Car (SARC), known in British service as the Marmon-Herrington[1], had a remarkably diverse pedigree, as it combined components made in the United States, Canada, and the United Kingdom, put together in South Africa. The service record of its variants was similarly far-flung, despite its relatively small production numbers, as it saw service in WW2, Cyprus, across Africa, and even (from captured Japanese stock) Indonesia.[2]
This variant, the Mark IV, fitted a 40 mm 2-pdr. gun in an artillery mounting, not the usual tank-style mantlet. It arrived rather late in WW2, but saw action post-war in Cyprus and with the Arab League. Earlier versions fought with the 1st King’s Dragoon Guards at the Siege of Tobruk in 1941.[2]
Media
- Images

- Skins
- Videos
See also
- Related development
External links
Paste links to sources and external resources, such as:
- topic on the official game forum;
- other literature.
References
- ↑ David Fletcher, Tank Chat #129, The Tank Museum https://www.youtube.com/watch?v=MQmaXWPouno
- ↑ 2.0 2.1 [Wikipedia] Marmon-Herrington Armoured Car
| Britain light tanks | |
|---|---|
| A13 | A13 Mk I · A13 Mk I (3rd R.T.R.) · A13 Mk II · A13 Mk II 1939 |
| A15 | Crusader II · Crusader "The Saint" · Crusader III |
| A17 | Tetrarch I |
| IFV | Warrior |
| Wheeled | Daimler Mk II · AEC Mk II · Fox · Vickers Mk.11 |
| Other | VFM5 |
| South Africa | |
| SARC | SARC MkIVa · SARC MkVI (2pdr) · SARC MkVI (6pdr) |
| Ratel | Ratel 90 · Ratel 20 |
| Rooikat | Rooikat Mk.1D · Rooikat 105 · Rooikat MTTD |
| Other | Concept 3 · Eland 90 Mk.7 |
| USA | Stuart I · Stuart III |
