Difference between revisions of "15cm sIG 33 B Sfl"
(→Pros and cons: note about the abysmal shell velocity) (Tag: Visual edit) |
(→Pros and cons: mobility) (Tag: Visual edit) |
||
| (67 intermediate revisions by 26 users not shown) | |||
| Line 1: | Line 1: | ||
| − | {{Specs-Card | + | {{Specs-Card|code=germ_sturmpanzer_II}} |
| − | |code=germ_sturmpanzer_II | ||
| − | |||
| − | }} | ||
== Description == | == Description == | ||
| − | <!-- | + | <!--In the description, the first part should be about the history of the creation and combat usage of the vehicle, as well as its key features. In the second part, tell the reader about the ground vehicle in the game. Insert a screenshot of the vehicle, so that if the novice player does not remember the vehicle by name, he will immediately understand what kind of vehicle the article is talking about.--> |
| − | The ''' | + | [[File:GarageImage_{{PAGENAME}}.jpg|420px|thumb|left]] |
| − | + | {{break}} | |
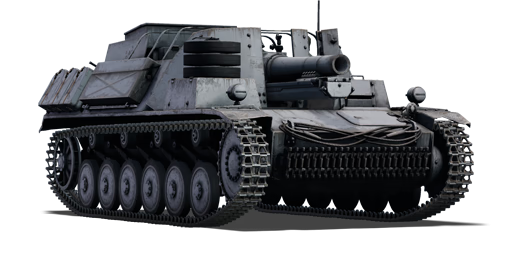
| − | + | The '''{{Specs|name}}''' is a rank {{Specs|rank}} German tank destroyer {{Battle-rating}}. It was introduced in [[Update 1.67 "Assault"]]. Based on the Panzer II chassis, it mounted a 150 millimeter cannon and was used during the North African campaign. | |
== General info == | == General info == | ||
=== Survivability and armour === | === Survivability and armour === | ||
| − | + | <!--Describe armour protection. Note the most well protected and key weak areas. Appreciate the layout of modules as well as the number and location of crew members. Is the level of armour protection sufficient, is the placement of modules helpful for survival in combat? | |
| − | <!-- | ||
| − | |||
| − | |||
| − | |||
| − | |||
| − | |||
| − | |||
| − | |||
| − | |||
| − | |||
| − | |||
| − | |||
| − | |||
| − | |||
| − | |||
| − | |||
| − | |||
| − | |||
| − | |||
| − | The Sturmpanzer II does have enough armour to stop low BR tank rounds, however it should not be relied upon to stop | + | If necessary use a visual template to indicate the most secure and weak zones of the armour.--> |
| + | The Sturmpanzer II does have enough armour to stop low BR tank rounds, however it should not be relied upon to stop High Velocity or High Penetration rounds, especially from other SPGs. It is an open topped vehicle, and since it has no machine guns, it is very vulnerable to air attack. | ||
| − | Despite having very little | + | Despite having very little armor, it does have a lot of empty space in the tank to resist multiple penetrating hits before being destroyed. However, it is hull-breakable against 75mm or larger guns with sufficient AP velocity or HEAT capability. |
=== Mobility === | === Mobility === | ||
| − | |||
<!-- ''Write about the mobility of the ground vehicle. Estimate the specific power and manoeuvrability, as well as the maximum speed forwards and backwards.'' --> | <!-- ''Write about the mobility of the ground vehicle. Estimate the specific power and manoeuvrability, as well as the maximum speed forwards and backwards.'' --> | ||
| − | {{tankMobility|abMinHp=220|rbMinHp=137 | + | {{tankMobility|abMinHp= 220|rbMinHp= 137|<!--AoAweight=(optional) -->}} |
| − | |||
| − | |||
| − | + | The Sturmpanzer II can go up to 45 km/h, but due to the low power-to-weight ratio of 17.04 hp/ton in AB and 9.74 hp/ton in RB, the practical top speed is significantly less. Reverse speed is decent, up to -8.4 km/h. Has a decent turning capability when moving at higher speeds. When stopped it can barely turn do to its weight. | |
| − | |||
== Armaments == | == Armaments == | ||
| − | |||
=== Main armament === | === Main armament === | ||
| − | + | <!--Give the reader information about the characteristics of the main gun. Assess its effectiveness in a battle based on the reloading speed, ballistics and the power of shells. Do not forget about the flexibility of the fire, that is how quickly the cannon can be aimed at the target, open fire on it and aim at another enemy. Add a link to the main article on the gun: <code><nowiki>{{main|Name of the weapon}}</nowiki></code>. Describe in general terms the ammunition available for the main gun. Advise about how to use them and how to fill the ammunition storage.--> | |
| − | <!-- | + | {{main|SIG 33 (150 mm)}} |
| − | {{main| | ||
| − | |||
| − | |||
| − | |||
| − | |||
| − | |||
| − | |||
| − | |||
| − | |||
| − | |||
| − | |||
| − | |||
| − | |||
| − | |||
| − | |||
| − | |||
| − | |||
| − | |||
| − | |||
| − | |||
| − | |||
| − | |||
| − | |||
| − | |||
| − | |||
| − | |||
| − | |||
| − | |||
| − | |||
| − | + | The Sturmpanzer II mounts a S.I.G. 33 Infantry Support cannon, which can fire HEAT or HE rounds. The shell velocity is very slow (240m/s), so slow that it can be awkward to target moving targets or those at long ranges, especially with HE rounds. The calibre of the gun is 15 cm (150 mm/5.9 in). The Sturmpanzer does not have any other weapons. | |
| − | + | The J.Gr.38 HE shell penetrates 65 mm against vertical armour and 60 mm against armour sloped back 60 degrees from vertical (30 degrees from horizontal), due to it having similar mechanics to naval Guns of the same calibre. The 8.6 kg explosive mass ensures that anything that gets penetrated is instantly knocked out or is so badly crippled that a follow-up shot is guaranteed. | |
| − | |||
| − | |||
| − | |||
| − | |||
| − | |||
| − | |||
| − | |||
| − | |||
| − | |||
| − | |||
| − | |||
| − | |||
| − | |||
| − | |||
| − | + | - Note: the HE on this is so powerful that it can even one-shot top rank tanks reliably, but due to the huge mobility disadvantage, this is not recommended unless you know exactly what you are getting yourself into. | |
| − | + | The J.Gr.39 HI/A HEAT shell penetrates 185 mm against vertical armour and still has a 4.16 kg TNT equivalent of explosives behind it, giving it effectively 40-45 mm penetration from the explosion splash on top of the HEAT superplastic copper jet penetration. In one of the minor updates of the game, 120mm and larger HEAT rounds were altered to act more like HE shells to benefit top rank vehicles - tanks such as the Sturmpanzer are unintentional beneficiaries of this change. | |
== Usage in battles == | == Usage in battles == | ||
| − | <!-- | + | <!--Describe the tactics of playing in the vehicle, the features of using vehicles in the team and advice on tactics. Refrain from creating a "guide" - do not impose a single point of view but instead give the reader food for thought. Describe the most dangerous enemies and give recommendations on fighting them. If necessary, note the specifics of the game in different modes (AB, RB, SB).--> |
| − | |||
| − | |||
| − | |||
| − | |||
| − | Another tactic is to try facing down a street while partly undercover. The Sturmpanzer is a relatively small vehicle and many beginning players will not notice the tank, especially if only part of the vehicle is exposed. Patiently wait for an easy target to turn onto the street then fire before they realize where they are being fired from. It is critical to remember the shell drop of the tank cannon after being fired, compared to other tanks, the shell drop is significant over any distance. It is advisable to always fire above where other tanks would typically target to allow for | + | The Sturmpanzer has no air defence weapons, therefore partnering with an SPAA tank at the back of the map is a viable option. For those operators who prefer to close-range brawl with other low-tier tanks, then sticking with another tank is a good idea, mainly due to the long reload time, allowing your partner tank to help fend off any enemy advancers. It has the capability to knock out much higher battle rated tank, so if you're up-tiered, there is still a good chance of survival. However, it is imperative to get a shot off first, because if you come across a higher tier tank, there may not be a second chance. Stay on the move after firing, fall back to safety to reload and then reengage. Another tactic is to try facing down a street while partly undercover. The Sturmpanzer is a relatively small vehicle and many beginning players will not notice the tank, especially if only part of the vehicle is exposed. Patiently wait for an easy target to turn onto the street then fire before they realize where they are being fired from. It is critical to remember the shell drop of the tank cannon after being fired, compared to other tanks, the shell drop is significant over any distance. It is advisable to always fire just above where other tanks would typically target to allow for shell drop and hitting of the enemy vehicle were intended instead of lower than expected. |
| − | Due to the huge HE splash ability and sheer calibre of the gun, it can even be used to | + | Due to the huge HE splash ability and sheer calibre of the gun, it can even be used to hull break high-rank IFVs - BMP-1s at 7.3 are especially common to encounter. It does the same thing to BMP-2s, M3 Bradleys, Warriors, Centauros, and many other vehicles. The HE splash, however, is strong enough that it can one-shot the light, but non-hull-breakable vehicles such as the M41A1 Bulldog, any AMX-13 variation, Crusaders in lower ranks, and many others. Purposely up-tiering it can be a very effective way to earn Silver Lions with the "God Mode!" award - destroying an enemy vehicle 5.0 BR ranks higher (BR 7.0+) than you which nets 20,000 Silver Lions. |
| − | |||
| − | |||
| − | |||
| − | |||
=== Pros and cons === | === Pros and cons === | ||
| − | <!-- | + | <!--Summarize and briefly evaluate the vehicle in terms of its characteristics and combat effectiveness. Mark its pros and cons in a bulleted list. Try not to use more than 6 points for each of the characteristics. Avoid using certain definitions such as "bad", "good" and the like - use substitutions with softer forms such as "inadequate" and "effective".--> |
'''Pros:''' | '''Pros:''' | ||
| − | * | + | * Has the most powerful gun in the game at its rank |
| − | * | + | * Excels when up-tiered, only starts to become obsolete when newer main battle tanks arrive |
| − | * | + | * Can survive hits it will take from rank 1 tanks |
| − | * Low and small | + | * Can make a fair turn at speed when driving along |
| − | * Can withstand a few | + | * Low profile and small front make it easy to hide and easy to camouflage with bushes |
| + | * Speedy for its size and gun caliber | ||
| + | * Can withstand a few blows on the front armour | ||
'''Cons:''' | '''Cons:''' | ||
| − | * | + | * Reload means it is inadequate for close-range combat without allied support |
| − | + | * HE and HEAT are both stopped by various soft debris found on most maps such as fences, concrete blocks, brick walls, wood objects, etc. | |
| − | * HE and HEAT | + | * Open-topped and very vulnerable to aircraft as a result |
| − | * | + | * Very slow at turning |
| − | * Very slow | + | * Limited firing arc |
| − | * | + | * Easily penetrated and immobilized by machine guns (M2, M3A1, etc) and also the guns of light tanks |
| + | * When firing gives significant recoil | ||
| + | * Almost certain you will be destroyed if flanked by enemy without allied support | ||
== History == | == History == | ||
| − | + | ''Describe the history of the creation and combat usage of the aircraft in more detail than in the introduction. If the historical reference turns out to be too long, take it to a separate article, taking a link to the article about the vehicle and adding a block "/ History" (example: <nowiki>https://wiki.warthunder.com/(Vehicle-name)/History</nowiki>) and add a link to it here using the <code>main</code> template. Be sure to reference text and sources by using <code><nowiki><ref></ref></nowiki></code>, as well as adding them at the end of the article with <code><nowiki><references /></nowiki></code>. This section may also include the vehicle's dev blog entry (if applicable) and the in-game encyclopedia description (under <code><nowiki>=== Encyclopedia Info ===</nowiki></code>, also if applicable).'' | |
| − | |||
| − | |||
| − | |||
| − | |||
| − | |||
| − | |||
| − | |||
| − | |||
| − | |||
| − | |||
| − | |||
| − | |||
| − | |||
| − | |||
| − | |||
== Media == | == Media == | ||
| − | + | [[File:15cm slG 33 B Sfl.jpg|thumb|15cm slG 33 B Sfl]] | |
| − | + | == See also == | |
| − | + | ''Links to the articles on the War Thunder Wiki that you think will be useful for the reader, for example:'' | |
| − | |||
| − | |||
| − | |||
| − | |||
| − | |||
| − | |||
* ''reference to the series of the vehicles;'' | * ''reference to the series of the vehicles;'' | ||
| − | * ''links to approximate analogues of other nations and research trees.'' | + | * ''links to approximate analogues of other nations and research trees.'' |
| − | + | == External links == | |
| − | + | ''Paste links to sources and external resources, such as:'' | |
| − | |||
| − | |||
| − | |||
| − | |||
| − | |||
| − | |||
| − | |||
| − | |||
| − | |||
* ''topic on the official game forum;'' | * ''topic on the official game forum;'' | ||
| − | * ''other literature.'' | + | * ''encyclopedia page on the tank;'' |
| − | + | * ''other literature.'' | |
| − | |||
| − | |||
{{Germany tank destroyers}} | {{Germany tank destroyers}} | ||
Revision as of 21:37, 22 April 2020
Contents
Description

The 15cm sIG 33 B Sfl is a rank I German tank destroyer
with a battle rating of 1.0 (AB/RB/SB). It was introduced in Update 1.67 "Assault". Based on the Panzer II chassis, it mounted a 150 millimeter cannon and was used during the North African campaign.
General info
Survivability and armour
The Sturmpanzer II does have enough armour to stop low BR tank rounds, however it should not be relied upon to stop High Velocity or High Penetration rounds, especially from other SPGs. It is an open topped vehicle, and since it has no machine guns, it is very vulnerable to air attack.
Despite having very little armor, it does have a lot of empty space in the tank to resist multiple penetrating hits before being destroyed. However, it is hull-breakable against 75mm or larger guns with sufficient AP velocity or HEAT capability.
Mobility
| Game Mode | Max Speed (km/h) | Weight (tons) | Engine power (horsepower) | Power-to-weight ratio (hp/ton) | |||
|---|---|---|---|---|---|---|---|
| Forward | Reverse | Stock | Upgraded | Stock | Upgraded | ||
| Arcade | 49 | 10 | 15.9 | 220 | 296 | 13.84 | 18.62 |
| Realistic | 46 | 9 | 137 | 155 | 8.62 | 9.75 | |
The Sturmpanzer II can go up to 45 km/h, but due to the low power-to-weight ratio of 17.04 hp/ton in AB and 9.74 hp/ton in RB, the practical top speed is significantly less. Reverse speed is decent, up to -8.4 km/h. Has a decent turning capability when moving at higher speeds. When stopped it can barely turn do to its weight.
Armaments
Main armament
The Sturmpanzer II mounts a S.I.G. 33 Infantry Support cannon, which can fire HEAT or HE rounds. The shell velocity is very slow (240m/s), so slow that it can be awkward to target moving targets or those at long ranges, especially with HE rounds. The calibre of the gun is 15 cm (150 mm/5.9 in). The Sturmpanzer does not have any other weapons.
The J.Gr.38 HE shell penetrates 65 mm against vertical armour and 60 mm against armour sloped back 60 degrees from vertical (30 degrees from horizontal), due to it having similar mechanics to naval Guns of the same calibre. The 8.6 kg explosive mass ensures that anything that gets penetrated is instantly knocked out or is so badly crippled that a follow-up shot is guaranteed.
- Note: the HE on this is so powerful that it can even one-shot top rank tanks reliably, but due to the huge mobility disadvantage, this is not recommended unless you know exactly what you are getting yourself into.
The J.Gr.39 HI/A HEAT shell penetrates 185 mm against vertical armour and still has a 4.16 kg TNT equivalent of explosives behind it, giving it effectively 40-45 mm penetration from the explosion splash on top of the HEAT superplastic copper jet penetration. In one of the minor updates of the game, 120mm and larger HEAT rounds were altered to act more like HE shells to benefit top rank vehicles - tanks such as the Sturmpanzer are unintentional beneficiaries of this change.
Usage in battles
The Sturmpanzer has no air defence weapons, therefore partnering with an SPAA tank at the back of the map is a viable option. For those operators who prefer to close-range brawl with other low-tier tanks, then sticking with another tank is a good idea, mainly due to the long reload time, allowing your partner tank to help fend off any enemy advancers. It has the capability to knock out much higher battle rated tank, so if you're up-tiered, there is still a good chance of survival. However, it is imperative to get a shot off first, because if you come across a higher tier tank, there may not be a second chance. Stay on the move after firing, fall back to safety to reload and then reengage. Another tactic is to try facing down a street while partly undercover. The Sturmpanzer is a relatively small vehicle and many beginning players will not notice the tank, especially if only part of the vehicle is exposed. Patiently wait for an easy target to turn onto the street then fire before they realize where they are being fired from. It is critical to remember the shell drop of the tank cannon after being fired, compared to other tanks, the shell drop is significant over any distance. It is advisable to always fire just above where other tanks would typically target to allow for shell drop and hitting of the enemy vehicle were intended instead of lower than expected.
Due to the huge HE splash ability and sheer calibre of the gun, it can even be used to hull break high-rank IFVs - BMP-1s at 7.3 are especially common to encounter. It does the same thing to BMP-2s, M3 Bradleys, Warriors, Centauros, and many other vehicles. The HE splash, however, is strong enough that it can one-shot the light, but non-hull-breakable vehicles such as the M41A1 Bulldog, any AMX-13 variation, Crusaders in lower ranks, and many others. Purposely up-tiering it can be a very effective way to earn Silver Lions with the "God Mode!" award - destroying an enemy vehicle 5.0 BR ranks higher (BR 7.0+) than you which nets 20,000 Silver Lions.
Pros and cons
Pros:
- Has the most powerful gun in the game at its rank
- Excels when up-tiered, only starts to become obsolete when newer main battle tanks arrive
- Can survive hits it will take from rank 1 tanks
- Can make a fair turn at speed when driving along
- Low profile and small front make it easy to hide and easy to camouflage with bushes
- Speedy for its size and gun caliber
- Can withstand a few blows on the front armour
Cons:
- Reload means it is inadequate for close-range combat without allied support
- HE and HEAT are both stopped by various soft debris found on most maps such as fences, concrete blocks, brick walls, wood objects, etc.
- Open-topped and very vulnerable to aircraft as a result
- Very slow at turning
- Limited firing arc
- Easily penetrated and immobilized by machine guns (M2, M3A1, etc) and also the guns of light tanks
- When firing gives significant recoil
- Almost certain you will be destroyed if flanked by enemy without allied support
History
Describe the history of the creation and combat usage of the aircraft in more detail than in the introduction. If the historical reference turns out to be too long, take it to a separate article, taking a link to the article about the vehicle and adding a block "/ History" (example: https://wiki.warthunder.com/(Vehicle-name)/History) and add a link to it here using the main template. Be sure to reference text and sources by using <ref></ref>, as well as adding them at the end of the article with <references />. This section may also include the vehicle's dev blog entry (if applicable) and the in-game encyclopedia description (under === Encyclopedia Info ===, also if applicable).
Media
See also
Links to the articles on the War Thunder Wiki that you think will be useful for the reader, for example:
- reference to the series of the vehicles;
- links to approximate analogues of other nations and research trees.
External links
Paste links to sources and external resources, such as:
- topic on the official game forum;
- encyclopedia page on the tank;
- other literature.
| Germany tank destroyers | |
|---|---|
| Pz. I Derivatives | Panzerjäger I |
| Pz. II Derivatives | 15cm sIG 33 B Sfl |
| Pz. 38(t) Derivatives | Marder III · Marder III H · Jagdpanzer 38(t) |
| Pz. III Derivatives | StuG III A · StuG III F · StuG III G · StuH 42 G |
| Pz. IV Derivatives | Jagdpanzer IV · Panzer IV/70(A) · Panzer IV/70(V) · Dicker Max · Nashorn · Brummbär · VFW |
| Pz. V Derivatives | Jagdpanther G1 · Bfw. Jagdpanther G1 |
| Pz. VI Derivatives | Sturer Emil · Elefant · Ferdinand · 38 cm Sturmmörser · Jagdtiger |
| Wheeled/Half-track | 8,8 cm Flak 37 Sfl. · Sd.Kfz.251/9 · Sd.Kfz.251/10 · Sd.Kfz.251/22 · Sd.Kfz.234/3 · Sd.Kfz.234/4 · 15 cm Pz.W.42 |
| ATGM Carrier | RakJPz 2 · RakJPz 2 (HOT) · Wiesel 1A2 |
| Other | Waffenträger · M109G · JPz 4-5 · Raketenautomat · VT1-2 |
