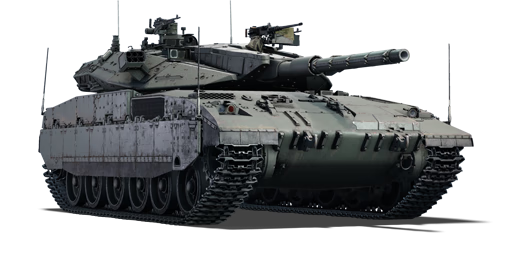
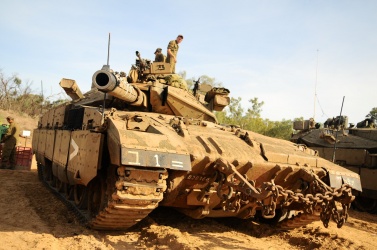
Merkava Mk.2D
| This page is about the Israeli medium tank Merkava Mk.2D. For other versions, see Merkava (Family). |
Contents
Description
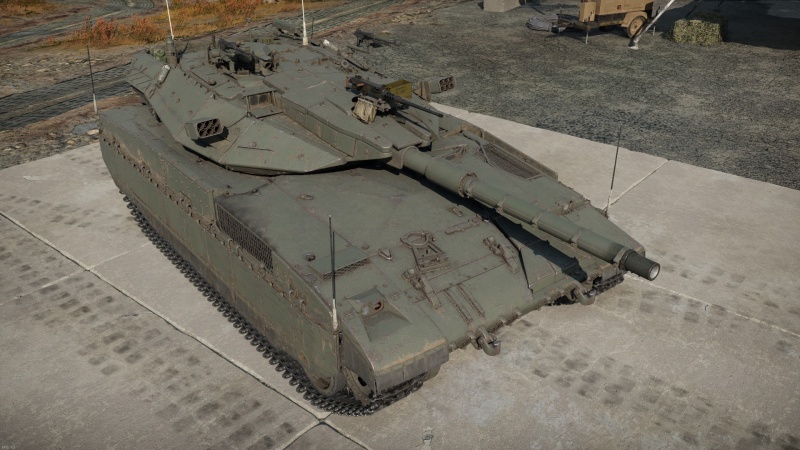
The Merkava Mk.2D was the third and last subvariant of the Merkava Mk.2, which was the second variant of the Merkava main battle tank family. Several enhancements were made to the Merkava Mk.2 over its service life. The Merkava Mk.2B was equipped with gunner thermal imaging equipment; this was followed by more armour and composite screens on the top of the turret of the Merkava Mk.2C, to enhance urban warfare protection against rocket-propelled grenades (RPGs) and anti-tank guided missiles (ATGMs) fired from building rooftops, as well as attacks from enemy air forces. Finally, the Merkava Mk.2D was equipped with the most recent add-on modular composite armour, quite similar to that of the Merkava Mk.4 variant, where damaged modular composite armour may be easily swapped out for new modular composite armour even while in combat. Newly upgraded modular composite armour could also be simply added without requiring significant changes to the tank's fundamental structure.
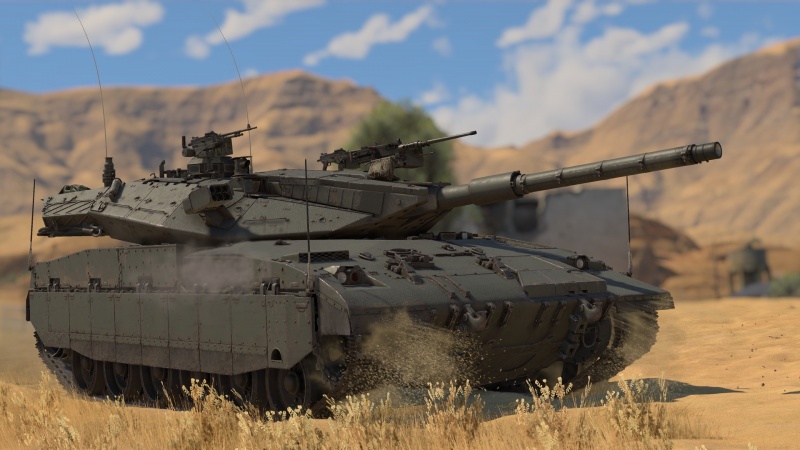
Introduced in Update "Winged Lions", the Merkava Mk.2D is the most advanced derivative of the Merkava Mk.2. With turret protection comparable to the Merkava Mk.4 variant, the Merkava Mk.2D will undoubtedly shine in the hands of any competent player. In rocky terrain, players will have little issue adopting a hull-down position and making the best use of the tank's low silhouette and fully protected turret to lock down areas of the battlefield against adversaries.
General info
Survivability and armour
The Merkava Mk.2D has a complex armour array, with the composite screens and interior armour plates giving the tank a more imposing armour profile than the first glance would suggest.
The tank is rather resistant against chemical tank shells like high-explosive and HEAT shells thanks to the composite screen present on the hull and turret. The composite screen on the sides are even enough for these kinds of threats. However, some higher-performing missiles can still cleave through this armour like butter, so beware of tanks that can fire missiles from a long distance.
Though only a portion of the Merkava Mk.2D's front armour is covered in composite screen, the iconic Merkava engine placement enables the non-composite areas of the hull front to still be survivable against incoming shells. If the penetrating shell cannot penetrate through the engine and its two armour plated fire walls, then the crew interior can survive against a frontal penetration.
Despite all this elaborate protection against some chemical shells, the Merkava Mk.2D's protection against kinetic shells is pretty poor except for the turret front due to its awkward geometry. However, as most enemies the Merkava Mk.2D faces have access to rather high-end kinetic APFSDS shells, this makes the Merkava Mk.2D rather vulnerable to most battlefield threats a player will face in a match.
Armour type:
- Cast homogeneous armour (Hull front, Turret, Gun mantlet)
- Rolled homogeneous armour (Hull, Turret roof)
- Composite screen (Extra laid on Hull front/sides and Turret front/sides)
| Armour | Front (Slope angle) | Sides | Rear | Roof |
|---|---|---|---|---|
| Hull | 20-60* mm (22-88°) Front glacis 50-90 mm (30-57°) Lower glacis |
30-50* mm (12-13°) | 30‡ mm (12-44°) | 30 mm (81-90°) |
| Turret | 30-65*‡ mm (0-78°) Turret front 100 mm (0-83°) Gun mantlet |
30-65*‡ mm (0-61°) | 65‡ mm (0-70°) | 30 mm (86-90°) |
| Cupola | 30 mm (0-32°) | 30 mm (0-33°) | 30 mm (0-33°) | 30 mm |
| Composite screen | * - Presence of composite screen. | |||
| Spaced armour | ‡ - Presence of spaced armour. | |||
Notes:
- Tracks and suspension wheels are 20 mm thick.
- Turret front has 100 mm CHA plate behind the base armour.
- Turret sides and rear consists of spaced armour with the base cast armour and a 45 mm plate behind them.
- Engine is surrounded by RHA plates ranging from 10-35 mm in thickness.
- Hull rear consists of spaced armour with two 30 mm RHA plates.
- Belly armour is 30 mm thick in RHA.
- Ammo rack bundles are surrounded by a 5 or 10 mm thick RHA armour.
Mobility
Comparing the top speeds of contemporary main battle tanks to the Merkava Mk.2D, the Merkava Mk.2D is on the slower side. The only other main battle tank the Merkava Mk.2D will beat in a straight line race is the M60 Patton tanks.
Acceleration is quick in the first 20 km/h speed in gear 1-3, though it starts slowing down when reaching gear 4-5 at around 30-40 km/h. As such, the Merkava Mk.2D can make some quick moves if starting from a stop, but it will still take a while to build up the necessary speed to cross through the open in a timely manner.
When moving at high speed, the Merkava Mk.2D's could have enough momentum to turn the entire tank in a near 180 degree. This does allow the Merkava to quickly orient itself if attacked while it was moving at high speed towards an objective. However, doing this will bleed most, if not all, of the Merkava Mk.2D's speed and so it would be best not to do turn so hard when there is a need to keep moving into a cover.
| Game Mode | Max Speed (km/h) | Weight (tons) | Engine power (horsepower) | Power-to-weight ratio (hp/ton) | ||||
|---|---|---|---|---|---|---|---|---|
| Forward | Reverse | Stock | AoA | Stock | Upgraded | Stock | Upgraded | |
| Arcade | 60 | 26 | 60 | 3 | 1,492 | 1,837 | 24.87 | 29.16 |
| Realistic | 54 | 24 | 852 | 963 | 14.2 | 15.29 | ||
Modifications and economy
Armaments
Main armament
| 105 mm Sharir | Turret rotation speed (°/s) | Reloading rate (seconds) | |||||||||||
|---|---|---|---|---|---|---|---|---|---|---|---|---|---|
| Mode | Capacity | Vertical | Horizontal | Stabilizer | Stock | Upgraded | Full | Expert | Aced | Stock | Full | Expert | Aced |
| Arcade | 54 | -8°/+20° | ±180° | Two-plane | 38.1 | 52.7 | 64.0 | 70.8 | 75.3 | 8.71 | 7.70 | 7.10 | 6.70 |
| Realistic | 23.8 | 28.0 | 34.0 | 37.6 | 40.0 | ||||||||
Ammunition
| Penetration statistics | |||||||
|---|---|---|---|---|---|---|---|
| Ammunition | Type of warhead |
Penetration @ 0° Angle of Attack (mm) | |||||
| 10 m | 100 m | 500 m | 1,000 m | 1,500 m | 2,000 m | ||
| M152 | HEATFS | 400 | 400 | 400 | 400 | 400 | 400 |
| M156 | HESH | 127 | 127 | 127 | 127 | 127 | 127 |
| M111 | APFSDS | 337 | 335 | 330 | 322 | 314 | 306 |
| M413 | APFSDS | 408 | 405 | 398 | 389 | 379 | 370 |
| Shell details | ||||||||||||
|---|---|---|---|---|---|---|---|---|---|---|---|---|
| Ammunition | Type of warhead |
Velocity (m/s) |
Projectile mass (kg) |
Fuse delay (m) |
Fuse sensitivity (mm) |
Explosive mass (TNT equivalent) (kg) |
Ricochet | |||||
| 0% | 50% | 100% | ||||||||||
| M152 | HEATFS | 1,174 | 10.5 | 0.05 | 0.1 | 1.27 | 65° | 72° | 77° | |||
| M156 | HESH | 731 | 11.4 | 0.1 | 4 | 3.17 | 73° | 77° | 80° | |||
| M111 | APFSDS | 1,455 | 4.2 | - | - | - | 78° | 80° | 81° | |||
| M413 | APFSDS | 1,455 | 3.79 | - | - | - | 78° | 80° | 81° | |||
| Smoke shell characteristics | ||||||
|---|---|---|---|---|---|---|
| Ammunition | Velocity (m/s) |
Projectile mass (kg) |
Screen radius (m) |
Screen deploy time (s) |
Screen hold time (s) |
Explosive mass (TNT equivalent) (g) |
| M416 | 732 | 11.6 | 20 | 5 | 25 | 50 |
Ammo racks
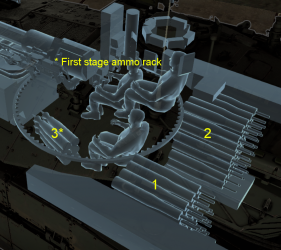
| Full ammo |
1st rack empty |
2nd rack empty |
3rd rack empty |
Visual discrepancy |
|---|---|---|---|---|
| 54 | 31 (+23) | 7 (+47) | 1 (+53) | No |
Notes:
- Shells are modeled individually and disappear after having been shot or loaded.
- Rack 3 is a first stage ammo rack. It totals 6 shells and gets filled first when loading up the tank.
- This rack is also emptied early: the rack depletion order at full capacity is: 3 - 1 - 2.
- Simply not firing when the gun is loaded will move ammo from racks 1 and 2 into rack 3. Firing will interrupt the restocking of the ready rack.
Machine guns
| 12.7 mm M2HB | ||||
|---|---|---|---|---|
| Mount | Capacity (Belt) | Fire rate | Vertical | Horizontal |
| Coaxial | 1,000 (200) | 577 | N/A | N/A |
| 7.62 mm FN MAG 60-40 | ||||
|---|---|---|---|---|
| Mount | Capacity (Belt) | Fire rate | Vertical | Horizontal |
| Coaxial | 6,000 (200) | 600 | N/A | N/A |
| Pintle | 1,800 (200) | 600 | -5°/+50° | -60°/+120° |
| Pintle | 1,800 (200) | 600 | -5°/+50° | -120°/+60° |
Usage in battles
Aside from the additional composite screens on the hull and turret, the Merkava Mk.2D does not differ so greatly compared to the Merkava Mk.2B. The Merkava Mk.2D continues to carry its quirk of possesses a front engine module. This should be taken into consideration when using the Merkava Mk.2D because most hits to the front will inevitably damage the engine and/or cause a fire, which will immobilize the tank. An immobilized tank is open to follow-up shots and so a Merkava that survives the first shot and gets stuck is still open to follow-up shots that will destroy it. Deploying smoke after a damaging hit from the front should be a survival instinct when playing this tank to provide that much extra cover and time needed to repair the tank's mobility to reverse away to cover.
These issues of being hit and easily immobilized means the Merkava Mk.2D player should be encouraged to work with teammates. Since players are now able to help each other assist with repair, having an ally nearby able to provide aid will be important to getting the Merkava moving again as fast as possible. Deploying smoke after you get hit can also give allies that needed concealment to get in close and provide the necessary repair or fire extinguishing aid without getting shot at.
Due to the vulnerability of the hull front, but rather strong turret front geometry, the Merkava Mk.2D should try to fight the enemy in positions where only the turret is exposed. Areas on the battlefield for this to be done are relatively rare and will require a lot of situational awareness and map familiarization to find the right locations. However, if done, the Merkava Mk.2D can place itself and bounce many incoming shells that hit a turret part the wrong way. Doing this from a far distance is also possible with the use of the laser rangefinder to quickly range the target and have the distance automatically calculated into the reticle for a quick hit.
If it is a must for the Merkava Mk.2D to lead an attack right into an enemy objective, careful on how the front armour is exposed when advancing. If turning a corner, try to turn right into it rather than left. If turning right and an enemy attacks around the corner, they will hit your engine and, if lucky, the driver might survive. This is important because if the Merkava is immobile in a way where the front is hanging out the corner but the Merkava's turret cannot aim at the enemy, the enemy can just snipe away at the driver's position until the Merkava Mk.2D is fully knocked out. However, turning from the engine side might give that extra chance of the driver surviving, prolonging the Merkava Mk.2D's survival for either a lucky break or an ally coming to assist.
However, if the Merkava Mk.2D is aware that the player across the corner fires only HE or HEAT shells, take great confidence turning left around the corner as the composite screen on the hull sides and driver front are highly likely to be able to resist against those kinds of shots. The only big concern is if a HE shell explodes and goes down the Merkava Mk.2D roof, or if the tracks get destroyed.
Pros and cons
Pros:
- Effective protection against chemical shells
- Plethora of smoke launchers
- Effective firepower with APFSDS and laser rangefinder / warning system
- Thermal imaging systems for gunner
- The placement of the engine at the front of the vehicle allows for it to occasionally it to soak up some hits and protect the crew, allowing you to return fire even if you are immobilised
Cons:
- Relatively low mobility
- Below average gun elevation angles
- Large ammunition racks in the rear of the vehicle
- Unreliable armour against APFSDS
History
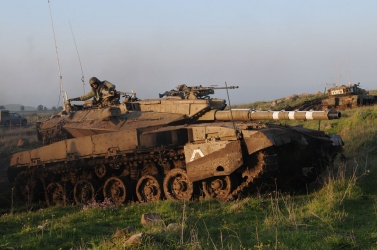
Merkava Mk.1 tanks served in the Israeli Defense Force (IDF) from 1979 as the primary Israeli MBT. Not long after its introduction into service, this tank was sent to lead the way during the First Lebanon War of 1982. Despite proving itself under fire against Syrian T-72As and a variety of other threats, it was obvious that the first iteration of the design was not suitable for the changing combat environment of the 1980s Middle East. In particular, it was found to be lacking in close-quarters and urban combat against asymmetric threats - primarily guerilla infantry using unguided rocket launchers.
The second generation of the Merkava was already under development when the First Lebanon War broke out, but benefited greatly from lessons learned during combat. Over the 6 years in which the Merkava Mk.2 was in production, several important changes were made to compensate for the Mk.1's deficiencies. The Merkava Mk.2D represents the final variant of this generation of Merkava tanks, including all of those modifications.
Firstly, a very familiar feature of all modern Merkava tanks was added to the first Mk.2: the Hairs of Shulamit, a line of heavy iron spheres dangling on chains around the rear rim of the turret. This simple device helps deflect incoming rounds away from the vulnerable turret ring, and increases the chance of prematurely detonating HEAT rockets and missiles. This feature proved to be so successful and cost-efficient that it was retroactively added to all Mk.1 variants as well.
Another major improvement was made to the fire control system, whose computer was updated to take many additional factors into consideration, such as air temperature, humidity, and barometric pressure. This significantly improved the accuracy of the tank's 105 mm cannon, allowing it to reliably outperform the T-72 at long-range combat. The computer was also taught to handle a variety of new shells made available for the Mk.2, and to be able to record its ballistic calculations in order to gradually improve accuracy over time for the specific cannon it was controlling.
The Mk.2's powertrain also saw several improvements, the most major of which was an upgraded transmission that could pivot the tank in-place - a feature sorely required for manoeuvres in dense urban terrain. The Mk.2's engine itself was also slightly more powerful than the Mk.1's.
Other features included thermal optics, additional top armour, and finally (unique to the Mk.2D) a modular armour system allowing damaged segments to be quickly replaced after a battle.
The Mk.2 continued to serve until as late as 2016. As of 2021, some Merkava Mk.2 hulls are being converted into heavily-armoured APCs, primarily to serve as Command and Control vehicles known as Ofek ("Horizon").
Media
- Skins
- Videos
See also
External links
| Israeli Ordnance Corps (חיל החימוש) | |
|---|---|
| Medium Tanks | M-51 · M-51 (W) |
| MBTs | |
| Magach | Magach 1 · Magach 2 · Magach 3 · Magach 3 (ERA) · ▃Magach 3 (ERA) · Magach 5 |
| Magach 6 · Magach 6A · Magach 6B · Magach 6C · Magach 6R · Magach 6M · Gal Batash | |
| Sho't | Sho't · Sho't Kal Alef · Sho't Kal Gimel · Sho't Kal Dalet · ▄Sho't Kal Dalet |
| Tiran | Tiran 4 · Tiran 4S |
| Merkava | ▃Merkava Mk.1 · Merkava Mk.1B · Merkava Mk.2B · ▃Merkava Mk.2B · Merkava Mk.2D |
| Merkava Mk.3B · Merkava Mk.3C · ▃Merkava Mk.3D · Merkava Mk.4B · Merkava Mk.4M | |
| Tank destroyers | Zachlam Tager |
| See Also | Chrysler Defense · Department of Tank Design · Morozov Design Bureau |
| Israel medium tanks | |
|---|---|
| M-51 | M-51 · M-51 (W) |
| Magach | Magach 1 · Magach 2 · Magach 3 · Magach 3 (ERA) · Magach 5 · Magach 6 |
| Magach 6A · Magach 6B · Magach 6B Gal · Gal Batash · Magach 6C · Magach 6M · Magach 6R · Magach Hydra · Magach 7C | |
| Tiran | Tiran 4 · Tiran 4S |
| Sho't | Sho't · Sho't Kal Alef · Sho't Kal Gimel · Sho't Kal Dalet |
| Merkava | Merkava Mk.1B · Merkava Mk.2B · Merkava Mk.2D · Merkava Mk.3B · Merkava Mk.3C · Ra'am Sagol |
| Merkava Mk.4B · Merkava Mk.4M · Merkava Mk.4 LIC | |
| Israel premium ground vehicles | |
|---|---|
- Ground vehicles
- Israel ground vehicles
- Sixth rank ground vehicles
- Premium ground vehicles
- Medium tanks
- Gift ground vehicles
- Ground vehicles with smoke grenades
- Ground vehicles with engine smoke generating system
- Ground vehicles with night vision device
- Ground vehicles with thermal sight
- Ground vehicles with gun stabilizer


