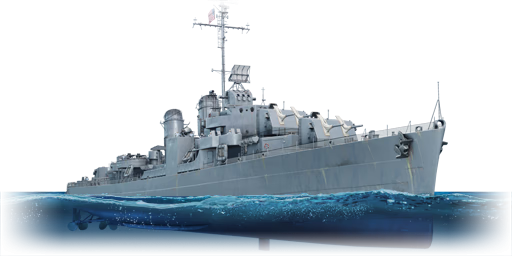
USS Sumner


Contents
Description
The USS Allen M. Sumner (DD-692) is a member of the Allen M. Sumner-class destroyer family. The Federal Shipbuilding and Drydock Company in Kearny, New Jersey laid down the USS Allen M. Sumner on 7 July 1943; launched on 15 December 1943; sponsored by Mrs. Allen M. Sumner, Captain Sumner's widow; and commissioned on 26 January 1944 at the New York Navy Yard. The ship was named after Allen Melancthon Sumner, a United States Marine Corps captain who died in action during World War I. Also commonly known as USS Sumner, this destroyer was distinguishable from earlier Fletcher-class destroyers by its twin 5-inch/38 calibre gun mounts, dual rudders, additional anti-aircraft armament, and numerous other innovations. During World War II, the USS Allen M. Sumner received two combat stars, one during the Korean War, and two during the Vietnam War. In the end, the USS Allen M. Sumner was decommissioned in Philadelphia. On October 16, 1974, she was sold for scrap to Union Minerals & Alloy Corp.
Introduced in Update 1.83 "Masters of the Sea", the USS Sumner is a powerful and versatile destroyer in the arsenal of the U.S. Navy. The USS Sumner, with its powerful main armament, substantial anti-air capabilities, and even some armour, is capable of winning virtually any one-on-one battle against hostile destroyers, as well as providing assistance for its squad. The USS Sumner is an extremely useful ship, serving as a superior version of the USS Cowell, with essentially similar roles on the battlefield, albeit with subtle variances that give them advantages and drawbacks in different areas.
General info
Survivability and armour
USS Sumner has a very effective belt 0.75 inches thick, made of anti-fragmentation armour. This is quite good for a destroyer of the rank, and along with other American destroyers makes Sumner survivable as far as destroyers are concerned. This belt will not stop more than 20 mm or smaller autocannons and machine guns, but will lessen spall damage from HE shells from other destroyers and light cruisers. The dual turret mounts have 0.125 inches of armour on all sides, and the deck armour consists of a 0.5-inch anti-fragmentation armour belt to shield the machinery spaces from any splinters. This will also protect her crew compartments, which at 345 members is on the high end for a destroyer, allowing USS Sumner to soak up more damage than other smaller destroyers are capable of.
The primary battery's gun mounts have enough armour to stop some splinters from near-misses with high explosive shells, and possibly some smaller autocannons at range. Any direct hit from anything larger than a 40 mm gun can be expected to knock the turrets out of action however, and even HE shells splashing in between the forward two turrets will commonly destroy both. The secondary battery has no armour whatsoever; these will quickly be knocked out in most engagements. It is recommended to avoid repairing these whenever possible, as they will inevitably be destroyed again and drain crew from the ship.
The magazine is placed in the same position as other American destroyers, under the aft turret. Unlike on the later Gearing-class destroyers, there are no fuel tanks placed next to the magazine. Any and all hits will usually destroy the entire ship; captains should avoid making this an easy target at all costs. Evasive action is recommended whenever possible, and if another area of the ship needs to be sacrificed to prevent a hit it is recommended to do so.
| Armour | Bow (Slope angle) | Sides | Stern | Deck |
|---|---|---|---|---|
| Hull | N/A | 19 mm (0-19°) | N/A | 13 mm (88-89°) |
| Armour | Front | Sides | Rear | Roof |
| Turrets | 6 mm | 6 mm | 6 mm | 6 mm |
Notes:
- The radar atop the bridge is covered with an anti-fragmentation armour with 19 mm thickness.
- The gun shields around the 20 mm Oerlikon autocannons are 12.7 mm thick.
Mobility
The Sumner's increased firepower compared to the previous destroyers come at a cost to the max speed of the vessel. While not much, the decrease in 1 or 2 km/h in max speed is noticeable on larger maps as much faster Russian or German ships are able to flank the ship with their superior top speeds. The Sumner however, is fitted with an additional rudder over the previous destroyers on the tree, greatly increasing the turn rate of the ship and allowing much greater manoeuvrability, which comes in especially useful when dodging torpedoes and enemy fire.
| Mobility Characteristics | |||||
|---|---|---|---|---|---|
| Game Mode | Upgrade Status | Maximum Speed (km/h) | Turn Time (s) | Turn Radius (m) | |
| Forward | Reverse | ||||
| AB | Stock | 57 | 23 | ~126.9 | ~224.41 |
| Upgraded | 77 | 31 | ___ | ___ | |
| RB/SB | |||||
| Upgraded | 63 | 25 | ___ | ___ | |
Modifications and economy
| Seakeeping | Unsinkability | Firepower | ||||||||||||||||||||||||
|---|---|---|---|---|---|---|---|---|---|---|---|---|---|---|---|---|---|---|---|---|---|---|---|---|---|---|
|
|
|
Armament
Primary armament
The primary battery of the USS Sumner is 6 x 5-inch/38 Mk.12 Dual Purpose cannons, mounted in three twin turrets. Two of these are mounted forward on the ship and one aft. As with other American destroyers, the 5-inch/38 gives Sumner excellent fire rate and good damage when engaging other destroyers and lightly armoured cruisers. The AAVT shell is recommended for non-armoured ships and PT boats, while also providing long range AA support, beyond the range of the secondary battery. It can also be used against heavily armoured ships, to destroy lightly-armoured areas such as the secondary battery and AA mounts, while also setting fires and wrecking rangefinding equipment. The other two shells, the Common and SP Common are very similar. The common shell has more filler but less pen, and is the main recommended shell for USS Sumner, as most enemy ships will be destroyers easily penetrated. If however, captains are engaging enemy cruisers, the SP common shell should be used instead. Although lacking slightly in filler, the extra penetration is quite useful when engaging enemies with superior armour.
| Penetration statistics | |||||||
|---|---|---|---|---|---|---|---|
| Ammunition | Type of warhead |
Penetration @ 0° Angle of Attack (mm) | |||||
| 1,000 m | 2,500 m | 5,000 m | 7,500 m | 10,000 m | 15,000 m | ||
| AAC Mk.34 | HE | 36 | 36 | 36 | 36 | 36 | 36 |
| Common Mk.32 | Common | 124 | 103 | 77 | 58 | 46 | 37 |
| SP Common Mk.46 | SP Common | 150 | 125 | 93 | 71 | 56 | 45 |
| AAVT Mk.31 | HE-VT | 36 | 36 | 36 | 36 | 36 | 36 |
| Shell details | ||||||||||||
|---|---|---|---|---|---|---|---|---|---|---|---|---|
| Ammunition | Type of warhead |
Velocity (m/s) |
Projectile mass (kg) |
Fuse delay (s) |
Fuse sensitivity (mm) |
Explosive mass (TNT equivalent) (g) |
Ricochet | |||||
| 0% | 50% | 100% | ||||||||||
| AAC Mk.34 | HE | 792 | 25 | 0 | 0.1 | 3,220 | 79° | 80° | 81° | |||
| Common Mk.32 | Common | 792 | 24.49 | 0.01 | 6 | 1,150 | 47° | 60° | 65° | |||
| SP Common Mk.46 | SP Common | 792 | 25 | 0.01 | 6 | 906.5 | 48° | 63° | 71° | |||
| Proximity-fused shell details | ||||||||||||
|---|---|---|---|---|---|---|---|---|---|---|---|---|
| Ammunition | Type of warhead |
Velocity (m/s) |
Projectile mass (kg) |
Fuse delay (s) |
Fuse sensitivity (mm) |
Arming distance (m) |
Trigger radius (m) |
Explosive mass (TNT equivalent) (g) |
Ricochet | |||
| 0% | 50% | 100% | ||||||||||
| AAVT Mk.31 | HE-VT | 792 | 25 | 0 | 0.1 | 457 | 23 | 3,220 | 79° | 80° | 81° | |
Secondary armament
The Sumner is fitted with an excellent secondary armament of a total of twelve 40 mm cannons. Eight Bofors L/60 Mark 2 in two quad mounts, and four Bofors L/60 Mark 1 in two dual mounts. This is an incredible amount of guns, topping even the AA heavy USS Cowell premium destroyer. Regardless of your crew level, these guns are great for almost every engagement the Sumner might find itself in. They work great to shoot down aircraft, whittle down enemy crews in close quarters, and to keep enemy PT boats a safe distance away from you. Be sure to manage what targets you want the 40 mm cannons to be shooting at to be as efficient as possible.
- Universal: AP-T · HEFI-T
- 40 mm HE clips: HEFI-T · HEFI-T · HEFI-T · AP-T
- 40 mm AP clips: AP-T · AP-T · AP-T · HEFI-T
| Penetration statistics | |||||||
|---|---|---|---|---|---|---|---|
| Ammunition | Penetration @ 0° Angle of Attack (mm) | ||||||
| 10 m | 100 m | 500 m | 1,000 m | 1,500 m | 2,000 m | ||
| HEFI-T | 3 | 3 | 3 | 3 | 3 | 3 | |
| AP-T | 81 | 78 | 68 | 58 | 49 | 41 | |
| Shell details | ||||||||||||
|---|---|---|---|---|---|---|---|---|---|---|---|---|
| Ammunition | Velocity (m/s) |
Projectile mass (kg) |
Fuse delay (m) |
Fuse sensitivity (mm) |
Explosive mass (TNT equivalent) (g) |
Ricochet | ||||||
| 0% | 50% | 100% | ||||||||||
| HEFI-T | 874 | 0.9 | 0 | 0.1 | 67.13 | 79° | 80° | 81° | ||||
| AP-T | 874 | 0.89 | - | - | - | 47° | 60° | 65° | ||||
Anti-aircraft armament
The Sumner's anti-aircraft armament consists of ten single mounted Oerlikon Mk.II 20 mm cannons. This number once again tops the USS Cowell with its seven 20 mm cannons. Much like the rest of the Sumner's armament, the 20 mm cannons are very versatile, multi-purpose weapons. They play a very similar role to the Bofors 40 mm cannons, however their smaller calibre means that in most situations it should remain as anti-aircraft armament, and leave the anti-smaller ship duties to the Bofors cannons. These are very standard and very good 20 mm cannons found on most American destroyers.
Additional armament
The torpedo armament on the Sumner should be one that most, if not all US sailors should be familiar with at this point, since the torpedoes themselves are found on all but one of the US destroyers. The Sumner carries ten Mk.15 533 mm torpedoes, which are found in two mounts of five tubes each. One of these mounts is found in the very middle of the ship, and the second one can be found further aft, near turret 3. The torpedoes are not a greatly important part of the Sumner's kit, being more of something that's simply nice to have as opposed to being something necessary. The Mk.15 torpedoes are nothing to particularly write home about, especially when compared to other torpedoes like the Japanese Type 93 "Long Lance" which boast both superior range and speed. Torpedoes are always nice to have however, and will come in very handy for sinking enemy cargo ships and convoys, or they can be spammed out in stressful extreme close quarters or last ditch situations.
The Sumner can carry depth charges in the form of the Mk.6 mortar depth charge. The depth charges shoot off the side of the ship, but they are not particularly useful for anything. You might get the occasional rare depth charge kill on an unlucky PT boat, but you are probably better off not taking the depth charges and save the little bit of money that it would have cost you to replenish them.
Usage in battles
The USS Sumner is one of, if not the most powerful and versatile destroyer in the game. The Sumner with its powerful main armament, ample anti-air capabilities and even some armour, can win almost any one on one engagement against enemy destroyers, as well as being capable of taking on support roles for its team. The Sumner is an extremely useful ship, functioning like a superior version of the USS Cowell, having very similar roles on the battlefield, although each with their slight differences, giving them advantages in disadvantages in various areas.
- Gunfighter
The Sumner is equipped with one more main gun than the USS Fletcher and USS Cowell. While this might not seem a lot, there is a key difference: the guns are mounted in three turrets, each containing two guns. This means that your shells will have better grouping, but the most significant advantage is when you're bow on towards an enemy. While the Cowell and Fletcher can only utilize two of its guns while facing forward, the Sumner has a whopping four, allowing you to deal twice as much damage when you are bow on. The Sumner's guns also fire faster than the Fletcher-classes, with a reload of 2.8 seconds aced compared to the Fletcher-classes' 3.7 seconds, giving them just another advantage. This allows you to put out a lot more shells in a short period of time compared to the Fletcher-class destroyers. Other than that, ship-to-ship combat plays out rather similarly to when playing the Fletcher-class ships. You will be able to take on most destroyers in a straight-up battle with your main threats being a USS Somers, with eight guns, the Z32 which has larger calibre guns, and the Tashkent which possess strong firepower. You have increased armour protection compared to the Fletcher-class destroyers which will help you to take a few more hits. However, as a trade-off, losing a turret that houses two guns is a much more significant loss. This is even more dangerous than the fact that your turrets are huge and are easy to take out. Nonetheless, the Sumner is a potent ship when it comes to gun fighting.
- Anti-air ship
The Sumner, like most of the late-war USN destroyers, is filled to the brim with anti-aircraft armament making it a great anti-air escort ship. A group of Sumners and Cowells can easily deny a large area of enemy aircraft. The Sumner is equipped with radio fuse HE-VT shells, that when combined with the good shell grouping as well as its fast rate of fire, makes for incredible air defence potential. The Sumner's many 40 mm Bofors cannons mean that you can easily deal with aircraft at medium and close ranges. The firing arcs on the Sumner are slightly inferior to the Cowell's as they cannot fire directly towards the bow, although this isn't a major drawback for the incredible capabilities of the ship. It is also equipped with 10 x 20 mm Oerlikon cannons which will provide decent short-range protection. As always, lead your targets when commanding your anti-air and make sure to switch between your main battery for long-range and smaller guns for short-range engagements.
- Light craft hunter
The Bofors cannons on the Sumner make for an extremely effective system to deal with smaller enemy vessels. The cannons will allow you to shred anything smaller than a destroyer, as well as some of the older destroyers like the Clemson and Mutsuki if they ever have the misfortune of coming across you. Get your crew to a point where they are good with the secondary armaments of the ship. When engaging small, fast boats, designate the target for your gunners and if you have no other immediate threats open fire on them with your main guns. A direct hit will be a single-shot knock out, but even the splash damage can deal important damage to modules. Note that unlike the Cowell, you cannot fire off both of your dual Bofors mounts directly towards the bow as the ship's superstructure blocks the way. To deal with this, turn slightly to one side so that one side so that that side's mount can fire at them, sadly you won't be able to train both mounts on a single target. Turning a bit more will allow your quad Bofors near the stern of the ship to open fire. Always keep your head on a swivel when in patrol boat territory and never let them sneak up on you. The Sumner does not take torpedoes well and if a PT boat gets a torpedo off on you then there is not much you can do to avoid destruction. If you see a patrol boat nearby, turn in whichever direction you can, and keep your eyes on the water until you see the torpedoes.
Enemies worth noting:
- USS Somers: This destroyer has your guns, but with an extra turret for a total of eight guns. This means that if you aren't careful it cant beat you in a one-on-one duel. Try to knock out its turrets first and keep yours alive to make it even. You also have more armour than it so you can take a bit more of a punch.
- BTD-1: Despite your potent AA, these bombers can still get by and drop off a torpedo before it gets shot down. It carries two torpedoes or a 2,000 lb bomb, all of them lethal. Prioritize these bombers and always keep your eyes peeled for torpedoes, even after you've gotten the kill on the plane.
- Pe-8: These bombers often stay at high altitude from where they drop their 5,000 kg bomb. Keep an eye out for them and use the HE-VT on your main guns to take them out. Call them out for your team if you want, as they might be able to help
- Z32: This destroyer has 150 mm guns which can deal significant damage to you. You have a faster fire rate and more durability so use that to your advantage. It might be best to avoid long range fights with these, as you can shred them when close up.
- SKR-1 and SKR-7: While these frigates will most likely be unable to kill you, they have fast-firing 76 mm guns which can very quickly destroy your turrets and bridge, leaving you a sitting duck for other ships. These ships lack armour protection so if you have good aim you will be able to destroy them with ease. Their guns have less range than yours, so long-range engagements will give you the edge.
- Light cruisers: They will generally have superior firepower and armour than you. Never fight a cruiser one-on-one, especially at long range. Don't give though, your guns can still deal decent damage to them should you gain the opportunity. You should only engage cruisers directly if you are in a group of ships attacking the cruiser or if the cruiser is preoccupied engaging with a friendly cruiser. Be aware of any secondary armament they might have.
- PT boats: Fast-moving PT-boats can catch you off-guard and fire their torpedoes. You might be able to destroy them but their torpedoes could instantly kill you if they hit. Always be on the lookout for PT boats in all directions and watch for any torpedoes.
Pros and cons
Pros:
- Quick rate of fire (2.8 seconds aced)
- Powerful primary armament
- Great AA
- Large crew size
- Good armour for a destroyer
- Turrets can traverse 360 degrees
Cons:
- Dual turrets are an easy target
- Top speed is slightly below the Cowell's
History
The Sumner-class was introduced as an improvement to the previous Fletcher-class destroyers incorporating many of the lessons learned during the war. Twin 5" guns simplified the deck layout to allow for the installation of a more powerful anti-aircraft battery. Two quad 40 mm Bofors mounts and two dual 40 mm Bofors mounts supplied the heavy anti-aircraft fire with 11 x 20 mm guns further improving the weight of fire coming from the ship.
Majority of the class would find service in the Pacific Theater from 1944 to 1945 serving as a fleet escort. Several in the class would serve as radar picket ships during and after the Battle of Okinawa.
Post War service saw many ships undergoing significant upgrades with the last of the class decommissioned from US Navy service on December 15, 1973.
Media
- Skins
See also
External links
| Federal Shipbuilding and Drydock Company | |
|---|---|
| Gun Destroyers (DD) | |
| Somers-class | USS Somers |
| Fletcher-class | USS Fletcher |
| Allen M. Sumner-class | USS Sumner |
| Gearing-class | USS Gearing |
| Cruiser, Light (CL) | |
| Atlanta-class | USS Atlanta |
| USA destroyers | |
|---|---|
| Clemson-class | USS Welborn C. Wood · USS Barker · USS Litchfield |
| Farragut-class | USS Aylwin |
| Porter-class | USS Porter · USS Phelps · USS Moffett |
| Somers-class | USS Somers · USS Davis |
| Fletcher-class | USS Fletcher · USS Bennion · USS Cowell |
| Allen M. Sumner-class | USS Sumner |
| Gearing-class | USS Gearing · USS Frank Knox |
| Mitscher-class | USS Mitscher · USS Wilkinson |
