Difference between revisions of "Somua SM"
Matsuri4life (talk | contribs) m (→Main armament: Autoloader) (Tag: Visual edit) |
m (→Pros and cons) (Tag: Visual edit) |
||
| (30 intermediate revisions by 13 users not shown) | |||
| Line 1: | Line 1: | ||
{{Specs-Card | {{Specs-Card | ||
|code=fr_somua_sm | |code=fr_somua_sm | ||
| − | |||
|store=9313 | |store=9313 | ||
}} | }} | ||
| Line 7: | Line 6: | ||
== Description == | == Description == | ||
<!-- ''In the description, the first part should be about the history of the creation and combat usage of the vehicle, as well as its key features. In the second part, tell the reader about the ground vehicle in the game. Insert a screenshot of the vehicle, so that if the novice player does not remember the vehicle by name, he will immediately understand what kind of vehicle the article is talking about.'' --> | <!-- ''In the description, the first part should be about the history of the creation and combat usage of the vehicle, as well as its key features. In the second part, tell the reader about the ground vehicle in the game. Insert a screenshot of the vehicle, so that if the novice player does not remember the vehicle by name, he will immediately understand what kind of vehicle the article is talking about.'' --> | ||
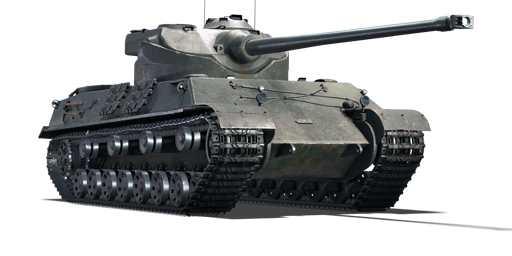
| − | The '''{{Specs|name}}''' | + | [[File:GarageImage_{{PAGENAME}}.jpg|420px|thumb|left]] |
| − | + | {{Break}} | |
| − | + | The '''{{Specs|name}}''' is a premium gift rank {{Specs|rank}} French heavy tank {{Battle-rating}}. It was introduced in [[Update "Raining Fire"]]. | |
== General info == | == General info == | ||
=== Survivability and armour === | === Survivability and armour === | ||
| − | |||
<!-- ''Describe armour protection. Note the most well protected and key weak areas. Appreciate the layout of modules as well as the number and location of crew members. Is the level of armour protection sufficient, is the placement of modules helpful for survival in combat? If necessary use a visual template to indicate the most secure and weak zones of the armour.'' --> | <!-- ''Describe armour protection. Note the most well protected and key weak areas. Appreciate the layout of modules as well as the number and location of crew members. Is the level of armour protection sufficient, is the placement of modules helpful for survival in combat? If necessary use a visual template to indicate the most secure and weak zones of the armour.'' --> | ||
| − | The upper glacis of the hull and the turret | + | The upper glacis of the hull and the upper part of the turret are the only well protected areas, which will give you good protection against most conventional rounds, especially from far ranges. However, the rest of the armor is very weak and can be easily penetrated by pretty much everything, and you will still be vulnerable against HEAT-FS, ATGMs, APFSDS and such. Your best bet is to flank the enemy and take them out with your auto loading gun before they can get a hit on you. If an enemy spots you, face them so they can only hit the front of the tank, and hope that they don't hit the very weak bottom portion of your turret. Try not to angle your tank as the sides can easily be penetrated. Since you have 5 crew members, with 2 in the front of the hull and 3 in the turret, and come equipped with a handy auto loader, you can take a few hits and lose a couple of crew members without having to worry too much. |
| − | |||
| − | |||
| − | |||
| − | |||
| − | |||
{| class="wikitable" | {| class="wikitable" | ||
| Line 26: | Line 19: | ||
! Armour !! Front (Slope angle) !! Sides !! Rear !! Roof | ! Armour !! Front (Slope angle) !! Sides !! Rear !! Roof | ||
|- | |- | ||
| − | | Hull || 150 mm (55°) ''Front glacis'' | + | | Hull || 150 mm (55°) ''Front glacis'' |
| + | 60 mm (55°) ''Lower glacis'' | ||
| + | | 40 mm (25°) ''Top'' <br> 40 mm ''Bottom'' || 40 mm (30°) || 5 - 20 mm | ||
|- | |- | ||
| − | | Turret || 120 mm ''Turret front'' | + | | Turret || 40 - 120 mm ''Turret front'' <br> 200 mm ''Gun mantlet'' || 40 - 60 mm || 40 mm || 30 mm |
| − | |||
| − | | 40 mm || 30 mm | ||
|- | |- | ||
| Cupola || 30 mm || 30 mm || 30 mm || 30 mm | | Cupola || 30 mm || 30 mm || 30 mm || 30 mm | ||
|- | |- | ||
|} | |} | ||
| − | |||
| − | * Suspension wheels, tracks and torsion bars are | + | '''Notes:''' <!-- Any additional notes which the user needs to be aware of --> |
| + | <!-- Example: * Suspension wheels are 20 mm thick, tracks are 30 mm thick, and torsion bars are 60 mm thick. --> | ||
=== Mobility === | === Mobility === | ||
| − | |||
<!-- ''Write about the mobility of the ground vehicle. Estimate the specific power and manoeuvrability, as well as the maximum speed forwards and backwards.'' --> | <!-- ''Write about the mobility of the ground vehicle. Estimate the specific power and manoeuvrability, as well as the maximum speed forwards and backwards.'' --> | ||
| − | Although | + | Although heaver and not as mobile as the AMX 50 or Lorraine 40t, the SOMUA SM is still pretty mobile for a heavy tank. You will still want to flank the enemy as much as possible and take them out quickly with your auto loading gun, but don’t be afraid to take a few hits from the front. However, your reverse speed is pretty slow and will not save you, so watch out for that. |
| − | {{tankMobility | + | {{tankMobility}} |
| − | |||
| − | |||
| − | |||
== Armaments == | == Armaments == | ||
| − | |||
=== Main armament === | === Main armament === | ||
| − | |||
<!-- ''Give the reader information about the characteristics of the main gun. Assess its effectiveness in a battle based on the reloading speed, ballistics and the power of shells. Do not forget about the flexibility of the fire, that is how quickly the cannon can be aimed at the target, open fire on it and aim at another enemy. Add a link to the main article on the gun: <code><nowiki>{{main|Name of the weapon}}</nowiki></code>. Describe in general terms the ammunition available for the main gun. Give advice on how to use them and how to fill the ammunition storage.'' --> | <!-- ''Give the reader information about the characteristics of the main gun. Assess its effectiveness in a battle based on the reloading speed, ballistics and the power of shells. Do not forget about the flexibility of the fire, that is how quickly the cannon can be aimed at the target, open fire on it and aim at another enemy. Add a link to the main article on the gun: <code><nowiki>{{main|Name of the weapon}}</nowiki></code>. Describe in general terms the ammunition available for the main gun. Give advice on how to use them and how to fill the ammunition storage.'' --> | ||
{{main|SA47 L/58 (100 mm)}} | {{main|SA47 L/58 (100 mm)}} | ||
| + | ''Give the reader information about the characteristics of the main gun. Assess its effectiveness in a battle based on the reloading speed, ballistics and the power of shells. Do not forget about the flexibility of the fire, that is how quickly the cannon can be aimed at the target, open fire on it and aim at another enemy. Add a link to the main article on the gun: <code><nowiki>{{main|Name of the weapon}}</nowiki></code>. Describe in general terms the ammunition available for the main gun. Give advice on how to use them and how to fill the ammunition storage.'' | ||
{| class="wikitable" style="text-align:center" width="100%" | {| class="wikitable" style="text-align:center" width="100%" | ||
|- | |- | ||
| − | ! colspan="5" | [[SA47 L/58 (100 mm)|100 mm SA47 L/58]] || colspan="5" | Turret rotation speed (°/s) || Reloading rate (seconds) | + | ! colspan="5" | [[SA47 L/58 (100 mm)|100 mm SA47 L/58]] || colspan="5" | Turret rotation speed (°/s) || colspan="4" | Reloading rate (seconds) |
|- | |- | ||
! Mode !! Capacity !! Vertical !! Horizontal !! Stabilizer | ! Mode !! Capacity !! Vertical !! Horizontal !! Stabilizer | ||
! Stock !! Upgraded !! Full !! Expert !! Aced | ! Stock !! Upgraded !! Full !! Expert !! Aced | ||
| − | ! | + | ! Stock !! Full !! Expert !! Aced |
|- | |- | ||
! ''Arcade'' | ! ''Arcade'' | ||
| − | | rowspan="2" | 50 || rowspan="2" | -8°/+15° || rowspan="2" | ±180° || rowspan="2" | N/A || | + | | rowspan="2" | 50 || rowspan="2" | -8°/+15° || rowspan="2" | ±180° || rowspan="2" | N/A || __.__ || __.__ || __.__ || __.__ || __.__ || rowspan="2" | 4.00 || rowspan="2" | 4.00 || rowspan="2" | 4.00 || rowspan="2" | 4.00 |
|- | |- | ||
! ''Realistic'' | ! ''Realistic'' | ||
| − | | | + | | __.__ || __.__ || __.__ || __.__ || __.__ |
|- | |- | ||
|} | |} | ||
==== Ammunition ==== | ==== Ammunition ==== | ||
| − | {{: | + | {| class="wikitable sortable" style="text-align:center" width="100%" |
| + | ! colspan="8" | Penetration statistics | ||
| + | |- | ||
| + | ! rowspan="2" data-sort-type="text" | Ammunition | ||
| + | ! rowspan="2" | Type of<br>warhead | ||
| + | ! colspan="6" | '''Penetration @ 0° Angle of Attack (mm)''' | ||
| + | |- | ||
| + | ! 10 m !! 100 m !! 500 m !! 1,000 m !! 1,500 m !! 2,000 m | ||
| + | |- | ||
| + | | 100 mm Obus de rupture || APCBC || 273 || 270 || 257 || 242 || 228 || 215 | ||
| + | |- | ||
| + | | 100 mm Obus explosif || HE || 18 || 18 || 18 || 18 || 18 || 18 | ||
| + | |- | ||
| + | |} | ||
| + | {| class="wikitable sortable" style="text-align:center" width="100%" | ||
| + | ! colspan="10" | Shell details | ||
| + | |- | ||
| + | ! rowspan="2" data-sort-type="text" | Ammunition | ||
| + | ! rowspan="2" | Type of<br>warhead | ||
| + | ! rowspan="2" | Velocity<br>(m/s) | ||
| + | ! rowspan="2" | Projectile<br>Mass (kg) | ||
| + | ! rowspan="2" | Fuse delay<br>(m) | ||
| + | ! rowspan="2" | Fuse sensitivity<br>(mm) | ||
| + | ! rowspan="2" | Explosive Mass<br>(TNT equivalent) (g) | ||
| + | ! colspan="3" | Ricochet | ||
| + | |- | ||
| + | ! 0% !! 50% !! 100% | ||
| + | |- | ||
| + | | 100 mm Obus de rupture || APCBC || 1,000 || 15.0 || N/A || N/A || N/A || 48° || 63° || 71° | ||
| + | |- | ||
| + | | 100 mm Obus explosif || HE || 1,000 || 14.8 || 0.1 || 0.5 || 1,400 || 79° || 80° || 81° | ||
| + | |- | ||
| + | |} | ||
==== [[Ammo racks]] ==== | ==== [[Ammo racks]] ==== | ||
| Line 95: | Line 115: | ||
|} | |} | ||
[[File:Ammoracks_{{PAGENAME}}.png|right|thumb|x250px|[[Ammo racks]] of the {{PAGENAME}}]] | [[File:Ammoracks_{{PAGENAME}}.png|right|thumb|x250px|[[Ammo racks]] of the {{PAGENAME}}]] | ||
| − | + | Notes: | |
| − | * Shells are | + | * Shells are modeled individually and disappear after having been shot or loaded. |
* Rack 9* (autoloader magazine) is a first stage ammo rack. It totals 9 shells. | * Rack 9* (autoloader magazine) is a first stage ammo rack. It totals 9 shells. | ||
| − | + | * This racks get filled first when loading up the tank and is also emptied first. | |
* As it is equipped with an autoloader, manual reloading of the gun is not possible. | * As it is equipped with an autoloader, manual reloading of the gun is not possible. | ||
* Once the autoloader magazine has been depleted, you can't shoot until the loader has restocked the autoloader. The restocking time is longer than the normal reload time of the gun. Take this into account when playing. | * Once the autoloader magazine has been depleted, you can't shoot until the loader has restocked the autoloader. The restocking time is longer than the normal reload time of the gun. Take this into account when playing. | ||
| Line 106: | Line 126: | ||
=== Machine guns === | === Machine guns === | ||
| − | |||
<!-- ''Offensive and anti-aircraft machine guns not only allow you to fight some aircraft but also are effective against lightly armoured vehicles. Evaluate machine guns and give recommendations on its use.'' --> | <!-- ''Offensive and anti-aircraft machine guns not only allow you to fight some aircraft but also are effective against lightly armoured vehicles. Evaluate machine guns and give recommendations on its use.'' --> | ||
{{main|MAC 31 (7.5 mm)}} | {{main|MAC 31 (7.5 mm)}} | ||
| Line 116: | Line 135: | ||
! Mount !! Capacity (Belt) !! Fire rate !! Vertical !! Horizontal | ! Mount !! Capacity (Belt) !! Fire rate !! Vertical !! Horizontal | ||
|- | |- | ||
| − | | Coaxial || | + | | Coaxial || 4800 (150) || 1350 || N/A || N/A |
|- | |- | ||
|} | |} | ||
| − | The small | + | The small caliber of the MAC 31 machine gun makes it largely ineffective against all armoured vehicles but the ones with an open compartment. It still can be used to ping targets as a rangefinding help. |
== Usage in battles == | == Usage in battles == | ||
<!-- ''Describe the tactics of playing in the vehicle, the features of using vehicles in the team and advice on tactics. Refrain from creating a "guide" - do not impose a single point of view but instead give the reader food for thought. Describe the most dangerous enemies and give recommendations on fighting them. If necessary, note the specifics of the game in different modes (AB, RB, SB).'' --> | <!-- ''Describe the tactics of playing in the vehicle, the features of using vehicles in the team and advice on tactics. Refrain from creating a "guide" - do not impose a single point of view but instead give the reader food for thought. Describe the most dangerous enemies and give recommendations on fighting them. If necessary, note the specifics of the game in different modes (AB, RB, SB).'' --> | ||
| − | + | ''Describe the tactics of playing in the vehicle, the features of using vehicles in the team and advice on tactics. Refrain from creating a "guide" - do not impose a single point of view but instead give the reader food for thought. Describe the most dangerous enemies and give recommendations on fighting them. If necessary, note the specifics of the game in different modes (AB, RB, SB).'' | |
| − | + | === Modules === | |
| − | + | {| class="wikitable" | |
| − | + | ! Tier | |
| − | + | ! colspan="2" | Mobility | |
| − | + | ! Protection | |
| − | + | ! Firepower | |
| − | + | |- | |
| − | + | | I | |
| − | + | |Tracks | |
| + | | | ||
| + | |Parts | ||
| + | |Horizontal drive | ||
| + | |- | ||
| + | | II | ||
| + | |Suspension | ||
| + | |Brake System | ||
| + | |FPE | ||
| + | |Adjustment of Fire | ||
| + | |- | ||
| + | | III | ||
| + | |Filters | ||
| + | | | ||
| + | |Crew Replenishment | ||
| + | |Elevation Mechanism | ||
| + | |- | ||
| + | | IV | ||
| + | |Transmission | ||
| + | |Engine | ||
| + | | | ||
| + | | | ||
| + | |- | ||
| + | ! colspan="5" | This is a premium vehicle: all modifications are unlocked on purchase | ||
| + | |- | ||
| + | |} | ||
=== Pros and cons === | === Pros and cons === | ||
<!-- ''Summarise and briefly evaluate the vehicle in terms of its characteristics and combat effectiveness. Mark its pros and cons in a bulleted list. Try not to use more than 6 points for each of the characteristics. Avoid using categorical definitions such as "bad", "good" and the like - use substitutions with softer forms such as "inadequate" and "effective".'' --> | <!-- ''Summarise and briefly evaluate the vehicle in terms of its characteristics and combat effectiveness. Mark its pros and cons in a bulleted list. Try not to use more than 6 points for each of the characteristics. Avoid using categorical definitions such as "bad", "good" and the like - use substitutions with softer forms such as "inadequate" and "effective".'' --> | ||
| + | |||
'''Pros:''' | '''Pros:''' | ||
| − | * | + | * Same great gun that's found on the AMX-50 and Lorraine. |
| − | * Equipped with a huge 9-shell | + | * Equipped with a huge 9-shell auto loader, making this one of the best tanks to attack multiple enemies at once. |
| − | *Unlike most French tanks, the SOMUA has good frontal | + | * Unlike most French tanks, the SOMUA has good frontal armor. The upper turret and upper plate are basically immune to all conventional rounds. |
| − | * Due to the frontal | + | * Due to the frontal armor and 9 shot autoloader, the tank is not only great at flanking and ambushing, but also very good at brawling. |
| − | * The strong upper turret coupled with the | + | * The strong upper turret coupled with the 8 degrees of gun depression makes this tank great at hull-down fighting and cresting ridge lines. |
| − | * Due to how tall this tank is and how high the gun is placed, it can shoot over obstacles that many tanks have trouble seeing over | + | * Due to how tall this tank is and how high the gun is placed, it can shoot over obstacles that many tanks have trouble seeing over. |
| − | * Quick and | + | * Quick and maneuverable for a heavy tank. |
| − | * This tank has a high level of survivability thanks to the spacious crew compartment and | + | * This tank has a high level of survivability thanks to the spacious crew compartment and 5 man crew. |
| − | * Good set of optics with 6x magnification | + | * Good set of optics with 6x magnification. |
| − | + | ||
'''Cons:''' | '''Cons:''' | ||
| − | * Absolutely huge tank | + | * Absolutely huge tank, is longer, wider, and taller than a Tiger II. Finding proper concealment is difficult. |
| − | * The neck of the turret a prime weak spot that's hard to effectively hide | + | * The neck of the turret a prime weak spot that's hard to effectively hide. |
| − | * The lower plate is as weak as British lower plates. Any APHE shell that enters here will likely knock out the whole crew | + | * The lower plate is as weak as British lower plates. Any APHE shell that enters here will likely knock out the whole crew. |
| − | * Will face a lot of enemies that fire APDS and HEAT, the upper turret and upper plate just can't absorb those | + | * Will face a lot of enemies that fire APDS and HEAT, the upper turret and upper plate just can't absorb those kind of shells. |
| − | * Terrible side armour, side-scraping or angling the tank is extremely hazardous | + | * Terrible side armour, side-scraping or angling the tank is extremely hazardous. |
| − | * Is much slower than the Lorraine and AMX-50 | + | * Is much slower than the Lorraine and AMX-50. |
| − | * Mediocre elevation angles thanks to the inherent nature of oscillating turrets | + | * Mediocre elevation angles thanks to the inherent nature of oscillating turrets. |
| − | * Once the autoloader is expended, reloading the magazine takes a considerable amount of time | + | * The 100mm gun is surprisingly inaccurate past 500 meters. Sniping can only be done thanks to the massive autoloader. |
| − | + | * Once the autoloader is expended, reloading the magazine takes a considerable amount of time. | |
== History == | == History == | ||
<!-- ''Describe the history of the creation and combat usage of the vehicle in more detail than in the introduction. If the historical reference turns out to be too long, take it to a separate article, taking a link to the article about the vehicle and adding a block "/History" (example: <nowiki>https://wiki.warthunder.com/(Vehicle-name)/History</nowiki>) and add a link to it here using the <code>main</code> template. Be sure to reference text and sources by using <code><nowiki><ref></ref></nowiki></code>, as well as adding them at the end of the article with <code><nowiki><references /></nowiki></code>. This section may also include the vehicle's dev blog entry (if applicable) and the in-game encyclopedia description (under <code><nowiki>=== In-game description ===</nowiki></code>, also if applicable).'' --> | <!-- ''Describe the history of the creation and combat usage of the vehicle in more detail than in the introduction. If the historical reference turns out to be too long, take it to a separate article, taking a link to the article about the vehicle and adding a block "/History" (example: <nowiki>https://wiki.warthunder.com/(Vehicle-name)/History</nowiki>) and add a link to it here using the <code>main</code> template. Be sure to reference text and sources by using <code><nowiki><ref></ref></nowiki></code>, as well as adding them at the end of the article with <code><nowiki><references /></nowiki></code>. This section may also include the vehicle's dev blog entry (if applicable) and the in-game encyclopedia description (under <code><nowiki>=== In-game description ===</nowiki></code>, also if applicable).'' --> | ||
| − | At the end of WW2, the French army realized that they needed a new modern heavy tank. The SOMUA Company competed with AMX to design a new heavy tank for France, and they were given the order to build a prototype in 1946. The hull of the tank was based off the German Tiger II, and the tank used an oscillating turret armed with an auto | + | At the end of WW2, the French army realized that they needed a new modern heavy tank. The SOMUA Company competed with AMX to design a new heavy tank for France, and they were given the order to build a prototype in 1946. The hull of the tank was based off the German Tiger II, and the tank used an oscillating turret armed with an auto loading 100mm gun. Because the two companies were forced to make a new design with the same requirements, the Somua SM design looked similar to the AMX 50, and both tanks had equipped the 100mm gun. The prototype was delivered in October of 1951 but was still lacking an engine and some other parts. Due to delays, the prototype was not tested until 1953, but it was already too late. The SOMUA’s design was rejected in favor of the AMX 50. |
| − | |||
| − | |||
| − | |||
| − | |||
| − | |||
| − | |||
| − | |||
| − | |||
| − | |||
== Media == | == Media == | ||
| Line 181: | Line 217: | ||
;Skins | ;Skins | ||
| − | * [https://live.warthunder.com/feed/camouflages/?vehicle=fr_somua_sm Skins and camouflages for the {{PAGENAME}} from live.warthunder.com.] | + | * [https://live.warthunder.com/feed/camouflages/?vehicleCountry=france&vehicleType=tank&vehicleClass=heavy_tank&vehicle=fr_somua_sm Skins and camouflages for the {{PAGENAME}} from live.warthunder.com.] |
| − | |||
| − | |||
| − | |||
| − | |||
| − | |||
| − | |||
| − | |||
| − | |||
| − | |||
| − | |||
;Videos | ;Videos | ||
| − | {{Youtube-gallery | + | {{Youtube-gallery|cj5yjwMfmAM|'''The Shooting Range #217''' - ''Metal Beasts'' section at 00:30 discusses the {{PAGENAME}}.}} |
== See also == | == See also == | ||
| − | <!--''Links to the articles on the War Thunder Wiki that you think will be useful for the reader, for example:'' | + | <!-- ''Links to the articles on the War Thunder Wiki that you think will be useful for the reader, for example:'' |
* ''reference to the series of the vehicles;'' | * ''reference to the series of the vehicles;'' | ||
| − | * ''links to approximate analogues of other nations and research trees.''--> | + | * ''links to approximate analogues of other nations and research trees.'' --> |
| + | ''Links to the articles on the War Thunder Wiki that you think will be useful for the reader, for example:'' | ||
| − | * | + | * ''reference to the series of the vehicles;'' |
| − | * | + | * ''links to approximate analogues of other nations and research trees.'' |
== External links == | == External links == | ||
<!-- ''Paste links to sources and external resources, such as:'' | <!-- ''Paste links to sources and external resources, such as:'' | ||
* ''topic on the official game forum;'' | * ''topic on the official game forum;'' | ||
| + | * ''encyclopedia page on the tank;'' | ||
* ''other literature.'' --> | * ''other literature.'' --> | ||
Revision as of 20:31, 19 November 2020
Contents
Description

The Somua SM is a premium gift rank V French heavy tank
with a battle rating of 7.7 (AB/RB/SB). It was introduced in Update "Raining Fire".
General info
Survivability and armour
The upper glacis of the hull and the upper part of the turret are the only well protected areas, which will give you good protection against most conventional rounds, especially from far ranges. However, the rest of the armor is very weak and can be easily penetrated by pretty much everything, and you will still be vulnerable against HEAT-FS, ATGMs, APFSDS and such. Your best bet is to flank the enemy and take them out with your auto loading gun before they can get a hit on you. If an enemy spots you, face them so they can only hit the front of the tank, and hope that they don't hit the very weak bottom portion of your turret. Try not to angle your tank as the sides can easily be penetrated. Since you have 5 crew members, with 2 in the front of the hull and 3 in the turret, and come equipped with a handy auto loader, you can take a few hits and lose a couple of crew members without having to worry too much.
| Armour | Front (Slope angle) | Sides | Rear | Roof |
|---|---|---|---|---|
| Hull | 150 mm (55°) Front glacis
60 mm (55°) Lower glacis |
40 mm (25°) Top 40 mm Bottom |
40 mm (30°) | 5 - 20 mm |
| Turret | 40 - 120 mm Turret front 200 mm Gun mantlet |
40 - 60 mm | 40 mm | 30 mm |
| Cupola | 30 mm | 30 mm | 30 mm | 30 mm |
Notes:
Mobility
Although heaver and not as mobile as the AMX 50 or Lorraine 40t, the SOMUA SM is still pretty mobile for a heavy tank. You will still want to flank the enemy as much as possible and take them out quickly with your auto loading gun, but don’t be afraid to take a few hits from the front. However, your reverse speed is pretty slow and will not save you, so watch out for that.
| Game Mode | Max Speed (km/h) | Weight (tons) | Engine power (horsepower) | Power-to-weight ratio (hp/ton) | |||
|---|---|---|---|---|---|---|---|
| Forward | Reverse | Stock | Upgraded | Stock | Upgraded | ||
| Arcade | 43 | 7 | 60 | _,___ | 1,908 | __.__ | 31.8 |
| Realistic | 41 | 6 | _,___ | 1,000 | __.__ | 16.67 | |
Armaments
Main armament
Give the reader information about the characteristics of the main gun. Assess its effectiveness in a battle based on the reloading speed, ballistics and the power of shells. Do not forget about the flexibility of the fire, that is how quickly the cannon can be aimed at the target, open fire on it and aim at another enemy. Add a link to the main article on the gun: {{main|Name of the weapon}}. Describe in general terms the ammunition available for the main gun. Give advice on how to use them and how to fill the ammunition storage.
| 100 mm SA47 L/58 | Turret rotation speed (°/s) | Reloading rate (seconds) | |||||||||||
|---|---|---|---|---|---|---|---|---|---|---|---|---|---|
| Mode | Capacity | Vertical | Horizontal | Stabilizer | Stock | Upgraded | Full | Expert | Aced | Stock | Full | Expert | Aced |
| Arcade | 50 | -8°/+15° | ±180° | N/A | __.__ | __.__ | __.__ | __.__ | __.__ | 4.00 | 4.00 | 4.00 | 4.00 |
| Realistic | __.__ | __.__ | __.__ | __.__ | __.__ | ||||||||
Ammunition
| Penetration statistics | |||||||
|---|---|---|---|---|---|---|---|
| Ammunition | Type of warhead |
Penetration @ 0° Angle of Attack (mm) | |||||
| 10 m | 100 m | 500 m | 1,000 m | 1,500 m | 2,000 m | ||
| 100 mm Obus de rupture | APCBC | 273 | 270 | 257 | 242 | 228 | 215 |
| 100 mm Obus explosif | HE | 18 | 18 | 18 | 18 | 18 | 18 |
| Shell details | |||||||||
|---|---|---|---|---|---|---|---|---|---|
| Ammunition | Type of warhead |
Velocity (m/s) |
Projectile Mass (kg) |
Fuse delay (m) |
Fuse sensitivity (mm) |
Explosive Mass (TNT equivalent) (g) |
Ricochet | ||
| 0% | 50% | 100% | |||||||
| 100 mm Obus de rupture | APCBC | 1,000 | 15.0 | N/A | N/A | N/A | 48° | 63° | 71° |
| 100 mm Obus explosif | HE | 1,000 | 14.8 | 0.1 | 0.5 | 1,400 | 79° | 80° | 81° |
Ammo racks
| Full ammo |
1st rack empty |
2nd rack empty |
3rd rack empty |
4th rack empty |
5th rack empty |
6th rack empty |
7th rack empty |
8th rack empty |
9th rack empty |
Visual discrepancy |
|---|---|---|---|---|---|---|---|---|---|---|
| 50 | 46 (+4) | 39 (+11) | 32 (+18) | 25 (+25) | 18 (+32) | 14 (+36) | 10 (+40) | 9 (+41) | 1 (+49) | No |

Notes:
- Shells are modeled individually and disappear after having been shot or loaded.
- Rack 9* (autoloader magazine) is a first stage ammo rack. It totals 9 shells.
- This racks get filled first when loading up the tank and is also emptied first.
- As it is equipped with an autoloader, manual reloading of the gun is not possible.
- Once the autoloader magazine has been depleted, you can't shoot until the loader has restocked the autoloader. The restocking time is longer than the normal reload time of the gun. Take this into account when playing.
- Simply not firing when the gun is loaded will move ammo from racks 1 to 8 into rack 9*. Firing will interrupt the restocking of the ready racks.
- The depletion order at full capacity is: 9 - 1 - 2 - up to 8.
Machine guns
| 7.5 mm MAC 31 | ||||
|---|---|---|---|---|
| Mount | Capacity (Belt) | Fire rate | Vertical | Horizontal |
| Coaxial | 4800 (150) | 1350 | N/A | N/A |
The small caliber of the MAC 31 machine gun makes it largely ineffective against all armoured vehicles but the ones with an open compartment. It still can be used to ping targets as a rangefinding help.
Usage in battles
Describe the tactics of playing in the vehicle, the features of using vehicles in the team and advice on tactics. Refrain from creating a "guide" - do not impose a single point of view but instead give the reader food for thought. Describe the most dangerous enemies and give recommendations on fighting them. If necessary, note the specifics of the game in different modes (AB, RB, SB).
Modules
| Tier | Mobility | Protection | Firepower | |
|---|---|---|---|---|
| I | Tracks | Parts | Horizontal drive | |
| II | Suspension | Brake System | FPE | Adjustment of Fire |
| III | Filters | Crew Replenishment | Elevation Mechanism | |
| IV | Transmission | Engine | ||
| This is a premium vehicle: all modifications are unlocked on purchase | ||||
Pros and cons
Pros:
- Same great gun that's found on the AMX-50 and Lorraine.
- Equipped with a huge 9-shell auto loader, making this one of the best tanks to attack multiple enemies at once.
- Unlike most French tanks, the SOMUA has good frontal armor. The upper turret and upper plate are basically immune to all conventional rounds.
- Due to the frontal armor and 9 shot autoloader, the tank is not only great at flanking and ambushing, but also very good at brawling.
- The strong upper turret coupled with the 8 degrees of gun depression makes this tank great at hull-down fighting and cresting ridge lines.
- Due to how tall this tank is and how high the gun is placed, it can shoot over obstacles that many tanks have trouble seeing over.
- Quick and maneuverable for a heavy tank.
- This tank has a high level of survivability thanks to the spacious crew compartment and 5 man crew.
- Good set of optics with 6x magnification.
Cons:
- Absolutely huge tank, is longer, wider, and taller than a Tiger II. Finding proper concealment is difficult.
- The neck of the turret a prime weak spot that's hard to effectively hide.
- The lower plate is as weak as British lower plates. Any APHE shell that enters here will likely knock out the whole crew.
- Will face a lot of enemies that fire APDS and HEAT, the upper turret and upper plate just can't absorb those kind of shells.
- Terrible side armour, side-scraping or angling the tank is extremely hazardous.
- Is much slower than the Lorraine and AMX-50.
- Mediocre elevation angles thanks to the inherent nature of oscillating turrets.
- The 100mm gun is surprisingly inaccurate past 500 meters. Sniping can only be done thanks to the massive autoloader.
- Once the autoloader is expended, reloading the magazine takes a considerable amount of time.
History
At the end of WW2, the French army realized that they needed a new modern heavy tank. The SOMUA Company competed with AMX to design a new heavy tank for France, and they were given the order to build a prototype in 1946. The hull of the tank was based off the German Tiger II, and the tank used an oscillating turret armed with an auto loading 100mm gun. Because the two companies were forced to make a new design with the same requirements, the Somua SM design looked similar to the AMX 50, and both tanks had equipped the 100mm gun. The prototype was delivered in October of 1951 but was still lacking an engine and some other parts. Due to delays, the prototype was not tested until 1953, but it was already too late. The SOMUA’s design was rejected in favor of the AMX 50.
Media
- Skins
- Videos
See also
Links to the articles on the War Thunder Wiki that you think will be useful for the reader, for example:
- reference to the series of the vehicles;
- links to approximate analogues of other nations and research trees.
External links
| France heavy tanks | |
|---|---|
| B1 | B1 bis · B1 ter |
| 2C | 2C · 2C bis |
| ARL-44 | ARL-44 (ACL-1) |
| AMX-50 | Somua SM · AMX-50 Surbaissé · AMX-50 Surblindé |
| USA | ▄M4A3E2 |
| France premium ground vehicles | |
|---|---|
| Light tanks | AMD.35 (SA35) · H.39 "Cambronne" · LVT-4/40 · AMX-13 (SS.11) · AMX-13-M24 · E.B.R. (1954) · E.B.R. (1963) · VBCI-2 (MCT30) |
| Medium tanks | M4A1 (FL10) · Panther "Dauphiné" · AMX-30 · AMX-30 Super · AMX-50 (TO90/930) |
| Heavy tanks | B1 ter · 2C bis · Somua SM |
| Tank destroyers | Lorraine 155 Mle.50 |
