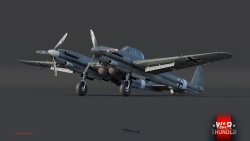
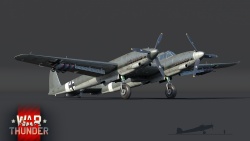
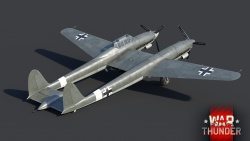
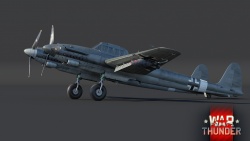
Difference between revisions of "SM.92"
m (fixed some grammar errors and worded some phrases better) (Tag: Visual edit) |
(Added high res imagery) (Tag: Visual edit) |
||
| (25 intermediate revisions by 13 users not shown) | |||
| Line 1: | Line 1: | ||
| − | {{Specs-Card | + | {{Specs-Card|code=sm_92}} |
| − | |code=sm_92 | ||
| − | |||
| − | }} | ||
== Description == | == Description == | ||
<!-- ''In the description, the first part should be about the history of and the creation and combat usage of the aircraft, as well as its key features. In the second part, tell the reader about the aircraft in the game. Insert a screenshot of the vehicle, so that if the novice player does not remember the vehicle by name, he will immediately understand what kind of vehicle the article is talking about.'' --> | <!-- ''In the description, the first part should be about the history of and the creation and combat usage of the aircraft, as well as its key features. In the second part, tell the reader about the aircraft in the game. Insert a screenshot of the vehicle, so that if the novice player does not remember the vehicle by name, he will immediately understand what kind of vehicle the article is talking about.'' --> | ||
| − | The '''{{Specs|name}}''' is a rank {{Specs|rank}} Italian | + | [[File:GarageImage_{{PAGENAME}}.jpg|420px|thumb|left]] |
| + | {{break}} | ||
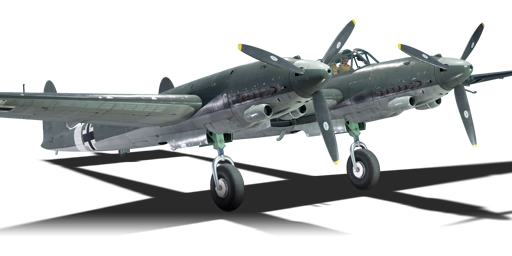
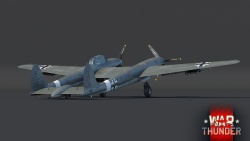
| + | The '''{{Specs|name}}''' is a rank {{Specs|rank}} Italian attacker {{Battle-rating}}. It was introduced in [[Update 1.87 "Locked On"]]. | ||
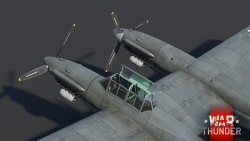
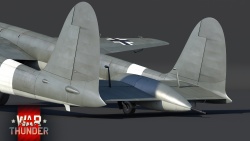
| − | The | + | The SM.92 was an italian twin-engine fighter/bomber prototype designed and produced on 1943. It had 2 import Daimler-Benz 605 engines. It was designed to have better performance that its predecesor, the SM.91. The middle gondola got removed and the crew of two, the pilot and the gunner, were moved behind the left engine. The gunner remotley opperated a fixed 12.7mm Breda-Safat machine gun in the tail. |
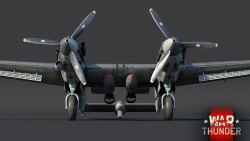
| − | + | It had an armament of 3 20mm MG 151 autocannons and 4 12.7mm Breda-Safat machine guns. | |
| − | |||
| − | |||
| + | In-game this plane can reach over 16m/s of climb rate, and with its airspawn, that is enough to get a sufficient altitude once engagements start | ||
== General info == | == General info == | ||
| − | === Flight | + | === Flight Performance === |
| − | + | <!-- ''Describe how the aircraft behaves in the air. Speed, manoeuvrability, acceleration and allowable loads - these are the most important characteristics of the vehicle.'' -->The SM.92 has a better performance that its predecesor, despite the engines staying the same. It has been made much more aeordynamic with the removal of the gondola on the SM.91 and the moving of the crew to the left fuselage, behind one of the 2 powerful Daimler-Benz 605A1 engines. Part of this improvement is also due to the change on the defensive armament, changing from a 20mm cannon with decent traverse to an aerodynamically mounted fixed 12.7mm Breda-Safat | |
| − | <!-- ''Describe how the aircraft behaves in the air. Speed, manoeuvrability, acceleration and allowable loads - these are the most important characteristics of the vehicle.'' --> | ||
| − | + | This plane also has leading edge slats, which help it on its roll rate (as they get deployed on one wing when doing a roll maneuver) and its low speed performance. | |
| − | + | {| class="wikitable" width="70%" style="text-align:center" | |
| − | This plane also has leading edge slats, which help it on its roll rate (as they get deployed on one wing when doing a roll | + | ! rowspan="2" |Characteristics |
| − | + | ! colspan="2" |Max Speed | |
| − | {| class="wikitable" style="text-align:center | + | (km/h at 6,500 m) |
| − | ! rowspan="2" | Characteristics | + | ! rowspan="2" |Max altitude |
| − | ! colspan="2" | Max Speed | + | (metres) |
| − | ! rowspan="2" | Max altitude | + | ! colspan="2" |Turn time |
| − | ! colspan="2" | Turn time | + | (seconds) |
| − | ! colspan="2" | Rate of climb | + | ! colspan="2" |Rate of climb |
| − | ! rowspan="2" | Take-off run | + | (metres/second) |
| + | ! rowspan="2" |Take-off run | ||
| + | (metres) | ||
|- | |- | ||
| − | ! AB !! RB !! AB !! RB !! AB !! RB | + | !AB!!RB!!AB!!RB!!AB!!RB |
|- | |- | ||
| − | ! Stock | + | !Stock |
| − | | 606 || 590 || rowspan="2" | {{Specs|ceiling}} || 20.5 || 21.2 || 8.9 || 8.9 || rowspan="2" | 375 | + | |606||590|| rowspan="2" |{{Specs|ceiling}}||20.5||21.2||8.9||8.9|| rowspan="2" |375 |
| − | |||
| − | |||
| − | |||
|- | |- | ||
| + | !Upgraded | ||
| + | |656||630||18.9||19.5||16.0||12.0 | ||
|} | |} | ||
| − | |||
==== Details ==== | ==== Details ==== | ||
| − | {| class="wikitable" style="text-align:center | + | {| class="wikitable" style="text-align:center" |
|- | |- | ||
! colspan="5" | Features | ! colspan="5" | Features | ||
|- | |- | ||
| − | ! Combat flaps | + | ! Combat flaps |
| + | ! Take-off flaps | ||
| + | ! Landing flaps | ||
| + | ! Air brakes | ||
| + | ! Arrestor gear | ||
|- | |- | ||
| ✓ || ✓ || ✓ || ✓ || X <!-- ✓ --> | | ✓ || ✓ || ✓ || ✓ || X <!-- ✓ --> | ||
| Line 52: | Line 53: | ||
|} | |} | ||
| − | {| class="wikitable" style="text-align:center | + | {| class="wikitable" style="text-align:center" |
|- | |- | ||
| − | ! colspan=" | + | ! colspan="5" | Limits |
|- | |- | ||
| − | ! rowspan="2" | | + | ! rowspan="2" | Wing-break speed<br>(km/h) |
| − | ! rowspan="2" | Gear (km/h) | + | ! rowspan="2" | Gear limit<br>(km/h) |
| − | ! | + | ! rowspan="2" | Combat flaps<br>(km/h) |
! colspan="2" | Max Static G | ! colspan="2" | Max Static G | ||
|- | |- | ||
| − | + | ! + | |
| + | ! - | ||
|- | |- | ||
| − | | {{Specs|destruction|body}} || {{Specs|destruction|gear}} || | + | |{{Specs|1=destruction|2=body}}||{{Specs|1=destruction|2=gear}} || 600 || ~10 || ~5 |
|- | |- | ||
|} | |} | ||
| Line 69: | Line 71: | ||
{| class="wikitable" style="text-align:center" | {| class="wikitable" style="text-align:center" | ||
|- | |- | ||
| − | ! colspan="4" | Optimal velocities | + | ! colspan="4" | Optimal velocities |
|- | |- | ||
| − | ! Ailerons | + | ! Ailerons<br>(km/h) |
| + | ! Rudder<br>(km/h) | ||
| + | ! Elevators<br>(km/h) | ||
| + | ! Radiator<br>(km/h) | ||
|- | |- | ||
| < 300 || < 240 || < 500 || > 380 | | < 300 || < 240 || < 500 || > 380 | ||
| Line 91: | Line 96: | ||
|} | |} | ||
| − | === Survivability and armour === | + | === Survivability and armour ===<!-- ''Examine the survivability of the aircraft. Note how vulnerable the structure is and how secure the pilot is, whether the fuel tanks are armoured, etc. Describe the armour, if there is any, and also mention the vulnerability of other critical aircraft systems.'' --> |
| − | |||
| − | <!-- ''Examine the survivability of the aircraft. Note how vulnerable the structure is and how secure the pilot is, whether the fuel tanks are armoured, etc. Describe the armour, if there is any, and also mention the vulnerability of other critical aircraft systems.'' --> | ||
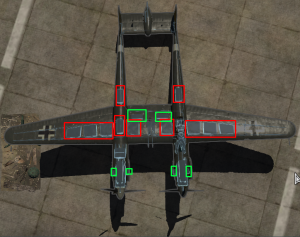
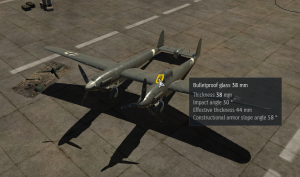
| − | [[File:Sm.92 XRay modules HIGH RES.png|thumb|The | + | *[[File:Sm.92 XRay modules HIGH RES.png|thumb|The Modules on the SM.92 as seen from the top down. The red squares are the fuel tanks. The green squares are the cooling systems]][[File:Serious this time SM.92 high res armour.png|thumb|Armoured windshield on the SM.92]]Fuel Tanks located in wings and behind the engines 38 mm Bulletproof glass - Armored windscreen |
| − | [[File:Serious this time SM.92 high res armour.png|thumb|Armoured windshield on the SM.92]] | ||
| − | |||
| − | |||
| − | |||
| − | |||
| − | |||
| − | |||
== Armaments == | == Armaments == | ||
| − | |||
=== Offensive armament === | === Offensive armament === | ||
| − | |||
<!-- ''Describe the offensive armament of the aircraft, if any. Describe how effective the cannons and machine guns are in a battle, and also what belts or drums are better to use. If there is no offensive weaponry, delete this subsection.'' --> | <!-- ''Describe the offensive armament of the aircraft, if any. Describe how effective the cannons and machine guns are in a battle, and also what belts or drums are better to use. If there is no offensive weaponry, delete this subsection.'' --> | ||
| − | {{main|MG 151 (20 mm)|Breda-SAFAT (12.7 mm)}} | + | {{main|MG 151/20 (20 mm)|Breda-SAFAT (12.7 mm)}} |
The '''''{{PAGENAME}}''''' is armed with: | The '''''{{PAGENAME}}''''' is armed with: | ||
| − | * 2 x 20 mm MG 151 cannons, centre-mounted (300 rpg = 600 total) | + | * 2 x 20 mm MG 151/20 cannons, centre-mounted (300 rpg = 600 total) |
| − | * 1 x 20 mm MG 151 cannon, mounted in right propeller hub (300 rpg) | + | * 1 x 20 mm MG 151/20 cannon, mounted in right propeller hub (300 rpg) |
* 4 x 12.7 mm Breda-SAFAT machine guns, nose-mounted (350 rpg = 1,400 total) | * 4 x 12.7 mm Breda-SAFAT machine guns, nose-mounted (350 rpg = 1,400 total) | ||
=== Suspended armament === | === Suspended armament === | ||
| − | |||
<!-- ''Describe the aircraft's suspended armament: additional cannons under the wings, bombs, rockets and torpedoes. This section is especially important for bombers and attackers. If there is no suspended weaponry remove this subsection.'' --> | <!-- ''Describe the aircraft's suspended armament: additional cannons under the wings, bombs, rockets and torpedoes. This section is especially important for bombers and attackers. If there is no suspended weaponry remove this subsection.'' --> | ||
| − | {{main|GP 50 (50 kg)|GP | + | {{main|GP 50 (50 kg)|GP 100 (100 kg)|GP 250 (250 kg)|GP 500 (500 kg)}} |
The '''''{{PAGENAME}}''''' can be outfitted with the following ordnance: | The '''''{{PAGENAME}}''''' can be outfitted with the following ordnance: | ||
| Line 126: | Line 119: | ||
* Without load | * Without load | ||
* 6 x 50 kg GP 50 bombs (300 kg total) | * 6 x 50 kg GP 50 bombs (300 kg total) | ||
| − | * 6 x 100 kg GP | + | * 6 x 100 kg GP 100 bombs (600 kg total) |
* 2 x 250 kg GP 250 bombs (500 kg total) | * 2 x 250 kg GP 250 bombs (500 kg total) | ||
* 2 x 500 kg GP 500 bombs (1,000 kg total) | * 2 x 500 kg GP 500 bombs (1,000 kg total) | ||
=== Defensive armament === | === Defensive armament === | ||
| − | |||
<!-- ''Defensive armament with turret machine guns or cannons, crewed by gunners. Examine the number of gunners and what belts or drums are better to use. If defensive weaponry is not available, remove this subsection.'' --> | <!-- ''Defensive armament with turret machine guns or cannons, crewed by gunners. Examine the number of gunners and what belts or drums are better to use. If defensive weaponry is not available, remove this subsection.'' --> | ||
{{main|Breda-SAFAT (12.7 mm)}} | {{main|Breda-SAFAT (12.7 mm)}} | ||
| Line 140: | Line 132: | ||
== Usage in battles == | == Usage in battles == | ||
| − | + | ''Describe the tactics of playing in an aircraft, the features of using vehicles in a team and advice on tactics. Refrain from creating a "guide" - do not impose a single point of view, but instead, give the reader food for thought. Examine the most dangerous enemies and give recommendations on fighting them. If necessary, note the specifics of the game in different modes (AB, RB, SB).'' | |
| − | |||
| − | |||
| − | |||
| − | |||
| − | |||
| − | |||
| − | |||
| − | |||
| − | |||
| − | |||
| − | |||
| − | |||
| − | |||
| − | |||
| − | |||
| − | |||
| − | |||
| − | |||
| − | |||
=== Manual Engine Control === | === Manual Engine Control === | ||
| Line 172: | Line 145: | ||
! rowspan="2" | Turbocharger | ! rowspan="2" | Turbocharger | ||
|- | |- | ||
| − | ! Oil | + | ! Oil |
| + | ! Water | ||
| + | ! Type | ||
|- | |- | ||
| − | | Not controllable || Controllable<br>Not auto controlled || Controllable<br>Not auto controlled || Controllable<br>Not auto controlled || Separate || Not controllable<br>1 gear || Not controllable | + | | Not controllable || rowspan="2" | Controllable<br>Not auto controlled || rowspan="2" | Controllable<br>Not auto controlled || rowspan="2" | Controllable<br>Not auto controlled || rowspan="2" | Separate || rowspan="2" | Not controllable<br>1 gear || rowspan="2" | Not controllable |
| + | |- | ||
| + | |} | ||
| + | |||
| + | === Modules === | ||
| + | {| class="wikitable" | ||
| + | ! colspan="1" | Tier | ||
| + | ! colspan="2" | Flight performance | ||
| + | ! colspan="1" | Survivability | ||
| + | ! colspan="3" | Weaponry | ||
| + | |- | ||
| + | | I | ||
| + | | Fuselage repair | ||
| + | | Radiator | ||
| + | | | ||
| + | | Offensive 12 mm | ||
| + | | Turret 12 mm | ||
| + | | MCGP50 | ||
| + | |- | ||
| + | | II | ||
| + | | | ||
| + | | Compressor | ||
| + | | Airframe | ||
| + | | New 12 mm MGs | ||
| + | | | ||
| + | | MCSAP100 | ||
| + | |- | ||
| + | | III | ||
| + | | Wings repair | ||
| + | | Engine | ||
| + | | | ||
| + | | Offensive 20 mm | ||
| + | | New 12 mm MGs (turret) | ||
| + | | MCGP250 | ||
| + | |- | ||
| + | | IV | ||
| + | | | ||
| + | | Engine injection | ||
| + | | Cover | ||
| + | | New 20 mm cannons | ||
| + | | | ||
| + | | MCRO500 | ||
|- | |- | ||
|} | |} | ||
=== Pros and cons === | === Pros and cons === | ||
| − | <!-- | + | <!--Summarise and briefly evaluate the vehicle in terms of its characteristics and combat effectiveness. Mark its pros and cons in the bulleted list. Try not to use more than 6 points for each of the characteristics. Avoid using categorical definitions such as "bad", "good" and the like - use substitutions with softer forms such as "inadequate" and "effective".--> |
'''Pros:''' | '''Pros:''' | ||
| − | * | + | * Lots of guns that can be brought to use |
| − | |||
| − | |||
| − | |||
| − | |||
| − | |||
'''Cons:''' | '''Cons:''' | ||
| − | + | * Defensive turret is almost fixed (only ±2° in each direction); the target has to be at exact 6 o'clock to be engaged | |
| − | * Defensive turret is almost fixed (only ±2° in each direction); the target has to be at | + | * Bad acceleration-rate, even when diving |
| − | * | ||
| − | |||
| − | |||
| − | |||
| − | |||
| − | |||
== History == | == History == | ||
| − | + | ''Describe the history of the creation and combat usage of the aircraft in more detail than in the introduction. If the historical reference turns out to be too long, take it to a separate article, taking a link to the article about the vehicle and adding a block "/ History" (example: <nowiki>https://wiki.warthunder.com/(Vehicle-name)/History</nowiki>) and add a link to it here using the <code>main</code> template. Be sure to reference text and sources by using <code><nowiki><ref></ref></nowiki></code>, as well as adding them at the end of the article with <code><nowiki><references /></nowiki></code>. This section may also include the vehicle's dev blog entry (if applicable) and the in-game encyclopedia description (under <code><nowiki>=== In-game description ===</nowiki></code>, also if applicable).'' | |
| − | |||
| − | |||
| − | |||
| − | |||
| − | |||
| − | |||
| − | |||
| − | |||
| − | |||
| − | |||
| − | |||
| − | |||
== Media == | == Media == | ||
<!-- ''Excellent additions to the article would be video guides, screenshots from the game, and photos.'' --> | <!-- ''Excellent additions to the article would be video guides, screenshots from the game, and photos.'' --> | ||
| − | |||
| − | |||
| − | |||
| − | |||
;Images | ;Images | ||
| − | < | + | <div><ul> |
| − | File:SM 92 WTWallpaper 001.jpg | + | <li style="display: inline-block;"> [[File:SM 92 WTWallpaper 001.jpg |thumb|none|250px|]] </li> |
| − | File:SM 92 WTWallpaper 002.jpg | + | <li style="display: inline-block;"> [[File:SM 92 WTWallpaper 002.jpg |thumb|none|250px|]] </li> |
| − | File:SM 92 WTWallpaper 003.jpg | + | <li style="display: inline-block;"> [[File:SM 92 WTWallpaper 003.jpg |thumb|none|250px|]] </li> |
| − | File:SM 92 WTWallpaper 004.jpg | + | <li style="display: inline-block;"> [[File:SM 92 WTWallpaper 004.jpg |thumb|none|250px|]] </li> |
| − | File:SM 92 WTWallpaper 005.jpg | + | <li style="display: inline-block;"> [[File:SM 92 WTWallpaper 005.jpg |thumb|none|250px|]] </li> |
| − | File:SM 92 WTWallpaper 006.jpg | + | <li style="display: inline-block;"> [[File:SM 92 WTWallpaper 006.jpg |thumb|none|250px|]] </li> |
| − | File:SM 92 WTWallpaper 007.jpg | + | <li style="display: inline-block;"> [[File:SM 92 WTWallpaper 007.jpg |thumb|none|250px|]] </li> |
| − | File:SM 92 WTWallpaper 008.jpg | + | <li style="display: inline-block;"> [[File:SM 92 WTWallpaper 008.jpg |thumb|none|250px|]] </li> |
| − | </ | + | </ul></div> |
| − | + | == See also == | |
| − | + | ''Links to the articles on the War Thunder Wiki that you think will be useful for the reader, for example:'' | |
| − | |||
| − | |||
* ''reference to the series of the aircraft;'' | * ''reference to the series of the aircraft;'' | ||
| − | * ''links to approximate analogues of other nations and research trees.'' | + | * ''links to approximate analogues of other nations and research trees.'' |
| − | |||
| − | |||
| − | |||
| − | |||
| − | |||
| − | |||
| − | |||
| − | |||
| − | |||
== External links == | == External links == | ||
| − | <!-- ''Paste links to sources and external resources, such as:'' | + | <!--''Paste links to sources and external resources, such as:'' |
* ''topic on the official game forum;'' | * ''topic on the official game forum;'' | ||
| − | * ''other literature.'' --> | + | * ''encyclopedia page on the aircraft;'' |
| + | * ''other literature.''--> | ||
* [[wt:en/news/6056-development-sm-92-second-chance-for-a-second-tail-en|[Devblog] SM.92: Second Chance for a Second Tail]] | * [[wt:en/news/6056-development-sm-92-second-chance-for-a-second-tail-en|[Devblog] SM.92: Second Chance for a Second Tail]] | ||
| − | * | + | * '''[http://worldatwar.net/chandelle/v3/v3n1/italtwin.html Might Have Beens: Italian Twin-Engined Fighters, 1943]''' |
| − | |||
| − | |||
{{AirManufacturer SM}} | {{AirManufacturer SM}} | ||
{{Italy attackers}} | {{Italy attackers}} | ||
Revision as of 13:43, 27 October 2020
Contents
Description
The SM.92 is a rank III Italian attacker
with a battle rating of 4.0 (AB/RB) and 4.3 (SB). It was introduced in Update 1.87 "Locked On".
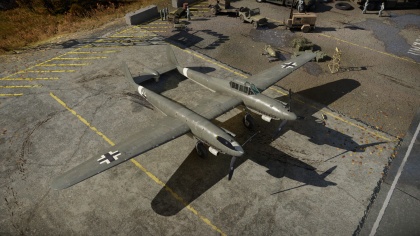
The SM.92 was an italian twin-engine fighter/bomber prototype designed and produced on 1943. It had 2 import Daimler-Benz 605 engines. It was designed to have better performance that its predecesor, the SM.91. The middle gondola got removed and the crew of two, the pilot and the gunner, were moved behind the left engine. The gunner remotley opperated a fixed 12.7mm Breda-Safat machine gun in the tail.
It had an armament of 3 20mm MG 151 autocannons and 4 12.7mm Breda-Safat machine guns.
In-game this plane can reach over 16m/s of climb rate, and with its airspawn, that is enough to get a sufficient altitude once engagements start
General info
Flight Performance
The SM.92 has a better performance that its predecesor, despite the engines staying the same. It has been made much more aeordynamic with the removal of the gondola on the SM.91 and the moving of the crew to the left fuselage, behind one of the 2 powerful Daimler-Benz 605A1 engines. Part of this improvement is also due to the change on the defensive armament, changing from a 20mm cannon with decent traverse to an aerodynamically mounted fixed 12.7mm Breda-Safat
This plane also has leading edge slats, which help it on its roll rate (as they get deployed on one wing when doing a roll maneuver) and its low speed performance.
| Characteristics | Max Speed
(km/h at 6,500 m) |
Max altitude
(metres) |
Turn time
(seconds) |
Rate of climb
(metres/second) |
Take-off run
(metres) | |||
|---|---|---|---|---|---|---|---|---|
| AB | RB | AB | RB | AB | RB | |||
| Stock | 606 | 590 | 12000 | 20.5 | 21.2 | 8.9 | 8.9 | 375 |
| Upgraded | 656 | 630 | 18.9 | 19.5 | 16.0 | 12.0 | ||
Details
| Features | ||||
|---|---|---|---|---|
| Combat flaps | Take-off flaps | Landing flaps | Air brakes | Arrestor gear |
| ✓ | ✓ | ✓ | ✓ | X |
| Limits | ||||
|---|---|---|---|---|
| Wing-break speed (km/h) |
Gear limit (km/h) |
Combat flaps (km/h) |
Max Static G | |
| + | - | |||
| 845 | 300 | 600 | ~10 | ~5 |
| Optimal velocities | |||
|---|---|---|---|
| Ailerons (km/h) |
Rudder (km/h) |
Elevators (km/h) |
Radiator (km/h) |
| < 300 | < 240 | < 500 | > 380 |
| Compressor (RB/SB) | ||
|---|---|---|
| Setting 1 | ||
| Optimal altitude | 100% Engine power | WEP Engine power |
| 6,000 m | 1,232 hp | 1,387 hp |
Survivability and armour
- Fuel Tanks located in wings and behind the engines 38 mm Bulletproof glass - Armored windscreen
Armaments
Offensive armament
The SM.92 is armed with:
- 2 x 20 mm MG 151/20 cannons, centre-mounted (300 rpg = 600 total)
- 1 x 20 mm MG 151/20 cannon, mounted in right propeller hub (300 rpg)
- 4 x 12.7 mm Breda-SAFAT machine guns, nose-mounted (350 rpg = 1,400 total)
Suspended armament
The SM.92 can be outfitted with the following ordnance:
- Without load
- 6 x 50 kg GP 50 bombs (300 kg total)
- 6 x 100 kg GP 100 bombs (600 kg total)
- 2 x 250 kg GP 250 bombs (500 kg total)
- 2 x 500 kg GP 500 bombs (1,000 kg total)
Defensive armament
The SM.92 is defended by:
- 1 x 12.7 mm Breda-SAFAT machine gun, tail turret (350 rpg)
Usage in battles
Describe the tactics of playing in an aircraft, the features of using vehicles in a team and advice on tactics. Refrain from creating a "guide" - do not impose a single point of view, but instead, give the reader food for thought. Examine the most dangerous enemies and give recommendations on fighting them. If necessary, note the specifics of the game in different modes (AB, RB, SB).
Manual Engine Control
| MEC elements | ||||||
|---|---|---|---|---|---|---|
| Mixer | Pitch | Radiator | Supercharger | Turbocharger | ||
| Oil | Water | Type | ||||
| Not controllable | Controllable Not auto controlled |
Controllable Not auto controlled |
Controllable Not auto controlled |
Separate | Not controllable 1 gear |
Not controllable |
Modules
| Tier | Flight performance | Survivability | Weaponry | |||
|---|---|---|---|---|---|---|
| I | Fuselage repair | Radiator | Offensive 12 mm | Turret 12 mm | MCGP50 | |
| II | Compressor | Airframe | New 12 mm MGs | MCSAP100 | ||
| III | Wings repair | Engine | Offensive 20 mm | New 12 mm MGs (turret) | MCGP250 | |
| IV | Engine injection | Cover | New 20 mm cannons | MCRO500 | ||
Pros and cons
Pros:
- Lots of guns that can be brought to use
Cons:
- Defensive turret is almost fixed (only ±2° in each direction); the target has to be at exact 6 o'clock to be engaged
- Bad acceleration-rate, even when diving
History
Describe the history of the creation and combat usage of the aircraft in more detail than in the introduction. If the historical reference turns out to be too long, take it to a separate article, taking a link to the article about the vehicle and adding a block "/ History" (example: https://wiki.warthunder.com/(Vehicle-name)/History) and add a link to it here using the main template. Be sure to reference text and sources by using <ref></ref>, as well as adding them at the end of the article with <references />. This section may also include the vehicle's dev blog entry (if applicable) and the in-game encyclopedia description (under === In-game description ===, also if applicable).
Media
- Images
See also
Links to the articles on the War Thunder Wiki that you think will be useful for the reader, for example:
- reference to the series of the aircraft;
- links to approximate analogues of other nations and research trees.
External links
- [Devblog] SM.92: Second Chance for a Second Tail
- Might Have Beens: Italian Twin-Engined Fighters, 1943
| Savoia-Marchetti | |
|---|---|
| Bombers | S.M.79 serie 1 · S.M.79 serie 8 · S.M.79 AS · S.M.79 bis/T.M |
| S.81 | |
| Attackers | SM.91 · SM.92 |
| Export | S.M.79 B |
| Captured | ▀S.M.79 serie 1 · ▀S.M.79 serie 4 · ▀S.M.79 serie 8 |
| ▀S.M.79 AS · ▀S.M.79 bis/N · ▀S.M.79 bis/T.M · ▀S.M.79 B | |
| Italy strike aircraft | |
|---|---|
| Ba.65 (K.14) L · Breda 88 (P.XI) · F.C.20 Bis · P.108A serie 2 | |
| Ro.57 Quadriarma · SM.91 · SM.92 | |
| Hungary | ◐Bf 110 G-4 · ◔IL-10 |
| Romania | Hs 129 B-2 (Romania) |


