Difference between revisions of "D4Y2"
(→Description) |
(→History: Added history for the D4Y2) (Tag: Visual edit) |
||
| (28 intermediate revisions by 10 users not shown) | |||
| Line 1: | Line 1: | ||
| + | {{Specs-Card|code=d4y2}} | ||
{{About | {{About | ||
| about = Japanese dive bomber '''{{PAGENAME}}''' | | about = Japanese dive bomber '''{{PAGENAME}}''' | ||
| + | | and | ||
| usage = other versions | | usage = other versions | ||
| − | | link | + | | link-1 = D4Y1 |
| − | + | | link-2 = D4Y3 Ko | |
| − | |||
| − | |||
| − | | | ||
}} | }} | ||
== Description == | == Description == | ||
<!-- ''In the description, the first part should be about the history of and the creation and combat usage of the aircraft, as well as its key features. In the second part, tell the reader about the aircraft in the game. Insert a screenshot of the vehicle, so that if the novice player does not remember the vehicle by name, he will immediately understand what kind of vehicle the article is talking about.'' --> | <!-- ''In the description, the first part should be about the history of and the creation and combat usage of the aircraft, as well as its key features. In the second part, tell the reader about the aircraft in the game. Insert a screenshot of the vehicle, so that if the novice player does not remember the vehicle by name, he will immediately understand what kind of vehicle the article is talking about.'' --> | ||
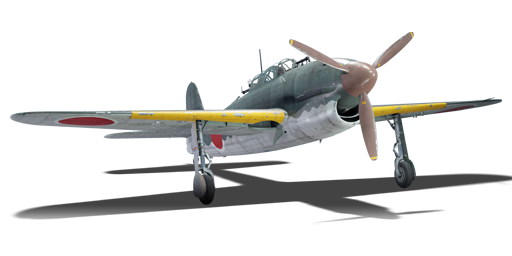
| − | The '''{{Specs|name}} | + | [[File:GarageImage_{{PAGENAME}}.jpg|420px|thumb|left]] |
| − | + | {{break}} | |
| − | It was introduced in [[Update 1.71 "New E.R.A | + | The '''{{Specs|name}}''' is a rank {{Specs|rank}} Japanese dive bomber {{Battle-rating}}. It was introduced in [[Update 1.71 "New E.R.A"]]. |
| − | |||
| − | |||
| − | |||
| − | |||
== General info == | == General info == | ||
| − | + | === Flight Performance === | |
| − | === Flight | + | ''Describe how the aircraft behaves in the air. Speed, manoeuvrability, acceleration and allowable loads - these are the most important characteristics of the vehicle.'' |
| − | |||
| − | |||
| − | |||
| − | {| class="wikitable" style="text-align:center" | + | {| class="wikitable" style="text-align:center" |
| − | ! | + | |- |
| + | ! colspan="8" | Characteristics | ||
| + | |- | ||
| + | ! colspan="8" | ''Stock'' | ||
| + | |- | ||
! colspan="2" | Max Speed<br>(km/h at 5,250 m) | ! colspan="2" | Max Speed<br>(km/h at 5,250 m) | ||
| − | ! rowspan="2" | Max altitude<br>( | + | ! rowspan="2" | Max altitude<br>(meters) |
! colspan="2" | Turn time<br>(seconds) | ! colspan="2" | Turn time<br>(seconds) | ||
| − | ! colspan="2" | Rate of climb<br>( | + | ! colspan="2" | Rate of climb<br>(meters/second) |
| − | ! rowspan="2" | Take-off run<br>( | + | ! rowspan="2" | Take-off run<br>(meters) |
|- | |- | ||
| − | ! AB | + | ! AB |
| + | ! RB | ||
| + | ! AB | ||
| + | ! RB | ||
| + | ! AB | ||
| + | ! RB | ||
|- | |- | ||
| − | + | | 555 || 541 || {{Specs|ceiling}} || 23.8 || 24.4 || 7.7 || 7.7 || 300 | |
| − | | 555 || 541 | | ||
|- | |- | ||
| − | ! Upgraded | + | ! colspan="8" | ''Upgraded'' |
| − | | 607 || 580 || 22.2 || 23.0 || 14.6 || 10.9 | + | |- |
| + | ! colspan="2" | Max Speed<br>(km/h at 5,250 m) | ||
| + | ! rowspan="2" | Max altitude<br>(meters) | ||
| + | ! colspan="2" | Turn time<br>(seconds) | ||
| + | ! colspan="2" | Rate of climb<br>(meters/second) | ||
| + | ! rowspan="2" | Take-off run<br>(meters) | ||
| + | |- | ||
| + | ! AB | ||
| + | ! RB | ||
| + | ! AB | ||
| + | ! RB | ||
| + | ! AB | ||
| + | ! RB | ||
| + | |- | ||
| + | |607||580|| {{Specs|ceiling}} ||22.2||23.0||14.6||10.9|| 300 | ||
|- | |- | ||
|} | |} | ||
==== Details ==== | ==== Details ==== | ||
| − | + | {| class="wikitable" style="text-align:center" | |
| − | {| class="wikitable" style="text-align:center | ||
|- | |- | ||
! colspan="5" | Features | ! colspan="5" | Features | ||
|- | |- | ||
| − | ! Combat flaps | + | ! Combat flaps |
| + | ! Take-off flaps | ||
| + | ! Landing flaps | ||
| + | ! Air brakes | ||
| + | ! Arrestor gear | ||
|- | |- | ||
| ✓ || ✓ || ✓ || ✓ || ✓ <!-- ✓ --> | | ✓ || ✓ || ✓ || ✓ || ✓ <!-- ✓ --> | ||
| Line 56: | Line 73: | ||
|} | |} | ||
| − | {| class="wikitable" style="text-align:center | + | {| class="wikitable" style="text-align:center" |
|- | |- | ||
| − | ! colspan=" | + | ! colspan="5" | Limits |
|- | |- | ||
| − | ! rowspan="2" | | + | ! rowspan="2" | Wing-break speed<br>(km/h) |
| − | ! rowspan="2" | Gear (km/h) | + | ! rowspan="2" | Gear limit<br>(km/h) |
| − | ! | + | ! rowspan="2" | Combat flaps<br>(km/h) |
! colspan="2" | Max Static G | ! colspan="2" | Max Static G | ||
|- | |- | ||
| − | + | ! + | |
| + | ! - | ||
|- | |- | ||
| − | | {{Specs|destruction| | + | | {{Specs|destruction|constructions}} || {{Specs|destruction|chassis}} || 480 || ~12 || ~9 |
|- | |- | ||
|} | |} | ||
| Line 73: | Line 91: | ||
{| class="wikitable" style="text-align:center" | {| class="wikitable" style="text-align:center" | ||
|- | |- | ||
| − | ! colspan="4" | Optimal velocities | + | ! colspan="4" | Optimal velocities |
|- | |- | ||
| − | ! Ailerons | + | ! Ailerons<br>(km/h) |
| + | ! Rudder<br>(km/h) | ||
| + | ! Elevators<br>(km/h) | ||
| + | ! Radiator<br>(km/h) | ||
|- | |- | ||
| − | | < 350 || < 400 || < | + | | < 350 || < 400 || < 430 || > 200 |
|- | |- | ||
|} | |} | ||
| Line 96: | Line 117: | ||
=== Survivability and armour === | === Survivability and armour === | ||
| − | + | ''Examine the survivability of the aircraft. Note how vulnerable the structure is and how secure the pilot is, whether the fuel tanks are armoured, etc. Describe the armour, if there is any, and also mention the vulnerability of other critical aircraft systems.'' | |
| − | |||
| − | |||
| − | |||
| − | |||
| − | |||
| − | |||
| − | |||
== Armaments == | == Armaments == | ||
| − | |||
| − | |||
| − | |||
| − | |||
| − | |||
=== Offensive armament === | === Offensive armament === | ||
| − | |||
<!-- ''Describe the offensive armament of the aircraft, if any. Describe how effective the cannons and machine guns are in a battle, and also what belts or drums are better to use. If there is no offensive weaponry, delete this subsection.'' --> | <!-- ''Describe the offensive armament of the aircraft, if any. Describe how effective the cannons and machine guns are in a battle, and also what belts or drums are better to use. If there is no offensive weaponry, delete this subsection.'' --> | ||
{{main|Type 97 navy (7.7 mm)}} | {{main|Type 97 navy (7.7 mm)}} | ||
| Line 121: | Line 129: | ||
=== Suspended armament === | === Suspended armament === | ||
| − | |||
<!-- ''Describe the aircraft's suspended armament: additional cannons under the wings, bombs, rockets and torpedoes. This section is especially important for bombers and attackers. If there is no suspended weaponry remove this subsection.'' --> | <!-- ''Describe the aircraft's suspended armament: additional cannons under the wings, bombs, rockets and torpedoes. This section is especially important for bombers and attackers. If there is no suspended weaponry remove this subsection.'' --> | ||
{{main|Navy Type 97 Number 6 (60 kg)|Navy Type Number 25 Model 2 (250 kg)|Number Type 2 50 Model 1 GP(SAP) (500 kg)|Type 3 No.1 Mod.28 Mk.1}} | {{main|Navy Type 97 Number 6 (60 kg)|Navy Type Number 25 Model 2 (250 kg)|Number Type 2 50 Model 1 GP(SAP) (500 kg)|Type 3 No.1 Mod.28 Mk.1}} | ||
| Line 134: | Line 141: | ||
=== Defensive armament === | === Defensive armament === | ||
| − | |||
| − | |||
<!-- ''Defensive armament with turret machine guns or cannons, crewed by gunners. Examine the number of gunners and what belts or drums are better to use. If defensive weaponry is not available, remove this subsection.'' --> | <!-- ''Defensive armament with turret machine guns or cannons, crewed by gunners. Examine the number of gunners and what belts or drums are better to use. If defensive weaponry is not available, remove this subsection.'' --> | ||
| − | {{main|Type 92 (7.7 mm)}} | + | {{main|Type 92 navy (7.7 mm)}} |
The '''''{{PAGENAME}}''''' is defended by: | The '''''{{PAGENAME}}''''' is defended by: | ||
| − | * 1 x 7.7 mm Type 92 machine gun, dorsal turret (582 rpg) | + | * 1 x 7.7 mm Type 92 navy machine gun, dorsal turret (582 rpg) |
== Usage in battles == | == Usage in battles == | ||
| − | + | ''Describe the tactics of playing in an aircraft, the features of using vehicles in a team and advice on tactics. Refrain from creating a "guide" - do not impose a single point of view, but instead, give the reader food for thought. Examine the most dangerous enemies and give recommendations on fighting them. If necessary, note the specifics of the game in different modes (AB, RB, SB).'' | |
| − | |||
| − | |||
| − | |||
| − | |||
| − | |||
| − | |||
| − | |||
| − | |||
=== Manual Engine Control === | === Manual Engine Control === | ||
| Line 165: | Line 162: | ||
! rowspan="2" | Turbocharger | ! rowspan="2" | Turbocharger | ||
|- | |- | ||
| − | ! Oil !! | + | ! Oil |
| + | ! Water | ||
| + | ! Type | ||
| + | |- | ||
| + | | Controllable || rowspan="2" | Controllable<br>Not auto controlled || rowspan="2" | Controllable<br>Not auto controlled || rowspan="2" | Controllable<br>Not auto controlled || rowspan="2" | Separate || rowspan="2" | Not controllable<br>1 gear || rowspan="2" | Not controllable | ||
| + | |- | ||
| + | |} | ||
| + | |||
| + | === Modules === | ||
| + | {| class="wikitable" | ||
| + | ! colspan="1" | Tier | ||
| + | ! colspan="2" | Flight performance | ||
| + | ! colspan="1" | Survivability | ||
| + | ! colspan="2" | Weaponry | ||
| + | |- | ||
| + | | I | ||
| + | | Fuselage repair | ||
| + | | Radiator | ||
| + | | | ||
| + | | Offensive 7 mm | ||
| + | | Type 3 No.1 Mod.28 Mk.1 rockets | ||
|- | |- | ||
| − | | | + | | II |
| + | | | ||
| + | | Compressor | ||
| + | | Airframe | ||
| + | | New 7 mm MGs | ||
| + | | | ||
| + | |- | ||
| + | | III | ||
| + | | Wings repair | ||
| + | | Engine | ||
| + | | | ||
| + | | Turret 7 mm | ||
| + | | 9 in (mod30) | ||
| + | |- | ||
| + | | IV | ||
| + | | | ||
| + | | Engine injection | ||
| + | | Cover | ||
| + | | New 7 mm MGs (turret) | ||
| + | | 13 in (mod35) | ||
|- | |- | ||
|} | |} | ||
| − | |||
=== Pros and cons === | === Pros and cons === | ||
| − | + | ''Summarise and briefly evaluate the vehicle in terms of its characteristics and combat effectiveness. Mark its pros and cons in the bulleted list. Try not to use more than 6 points for each of the characteristics. Avoid using categorical definitions such as "bad", "good" and the like - use substitutions with softer forms such as "inadequate" and "effective".'' | |
'''Pros:''' | '''Pros:''' | ||
| − | * | + | *Quite fast and nimble |
| − | + | ||
| − | |||
| − | |||
| − | |||
| − | |||
| − | |||
| − | |||
| − | |||
| − | |||
| − | |||
| − | |||
| − | |||
'''Cons:''' | '''Cons:''' | ||
| − | * | + | * Rocket payload is terrible |
| − | ** | + | ** Explosive mass is insufficient to make the rocket useful against armour or as an area-attack weapon - is really only useful in a direct hit against planes |
| − | + | ** Only four rockets are carried | |
| − | |||
| − | |||
| − | |||
| − | |||
| − | |||
| − | |||
| − | |||
| − | |||
| − | ** | ||
== History == | == History == | ||
| − | + | Nicknamed the the "Judy" by allied pilots, the D4Y2 was feared by both troops on the ground and ships in the sea. | |
| − | |||
| − | |||
| − | |||
| − | The D4Y2 was a carrier based dive bomber. It sported a 1, | + | The D4Y2 was a carrier based dive bomber. It sported a 1,400hp "Aichi AE1P Atsuta 32" engine. The D4Y2 would see 7 variants, and was the most widely used version of the D4Y series. |
| − | Some variants had very unique roles such as the D4Y2 | + | Some variants had very unique roles such as the D4Y2 KAI ''Suisei Model 22,'' designed to be launched from a battleship by the means of a catapult. |
| − | With a range of 1,400 miles the D4Y2 was perfect for the | + | With a range of 1,400 miles the D4Y2 was perfect for the defense of the Japanese territories. Combined with it's extreme accuracy in a dive it saw great success. However, with allied aircraft upgrading from the F4F Wildcat to the F6F Hellcat, it was no longer fast enough to escape and started seeing massive casualties in missions which just months before would have had little to no casualties. The increased death rates of the pilots and crew saw pilots becoming less and less experienced. Increasing the death rates even further. Slowly the time of the D4Y's was coming to an end. |
No D4Y2's survived the war, but their legacy lives on as a feared a ruthless dive bomber and night fighter. Their achievements include the attack on the USS Enterprise and attack on the USS Bunker Hill which was damaged beyond repair at sea and had to return to port in the United States to repair. | No D4Y2's survived the war, but their legacy lives on as a feared a ruthless dive bomber and night fighter. Their achievements include the attack on the USS Enterprise and attack on the USS Bunker Hill which was damaged beyond repair at sea and had to return to port in the United States to repair. | ||
| − | |||
== Media == | == Media == | ||
| − | + | ''Excellent additions to the article would be video guides, screenshots from the game, and photos.'' | |
| − | + | == See also == | |
| + | ''Links to the articles on the War Thunder Wiki that you think will be useful for the reader, for example:'' | ||
| − | |||
| − | |||
| − | |||
| − | |||
| − | |||
| − | |||
| − | |||
* ''reference to the series of the aircraft;'' | * ''reference to the series of the aircraft;'' | ||
| − | * ''links to approximate analogues of other nations and research trees.'' | + | * ''links to approximate analogues of other nations and research trees.'' |
| − | + | == External links == | |
| − | + | ''Paste links to sources and external resources, such as:'' | |
| − | |||
| − | |||
| − | |||
| − | |||
* ''topic on the official game forum;'' | * ''topic on the official game forum;'' | ||
| − | * '' | + | * ''encyclopedia page on the aircraft;'' |
| − | + | * ''other literature.'' | |
| − | * | ||
| − | |||
| − | |||
| − | |||
{{Japan bombers}} | {{Japan bombers}} | ||
Revision as of 16:48, 15 April 2020
Contents
| This page is about the Japanese dive bomber D4Y2. For other versions, see D4Y1 and D4Y3 Ko. |
Description

The D4Y2 is a rank II Japanese dive bomber
with a battle rating of 2.0 (AB), 2.3 (RB), and 2.7 (SB). It was introduced in Update 1.71 "New E.R.A".
General info
Flight Performance
Describe how the aircraft behaves in the air. Speed, manoeuvrability, acceleration and allowable loads - these are the most important characteristics of the vehicle.
| Characteristics | |||||||
|---|---|---|---|---|---|---|---|
| Stock | |||||||
| Max Speed (km/h at 5,250 m) |
Max altitude (meters) |
Turn time (seconds) |
Rate of climb (meters/second) |
Take-off run (meters) | |||
| AB | RB | AB | RB | AB | RB | ||
| 555 | 541 | 9800 | 23.8 | 24.4 | 7.7 | 7.7 | 300 |
| Upgraded | |||||||
| Max Speed (km/h at 5,250 m) |
Max altitude (meters) |
Turn time (seconds) |
Rate of climb (meters/second) |
Take-off run (meters) | |||
| AB | RB | AB | RB | AB | RB | ||
| 607 | 580 | 9800 | 22.2 | 23.0 | 14.6 | 10.9 | 300 |
Details
| Features | ||||
|---|---|---|---|---|
| Combat flaps | Take-off flaps | Landing flaps | Air brakes | Arrestor gear |
| ✓ | ✓ | ✓ | ✓ | ✓ |
| Limits | ||||
|---|---|---|---|---|
| Wing-break speed (km/h) |
Gear limit (km/h) |
Combat flaps (km/h) |
Max Static G | |
| + | - | |||
| 480 | ~12 | ~9 | ||
| Optimal velocities | |||
|---|---|---|---|
| Ailerons (km/h) |
Rudder (km/h) |
Elevators (km/h) |
Radiator (km/h) |
| < 350 | < 400 | < 430 | > 200 |
| Compressor (RB/SB) | ||
|---|---|---|
| Setting 1 | ||
| Optimal altitude | 100% Engine power | WEP Engine power |
| 5,000 m | 1,300 hp | 1,430 hp |
Survivability and armour
Examine the survivability of the aircraft. Note how vulnerable the structure is and how secure the pilot is, whether the fuel tanks are armoured, etc. Describe the armour, if there is any, and also mention the vulnerability of other critical aircraft systems.
Armaments
Offensive armament
The D4Y2 is armed with:
- 2 x 7.7 mm Type 97 navy machine guns, nose-mounted (400 rpg = 800 total)
Suspended armament
The D4Y2 can be outfitted with the following ordnance:
- Without load
- 1 x 250 kg Navy Type Number 25 Model 2 bomb (250 kg total)
- 4 x Type 3 No.1 Mod.28 Mk.1 rockets
- 1 x 250 kg Navy Type Number 25 Model 2 bomb + 2 x 60 kg Navy Type 97 Number 6 bombs (370 kg total)
- 1 x 500 kg Number Type 2 50 Model 1 GP(SAP) bomb (500 kg total)
Defensive armament
The D4Y2 is defended by:
- 1 x 7.7 mm Type 92 navy machine gun, dorsal turret (582 rpg)
Usage in battles
Describe the tactics of playing in an aircraft, the features of using vehicles in a team and advice on tactics. Refrain from creating a "guide" - do not impose a single point of view, but instead, give the reader food for thought. Examine the most dangerous enemies and give recommendations on fighting them. If necessary, note the specifics of the game in different modes (AB, RB, SB).
Manual Engine Control
| MEC elements | ||||||
|---|---|---|---|---|---|---|
| Mixer | Pitch | Radiator | Supercharger | Turbocharger | ||
| Oil | Water | Type | ||||
| Controllable | Controllable Not auto controlled |
Controllable Not auto controlled |
Controllable Not auto controlled |
Separate | Not controllable 1 gear |
Not controllable |
Modules
| Tier | Flight performance | Survivability | Weaponry | ||
|---|---|---|---|---|---|
| I | Fuselage repair | Radiator | Offensive 7 mm | Type 3 No.1 Mod.28 Mk.1 rockets | |
| II | Compressor | Airframe | New 7 mm MGs | ||
| III | Wings repair | Engine | Turret 7 mm | 9 in (mod30) | |
| IV | Engine injection | Cover | New 7 mm MGs (turret) | 13 in (mod35) | |
Pros and cons
Summarise and briefly evaluate the vehicle in terms of its characteristics and combat effectiveness. Mark its pros and cons in the bulleted list. Try not to use more than 6 points for each of the characteristics. Avoid using categorical definitions such as "bad", "good" and the like - use substitutions with softer forms such as "inadequate" and "effective".
Pros:
- Quite fast and nimble
Cons:
- Rocket payload is terrible
- Explosive mass is insufficient to make the rocket useful against armour or as an area-attack weapon - is really only useful in a direct hit against planes
- Only four rockets are carried
History
Nicknamed the the "Judy" by allied pilots, the D4Y2 was feared by both troops on the ground and ships in the sea.
The D4Y2 was a carrier based dive bomber. It sported a 1,400hp "Aichi AE1P Atsuta 32" engine. The D4Y2 would see 7 variants, and was the most widely used version of the D4Y series.
Some variants had very unique roles such as the D4Y2 KAI Suisei Model 22, designed to be launched from a battleship by the means of a catapult.
With a range of 1,400 miles the D4Y2 was perfect for the defense of the Japanese territories. Combined with it's extreme accuracy in a dive it saw great success. However, with allied aircraft upgrading from the F4F Wildcat to the F6F Hellcat, it was no longer fast enough to escape and started seeing massive casualties in missions which just months before would have had little to no casualties. The increased death rates of the pilots and crew saw pilots becoming less and less experienced. Increasing the death rates even further. Slowly the time of the D4Y's was coming to an end.
No D4Y2's survived the war, but their legacy lives on as a feared a ruthless dive bomber and night fighter. Their achievements include the attack on the USS Enterprise and attack on the USS Bunker Hill which was damaged beyond repair at sea and had to return to port in the United States to repair.
Media
Excellent additions to the article would be video guides, screenshots from the game, and photos.
See also
Links to the articles on the War Thunder Wiki that you think will be useful for the reader, for example:
- reference to the series of the aircraft;
- links to approximate analogues of other nations and research trees.
External links
Paste links to sources and external resources, such as:
- topic on the official game forum;
- encyclopedia page on the aircraft;
- other literature.
| Japan bombers | |
|---|---|
| Navy | |
| Carrier-based attack bomber | |
| B5N | B5N2 |
| B6N | B6N1 · B6N2 · B6N2a |
| B7A | B7A2 · B7A2 (Homare 23) |
| Carrier-based dive bomber | |
| D3A | D3A1 |
| D4Y | D4Y1 · D4Y2 · D4Y3 Ko |
| Shipboard Observation seaplane | |
| F1M | F1M2 |
| Land-based Attack bomber | |
| G4M | G4M1 |
| G5N | G5N1 |
| G8N | G8N1 |
| Flying boat | |
| H6K | H6K4 |
| H8K | H8K2 · H8K3 |
| Land-based Bomber | |
| P1Y | P1Y1 |
| Army | |
| Light | Ki-32 |
| Ki-48-II otsu | |
| Heavy | Ki-21-Ia · Ki-21-I hei |
| Ki-49-I · Ki-49-IIa · Ki-49-IIb · Ki-49-IIb/L | |
| Ki-67-I Ko · Ki-67-I otsu | |
| Other countries | ▅B-17E |
