Difference between revisions of "Spj fm/43-44"
Oxygen_Thief (talk | contribs) (Article majority added) (Tag: Visual edit) |
(Edits) |
||
| Line 12: | Line 12: | ||
== General info == | == General info == | ||
=== Survivability and armour === | === Survivability and armour === | ||
| − | The fm/43-44 is a deceptively survivable vehicle from the front | + | <!-- ''Describe armour protection. Note the most well protected and key weak areas. Appreciate the layout of modules as well as the number and location of crew members. Is the level of armour protection sufficient, is the placement of modules helpful for survival in combat? If necessary use a visual template to indicate the most secure and weak zones of the armour.'' --> |
| + | The fm/43-44 is a deceptively survivable vehicle from the front. Open-topped high-calibre tank destroyers and SPGs are seldom very well armoured, but this example is the exception, with 50 mm of armour covering the upper and and lower plate as well as the turret face, with the tapering sides being 30 mm. The only frontal weak point of this vehicle is the shield directly protecting the breech, which is only 15 mm. | ||
It's also manned by 5 crew members, two in the hull and three in the back, which really helps its survivability. Most of the cannons you'll be encountering around this battle rating are quite low calibre, meaning it will take a fair few rounds penetrating this vehicle to knock out all the crew. Additionally, it's nearly impossible to one-shot this vehicle without detonating the ammo, as the crew in the front and back are completely separate from each other, so a shot entering one compartment won't cause any damage to the other, so after taking a shot you'll still either be able to fire the gun, or drive away, which is a huge advantage. A drawback of this vehicle though is in regards to its protection from the air, the crew operating the cannon have no armour protecting them from incoming air strafing, so even aircraft with weak machine guns can slowly chip away at this vehicle, additionally its also very vulnerable to artillery. | It's also manned by 5 crew members, two in the hull and three in the back, which really helps its survivability. Most of the cannons you'll be encountering around this battle rating are quite low calibre, meaning it will take a fair few rounds penetrating this vehicle to knock out all the crew. Additionally, it's nearly impossible to one-shot this vehicle without detonating the ammo, as the crew in the front and back are completely separate from each other, so a shot entering one compartment won't cause any damage to the other, so after taking a shot you'll still either be able to fire the gun, or drive away, which is a huge advantage. A drawback of this vehicle though is in regards to its protection from the air, the crew operating the cannon have no armour protecting them from incoming air strafing, so even aircraft with weak machine guns can slowly chip away at this vehicle, additionally its also very vulnerable to artillery. | ||
=== Mobility === | === Mobility === | ||
| − | The mobility of this vehicle as well is deceptively effective. It can reach a max speed off-road of 42 km/h in RB modes, and 46 km/h in AB modes. It | + | <!-- ''Write about the mobility of the ground vehicle. Estimate the specific power and manoeuvrability, as well as the maximum speed forwards and backwards.'' --> |
| + | |||
| + | {{tankMobility|abMinHp=227|rbMinHp=142}} | ||
| + | |||
| + | The mobility of this vehicle as well is deceptively effective. It can reach a max speed off-road of 42 km/h in RB modes, and 46 km/h in AB modes. It won't outpace many light vehicles, but it certainly isn't slow, and can easily cruise faster than most contemporary tank destroyers and medium tanks. Once upgraded, its hull traverse as well is effective, it can turn from stationary to re-position the gun and change direction easily, which is important for a turretless vehicle like this one. Its reverse speed is about average at 5 km/h, which will be enough to back out of sight into cover, but it wont save you if you're out in the open, so the lack of a fast reverse gear should play into where you choose to position. | ||
== Armaments == | == Armaments == | ||
=== Main armament === | === Main armament === | ||
| − | This vehicle is equipped with a 150mm | + | <!-- ''Give the reader information about the characteristics of the main gun. Assess its effectiveness in a battle based on the reloading speed, ballistics and the power of shells. Do not forget about the flexibility of the fire, that is how quickly the cannon can be aimed at the target, open fire on it and aim at another enemy. Add a link to the main article on the gun: <code><nowiki>{{main|Name of the weapon}}</nowiki></code>. Describe in general terms the ammunition available for the main gun. Give advice on how to use them and how to fill the ammunition storage.'' --> |
| + | {{main|Fsthaub m/02 (150 mm)}} | ||
| + | |||
| + | This vehicle is equipped with a 150mm recoilless rifle with a small ammo pool of only 10 rounds. It's only equipped with a single ammo type, a standard HE round which sports huge damage potential if it connects with an enemy vehicle, in most engagements with conventional tanks you will only need to connect the round to the vehicle to knock them out in a single shot, which eliminates the tedium spent aiming for particular weak points, which isn't very easy for this vehicle as the muzzle velocity is quite slow at only 285 m/s, meaning that ranging in the gun can be quite tricky. Another slight drawback is the gun depression, at only -4°, this does somewhat limit the locations you can play effectively, as this vehicle can't use many hills or ridge lines to shoot over. | ||
As well as this, the reload is fairly long at 19.5 seconds stock, so if you miss a shot this vehicle will be quite vulnerable, especially considering that the average reload of small calibre guns around this battle rating is around 4 seconds, so an enemy could potentially fire on you 5 times before you reload. | As well as this, the reload is fairly long at 19.5 seconds stock, so if you miss a shot this vehicle will be quite vulnerable, especially considering that the average reload of small calibre guns around this battle rating is around 4 seconds, so an enemy could potentially fire on you 5 times before you reload. | ||
| Line 27: | Line 35: | ||
Because of this, its recommended that you use the rangefinder when engaging enemies that aren't aware of you, this way you can almost guarantee the round connects, although it's not wise to spend the time rangefinding if an enemy is aware of you, as in the time you spend sitting and waiting for the range to come in, your enemy will likely be firing at you and knocking out your crew. Ultimately this round wont have any trouble knocking out the vast majority of vehicles you can meet around the battle rating, the only challenging vehicle will be the French B1 Bis, if you engaging one of these tanks it's recommended to aim your shot for just beneath the turret, as this will cripple the tank, avoid hitting the front plate as this likely will result in no damage. | Because of this, its recommended that you use the rangefinder when engaging enemies that aren't aware of you, this way you can almost guarantee the round connects, although it's not wise to spend the time rangefinding if an enemy is aware of you, as in the time you spend sitting and waiting for the range to come in, your enemy will likely be firing at you and knocking out your crew. Ultimately this round wont have any trouble knocking out the vast majority of vehicles you can meet around the battle rating, the only challenging vehicle will be the French B1 Bis, if you engaging one of these tanks it's recommended to aim your shot for just beneath the turret, as this will cripple the tank, avoid hitting the front plate as this likely will result in no damage. | ||
| − | === | + | {| class="wikitable" style="text-align:center" width="100%" |
| − | The fm/43-44 is also equipped with a hull mounted | + | |- |
| + | ! colspan="5" | [[Fsthaub m/02 (150 mm)|150 mm Fsthaub m/02]] || colspan="5" | Turret rotation speed (°/s) || colspan="4" | Reloading rate (seconds) | ||
| + | |- | ||
| + | ! Mode !! Capacity !! Vertical !! Horizontal !! Stabilizer | ||
| + | ! Stock !! Upgraded !! Full !! Expert !! Aced | ||
| + | ! Stock !! Full !! Expert !! Aced | ||
| + | |- | ||
| + | ! ''Arcade'' | ||
| + | | rowspan="2" | 10 || rowspan="2" | -4°/+10° || rowspan="2" | ±12° || rowspan="2" | N/A || 7.0 || __._ || __._ || __._ || __._ || rowspan="2" | 19.4 || rowspan="2" | _._ || rowspan="2" | _._ || rowspan="2" | _._ | ||
| + | |- | ||
| + | ! ''Realistic'' | ||
| + | | 4.8 || __._ || __._ || __._ || __._ | ||
| + | |- | ||
| + | |} | ||
| + | |||
| + | ==== Ammunition ==== | ||
| + | {| class="wikitable sortable" style="text-align:center" width="100%" | ||
| + | ! colspan="8" | Penetration statistics | ||
| + | |- | ||
| + | ! rowspan="2" data-sort-type="text" | Ammunition | ||
| + | ! rowspan="2" | Type of<br>warhead | ||
| + | ! colspan="6" | '''Penetration @ 0° Angle of Attack (mm)''' | ||
| + | |- | ||
| + | ! 10 m !! 100 m !! 500 m !! 1,000 m !! 1,500 m !! 2,000 m | ||
| + | |- | ||
| + | | sgr m/38 || HE || 48 || 48 || 48 || 48 || 48 || 48 | ||
| + | |- | ||
| + | |} | ||
| + | {| class="wikitable sortable" style="text-align:center" width="100%" | ||
| + | ! colspan="11" | Shell details | ||
| + | |- | ||
| + | ! rowspan="2" data-sort-type="text" | Ammunition | ||
| + | ! rowspan="2" | Type of<br>warhead | ||
| + | ! rowspan="2" | Velocity<br>(m/s) | ||
| + | ! rowspan="2" | Projectile<br>Mass (kg) | ||
| + | ! rowspan="2" | Fuse delay<br>(m) | ||
| + | ! rowspan="2" | Fuse sensitivity<br>(mm) | ||
| + | ! rowspan="2" | Explosive Mass<br>(TNT equivalent) (g) | ||
| + | ! rowspan="2" | Normalisation at 30°<br>from horizontal | ||
| + | ! colspan="3" | Ricochet | ||
| + | |- | ||
| + | ! 0% !! 50% !! 100% | ||
| + | |- | ||
| + | | sgr m/38 || HE || 285 || 37.0 || 0.1 || 0.5 || 5,800 || +0.0° || 79° || 80° || 81° | ||
| + | |- | ||
| + | |} | ||
| + | |||
| + | ==== [[Ammo racks]] ==== | ||
| + | <!-- [[File:Ammoracks_{{PAGENAME}}.jpg|right|thumb|x250px|[[Ammo racks]] of the {{PAGENAME}}]] --> | ||
| + | {| class="wikitable" style="text-align:center" | ||
| + | |- | ||
| + | ! Full<br>ammo | ||
| + | ! 1st<br>rack empty | ||
| + | ! 2nd<br>rack empty | ||
| + | ! 3rd<br>rack empty | ||
| + | ! 4th<br>rack empty | ||
| + | ! 5th<br>rack empty | ||
| + | ! 6th<br>rack empty | ||
| + | ! Visual<br>discrepancy | ||
| + | |- | ||
| + | | '''10''' || __ ''(+__)'' || __ ''(+__)'' || __ ''(+__)'' || __ ''(+__)'' || __ ''(+__)'' || __ ''(+__)'' || __ | ||
| + | |- | ||
| + | |} | ||
| + | |||
| + | ==== [[Optics]] ==== | ||
| + | {| class="wikitable" style="text-align:center" | ||
| + | ! colspan="3" | {{PAGENAME}} Optics | ||
| + | |- | ||
| + | ! | ||
| + | ! Default magnification | ||
| + | ! Maximum magnification | ||
| + | |- | ||
| + | ! Main Gun optics | ||
| + | | X1.8 || X3.5 | ||
| + | |- | ||
| + | ! Comparable optics | ||
| + | | colspan="2" | ___ | ||
| + | |- | ||
| + | |} | ||
| + | |||
| + | === Machine guns === | ||
| + | <!-- ''Offensive and anti-aircraft machine guns not only allow you to fight some aircraft but also are effective against lightly armoured vehicles. Evaluate machine guns and give recommendations on its use.'' --> | ||
| + | {{main|Ksp m/36 (8 mm)}} | ||
| + | |||
| + | The fm/43-44 is also equipped with a hull mounted 8 mm ksp m/36 machine gun, it has no viability against armoured targets but can knock out exposed crew members of enemy vehicles. It's recommended to select it directly when using it however as aiming it accurately by eye isn't very easy. | ||
| + | |||
| + | {| class="wikitable" style="text-align:center" | ||
| + | |- | ||
| + | ! colspan="5" | [[Ksp m/36 (8 mm)|8 mm Ksp m/36]] | ||
| + | |- | ||
| + | ! Mount | ||
| + | ! Capacity<br>(Belt capacity) | ||
| + | ! Rate of fire<br>(shots/minute) | ||
| + | ! Vertical<br>guidance | ||
| + | ! Horizontal<br>guidance | ||
| + | |- | ||
| + | | Hull || 2,000 (250) || 648 || ±10° || ±10° | ||
| + | |- | ||
| + | |} | ||
== Usage in battles == | == Usage in battles == | ||
| + | <!-- ''Describe the tactics of playing in the vehicle, the features of using vehicles in the team and advice on tactics. Refrain from creating a "guide" - do not impose a single point of view but instead give the reader food for thought. Describe the most dangerous enemies and give recommendations on fighting them. If necessary, note the specifics of the game in different modes (AB, RB, SB).'' --> | ||
[[File:Fm-43-44 1.jpg|thumb|689x689px|The fm/43-44 engaging an M13/40]] | [[File:Fm-43-44 1.jpg|thumb|689x689px|The fm/43-44 engaging an M13/40]] | ||
| − | The main trick to doing well in the fm/43-44 is to stay around cover, and to not advance too far into the map on your own. Due to the reload you can't afford to get caught out at close range as if you're unable to fire, an enemy can quite easily flank and disable you. To stay in the fight it's imperative you stay around some form of hard cover to retreat behind to reload, as this is the only time that you're really vulnerable. | + | The main trick to doing well in the fm/43-44 is to stay around cover, and to not advance too far into the map on your own. Due to the reload you can't afford to get caught out at close range as if you're unable to fire, an enemy can quite easily flank and disable you. To stay in the fight it's imperative you stay around some form of hard cover to retreat behind to reload, as this is the only time that you're really vulnerable. |
| − | Another choice to make is at what range you're going to engage at, and there are notable drawbacks and advantages for each distance. At close range the cannon is very very easy to aim which will land you a lot of easy kills, however it is much easy to get caught out here, if you miss a shot an enemy has plenty of time to rush and flank you, as well as this even if you do land a shot and knock an enemy out, enemy enemies that are aware of you in the surrounding area will know they safely have at least 15 seconds to rush you while you're on reload. At long range your armour will be very effective, the weak spots are very hard to hit here and some enemies might not even be able to get through the casemate itself, but as the muzzle velocity on the round is so low, hitting targets at this distance is very tricky, and considering as you only have 10 rounds, you can't really afford to miss very much, as each shot fired takes up 10% of your ammunition effectively. | + | Another choice to make is at what range you're going to engage at, and there are notable drawbacks and advantages for each distance. At close range the cannon is very very easy to aim which will land you a lot of easy kills, however it is much easy to get caught out here, if you miss a shot an enemy has plenty of time to rush and flank you, as well as this even if you do land a shot and knock an enemy out, enemy enemies that are aware of you in the surrounding area will know they safely have at least 15 seconds to rush you while you're on reload. At long range your armour will be very effective, the weak spots are very hard to hit here and some enemies might not even be able to get through the casemate itself, but as the muzzle velocity on the round is so low, hitting targets at this distance is very tricky, and considering as you only have 10 rounds, you can't really afford to miss very much, as each shot fired takes up 10% of your ammunition effectively. |
At long range you're much more survivable but much less effective at taking out enemies, and at close range it's much the reverse, able to engage enemies easily at the detriment of being much more vulnerable. The Goldilocks principle in this situation is as the analogy goes- 'in the middle', where you have the best of both worlds, in essence all you really need to do is position yourself in a location around hard cover, and far enough away that an enemy can't rush you on your reload cycle, this is the ideal spot to be to maximise your survivability and combat effectiveness, if you are in this sort of position and watching a corner or sight-line, it's a good idea to rangefind that corner or sight-line as when an enemy appears you'll already have the perfect range, this really is the idea spot for consistency, there are a few smaller caveats to consider however. As this vehicle is so vulnerable from the air it's a good idea to position yourself around some form of lateral cover, some buildings, a hill, some trees etc- just to give you a slight advantage when hiding from enemies. Another spot in the map to position yourself around would be a friendly cap point, if you're running out of ammunition you can simply drive onto one to replenish your stores, which wont always be necessary but if you start to notice you only have a few rounds left it'd be a good idea to make your way towards one. | At long range you're much more survivable but much less effective at taking out enemies, and at close range it's much the reverse, able to engage enemies easily at the detriment of being much more vulnerable. The Goldilocks principle in this situation is as the analogy goes- 'in the middle', where you have the best of both worlds, in essence all you really need to do is position yourself in a location around hard cover, and far enough away that an enemy can't rush you on your reload cycle, this is the ideal spot to be to maximise your survivability and combat effectiveness, if you are in this sort of position and watching a corner or sight-line, it's a good idea to rangefind that corner or sight-line as when an enemy appears you'll already have the perfect range, this really is the idea spot for consistency, there are a few smaller caveats to consider however. As this vehicle is so vulnerable from the air it's a good idea to position yourself around some form of lateral cover, some buildings, a hill, some trees etc- just to give you a slight advantage when hiding from enemies. Another spot in the map to position yourself around would be a friendly cap point, if you're running out of ammunition you can simply drive onto one to replenish your stores, which wont always be necessary but if you start to notice you only have a few rounds left it'd be a good idea to make your way towards one. | ||
If you're confident with your map knowledge or playing with some friends you can use this vehicle to be a bit more aggressive, as the armour is still very effective and if you have support from friends watching your flanks you can really be a battering ram for the team as no enemy vehicle is safe from your cannon, if this way of playing does sound appealing in any case try to stick around some friendly tanks, as they will be able to help you if you get caught out. | If you're confident with your map knowledge or playing with some friends you can use this vehicle to be a bit more aggressive, as the armour is still very effective and if you have support from friends watching your flanks you can really be a battering ram for the team as no enemy vehicle is safe from your cannon, if this way of playing does sound appealing in any case try to stick around some friendly tanks, as they will be able to help you if you get caught out. | ||
| + | |||
| + | === Modules === | ||
| + | {| class="wikitable" | ||
| + | ! Tier | ||
| + | ! colspan="2" | Mobility | ||
| + | ! Protection | ||
| + | ! Firepower | ||
| + | |- | ||
| + | | I | ||
| + | | Tracks | ||
| + | | | ||
| + | | Parts | ||
| + | | Horizontal Drive | ||
| + | |- | ||
| + | | II | ||
| + | | Suspension | ||
| + | | Brake System | ||
| + | | FPE | ||
| + | | Adjustment of Fire | ||
| + | |- | ||
| + | | III | ||
| + | | Filters | ||
| + | | | ||
| + | | Crew Replenishment | ||
| + | | Elevation Mechanism | ||
| + | |- | ||
| + | | IV | ||
| + | | Transmission | ||
| + | | Engine | ||
| + | | | ||
| + | | | ||
| + | |- | ||
| + | |} | ||
=== Pros and cons === | === Pros and cons === | ||
| − | <!--Summarise and briefly evaluate the vehicle in terms of its characteristics and combat effectiveness. Mark its pros and cons in a bulleted list. Try not to use more than 6 points for each of the characteristics. Avoid using categorical definitions such as "bad", "good" and the like - use substitutions with softer forms such as "inadequate" and "effective".--> | + | <!-- ''Summarise and briefly evaluate the vehicle in terms of its characteristics and combat effectiveness. Mark its pros and cons in a bulleted list. Try not to use more than 6 points for each of the characteristics. Avoid using categorical definitions such as "bad", "good" and the like - use substitutions with softer forms such as "inadequate" and "effective".'' --> |
'''Pros:''' | '''Pros:''' | ||
| − | |||
* Incredibly high damage output from the main gun | * Incredibly high damage output from the main gun | ||
| − | * Effective when up-tiered | + | * Effective when up-tiered |
* Decent mobility | * Decent mobility | ||
* Effective armour against low tier vehicles | * Effective armour against low tier vehicles | ||
| − | * High survivability with five crew members | + | * High survivability with five crew members |
'''Cons:''' | '''Cons:''' | ||
| − | |||
* Vulnerable to aircraft and artillery | * Vulnerable to aircraft and artillery | ||
* Long reload time | * Long reload time | ||
| Line 63: | Line 201: | ||
== Media == | == Media == | ||
| + | <!-- ''Excellent additions to the article would be video guides, screenshots from the game, and photos.'' --> | ||
<gallery mode="nolines" widths="240" heights="240"> | <gallery mode="nolines" widths="240" heights="240"> | ||
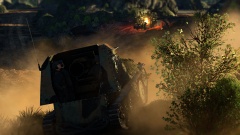
File:Fm-43-44 2.jpg|the fm/43-44 using its machine gun to knock out a GAZ truck | File:Fm-43-44 2.jpg|the fm/43-44 using its machine gun to knock out a GAZ truck | ||
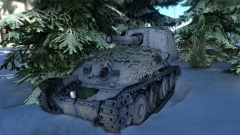
| − | File:Fm-43-44 3.jpg|The fm/43-44 in Winter livery | + | File:Fm-43-44 3.jpg|The fm/43-44 in Winter livery |
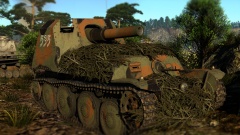
File:Fm-43-44 4.jpg|The fm/43-44 in standard livery | File:Fm-43-44 4.jpg|The fm/43-44 in standard livery | ||
File:Fm-43-44 5.jpg|The fm/43-44 engaging a BT-5 | File:Fm-43-44 5.jpg|The fm/43-44 engaging a BT-5 | ||
| Line 71: | Line 210: | ||
== See also == | == See also == | ||
| − | + | <!-- ''Links to the articles on the War Thunder Wiki that you think will be useful for the reader, for example:'' | |
| + | * ''reference to the series of the vehicles;'' | ||
| + | * ''links to approximate analogues of other nations and research trees.'' --> | ||
* [[Ho-Ro]] | * [[Ho-Ro]] | ||
* [[15cm sIG 33 B Sfl]] | * [[15cm sIG 33 B Sfl]] | ||
| − | == External | + | == External links == |
| − | |||
''Paste links to sources and external resources, such as:'' | ''Paste links to sources and external resources, such as:'' | ||
| − | |||
* ''topic on the official game forum;'' | * ''topic on the official game forum;'' | ||
* ''encyclopedia page on the tank;'' | * ''encyclopedia page on the tank;'' | ||
Revision as of 14:36, 27 March 2020
Contents
Description
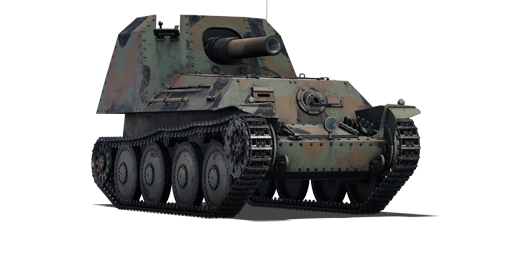
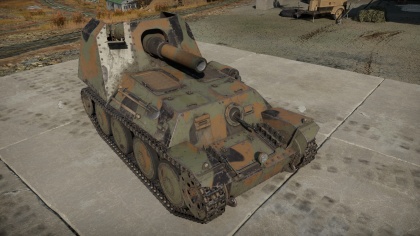
The Stormpjäs fm/43-44 is a rank II Swedish tank destroyer
with a battle rating of 2.3 (AB) and 1.7 (RB/SB). It was introduced in Update 1.97 "Viking Fury".
General info
Survivability and armour
The fm/43-44 is a deceptively survivable vehicle from the front. Open-topped high-calibre tank destroyers and SPGs are seldom very well armoured, but this example is the exception, with 50 mm of armour covering the upper and and lower plate as well as the turret face, with the tapering sides being 30 mm. The only frontal weak point of this vehicle is the shield directly protecting the breech, which is only 15 mm.
It's also manned by 5 crew members, two in the hull and three in the back, which really helps its survivability. Most of the cannons you'll be encountering around this battle rating are quite low calibre, meaning it will take a fair few rounds penetrating this vehicle to knock out all the crew. Additionally, it's nearly impossible to one-shot this vehicle without detonating the ammo, as the crew in the front and back are completely separate from each other, so a shot entering one compartment won't cause any damage to the other, so after taking a shot you'll still either be able to fire the gun, or drive away, which is a huge advantage. A drawback of this vehicle though is in regards to its protection from the air, the crew operating the cannon have no armour protecting them from incoming air strafing, so even aircraft with weak machine guns can slowly chip away at this vehicle, additionally its also very vulnerable to artillery.
Mobility
| Game Mode | Max Speed (km/h) | Weight (tons) | Engine power (horsepower) | Power-to-weight ratio (hp/ton) | |||
|---|---|---|---|---|---|---|---|
| Forward | Reverse | Stock | Upgraded | Stock | Upgraded | ||
| Arcade | 47 | 6 | 10 | 227 | 305 | 22.7 | 30.5 |
| Realistic | 43 | 6 | 142 | 160 | 14.2 | 16 | |
The mobility of this vehicle as well is deceptively effective. It can reach a max speed off-road of 42 km/h in RB modes, and 46 km/h in AB modes. It won't outpace many light vehicles, but it certainly isn't slow, and can easily cruise faster than most contemporary tank destroyers and medium tanks. Once upgraded, its hull traverse as well is effective, it can turn from stationary to re-position the gun and change direction easily, which is important for a turretless vehicle like this one. Its reverse speed is about average at 5 km/h, which will be enough to back out of sight into cover, but it wont save you if you're out in the open, so the lack of a fast reverse gear should play into where you choose to position.
Armaments
Main armament
This vehicle is equipped with a 150mm recoilless rifle with a small ammo pool of only 10 rounds. It's only equipped with a single ammo type, a standard HE round which sports huge damage potential if it connects with an enemy vehicle, in most engagements with conventional tanks you will only need to connect the round to the vehicle to knock them out in a single shot, which eliminates the tedium spent aiming for particular weak points, which isn't very easy for this vehicle as the muzzle velocity is quite slow at only 285 m/s, meaning that ranging in the gun can be quite tricky. Another slight drawback is the gun depression, at only -4°, this does somewhat limit the locations you can play effectively, as this vehicle can't use many hills or ridge lines to shoot over.
As well as this, the reload is fairly long at 19.5 seconds stock, so if you miss a shot this vehicle will be quite vulnerable, especially considering that the average reload of small calibre guns around this battle rating is around 4 seconds, so an enemy could potentially fire on you 5 times before you reload.
Because of this, its recommended that you use the rangefinder when engaging enemies that aren't aware of you, this way you can almost guarantee the round connects, although it's not wise to spend the time rangefinding if an enemy is aware of you, as in the time you spend sitting and waiting for the range to come in, your enemy will likely be firing at you and knocking out your crew. Ultimately this round wont have any trouble knocking out the vast majority of vehicles you can meet around the battle rating, the only challenging vehicle will be the French B1 Bis, if you engaging one of these tanks it's recommended to aim your shot for just beneath the turret, as this will cripple the tank, avoid hitting the front plate as this likely will result in no damage.
| 150 mm Fsthaub m/02 | Turret rotation speed (°/s) | Reloading rate (seconds) | |||||||||||
|---|---|---|---|---|---|---|---|---|---|---|---|---|---|
| Mode | Capacity | Vertical | Horizontal | Stabilizer | Stock | Upgraded | Full | Expert | Aced | Stock | Full | Expert | Aced |
| Arcade | 10 | -4°/+10° | ±12° | N/A | 7.0 | __._ | __._ | __._ | __._ | 19.4 | _._ | _._ | _._ |
| Realistic | 4.8 | __._ | __._ | __._ | __._ | ||||||||
Ammunition
| Penetration statistics | |||||||
|---|---|---|---|---|---|---|---|
| Ammunition | Type of warhead |
Penetration @ 0° Angle of Attack (mm) | |||||
| 10 m | 100 m | 500 m | 1,000 m | 1,500 m | 2,000 m | ||
| sgr m/38 | HE | 48 | 48 | 48 | 48 | 48 | 48 |
| Shell details | ||||||||||
|---|---|---|---|---|---|---|---|---|---|---|
| Ammunition | Type of warhead |
Velocity (m/s) |
Projectile Mass (kg) |
Fuse delay (m) |
Fuse sensitivity (mm) |
Explosive Mass (TNT equivalent) (g) |
Normalisation at 30° from horizontal |
Ricochet | ||
| 0% | 50% | 100% | ||||||||
| sgr m/38 | HE | 285 | 37.0 | 0.1 | 0.5 | 5,800 | +0.0° | 79° | 80° | 81° |
Ammo racks
| Full ammo |
1st rack empty |
2nd rack empty |
3rd rack empty |
4th rack empty |
5th rack empty |
6th rack empty |
Visual discrepancy |
|---|---|---|---|---|---|---|---|
| 10 | __ (+__) | __ (+__) | __ (+__) | __ (+__) | __ (+__) | __ (+__) | __ |
Optics
| Spj fm/43-44 Optics | ||
|---|---|---|
| Default magnification | Maximum magnification | |
| Main Gun optics | X1.8 | X3.5 |
| Comparable optics | ___ | |
Machine guns
The fm/43-44 is also equipped with a hull mounted 8 mm ksp m/36 machine gun, it has no viability against armoured targets but can knock out exposed crew members of enemy vehicles. It's recommended to select it directly when using it however as aiming it accurately by eye isn't very easy.
| 8 mm Ksp m/36 | ||||
|---|---|---|---|---|
| Mount | Capacity (Belt capacity) |
Rate of fire (shots/minute) |
Vertical guidance |
Horizontal guidance |
| Hull | 2,000 (250) | 648 | ±10° | ±10° |
Usage in battles
The main trick to doing well in the fm/43-44 is to stay around cover, and to not advance too far into the map on your own. Due to the reload you can't afford to get caught out at close range as if you're unable to fire, an enemy can quite easily flank and disable you. To stay in the fight it's imperative you stay around some form of hard cover to retreat behind to reload, as this is the only time that you're really vulnerable.
Another choice to make is at what range you're going to engage at, and there are notable drawbacks and advantages for each distance. At close range the cannon is very very easy to aim which will land you a lot of easy kills, however it is much easy to get caught out here, if you miss a shot an enemy has plenty of time to rush and flank you, as well as this even if you do land a shot and knock an enemy out, enemy enemies that are aware of you in the surrounding area will know they safely have at least 15 seconds to rush you while you're on reload. At long range your armour will be very effective, the weak spots are very hard to hit here and some enemies might not even be able to get through the casemate itself, but as the muzzle velocity on the round is so low, hitting targets at this distance is very tricky, and considering as you only have 10 rounds, you can't really afford to miss very much, as each shot fired takes up 10% of your ammunition effectively.
At long range you're much more survivable but much less effective at taking out enemies, and at close range it's much the reverse, able to engage enemies easily at the detriment of being much more vulnerable. The Goldilocks principle in this situation is as the analogy goes- 'in the middle', where you have the best of both worlds, in essence all you really need to do is position yourself in a location around hard cover, and far enough away that an enemy can't rush you on your reload cycle, this is the ideal spot to be to maximise your survivability and combat effectiveness, if you are in this sort of position and watching a corner or sight-line, it's a good idea to rangefind that corner or sight-line as when an enemy appears you'll already have the perfect range, this really is the idea spot for consistency, there are a few smaller caveats to consider however. As this vehicle is so vulnerable from the air it's a good idea to position yourself around some form of lateral cover, some buildings, a hill, some trees etc- just to give you a slight advantage when hiding from enemies. Another spot in the map to position yourself around would be a friendly cap point, if you're running out of ammunition you can simply drive onto one to replenish your stores, which wont always be necessary but if you start to notice you only have a few rounds left it'd be a good idea to make your way towards one.
If you're confident with your map knowledge or playing with some friends you can use this vehicle to be a bit more aggressive, as the armour is still very effective and if you have support from friends watching your flanks you can really be a battering ram for the team as no enemy vehicle is safe from your cannon, if this way of playing does sound appealing in any case try to stick around some friendly tanks, as they will be able to help you if you get caught out.
Modules
| Tier | Mobility | Protection | Firepower | |
|---|---|---|---|---|
| I | Tracks | Parts | Horizontal Drive | |
| II | Suspension | Brake System | FPE | Adjustment of Fire |
| III | Filters | Crew Replenishment | Elevation Mechanism | |
| IV | Transmission | Engine | ||
Pros and cons
Pros:
- Incredibly high damage output from the main gun
- Effective when up-tiered
- Decent mobility
- Effective armour against low tier vehicles
- High survivability with five crew members
Cons:
- Vulnerable to aircraft and artillery
- Long reload time
- Low ammo count (10 rounds)
- Poor gun Depression at only -4°
- Slow muzzle velocity
History
Describe the history of the creation and combat usage of the vehicle in more detail than in the introduction. If the historical reference turns out to be too long, take it to a separate article, taking a link to the article about the vehicle and adding a block "/History" (example: https://wiki.warthunder.com/(Vehicle-name)/History) and add a link to it here using the main template. Be sure to reference text and sources by using <ref></ref>, as well as adding them at the end of the article with <references />. This section may also include the vehicle's dev blog entry (if applicable) and the in-game encyclopedia description (under === In-game description ===, also if applicable).
Media
See also
External links
Paste links to sources and external resources, such as:
- topic on the official game forum;
- encyclopedia page on the tank;
- other literature.
| Sweden tank destroyers | |
|---|---|
| Strv m/41 derivatives | Spj fm/43-44 · Sav m/43 (1944) · Sav m/43 (1946) · Pvkv II · Pvkv III |
| Ikv 72/103 | Ikv 72 · Ikv 103 |
| Pvkv m/43 | Pvkv m/43 (1946) · Pvkv m/43 (1963) |
| ATGM | UDES 33 · Pbv 302 (BILL) · Pvrbv 551 |
| Other | SAV 20.12.48 · Bkan 1C |
| Norway | VIDAR |


