Difference between revisions of "Avenger"
(→Description: Updated to new standard) |
m (Wikipedia link added / Link to Skins in WT Live) |
||
| (30 intermediate revisions by 10 users not shown) | |||
| Line 1: | Line 1: | ||
| − | + | {{Specs-Card|code=uk_a30_sp_avenger}} | |
| − | |||
| − | |||
| − | |||
| − | |||
| − | {{Specs-Card | ||
| − | |code=uk_a30_sp_avenger | ||
| − | |||
| − | }} | ||
== Description == | == Description == | ||
| − | <!-- ''In the description, the first part | + | <!--''In the description, the first part needs to be about the history of the creation and combat usage of the vehicle, as well as its key features. In the second part, tell the reader about the ground vehicle in the game. Insert the screenshot of the vehicle. If the novice player does not remember the vehicle by name, they will immediately understand what kind of vehicle it is talking about.''--> |
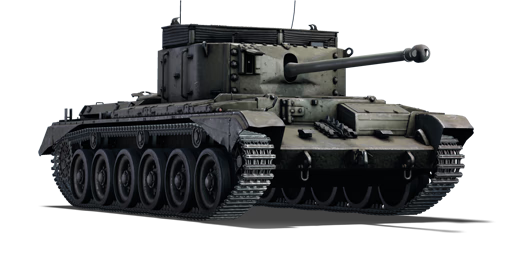
| − | The ''' | + | [[File:GarageImage_{{PAGENAME}}.jpg|420px|thumb|left]] |
| − | + | {{break}} | |
| − | + | The '''{{Specs|name}}''' is a Rank {{Specs|rank}} British tank destroyer {{Battle-rating|1}}. It is armed with the 17-pounder, with no secondary armament. It was based on a lengthened Cromwell hull from the [[Challenger|A30 Challenger]] from World War II. | |
== General info == | == General info == | ||
=== Survivability and armour === | === Survivability and armour === | ||
| − | + | <!--''Describe armour protection. Note the most well protected and key weak areas. Appreciate the layout of modules as well as the number and location of crew members. Is the level of armour protection sufficient, is the placement of modules helpfull for survival in combat?'' | |
| − | <!-- ''Describe armour protection. Note the most well protected and key weak areas. Appreciate the layout of modules as well as the number and location of crew members. Is the level of armour protection sufficient, is the placement of modules | ||
| − | |||
| − | |||
| − | |||
| − | |||
| − | + | ''If necessary use a visual template to indicate the most secure and weak zones of the armour.''--> | |
| − | + | Avenger is one of the most unexpected survivors on battlefields of War Thunder, both arcade and realistic mode. | |
| + | All of this is due to fact, that it's crew sits in very specific places and vehicle's armour doesn't have any small weird weak spots. In fact, armour and overall module placement is so solid, it can sometimes hold off SPAA attack, some bombs and, with some angling and range, even stock [[M4A3E2]] shells. | ||
| − | + | Even if shells penetrate (usually though angled sides of turret), usually only 2 crew members get knocked out. | |
| + | The only strange weakspot it has is the windows on top of turret. While roof windows seem to be a flaw, as it creates potential for HE shells to simply fly inside of Avenger and decimate entire crew, in reality nobody uses them at this BR. Even strafing planes have hard time hitting anything through those windows, and rather penetrate roof completely, which is still a challenge. | ||
| − | + | Because of that, windows instead give enemy APHE shells a high chance to bounce around and fly out of window without exploding inside of vehicle. In fact, this happens so often, single avenger can survive up to 6 direct shots while losing only gunner or loader, while vehicles like [[Sherman Firefly]] would be destroyed in one hit by those. | |
| + | '''Armour Type:''' | ||
* Rolled homogeneous armour | * Rolled homogeneous armour | ||
| − | |||
{| class="wikitable" | {| class="wikitable" | ||
|- | |- | ||
! Armour !! Front !! Sides !! Rear !! Roof | ! Armour !! Front !! Sides !! Rear !! Roof | ||
|- | |- | ||
| − | | Hull || 63.5 mm (1°) ''Front plate'' <br> 30 mm (71°) ''Front glacis'' <br> 57.15 mm (19°) ''Lower glacis''|| 14 mm || 38.1 mm (1°) ''Top'' <br> 38.1 mm (13-59°) ''Bottom'' || 20 mm | + | | Hull || 63.5 mm (1°) ''Front plate'' <br> 30 mm (71°) ''Front glacis'' <br> 57.15 mm (19°) ''Lower glacis''|| 14 mm || 38.1 mm (1°) ''Top'' <br> 38.1 mm (13-59°) ''Bottom'' || 20 mm |
|- | |- | ||
| Turret || 63.5 mm (0-49°) ''Turret front'' <br> 40 mm (30-31°) ''Gun mantlet'' || 40 mm (0-1°) || 40 mm (8-40°) || 20 mm | | Turret || 63.5 mm (0-49°) ''Turret front'' <br> 40 mm (30-31°) ''Gun mantlet'' || 40 mm (0-1°) || 40 mm (8-40°) || 20 mm | ||
|} | |} | ||
'''Notes:''' | '''Notes:''' | ||
| − | |||
* Suspension wheels and tracks are 20 mm thick. | * Suspension wheels and tracks are 20 mm thick. | ||
* Rack on top of the hull rear seems to be stacking 38.1 mm armour. No concrete evidence of their effectiveness as of yet. | * Rack on top of the hull rear seems to be stacking 38.1 mm armour. No concrete evidence of their effectiveness as of yet. | ||
=== Mobility === | === Mobility === | ||
| − | + | <!--''Write about the mobility of the ground vehicle. Estimate the specific power and maneuverability as well as the maximum speed forward and backward.''--> | |
| − | <!-- ''Write about the mobility of the ground vehicle. Estimate the specific power and | + | {| class="wikitable" style="text-align:center" |
| − | + | |- | |
| − | + | !colspan="3" | Mobility characteristic | |
| − | + | |- | |
| − | === | + | ! Weight (tons) |
| − | + | !colspan="1" | Add-on Armour<br>weight (tons) | |
| + | !colspan="1" | Max speed (km/h) | ||
| + | |- | ||
| + | |rowspan="2" | 31.5 || colspan="1" rowspan="2" | N/A || colspan="1" | 56 (AB) | ||
| + | |- | ||
| + | |52 (RB/SB) | ||
| + | |- | ||
| + | !colspan="3" | Engine power (horsepower) | ||
| + | |- | ||
| + | !colspan="1" | Mode | ||
| + | !Stock | ||
| + | !Upgraded | ||
| + | |- | ||
| + | |''Arcade'' | ||
| + | |852 | ||
| + | |1,049 | ||
| + | |- | ||
| + | |''Realistic/Simulator'' | ||
| + | |531 | ||
| + | |600 | ||
| + | |- | ||
| + | !colspan="3" | Power-to-weight ratio (hp/ton) | ||
| + | |- | ||
| + | !colspan="1" | Mode | ||
| + | !Stock | ||
| + | !Upgraded | ||
| + | |- | ||
| + | |''Arcade'' | ||
| + | |27.05 | ||
| + | |33.30 | ||
| + | |- | ||
| + | |''Realistic/Simulator'' | ||
| + | |16.86 | ||
| + | |19.04 | ||
| + | |- | ||
| + | |} | ||
== Armaments == | == Armaments == | ||
| − | |||
=== Main armament === | === Main armament === | ||
| − | + | <!--''Give the reader information about the characteristics of the main gun. Assess its effectiveness in a battle based on the reloading speed, ballistics and the power of shells. Do not forget about the flexibilty of the fire, that is how quickly the cannon can be aimed at the target, open fire on it and aim at another enemy. Add a link to the main article on the gun: <code><nowiki>{{main|Name of the weapon}}</nowiki></code>. Describe in general terms the ammunition available for the main gun. Give advice on how to use them and how to fill the ammunition storage.''--> | |
| − | <!-- ''Give the reader information about the characteristics of the main gun. Assess its effectiveness in a battle based on the reloading speed, ballistics and the power of shells. Do not forget about the | + | {{main|Ordnance QF 17-pounder (76 mm)}} |
| − | {{main|QF 17-pounder (76 mm)}} | ||
| − | {| class="wikitable" style="text-align:center" width=" | + | {| class="wikitable" style="text-align:center" |
| + | |- | ||
| + | ! colspan="6" | [[Ordnance QF 17-pounder (76 mm)|76 mm OQF 17-pounder]] | ||
| + | |- | ||
| + | ! colspan="3" rowspan="1" style="width:5em" |Capacity | ||
| + | ! rowspan="1" | Vertical <br> guidance | ||
| + | ! rowspan="1" | Horizontal <br> guidance | ||
| + | ! rowspan="1" | Stabilizer | ||
|- | |- | ||
| − | + | | colspan="3" | 55 || -10°/+17° || ±180° || N/A | |
|- | |- | ||
| − | ! | + | ! colspan="6" | Turret rotation speed (°/s) |
| − | |||
| − | |||
|- | |- | ||
| − | ! | + | ! style="width:4em" |Mode |
| − | + | ! style="width:4em" |Stock | |
| + | ! style="width:4em" |Upgraded | ||
| + | ! style="width:4em" |Prior + Full crew | ||
| + | ! style="width:4em" |Prior + Expert qualif. | ||
| + | ! style="width:4em" |Prior + Ace qualif. | ||
|- | |- | ||
| − | + | | ''Arcade'' || 12.33 || 17.06 || __.__ || __.__ || 24.38 | |
| − | | 8. | + | |- |
| + | | ''Realistic'' || 8.33 || 9.80 || __.__ || __.__ || 14.00 | ||
| + | |- | ||
| + | ! colspan="4" | Reloading rate (seconds) | ||
| + | |- | ||
| + | ! colspan="1" style="width:4em" |Stock | ||
| + | ! colspan="1" style="width:4em" |Prior + Full crew | ||
| + | ! colspan="1" style="width:4em" |Prior + Expert qualif. | ||
| + | ! colspan="1" style="width:4em" |Prior + Ace qualif. | ||
| + | |- | ||
| + | | 7.28 || __.__ || __.__ || 5.60 | ||
|- | |- | ||
|} | |} | ||
| − | ==== Ammunition ==== | + | ===== Ammunition ===== |
| − | { | + | {| class="wikitable sortable" style="text-align:center" width="100%" |
| − | + | ! colspan="8" | Penetration statistics | |
| − | ==== | + | |- |
| − | + | ! rowspan="2" data-sort-type="text" | Ammunition | |
| − | + | ! rowspan="2" class="unsortable" | Type of <br /> warhead | |
| − | + | ! colspan="6" | '''Penetration''' '''''in mm''''' '''@ 90°''' | |
| + | |- | ||
| + | ! 10m | ||
| + | ! 100m | ||
| + | ! 500m | ||
| + | ! 1000m | ||
| + | ! 1500m | ||
| + | ! 2000m | ||
| + | |- | ||
| + | | Shot Mk.6 || AP || 160 || 157 || 133 || 112 || 96 || 86 | ||
| + | |- | ||
| + | | Shell Mk.1 || HE || 9 || 9 || 9 || 9 || 9 || 9 | ||
|- | |- | ||
| − | + | | Shot Mk.4 || APC || 165 || 160 || 138 || 108 || 94 || 81 | |
| − | |||
| − | |||
| − | |||
| − | |||
| − | |||
| − | |||
| − | |||
| − | |||
| − | |||
|- | |- | ||
| − | | | + | | Shot Mk.8 || APCBC || 171 || 168 || 156 || 143 || 130 || 120 |
|- | |- | ||
|} | |} | ||
| − | ''' | + | {| class="wikitable sortable" style="text-align:center" width="100%" |
| − | + | ! colspan="11" | Shell details | |
| − | + | |- | |
| − | + | ! rowspan="2" data-sort-type="text" | Ammunition | |
| − | + | ! rowspan="2" class="unsortable" | Type of <br /> warhead | |
| − | + | ! rowspan="2" |Velocity <br /> in m/s | |
| − | + | ! rowspan="2" |Projectile<br />Mass in kg | |
| − | + | ! rowspan="2" | ''Fuse delay'' | |
| − | ! colspan="3" | | + | ''in m:'' |
| + | ! rowspan="2" | ''Fuse sensitivity'' | ||
| + | ''in mm:'' | ||
| + | ! rowspan="2" | ''Explosive Mass in g<br /> (TNT equivalent):'' | ||
| + | ! rowspan="2" | ''Normalization At 30° <br> from horizontal:'' | ||
| + | ! colspan="3" | ''Ricochet:'' | ||
| + | |- | ||
| + | ! 0% | ||
| + | ! 50% | ||
| + | ! 100% | ||
| + | |- | ||
| + | | Shot Mk.6 || AP || 883 || 7.7 || N/A || N/A || N/A || -1° || 47° || 60° || 65° | ||
| + | |- | ||
| + | | Shell Mk.1 || HE || 883 || 7.0 || 0.4 || 0.5 || 580 || +0° || 79° || 80° || 81° | ||
| + | |- | ||
| + | | Shot Mk.4 || APC || 883 || 7.7 || N/A || N/A || N/A || -1° || 48° || 63° || 71° | ||
| + | |- | ||
| + | | Shot Mk.8 || APCBC || 883 || 7.7 || N/A || N/A || N/A || +4° || 48° || 63° || 71° | ||
|- | |- | ||
| − | + | |} | |
| − | + | {| class="wikitable sortable" style="text-align:center" | |
| − | ! | + | ! colspan="7" | Smoke characteristic |
|- | |- | ||
| − | ! | + | ! Ammunition |
| − | + | ! Velocity <br /> in m/s | |
| + | ! Projectile<br />Mass in kg | ||
| + | ! ''Screen radius <br /> in m'' | ||
| + | ! ''Screen time <br /> in s'' | ||
| + | ! ''Screen hold time <br /> in s:'' | ||
| + | ! ''Explosive Mass in g<br /> (TNT equivalent):'' | ||
|- | |- | ||
| − | + | | 17pdr Shell SS Mk.1 || 754 || 8.4 || 13 || 5 || 20 || 50 | |
| − | | | ||
|- | |- | ||
|} | |} | ||
| − | + | ===== [[Ammo racks|Ammo racks]] ===== | |
| + | [[File:Ammoracks_{{PAGENAME}}.png|right|thumbnail|x250px|Ammo racks of the {{PAGENAME}}.]] | ||
| + | {| class="wikitable sortable" style="text-align:center" | ||
| + | |- | ||
| + | ! class="wikitable unsortable" |Full<br /> ammo | ||
| + | ! class="wikitable unsortable" |1st<br /> rack empty | ||
| + | ! class="wikitable unsortable" |2nd<br /> rack empty | ||
| + | ! class="wikitable unsortable" |3rd<br /> rack empty | ||
| + | ! class="wikitable unsortable" |4th<br /> rack empty | ||
| + | ! class="wikitable unsortable" |5th<br /> rack empty | ||
| + | ! class="wikitable unsortable" |6th<br /> rack empty | ||
| + | ! class="wikitable unsortable" |7th<br /> rack empty | ||
| + | ! class="wikitable unsortable" |8th<br /> rack empty | ||
| + | ! class="wikitable unsortable" |Visual<br /> discrepancy | ||
| + | |- | ||
| + | || '''55''' || 49 ''(+6)'' || 42 ''(+13)'' || 35 ''(+20)'' || 28 ''(+27)'' || 21 ''(+34)'' || 14 ''(+41)'' || 7 ''(+48)'' || 1 ''(+54)'' || style="text-align:left" | yes | ||
| + | |- | ||
| + | |} | ||
| − | + | Turret empty: 49 ''(+6)'' | |
| − | == Usage in battles == | + | == Usage in the battles == |
| − | <!-- ''Describe the tactics of playing in the vehicle, the features of using vehicles in the team and advice on tactics. Refrain from creating a "guide" - do not impose a single point of view but | + | <!--''Describe the tactics of playing in the vehicle, the features of using vehicles in the team and advice on tactics. Refrain from creating a "guide" - do not impose a single point of view but give the reader food for thought. Describe the most dangerous enemies and give recommendations on fighting them. If necessary, note the specifics of the game in different modes (AB, RB, SB).''--> |
The Avenger plays like an upgunned and a bit more sluggish Cromwell. There are two main play styles possible with this vehicle. | The Avenger plays like an upgunned and a bit more sluggish Cromwell. There are two main play styles possible with this vehicle. | ||
'''Close range flanker''': The Avenger's mobility allows it to sneak up to the enemy's flank without too much problems. With its awesome gun depression, it can pop over a hill and shoot before engaging a "turn fight" (running around the enemy's tank too fast so he can't aim at you). Such manoeuvre has a greater chance of success on isolated enemies since you need to get at least 2 shots to destroy any tank you might encounter. This kind of strategy is great early in the game, to counter-capture a point by , for example, an enemy Hellcat that rushed it. A small note there: make sure to pre-aim in the general direction of your enemy since the turret turning rate is not so great. | '''Close range flanker''': The Avenger's mobility allows it to sneak up to the enemy's flank without too much problems. With its awesome gun depression, it can pop over a hill and shoot before engaging a "turn fight" (running around the enemy's tank too fast so he can't aim at you). Such manoeuvre has a greater chance of success on isolated enemies since you need to get at least 2 shots to destroy any tank you might encounter. This kind of strategy is great early in the game, to counter-capture a point by , for example, an enemy Hellcat that rushed it. A small note there: make sure to pre-aim in the general direction of your enemy since the turret turning rate is not so great. | ||
| − | '''Sniper''': As said earlier, the Avenger's crazy depression angles and good gun, combined with its great mobility and good climbing characteristics makes it ideal for the sniper role. | + | '''Sniper''': As said earlier, the Avenger's crazy depression angles and good gun, combined with its great mobility and good climbing characteristics makes it ideal for the sniper role. It's mobility allows the Avenger to get anywhere on the map, an intelligent pilot will avoid main roads where encountering enemies upfront is often a death sentence and prefer unexpected roads, surprising camping spots, your enemy must never know where to expect a shot from. When firing, make sure to change position every 2-3 shots (every time you kill a tank). With a good mix of luck and skill, you can even find a good viewing point on the enemy's base pretty early in the game (even in AB !). Make sure sure to hide your turret top since HE and some APHE can detonate from the thin plate of your half open-topped turret, resulting in a crew knock out. One last thing to consider: the Avenger's functional elevation angle is lower than its characteristics says: the optics gets blinded in the last 1-2 degrees. |
| − | What's great with this vehicle is it can change role pretty fast in the game. A great way to use this vehicle at its plains potential is on a map like Mozdok or El | + | What's great with this vehicle is it can change role pretty fast in the game. A great way to use this vehicle at its plains potential is on a map like Mozdok or El Amalein. A good example of tactics is being flanker early game, then sniper to clear the next capture point and then flanker again to go get it (provided you do not get shut down). |
=== Pros and cons === | === Pros and cons === | ||
| − | <!-- '' | + | <!--''Summarize and briefly evaluate the vehicle in terms of its characteristics and combat effectiveness. Mark its pros and cons in a bulleted list. Do not use more than 6 points for each of the characteristics. Avoid using categorical definitions such as "bad", "good" and the like - they have a substitution in the form of softer "inadequate", "effective".''--> |
| − | |||
'''Pros:''' | '''Pros:''' | ||
| − | + | * Cromwell-esque controls with good acceleration and speed. | |
| − | * Cromwell-esque controls with good acceleration and speed | + | * Neutral steering allows for quick alignment of hull. |
| − | * Neutral steering allows for quick alignment of | + | * Access to the 17-pounder "Quickfire" cannon. |
| − | * 17-pounder "Quickfire" cannon | + | * Good gun depression. |
| − | * Good gun depression | + | * Very fast rate of fire. |
| − | * Very fast rate | ||
| − | |||
| − | |||
| − | |||
'''Cons:''' | '''Cons:''' | ||
| − | + | * No machine gun armament. | |
| − | * No machine gun | + | * 17-pounder AP shells are all solid shot, no explosive filler. |
| − | * AP shells | + | * Vulnerable turret, no exterior gun mantlet. |
| − | * | + | * Sluggish handling. |
| − | * | + | * Terrible reverse speed. |
| − | * Terrible reverse speed | + | * Armour is not sloped. |
| − | * Gun traverse speed is subpar | + | * Very poor side armour. |
| + | * Gun traverse speed is only subpar. | ||
== History == | == History == | ||
| − | <!-- ''Describe the history of the creation and combat usage of the vehicle in more detail than in the introduction. If the historical reference turns out to be too | + | <!--''Describe the history of the creation and combat usage of the ground vehicle in more detail than in the introduction. If the historical reference turns out to be too big, take it to a separate article, taking a link to an article about the vehicle and adding a block "/historical reference" (example: https://wiki.warthunder.com/Name-vehicles/historical reference) and add a link to it here using the <code>main</code> template. Be sure to include links to sources at the end of the article.''--> |
===Basis=== | ===Basis=== | ||
The [[Challenger|A30 Challenger]] tank was an improved variant of the [[Cromwell V|Cromwell]] tank made to improve the firepower of the armoured brigades in the British Army. While equipped with the 17-pounder, the Challenger ran into issues with production and mechanical issues, along with design deficiencies that was much criticized by the crew that manned the tank. The Challenger had thin armour, had a tendency for track throwing, and had a high profile. However, it was praised for its speed, agility, and firepower with the 17-pounder gun. The Challenger was ordered in February 1943 for 200 vehicles, but the development of the [[Sherman Firefly|Firefly]] from the [[M4|Sherman]] tank proved much easier and cheaper than the Challenger and was thus cancelled. | The [[Challenger|A30 Challenger]] tank was an improved variant of the [[Cromwell V|Cromwell]] tank made to improve the firepower of the armoured brigades in the British Army. While equipped with the 17-pounder, the Challenger ran into issues with production and mechanical issues, along with design deficiencies that was much criticized by the crew that manned the tank. The Challenger had thin armour, had a tendency for track throwing, and had a high profile. However, it was praised for its speed, agility, and firepower with the 17-pounder gun. The Challenger was ordered in February 1943 for 200 vehicles, but the development of the [[Sherman Firefly|Firefly]] from the [[M4|Sherman]] tank proved much easier and cheaper than the Challenger and was thus cancelled. | ||
===The Avenger=== | ===The Avenger=== | ||
| − | An attempt to improve on the Challenger was the [[Avenger|A30 SP Avenger]], which used a different open-topped turret to save weight on the tank design. However, due to priorities on the [[Comet I|Comet]] tank in the Vauxhall Motors plant, they were not being built until 1945 and weren't used until after the war in Europe is over. 250 | + | An attempt to improve on the Challenger was the [[Avenger|A30 SP Avenger]], which used a different open-topped turret to save weight on the tank design. However, due to priorities on the [[Comet I|Comet]] tank in the Vauxhall Motors plant, they were not being built until 1945 and weren't used until after the war in Europe is over. 250 unit were built and formed part of the British Army of the Rhine stationed in Germany after the war. They did not see any combat action during their service life. |
== Media == | == Media == | ||
| − | + | Skin and Camouflages for the [https://live.warthunder.com/feed/camouflages/?vehicleCountry=britain&vehicleType=tank&vehicleClass=tank_destroyer&vehicle=uk_a30_sp_avenger Avenger] in Warthunder Live. | |
| − | |||
| − | |||
| − | + | ==References== | |
| − | + | <references /> | |
| − | |||
| − | |||
| − | |||
| − | |||
| − | |||
| − | |||
| − | |||
| − | |||
| − | |||
| − | |||
| + | == Read also == | ||
| + | <!--''Links to the articles on the War Thunder Wiki that you think will be useful for the reader, for example,'' | ||
* ''reference to the series of the vehicles;'' | * ''reference to the series of the vehicles;'' | ||
* ''links to approximate analogues of other nations and research trees.'' | * ''links to approximate analogues of other nations and research trees.'' | ||
| + | ''ETC.''--> | ||
| − | == | + | == Sources == |
| − | <!-- ''Paste links to sources and external resources, such as:'' | + | <!--''Paste links to sources and external resources, such as:'' |
* ''topic on the official game forum;'' | * ''topic on the official game forum;'' | ||
| − | * ''other literature.'' --> | + | * ''other literature.''--> |
| − | + | * [https://en.wikipedia.org/wiki/Cruiser_Mk_VIII_Challenger#Variants Wikipedia] | |
| − | * [ | ||
| − | {{Britain | + | {{Britain tank destroyers}} |
Revision as of 13:35, 4 April 2019
Contents
Description

The Self Propelled 17pdr, A30 (Avenger) is a Rank III British tank destroyer
with a battle rating of 4.7 (AB/RB/SB). It is armed with the 17-pounder, with no secondary armament. It was based on a lengthened Cromwell hull from the A30 Challenger from World War II.
General info
Survivability and armour
Avenger is one of the most unexpected survivors on battlefields of War Thunder, both arcade and realistic mode. All of this is due to fact, that it's crew sits in very specific places and vehicle's armour doesn't have any small weird weak spots. In fact, armour and overall module placement is so solid, it can sometimes hold off SPAA attack, some bombs and, with some angling and range, even stock M4A3E2 shells.
Even if shells penetrate (usually though angled sides of turret), usually only 2 crew members get knocked out. The only strange weakspot it has is the windows on top of turret. While roof windows seem to be a flaw, as it creates potential for HE shells to simply fly inside of Avenger and decimate entire crew, in reality nobody uses them at this BR. Even strafing planes have hard time hitting anything through those windows, and rather penetrate roof completely, which is still a challenge.
Because of that, windows instead give enemy APHE shells a high chance to bounce around and fly out of window without exploding inside of vehicle. In fact, this happens so often, single avenger can survive up to 6 direct shots while losing only gunner or loader, while vehicles like Sherman Firefly would be destroyed in one hit by those.
Armour Type:
- Rolled homogeneous armour
| Armour | Front | Sides | Rear | Roof |
|---|---|---|---|---|
| Hull | 63.5 mm (1°) Front plate 30 mm (71°) Front glacis 57.15 mm (19°) Lower glacis |
14 mm | 38.1 mm (1°) Top 38.1 mm (13-59°) Bottom |
20 mm |
| Turret | 63.5 mm (0-49°) Turret front 40 mm (30-31°) Gun mantlet |
40 mm (0-1°) | 40 mm (8-40°) | 20 mm |
Notes:
- Suspension wheels and tracks are 20 mm thick.
- Rack on top of the hull rear seems to be stacking 38.1 mm armour. No concrete evidence of their effectiveness as of yet.
Mobility
| Mobility characteristic | ||
|---|---|---|
| Weight (tons) | Add-on Armour weight (tons) |
Max speed (km/h) |
| 31.5 | N/A | 56 (AB) |
| 52 (RB/SB) | ||
| Engine power (horsepower) | ||
| Mode | Stock | Upgraded |
| Arcade | 852 | 1,049 |
| Realistic/Simulator | 531 | 600 |
| Power-to-weight ratio (hp/ton) | ||
| Mode | Stock | Upgraded |
| Arcade | 27.05 | 33.30 |
| Realistic/Simulator | 16.86 | 19.04 |
Armaments
Main armament
| 76 mm OQF 17-pounder | |||||
|---|---|---|---|---|---|
| Capacity | Vertical guidance |
Horizontal guidance |
Stabilizer | ||
| 55 | -10°/+17° | ±180° | N/A | ||
| Turret rotation speed (°/s) | |||||
| Mode | Stock | Upgraded | Prior + Full crew | Prior + Expert qualif. | Prior + Ace qualif. |
| Arcade | 12.33 | 17.06 | __.__ | __.__ | 24.38 |
| Realistic | 8.33 | 9.80 | __.__ | __.__ | 14.00 |
| Reloading rate (seconds) | |||||
| Stock | Prior + Full crew | Prior + Expert qualif. | Prior + Ace qualif. | ||
| 7.28 | __.__ | __.__ | 5.60 | ||
Ammunition
| Penetration statistics | |||||||
|---|---|---|---|---|---|---|---|
| Ammunition | Type of warhead |
Penetration in mm @ 90° | |||||
| 10m | 100m | 500m | 1000m | 1500m | 2000m | ||
| Shot Mk.6 | AP | 160 | 157 | 133 | 112 | 96 | 86 |
| Shell Mk.1 | HE | 9 | 9 | 9 | 9 | 9 | 9 |
| Shot Mk.4 | APC | 165 | 160 | 138 | 108 | 94 | 81 |
| Shot Mk.8 | APCBC | 171 | 168 | 156 | 143 | 130 | 120 |
| Shell details | ||||||||||
|---|---|---|---|---|---|---|---|---|---|---|
| Ammunition | Type of warhead |
Velocity in m/s |
Projectile Mass in kg |
Fuse delay
in m: |
Fuse sensitivity
in mm: |
Explosive Mass in g (TNT equivalent): |
Normalization At 30° from horizontal: |
Ricochet: | ||
| 0% | 50% | 100% | ||||||||
| Shot Mk.6 | AP | 883 | 7.7 | N/A | N/A | N/A | -1° | 47° | 60° | 65° |
| Shell Mk.1 | HE | 883 | 7.0 | 0.4 | 0.5 | 580 | +0° | 79° | 80° | 81° |
| Shot Mk.4 | APC | 883 | 7.7 | N/A | N/A | N/A | -1° | 48° | 63° | 71° |
| Shot Mk.8 | APCBC | 883 | 7.7 | N/A | N/A | N/A | +4° | 48° | 63° | 71° |
| Smoke characteristic | ||||||
|---|---|---|---|---|---|---|
| Ammunition | Velocity in m/s |
Projectile Mass in kg |
Screen radius in m |
Screen time in s |
Screen hold time in s: |
Explosive Mass in g (TNT equivalent): |
| 17pdr Shell SS Mk.1 | 754 | 8.4 | 13 | 5 | 20 | 50 |
Ammo racks

| Full ammo |
1st rack empty |
2nd rack empty |
3rd rack empty |
4th rack empty |
5th rack empty |
6th rack empty |
7th rack empty |
8th rack empty |
Visual discrepancy |
|---|---|---|---|---|---|---|---|---|---|
| 55 | 49 (+6) | 42 (+13) | 35 (+20) | 28 (+27) | 21 (+34) | 14 (+41) | 7 (+48) | 1 (+54) | yes |
Turret empty: 49 (+6)
Usage in the battles
The Avenger plays like an upgunned and a bit more sluggish Cromwell. There are two main play styles possible with this vehicle.
Close range flanker: The Avenger's mobility allows it to sneak up to the enemy's flank without too much problems. With its awesome gun depression, it can pop over a hill and shoot before engaging a "turn fight" (running around the enemy's tank too fast so he can't aim at you). Such manoeuvre has a greater chance of success on isolated enemies since you need to get at least 2 shots to destroy any tank you might encounter. This kind of strategy is great early in the game, to counter-capture a point by , for example, an enemy Hellcat that rushed it. A small note there: make sure to pre-aim in the general direction of your enemy since the turret turning rate is not so great.
Sniper: As said earlier, the Avenger's crazy depression angles and good gun, combined with its great mobility and good climbing characteristics makes it ideal for the sniper role. It's mobility allows the Avenger to get anywhere on the map, an intelligent pilot will avoid main roads where encountering enemies upfront is often a death sentence and prefer unexpected roads, surprising camping spots, your enemy must never know where to expect a shot from. When firing, make sure to change position every 2-3 shots (every time you kill a tank). With a good mix of luck and skill, you can even find a good viewing point on the enemy's base pretty early in the game (even in AB !). Make sure sure to hide your turret top since HE and some APHE can detonate from the thin plate of your half open-topped turret, resulting in a crew knock out. One last thing to consider: the Avenger's functional elevation angle is lower than its characteristics says: the optics gets blinded in the last 1-2 degrees.
What's great with this vehicle is it can change role pretty fast in the game. A great way to use this vehicle at its plains potential is on a map like Mozdok or El Amalein. A good example of tactics is being flanker early game, then sniper to clear the next capture point and then flanker again to go get it (provided you do not get shut down).
Pros and cons
Pros:
- Cromwell-esque controls with good acceleration and speed.
- Neutral steering allows for quick alignment of hull.
- Access to the 17-pounder "Quickfire" cannon.
- Good gun depression.
- Very fast rate of fire.
Cons:
- No machine gun armament.
- 17-pounder AP shells are all solid shot, no explosive filler.
- Vulnerable turret, no exterior gun mantlet.
- Sluggish handling.
- Terrible reverse speed.
- Armour is not sloped.
- Very poor side armour.
- Gun traverse speed is only subpar.
History
Basis
The A30 Challenger tank was an improved variant of the Cromwell tank made to improve the firepower of the armoured brigades in the British Army. While equipped with the 17-pounder, the Challenger ran into issues with production and mechanical issues, along with design deficiencies that was much criticized by the crew that manned the tank. The Challenger had thin armour, had a tendency for track throwing, and had a high profile. However, it was praised for its speed, agility, and firepower with the 17-pounder gun. The Challenger was ordered in February 1943 for 200 vehicles, but the development of the Firefly from the Sherman tank proved much easier and cheaper than the Challenger and was thus cancelled.
The Avenger
An attempt to improve on the Challenger was the A30 SP Avenger, which used a different open-topped turret to save weight on the tank design. However, due to priorities on the Comet tank in the Vauxhall Motors plant, they were not being built until 1945 and weren't used until after the war in Europe is over. 250 unit were built and formed part of the British Army of the Rhine stationed in Germany after the war. They did not see any combat action during their service life.
Media
Skin and Camouflages for the Avenger in Warthunder Live.
References
Read also
Sources
| Britain tank destroyers | |
|---|---|
| Infantry tank derivatives | Archer · Gun Carrier (3-in) |
| Light tank derivatives | Alecto I |
| M10 Achilles | Achilles · Achilles (65 Rg.) |
| Centurion derivatives | FV4005 · Conway |
| ATGM | Swingfire · Striker |
| Other | Tortoise · ▄M109A1 |
| Canada | QF 3.7 Ram · ADATS (M113) |
| South Africa | G6 · ZT3A2 |
