Difference between revisions of "User talk:skiesdalimited@psn"
Colok76286 (talk | contribs) (Blanked. This is not the role of the this page. Use your userpage for this.) |
(→Tunisia - Ground Assault Arcade: new section) |
||
| Line 1: | Line 1: | ||
| + | == Tunisia - Ground Assault Arcade == | ||
| + | |||
| + | == Ground Assault (Tunisia)== | ||
| + | === Objective === | ||
| + | Players use ground vehicles and helicopters to defend the zone on the map centre from incoming waves of enemy tanks. | ||
| + | Helicopters are allowed only in the top tier bracket (BR 8.3+). | ||
| + | |||
| + | The main objective is to not let the enemy units capture the area on the centre of map and slow them down as much as possible. If the AI units manage to enter the capture zone, it will start to flash and the team will start to lose tickets, the more AI that enter it, the more tickets the team loses. | ||
| + | The enemy units slow down upon entering the zone, and their shooting accuracy is also lowered. | ||
| + | After successfully defending the zone and destroying enemy waves your team regain a small amount of lost tickets. The battle is lost once the team's tickets reaches 0. | ||
| + | The counter in the bottom-left corner shows the remaining amount of waves to beat (including current one). | ||
| + | |||
| + | Destroying enemy planes is optional but highly recommended, some of them are equipped with weapons that can destroy player's vehicle in a single attack. | ||
| + | Sometimes a pickup can appear outside the zone, it can repair the tank and replenish its ammunition. | ||
| + | The number of active players affects the amount of AI units which is being spawned by the game. | ||
| + | |||
| + | === Waves === | ||
| + | Waves can be composed of four unit types: light tanks, medium tanks, slightly better medium tanks, and heavy tanks. Every wave, two planes are also spawned which attack ground units and player controlled helicopters. | ||
| + | In top tier assault battles, SPAA units can also appear, they will engage only flying units. Usually the game spawns one SPAA unit per player in a helicopter, their range is so large that they can reach players very soon after they leave the helipad. SPAA units spawn during the 2nd, 5th, 8th and 11th wave and it happens 20 seconds after the tanks start to appear. | ||
| + | Spawn position of ground units is random, they always spawn from seven different predetermined directions. | ||
| + | |||
| + | Some enemy ground units can attack player controlled helicopters by using their roof mounted machine guns, such as the Russian tanks on Kursk map. | ||
| + | The accuracy of the AI remains very high even when driving at full speed. | ||
| + | |||
| + | ''Note: It is a viable tactic to destroy track of the front most vehicles to make them stop, but keep in mind that they can repair damaged parts, including the engine and extinguish parts that are set on fire.'' | ||
| + | |||
| + | A table showing when and what type of units spawn during the mission (Light (L), Medium (M), Intermediate (MH), Heavy (H) and (S) Air Cover (in top tier battles)): | ||
| + | |||
| + | {| class="wikitable" style="width:100%" | ||
| + | ! colspan="16" | Waves | ||
| + | |- | ||
| + | ! Wave | ||
| + | | style="width:8%" | 1 | ||
| + | | style="width:8%" | 2 | ||
| + | | style="width:8%" | 3 | ||
| + | | style="width:8%" | 4 | ||
| + | | style="width:8%" | 5 | ||
| + | | style="width:8%" | 6 | ||
| + | | style="width:8%" | 7 | ||
| + | | style="width:8%" | 8 | ||
| + | | style="width:8%" | 9 | ||
| + | | style="width:8%" | 10 | ||
| + | | style="width:8%" | 11 | ||
| + | |- | ||
| + | ! Type | ||
| + | | L || M + S || H || M || MH || H || L + S || MH || H || MH + S || H | ||
| + | |- | ||
| + | |} | ||
| + | |||
| + | The amount of spawned units can vary depending of battle level (1-6) and amount of beaten waves, the more of them are destroyed the more of enemies are spawning and the game increases their number up to 4 times per battle (that happens every 3-4 destroyed waves). | ||
| + | |||
| + | === Enemy types === | ||
| + | Depending on level, the game spawns different units, the higher is the level of battle the harder they are to destroy. | ||
| + | |||
| + | {{Tree-Start|3|without header}} | ||
| + | {{Tree-Line|}} | ||
| + | |style="border-left: solid 1px #cccccc"|{{Tree-Skip|40px}}<center>'''Vehicle{{Tree-Skip|1px}}Type'''</center> | ||
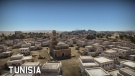
| + | |style="border-left: solid 1px #cccccc"|<center>[[File:Heavy_tanks_icon.png|50px|link=]][[File:Italy flag.png|70px|link=Category:Italy_ground_vehicles]]{{Tree-Skip|5px}}[[File:MapIcon Ground Tunisia.jpg|135px|link=Tunisia_(Ground_Forces)]]</center>{{Tree-Skip|10px}} | ||
| + | {{Tree-Line|Level 1 - (1.0 - 2.3)}} | ||
| + | |style="border-left: solid 1px #cccccc" align="center"| | ||
| + | {{Tree-Skip|12px}} | ||
| + | <span style="color:#cccccc">Light</span> | ||
| + | {{Tree-Skip|12px}} | ||
| + | <span style="color:#cccccc">Medium</span> | ||
| + | {{Tree-Skip|12px}} | ||
| + | <span style="color:#cccccc">Intermediate</span> | ||
| + | {{Tree-Skip|12px}} | ||
| + | <span style="color:#cccccc">Heavy</span> | ||
| + | {{Tree-Skip|12px}} | ||
| + | <span style="color:#cccccc">Air Support</span> | ||
| + | |style="border-left: solid 1px #cccccc;"| | ||
| + | {{Tree-Skip|10px}} | ||
| + | {{Tree-Unit|it_m13_40_serie_1}} | ||
| + | {{Tree-Skip|10px}} | ||
| + | {{Tree-Unit|it_m14_41}} | ||
| + | {{Tree-Skip|10px}} | ||
| + | {{Tree-Unit|it_m3a3_stuart}} | ||
| + | {{Tree-Skip|10px}} | ||
| + | {{Tree-Unit|it_p_40}} | ||
| + | {{Tree-Skip|10px}} | ||
| + | {{Tree-Unit|br_20_dr}} | ||
| + | {{Tree-Skip|10px}} | ||
| + | |||
| + | {{Tree-Line|Level 2 - (2.7 - 3.7)}} | ||
| + | |style="border-left: solid 1px #cccccc" align="center"| | ||
| + | {{Tree-Skip|12px}} | ||
| + | <span style="color:#cccccc">Light</span> | ||
| + | {{Tree-Skip|12px}} | ||
| + | <span style="color:#cccccc">Medium</span> | ||
| + | {{Tree-Skip|12px}} | ||
| + | <span style="color:#cccccc">Intermediate</span> | ||
| + | {{Tree-Skip|12px}} | ||
| + | <span style="color:#cccccc">Heavy</span> | ||
| + | {{Tree-Skip|12px}} | ||
| + | <span style="color:#cccccc">Air Support</span> | ||
| + | |style="border-left: solid 1px #cccccc;"| | ||
| + | {{Tree-Skip|10px}} | ||
| + | {{Tree-Unit|it_m24_chaffee}} | ||
| + | {{Tree-Skip|10px}} | ||
| + | {{Tree-Unit|it_pzkpfw_III_ausf_N}} | ||
| + | {{Tree-Skip|10px}} | ||
| + | {{Tree-Unit|it_m4a4_sherman}} | ||
| + | {{Tree-Skip|10px}} | ||
| + | {{Tree-Unit|it_sherman_VII}} | ||
| + | {{Tree-Skip|10px}} | ||
| + | {{Tree-Unit|re_2001_serie1}} | ||
| + | {{Tree-Skip|10px}} | ||
| + | |||
| + | {{Tree-Line|Level 3 - (4.0 - 5.0)}} | ||
| + | |style="border-left: solid 1px #cccccc" align="center"| | ||
| + | {{Tree-Skip|12px}} | ||
| + | <span style="color:#cccccc">Light</span> | ||
| + | {{Tree-Skip|12px}} | ||
| + | <span style="color:#cccccc">Medium</span> | ||
| + | {{Tree-Skip|12px}} | ||
| + | <span style="color:#cccccc">Intermediate</span> | ||
| + | {{Tree-Skip|12px}} | ||
| + | <span style="color:#cccccc">Heavy</span> | ||
| + | {{Tree-Skip|12px}} | ||
| + | <span style="color:#cccccc">Air Support</span> | ||
| + | |style="border-left: solid 1px #cccccc;"| | ||
| + | {{Tree-Skip|10px}} | ||
| + | {{Tree-Unit|it_m18_hellcat}} | ||
| + | {{Tree-Skip|10px}} | ||
| + | {{Tree-Unit|it_m4a4_sherman}} | ||
| + | {{Tree-Skip|10px}} | ||
| + | {{Tree-Unit|it_pzkpfw_IV_ausf_G}} | ||
| + | {{Tree-Skip|10px}} | ||
| + | {{Tree-Unit|it_sherman_vc_firefly}} | ||
| + | {{Tree-Skip|10px}} | ||
| + | {{Tree-Unit|z_1007_bis_serie5}} | ||
| + | {{Tree-Skip|10px}} | ||
| + | |||
| + | {{Tree-Line|Level 4 - (5.3 - 6.3)}} | ||
| + | |style="border-left: solid 1px #cccccc" align="center"| | ||
| + | {{Tree-Skip|12px}} | ||
| + | <span style="color:#cccccc">Light</span> | ||
| + | {{Tree-Skip|12px}} | ||
| + | <span style="color:#cccccc">Medium</span> | ||
| + | {{Tree-Skip|12px}} | ||
| + | <span style="color:#cccccc">Intermediate</span> | ||
| + | {{Tree-Skip|12px}} | ||
| + | <span style="color:#cccccc">Heavy</span> | ||
| + | {{Tree-Skip|12px}} | ||
| + | <span style="color:#cccccc">Air Support</span> | ||
| + | |style="border-left: solid 1px #cccccc;"| | ||
| + | {{Tree-Skip|10px}} | ||
| + | {{Tree-Unit|it_fiat_6616_cockerill}} | ||
| + | {{Tree-Skip|10px}} | ||
| + | {{Tree-Unit|it_sherman_vc_firefly}} | ||
| + | {{Tree-Skip|10px}} | ||
| + | {{Tree-Unit|it_m26a1_pershing}} | ||
| + | {{Tree-Skip|10px}} | ||
| + | {{Tree-Unit|it_m47_105}} | ||
| + | {{Tree-Skip|10px}} | ||
| + | {{Tree-Unit|bf-109g-14as}} | ||
| + | {{Tree-Skip|10px}} | ||
| + | |||
| + | {{Tree-Line|Level 5 - (6.7-8.0)}} | ||
| + | |style="border-left: solid 1px #cccccc" align="center"| | ||
| + | {{Tree-Skip|12px}} | ||
| + | <span style="color:#cccccc">Light</span> | ||
| + | {{Tree-Skip|12px}} | ||
| + | <span style="color:#cccccc">Medium</span> | ||
| + | {{Tree-Skip|12px}} | ||
| + | <span style="color:#cccccc">Intermediate</span> | ||
| + | {{Tree-Skip|12px}} | ||
| + | <span style="color:#cccccc">Heavy</span> | ||
| + | {{Tree-Skip|12px}} | ||
| + | <span style="color:#cccccc">Air Support</span> | ||
| + | |style="border-left: solid 1px #cccccc;"| | ||
| + | {{Tree-Skip|10px}} | ||
| + | {{Tree-Unit|it_c13_t90}} | ||
| + | {{Tree-Skip|10px}} | ||
| + | {{Tree-Unit|it_m26a1_pershing}} | ||
| + | {{Tree-Skip|10px}} | ||
| + | {{Tree-Unit|it_of_40_mk_1}} | ||
| + | {{Tree-Skip|10px}} | ||
| + | {{Tree-Unit|it_of_40_mk_2a}} | ||
| + | {{Tree-Skip|10px}} | ||
| + | {{Tree-Unit|f-84f_italy}} | ||
| + | {{Tree-Skip|10px}} | ||
| + | |||
| + | {{Tree-End}} | ||
| + | |||
| + | = Strategies = | ||
| + | For both modes: | ||
| + | |||
| + | * Don't shy away from expensive ammo. Ammo is free in this mode. | ||
Revision as of 13:56, 6 September 2022
Contents
Tunisia - Ground Assault Arcade
Ground Assault (Tunisia)
Objective
Players use ground vehicles and helicopters to defend the zone on the map centre from incoming waves of enemy tanks. Helicopters are allowed only in the top tier bracket (BR 8.3+).
The main objective is to not let the enemy units capture the area on the centre of map and slow them down as much as possible. If the AI units manage to enter the capture zone, it will start to flash and the team will start to lose tickets, the more AI that enter it, the more tickets the team loses. The enemy units slow down upon entering the zone, and their shooting accuracy is also lowered. After successfully defending the zone and destroying enemy waves your team regain a small amount of lost tickets. The battle is lost once the team's tickets reaches 0. The counter in the bottom-left corner shows the remaining amount of waves to beat (including current one).
Destroying enemy planes is optional but highly recommended, some of them are equipped with weapons that can destroy player's vehicle in a single attack. Sometimes a pickup can appear outside the zone, it can repair the tank and replenish its ammunition. The number of active players affects the amount of AI units which is being spawned by the game.
Waves
Waves can be composed of four unit types: light tanks, medium tanks, slightly better medium tanks, and heavy tanks. Every wave, two planes are also spawned which attack ground units and player controlled helicopters. In top tier assault battles, SPAA units can also appear, they will engage only flying units. Usually the game spawns one SPAA unit per player in a helicopter, their range is so large that they can reach players very soon after they leave the helipad. SPAA units spawn during the 2nd, 5th, 8th and 11th wave and it happens 20 seconds after the tanks start to appear. Spawn position of ground units is random, they always spawn from seven different predetermined directions.
Some enemy ground units can attack player controlled helicopters by using their roof mounted machine guns, such as the Russian tanks on Kursk map. The accuracy of the AI remains very high even when driving at full speed.
Note: It is a viable tactic to destroy track of the front most vehicles to make them stop, but keep in mind that they can repair damaged parts, including the engine and extinguish parts that are set on fire.
A table showing when and what type of units spawn during the mission (Light (L), Medium (M), Intermediate (MH), Heavy (H) and (S) Air Cover (in top tier battles)):
| Waves | |||||||||||||||
|---|---|---|---|---|---|---|---|---|---|---|---|---|---|---|---|
| Wave | 1 | 2 | 3 | 4 | 5 | 6 | 7 | 8 | 9 | 10 | 11 | ||||
| Type | L | M + S | H | M | MH | H | L + S | MH | H | MH + S | H | ||||
The amount of spawned units can vary depending of battle level (1-6) and amount of beaten waves, the more of them are destroyed the more of enemies are spawning and the game increases their number up to 4 times per battle (that happens every 3-4 destroyed waves).
Enemy types
Depending on level, the game spawns different units, the higher is the level of battle the harder they are to destroy.
 | ||
Level 1 - (1.0 - 2.3)
|
Light Medium Intermediate Heavy Air Support |
M13/40 (I)  M14/41  ▄M3A3  P40  B.R.20DR 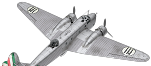 |
Level 2 - (2.7 - 3.7)
|
Light Medium Intermediate Heavy Air Support |
▄M24  ▄Pz.III N  ▄Sherman V  Sherman Ic  Re.2001 serie 1 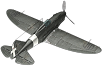 |
Level 3 - (4.0 - 5.0)
|
Light Medium Intermediate Heavy Air Support |
▄M18  ▄Sherman V ▄Pz.IV G  ▄Sherman Vc  Z.1007 bis serie 5 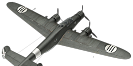 |
Level 4 - (5.3 - 6.3)
|
Light Medium Intermediate Heavy Air Support |
AUBL/74  ▄Sherman Vc M26A1  M47 (105/55)  ▄Bf 109 G-14/AS  |
Level 5 - (6.7-8.0)
|
Light Medium Intermediate Heavy Air Support |
C13 T90  M26A1 OF-40  OF-40 Mk.2A  ▄F-84F  |
Strategies
For both modes:
- Don't shy away from expensive ammo. Ammo is free in this mode.
