Difference between revisions of "Striker"
Inceptor57 (talk | contribs) (Restored page) |
|||
| Line 2: | Line 2: | ||
== Description == | == Description == | ||
| − | ''In the description, the first part needs to be about the history of the creation and combat usage of the vehicle, as well as its key features. In the second part, tell the reader about the ground vehicle in the game. Insert the screenshot of the vehicle. If the novice player does not remember the vehicle by name, they will immediately understand what kind of vehicle it is talking about.'' | + | <!--''In the description, the first part needs to be about the history of the creation and combat usage of the vehicle, as well as its key features. In the second part, tell the reader about the ground vehicle in the game. Insert the screenshot of the vehicle. If the novice player does not remember the vehicle by name, they will immediately understand what kind of vehicle it is talking about.''--> |
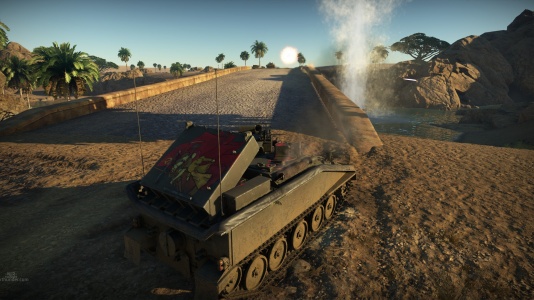
| + | [[File:GarageImage Striker.jpg|420px|thumb|left]] | ||
| + | {{Break}} | ||
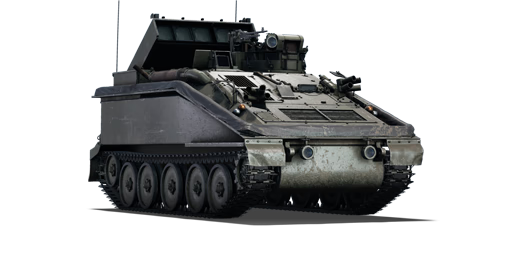
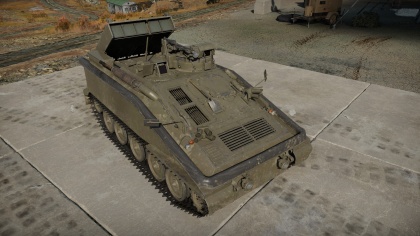
| + | The '''{{Specs|name}}''' is a Rank {{Specs|rank}} British tank destroyer {{Battle-rating|1}}. It was introduced in [[Update 1.71 "New E.R.A."]] | ||
| + | |||
| + | The Striker is a direct upgrade to the [[Swingfire|Swingfire]] and is better than its predecessor in almost every way, even though it has its own problems. Just as the Swingfire, the Striker's purpose is to blast enemy out of cover by firing at them indirectly with easily controllable missiles, but it has some trouble at attacking long range, as BAe Swingfire missiles are slower than normal ones. It has a much better fire rate and bigger room for error than its predecessor however, due to having five launchers at once and being more mobile so its push-preventing powers are godlike, however, it has problems with firing downwards in front of itself. | ||
| + | |||
| + | Much like the Swingfire, it's a box with sloped front, however, it has a smaller profile than the Swingfire. It still has little to no armour and there are fewer points where the Striker can get shot without consequences. Still, the sloped armour makes it difficult to be destroyed with weaker machine guns, so the Striker should face the enemy's push direction, not just to make aiming easier, but to reduce the chances of being instantly destroyed. If the Striker is in a good enough cover, it's not important. | ||
| + | |||
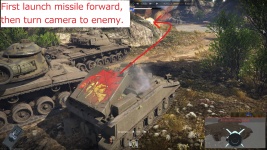
| + | The first thing to notice about the Striker is a giant missile panel on its back. Being hit there lights the vehicle on fire, the missile area to light up like a firework, and be unable to fire back. As such, try not to get hit in the missile launch area. In case all of the ammo is spent, the rear is actually the safest place to be hit as only ammo and fuel is stored there and will otherwise be open space; it can even completely absorb artillery shots or fire from the BMP-1 cannon, which normally hull breaks or destroys the much better protected Warrior. The missile rack also covers the ammo rack from planes strafing from the sky, so as long as they can't fire inside of the vehicle, the Striker should be fine. In case the Striker get shots at an empty tube, there is a chance the entire rack wont break in one hit and the vehicle will still be able to fire, while having option to repair it back to 100%. Also, since the launcher is now closer to the front of the hull, the Striker cannot fire in 10 m dead zone in front, so try to destroy the opponents before the missiles go out of control. | ||
| + | |||
| + | On its mid-left, there is a commander cupola which has a machine gun on it. Not much to be said about it, at 8.3 it barely does anything, so use the machine gun to remove fences, since hitting anything with the Striker slows it down considerably. Fighting planes with this MG is redundant, it's easier to just fire ATGM at them and hope they care enough to disengage, but it can be done in RB just to do minor damage. | ||
| + | |||
| + | Slightly to the right, there is ATGM camera, the optics. Because of how it's placed, the Striker cannot fire down well, the inclination of +20° to the enemy ground increases the difficulty of firing down, as well as the major problem firing at people that is on the other side of the same hill. The Striker also cannot fire at long range without exposing itself or risking a complete miss. All of this is a downgrade from Swingfire. Accuracy problem can be somewhat compensated by extreme mouse manipulations in Third person view, as long as leading shots can be scored. However, it's better at controlling missiles, as long as the Striker stand on a semi-flat surface or have direct sight of the enemy. It's also better at aiming shots behind the Striker and at correcting missed shots. | ||
| + | |||
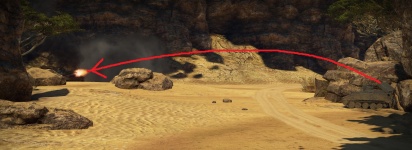
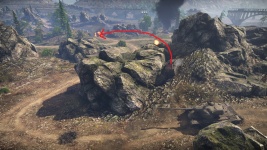
| + | Take the missile characteristics into consideration. The missiles start out to be slow and start increasing their speed with each second, becoming less controllable and taking crazy turns when trying to guide on target, so if there's something weird that needs to be done, it's better to do in close range from the third person view or in open fields. They still drop down on launch and take super sharp turns on new targets, so keep attention at where the missile is going, or it will hit the ground or overshoot. If there is nothing around the target, the missiles '''will''' hit whatever the reticle points at, even from one km away if still intact. In fact, it's usually so accurate, the missiles can even drop them below train carriages if someone uses them as cover. Only the missile the Striker launched last can be controlled though. | ||
| + | |||
| + | [[File:Striker VerticalAttack BehindCover.jpg|x150px|thumb|left|BAe Swingfire does not care about cover.]] | ||
| + | |||
| + | <!-- I'm pretty sure it's same in RB, but correct this if I'm wrong, also the note in "pros and cons" of that person who posted before about 5 shot ammo rack.--> | ||
| + | It may look like Striker is supposed to reload 5 missiles at once after it shot them all, but it's actually reloading them one by one at a certain rate, depending on crew skill. The ammo pool is shared. This can lead to an advantage in Arcade battles, as the ammo can be portrayed as limitless since tubes generally reload while guiding the missiles to the target, and a full ammo rearm time after spending all missiles is just 15 seconds, leaving most of them ready to fire again. However, missiles cannot be used recklessly as it still takes at least 8 to 12 seconds to reload one launcher. In Realistic battles, this advantage is less important since the Striker only has 10 shots, and being shot at missile racks explodes all the ammo in the launcher, leaving the Striker with even less. In short: Practice the Striker's aim in AB and abstain from RB until able to control the missiles properly, having a wasteful attitude to missiles and missing shots will force a constant rearming period at a control point. | ||
| + | |||
| + | The mobility of the Striker is better than of the Swingfire's, so it can actually get to capture points along with the team's push, so the Striker can assist in intercepting and destroy enemy team while rearming at the point. If travelling by asphalt roads with all the upgrades, the Striker can temporarily reach a maximum speed of 87 km/h. This is possible because Striker is much lighter than the Swingfire. Unfortunately, the lighter hull is easier for the enemy to push around, temporarily disabling the weapon and potentially ramming the Striker into a wall. It is important for the Strikers to take mobility upgrades as soon as possible, because: | ||
| + | |||
| + | Brakes are vert important in towns, as stopping one moment too late can push the Striker out of cover and now the vehicle is exposed at the mercy of medium tanks, who would most likely '''really''' hate missile launchers, or are just more than happy for an easy target. Better brakes also help in hill battles, especially when the Striker gets flanked and need to do something about it. Also, since the [[Update 1.85 "Supersonic"|"Supersonic" update]], the Striker can no longer fire on the move, so better brakes = less time taken before the Striker can actually fire. | ||
| + | |||
| + | Maximum inclination upgrades allow the Striker to climb hills and mountain rocks better, and also stay on them. The Striker may have issues with controlling missiles when not staying on flat terrain, but getting a good sight on choke point is still a major benefit, as attacking position when it's raining missiles is scary, even if they don't really destroy anyone. And if accurate enough at angling missiles despite this problem, they are all doomed regardless of their numbers. | ||
| + | |||
| + | The Striker is slower than light tanks, so unless the scouts are willing to take a hit for the Striker, there's no expectation to take cap points solo, or get there first, so that's out of the question. But getting better acceleration from modifications and keeping map situation in mind still can make a difference, because, despite the "Supersonic" update removing the ability to ''fire'' on move, the Striker can still fire a missile and ''follow it'', as it guides the missile onto the enemy. That way, the missiles can be fired and make the enemy think otherwise while the Striker moves to the next cover. Even if that is not enough to deter them, more missiles can just be fired at the next stop. | ||
== General info == | == General info == | ||
=== Survivability and armour === | === Survivability and armour === | ||
| − | ''Describe armour protection. Note the most well protected and key weak areas. Appreciate the layout of modules as well as the number and location of crew members. Is the level of armour protection sufficient, is the placement of modules helpfull for survival in combat?'' | + | <!--''Describe armour protection. Note the most well protected and key weak areas. Appreciate the layout of modules as well as the number and location of crew members. Is the level of armour protection sufficient, is the placement of modules helpfull for survival in combat?'' |
| − | ''If necessary use a visual template to indicate the most secure and weak zones of the armour.'' | + | ''If necessary use a visual template to indicate the most secure and weak zones of the armour.''--> |
| + | '''Armour type:''' | ||
| + | * Aluminium Alloy AA7017 | ||
| + | {| class="wikitable" | ||
| + | |- | ||
| + | ! Armour !! Front (Slope angle) !! Sides !! Rear !! Roof | ||
| + | |- | ||
| + | | Hull || 25 mm (69°) || 12.7 mm || 12.7 mm || 12.7 mm | ||
| + | |- | ||
| + | | Turret || 0 || 0|| 0 || 0 mm | ||
| + | |- | ||
| + | ! Armour !! Sides !! Roof | ||
| + | |- | ||
| + | | Cupola || 25 mm || 12.7 mm | ||
| + | |} | ||
| + | |||
| + | '''Notes:''' | ||
| + | * Suspension wheels and tracks are 15 mm thick | ||
| + | * Belly and hull undersides over the tracks are 12.7mm thick | ||
| + | * Outdoor ammo rack is 50 mm thick everywhere, except hinges that are 10 mm thick | ||
| + | |||
| + | ==== Crew ==== | ||
| + | * Commander | ||
| + | * Loader | ||
| + | * Driver | ||
| + | Total: 3 Crew members | ||
=== Mobility === | === Mobility === | ||
| − | ''Write about the mobility of the ground vehicle. Estimate the specific power and maneuverability as well as the maximum speed forward and backward.'' | + | <!--''Write about the mobility of the ground vehicle. Estimate the specific power and maneuverability as well as the maximum speed forward and backward.''--> |
| + | {| class="wikitable" style="text-align:center" | ||
| + | |- | ||
| + | !colspan="3" | Mobility characteristic | ||
| + | |- | ||
| + | ! Weight (tons) | ||
| + | !colspan="1" | Add-on Armour<br>weight (tons) | ||
| + | !colspan="1" | Max speed (km/h) | ||
| + | |- | ||
| + | |rowspan="2" | 8.3 || colspan="1" rowspan="2" | N/A || colspan="1" | 87 (AB) | ||
| + | |- | ||
| + | |80 (RB/SB) | ||
| + | |- | ||
| + | !colspan="3" | Engine power (horsepower) | ||
| + | |- | ||
| + | !colspan="1" | Mode | ||
| + | !Stock | ||
| + | !Upgraded | ||
| + | |- | ||
| + | |''Arcade'' | ||
| + | |270 | ||
| + | |___ | ||
| + | |- | ||
| + | |''Realistic/Simulator'' | ||
| + | |168 | ||
| + | |___ | ||
| + | |- | ||
| + | !colspan="3" | Power-to-weight ratio (hp/ton) | ||
| + | |- | ||
| + | !colspan="1" | Mode | ||
| + | !Stock | ||
| + | !Upgraded | ||
| + | |- | ||
| + | |''Arcade'' | ||
| + | |__.__ | ||
| + | |__.__ | ||
| + | |- | ||
| + | |''Realistic/Simulator'' | ||
| + | |__.__ | ||
| + | |__.__ | ||
| + | |- | ||
| + | |} | ||
== Armaments == | == Armaments == | ||
=== Main armament === | === Main armament === | ||
| − | ''Give the reader information about the characteristics of the main gun. Assess its effectiveness in a battle based on the reloading speed, ballistics and the power of shells. Do not forget about the flexibilty of the fire, that is how quickly the cannon can be aimed at the target, open fire on it and aim at another enemy. Add a link to the main article on the gun: <code><nowiki>{{main|Name of the weapon}}</nowiki></code>. Describe in general terms the ammunition available for the main gun. Give advice on how to use them and how to fill the ammunition storage.'' | + | <!--''Give the reader information about the characteristics of the main gun. Assess its effectiveness in a battle based on the reloading speed, ballistics and the power of shells. Do not forget about the flexibilty of the fire, that is how quickly the cannon can be aimed at the target, open fire on it and aim at another enemy. Add a link to the main article on the gun: <code><nowiki>{{main|Name of the weapon}}</nowiki></code>. Describe in general terms the ammunition available for the main gun. Give advice on how to use them and how to fill the ammunition storage.''--> |
| + | {| class="wikitable" style="text-align:center" | ||
| + | |- | ||
| + | ! colspan="6" | 164 mm Robot-52 (SS11) ATGM | ||
| + | |- | ||
| + | ! colspan="3" rowspan="1" style="width:5em" |Capacity | ||
| + | ! rowspan="1" | Vertical <br> guidance | ||
| + | ! rowspan="1" | Horizontal <br> guidance | ||
| + | ! rowspan="1" | Stabilizer | ||
| + | |- | ||
| + | | colspan="3" | 10 || N/A || N/A || Two-plane | ||
| + | |- | ||
| + | ! colspan="6" | Turret rotation speed (°/s) | ||
| + | |- | ||
| + | ! style="width:4em" |Mode | ||
| + | ! style="width:4em" |Stock | ||
| + | ! style="width:4em" |Upgraded | ||
| + | ! style="width:4em" |Prior + Full crew | ||
| + | ! style="width:4em" |Prior + Expert qualif. | ||
| + | ! style="width:4em" |Prior + Ace qualif. | ||
| + | |- | ||
| + | | ''Arcade'' || 18.6 || __.__ || __.__ || __.__ || __.__ | ||
| + | |- | ||
| + | | ''Realistic'' || 12.6 || __.__ || __.__ || __.__ || __.__ | ||
| + | |- | ||
| + | ! colspan="4" | Reloading rate (seconds) | ||
| + | |- | ||
| + | ! colspan="1" style="width:4em" |Stock | ||
| + | ! colspan="1" style="width:4em" |Prior + Full crew | ||
| + | ! colspan="1" style="width:4em" |Prior + Expert qualif. | ||
| + | ! colspan="1" style="width:4em" |Prior + Ace qualif. | ||
| + | |- | ||
| + | | 0.6 || __.__ || __.__ || __.__ | ||
| + | |- | ||
| + | |} | ||
| + | |||
| + | ===== Ammunition ===== | ||
| + | {| class="wikitable sortable" style="text-align:center" width="100%" | ||
| + | ! colspan="8" | Penetration statistics | ||
| + | |- | ||
| + | ! rowspan="2" data-sort-type="text" | Ammunition | ||
| + | ! rowspan="2" class="unsortable" | Type of <br /> warhead | ||
| + | ! colspan="6" | '''Penetration''' '''''in mm''''' '''@ 90°''' | ||
| + | |- | ||
| + | ! 10m | ||
| + | ! 100m | ||
| + | ! 500m | ||
| + | ! 1000m | ||
| + | ! 1500m | ||
| + | ! 2000m | ||
| + | |- | ||
| + | | BAe Swingfire || ATGM || 500 || 500 || 500 || 500 || 500 || 500 | ||
| + | |- | ||
| + | |} | ||
| + | {| class="wikitable sortable" style="text-align:center" width="100%" | ||
| + | ! colspan="12" | Shell details | ||
| + | |- | ||
| + | ! rowspan="2" data-sort-type="text" | Ammunition | ||
| + | ! rowspan="2" class="unsortable" | Type of <br /> warhead | ||
| + | ! rowspan="2" |Velocity <br /> in m/s | ||
| + | ! rowspan="2" |Projectile<br />Mass in kg | ||
| + | ! rowspan="2" | Range (m) | ||
| + | ! rowspan="2" | ''Fuse delay'' | ||
| + | ''in m:'' | ||
| + | ! rowspan="2" | ''Fuse sensitivity'' | ||
| + | ''in mm:'' | ||
| + | ! rowspan="2" | ''Explosive Mass in g<br /> (TNT equivalent):'' | ||
| + | ! rowspan="2" | ''Normalization At 30° <br> from horizontal:'' | ||
| + | ! colspan="3" | ''Ricochet:'' | ||
| + | |- | ||
| + | ! 0% | ||
| + | ! 50% | ||
| + | ! 100% | ||
| + | |- | ||
| + | | BAe Swingfire || ATGM || 250 || 37 || 3,000 || 0.0 || 0.01 || 4550 || +0° || 80° || 82° || 90° | ||
| + | |- | ||
| + | |} | ||
| − | === | + | ===== [[Ammo racks|Ammo racks]] ===== |
| − | '' | + | {| class="wikitable sortable" style="text-align:center" |
| + | |- | ||
| + | ! class="wikitable unsortable" |Full<br /> ammo | ||
| + | ! class="wikitable unsortable" |1st<br /> rack empty | ||
| + | ! class="wikitable unsortable" |2nd<br /> rack empty | ||
| + | ! class="wikitable unsortable" |3rd<br /> rack empty | ||
| + | ! class="wikitable unsortable" |Visual<br /> discrepancy | ||
| + | |- | ||
| + | || '''10''' || XX ''(+XX)'' || XX ''(+XX)'' || XX ''(+XX)'' || style="text-align:center" | No | ||
| + | |- | ||
| + | |} | ||
=== Machine guns === | === Machine guns === | ||
| − | ''Offensive and anti-aircraft machine guns not only allow you to fight some aircraft, but also are effective against lightly armoured vehicles. Evaluate machine guns and give recommendations on its use.'' | + | <!--''Offensive and anti-aircraft machine guns not only allow you to fight some aircraft, but also are effective against lightly armoured vehicles. Evaluate machine guns and give recommendations on its use.''--> |
| + | {{main|L37A1 (7.62 mm)}} | ||
| + | |||
| + | {| class="wikitable" style="text-align:center" | ||
| + | |- | ||
| + | ! colspan="7" | [[L37A1 (7.62 mm)|7.62 mm L37A1]] | ||
| + | |- | ||
| + | ! colspan="7" | ''Pintle mount'' | ||
| + | |- | ||
| + | ! colspan="4" rowspan="1" style="width:5em" |Capacity (Belt capacity) | ||
| + | ! rowspan="1" | Fire rate <br> (shots/minute) | ||
| + | ! rowspan="1" | Vertical <br> guidance | ||
| + | ! rowspan="1" | Horizontal <br> guidance | ||
| + | |- | ||
| + | | colspan="4" | 2,500 (100) || 650 || __° || __° | ||
| + | |- | ||
| + | |} | ||
== Usage in the battles == | == Usage in the battles == | ||
| − | ''Describe the tactics of playing in the vehicle, the features of using vehicles in the team and advice on tactics. Refrain from creating a "guide" - do not impose a single point of view but give the reader food for thought. Describe the most dangerous enemies and give recommendations on fighting them. If necessary, note the specifics of the game in different modes (AB, RB, SB).'' | + | <!--''Describe the tactics of playing in the vehicle, the features of using vehicles in the team and advice on tactics. Refrain from creating a "guide" - do not impose a single point of view but give the reader food for thought. Describe the most dangerous enemies and give recommendations on fighting them. If necessary, note the specifics of the game in different modes (AB, RB, SB).''--> |
| + | <!--Specific methods of play in different situations, label the methods with pros and cons (if possible) based on vehicle's performances (i.e. Using the M22 Locust and getting close to target so gun depression cannot reach it.)--> | ||
| + | [[File:Striker_Korea38thParallel InclintationUpgraded.jpg|x150px|thumb|right|With team help and enough upgrades, the Striker can use this spot on 38th parallel to suffocate any push onto capture point before they even get there.]] | ||
| + | |||
| + | '''Moving around''': Find building, teammate, hill, or rock that is as tall as the hull of Striker, then find the enemy and destroy them using the ATGM. Use the machine gun only for destroying fences and against planes. In other words "Be sneaky and shoot at range". | ||
| + | |||
| + | Driving out in the open will not end well for the Striker, unless the enemy has someone else to shoot. The Striker can drive around in enemy sight, but make sure that they are afraid and in cover, or at least can't fire at the Striker first before the Striker sends a missile their way. The Striker can use the opposite side of cover that the enemy is using, as long as the missiles can fire at them from above and the Striker isn't opened for flank shots. At that point, it doesn't matter if they know where the Striker is. | ||
| + | |||
| + | [[File:Striker Map VietnamRushC.JPG|x200px|thumb|right|Trade one for eight.]] | ||
| + | |||
| + | In '''extreme''' situations, the Striker can be sacrificed by driving straight to cover inside of enemy territory (preferable at start of the match), hoping that nobody expects missile launcher of all things to drive right into "their" part of the map and ruin their plans. There are several examples of this tactic: | ||
| + | |||
| + | [[File:Striker Map AmericanDesertRush.JPG|x200px|thumb|left|The tables have turned.]] | ||
| + | |||
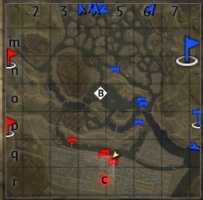
| + | As the right-side team on the "Vietnam" map, the Striker cannot hope to take hold of C capture point, as left team has absurd advantage over that capture point. Even the idea of it is so unthinkable, that nobody even checks the river near to town (and even if they do, using both smoke launchers can give enough breathing space to get past them), so the Striker can dash to the river entrance of C cap point, which is exactly the size of Striker and is heavily fortified from every direction, and attempt to destroy entire enemy team right there, as it tries to leave C. Not only the chance of success is quite high, as heavily insulted enemy team will probably come straight at the Striker's position, but even if this fail, teammates can snipe remaining opponents with little to no effort as they converge onto the Striker's position here. | ||
| + | |||
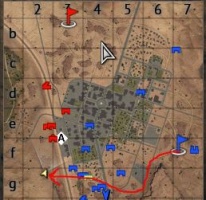
| + | As the south-side team in "American Desert", A point only variant, it is possible to use the road to reach max speed and then fall off the cliff straight into the cover below, then immediately proceed to fire at completely confused enemy team. There is high chance of being shot mid-air or breaking the tracks due to fall damage, however, sometimes this idea is just crazy enough to work, and if they fail to stop the Striker in time, then entire enemy team is at the Striker's missile's mercy. At this point, the Striker should take out as many of them as possible, preferably pushing them back to their spawn point or even destroying them all. | ||
| + | |||
| + | [[File:Striker HorizontalAttack BehindCover.jpg|x150px|thumb|right|Use teammates as a cover (don't block their escape path though!) and destroy the enemy when they think they are safe behind their cover.]] | ||
| + | |||
| + | Note that this rush tactic is not feasible without spaded vehicle, as it's significantly harder to hit a Striker when it is driving at 60-87 km/h, compared to 40-60, weaker suspension may stop the Striker from moving altogether after hitting any bumps on a road, weaker tracks tend to break easier, and so on. | ||
| + | |||
| + | '''Combat and teamwork''': Striker excels at holding choke points and indirect horizontal missile fighting, so just give the enemy something to think about by firing 1-2 missiles at their corner, then use their confusion and fear to get closer and adjust their aim, then actually blow them up. If they try something as stupid as rushing without smokes, show no mercy and fire all launchers, until they are crippled or destroyed. | ||
| + | |||
| + | Having scout vehicle working with the team to actually mark enemy through walls and smokes is best. Having someone to draw attention from the Striker, like a Chieftain tank, is even better, as nobody normally prioritizes the innocuous Striker, especially if next to a bunch more scarier, tanky teammates. | ||
| + | |||
| + | When choosing choke point, aim for certain criterias to be flexible if trying make a difference: | ||
| + | |||
| + | * Can this help at holding control point from here? Can the Striker destroy the enemy before they can run away? | ||
| + | * Is it fortified to a point it's impossible to take out the Striker without heavy losses or air support? | ||
| + | * Can the Striker control more than one direction from here? | ||
| + | * (In RB) Can the Striker rearm fast there? | ||
| + | |||
| + | '''Gallery of examples:'''<br> | ||
| + | <gallery mode=packed-hover heights=200px> | ||
| + | Striker ChokePoint Mozdok.jpg|A Mozdok choke point. Note that the Striker can control entire front-line and can decimate anyone on B point. There is nothing enemy team can do about it, but attempt to flank the Striker through the directions also in the Striker's firing lines. The Striker can also pop smoke and escape to B, in case if they flanked the position, called air support, or the Striker simply need to rearm. | ||
| + | </gallery> | ||
| + | <gallery mode=packed-hover heights=200px> | ||
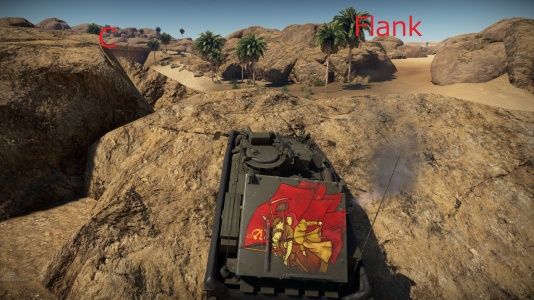
| + | Striker ChokePoint Tunisia (Safe).jpg|If without modifications or prefer something more fortified, choose unorthodox covers like the C choke point on Tunisia. It's hard to see it coming, the Striker can fire upon anyone trying to drive around C point, Artillery almost never fires on rocks, there are covers from planes with the mountains nearby, and there is only 2 entrances to this hideout, which are hard to even get to. However, like with all good positions for Striker, the team has to protect the right flank, as the Striker can get shot if the enemy team controls the B area or use river entrance to flank. | ||
| + | Striker ChokePoint Tunisia (Risky).jpg|Alternatively, the Striker can attack capture point itself and use buildings as a shield (pictured left). Use the missile's mobility to attack everywhere and push the enemy back. This kind of attack is very risky and reaction based and tables can quickly turn. Immediately seek a hiding place as the enemy can pinpoint artillery onto the Striker's location. | ||
| + | </gallery> | ||
| + | |||
| + | [[File:Striker LastStandStrike.jpg|x150px|thumb|right|Typical day of Striker driver.]] | ||
| + | |||
| + | '''Surviving counterattack''': The Striker's actions will draw attention, so expect to be bombarded by artillery almost constantly. Standing under artillery fire is a bad idea, but at some point it will be required to tough it out, hoping the blasts or shrapnel won't end the Striker. However, focus at stopping whatever called the artillery, as enemy tanks probably will come after the bombarded area soon enough. If just focused on the artillery, keep in mind that it has fewer chances of hitting the Striker on mountain rocks and other unorthodox types of cover, especially if close to several covers at once. However, it's harder to be protected against vehicles on unstable steep surfaces and without direct sight. | ||
| + | |||
| + | If someone is rushing towards the Striker's position, keep calm and turn as much attention as possible to the direction of assault. First disable everyone's gunner, turning while guiding missiles. Weak machine guns have problems with disabling the Striker's weapon system from the front, so medium and heavy tanks are a priority. Once everyone is pacified, destroy them. Don't attempt an escape, unless in need of some convenient temporary cover, there is no way the Striker will outrun a bunch of tanks with cannons without fighting them back first. | ||
| + | |||
| + | In case only the hull can be hidden, and the enemies got the weapon constantly in field repair mode, force it into manual repairs, allowing the Striker to fire back in desperate situation. Unlike field repair, manual repair is not prevented by continuous attacks on launcher, sometimes restoring the launcher to 100% right after enemy hit. Granted, not every enemy will just stand and fire at the launcher for 14-34 seconds, however, that knowledge can help in expediting the enemy's destruction. Manual repair can be prevented by hitting the missiles in the rack and setting the vehicle on fire, which is likely to happen, since finishing repairs causes reloading to resume, so start firing immediately. | ||
| + | |||
| + | <gallery mode=packed-hover heights=200px> | ||
| + | Striker LastStand (Fail).jpg|'''Last stand failure''': Operator failed to destroy even one of enemy tanks with 6 shots because he panicked. After that, he tried to run to cover, exposing vehicle's side to one of the opponents, and is ultimately destroyed by a third opponent, because striker cannot fire ATGM while moving, only guide them. Moral: If caught in open - fight till the bitter end. | ||
| + | Striker LastStand (Success).jpg|'''Last stand success''': Despite being severely damaged, striker managed to hide all vital points in between damaged cistern and wooden logs, minimizing chances of being obliterated by massive artillery barrage, being shot to the hull, or rammed to smithereens, and proceeded to fire at incoming enemy in cold blood, despite being alone in literal hell. Moral: even if entire enemy team fires onto the position, as long as the player remains calm, the Striker can survive or destroy most of them before perishing. | ||
| + | </gallery> | ||
| + | |||
| + | '''Overcoming dead zones and other weaknesses of a vehicle:''' | ||
| + | <!--This section is more about the technical and non-standard approach to tactical problems this vehicle has. May or may not be intended by developers...--> | ||
| + | Since Striker is unable to fire in sniper mode without exposing itself, most enemies will have to be attacked indirectly regardless of range. This may seem extremely harsh at longer ranges, however, when the turret loses direct sight on the missile and the target at the same time, the missiles are then controlled by movements of the turret (therefore, directly guided by the mouse, not by the targeting reticle.). Since BAe Swingfire missiles are very slow and mobile, they can be directed wherever necessary, negating sniper aim disadvantage by some extent. Regaining control over missile will send it into a crazy spiral and/or towards the targeting reticle, so try to avoid it, unless the Striker's position is suddenly compromised. | ||
| + | |||
| + | Mostly this kind of attack is done in third person view, as sniper mode restricts the vision way too much, and missiles are way too sensitive for it, even at 800 m range. | ||
| + | |||
| + | This allows the Striker to attack the enemy from extremely advantageous angles. First, position in such a way that the Striker can launch missiles using semi-auto mode in general direction of enemy '''outside''' of the line of control (behind terrain, high ground, or building). When choosing the place, make sure that the Striker is also stable, as even moving it a bit will make missiles take unexpected turns. When the missile goes out of the turret's sight, direct it into enemy's weak spots by moving the mouse. That way, the Striker can hold off entire army's of tanks and attack fortified positions without '''ever''' being critically hit, or even seen while being in the middle of the enemy ground. | ||
| + | |||
| + | [[File:CameraAdjustment_Settings_for_ATGM.jpg|x120px|thumb|right|Press for detailed settings.]] | ||
| + | This way of firing adds another problem - there are still dead zones (because of launcher's placement and turret's camera's inability to look down) and also blind spots, because it is hard to see what the missiles are heading towards (due to how camera works and the angle of missile's launch), and "directing" missile still moves the camera, usually into the ground, obscuring direct vision. To overcome this and become even stronger, activate "relative camera control" in the "control-tank-view in battle - Ground (y/x axis)". For specific settings and control explanations relate to the screenshot to the right. | ||
| + | |||
| + | Basically, this will temporarily detach the camera from the reticle by a certain degree. Be extremely careful when using this option because it makes the Striker specifically designed for close or ultra long range combat or battles at certain altitudes, and the camera must have a reset and apply button on hand, in case anything unexpected happens. In case '''everything''' goes wrong, the Striker still can use sniper mode, as it's unaffected by camera modifiers and will still guide missiles straight into the crosshairs. | ||
| + | |||
| + | [[File:CameraAdjustments ATGM (Striker).gif|x480px|thumb|left|Examples of using missile control specifics and camera adjustments together. Note how reticle is initially aimed in most of these fights. This kind of performance is rarely ever expected, and sometimes is impossible otherwise. In less extreme situations it simply helps to see. (Picture refresh rate is ~8 seconds. If it doesn't change - click on it.)]] | ||
| + | {{Break}} | ||
| + | ====Specific enemies worth noting==== | ||
| + | <!--Some concerning vehicles to worry about if playing this tank and how to fight them in an encounter. (i.e. Tiger II - shoot the turret cheeks)--> | ||
| + | '''Other ATGM launchers''': Don't fight them directly at close range, it will be foolish. Instead, bait enemy closer to cover, then just destroy them by firing over it. Another way is to just set them on fire and let them burn, there is nothing they can possibly do about it themselves. | ||
| + | |||
| + | '''Light tanks and SPAA''': As fun as it may be to trigger them by firing all over their cover, they still can destroy the Striker easily and have enough speed and mobility to actually do that. Let them ignore the Striker and do their business, though keep an eye on them. If they try something sneaky - destroy them. If it's possible to hit them within first two shots to trigger hull break - do it. | ||
| + | |||
| + | '''Soviet tanks''': Aim for the hull, as it usually destroys or immobilizes them. Aiming for right (their left) side is better for self-defence. They are also more dangerous than German ones, so prioritize them over others. | ||
| + | |||
| + | '''Helicopters''': In case the Striker provokes half of the enemy team and didn't succumb to artillery, they will probably send one of these flying birds directly at the Striker's location. If they have ATGM, '''immediately''' run behind some tall cover and fire back with a missile. If they are too far away, there is not much the Striker can do. Rockets can destroy the Striker as well if the pilot manages to carpet-bomb the position, so helicopters should be prioritized as a target and a threat. | ||
| + | |||
| + | ====Counter-tactics==== | ||
| + | <!--What to expect, if it would be in command of the enemy and how to counter it. (i.e. Just flank)--> | ||
| + | Don't attack the enemy's position without artillery support and smoke screens. If Striker is using single fortified position and can't move, an option is to fire smoke shells at it to not only protect oneself, but blind it altogether. (just make sure they don't have friendly scout vehicles around, otherwise there is a chance they will be able to guide missiles towards a covered position.) | ||
| + | |||
| + | If it exposes its missile racks, fire at it with explosives or autocannons. After breaking it, destroy the hull. The front of Striker may be surprisingly resistant to machine gun fire, however, if in possession of high calibre machine guns, move around Striker and penetrate its back or sides with them. | ||
| + | |||
| + | If attacks didn't set Striker on fire, it will be about 9 seconds before the Striker repaired the launcher back. Firing at launcher again will reset the "field repair" timer, so take some time after a successive hit. Try firing at different tubes, if need be, it may set the vehicle on fire if actual ammo is hit. | ||
| + | |||
| + | It has problems firing at the opposite side of the same hill if it's too steep. It will not help destroy a Striker, but at least the location is somewhat safe. | ||
| + | |||
| + | It's best to attack from many directions at the same time, preferably from behind. Even better if the operator didn't see it coming. Sniping and terrain based flank are working better in arcade battle, while sneak attacks are more reliable in realistic battle. | ||
| + | |||
| + | Don't forget that it can fire from any sort of cover. Aside from already mentioned steep hills, its firing potential is only limited by operator's skill, as Striker is better at leading missiles behind it. | ||
| + | |||
| + | Destroy its weapons if unable to take out its gunner reliably before it fires the missiles. A cornered enemy is the most dangerous one. However, remember, that it '''does not''' have hull-break. The only real way to destroy it is to attack the hull or set it on fire. | ||
| + | |||
| + | [[File:Striker_BlindZone_Exploited.jpg|x200px|thumb|right|This is why one must always fire at Soviet tank's hulls: T-54 used terrain to get into melee range with the Striker. Despite being hit several times in turret, it managed to push striker into a wall, then smoked entire area to make teammates unable to save him. Because of T-54 low profile and mountains around the battle, Striker cannot fire back.]] | ||
| + | |||
| + | Since "Supersonic" update it must stop before firing, so if surprising one - destroy it before it hit the brakes, make them panic and try to push vehicle around, ultimately dragging them into a wall. If the vehicle profile is low enough, a blind spot could be created and force the Striker to attempt a miracle shot, which is inaccurate and will not work, unless there is enough room for a missile to turn around. This provides an opportunity to take a free direct shot at crew compartment. | ||
=== Pros and cons === | === Pros and cons === | ||
| − | ''Summarize and briefly evaluate the vehicle in terms of its characteristics and combat effectiveness. Mark its pros and cons in a bulleted list. Do not use more than 6 points for each of the characteristics. Avoid using categorical definitions such as "bad", "good" and the like - they have a substitution in the form of softer "inadequate", "effective".'' | + | <!--''Summarize and briefly evaluate the vehicle in terms of its characteristics and combat effectiveness. Mark its pros and cons in a bulleted list. Do not use more than 6 points for each of the characteristics. Avoid using categorical definitions such as "bad", "good" and the like - they have a substitution in the form of softer "inadequate", "effective".''--> |
| − | |||
'''Pros:''' | '''Pros:''' | ||
| − | * | + | * Fast, even on stock modules |
| − | + | * Five ATGMs in rack means five shots without reloading | |
| + | * Smoke screen is not a liability for this vehicle and is unlocked earlier | ||
| + | * Infinite ammo in AB | ||
| + | * Can fire in covers like artillery, but more precise | ||
'''Cons:''' | '''Cons:''' | ||
| − | * | + | * No armour whatsoever, can be easily destroyed by heavy machine guns with 12.7 mm and any weapon larger than a 12.7 mm machine gun |
| + | * It is a large target and it's not easy to find cover that protects the weapon well | ||
| + | * Practically impossible to fire at long range without exposing the vehicle or using third person view | ||
| + | * Low ammo capacity with 10 ATGMs in RB | ||
| + | * Using it too well draws attention and may cause massive attacks of all kinds on the Striker's position | ||
== History == | == History == | ||
| Line 42: | Line 342: | ||
== Read also == | == Read also == | ||
| − | + | * [https://warthunder.com/en/news/4963-development-fv102-striker-five-missile-death-punch-en [Devblog<nowiki>]</nowiki> FV102 Striker: Five Missile Death Punch] | |
| − | * | ||
| − | |||
| − | |||
== Sources == | == Sources == | ||
| Line 51: | Line 348: | ||
* ''topic on the official game forum;'' | * ''topic on the official game forum;'' | ||
* ''other literature.'' | * ''other literature.'' | ||
| + | |||
| + | {{Britain tank destroyers}} | ||
Revision as of 23:42, 2 February 2019
Contents
Description
The FV102 Striker is a Rank VI British tank destroyer
with a battle rating of 8.3 (AB/RB/SB). It was introduced in Update 1.71 "New E.R.A."
The Striker is a direct upgrade to the Swingfire and is better than its predecessor in almost every way, even though it has its own problems. Just as the Swingfire, the Striker's purpose is to blast enemy out of cover by firing at them indirectly with easily controllable missiles, but it has some trouble at attacking long range, as BAe Swingfire missiles are slower than normal ones. It has a much better fire rate and bigger room for error than its predecessor however, due to having five launchers at once and being more mobile so its push-preventing powers are godlike, however, it has problems with firing downwards in front of itself.
Much like the Swingfire, it's a box with sloped front, however, it has a smaller profile than the Swingfire. It still has little to no armour and there are fewer points where the Striker can get shot without consequences. Still, the sloped armour makes it difficult to be destroyed with weaker machine guns, so the Striker should face the enemy's push direction, not just to make aiming easier, but to reduce the chances of being instantly destroyed. If the Striker is in a good enough cover, it's not important.
The first thing to notice about the Striker is a giant missile panel on its back. Being hit there lights the vehicle on fire, the missile area to light up like a firework, and be unable to fire back. As such, try not to get hit in the missile launch area. In case all of the ammo is spent, the rear is actually the safest place to be hit as only ammo and fuel is stored there and will otherwise be open space; it can even completely absorb artillery shots or fire from the BMP-1 cannon, which normally hull breaks or destroys the much better protected Warrior. The missile rack also covers the ammo rack from planes strafing from the sky, so as long as they can't fire inside of the vehicle, the Striker should be fine. In case the Striker get shots at an empty tube, there is a chance the entire rack wont break in one hit and the vehicle will still be able to fire, while having option to repair it back to 100%. Also, since the launcher is now closer to the front of the hull, the Striker cannot fire in 10 m dead zone in front, so try to destroy the opponents before the missiles go out of control.
On its mid-left, there is a commander cupola which has a machine gun on it. Not much to be said about it, at 8.3 it barely does anything, so use the machine gun to remove fences, since hitting anything with the Striker slows it down considerably. Fighting planes with this MG is redundant, it's easier to just fire ATGM at them and hope they care enough to disengage, but it can be done in RB just to do minor damage.
Slightly to the right, there is ATGM camera, the optics. Because of how it's placed, the Striker cannot fire down well, the inclination of +20° to the enemy ground increases the difficulty of firing down, as well as the major problem firing at people that is on the other side of the same hill. The Striker also cannot fire at long range without exposing itself or risking a complete miss. All of this is a downgrade from Swingfire. Accuracy problem can be somewhat compensated by extreme mouse manipulations in Third person view, as long as leading shots can be scored. However, it's better at controlling missiles, as long as the Striker stand on a semi-flat surface or have direct sight of the enemy. It's also better at aiming shots behind the Striker and at correcting missed shots.
Take the missile characteristics into consideration. The missiles start out to be slow and start increasing their speed with each second, becoming less controllable and taking crazy turns when trying to guide on target, so if there's something weird that needs to be done, it's better to do in close range from the third person view or in open fields. They still drop down on launch and take super sharp turns on new targets, so keep attention at where the missile is going, or it will hit the ground or overshoot. If there is nothing around the target, the missiles will hit whatever the reticle points at, even from one km away if still intact. In fact, it's usually so accurate, the missiles can even drop them below train carriages if someone uses them as cover. Only the missile the Striker launched last can be controlled though.
It may look like Striker is supposed to reload 5 missiles at once after it shot them all, but it's actually reloading them one by one at a certain rate, depending on crew skill. The ammo pool is shared. This can lead to an advantage in Arcade battles, as the ammo can be portrayed as limitless since tubes generally reload while guiding the missiles to the target, and a full ammo rearm time after spending all missiles is just 15 seconds, leaving most of them ready to fire again. However, missiles cannot be used recklessly as it still takes at least 8 to 12 seconds to reload one launcher. In Realistic battles, this advantage is less important since the Striker only has 10 shots, and being shot at missile racks explodes all the ammo in the launcher, leaving the Striker with even less. In short: Practice the Striker's aim in AB and abstain from RB until able to control the missiles properly, having a wasteful attitude to missiles and missing shots will force a constant rearming period at a control point.
The mobility of the Striker is better than of the Swingfire's, so it can actually get to capture points along with the team's push, so the Striker can assist in intercepting and destroy enemy team while rearming at the point. If travelling by asphalt roads with all the upgrades, the Striker can temporarily reach a maximum speed of 87 km/h. This is possible because Striker is much lighter than the Swingfire. Unfortunately, the lighter hull is easier for the enemy to push around, temporarily disabling the weapon and potentially ramming the Striker into a wall. It is important for the Strikers to take mobility upgrades as soon as possible, because:
Brakes are vert important in towns, as stopping one moment too late can push the Striker out of cover and now the vehicle is exposed at the mercy of medium tanks, who would most likely really hate missile launchers, or are just more than happy for an easy target. Better brakes also help in hill battles, especially when the Striker gets flanked and need to do something about it. Also, since the "Supersonic" update, the Striker can no longer fire on the move, so better brakes = less time taken before the Striker can actually fire.
Maximum inclination upgrades allow the Striker to climb hills and mountain rocks better, and also stay on them. The Striker may have issues with controlling missiles when not staying on flat terrain, but getting a good sight on choke point is still a major benefit, as attacking position when it's raining missiles is scary, even if they don't really destroy anyone. And if accurate enough at angling missiles despite this problem, they are all doomed regardless of their numbers.
The Striker is slower than light tanks, so unless the scouts are willing to take a hit for the Striker, there's no expectation to take cap points solo, or get there first, so that's out of the question. But getting better acceleration from modifications and keeping map situation in mind still can make a difference, because, despite the "Supersonic" update removing the ability to fire on move, the Striker can still fire a missile and follow it, as it guides the missile onto the enemy. That way, the missiles can be fired and make the enemy think otherwise while the Striker moves to the next cover. Even if that is not enough to deter them, more missiles can just be fired at the next stop.
General info
Survivability and armour
Armour type:
- Aluminium Alloy AA7017
| Armour | Front (Slope angle) | Sides | Rear | Roof |
|---|---|---|---|---|
| Hull | 25 mm (69°) | 12.7 mm | 12.7 mm | 12.7 mm |
| Turret | 0 | 0 | 0 | 0 mm |
| Armour | Sides | Roof | ||
| Cupola | 25 mm | 12.7 mm |
Notes:
- Suspension wheels and tracks are 15 mm thick
- Belly and hull undersides over the tracks are 12.7mm thick
- Outdoor ammo rack is 50 mm thick everywhere, except hinges that are 10 mm thick
Crew
- Commander
- Loader
- Driver
Total: 3 Crew members
Mobility
| Mobility characteristic | ||
|---|---|---|
| Weight (tons) | Add-on Armour weight (tons) |
Max speed (km/h) |
| 8.3 | N/A | 87 (AB) |
| 80 (RB/SB) | ||
| Engine power (horsepower) | ||
| Mode | Stock | Upgraded |
| Arcade | 270 | ___ |
| Realistic/Simulator | 168 | ___ |
| Power-to-weight ratio (hp/ton) | ||
| Mode | Stock | Upgraded |
| Arcade | __.__ | __.__ |
| Realistic/Simulator | __.__ | __.__ |
Armaments
Main armament
| 164 mm Robot-52 (SS11) ATGM | |||||
|---|---|---|---|---|---|
| Capacity | Vertical guidance |
Horizontal guidance |
Stabilizer | ||
| 10 | N/A | N/A | Two-plane | ||
| Turret rotation speed (°/s) | |||||
| Mode | Stock | Upgraded | Prior + Full crew | Prior + Expert qualif. | Prior + Ace qualif. |
| Arcade | 18.6 | __.__ | __.__ | __.__ | __.__ |
| Realistic | 12.6 | __.__ | __.__ | __.__ | __.__ |
| Reloading rate (seconds) | |||||
| Stock | Prior + Full crew | Prior + Expert qualif. | Prior + Ace qualif. | ||
| 0.6 | __.__ | __.__ | __.__ | ||
Ammunition
| Penetration statistics | |||||||
|---|---|---|---|---|---|---|---|
| Ammunition | Type of warhead |
Penetration in mm @ 90° | |||||
| 10m | 100m | 500m | 1000m | 1500m | 2000m | ||
| BAe Swingfire | ATGM | 500 | 500 | 500 | 500 | 500 | 500 |
| Shell details | |||||||||||
|---|---|---|---|---|---|---|---|---|---|---|---|
| Ammunition | Type of warhead |
Velocity in m/s |
Projectile Mass in kg |
Range (m) | Fuse delay
in m: |
Fuse sensitivity
in mm: |
Explosive Mass in g (TNT equivalent): |
Normalization At 30° from horizontal: |
Ricochet: | ||
| 0% | 50% | 100% | |||||||||
| BAe Swingfire | ATGM | 250 | 37 | 3,000 | 0.0 | 0.01 | 4550 | +0° | 80° | 82° | 90° |
Ammo racks
| Full ammo |
1st rack empty |
2nd rack empty |
3rd rack empty |
Visual discrepancy |
|---|---|---|---|---|
| 10 | XX (+XX) | XX (+XX) | XX (+XX) | No |
Machine guns
| 7.62 mm L37A1 | ||||||
|---|---|---|---|---|---|---|
| Pintle mount | ||||||
| Capacity (Belt capacity) | Fire rate (shots/minute) |
Vertical guidance |
Horizontal guidance | |||
| 2,500 (100) | 650 | __° | __° | |||
Usage in the battles
Moving around: Find building, teammate, hill, or rock that is as tall as the hull of Striker, then find the enemy and destroy them using the ATGM. Use the machine gun only for destroying fences and against planes. In other words "Be sneaky and shoot at range".
Driving out in the open will not end well for the Striker, unless the enemy has someone else to shoot. The Striker can drive around in enemy sight, but make sure that they are afraid and in cover, or at least can't fire at the Striker first before the Striker sends a missile their way. The Striker can use the opposite side of cover that the enemy is using, as long as the missiles can fire at them from above and the Striker isn't opened for flank shots. At that point, it doesn't matter if they know where the Striker is.
In extreme situations, the Striker can be sacrificed by driving straight to cover inside of enemy territory (preferable at start of the match), hoping that nobody expects missile launcher of all things to drive right into "their" part of the map and ruin their plans. There are several examples of this tactic:
As the right-side team on the "Vietnam" map, the Striker cannot hope to take hold of C capture point, as left team has absurd advantage over that capture point. Even the idea of it is so unthinkable, that nobody even checks the river near to town (and even if they do, using both smoke launchers can give enough breathing space to get past them), so the Striker can dash to the river entrance of C cap point, which is exactly the size of Striker and is heavily fortified from every direction, and attempt to destroy entire enemy team right there, as it tries to leave C. Not only the chance of success is quite high, as heavily insulted enemy team will probably come straight at the Striker's position, but even if this fail, teammates can snipe remaining opponents with little to no effort as they converge onto the Striker's position here.
As the south-side team in "American Desert", A point only variant, it is possible to use the road to reach max speed and then fall off the cliff straight into the cover below, then immediately proceed to fire at completely confused enemy team. There is high chance of being shot mid-air or breaking the tracks due to fall damage, however, sometimes this idea is just crazy enough to work, and if they fail to stop the Striker in time, then entire enemy team is at the Striker's missile's mercy. At this point, the Striker should take out as many of them as possible, preferably pushing them back to their spawn point or even destroying them all.
Note that this rush tactic is not feasible without spaded vehicle, as it's significantly harder to hit a Striker when it is driving at 60-87 km/h, compared to 40-60, weaker suspension may stop the Striker from moving altogether after hitting any bumps on a road, weaker tracks tend to break easier, and so on.
Combat and teamwork: Striker excels at holding choke points and indirect horizontal missile fighting, so just give the enemy something to think about by firing 1-2 missiles at their corner, then use their confusion and fear to get closer and adjust their aim, then actually blow them up. If they try something as stupid as rushing without smokes, show no mercy and fire all launchers, until they are crippled or destroyed.
Having scout vehicle working with the team to actually mark enemy through walls and smokes is best. Having someone to draw attention from the Striker, like a Chieftain tank, is even better, as nobody normally prioritizes the innocuous Striker, especially if next to a bunch more scarier, tanky teammates.
When choosing choke point, aim for certain criterias to be flexible if trying make a difference:
- Can this help at holding control point from here? Can the Striker destroy the enemy before they can run away?
- Is it fortified to a point it's impossible to take out the Striker without heavy losses or air support?
- Can the Striker control more than one direction from here?
- (In RB) Can the Striker rearm fast there?
Gallery of examples:
A Mozdok choke point. Note that the Striker can control entire front-line and can decimate anyone on B point. There is nothing enemy team can do about it, but attempt to flank the Striker through the directions also in the Striker's firing lines. The Striker can also pop smoke and escape to B, in case if they flanked the position, called air support, or the Striker simply need to rearm.
If without modifications or prefer something more fortified, choose unorthodox covers like the C choke point on Tunisia. It's hard to see it coming, the Striker can fire upon anyone trying to drive around C point, Artillery almost never fires on rocks, there are covers from planes with the mountains nearby, and there is only 2 entrances to this hideout, which are hard to even get to. However, like with all good positions for Striker, the team has to protect the right flank, as the Striker can get shot if the enemy team controls the B area or use river entrance to flank.
Alternatively, the Striker can attack capture point itself and use buildings as a shield (pictured left). Use the missile's mobility to attack everywhere and push the enemy back. This kind of attack is very risky and reaction based and tables can quickly turn. Immediately seek a hiding place as the enemy can pinpoint artillery onto the Striker's location.
Surviving counterattack: The Striker's actions will draw attention, so expect to be bombarded by artillery almost constantly. Standing under artillery fire is a bad idea, but at some point it will be required to tough it out, hoping the blasts or shrapnel won't end the Striker. However, focus at stopping whatever called the artillery, as enemy tanks probably will come after the bombarded area soon enough. If just focused on the artillery, keep in mind that it has fewer chances of hitting the Striker on mountain rocks and other unorthodox types of cover, especially if close to several covers at once. However, it's harder to be protected against vehicles on unstable steep surfaces and without direct sight.
If someone is rushing towards the Striker's position, keep calm and turn as much attention as possible to the direction of assault. First disable everyone's gunner, turning while guiding missiles. Weak machine guns have problems with disabling the Striker's weapon system from the front, so medium and heavy tanks are a priority. Once everyone is pacified, destroy them. Don't attempt an escape, unless in need of some convenient temporary cover, there is no way the Striker will outrun a bunch of tanks with cannons without fighting them back first.
In case only the hull can be hidden, and the enemies got the weapon constantly in field repair mode, force it into manual repairs, allowing the Striker to fire back in desperate situation. Unlike field repair, manual repair is not prevented by continuous attacks on launcher, sometimes restoring the launcher to 100% right after enemy hit. Granted, not every enemy will just stand and fire at the launcher for 14-34 seconds, however, that knowledge can help in expediting the enemy's destruction. Manual repair can be prevented by hitting the missiles in the rack and setting the vehicle on fire, which is likely to happen, since finishing repairs causes reloading to resume, so start firing immediately.
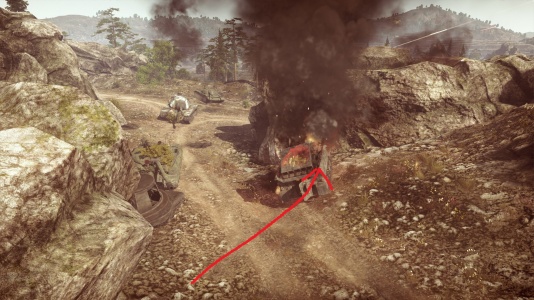
Last stand failure: Operator failed to destroy even one of enemy tanks with 6 shots because he panicked. After that, he tried to run to cover, exposing vehicle's side to one of the opponents, and is ultimately destroyed by a third opponent, because striker cannot fire ATGM while moving, only guide them. Moral: If caught in open - fight till the bitter end.
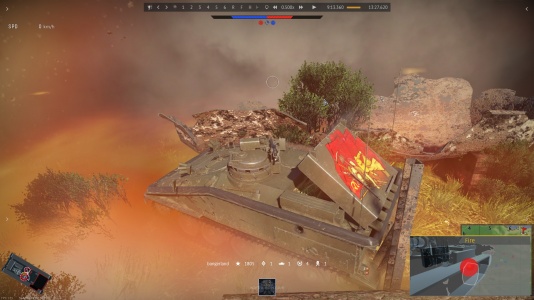
Last stand success: Despite being severely damaged, striker managed to hide all vital points in between damaged cistern and wooden logs, minimizing chances of being obliterated by massive artillery barrage, being shot to the hull, or rammed to smithereens, and proceeded to fire at incoming enemy in cold blood, despite being alone in literal hell. Moral: even if entire enemy team fires onto the position, as long as the player remains calm, the Striker can survive or destroy most of them before perishing.
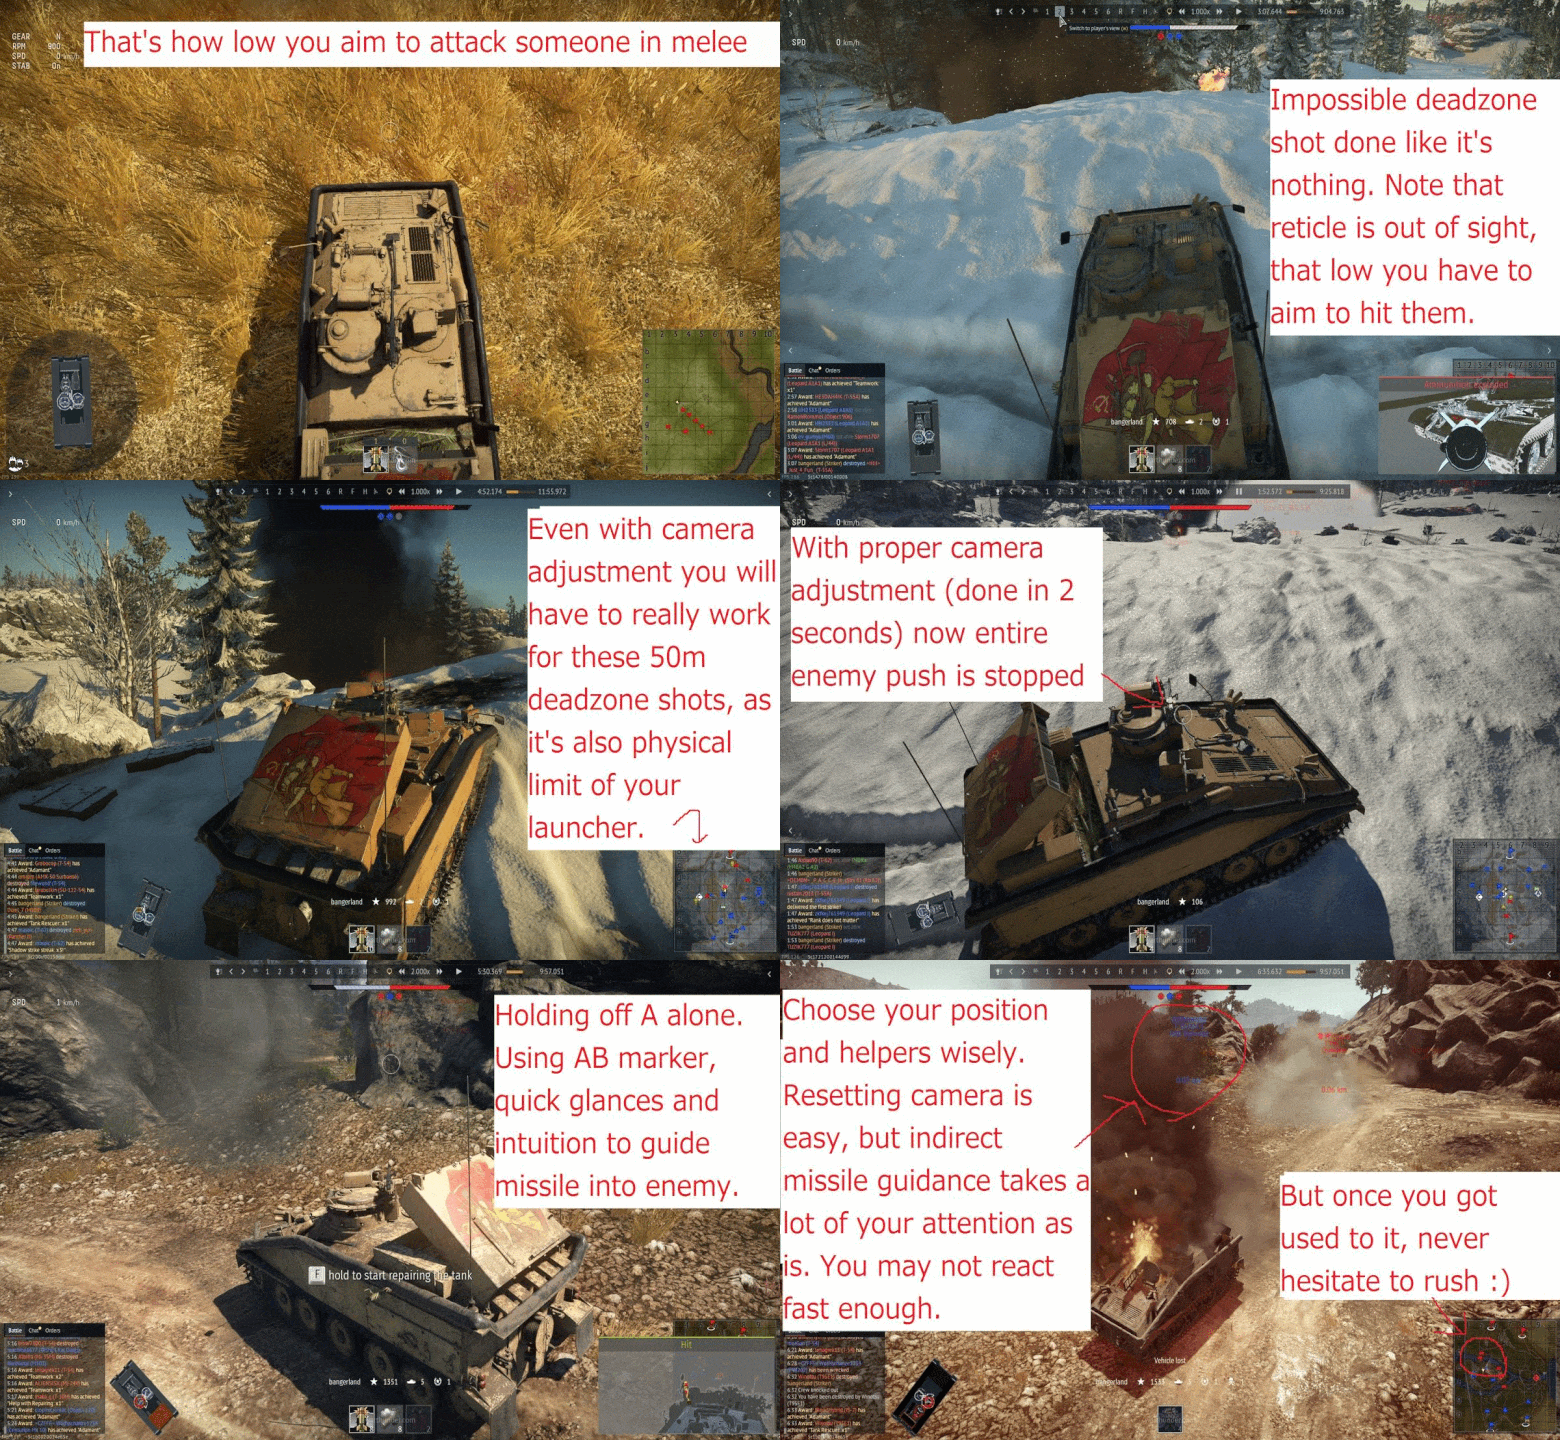
Overcoming dead zones and other weaknesses of a vehicle: Since Striker is unable to fire in sniper mode without exposing itself, most enemies will have to be attacked indirectly regardless of range. This may seem extremely harsh at longer ranges, however, when the turret loses direct sight on the missile and the target at the same time, the missiles are then controlled by movements of the turret (therefore, directly guided by the mouse, not by the targeting reticle.). Since BAe Swingfire missiles are very slow and mobile, they can be directed wherever necessary, negating sniper aim disadvantage by some extent. Regaining control over missile will send it into a crazy spiral and/or towards the targeting reticle, so try to avoid it, unless the Striker's position is suddenly compromised.
Mostly this kind of attack is done in third person view, as sniper mode restricts the vision way too much, and missiles are way too sensitive for it, even at 800 m range.
This allows the Striker to attack the enemy from extremely advantageous angles. First, position in such a way that the Striker can launch missiles using semi-auto mode in general direction of enemy outside of the line of control (behind terrain, high ground, or building). When choosing the place, make sure that the Striker is also stable, as even moving it a bit will make missiles take unexpected turns. When the missile goes out of the turret's sight, direct it into enemy's weak spots by moving the mouse. That way, the Striker can hold off entire army's of tanks and attack fortified positions without ever being critically hit, or even seen while being in the middle of the enemy ground.
This way of firing adds another problem - there are still dead zones (because of launcher's placement and turret's camera's inability to look down) and also blind spots, because it is hard to see what the missiles are heading towards (due to how camera works and the angle of missile's launch), and "directing" missile still moves the camera, usually into the ground, obscuring direct vision. To overcome this and become even stronger, activate "relative camera control" in the "control-tank-view in battle - Ground (y/x axis)". For specific settings and control explanations relate to the screenshot to the right.
Basically, this will temporarily detach the camera from the reticle by a certain degree. Be extremely careful when using this option because it makes the Striker specifically designed for close or ultra long range combat or battles at certain altitudes, and the camera must have a reset and apply button on hand, in case anything unexpected happens. In case everything goes wrong, the Striker still can use sniper mode, as it's unaffected by camera modifiers and will still guide missiles straight into the crosshairs.
Specific enemies worth noting
Other ATGM launchers: Don't fight them directly at close range, it will be foolish. Instead, bait enemy closer to cover, then just destroy them by firing over it. Another way is to just set them on fire and let them burn, there is nothing they can possibly do about it themselves.
Light tanks and SPAA: As fun as it may be to trigger them by firing all over their cover, they still can destroy the Striker easily and have enough speed and mobility to actually do that. Let them ignore the Striker and do their business, though keep an eye on them. If they try something sneaky - destroy them. If it's possible to hit them within first two shots to trigger hull break - do it.
Soviet tanks: Aim for the hull, as it usually destroys or immobilizes them. Aiming for right (their left) side is better for self-defence. They are also more dangerous than German ones, so prioritize them over others.
Helicopters: In case the Striker provokes half of the enemy team and didn't succumb to artillery, they will probably send one of these flying birds directly at the Striker's location. If they have ATGM, immediately run behind some tall cover and fire back with a missile. If they are too far away, there is not much the Striker can do. Rockets can destroy the Striker as well if the pilot manages to carpet-bomb the position, so helicopters should be prioritized as a target and a threat.
Counter-tactics
Don't attack the enemy's position without artillery support and smoke screens. If Striker is using single fortified position and can't move, an option is to fire smoke shells at it to not only protect oneself, but blind it altogether. (just make sure they don't have friendly scout vehicles around, otherwise there is a chance they will be able to guide missiles towards a covered position.)
If it exposes its missile racks, fire at it with explosives or autocannons. After breaking it, destroy the hull. The front of Striker may be surprisingly resistant to machine gun fire, however, if in possession of high calibre machine guns, move around Striker and penetrate its back or sides with them.
If attacks didn't set Striker on fire, it will be about 9 seconds before the Striker repaired the launcher back. Firing at launcher again will reset the "field repair" timer, so take some time after a successive hit. Try firing at different tubes, if need be, it may set the vehicle on fire if actual ammo is hit.
It has problems firing at the opposite side of the same hill if it's too steep. It will not help destroy a Striker, but at least the location is somewhat safe.
It's best to attack from many directions at the same time, preferably from behind. Even better if the operator didn't see it coming. Sniping and terrain based flank are working better in arcade battle, while sneak attacks are more reliable in realistic battle.
Don't forget that it can fire from any sort of cover. Aside from already mentioned steep hills, its firing potential is only limited by operator's skill, as Striker is better at leading missiles behind it.
Destroy its weapons if unable to take out its gunner reliably before it fires the missiles. A cornered enemy is the most dangerous one. However, remember, that it does not have hull-break. The only real way to destroy it is to attack the hull or set it on fire.
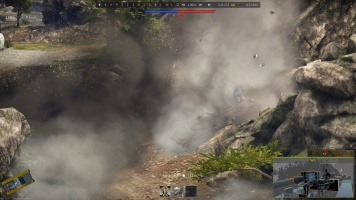
Since "Supersonic" update it must stop before firing, so if surprising one - destroy it before it hit the brakes, make them panic and try to push vehicle around, ultimately dragging them into a wall. If the vehicle profile is low enough, a blind spot could be created and force the Striker to attempt a miracle shot, which is inaccurate and will not work, unless there is enough room for a missile to turn around. This provides an opportunity to take a free direct shot at crew compartment.
Pros and cons
Pros:
- Fast, even on stock modules
- Five ATGMs in rack means five shots without reloading
- Smoke screen is not a liability for this vehicle and is unlocked earlier
- Infinite ammo in AB
- Can fire in covers like artillery, but more precise
Cons:
- No armour whatsoever, can be easily destroyed by heavy machine guns with 12.7 mm and any weapon larger than a 12.7 mm machine gun
- It is a large target and it's not easy to find cover that protects the weapon well
- Practically impossible to fire at long range without exposing the vehicle or using third person view
- Low ammo capacity with 10 ATGMs in RB
- Using it too well draws attention and may cause massive attacks of all kinds on the Striker's position
History
Describe the history of the creation and combat usage of the ground vehicle in more detail than in the introduction. If the historical reference turns out to be too big, take it to a separate article, taking a link to an article about the vehicle and adding a block "/historical reference" (example: https://wiki.warthunder.com/Name-vehicles/historical reference) and add a link to it here using the main template. Be sure to include links to sources at the end of the article.
Media
An excellent addition to the article will be video guides, as well as screenshots from the game and photos.
Read also
Sources
Paste links to sources and external resources, such as:
- topic on the official game forum;
- other literature.
| Britain tank destroyers | |
|---|---|
| Infantry tank derivatives | Archer · Gun Carrier (3-in) |
| Light tank derivatives | Alecto I |
| M10 Achilles | Achilles · Achilles (65 Rg.) |
| Centurion derivatives | FV4005 · Conway |
| ATGM | Swingfire · Striker |
| Other | Tortoise · ▄M109A1 |
| Canada | QF 3.7 Ram |
| South Africa | G6 · ZT3A2 |


