
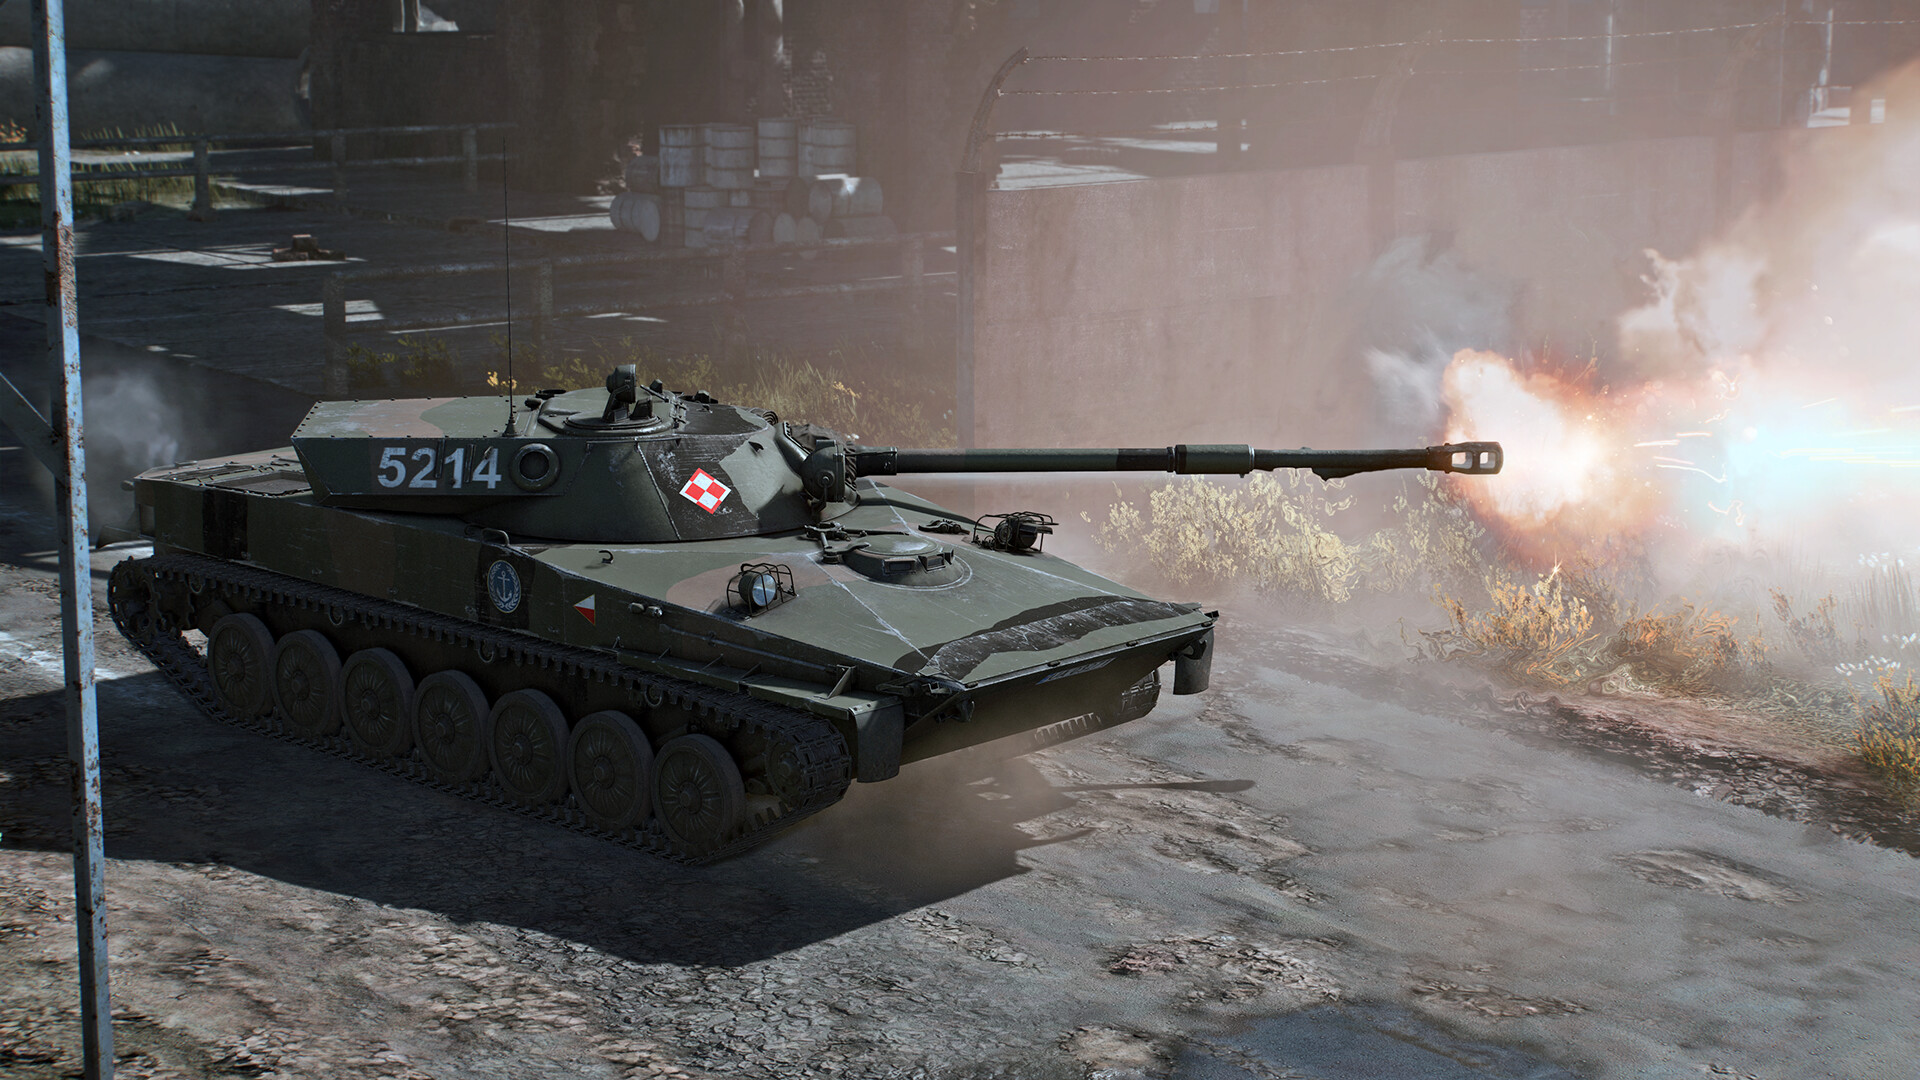
The Object 906 was intended to be a better replacement for the PT-76, with better NVD, mobility, and a better gun. Both of these vehicles were intended to be amphibious scout vehicles, a role they performed very well. In-game, the PT-76 is very underwhelming, however the Object 906 is the opposite of that. When played correctly, it can quickly turn into possibly the most dangerous vehicle on your team. Below, I’ll go over how to play it, its strengths and its weaknesses.

| Pros | Cons |
| Great mobility, top speed, and handling | No armour |
| Access to good shells | Slow acceleration |
| 4.3 second autoloader | No gun depression |
| Low profile |
Main Armament — the 85 mm D-58 cannon
The main gun on the Object 906 is possibly the best gun among all its contemporaries, despite not having the penetration to match. There are a couple of reasons for this. Firstly, it gets access to a high velocity, high penetration APCBC (it has explosive filler) round. As to why that’s good, it creates an explosion inside of the tank, making it easier to one-shot upon penetration. In comparison, a HEAT-FS round or APDS round, commonly found on enemies, either relies on spalling produced upon penetration (APDS) or on a jet of metal with very little spread but high damage upon hitting anything (HEAT-FS), both requiring careful aiming. The 85mm APCBC is an amazing round, and while it doesn’t match other weapons in penetration, the 4.3 second autoloader on the vehicle makes up for it. It means that for some enemies, like the M60, for every round they fire, you can shoot two. Not only that, the rounds you shoot are just better (apart from in penetration).
As mentioned before, the penetration is the only real drawback here. The APCBC round has 245mm of penetration at point blank. This is more than workable so long as you know the vehicle’s weakspots and can target them accurately. To help with that, the gun is fully stabilised, in both planes, all the way up to your top speed, allowing quick and accurate shooting and hit and run tactics. Many of the early MBTs you will face lack any kind of stabiliser, so you having one should be abused to the maximum. There are other shells, however typically the APCBC is the main-anti armour shell.
Be aware there are only 15 rounds in the ready rack.
| Shell | Type | Penetration at 100m on a flat surface | Muzzle velocity | Usage |
| BR-372 | APCBC | 242mm | 1040m/s | Main anti-armour shell due to explosive filler. Enough penetration to get job done, and really likes exposed sides of tanks. |
| OF-372 | HE | 27mm | 1010m/s | High explosive shell, for light vehicles, open-tops or SPAAs. Something like an M3 Bradley might tank this round, so only use on very lightly armoured vehicles. |
| 3BK7 | HEAT-FS | 300mm | 925m/s | Shell for more heavily armoured targets. Will only rarely be needed against vehicles like the Maus. |
As stated before, while it lacks the 400mm of penetration commonly found in foe’s shells, the 4.3 second autoloader and explosive filler make up for it. Horizontally, the rotation speed is 14°/s, and vertically it is 3.1°/s, with a maximum and minimum elevation/depression of -5°/20°, which is fairly respectable for a Soviet vehicle. This allows you to quickly swing the gun on target.
Main Armament Comparison
This is intended to give an overview of guns found on its peers. One thing to note is you will almost always out-reload vehicles.
1. The L7 cannon and subsequent variants.
Variations of this gun are found on many vehicles, with the Centurion Mk10 being the original.
The Centurion Mk10 has a HESH round with 127mm of penetration, easily capable of taking you out, and an APDS round with 350mm of penetration, once again easily able to take you out if placed correctly. With an 8.7 second reload, you can easily out-reload it.
This is also found on early variants of the venerable M60 family. Again, it has a reload over twice the length of yours, and two much higher penetrating shells. One is an APDS shell, with 350mm of penetration, and the other is HEAT-FS, with 400mm of penetration. You might be able to take a hit from the APDS shell, but not the HEAT-FS shell. Both the HEAT-FS shell and the APDS shell have higher velocities, at 1174m/s and 1478m/s respectively. Not only that, it has a HESH shell with 127mm of penetration. Easily the main advantage you have is the explosive filler and post-pen damage. This gun has its advantages and drawbacks, as does yours, and I think both guns are about equal.
The Leopard 1 has identical gun characteristics to the M60, with the exception of the smoke shell, which it lacks.
2. The 105 mm CN105-57 cannon (or CN105 G1)
These guns are found on the DF105 and CLOVIS in the German and French tech trees. They are also equipped with an autoloader, only it is 5 seconds, making you marginally faster. The main offensive shell is the OCC 105 F1, a HEAT shell with 400mm of penetration. This, like the previous HEAT-FS shell, can overpressure you easily, however so long as you get the first shot off, you should be able to deal with any vehicles armed with this gun easily enough.
3. Most French guns that you’ll see
For whatever reason, most French heavy tanks, and some medium tanks, have autoloaders, some of which actually reload faster than you. Specifically, vehicles like the Somua SM, the AMX-50 (TOA100), and the Lorraine 40t have 4 second autoloaders, slinging a 100mm shell with 273mm of penetration but no explosive fillers and a slightly lower velocity at rapid intervals; with French heavies like the AMX-50 Surbaissé and Surblindé having a 120mm cannon and a 6 second autoloader, firing shells with no explosive filler, slightly higher velocities, and 301mm of penetration. All of these guns are serious threats, especially as some of the vehicles are so heavily armoured.
Secondary armament
This is a singular 7.62 machine gun, only useful for very lightly armoured targets or exposed crew. It’s a very niche weapon, and can be used for clearing obstacles.
Armour and Survivability
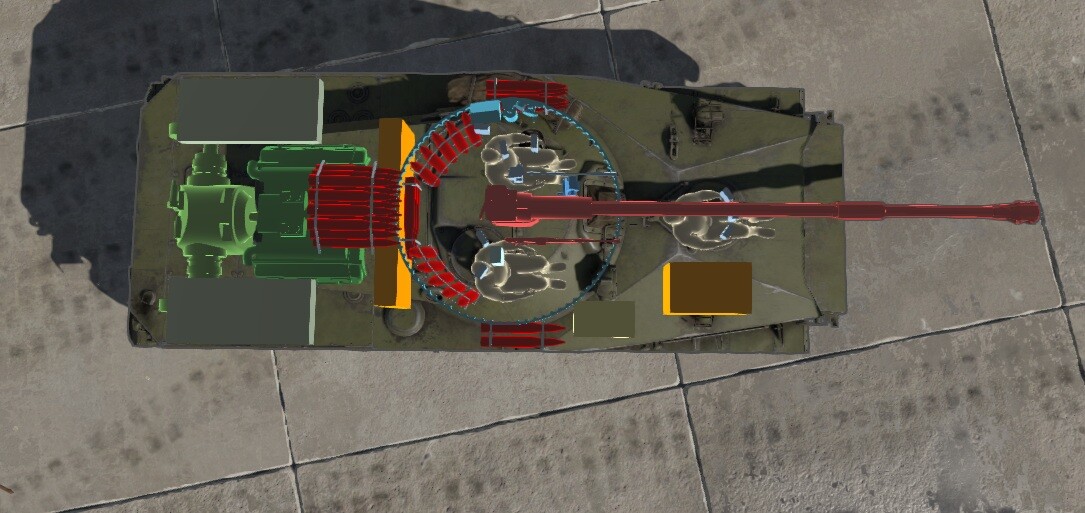
As with many light tanks, the Object 906's armour does not hold up very well. The hull armour, all the way around, is actually resistant up to 20mm. 20mm calibre weapons and above will rip into your armour. Not only that, but the turret cannot resist .50 calibre and above, meaning any tank with a roof mounted .50 calibre machine gun can kill the two crewmembers in the turret.
Don’t ever engage in reloading contests, because if you miss your shot and they don’t, only you’ll end up dying. This also means due to the armour, you need not to be reckless, as this will only end up with a dead Object 906 that has contributed nothing.
When it comes to survivability, it is again almost non-existent. It’s best to stay hidden. Most chemical munitions can overpressure you, you have two crewmembers tightly packed in the turret meaning a single well placed round can kill you, and not only that, lots of the ammunition stowage is in the back of the turret or under the autoloader, meaning sometimes a shot there is all that is needed to end you. No matter how much ammunition you bring, it will end up in a terrible place, and typically if a round penetrates you, you die. Don’t rely on your armour to do anything, instead try to stay hidden and out of sight.
Mobility
The mobility of the vehicle is very impressive, with only one factor holding it back.
Your forward speed is 74km/h, as is your backwards speed, allowing you to quickly enter/exit confrontations as you wish. The engine has 300hp, giving a 20.3hp/t due to the light weight of 14.8 tonnes. The vehicle turns well, can drive up hills very easily, and does lose that much speed in a turn, even though you might swing about slightly. In general, the vehicle handles nicely in both forward and reverse.
The one drawback of the vehicle is the acceleration, which is rather underwhelming. It takes a while to reach your maximum speed, however in reverse the acceleration may feel fine due to the terrible reverse speed on other vehicles, despite being the same.
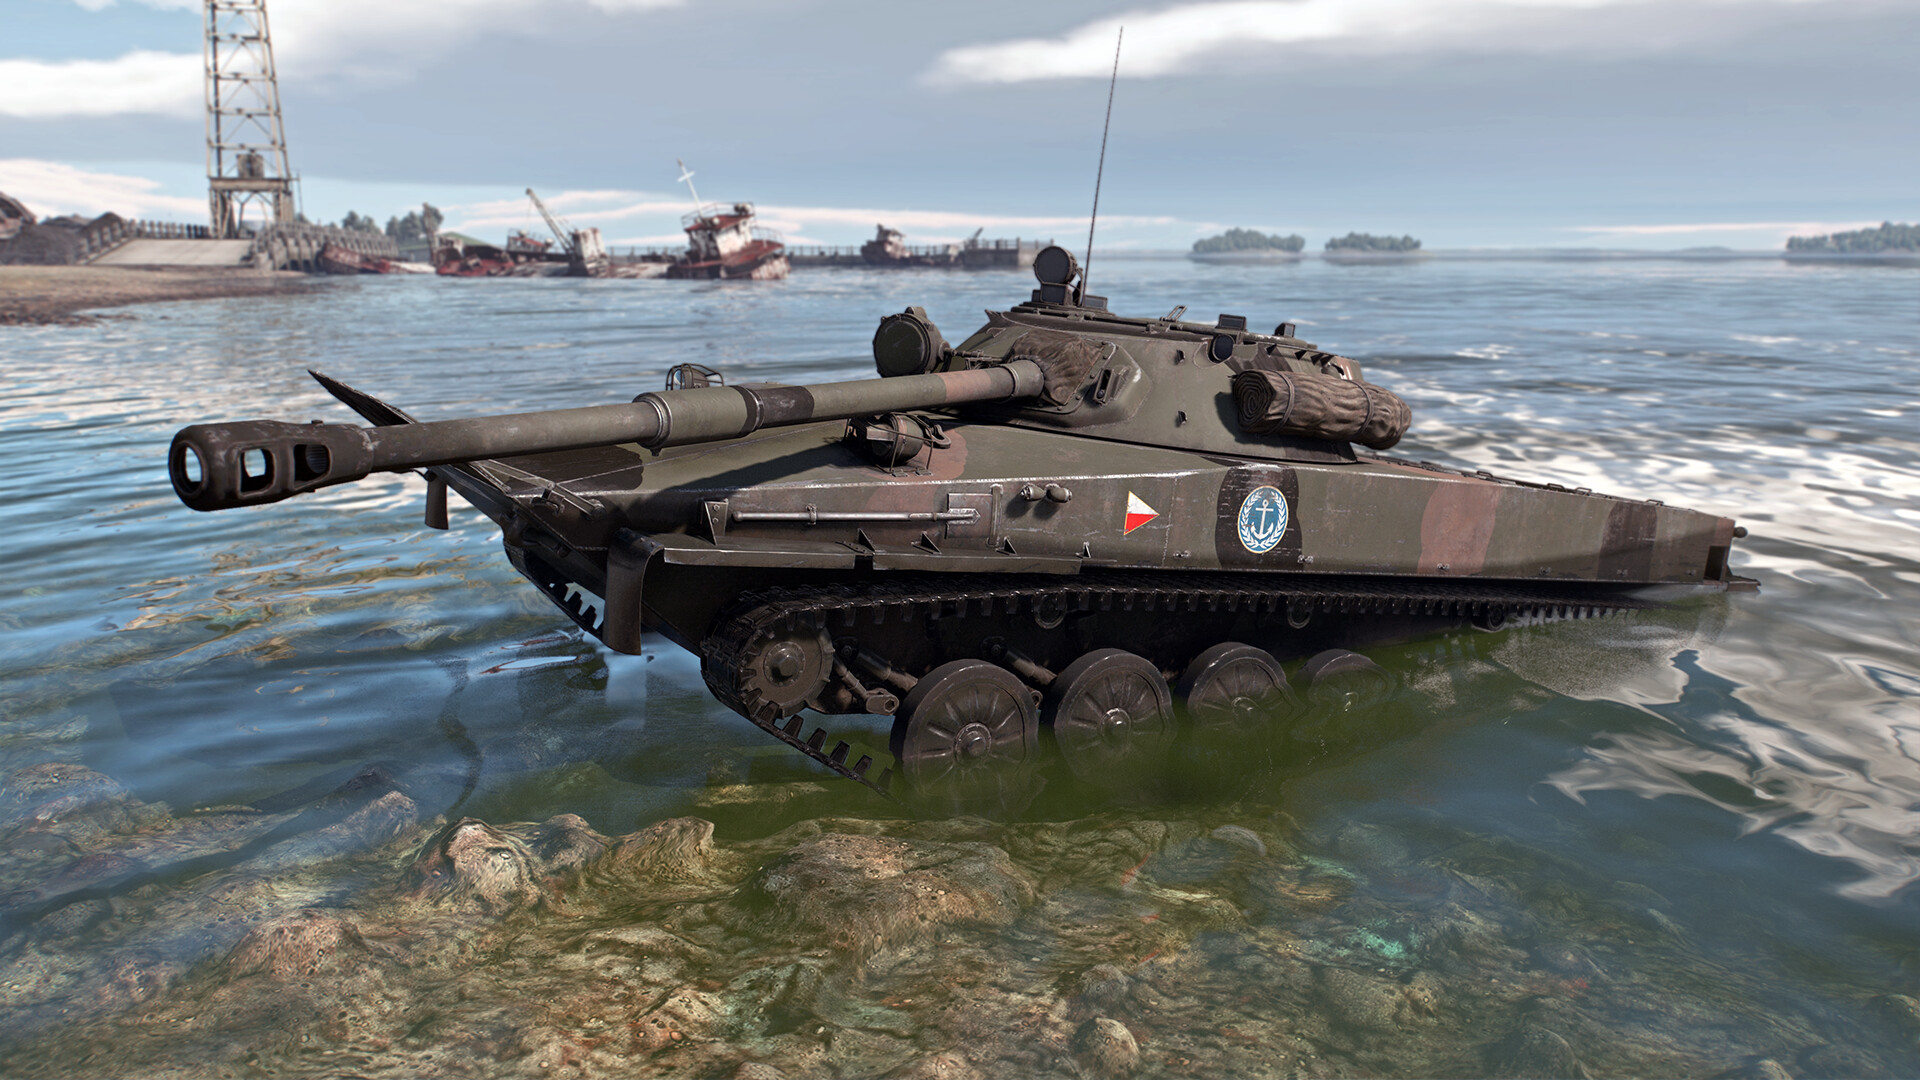
One other perk of the vehicle is that it is amphibious. On the right map, with a river flowing in the right place, it allows you to be an absolute nuisance with your stabiliser, with ambush attacks. Be aware your top speed in water is much, much lower than on land, so only enter the water near ambush sites.
Other Gimmicks
The Object 906 also comes with NVD for both the driver, commander, and gunner, along with ESS to help cover escapes and disguise advances.
Playstyle
There is one main playstyle for this vehicle, involving abusing many of the main advantages that this tank has.
Firstly, you should try to get into a key position, not necessarily a point but maybe somewhere with view over high traffic lanes, as fast as possible with your excellent mobility. This includes getting into a flanking spot at the side of the map, allowing views of the exposed sides of the enemy. These spots allow you to set up an ambush.
Make sure you won’t be spotted and wait for enemies, or multiple enemies, to drive by, and use the 4.3s reload on your vehicle to ambush them. Once you have dealt with the enemies, move to another spot and carry on what you were doing.
This is assuming a few things. First of all, that you don’t run into an enemy while moving to your first or next spots. If that does happen, try to evade their first shot, which, depending on the vehicle, will allow you to get multiple shots off with the help of your stabiliser. Make sure to try to use cover to advance and keep you undetected.
Secondly, if someone gets a pinpoint on your location, use the amazing reverse speed and leave. You can use the ESS to help with this, and if you think it will last for too long, it won’t — if you hold the button for the activation of your ESS while it is active, you can turn it off.
As you have probably figured, this is an ambush vehicle, best suited to the ground version of 'boom and zoom', allowing quick kills. The amphibious nature of the vehicle can help as well, by hiding in a river, a place where not many people would expect you to appear. Those are great ambush spots, however it is very situational and hard to escape a river like that.
Notable Enemies
There are many dangerous enemies you can face. I’ll group them by class, armament, or country, and provide penetration maps to better illustrate weak points.
1. The Maus

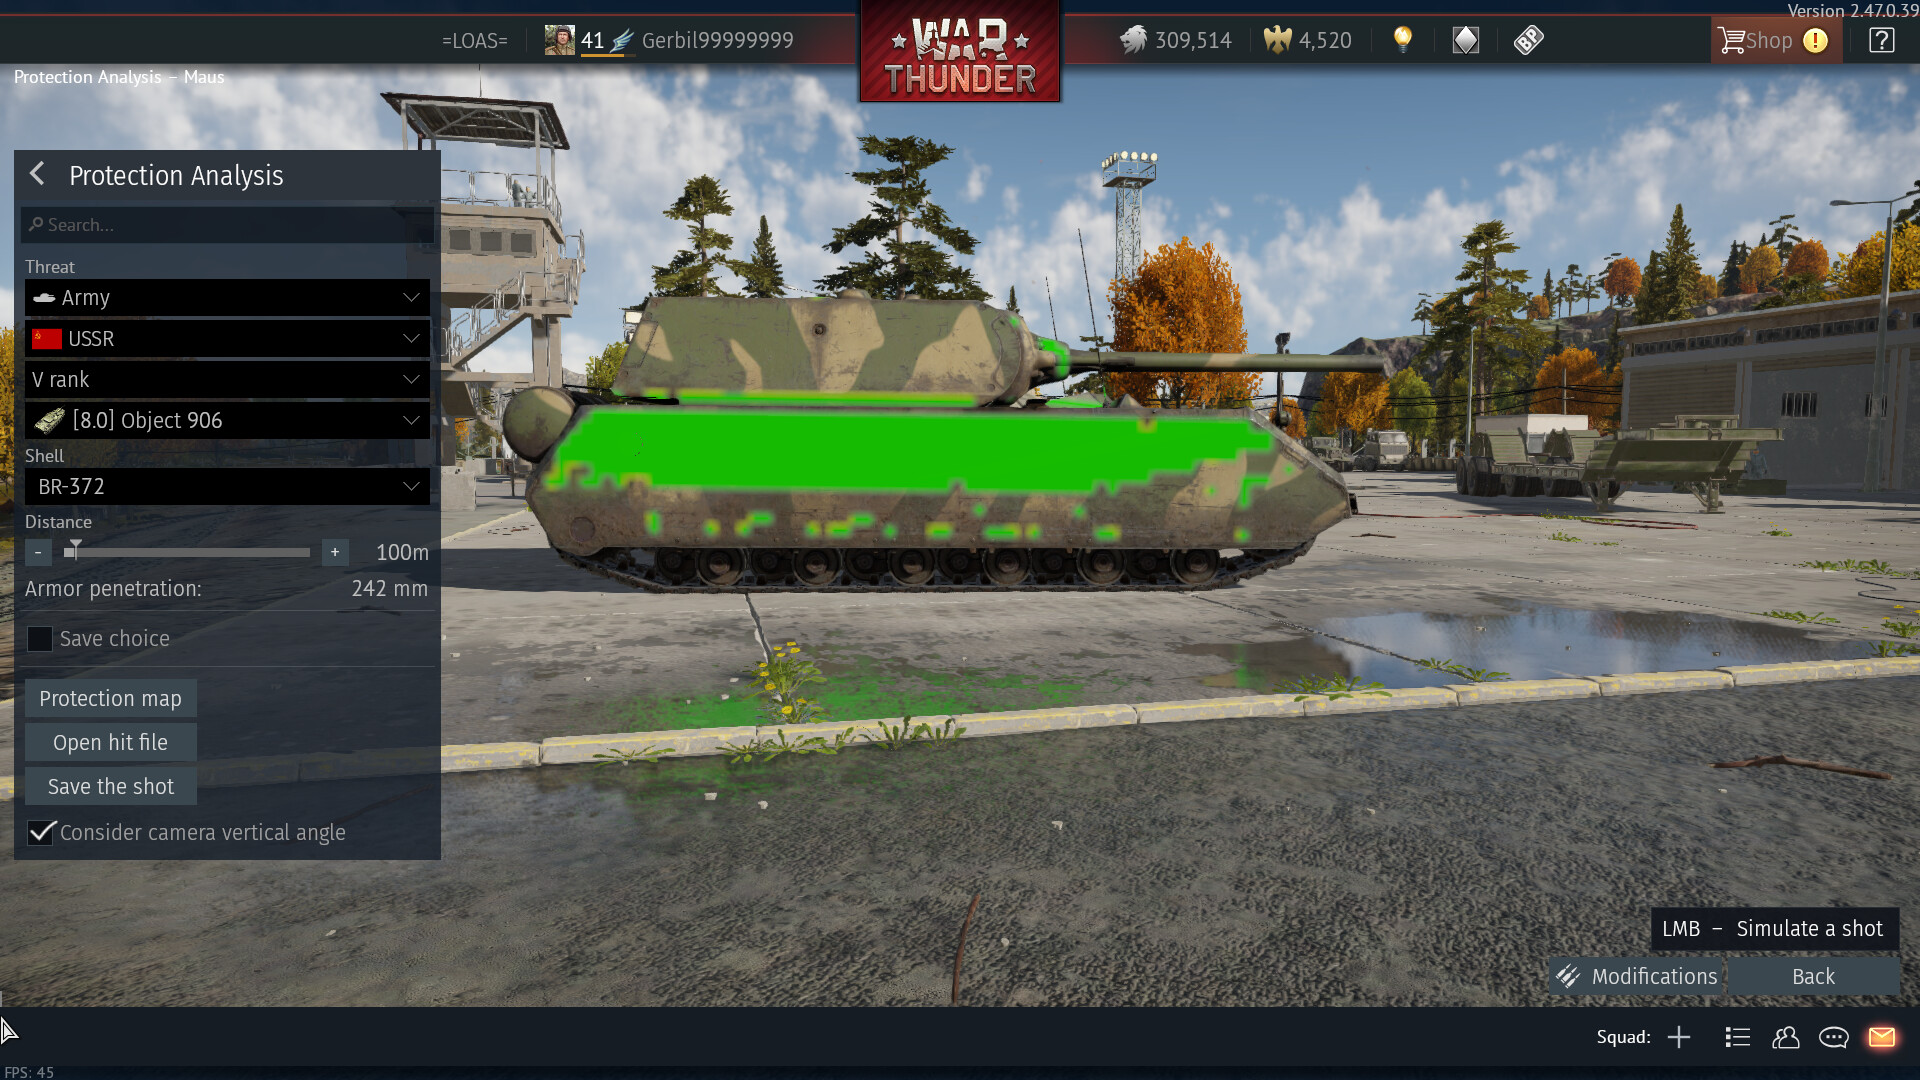
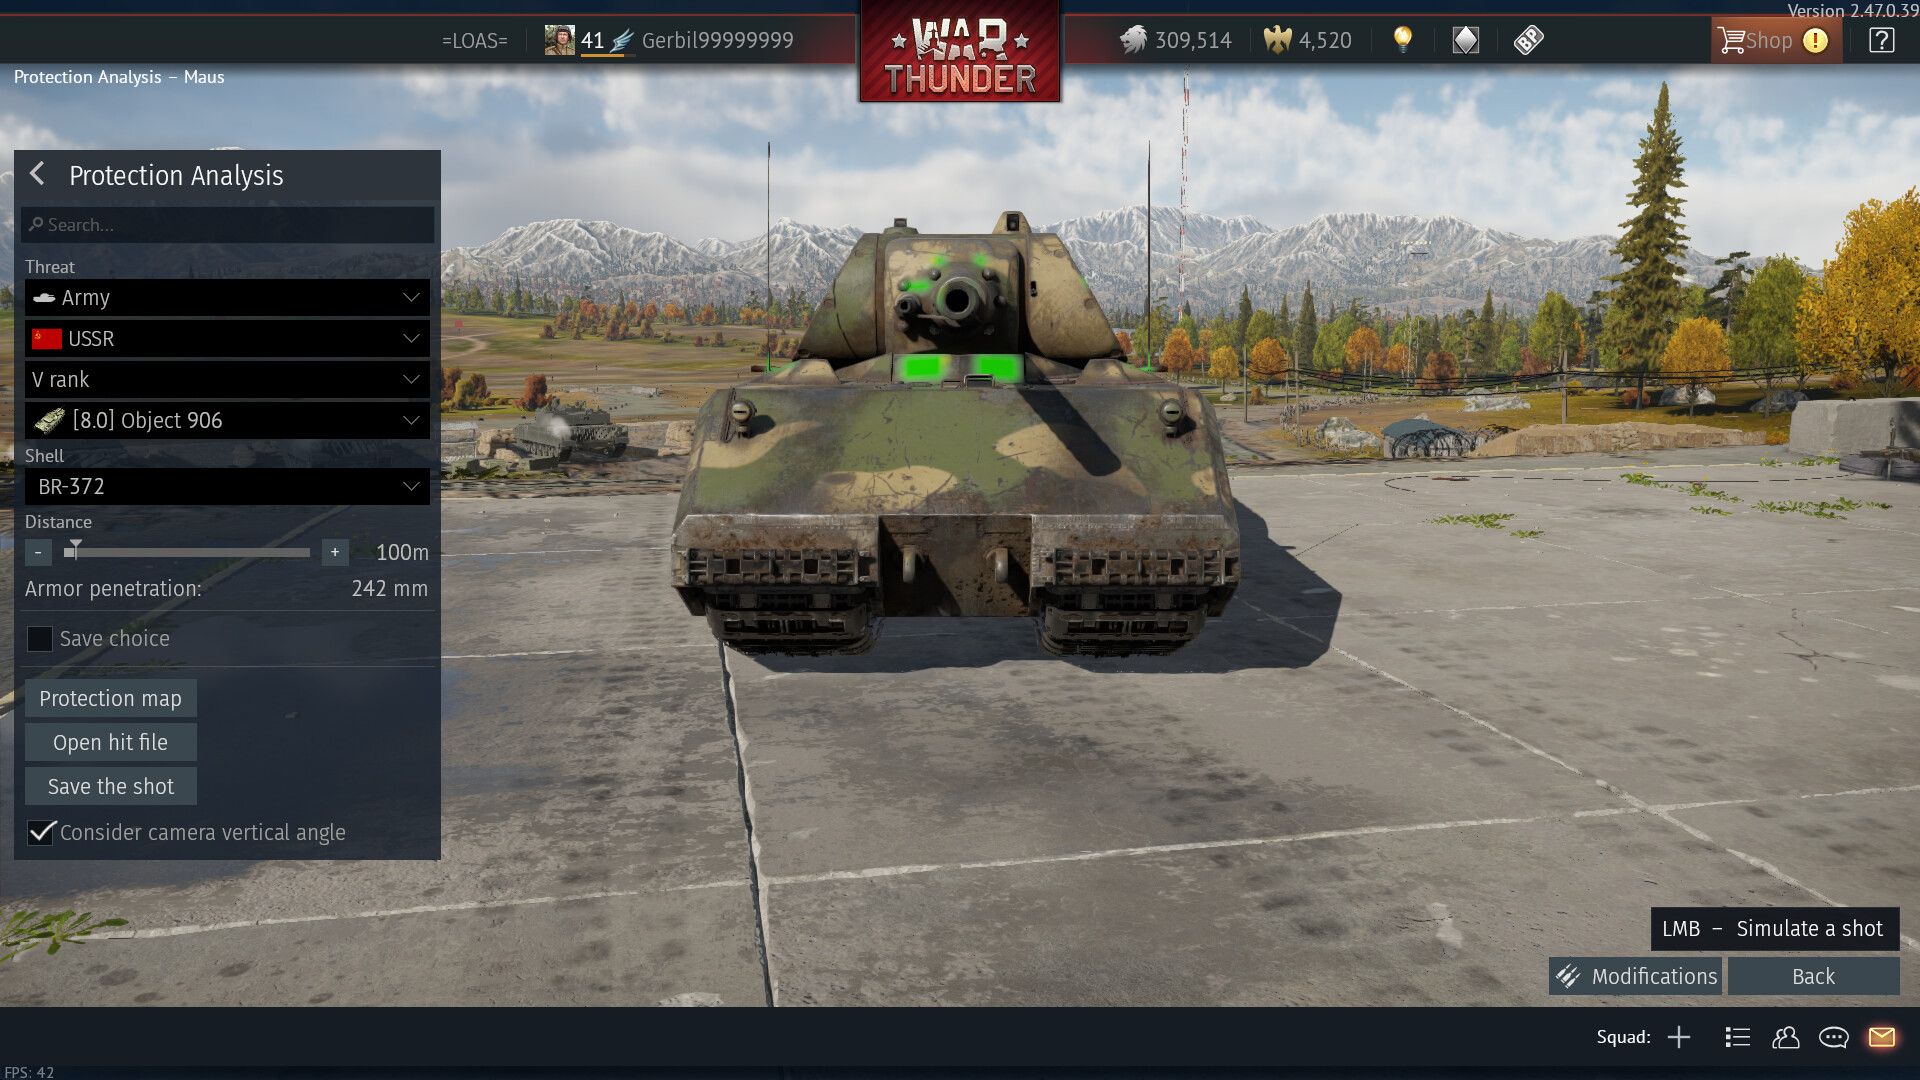
This vehicle deserves a section of its own. Armed with both a 128 mm KwK44 cannon and a 75 mm KwK44 L/36.5 cannon, both of these weapons are easily capable of taking you out with pretty much any shell. The Maus has more more or less 200mm of armour all around, apart from the rear of the hull which is 160mm. I would recommend trying to flank the Maus, due to its terrible manoeuvrability, and shoot its side at the flattest angle possible. If not, there is a shot trap you can try with the turret cheeks, however this is not recommended. Just don’t get hit.
2. Any tank armed with the L7A1 or close variants of it
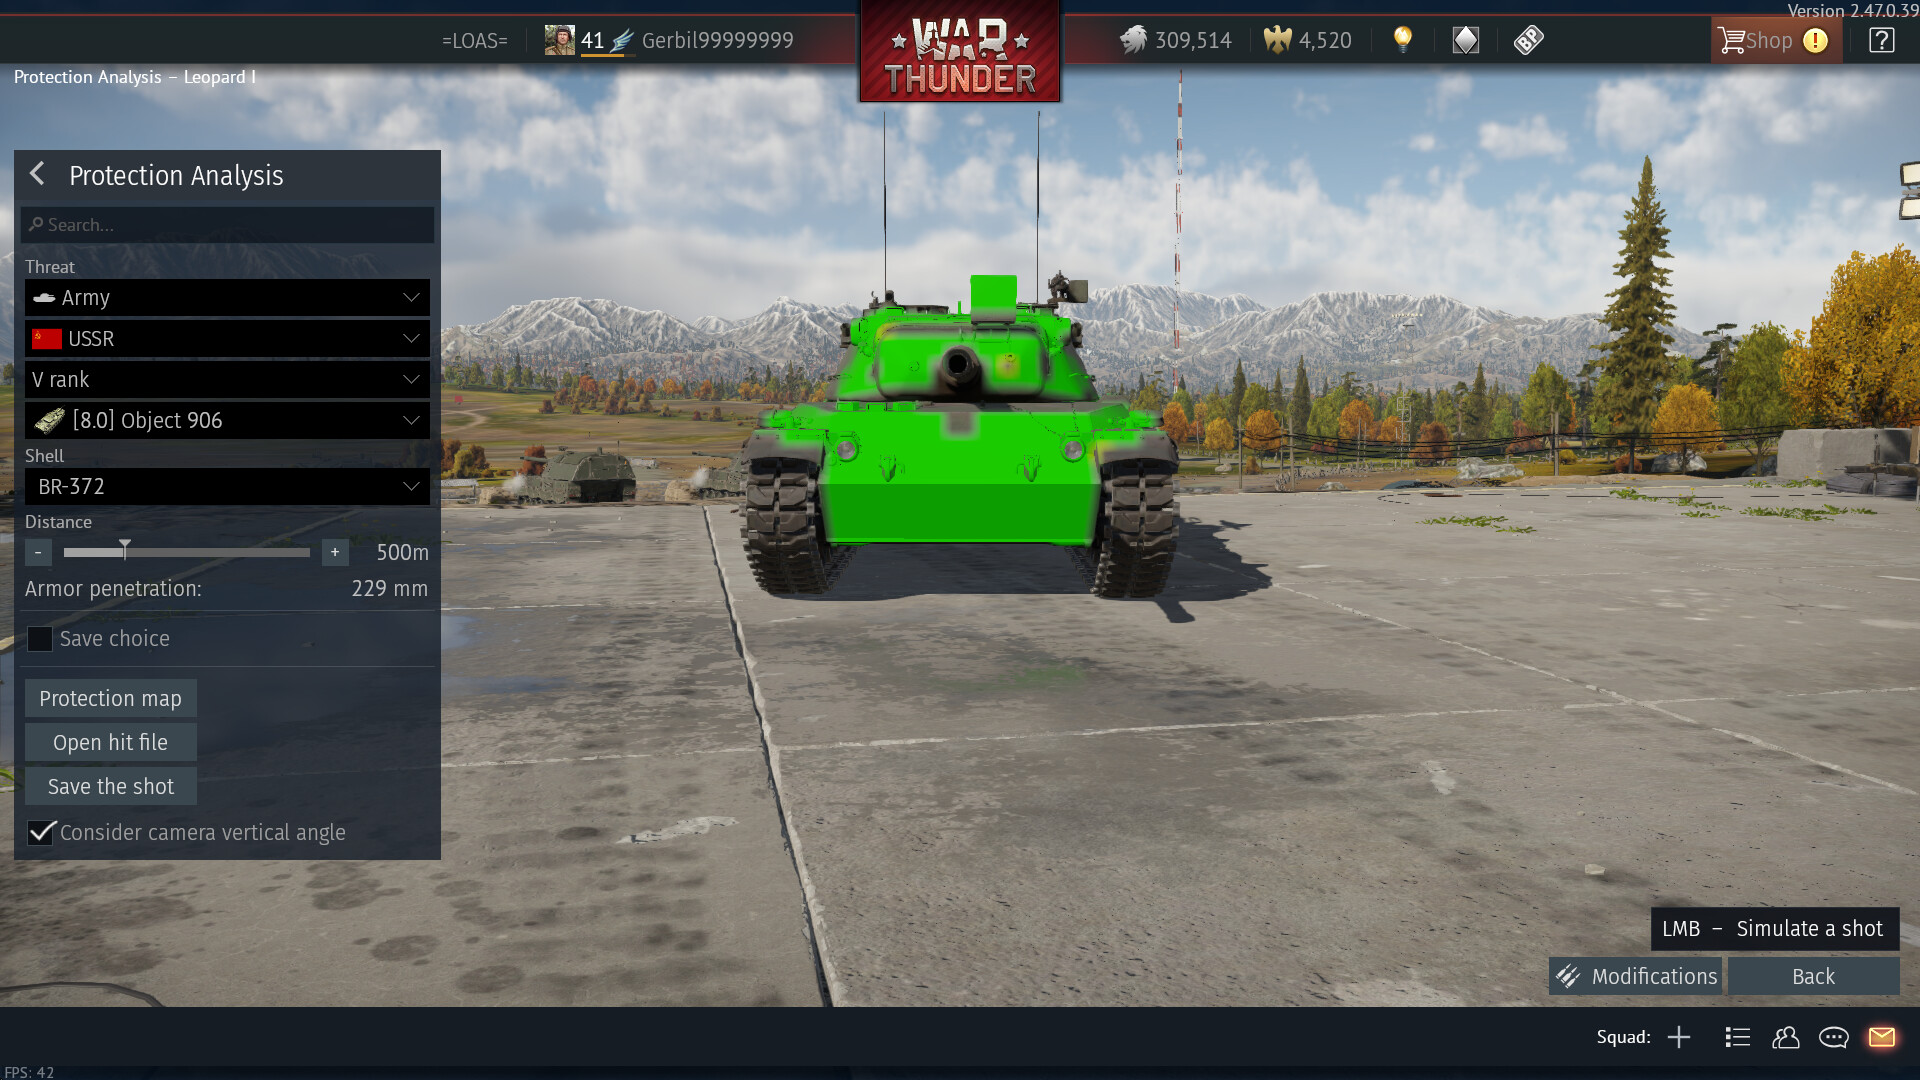
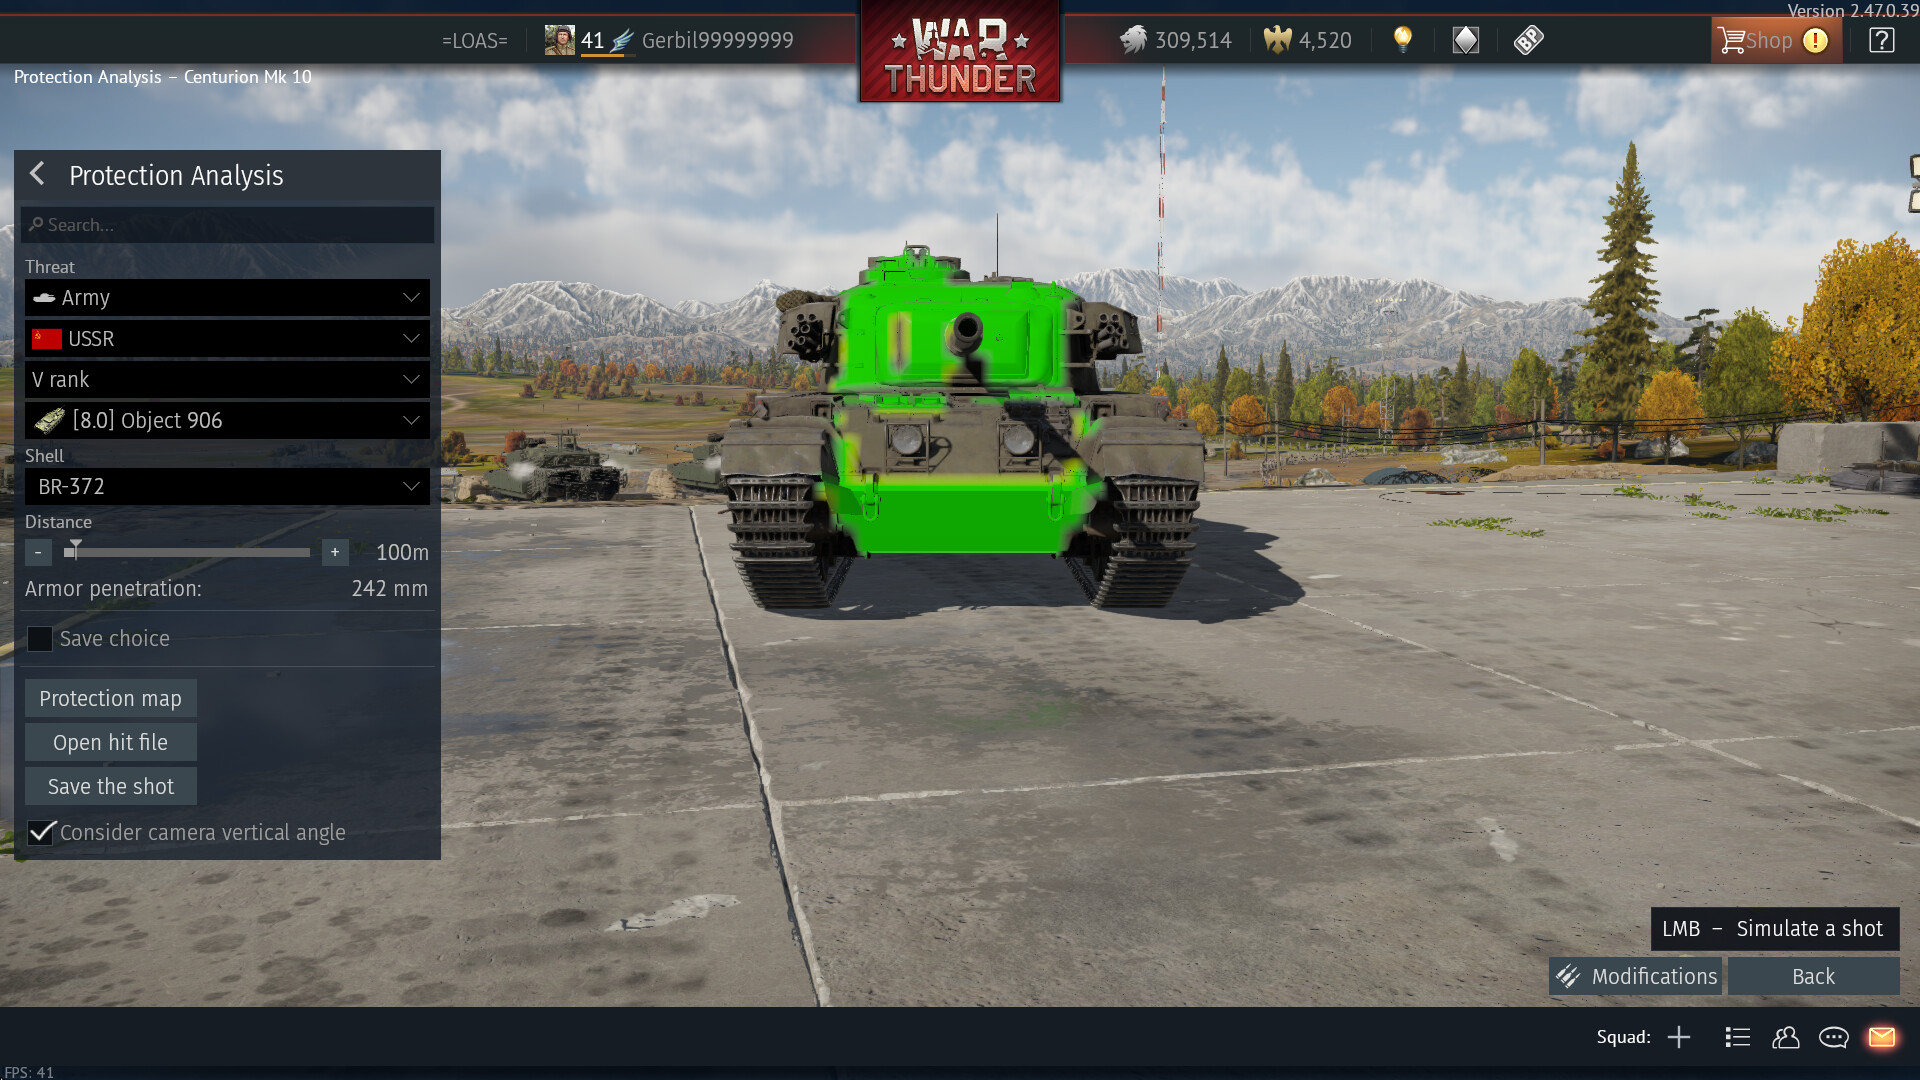

The vehicles armed with variants of the L7A1, particularly the Leopard 1, Centurion Mk 10, and M60, are examples of early MBTs and quite dangerous. Out of the 3, I would say the Leopard 1 is the least threatening, however its amazing mobility can be a threat. Again, same thing applies — don’t get shot. You can see it is fairly easy to target weakspots, and any visible cupolas are an amazing spot to hit if no other penetrable spots are visible. If you can, try to flank these vehicles and hit them from the side, for a better chance of a kill.
For the Leopard 1 and Centurion, if you hit their left side (or what would appear to the right) in a head-on engagement, you can hit the ammo stores. Also, neither the M60 or Leopard 1 have stabilisers.
3. Most French vehicles
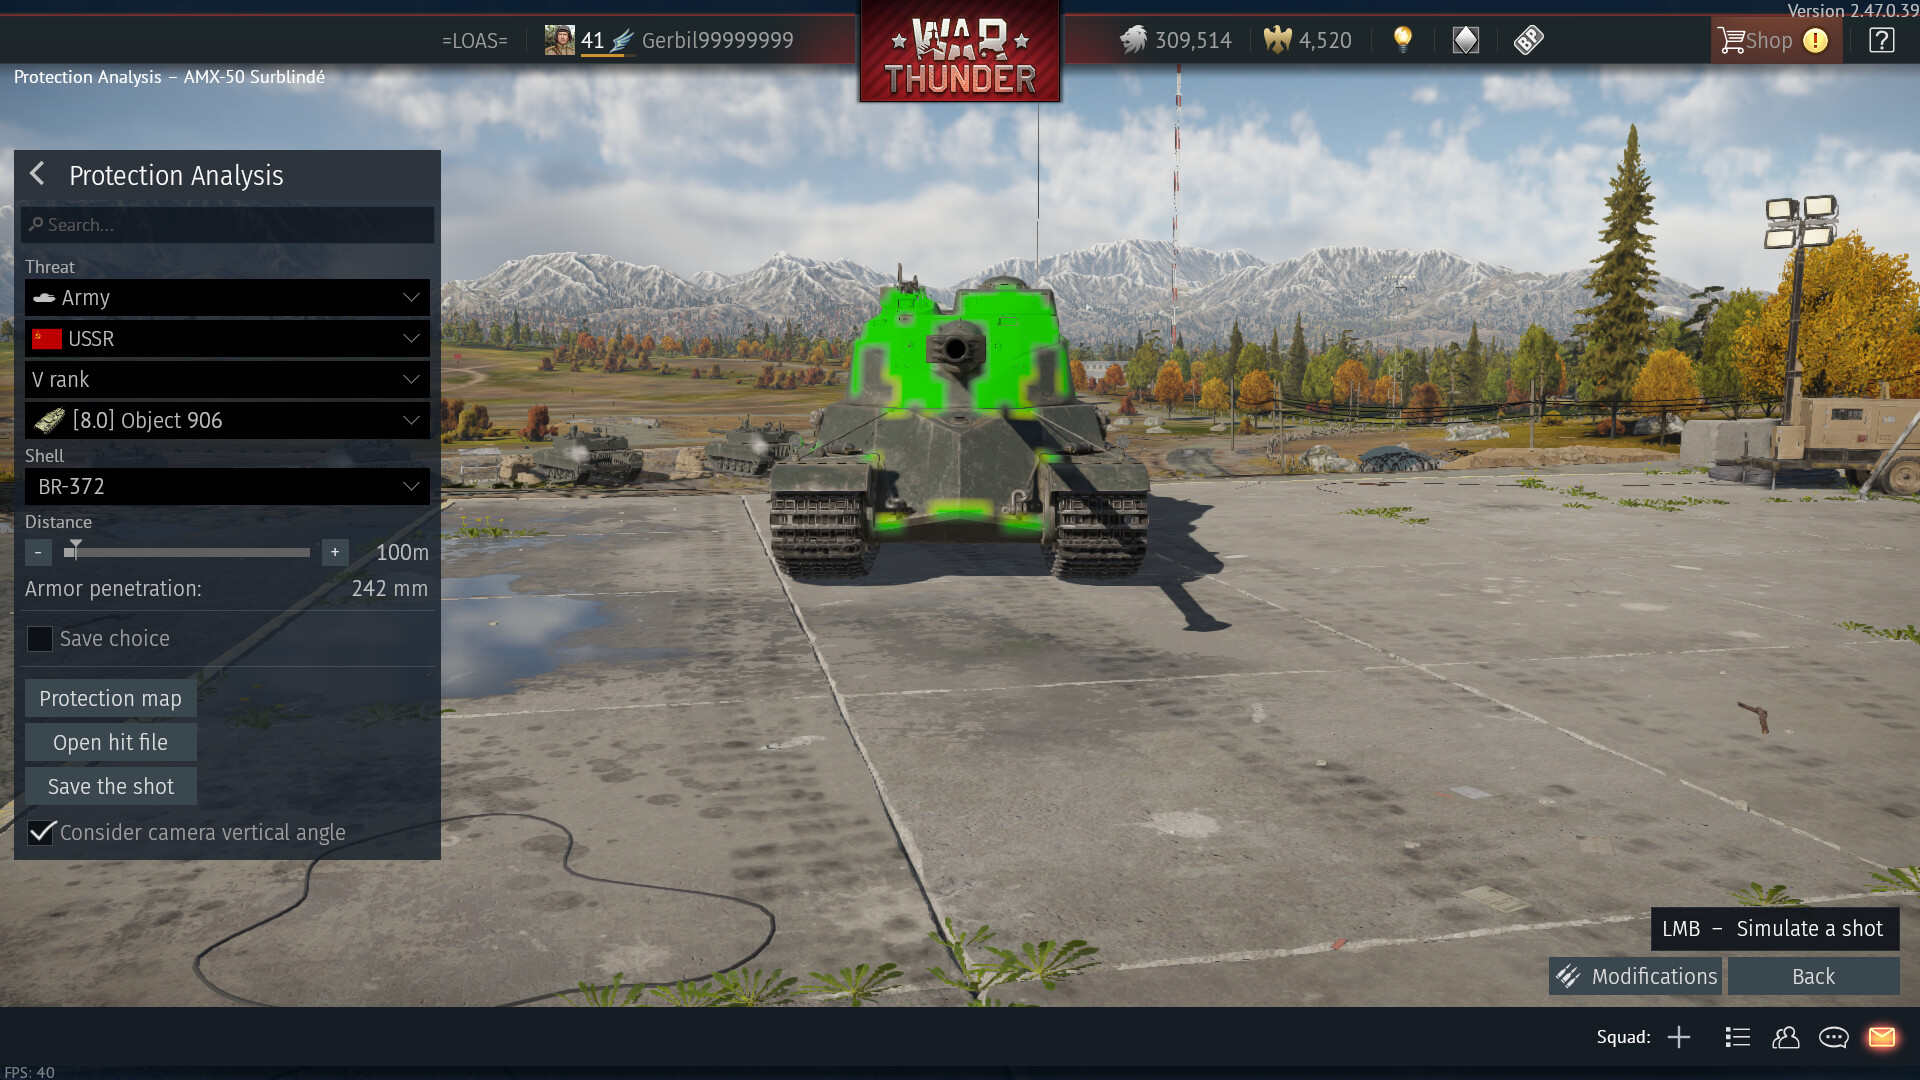
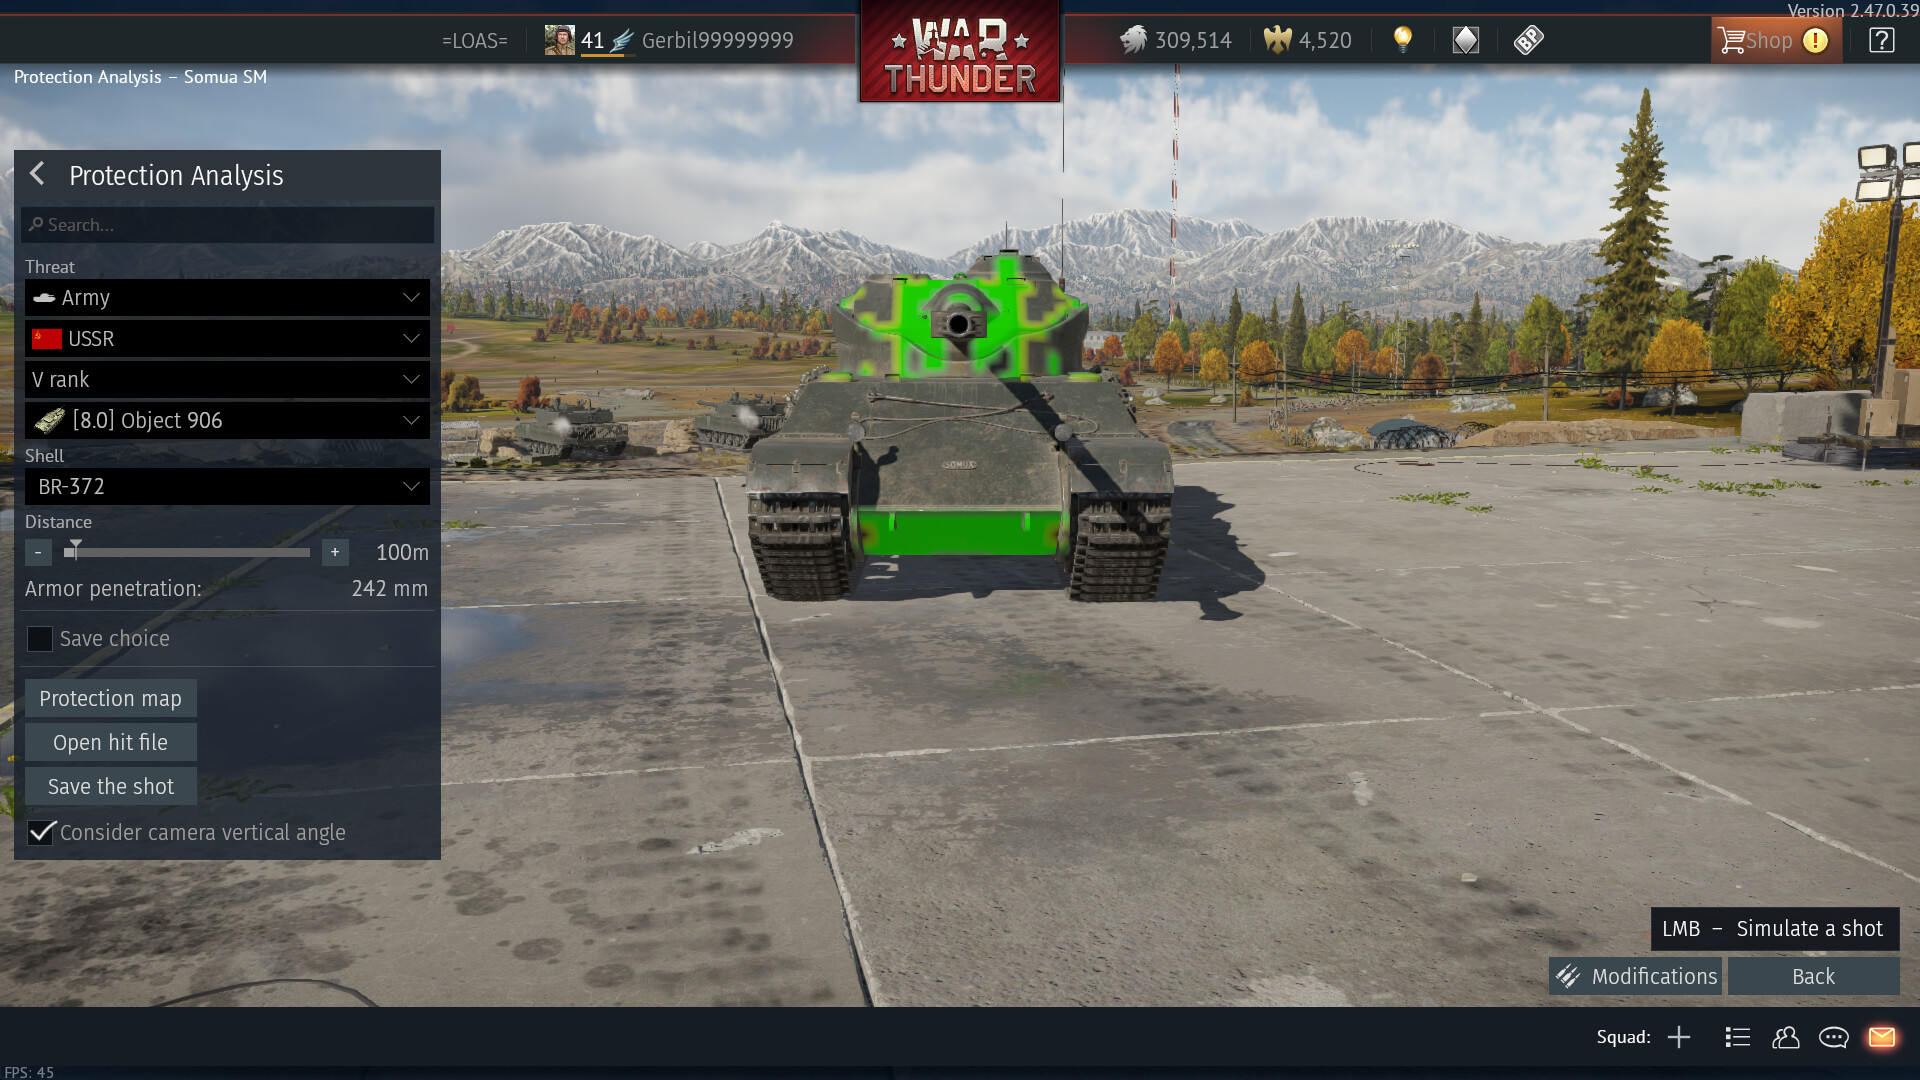
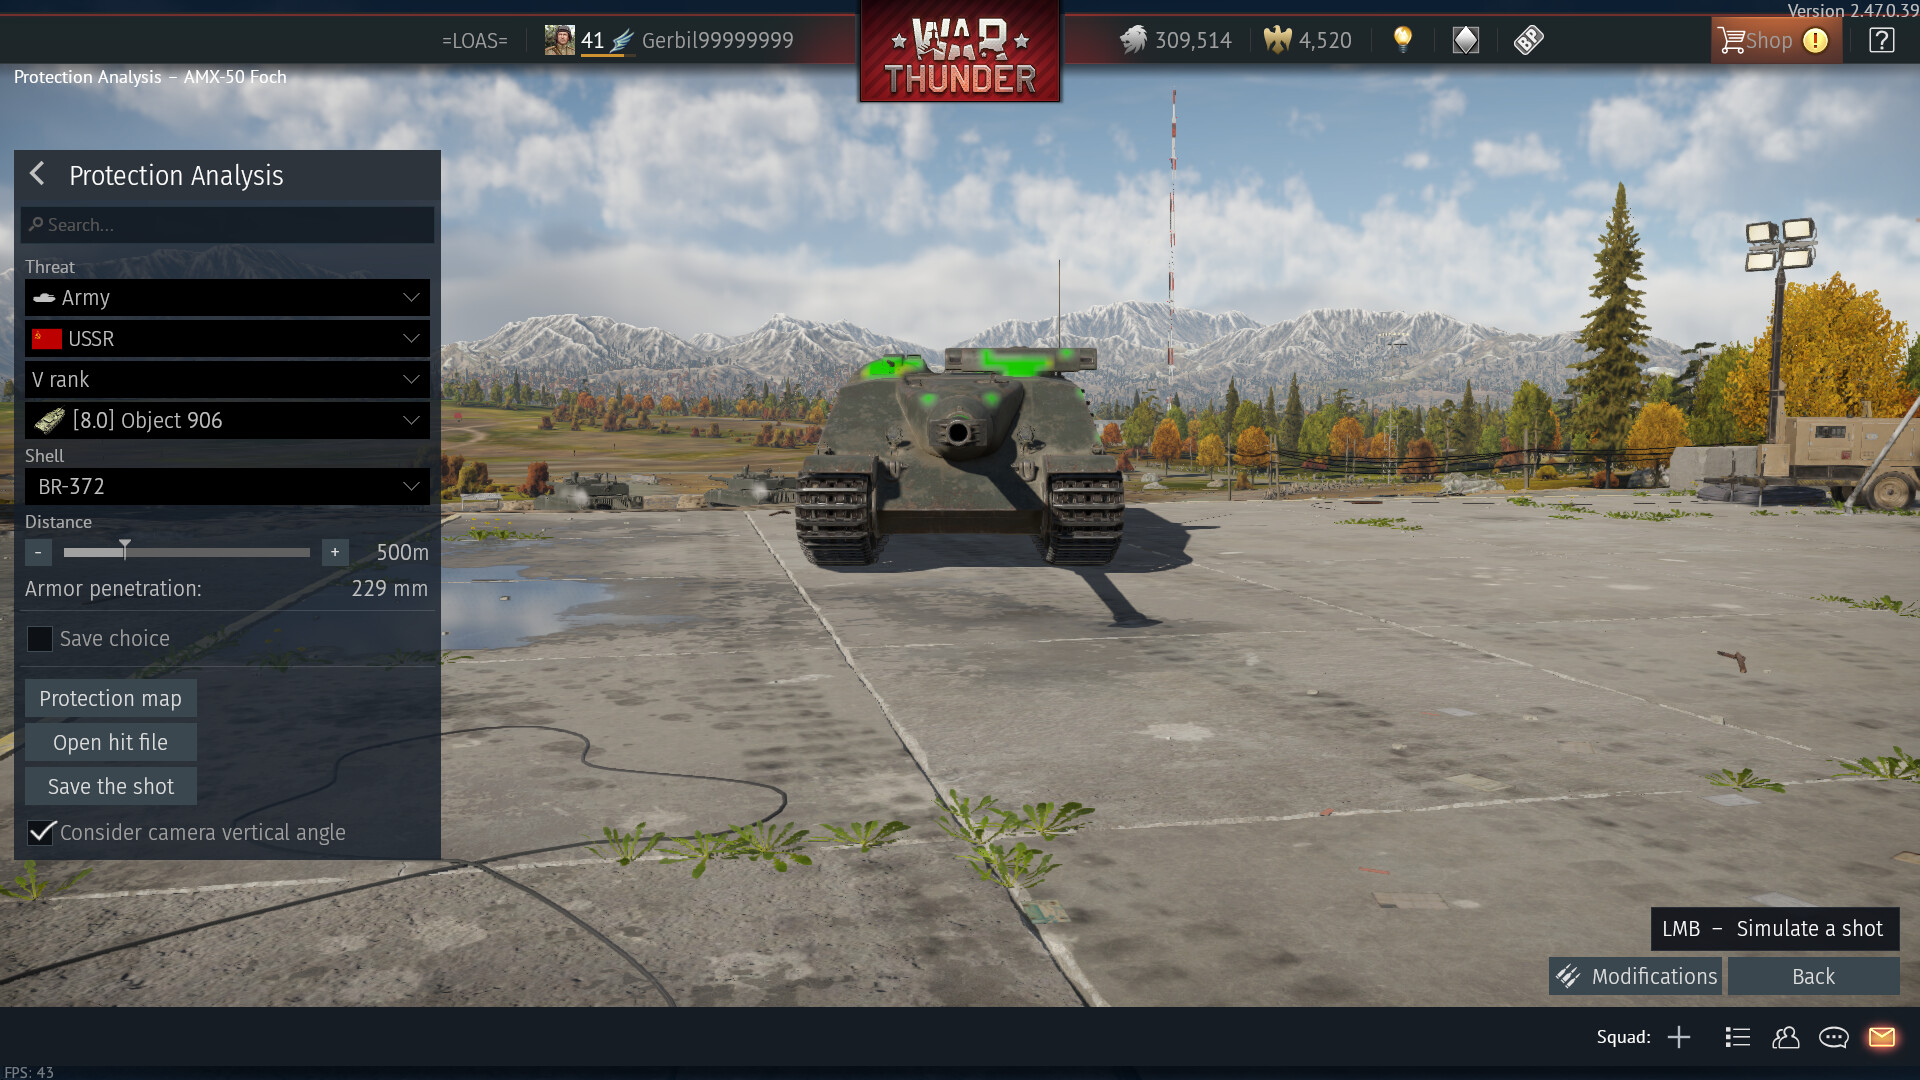

All of these French vehicles have fast autoloaders (apart from the Foch, which has much more armour). The two biggest threats here are the Somua SM due to the autoloader and incredible armour, and the AMX-50 Surblindé due to the armour, autoloader, and dangerous 20mm autocannon on the turret. So long as you know the weakspots, they can be simple mitigated, however the Foch might require shooting of the tracks, barrel and 20mm autocannon on the roof before flanking and shooting it in the side. Again, don’t get hit. One other thing I’ll mention, the two AMX heavy tanks have ammunition in the back of their turrets, allowing an easy one-shot from there.
4. The Turm III
While the Turm III had the same gun as the Leopard 1, it needs its own section. It’s a highly popular premium, essentially being a more lightly armoured, fully stabilised, autoloaded Leopard 1 with a 30mm turret capable of shredding the Object 906. A penetration map is not needed as you can penetrate it anywhere (more or less) however if there is one near you, you need to kill it and fast, making sure it, and its teammates doesn’t see you, which once again is the main premise of this vehicle.
I hope this guide helped!
Credits
WT Live // Images by bomberpilot1784 all images apart from the X-Ray view and penetration maps
Funnily enough, deadly_turtle, I took a few ideas from your article on the T-III and it’d feel wrong to not credit you :)

