Difference between revisions of "M3 GMC"
(→Modules: Edits) |
(Edits) |
||
| Line 7: | Line 7: | ||
== Description == | == Description == | ||
| − | <!--In the description, the first part should be about the history of the creation and combat usage of the vehicle, as well as its key features. In the second part, tell the reader about the ground vehicle in the game. Insert a screenshot of the vehicle, so that if the novice player does not remember the vehicle by name, he will immediately understand what kind of vehicle the article is talking about.--> | + | <!-- ''In the description, the first part should be about the history of the creation and combat usage of the vehicle, as well as its key features. In the second part, tell the reader about the ground vehicle in the game. Insert a screenshot of the vehicle, so that if the novice player does not remember the vehicle by name, he will immediately understand what kind of vehicle the article is talking about.'' --> |
| − | [[File: | + | [[File:GarageImage_{{PAGENAME}}.jpg|420px|thumb|left]] |
| − | {{ | + | {{Break}} |
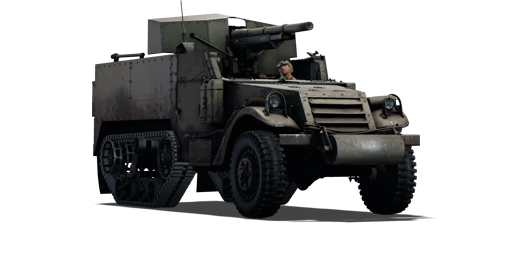
The '''{{Specs|name}}''' ('''{{Specs|pseudonym}}''') is a rank {{Specs|rank}} American tank destroyer {{Battle-rating}}. It was introduced in [[Update 1.49 "Weapons of Victory"]]. An M3 half-track with a 75 mm gun on its rear, the M3 GMC packs a punch against its rivals. | The '''{{Specs|name}}''' ('''{{Specs|pseudonym}}''') is a rank {{Specs|rank}} American tank destroyer {{Battle-rating}}. It was introduced in [[Update 1.49 "Weapons of Victory"]]. An M3 half-track with a 75 mm gun on its rear, the M3 GMC packs a punch against its rivals. | ||
== General info == | == General info == | ||
=== Survivability and armour === | === Survivability and armour === | ||
| − | <!--Describe armour protection. Note the most well protected and key weak areas. Appreciate the layout of modules as well as the number and location of crew members. Is the level of armour protection sufficient, is the placement of modules helpful for survival in combat? | + | <!-- ''Describe armour protection. Note the most well protected and key weak areas. Appreciate the layout of modules as well as the number and location of crew members. Is the level of armour protection sufficient, is the placement of modules helpful for survival in combat? If necessary use a visual template to indicate the most secure and weak zones of the armour.'' --> |
| − | |||
| − | If necessary use a visual template to indicate the most secure and weak zones of the armour.--> | ||
Just about any enemy is deadly to the 75 mm GMC M3, as the armour will only stop light machine gun rounds. In particular, vehicles with autocannons or heavy machines guns are often the deadliest for the crew. Every tank cannon will penetrate the armour, and although most guns at its rank cannot do so, the vehicle can be hull-broken. Aircraft and artillery are also very dangerous. | Just about any enemy is deadly to the 75 mm GMC M3, as the armour will only stop light machine gun rounds. In particular, vehicles with autocannons or heavy machines guns are often the deadliest for the crew. Every tank cannon will penetrate the armour, and although most guns at its rank cannot do so, the vehicle can be hull-broken. Aircraft and artillery are also very dangerous. | ||
| − | '''Armour type:''' | + | '''Armour type:''' |
*Rolled homogeneous armour | *Rolled homogeneous armour | ||
| Line 28: | Line 26: | ||
! Armour !! Front !! Sides !! Rear !! Roof | ! Armour !! Front !! Sides !! Rear !! Roof | ||
|- | |- | ||
| − | | Hull || 6.35 mm (31°) || 6.35 mm || 6.35 mm || N/A | + | | Hull || 6.35 mm (31°) || 6.35 mm || 6.35 mm || N/A |
|- | |- | ||
| Turret (Gun shield) || 12.7 mm || 12.7 mm || N/A || 12.7 mm | | Turret (Gun shield) || 12.7 mm || 12.7 mm || N/A || 12.7 mm | ||
| Line 42: | Line 40: | ||
<!-- ''Write about the mobility of the ground vehicle. Estimate the specific power and manoeuvrability, as well as the maximum speed forwards and backwards.'' --> | <!-- ''Write about the mobility of the ground vehicle. Estimate the specific power and manoeuvrability, as well as the maximum speed forwards and backwards.'' --> | ||
| − | {{tankMobility|abMinHp= 210|rbMinHp= 131 | + | {{tankMobility|abMinHp=210|rbMinHp=131}} |
== Armaments == | == Armaments == | ||
=== Main armament === | === Main armament === | ||
| − | <!--Give the reader information about the characteristics of the main gun. Assess its effectiveness in a battle based on the reloading speed, ballistics and the power of shells. Do not forget about the flexibility of the fire, that is how quickly the cannon can be aimed at the target, open fire on it and aim at another enemy. Add a link to the main article on the gun: <code><nowiki>{{main|Name of the weapon}}</nowiki></code>. Describe in general terms the ammunition available for the main gun. Give advice on how to use them and how to fill the ammunition storage.--> | + | <!-- ''Give the reader information about the characteristics of the main gun. Assess its effectiveness in a battle based on the reloading speed, ballistics and the power of shells. Do not forget about the flexibility of the fire, that is how quickly the cannon can be aimed at the target, open fire on it and aim at another enemy. Add a link to the main article on the gun: <code><nowiki>{{main|Name of the weapon}}</nowiki></code>. Describe in general terms the ammunition available for the main gun. Give advice on how to use them and how to fill the ammunition storage.'' --> |
{{main|M1897A4 (75 mm)}} | {{main|M1897A4 (75 mm)}} | ||
| − | {| class="wikitable" style="text-align:center" | + | {| class="wikitable" style="text-align:center" width="100%" |
|- | |- | ||
| − | ! colspan=" | + | ! colspan="5" | [[M1897A4 (75 mm)|75 mm M1897A4]] || colspan="5" | Turret rotation speed (°/s) || colspan="4" | Reloading rate (seconds) |
|- | |- | ||
| − | ! | + | ! Mode !! Capacity !! Vertical !! Horizontal !! Stabilizer |
| − | ! | + | ! Stock !! Upgraded !! Full !! Expert !! Aced |
| − | ! | + | ! Stock !! Full !! Expert !! Aced |
|- | |- | ||
| − | | | + | ! ''Arcade'' |
| + | | rowspan="2" | 60 || rowspan="2" | -10°/+29° || rowspan="2" | -19°/+21° || rowspan="2" | N/A || 5.3 || 7.3 || 8.9 || 9.8 || 10.5 || rowspan="2" | 7.80 || rowspan="2" | 6.90 || rowspan="2" | 6.36 || rowspan="2" | 6.00 | ||
|- | |- | ||
| − | ! | + | ! ''Realistic'' |
| + | | 3.6 || 4.2 || 5.1 || 5.6 || 6.0 | ||
|- | |- | ||
| − | + | |} | |
| − | + | ||
| − | + | ==== Ammunition ==== | |
| − | + | {| class="wikitable sortable" style="text-align:center" width="100%" | |
| − | + | ! colspan="8" | Penetration statistics | |
| − | ! | ||
|- | |- | ||
| − | | '' | + | ! rowspan="2" data-sort-type="text" | Ammunition |
| + | ! rowspan="2" | Type of<br>warhead | ||
| + | ! colspan="6" | '''Penetration @ 0° Angle of Attack (mm)''' | ||
|- | |- | ||
| − | + | ! 10 m !! 100 m !! 500 m !! 1,000 m !! 1,500 m !! 2,000 m | |
|- | |- | ||
| − | + | | M72 shot || AP || 89 || 86 || 76 || 65 || 56 || 48 | |
|- | |- | ||
| − | + | | M48 shell || HE || 10 || 10 || 10 || 10 || 10 || 10 | |
| − | |||
| − | |||
| − | |||
|- | |- | ||
| − | | | + | | M61 shot || APCBC || 102 || 99 || 88 || 77 || 67 || 58 |
|- | |- | ||
|} | |} | ||
| − | |||
| − | |||
{| class="wikitable sortable" style="text-align:center" width="100%" | {| class="wikitable sortable" style="text-align:center" width="100%" | ||
| − | ! colspan=" | + | ! colspan="10" | Shell details |
|- | |- | ||
! rowspan="2" data-sort-type="text" | Ammunition | ! rowspan="2" data-sort-type="text" | Ammunition | ||
| − | ! rowspan="2" | + | ! rowspan="2" | Type of<br>warhead |
| − | ! colspan=" | + | ! rowspan="2" | Velocity<br>(m/s) |
| + | ! rowspan="2" | Projectile<br>Mass (kg) | ||
| + | ! rowspan="2" | Fuse delay<br>(m) | ||
| + | ! rowspan="2" | Fuse sensitivity<br>(mm) | ||
| + | ! rowspan="2" | Explosive Mass<br>(TNT equivalent) (g) | ||
| + | ! colspan="3" | Ricochet | ||
| + | |- | ||
| + | ! 0% !! 50% !! 100% | ||
|- | |- | ||
| − | + | | M72 shot || AP || 609 || 6.3 || N/A || N/A || N/A || 47° || 60° || 65° | |
| − | |||
| − | |||
| − | |||
| − | |||
| − | |||
|- | |- | ||
| − | | | + | | M48 shell || HE || 594 || 6.3 || 0 || 0.1 || 666 || 79° || 80° || 81° |
| + | |- | ||
| + | | M61 shot || APCBC || 609 || 6.79 || 1.2 || 14 || 63.7 || 48° || 63° || 71° | ||
|- | |- | ||
| − | |||
| − | |||
| − | |||
| − | |||
|} | |} | ||
| − | {| class="wikitable | + | {| class="wikitable" style="text-align:center" |
| − | + | ! colspan="7" | Smoke shell characteristics | |
| − | |||
| − | |||
| − | |||
| − | |||
| − | |||
| − | |||
| − | |||
| − | |||
| − | |||
| − | |||
| − | ! colspan=" | ||
|- | |- | ||
| − | ! | + | ! Ammunition |
| − | ! | + | ! Velocity<br>(m/s) |
| − | ! | + | ! Projectile<br>Mass (kg) |
| + | ! Screen radius<br>(m) | ||
| + | ! Screen deploy time<br>(s) | ||
| + | ! Screen hold time<br>(s) | ||
| + | ! Explosive Mass<br>(TNT equivalent) (g) | ||
|- | |- | ||
| − | | | + | | M89 || 259 || 3 || 13 || 5 || 20 || 50 |
|- | |- | ||
| − | |||
| − | |||
| − | |||
| − | |||
|} | |} | ||
| − | + | ==== [[Ammo racks]] ==== | |
| − | [[File: | + | [[File:Ammoracks_{{PAGENAME}}.png|right|thumb|x250px|[[Ammo racks]] of the {{PAGENAME}}]] |
| − | {| class="wikitable | + | <!-- '''Last updated:''' --> |
| + | {| class="wikitable" style="text-align:center" | ||
|- | |- | ||
| − | ! | + | ! Full<br>ammo |
| − | ! | + | ! 1st<br>rack empty |
| − | ! | + | ! 2nd<br>rack empty |
| − | ! | + | ! Visual<br>discrepancy |
|- | |- | ||
| − | + | | '''60''' || 31 ''(+29)'' || 1 ''(+59)'' || Yes | |
|- | |- | ||
|} | |} | ||
== Usage in battles == | == Usage in battles == | ||
| − | <!--Describe the tactics of playing in the vehicle, the features of using vehicles in the team and advice on tactics. Refrain from creating a "guide" - do not impose a single point of view but instead give the reader food for thought. Describe the most dangerous enemies and give recommendations on fighting them. If necessary, note the specifics of the game in different modes (AB, RB, SB).--> | + | <!-- ''Describe the tactics of playing in the vehicle, the features of using vehicles in the team and advice on tactics. Refrain from creating a "guide" - do not impose a single point of view but instead give the reader food for thought. Describe the most dangerous enemies and give recommendations on fighting them. If necessary, note the specifics of the game in different modes (AB, RB, SB).'' --> |
| − | The 75 mm GMC M3 cannot go toe-to-toe with other tanks due to the lack of protection for the crew and insufficient armour layout. The armour can only stop rifle-calibre rounds from machine guns, and could possibly deflect 12.7 mm rounds off the frontal arc, but this vehicle was never designed to fight other tanks head-to-head. Its play style may generally confuse new or inexperienced players, as they would bring the vehicle up close to the front. | + | The 75 mm GMC M3 cannot go toe-to-toe with other tanks due to the lack of protection for the crew and insufficient armour layout. The armour can only stop rifle-calibre rounds from machine guns, and could possibly deflect 12.7 mm rounds off the frontal arc, but this vehicle was never designed to fight other tanks head-to-head. Its play style may generally confuse new or inexperienced players, as they would bring the vehicle up close to the front. |
The vehicle was mainly purposed for destroying tanks at a distance, hence the amazing penetration values with the gun at its battle rating. It will still penetrate tanks of its BR and rank even at 500 meters, which means staying from afar is the best way to play this particular vehicle. However, relocating after successive shots is another good idea. It prevents returning fire from the enemy, especially artillery strikes. It is not wise to bring this vehicle upfront, as it will probably not survive long with rigorous combat. However, the M3 GMC can be quite deadly up close as well if it manages to take the enemy by surprise. If planning to go up front, stock up on the M61 shot, which will increase the gun's lethality to tanks due to its internal HE charge. Keep in mind that this vehicle has to be supported by teammates, experienced players will take note of it's long to reload and may try to rush out and destroy the M3 GMC during the reloads. Effective use of its excellent reverse speed to take cover or back out of enemy fire will increase the chances of surviving. Overall, this vehicle is an effective tank destroyer for its rank, rivalling the [[ZiS-30]]. It combines the penetration ability of the ZiS-30 on to a larger calibre weapon, at the same time marrying the weapon on to the M3 half-track, which is already blessed with exceptional mobility. | The vehicle was mainly purposed for destroying tanks at a distance, hence the amazing penetration values with the gun at its battle rating. It will still penetrate tanks of its BR and rank even at 500 meters, which means staying from afar is the best way to play this particular vehicle. However, relocating after successive shots is another good idea. It prevents returning fire from the enemy, especially artillery strikes. It is not wise to bring this vehicle upfront, as it will probably not survive long with rigorous combat. However, the M3 GMC can be quite deadly up close as well if it manages to take the enemy by surprise. If planning to go up front, stock up on the M61 shot, which will increase the gun's lethality to tanks due to its internal HE charge. Keep in mind that this vehicle has to be supported by teammates, experienced players will take note of it's long to reload and may try to rush out and destroy the M3 GMC during the reloads. Effective use of its excellent reverse speed to take cover or back out of enemy fire will increase the chances of surviving. Overall, this vehicle is an effective tank destroyer for its rank, rivalling the [[ZiS-30]]. It combines the penetration ability of the ZiS-30 on to a larger calibre weapon, at the same time marrying the weapon on to the M3 half-track, which is already blessed with exceptional mobility. | ||
| Line 155: | Line 141: | ||
=== Modules === | === Modules === | ||
{| class="wikitable" | {| class="wikitable" | ||
| − | !Tier | + | ! Tier |
| − | ! colspan="2" |Mobility | + | ! colspan="2" | Mobility |
| − | !Protection | + | ! Protection |
| − | ! colspan="2" |Firepower | + | ! colspan="2" | Firepower |
|- | |- | ||
| − | |I | + | | I |
| − | |Tracks | + | | Tracks |
| − | |Parts | + | | |
| − | |Horizontal Drive | + | | Parts |
| + | | Horizontal Drive | ||
| + | | | ||
|- | |- | ||
| − | |II | + | | II |
| − | |Suspension | + | | Suspension |
| − | |FPE | + | | Brake System |
| − | |Adjustment of Fire | + | | FPE |
| + | | Adjustment of Fire | ||
| + | | M61 shot | ||
|- | |- | ||
| − | |III | + | | III |
| − | |Filters | + | | Filters |
| − | |Crew Replenishment | + | | |
| − | |Elevation Mechanism | + | | Crew Replenishment |
| + | | Elevation Mechanism | ||
| + | | | ||
|- | |- | ||
| − | |IV | + | | IV |
| − | |Transmission|| | + | | Transmission |
| + | | Engine | ||
| + | | | ||
| + | | M89 | ||
| | | | ||
| − | | | + | |- |
|} | |} | ||
| Line 184: | Line 179: | ||
=== Pros and cons === | === Pros and cons === | ||
| − | <!--Summarise and briefly evaluate the vehicle in terms of its characteristics and combat effectiveness. Mark its pros and cons in a bulleted list. Try not to use more than 6 points for each of the characteristics. Avoid using categorical definitions such as "bad", "good" and the like - use substitutions with softer forms such as "inadequate" and "effective".--> | + | <!-- ''Summarise and briefly evaluate the vehicle in terms of its characteristics and combat effectiveness. Mark its pros and cons in a bulleted list. Try not to use more than 6 points for each of the characteristics. Avoid using categorical definitions such as "bad", "good" and the like - use substitutions with softer forms such as "inadequate" and "effective".'' --> |
| + | |||
'''Pros:''' | '''Pros:''' | ||
| Line 211: | Line 207: | ||
== History == | == History == | ||
| − | <!--Describe the history of the creation and combat usage of the | + | <!-- ''Describe the history of the creation and combat usage of the vehicle in more detail than in the introduction. If the historical reference turns out to be too long, take it to a separate article, taking a link to the article about the vehicle and adding a block "/History" (example: <nowiki>https://wiki.warthunder.com/(Vehicle-name)/History</nowiki>) and add a link to it here using the <code>main</code> template. Be sure to reference text and sources by using <code><nowiki><ref></ref></nowiki></code>, as well as adding them at the end of the article with <code><nowiki><references /></nowiki></code>. This section may also include the vehicle's dev blog entry (if applicable) and the in-game encyclopedia description (under <code><nowiki>=== In-game description ===</nowiki></code>, also if applicable).'' --> |
===Development=== | ===Development=== | ||
| − | In the opening stages of World War II, the American military leaders realize they did not have any adequate anti-tank weaponry to repeal a German tank assault. An urgent request for one developed into something akin of an improvised weapon. | + | In the opening stages of World War II, the American military leaders realize they did not have any adequate anti-tank weaponry to repeal a German tank assault. An urgent request for one developed into something akin of an improvised weapon. |
Army development took an M3 half-track and placed the French 75 mm Gun M1897A4 gun onto it with a huge gun shield to protect the crew. This experimental vehicle was called the ''T12'', and was deemed to work well enough to be adopted and standardized in October 1941 as the '''75 mm GMC M3'''. From 1941 to 1943, about 2,200 units were produced, but many were converted back to standard half-tracks before they got issued, so it resulted in only about 842 units seeing combat service. | Army development took an M3 half-track and placed the French 75 mm Gun M1897A4 gun onto it with a huge gun shield to protect the crew. This experimental vehicle was called the ''T12'', and was deemed to work well enough to be adopted and standardized in October 1941 as the '''75 mm GMC M3'''. From 1941 to 1943, about 2,200 units were produced, but many were converted back to standard half-tracks before they got issued, so it resulted in only about 842 units seeing combat service. | ||
| Line 228: | Line 224: | ||
== Media == | == Media == | ||
| − | <!--Excellent additions to the article would be video guides, screenshots from the game, and photos.--> | + | <!-- ''Excellent additions to the article would be video guides, screenshots from the game, and photos.'' --> |
[http://live.warthunder.com/feed/camouflages/?q=%23M3gmc '''Skins''' and '''camouflages''' for the M3 GMC from live.warthunder.com.] | [http://live.warthunder.com/feed/camouflages/?q=%23M3gmc '''Skins''' and '''camouflages''' for the M3 GMC from live.warthunder.com.] | ||
| Line 235: | Line 231: | ||
== See also == | == See also == | ||
''Links to the articles on the War Thunder Wiki that you think will be useful for the reader, for example:'' | ''Links to the articles on the War Thunder Wiki that you think will be useful for the reader, for example:'' | ||
| − | |||
* ''reference to the series of the vehicles;'' | * ''reference to the series of the vehicles;'' | ||
* ''links to approximate analogues of other nations and research trees.'' | * ''links to approximate analogues of other nations and research trees.'' | ||
== External links == | == External links == | ||
| − | <!--Paste links to sources and external resources, such as: | + | <!-- ''Paste links to sources and external resources, such as:'' |
* ''topic on the official game forum;'' | * ''topic on the official game forum;'' | ||
* ''encyclopedia page on the tank;'' | * ''encyclopedia page on the tank;'' | ||
| − | * ''other literature.''--> | + | * ''other literature.'' --> |
| − | * [ | + | * [[wt:en/devblog/current/764/|[Devblog] M3 75 mm GMC and Ki-21-1ko]] |
{{USA tank destroyers}} | {{USA tank destroyers}} | ||
Revision as of 16:42, 29 November 2020
Contents
| This page is about the American tank destroyer M3 GMC. For other uses, see M3 (Disambiguation). |
Description

The 75 mm Gun Motor Carriage M3 (M3 GMC) is a rank I American tank destroyer
with a battle rating of 1.7 (AB/RB/SB). It was introduced in Update 1.49 "Weapons of Victory". An M3 half-track with a 75 mm gun on its rear, the M3 GMC packs a punch against its rivals.
General info
Survivability and armour
Just about any enemy is deadly to the 75 mm GMC M3, as the armour will only stop light machine gun rounds. In particular, vehicles with autocannons or heavy machines guns are often the deadliest for the crew. Every tank cannon will penetrate the armour, and although most guns at its rank cannot do so, the vehicle can be hull-broken. Aircraft and artillery are also very dangerous.
Armour type:
- Rolled homogeneous armour
- Structural steel (Back side)
| Armour | Front | Sides | Rear | Roof |
|---|---|---|---|---|
| Hull | 6.35 mm (31°) | 6.35 mm | 6.35 mm | N/A |
| Turret (Gun shield) | 12.7 mm | 12.7 mm | N/A | 12.7 mm |
Notes:
- Track thickness are 7 mm thick.
- Road wheels are 2 mm of rubber.
- Structural chassis thickness is 15 mm throughout.
Mobility
| Game Mode | Max Speed (km/h) | Weight (tons) | Engine power (horsepower) | Power-to-weight ratio (hp/ton) | |||
|---|---|---|---|---|---|---|---|
| Forward | Reverse | Stock | Upgraded | Stock | Upgraded | ||
| Arcade | 80 | 19 | 9.1 | 210 | 282 | 23.08 | 30.99 |
| Realistic | 73 | 17 | 131 | 148 | 14.4 | 16.26 | |
Armaments
Main armament
| 75 mm M1897A4 | Turret rotation speed (°/s) | Reloading rate (seconds) | |||||||||||
|---|---|---|---|---|---|---|---|---|---|---|---|---|---|
| Mode | Capacity | Vertical | Horizontal | Stabilizer | Stock | Upgraded | Full | Expert | Aced | Stock | Full | Expert | Aced |
| Arcade | 60 | -10°/+29° | -19°/+21° | N/A | 5.3 | 7.3 | 8.9 | 9.8 | 10.5 | 7.80 | 6.90 | 6.36 | 6.00 |
| Realistic | 3.6 | 4.2 | 5.1 | 5.6 | 6.0 | ||||||||
Ammunition
| Penetration statistics | |||||||
|---|---|---|---|---|---|---|---|
| Ammunition | Type of warhead |
Penetration @ 0° Angle of Attack (mm) | |||||
| 10 m | 100 m | 500 m | 1,000 m | 1,500 m | 2,000 m | ||
| M72 shot | AP | 89 | 86 | 76 | 65 | 56 | 48 |
| M48 shell | HE | 10 | 10 | 10 | 10 | 10 | 10 |
| M61 shot | APCBC | 102 | 99 | 88 | 77 | 67 | 58 |
| Shell details | |||||||||
|---|---|---|---|---|---|---|---|---|---|
| Ammunition | Type of warhead |
Velocity (m/s) |
Projectile Mass (kg) |
Fuse delay (m) |
Fuse sensitivity (mm) |
Explosive Mass (TNT equivalent) (g) |
Ricochet | ||
| 0% | 50% | 100% | |||||||
| M72 shot | AP | 609 | 6.3 | N/A | N/A | N/A | 47° | 60° | 65° |
| M48 shell | HE | 594 | 6.3 | 0 | 0.1 | 666 | 79° | 80° | 81° |
| M61 shot | APCBC | 609 | 6.79 | 1.2 | 14 | 63.7 | 48° | 63° | 71° |
| Smoke shell characteristics | ||||||
|---|---|---|---|---|---|---|
| Ammunition | Velocity (m/s) |
Projectile Mass (kg) |
Screen radius (m) |
Screen deploy time (s) |
Screen hold time (s) |
Explosive Mass (TNT equivalent) (g) |
| M89 | 259 | 3 | 13 | 5 | 20 | 50 |
Ammo racks

| Full ammo |
1st rack empty |
2nd rack empty |
Visual discrepancy |
|---|---|---|---|
| 60 | 31 (+29) | 1 (+59) | Yes |
Usage in battles
The 75 mm GMC M3 cannot go toe-to-toe with other tanks due to the lack of protection for the crew and insufficient armour layout. The armour can only stop rifle-calibre rounds from machine guns, and could possibly deflect 12.7 mm rounds off the frontal arc, but this vehicle was never designed to fight other tanks head-to-head. Its play style may generally confuse new or inexperienced players, as they would bring the vehicle up close to the front.
The vehicle was mainly purposed for destroying tanks at a distance, hence the amazing penetration values with the gun at its battle rating. It will still penetrate tanks of its BR and rank even at 500 meters, which means staying from afar is the best way to play this particular vehicle. However, relocating after successive shots is another good idea. It prevents returning fire from the enemy, especially artillery strikes. It is not wise to bring this vehicle upfront, as it will probably not survive long with rigorous combat. However, the M3 GMC can be quite deadly up close as well if it manages to take the enemy by surprise. If planning to go up front, stock up on the M61 shot, which will increase the gun's lethality to tanks due to its internal HE charge. Keep in mind that this vehicle has to be supported by teammates, experienced players will take note of it's long to reload and may try to rush out and destroy the M3 GMC during the reloads. Effective use of its excellent reverse speed to take cover or back out of enemy fire will increase the chances of surviving. Overall, this vehicle is an effective tank destroyer for its rank, rivalling the ZiS-30. It combines the penetration ability of the ZiS-30 on to a larger calibre weapon, at the same time marrying the weapon on to the M3 half-track, which is already blessed with exceptional mobility.
The low fire rate can be a fatal downfall for many newer players; always stay in cover while reloading. Many players will stay out in the open while they wait for the gun to reload; this is a deadly mistake.
Modules
| Tier | Mobility | Protection | Firepower | ||
|---|---|---|---|---|---|
| I | Tracks | Parts | Horizontal Drive | ||
| II | Suspension | Brake System | FPE | Adjustment of Fire | M61 shot |
| III | Filters | Crew Replenishment | Elevation Mechanism | ||
| IV | Transmission | Engine | M89 | ||
As with all tanks, Parts and FPE should be your first priority. After that you may want to pick up the M61 shot for an overall much more lethal round, with better penetration and some explosive filler. Beyond that, crew replenishment should be a priority; how you get there is personal preference between mobility improvements or gun handling. Both paths have merit, but seeing as the role of the M3 is more of a longer range support vehicle, gun handling would likely provide a greater benefit for most players.
Pros and cons
Pros:
- Good cannon for its rank
- Good mobility
- Penetration offered by the M72 shot is excellent, but it lacks explosive fillers
- The explosive abilities of the M61 shot is deadly if penetration occurs
- Exceptional reverse speed
- Acceleration is best when compared to other tank destroyers of its rank
- Relatively low target compared to other tank destroyers
- Two spare crew before efficiency is compromised
Cons:
- New players may find the car-like turning of this vehicle very hard to use
- Lightly armoured, will only withstand 7.92 mm rounds effectively
- Any cannon round will penetrate this vehicle anywhere
- Vulnerable to strafing aircraft
- Entire crew is exposed, can be incapacitated by aircraft simply ramming into the vehicle
- Susceptible to nearby explosions, especially from artillery
- Commander and loader are in-line with each other when viewing from the front, and same for the driver and gunner
- Poor reload time, will be out-RPMed by every other cannon at the rank
- Stock AP shell has poor after-armour effect
- Slow traverse speed for the cannon
- Limited traverse for cannon
History
Development
In the opening stages of World War II, the American military leaders realize they did not have any adequate anti-tank weaponry to repeal a German tank assault. An urgent request for one developed into something akin of an improvised weapon.
Army development took an M3 half-track and placed the French 75 mm Gun M1897A4 gun onto it with a huge gun shield to protect the crew. This experimental vehicle was called the T12, and was deemed to work well enough to be adopted and standardized in October 1941 as the 75 mm GMC M3. From 1941 to 1943, about 2,200 units were produced, but many were converted back to standard half-tracks before they got issued, so it resulted in only about 842 units seeing combat service.
The M3 GMC was not particularly a protected vehicle given that it used a half-track as its basis, giving it rather limited protection for the crew. The gun crew on the half-track has a huge gun shield to take cover behind as they ready the weapon, but the truck driver and passenger would have no protection available. The French 75 mm Gun M1897A4 attached was a multi-purpose artillery piece, it could fire an armour piercing shell that could penetrate 81 mm of armour at 500 yards in a direct-fire role, and could hit targets up to 9,200 yards in an indirect-fire role. The 75 mm gun could only traverse in a limited arc forward, unable to traverse to face the back. Nevertheless, for a rushed production, the vehicle was deemed acceptable for use.
Combat service
The vehicles saw service first in the Philippines when the Japanese invaded in December 1942, used to fend off Japanese vehicles and infantry. When the Japanese conquered the Philippines, they captured the 75 mm GMC M3s and used them against U.S. Forces when they invaded the Philippines in October 1944. The largest concentration of the 75 mm GMC M3 was in the North African Campaign, and then again in the Sicilian Campaign. During the Sicilian campaign, it was gradually phased out for the 3-inch Gun Motor Carriage M10 as it was starting to become obsolete, but it stayed as a support weapon as assault guns for special forces. In the Pacific, they saw further use in the Marine Corps blasting Japanese tanks and fortifications on the major island battles before being gradually replaced by the 105 mm artillery on the M7 Priest.
The British, French, and Philippine Army were the few Allies who got their hands on the 75 mm GMC M3. In British terminology, it was known as the 75 mm SP, Autocar. The Free French forces used some M3 GMC in the Western Front during the invasion of France. The Philippine forces used the M3 GMC when the U.S. supplied their military there with it. The Philippines retained the M3 GMC up to the 1960s, being used by a number of factions, from the Japanese when they captured it in the 1940s, the rebels of the Hukbalahap Rebellion, and in the Korean War by the Philippine Expeditionary Force.
In-game description
This self-propelled artillery installation was built in 1941 on the base of the M3 semitrack transporter by installing a modified version of an old French cannon onto it. It was released right up until 1943 and was unsuccessful as an anti-tank vehicle due to its poor armament and minimal armor.
Media
Skins and camouflages for the M3 GMC from live.warthunder.com.
by Oxide
See also
Links to the articles on the War Thunder Wiki that you think will be useful for the reader, for example:
- reference to the series of the vehicles;
- links to approximate analogues of other nations and research trees.
External links
| USA tank destroyers | |
|---|---|
| M10 | M10 GMC |
| M36 | M36 GMC · M36B2 |
| T95 | T28 · T95 |
| M109 | M109A1 |
| ATGM | LOSAT · M901 · ADATS |
| Wheeled | M3 GMC · T55E1 |
| Other | M8 HMC · M50 · M56 |
| China | ▃LVT(A)(4) (ZIS-2) |
