
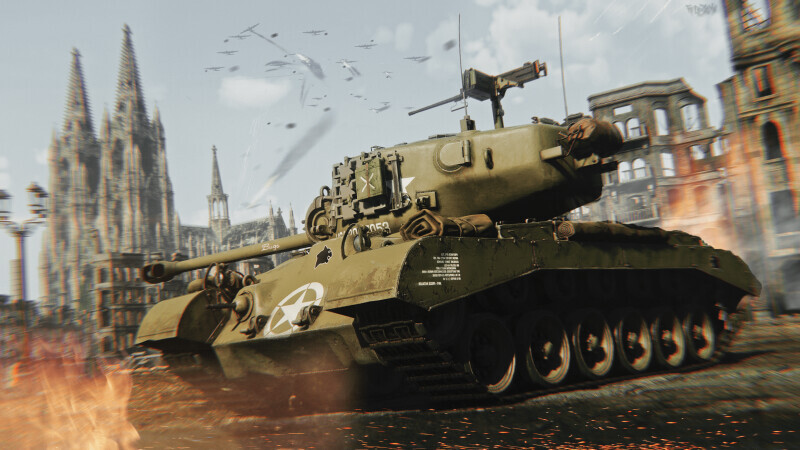
Throughout the vast majority of the Second World War, the M4 Sherman served as the backbone of the United States Army. However, just as the Sherman was entering mass production, there were already plans to design a successor vehicle. Named after the legendary General of the Armies John J. Pershing, the M26 was built to counter the increasing number of Axis heavy tanks that were entering service.

| PROS | CONS |
| Powerful APHE and APCR shell | Poor power-to-weight ratio |
| Low profile | Cannon will struggle in an uptier |
| Good reverse speed | Excels in no particular field |
| Excellent gun elevation and depression angles | Mediocre performance in comparison to vehicles of the same BR |
| Decent armor protection |
Armament
The Pershing is armed with the 90mm M3 cannon, which has rather average performance at its battle rating, being more comparable to the Tiger I’s KwK 36 or the Panther’s KwK 42 in terms of armor penetration.
In terms of gun handling, the Pershing is quite good with a respectable -10 degrees of gun depression and 20 degrees of gun elevation. The tank’s turret traverse speed quite good with stock traverse speeds being 12.5 dg/s, but can be boosted up to 14.7 dg/s with the Horizontal Drive module.
It should be noted that, like the previous M4/T26 and T25, the M26 Pershing has no vertical stabilizer, so players used to the Sherman may find the Pershing’s cannon to be unwieldy at times.

The following ammo is worth using:
- M82 Shot — This is an unlockable APCBC (Armor Piercing Capped Ballistic Capped) shell that has decent armor penetration performance and a respectable amount of HE filler that will cripple or kill most enemy vehicles in one shot. The M82 shell has superior performance compared to the stock T33 shell in every way and should be used as your primary ammunition type.
- M304 Shot — The M304 is an unlockable APCR (Armor Piercing Composite Rigid) shell that has a very high amount of armor penetration, yet as with all APCR type ammunition struggles on slopped surfaces and lacks post-penetration damage. Bringing a handful of these shells may prove useful against highly armored opponents.
- M71 Shell — Lastly, the M71 is a HE (High Explosive) shell that is mainly used for destroying buildings or taking out soft targets. Bring a small amount of these shells to deal with targets that the M82 shot would over penetrate.
Armor and Survivability
The M26 Pershing’s armor is quite good for a medium tank with the upper front plate being 101mm of cast armor slopped at 46 degrees, giving an effective thickness of about approximately 130-140mm with the lower front plate being 76.2mm thick with slopping ranging from 28 to 53 degrees. The 'bulge' in the front armor which houses the ventilator is 162.5mm in thickness and its slope varies between 25 and 41 degrees.

The turret front is protected by a thick cast gun mantlet is about 140mm in thickness with the turret itself being 101.6mm in thickness in the front and 76.2mm on the sides and rear. On the sides of the Pershing’s hull, the fore section is a flat 76.2mm whilst the aft and rear of the vehicle are 50.8mm.
This armor is sufficient at protecting you from threats that have lower powered guns such as the T-44's ZIS-S-53 or the Tiger I’s KwK 36. However, the armor is woefully inadequate at facing opponents that are similar in BR or above like the Soviet D-25T or the KwK 43, so avoiding to be hit in the first place is ideal.
Mobility
Whilst on paper the top speed of nearly 30 mph sounds promising, actually achieving this speed is another thing entirely. The acceleration on the Pershing is rather poor due to the underpowered Ford GAA engine and is even worse when stock. On a positive note, the reverse speed is rather quick at 10 mph.
In short, despite being classified as a medium tank you should expect heavy tank levels of mobility and the Pershing should be played to compensate for it.
Usage in Battle
The M26 Pershing is rather average in all metrics of performance, thus it can fulfill a wide variety of roles. However, the roles you can play in the Pershing vary heavily depending on the battle rating you find yourself in.
When in a downtier the Pershing fulfills the role of a heavy tank; its armor giving you the ability to brawl against weaker vehicles like the T-34-85, Tiger I, and Sherman variants, and its cannon being more than sufficient at bringing down most threats with a well-placed shot.
However in an uptier things change, your armor is practically useless against most weapons and your cannon will struggle against higher tier heavies. In these scenarios it is recommended to play the Pershing in a less aggressive manner, supporting your team rather than being a frontline combatant. Do this by targeting vulnerable enemy components such as cannon barrels or tracks while also taking opportunities to kill enemies that expose their weak spots to you.
Notable Enemies:
Medium Tanks:
- T-54 (1947): The T-54's frontal hull is immune to your 90mm and its cannon can destroy a Pershing easily. Either ambush it from the side or aim a precise shot to the gunner’s optics.
- Panther II: Whilst outwardly similar to the Panther F, the Panther II is armed with the same KwK 43 found on the Tiger II and is capable of easily destroying you. Like the Panther F, the best bet at destroying it is targeting the flat turret front.
Heavy Tanks:
- Tiger II (H): This tank essentially outclasses you in every single way while being at the same BR so it is a common adversary. If engaging the Tiger II frontally your best bet is to target the commander’s cupola and if you are at point-blank range you can penetrate the turret front with the M82 shot as well as its machine gun port. At longer ranges, it is recommended to either load APCR or wait for the Tiger II to expose its weaker sides.
- IS-3/IS-4M/T-10A: These vehicles cannot be penetrated frontally by the Pershing’s cannon in any area. Target the cannon barrels or tracks and wait for a teammate to take them out or attempt to flank them. Shoot their lower sides as their upper sides are also immune to your gun.
- Maus: Give up. The Maus is unstoppable. In all seriousness, your only chance of reliably penetrating the Maus is to load APCR, even from the side. Target its left turret cheek near the machine gun in order to incapacitate the gunner or disable its cannon and tracks.
Tank Destroyers:
- Ferdinand: The Ferdinand is immune to your M82 shot, but its flat armor can be penetrated by your APCR round. Target the left side of the upper casemate to incapacitate the gunner. Then target the far corners of the casemate to hit the ammunition.
- Jagdtiger: Unlike the Ferdinand, the Jagdtiger’s upper casemate is highly resistant to your APCR rounds. Your best option would be to disable its gun or tracks and get a flanking shot or if you are confident, like the Tiger II, you could try placing a shot into its machine gun port.


