Difference between revisions of "Scout AH.Mk.1"
Colok76286 (talk | contribs) (Edits) |
(→Description) |
||
| (16 intermediate revisions by 6 users not shown) | |||
| Line 1: | Line 1: | ||
| − | |||
| − | |||
| − | |||
| − | |||
| − | |||
{{Specs-Card | {{Specs-Card | ||
|code=scout_ah_mk1 | |code=scout_ah_mk1 | ||
| Line 11: | Line 6: | ||
== Description == | == Description == | ||
<!-- ''In the description, the first part should be about the history of and the creation and combat usage of the helicopter, as well as its key features. In the second part, tell the reader about the helicopter in the game. Insert a screenshot of the vehicle, so that if the novice player does not remember the vehicle by name, he will immediately understand what kind of vehicle the article is talking about.'' --> | <!-- ''In the description, the first part should be about the history of and the creation and combat usage of the helicopter, as well as its key features. In the second part, tell the reader about the helicopter in the game. Insert a screenshot of the vehicle, so that if the novice player does not remember the vehicle by name, he will immediately understand what kind of vehicle the article is talking about.'' --> | ||
| − | + | Development on the Westland Scout began in the late 1950s, however not at the Westland company, but at Saunders-Roe, as the Saro P.531 light utility helicopter. With the acquisition of Saunders-Roe by Westland in the early 1960s, the Westland Scout was created. The Scout conducted its maiden flight in August 1960 and was well-received with both the British Army and Royal Navy during testing. As work on the Scout steadily progressed, Westland continued developing a navalized version of the vehicle in parallel, which was eventually known as the "[[Wasp HAS.Mk.1|Wasp]]". Both versions of the helicopter took part in combat operations during their service, most notably in Borneo, the Falklands, and Northern Ireland. In the end, around 280 machines of both types were built, including export models. | |
| − | + | It was introduced in [[Update 1.91 "Night Vision"]]. It serves as an opening helicopter for British pilots that will familiarise them with the game's helicopter mechanics. This vehicle has several vulnerabilities such as a lack of armour, countermeasures and insufficient weaponry. It will require practice and good tactics to get in tune with it and efficiently provide good close air support without being blown out of the air by enemy air defence. The {{Specs|name}} shares the same qualities as the later British helicopters: it is light, agile and fast. It also comes with ATGMs stock, so you don't have to research them as a modification. | |
| − | |||
| − | |||
== General info == | == General info == | ||
| Line 21: | Line 14: | ||
{{Specs-Heli-Flight}} | {{Specs-Heli-Flight}} | ||
<!-- ''Describe how the helicopter behaves in the air. Speed, manoeuvrability, acceleration and allowable loads - these are the most important characteristics of the vehicle.'' --> | <!-- ''Describe how the helicopter behaves in the air. Speed, manoeuvrability, acceleration and allowable loads - these are the most important characteristics of the vehicle.'' --> | ||
| − | [[File:SCOUT HELO TAKE OFF.png|thumb| | + | [[File:SCOUT HELO TAKE OFF.png|thumb|350px|Scout taking off from heliport to the mission]] |
| − | The flight performance of the Scout will prove to be | + | The flight performance of the Scout will prove to be rather satisfactory even when stock. It feels light, fast, and agile making it competent in evading the barrage of things that will rain at you, including tank shells. Its speed and acceleration are sufficient to allow good positioning when the match starts; setting the collective to 80% and keeping the pitch at +2.0°/-4.0° will usually be enough to reach top speed without gaining too much altitude or over-revving the propeller. Using the collective at 100% will increase thrust (useful when altitude is needed) but will reduce the horizontal speed drastically, making the helicopter prone to stalling during manoeuvres. |
| − | When manoeuvring to a different course keep in mind to | + | When manoeuvring to a different course keep in mind to not lose speed, the proper way to do this is to bank the helicopter towards the desired location before beginning the turn. This allows pilots to maintain their speed, indicated in the speed vector arrow at the centre of your heads up display (HUD). |
| − | The only payload | + | The Scout only has one payload, so there is no negative performance impact. Using hover mode and locking the target from the gunner's sight considerably improves the chance of a ATGM impact but it's feasible to also hit tanks when on the move, thanks to the Scout's great agility and stability. |
{| class="wikitable" style="text-align:center" | {| class="wikitable" style="text-align:center" | ||
| Line 50: | Line 43: | ||
==== No armour ==== | ==== No armour ==== | ||
| − | The Scout does not | + | The Scout does not have any protective armour plates or bulletproof glass, due to the sacrifices this would require in performance. The pilot should keep this in mind when flying. Rushing into the middle of the battlefield will end with disastrous results as the crew and vital components are only protected by the thin fuselage walls. |
| − | The pilot, gunner, engine, transmission, main rotor, and tail rotors are all exposed to fire from missiles, rockets, cannons, and even small-calibre machine guns. However, it | + | The pilot, gunner, engine, transmission, main rotor, and tail rotors are all exposed to fire from missiles, rockets, cannons, and even small-calibre machine guns. However, it is sometimes possible to survive multiple hits due to the spacious layout of the vehicle's components. The low velocity of small-calibre rounds is sometimes inadequate to penetrate the Scout's fuselage panels. |
| − | The same cannot be stated from | + | The same cannot be stated from 20 mm cannons and beyond that will shred the helicopter into a million pieces. |
| − | ==== | + | ==== Survivability improvement ==== |
| − | The Flak jacket and Helicopter frame modules should be researched to increase the crew survivability against | + | The Flak jacket and Helicopter frame modules should be researched to increase the crew survivability against airburst shells that are extremely dangerous to your helicopter and crew. Pilots will be quick to notice the improvement in their helicopter's durability. A higher crew vitality (Pilot/Gunner) also improves survival. |
=== Modifications and economy === | === Modifications and economy === | ||
{{Specs-Economy}} | {{Specs-Economy}} | ||
| − | Thanks to | + | Thanks to great speed and agility, the modules of main concern relate to protection and survivability, such as the NVD or Flak jacket. The "Arcade Assault" game mode can allow rookie pilots to research the main modifications needed to improve the Scout for optimal performance in Mixed Battles. |
== Armaments == | == Armaments == | ||
{{Specs-Heli-Armaments}} | {{Specs-Heli-Armaments}} | ||
| − | [[File:SCOUT COMBAT.png|thumb| | + | [[File:SCOUT COMBAT.png|thumb|350px|Scout engaging enemy tanks from the flanks]] |
=== Offensive armament === | === Offensive armament === | ||
{{Specs-Heli-Offensive}} | {{Specs-Heli-Offensive}} | ||
| Line 76: | Line 69: | ||
* 2 x 7.62 mm L8A1 machine guns, skid-mounted (250 rpg = 500 total) | * 2 x 7.62 mm L8A1 machine guns, skid-mounted (250 rpg = 500 total) | ||
| − | The L8 MGs are rather inaccurate when not ungraded. British pilots | + | The L8 MGs are rather inaccurate when not ungraded. British pilots should not rely on this to attack any ground target as they mostly serve to defend against pestilent air targets or helicopters on attack runs. A gun convergence of 600 m is enough to fire effectively without getting too close to the enemy. |
=== Suspended armament === | === Suspended armament === | ||
{{Specs-Heli-Suspended}} | {{Specs-Heli-Suspended}} | ||
<!-- ''Describe the helicopter's suspended armament: additional cannons under the winglets, any bombs, and rockets. Since any helicopter is essentially only a platform for suspended weaponry, this section is significant and deserves your special attention. If there is no suspended weaponry remove this subsection.'' --> | <!-- ''Describe the helicopter's suspended armament: additional cannons under the winglets, any bombs, and rockets. Since any helicopter is essentially only a platform for suspended weaponry, this section is significant and deserves your special attention. If there is no suspended weaponry remove this subsection.'' --> | ||
| − | {{main| | + | {{main|AS.11}} |
The '''''{{PAGENAME}}''''' can be outfitted with the following ordnance: | The '''''{{PAGENAME}}''''' can be outfitted with the following ordnance: | ||
| − | * 4 x | + | * 4 x AS.11 missiles |
| + | |||
| + | The AS.11 missiles are usually good and enough to end with an armoured treat. Their SACLOS (Semi-Automatic Command to Line Of Sight) guidance requires the gunner to hold the reticle over the target until impact. It is recommended to aim for the sides of armoured vehicles, as some tanks are able to survive frontal ATGM impacts. Keep in mind the maximum range of 3.5 km and always anticipate a target's movement. | ||
| − | + | This helicopter has a very wide ATGM guidance area, so it can easily dodge SPAA volleys after locking the scope on target (F key). This feature is integral to the support helicopter playstyle, as the lack of armour does not allow to attack tanks or SPAA directly. The scope of this helicopter does not follow vehicles when they move, so sometimes gunner must correct aim when there is time, or when the ATGM is about to hit. | |
== Usage in battles == | == Usage in battles == | ||
<!-- ''Describe the tactics of playing in a helicopter, the features of using the helicopter in a team and advice on tactics. Refrain from creating a "guide" - do not impose a single point of view, but instead, give the reader food for thought. Examine the most dangerous enemies and give recommendations on fighting them. If necessary, note the specifics of the game in different modes (AB, RB, SB).'' --> | <!-- ''Describe the tactics of playing in a helicopter, the features of using the helicopter in a team and advice on tactics. Refrain from creating a "guide" - do not impose a single point of view, but instead, give the reader food for thought. Examine the most dangerous enemies and give recommendations on fighting them. If necessary, note the specifics of the game in different modes (AB, RB, SB).'' --> | ||
| − | As the Scout is such a weak target, the | + | As the Scout is such a weak target, the pilot must be aware of their surroundings and fight from the enemy's blind spots or flank, because a destroyed helicopter only assists the enemy's victory. Analyse and choose your side to engage in battle and preserve your helicopter. |
| + | |||
| + | Pilots should avoid high-altitude combat with this helicopter for several reasons: | ||
| + | |||
| + | * Increased vulnerability to SPAA and SAMs | ||
| + | * Increased visibility to enemy pilots | ||
| + | * Decrease in flight performance | ||
| + | * Lack of cover | ||
| + | |||
| + | '''Helicopter PvE (AB)''' | ||
| + | |||
| + | Since this mode is a decent way to grind through modifications, it can be used to train basic understanding of helicopter controls and interface. The enemy aircraft also won't necessarily hunt you specifically, unless you get in their way, so it's also less stressful. Due to the arcade mode rules, helicopter will also recover ATGMs without having to go to the airfield. Until MG upgrade is researched, it is better to set gun convergence to 400 m here. | ||
| + | |||
| + | The primary role of this helicopter in this mode is anti-SPAA. Since enemy SPAA AI doesn't have the best aim in the world, and does not intentionally dodge missiles, you will be able to dodge their shots easily while also attacking, as long as you don't fly into their optimal range. You will also be able to outrange any short-range SPAA, which generally obliterate allied helicopters relying on their rockets, but only start firing from 2.5 km away. But, you cannot destroy bases and the weapons are very weak against bombers. Try to team up with some less agile helicopters to clear objectives faster. | ||
| + | |||
| + | Against static ground targets - Simply approach the enemy ground forces. At about 3 km range long range SPAA will start firing, but it doesn't use overwhelming fire tactics, so you can actively roll to the sides to not get hit. Do not sleep on them, as a direct hit to the pilot cabin can be fatal. Once you reach 3.5 km range, try to stall the helicopter then aim and lock the gun scope in their general direction (F key by default) and quickly shift to the gunner seat. Here, fix your aim as fast as you can, so that the scope is actually aiming at the SPAA, and shift to a different view. Now, as long as you don't turn the helicopter too far away from the target, your ATGMs will fly exactly where you were aiming - simply fire the ATGM (spacebar key by default) and control the helicopter, so that it doesn't continue to fly directly into the SPAA nest, or start rolling to the sides to evade enemy fire until they explode if it already did. After that, designate new target while dodging, fix aim after roll and repeat. If you feel like it, you can also fly as close as 2.5 km to practice dodging close-range SPAA volleys or to simply draw their fire from your allies, but these must be actively dodged and will not forgive mistakes. In case the gunner got shot and you lost the ability to correct ATGM aim, you can return to the airfield to get a replacement. | ||
| + | |||
| + | Once SPAA were dealt with, attack ground forces. When attacking into enemy territory, you can destroy AT cannons with MG (much easier to do so from the cockpit view) and destroy pileboxes with ATGMs in the same manner you dealt with the SPAA - first designate target, then do a run-by or simply adjust helicopter hull so that the ATGM is launched directly into the target and does not miss. When defending, you can simply hover the helicopter and manually attack them with ATGM, as the MG cannot damage them anyway. | ||
| − | + | Against convoys - The general strategy is similar, but the MG is only useful against trucks here (those only spawn on certain maps) and you can't just lock the ATGM scope, as both tanks and SPAAs will be moving. Instead, you have to deal with the long-range SPAAs yourself and dodge their shots while aiming in the sniper seat. Since convoys are generally protected by the long-range SPAA, it is necessary to maintain safe range of 3.0-3.5 km to avoid being shot, unless you want a challenge. To maintain distance, try to approach the convoy from the front, then stall the helicopter and pull the nose up until it starts steadily flying backwards at about 40 km/h speed, then go into the sniper seat - the autopilot will ensure that the helicopter keeps its pace. After dealing with the SPAA, you can just hover the helicopter and bombard remaining vehicles at your leisure. Intercepting convoys from the front also allows to have easier time aiming, as it is much more difficult to hit targets moving at an angle. If you can't - try to hit the first tank in the column into engine to make all of them temporarily stop (assuming it doesn't immediately explode). | |
| − | + | Against AI planes - AI attackers generally choose to ignore helicopters, but you can get in their way and attempt to shoot them down either with MG or ATGM, but this is extremely difficult due to the insufficient firepower and lack of aiming tools. | |
| − | |||
| − | |||
| − | |||
| − | + | '''Mixed battles (RB)''' | |
| − | |||
| − | + | The best flight approach is low as possible to the ground. The Scout can pass trees, houses, and mountains remaining almost undetected. Try to stay out of the enemy's half of the map, as their base AAA will likely detect you, and you are closer to newly spawned vehicles. | |
| − | + | Instead, the Scout should support the allied offensive from a low, hidden spot, launching the ATGMs to strategically eliminate enemies causing problems to the allied team. | |
| − | * In | + | In a winning match, opt for SPAA hunting as they mostly will focus on protecting themselves from allied tanks or jets. If losing, pilots could look for a window of opportunity and quickly cap a distant point to assist the allied team in turning the tide of the battle. |
| + | |||
| + | * In empty or flat maps, the Scout is of minimal effectiveness due to the lack of cover. Instead, an aircraft fitted with ATGMs or rockets would be more suitable. | ||
=== Pros and cons === | === Pros and cons === | ||
<!-- ''Summarise and briefly evaluate the vehicle in terms of its characteristics and combat effectiveness. Mark its pros and cons in the bulleted list. Try not to use more than 6 points for each of the characteristics. Avoid using categorical definitions such as "bad", "good" and the like - use substitutions with softer forms such as "inadequate" and "effective".'' --> | <!-- ''Summarise and briefly evaluate the vehicle in terms of its characteristics and combat effectiveness. Mark its pros and cons in the bulleted list. Try not to use more than 6 points for each of the characteristics. Avoid using categorical definitions such as "bad", "good" and the like - use substitutions with softer forms such as "inadequate" and "effective".'' --> | ||
| − | [[File:SCOUT RETREAT.png|thumb| | + | [[File:SCOUT RETREAT.png|thumb|350px|Scout leaving the combat zone swiftly after depletion of ATGMs]] |
'''Pros:''' | '''Pros:''' | ||
| − | * Light and nimble | + | * Light and nimble - useful for evading enemy fire |
| − | * Small and stealthy | + | * Small and stealthy - one of the smallest helicopters, makes hiding easy |
* Perfect for nap-of-the-earth (NoE) flying | * Perfect for nap-of-the-earth (NoE) flying | ||
| − | * Decently | + | * Decently fast even when stock |
| − | * Powerful | + | * Powerful AS.11 missiles. Able to destroy most tanks' frontal armour at its BR |
| − | * Quite a strong frame, often | + | * Quite a strong frame, will often be heavily damaged but remain operable |
'''Cons:''' | '''Cons:''' | ||
| − | * Limited weaponry | + | * Limited weaponry: only 4 x AGMs and 2 x defensive 7.62 mm machine guns |
| − | * Exposed engine won't take a lot of damage before | + | * Exposed engine won't take a lot of damage before failing |
| − | * No | + | * No countermeasures |
| − | * | + | * Poor survivability due to lack of armour |
| − | * | + | * Prone to accidents when pushed to its limits, especially when piloted in a third person view - can fall into uncontrollable spin if not immediately stopped with opposite direction inputs |
| − | |||
== History == | == History == | ||
| Line 147: | Line 156: | ||
;Skins | ;Skins | ||
| − | * [https://live.warthunder.com/feed/camouflages/? | + | |
| + | * [https://live.warthunder.com/feed/camouflages/?vehicle=scout_ah_mk1 Skins and camouflages for the {{PAGENAME}} from live.warthunder.com.] | ||
;Images | ;Images | ||
| Line 167: | Line 177: | ||
* ''links to approximate analogues of other nations and research trees.'' --> | * ''links to approximate analogues of other nations and research trees.'' --> | ||
| − | |||
* [[Wasp HAS.Mk.1]] | * [[Wasp HAS.Mk.1]] | ||
Latest revision as of 15:21, 29 November 2023

Contents
Description
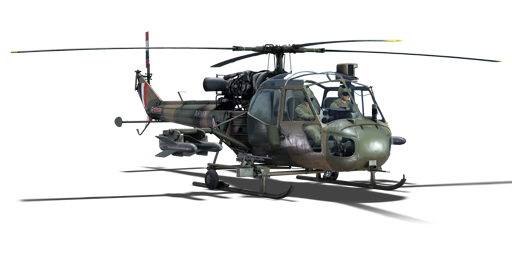
Development on the Westland Scout began in the late 1950s, however not at the Westland company, but at Saunders-Roe, as the Saro P.531 light utility helicopter. With the acquisition of Saunders-Roe by Westland in the early 1960s, the Westland Scout was created. The Scout conducted its maiden flight in August 1960 and was well-received with both the British Army and Royal Navy during testing. As work on the Scout steadily progressed, Westland continued developing a navalized version of the vehicle in parallel, which was eventually known as the "Wasp". Both versions of the helicopter took part in combat operations during their service, most notably in Borneo, the Falklands, and Northern Ireland. In the end, around 280 machines of both types were built, including export models.
It was introduced in Update 1.91 "Night Vision". It serves as an opening helicopter for British pilots that will familiarise them with the game's helicopter mechanics. This vehicle has several vulnerabilities such as a lack of armour, countermeasures and insufficient weaponry. It will require practice and good tactics to get in tune with it and efficiently provide good close air support without being blown out of the air by enemy air defence. The Scout AH.Mk.1 shares the same qualities as the later British helicopters: it is light, agile and fast. It also comes with ATGMs stock, so you don't have to research them as a modification.
General info
Flight performance

The flight performance of the Scout will prove to be rather satisfactory even when stock. It feels light, fast, and agile making it competent in evading the barrage of things that will rain at you, including tank shells. Its speed and acceleration are sufficient to allow good positioning when the match starts; setting the collective to 80% and keeping the pitch at +2.0°/-4.0° will usually be enough to reach top speed without gaining too much altitude or over-revving the propeller. Using the collective at 100% will increase thrust (useful when altitude is needed) but will reduce the horizontal speed drastically, making the helicopter prone to stalling during manoeuvres.
When manoeuvring to a different course keep in mind to not lose speed, the proper way to do this is to bank the helicopter towards the desired location before beginning the turn. This allows pilots to maintain their speed, indicated in the speed vector arrow at the centre of your heads up display (HUD).
The Scout only has one payload, so there is no negative performance impact. Using hover mode and locking the target from the gunner's sight considerably improves the chance of a ATGM impact but it's feasible to also hit tanks when on the move, thanks to the Scout's great agility and stability.
| Characteristics | Max Speed (km/h at 1,000 m) |
Max altitude (metres) | |
|---|---|---|---|
| AB | RB | ||
| Stock | 194 | 182 | 5400 |
| Upgraded | 232 | 213 | |
Survivability and armour
No armour
The Scout does not have any protective armour plates or bulletproof glass, due to the sacrifices this would require in performance. The pilot should keep this in mind when flying. Rushing into the middle of the battlefield will end with disastrous results as the crew and vital components are only protected by the thin fuselage walls.
The pilot, gunner, engine, transmission, main rotor, and tail rotors are all exposed to fire from missiles, rockets, cannons, and even small-calibre machine guns. However, it is sometimes possible to survive multiple hits due to the spacious layout of the vehicle's components. The low velocity of small-calibre rounds is sometimes inadequate to penetrate the Scout's fuselage panels.
The same cannot be stated from 20 mm cannons and beyond that will shred the helicopter into a million pieces.
Survivability improvement
The Flak jacket and Helicopter frame modules should be researched to increase the crew survivability against airburst shells that are extremely dangerous to your helicopter and crew. Pilots will be quick to notice the improvement in their helicopter's durability. A higher crew vitality (Pilot/Gunner) also improves survival.
Modifications and economy
| Flight performance | Survivability | Weaponry | ||||||||||||
|---|---|---|---|---|---|---|---|---|---|---|---|---|---|---|
|
|
|
Thanks to great speed and agility, the modules of main concern relate to protection and survivability, such as the NVD or Flak jacket. The "Arcade Assault" game mode can allow rookie pilots to research the main modifications needed to improve the Scout for optimal performance in Mixed Battles.
Armaments

Offensive armament
The Scout AH.Mk.1 is armed with:
- 2 x 7.62 mm L8A1 machine guns, skid-mounted (250 rpg = 500 total)
The L8 MGs are rather inaccurate when not ungraded. British pilots should not rely on this to attack any ground target as they mostly serve to defend against pestilent air targets or helicopters on attack runs. A gun convergence of 600 m is enough to fire effectively without getting too close to the enemy.
Suspended armament
The Scout AH.Mk.1 can be outfitted with the following ordnance:
- 4 x AS.11 missiles
The AS.11 missiles are usually good and enough to end with an armoured treat. Their SACLOS (Semi-Automatic Command to Line Of Sight) guidance requires the gunner to hold the reticle over the target until impact. It is recommended to aim for the sides of armoured vehicles, as some tanks are able to survive frontal ATGM impacts. Keep in mind the maximum range of 3.5 km and always anticipate a target's movement.
This helicopter has a very wide ATGM guidance area, so it can easily dodge SPAA volleys after locking the scope on target (F key). This feature is integral to the support helicopter playstyle, as the lack of armour does not allow to attack tanks or SPAA directly. The scope of this helicopter does not follow vehicles when they move, so sometimes gunner must correct aim when there is time, or when the ATGM is about to hit.
Usage in battles
As the Scout is such a weak target, the pilot must be aware of their surroundings and fight from the enemy's blind spots or flank, because a destroyed helicopter only assists the enemy's victory. Analyse and choose your side to engage in battle and preserve your helicopter.
Pilots should avoid high-altitude combat with this helicopter for several reasons:
- Increased vulnerability to SPAA and SAMs
- Increased visibility to enemy pilots
- Decrease in flight performance
- Lack of cover
Helicopter PvE (AB)
Since this mode is a decent way to grind through modifications, it can be used to train basic understanding of helicopter controls and interface. The enemy aircraft also won't necessarily hunt you specifically, unless you get in their way, so it's also less stressful. Due to the arcade mode rules, helicopter will also recover ATGMs without having to go to the airfield. Until MG upgrade is researched, it is better to set gun convergence to 400 m here.
The primary role of this helicopter in this mode is anti-SPAA. Since enemy SPAA AI doesn't have the best aim in the world, and does not intentionally dodge missiles, you will be able to dodge their shots easily while also attacking, as long as you don't fly into their optimal range. You will also be able to outrange any short-range SPAA, which generally obliterate allied helicopters relying on their rockets, but only start firing from 2.5 km away. But, you cannot destroy bases and the weapons are very weak against bombers. Try to team up with some less agile helicopters to clear objectives faster.
Against static ground targets - Simply approach the enemy ground forces. At about 3 km range long range SPAA will start firing, but it doesn't use overwhelming fire tactics, so you can actively roll to the sides to not get hit. Do not sleep on them, as a direct hit to the pilot cabin can be fatal. Once you reach 3.5 km range, try to stall the helicopter then aim and lock the gun scope in their general direction (F key by default) and quickly shift to the gunner seat. Here, fix your aim as fast as you can, so that the scope is actually aiming at the SPAA, and shift to a different view. Now, as long as you don't turn the helicopter too far away from the target, your ATGMs will fly exactly where you were aiming - simply fire the ATGM (spacebar key by default) and control the helicopter, so that it doesn't continue to fly directly into the SPAA nest, or start rolling to the sides to evade enemy fire until they explode if it already did. After that, designate new target while dodging, fix aim after roll and repeat. If you feel like it, you can also fly as close as 2.5 km to practice dodging close-range SPAA volleys or to simply draw their fire from your allies, but these must be actively dodged and will not forgive mistakes. In case the gunner got shot and you lost the ability to correct ATGM aim, you can return to the airfield to get a replacement.
Once SPAA were dealt with, attack ground forces. When attacking into enemy territory, you can destroy AT cannons with MG (much easier to do so from the cockpit view) and destroy pileboxes with ATGMs in the same manner you dealt with the SPAA - first designate target, then do a run-by or simply adjust helicopter hull so that the ATGM is launched directly into the target and does not miss. When defending, you can simply hover the helicopter and manually attack them with ATGM, as the MG cannot damage them anyway.
Against convoys - The general strategy is similar, but the MG is only useful against trucks here (those only spawn on certain maps) and you can't just lock the ATGM scope, as both tanks and SPAAs will be moving. Instead, you have to deal with the long-range SPAAs yourself and dodge their shots while aiming in the sniper seat. Since convoys are generally protected by the long-range SPAA, it is necessary to maintain safe range of 3.0-3.5 km to avoid being shot, unless you want a challenge. To maintain distance, try to approach the convoy from the front, then stall the helicopter and pull the nose up until it starts steadily flying backwards at about 40 km/h speed, then go into the sniper seat - the autopilot will ensure that the helicopter keeps its pace. After dealing with the SPAA, you can just hover the helicopter and bombard remaining vehicles at your leisure. Intercepting convoys from the front also allows to have easier time aiming, as it is much more difficult to hit targets moving at an angle. If you can't - try to hit the first tank in the column into engine to make all of them temporarily stop (assuming it doesn't immediately explode).
Against AI planes - AI attackers generally choose to ignore helicopters, but you can get in their way and attempt to shoot them down either with MG or ATGM, but this is extremely difficult due to the insufficient firepower and lack of aiming tools.
Mixed battles (RB)
The best flight approach is low as possible to the ground. The Scout can pass trees, houses, and mountains remaining almost undetected. Try to stay out of the enemy's half of the map, as their base AAA will likely detect you, and you are closer to newly spawned vehicles.
Instead, the Scout should support the allied offensive from a low, hidden spot, launching the ATGMs to strategically eliminate enemies causing problems to the allied team.
In a winning match, opt for SPAA hunting as they mostly will focus on protecting themselves from allied tanks or jets. If losing, pilots could look for a window of opportunity and quickly cap a distant point to assist the allied team in turning the tide of the battle.
- In empty or flat maps, the Scout is of minimal effectiveness due to the lack of cover. Instead, an aircraft fitted with ATGMs or rockets would be more suitable.
Pros and cons

Pros:
- Light and nimble - useful for evading enemy fire
- Small and stealthy - one of the smallest helicopters, makes hiding easy
- Perfect for nap-of-the-earth (NoE) flying
- Decently fast even when stock
- Powerful AS.11 missiles. Able to destroy most tanks' frontal armour at its BR
- Quite a strong frame, will often be heavily damaged but remain operable
Cons:
- Limited weaponry: only 4 x AGMs and 2 x defensive 7.62 mm machine guns
- Exposed engine won't take a lot of damage before failing
- No countermeasures
- Poor survivability due to lack of armour
- Prone to accidents when pushed to its limits, especially when piloted in a third person view - can fall into uncontrollable spin if not immediately stopped with opposite direction inputs
History
Development on the Westland Scout began in the late 1950s, however not at the Westland company, but at Saunders-Roe. Saunders-Roe developed their Saro P.531 light utility helicopter, which itself was based on the design of a previous piston-powered helicopter. The Saro P.531 already had several prototypes built and tested by the time the company was acquisitioned by Westland, who in turn, decided to continue development of the P.531.
As a result, in the early 1960s, the Westland Scout was created. The Scout conducted its maiden flight in August 1960 and was well-received with both the British Army and Royal Navy during testing. Following the favorable reception, the helicopter was subsequently ordered into production for the Army as the Scout AH Mk.1.
As work on the Scout steadily progressed, Westland continued developing a navalized version of the vehicle in parallel. The 'Sea Scout', as it was initially designated, only featured several minor design differences from the base model, such as a wheeled undercarriage and foldable blades and tail section, along with some other differences. After being reviewed by the Royal Navy, the 'Wasp' as it eventually became known, entered service with the Royal Navy in 1963, alongside the Army's Scout.
Both versions of the helicopter took part in combat operations during their service, most notably in Borneo, the Falklands and Northern Ireland. In the end, around 280 machines of both types were built, including export models.
- From Devblog
Media
- Skins
- Images


- Videos
See also
External links
| Westland Aircraft Limited | |
|---|---|
| Aircraft | |
| Fighters | Whirlwind Mk I · Whirlwind P.9 |
| Turboprop | Wyvern S4 |
| Helicopters* | |
| Attack | AH Mk.1 Apache** |
| Utility | Wessex HU Mk.5 · Scout AH.Mk.1 · Wasp HAS.Mk.1 · Lynx AH.Mk.1 · G-LYNX |
| *After World War II, Westland Aircraft focused on building helicopters and changed its name to Westland Helicopters. | |
| **Licensed AH-64D | |
| See Also | Boeing Aircraft |
| Britain helicopters | |
|---|---|
| Attack | AH Mk.1 Apache · Rooivalk Mk1F CSH |
| Utility | Wessex HU Mk.5 · Scout AH.Mk.1 · Wasp HAS.Mk.1 · Lynx AH.Mk.1 · G-LYNX |
