Bosvark
Contents
Description
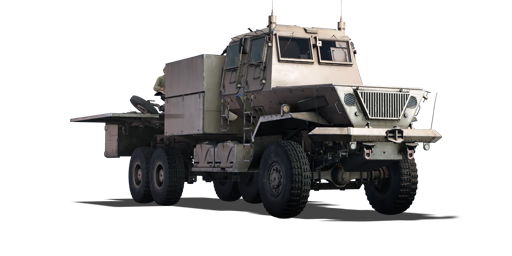
The Bosvark is a rank III British SPAA with a battle rating of 5.0 (AB) and 5.3 (RB/SB). It was introduced in Update "Fire and Ice".
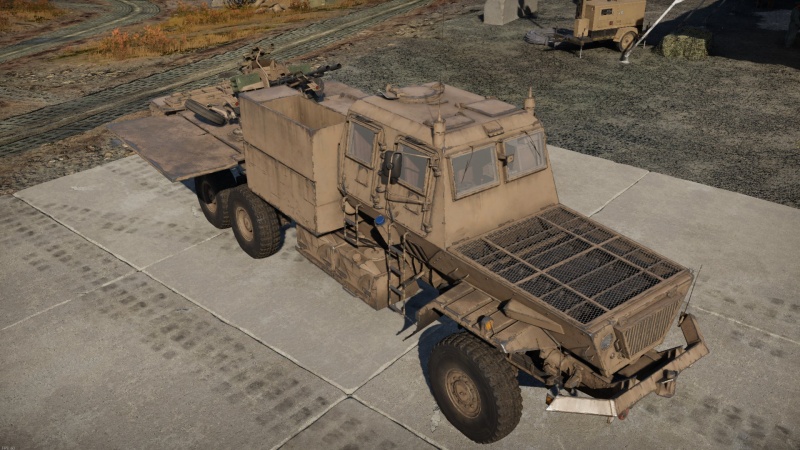
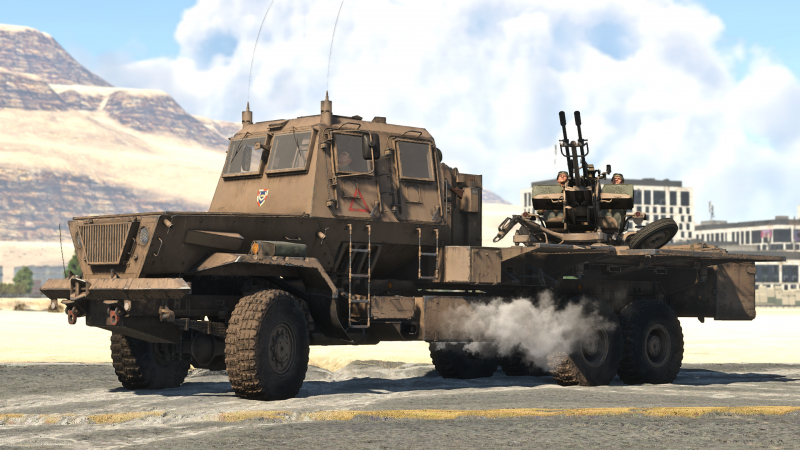
The Bosvark, also locally known as Zumlac, is a anti-air truck used by the South African Armed Forces combining the sturdy SAMIL 100 truck chassis with captured, Soviet-made fast-firing ZSU-23-2 anti-air cannons.
The design portrays all the fundamental principles of the average wheeled South African armoured vehicles: firepower and mobility over armour protection.
Players that enjoyed the skillfulness of the Ystervark will note the resemblance driving the Bosvark. Without much difference in the gameplay either, mainly focusing on close-range airspace denial and close ground support.
General info
Survivability and armour
Describe armour protection. Note the most well protected and key weak areas. Appreciate the layout of modules as well as the number and location of crew members. Is the level of armour protection sufficient, is the placement of modules helpful for survival in combat? If necessary use a visual template to indicate the most secure and weak zones of the armour.
Armour type:
| Armour | Front (Slope angle) | Sides | Rear | Roof |
|---|---|---|---|---|
| Hull | ___ mm | ___ mm Top ___ mm Bottom |
___ mm | ___ - ___ mm |
| Turret | ___ - ___ mm Turret front ___ mm Gun mantlet |
___ - ___ mm | ___ - ___ mm | ___ - ___ mm |
| Cupola | ___ mm | ___ mm | ___ mm | ___ mm |
Notes:
Mobility
| Game Mode | Max Speed (km/h) | Weight (tons) | Engine power (horsepower) | Power-to-weight ratio (hp/ton) | |||
|---|---|---|---|---|---|---|---|
| Forward | Reverse | Stock | Upgraded | Stock | Upgraded | ||
| Arcade | 109 | 9 | 19.5 | 447 | 601 | 22.92 | 30.82 |
| Realistic | 101 | 9 | 279 | 315 | 14.31 | 16.15 | |
Modifications and economy
Armaments
Main armament
| 23 mm ZU-23 (x2) | Turret rotation speed (°/s) | Reloading rate (seconds) | ||||||||||||
|---|---|---|---|---|---|---|---|---|---|---|---|---|---|---|
| Mode | Capacity (Belt) | Fire rate | Vertical | Horizontal | Stabilizer | Stock | Upgraded | Full | Expert | Aced | Stock | Full | Expert | Aced |
| Arcade | 700 (50) | 800 | -10°/+90° | ±180° | - | 52.8 | 73.1 | 88.8 | 98.2 | 104.5 | 13.00 | 11.50 | 10.60 | 10.00 |
| Realistic | 35.7 | 42.0 | 51.0 | 56.4 | 60.0 | |||||||||
Ammunition
- Default: API-T · HEF-I
- HEFI-T: HEF-I · HEFI-T · HEF-I · API-T
- APIT: API-T · API-T · API-T · HEFI-T
| Penetration statistics | |||||||
|---|---|---|---|---|---|---|---|
| Ammunition | Penetration @ 0° Angle of Attack (mm) | ||||||
| 10 m | 100 m | 500 m | 1,000 m | 1,500 m | 2,000 m | ||
| HEF-I | 6 | 6 | 4 | 3 | 2 | 2 | |
| API-T | 51 | 48 | 36 | 26 | 18 | 13 | |
| HEFI-T | 6 | 6 | 4 | 3 | 2 | 2 | |
| Shell details | ||||||||||||
|---|---|---|---|---|---|---|---|---|---|---|---|---|
| Ammunition | Velocity (m/s) |
Projectile mass (kg) |
Fuse delay (m) |
Fuse sensitivity (mm) |
Explosive mass (TNT equivalent) (g) |
Ricochet | ||||||
| 0% | 50% | 100% | ||||||||||
| HEF-I | 980 | 0.18 | 0.1 | 0.1 | 28.49 | 79° | 80° | 81° | ||||
| API-T | 970 | 0.19 | - | - | - | 47° | 60° | 65° | ||||
| HEFI-T | 970 | 0.19 | 0.1 | 0.1 | 20.02 | 79° | 80° | 81° | ||||
Ammo racks
| Full ammo |
1st rack empty |
2nd rack empty |
3rd rack empty |
4th rack empty |
5th rack empty |
6th rack empty |
Visual discrepancy |
|---|---|---|---|---|---|---|---|
| 14 | __ (+__) | __ (+__) | __ (+__) | __ (+__) | __ (+__) | __ (+__) | __ |
Usage in battles
Describe the tactics of playing in the vehicle, the features of using vehicles in the team and advice on tactics. Refrain from creating a "guide" - do not impose a single point of view but instead give the reader food for thought. Describe the most dangerous enemies and give recommendations on fighting them. If necessary, note the specifics of the game in different modes (AB, RB, SB).
Pros and cons
Pros:
- Fast vehicle, capable to relocate as needed thanks to superior top speed
- Powerful fast firing 23 mm cannons; small bursts are often enough
- Numerous crew members; may survive longer
Cons:
- Large vehicle; difficult to conceal and manoeuvre in enclosed areas due to large turning radius
- Lightly armoured; explosives, machine guns, rockets and cannons are a threat
- Cannon depletes magazine capacity quickly (50 rounds per gun); precision and restraint are needed
- Wheeled configuration provides poor off-road mobility, speed will not be any advantage
History
Describe the history of the creation and combat usage of the vehicle in more detail than in the introduction. If the historical reference turns out to be too long, take it to a separate article, taking a link to the article about the vehicle and adding a block "/History" (example: https://wiki.warthunder.com/(Vehicle-name)/History) and add a link to it here using the main template. Be sure to reference text and sources by using <ref></ref>, as well as adding them at the end of the article with <references />. This section may also include the vehicle's dev blog entry (if applicable) and the in-game encyclopedia description (under === In-game description ===, also if applicable).
Media
- Skins
See also
Links to the articles on the War Thunder Wiki that you think will be useful for the reader, for example:
- reference to the series of the vehicles;
- links to approximate analogues of other nations and research trees.
External links
| Britain anti-aircraft vehicles | |
|---|---|
| Crusader AA | Crusader AA Mk I · Crusader AA Mk II |
| Wheeled | Staghound AA · AEC AA |
| Radar SPAAG | Chieftain Marksman |
| Missile SPAA | Stormer HVM |
| Other | Light AA Mk I · Falcon |
| Canada | Skink |
| South Africa | Ystervark · Bosvark · ZA-35 |


