Crusader AA Mk II

From War Thunder Wiki
Jump to: navigation, search
VTOL | Rank 5 USA
AV-8A Harrier Pack
This page is about the British SPAAG Crusader AA Mk II. For other versions, see Crusader (Family).
Crusader AA Mk II
uk_crusader_aa_mk_2.png
GarageImage Crusader AA Mk II.jpg
ArtImage Crusader AA Mk II.png
Crusader AA Mk II
AB RB SB
5.0 4.0 4.0
Class:
Research:13 000 Specs-Card-Exp.png
Purchase:76 000 Specs-Card-Lion.png
Show in game

Description

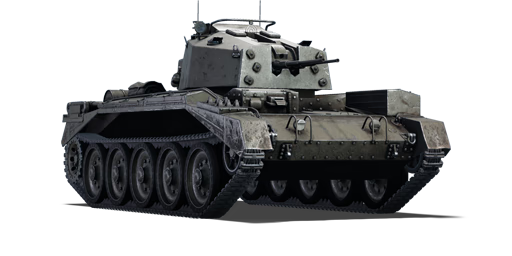
The Crusader III Anti-Aircraft Mark II is the second anti-air modification of the Crusader III, which is the third variant of the A15 Crusader cruiser tank family. It is armed with two 20 mm Oerlikon anti-aircraft autocannons. The turret was a small polygonal turret with good armour but poor situational awareness for identifying approaching aircraft. As a result of Allied air superiority over the battlefields of north-west Europe, none of these Crusader Anti-Aircraft modifications saw considerable use against aircraft, however, a few were used against ground targets, most notably by the 1st Polish Armoured Division.

Introduced in Update 1.55 "Royal Armour", the Crusader III Anti-Aircraft Mark II has far superior anti-aircraft capability than its predecessor, the Crusader III Anti-Aircraft Mark I. Despite having a smaller calibre anti-aircraft armament, it has a far higher firing rate. This results in substantially more extensive coverage against enemy aircraft on the battlefield. However, the decrease in armament calibre also results in a decrease in anti-tank capability, as the Crusader III Anti-Aircraft Mark II will struggle to engage practically any type of enemy armoured vehicle. Players do not have to worry about strafing fighters because they rarely cause major harm to the crew due to the vehicle's closed design. However, some planes equipped with cannons can be lethal since they can penetrate the armour while strafing.

General info

Survivability and armour

Armourfront / side / back
Hull20 / 28 / 14
Turret51 / 51 / 51
Crew4 people
Visibility89 %

Armour type:

  • Rolled homogeneous armour
  • Cast homogeneous armour (Gun mantlet, Driver's port)
Armour Front Sides Rear Roof
Hull 20 mm (33°) Front plate
9 mm (86°), 20 mm (62°) Front glacis
20 mm (26-64°) Lower glacis
18 mm (1°) Driver's plate
14 mm 14 mm (44-50°) Top
14 mm (14°) Bottom
7 mm
Turret 30 mm (5°)
30 mm (2-52°)
14 mm (7-9°) 17 mm (6-39°) 12.7 mm

Notes:

  • Suspension wheels and tracks are 15 mm thick.
  • The driver's port at the driver's position offers up to 50 mm of protection in cast homogeneous armour.

Mobility

Speedforward / back
AB48 / 8 km/h
RB and SB44 / 7 km/h
Number of gears4 forward
1 back
Weight19.6 t
Engine power
AB649 hp
RB and SB340 hp
Power-to-weight ratio
AB33.1 hp/t
RB and SB17.3 hp/t
Game Mode Max Speed (km/h) Weight (tons) Engine power (horsepower) Power-to-weight ratio (hp/ton)
Forward Reverse Stock Upgraded Stock Upgraded
Arcade 48 8 19.6 483 649 24.64 33.11
Realistic 44 7 301 340 15.36 17.35

Modifications and economy

Repair costBasic → Reference
AB1 493 → 1 921 Sl icon.png
RB1 118 → 1 438 Sl icon.png
SB1 689 → 2 173 Sl icon.png
Total cost of modifications24 700 Rp icon.png
44 900 Sl icon.png
Talisman cost1 100 Ge icon.png
Crew training22 000 Sl icon.png
Experts76 000 Sl icon.png
Aces400 Ge icon.png
Research Aces320 000 Rp icon.png
Reward for battleAB / RB / SB
80 / 100 / 150 % Sl icon.png
142 / 142 / 142 % Rp icon.png
Modifications
Mobility Protection Firepower
Mods new tank traks.png
Tracks
Research:
1 200 Rp icon.png
Cost:
2 200 Sl icon.png
100 Ge icon.png
Mods new tank suspension.png
Suspension
Research:
1 100 Rp icon.png
Cost:
2 000 Sl icon.png
90 Ge icon.png
Mods new tank break.png
Brake System
Research:
1 100 Rp icon.png
Cost:
2 000 Sl icon.png
90 Ge icon.png
Mods new tank filter.png
Filters
Research:
2 100 Rp icon.png
Cost:
3 800 Sl icon.png
170 Ge icon.png
Mods new tank transmission.png
Transmission
Research:
2 700 Rp icon.png
Cost:
4 900 Sl icon.png
220 Ge icon.png
Mods new tank engine.png
Engine
Research:
2 700 Rp icon.png
Cost:
4 900 Sl icon.png
220 Ge icon.png
Mods tank tool kit.png
Improved Parts
Research:
1 200 Rp icon.png
Cost:
2 200 Sl icon.png
100 Ge icon.png
Mods extinguisher.png
Improved FPE
Research:
1 100 Rp icon.png
Cost:
2 000 Sl icon.png
90 Ge icon.png
Mods tank reinforcement uk.png
Crew Replenishment
Research:
2 100 Rp icon.png
Cost:
3 800 Sl icon.png
170 Ge icon.png
Mods tank ammo.png
20mm_Oerlikon_HE_ammo_pack
Research:
1 200 Rp icon.png
Cost:
2 200 Sl icon.png
100 Ge icon.png
Mod arrow 0.png
Mods new tank horizontal aiming.png
Horizontal Drive
Research:
1 200 Rp icon.png
Cost:
2 200 Sl icon.png
100 Ge icon.png
Mods tank ammo.png
20mm_Oerlikon_AP_ammo_pack
Research:
1 100 Rp icon.png
Cost:
2 000 Sl icon.png
90 Ge icon.png
Mods tank cannon.png
Adjustment of Fire
Research:
1 100 Rp icon.png
Cost:
2 000 Sl icon.png
90 Ge icon.png
Mods new tank vertical aiming.png
Elevation Mechanism
Research:
2 100 Rp icon.png
Cost:
3 800 Sl icon.png
170 Ge icon.png
Mods art support.png
Artillery Support
Research:
2 700 Rp icon.png
Cost:
4 900 Sl icon.png
220 Ge icon.png
  • Like every other vehicle, the "Parts" and "FPE" modifications should be prioritized so you won't lose your vehicle due to being disabled.
  • After that, prioritize on the different ammunition, aiming for "HET", for better anti-air performance.
  • Getting "Horizontal Drive" next is recommended for aiming at high-speed targets
  • Everything else is extra, but still essentials to upgrading the vehicle.

Armaments

Main armament

Ammunition1 200 rounds
Belt capacity60 rounds
Reloadbasic crew → aces
1.3 → 1.0 s
Fire rate450 shots/min
Vertical guidance-5° / 87°
20 mm Oerlikon Mk.II (x2) Turret rotation speed (°/s) Reloading rate (seconds)
Mode Capacity (Belt) Fire rate Vertical Horizontal Stabilizer Stock Upgraded Full Expert Aced Stock Full Expert Aced
Arcade 1,200 (60) 450 -5°/+87° ±180° N/A 61.64 85.32 103.60 114.57 121.88 7.80 6.90 6.36 6.00
Realistic 41.65 49.00 59.50 65.80 70.00

Ammunition

  • Default: AP-T · HEF-I · AP-T - This belt carries an equal mixture of HEF-I and AP-T.
  • HET: HEFI-T · HEF-I · HEF-I - This is the belt you want to research first, since they are the best against aircraft.
  • APT: AP-T - These are purely AP-T belts. They are not always useful with only 42 mm of penetration, but it is always a good idea to carry a round of them for self-defence; it can knockout lightly armoured vehicles.

Penetration statistics
Ammunition Penetration @ 0° Angle of Attack (mm)
10 m 100 m 500 m 1,000 m 1,500 m 2,000 m
HEF-I 4 4 3 3 3 3
AP-T 38 35 23 14 9 5
HEFI-T 4 4 3 3 3 3
Shell details
Ammunition Velocity
(m/s)
Projectile
mass (kg)
Fuse delay
(m)
Fuse sensitivity
(mm)
Explosive mass
(TNT equivalent) (g)
Ricochet
0% 50% 100%
HEF-I 838 0.12 0 0.1 6 - - -
AP-T 830 0.14 - - - 47° 60° 65°
HEFI-T 838 0.12 0.1 0.1 5 79° 80° 81°

Ammo racks

Ammo racks of the AC Mk II AA (identical to Crusader AA Mk II).
Full
ammo
1st
rack empty
2nd
rack empty
3rd
rack empty
4th
rack empty
Visual
discrepancy
10 (+2) (+4) (+6) (+8) Yes

Usage in battles

Though the Crusader AA Mk.II was meant for SPAA, the twin 20 mm cannons mean this vehicle can annihilate lightly-protected vehicles with ease, such as the 8,8 cm Flak 37 Sfl. or the M15A1 CGMC, as the 20 mm will slice through the thin half-track armour to knock out the crew.

Due to the heavy ammunition consumption as SPAA in AA fights, stay at "safe" capture points to get free ammunition to reload during battle.

This vehicle has multiple uses depending on which type of ammunition is selected:

  • HET is recommended for destroying planes, but it would be impossible to destroy a tank with them. If such an encounter occurs, get out of the vicinity and do not draw the attention of tanks like the T-34-57 or Tiger will one shot this SPAA. When shooting planes try to aim for bombers and ground attack planes as they won't be able to outmanoeuvre the shots.
  • APT rounds gives a lot more choices. Though it is a Rank 3 vehicle, the low battle rating means it will be matched against Rank 2 opponents, many of which won't stand a chance if shot from the sides with APT. If in a higher rank battle (with opponents like the Panther D and the IS-1), this tactic will often not work. However, the Mark II can still tear apart tracks and gun barrels just as easily with the APT rounds.
  • As for the default belt, it is probably better off changing to prioritize HET or APT.

Due to the relatively low ammo reserve, only take one type of belt with you and take as much you can carry as the ammo will run out quickly when it is split apart for both belts.

Due to the closed nature of the vehicle, the Crusader AA Mk.II doesn't need to worry about strafing fighters as they will often not do any serious damage to the crew. However, ground attackers like the IL-2 or the P-47 are still just as deadly. Though more protected from machine gun fire, its armour is not enough to stand against enemy tanks, which would slice through the armour with shots from their cannons.

Pros and cons

Pros:

  • Using the Crusader Mk II's chassis - fast with a low profile
  • High fire rate and a quick reload
  • Closed-top AAA - the crew is well protected from strafing planes
  • Lightly-armoured vehicles like armoured cars, SPAA, and tank side armour can be an easy target to the rapid-firing 20 mm autocannons

Cons:

  • Limited ammo supply can be a problem when no allied capture point is available
  • The armour is overall weak and the hull roof can be penetrated by aircraft cannons
  • Can only penetrate medium tanks like the Panzer IVs from the side at close range, any more armour will leave the SPAA armament useless

History

Development

In 1938, the General Staff of the British Army requested a cruiser tank that was lighter and more affordable than the heavier A16 cruiser design developed by Nuffield Mechanizations & Aero. One of these designs was the designation Tank, Cruiser Mk.V based off the A13 cruiser tanks, named the "Covenanter", and Nuffield was invited to become part of its development team, but they refused due to interest in developing their own cruiser tank. Their tank was designated the Tank, Cruiser Mk.VI Crusader and fell under the General Staff specification of A15. The Crusader was a parallel design to the Covenanter but was ready six weeks earlier than the Covenanter despite starting at a later time. The Crusader was adopted into service with the British Army in 1941 and the 5,300 units were manufactured between 1940 to 1943.

Design

The Crusader features a new design that differs from its cruiser tank predecessors. The Christie suspension system on the Crusader had five road wheels for it instead of the usual four, which improves weight distribution of the increased 20-ton weight of the Crusader compared to the 14 tons of the A13 cruisers. The engine, steering system, and cooling system on the Crusader was different as well, but the Covenanter and Crusader use the same main turret. The polygonal shape of the turret gives the crew inside more room for the turret ring diameter.

The Crusader Mk.I and Mk.II were equipped with the 2-pounder, which was aimed by the gunner inside with a padded shaft that allows them to elevate the gun by simply adjusting his own height. Later in the war where an up-gun of the tank armament was necessary and newer tanks such as the Cromwell was delayed, the Crusader was upgraded into the Crusader Mk III variant with a 6-pounder instead, which restricted turret space, requiring the turret crew to be reduced from three to two. These saw the first action the Second Battle of El Alamein in October 1942.

Combat usage

The Crusader first saw action at North Africa, right after the British had been pushed back to the Egyptian border by Axis forces. The Crusaders were part of the huge shipment in the Malta Convoys to reequip the British forces there. Enough Crusaders arrive that the entire 6th Royal Tank Regiment was refitted with them, which joined up with the 2nd Royal Tank Regiment to form the 7th Armoured Brigade "Desert Rats". The brigade's first action was in Operation Battleaxe, though it was delayed due to adapting the tanks for the desert environment. The operation, which called for the relieve of the siege of Tobruk in June, was initiated in June to which 11 Crusader tanks were lost to anti-tank guns, plus many more to mechanical faults. While more Crusader tanks came in to reinforce the cruiser tank forces, there were never enough to supply the continuously expanding armoured units as 7th Brigade was combined with the 7th Hussars, the 2nd Armoured Brigade was added to the 7th Armoured Division, and the 8th Hussars was combined with the 4th Armoured Brigade. Overall, the Crusaders proved effective in the North African Campaign, the Crusader was faster than any tanks on the opposing side and the 2-pounder was lethal to the Panzer III, but the tank suffered from its thin armour, mechanical problems in the desert, and the growing deficiency of the 2-pounder, which didn't have enough range to destroy farther tanks. The Crusader design also caused the ammo racks on the tank to easily ignite due to unprotected racks and shot traps on the turret design. Anti-tank guns continue to be the main reason the Crusader units suffer losses, rather than to enemy tanks.

By the end of 1941, only the 2nd Armoured Brigade retained the Crusaders, the rest of the other tank units were being refitted with better tanks, such as the M3 Grant medium tank from the American Lend-Lease. Crusader units were also refitted with the more powerful Crusader Mk.III with the 6-pounder, which improved the Crusader's ability to destroy the gradually stronger German tanks. After General Bernard Montgomery took command of the British Army in 1942, more British tank units were re-equipped with the Grant and M4 Sherman tanks while the Crusaders were relegated from the front-lines to "light squadrons" meant to flank the enemy and attacked at its exposed sides. When the British 1st Army engaged the Axis at Tunisia, some tank regiments still use Crusaders mixed in with Valentine tanks. These units in the 26th Armoured Brigade, code-named "Blade Force", worked alongside the 78th Infantry Division as an independent armoured column. During Tunisia, the 1st Army was already converting the tank regiments into Shermans, but the 8th Army continued to use the Crusaders for much longer, which would see use at the Battle of Wadi Akarit and Mareth Line.

After the North African Campaign, the Crusaders no longer saw any use in the front-lines and were used in other roles such as gun tractors with 17-pounders or anti-aircraft mounts such as the Crusader AA Mk.I and Mk.II Some Crusader tanks equipped the tank regiments that stayed back at the British Homelands such as the 11th Armoured Division.

The AA tank Mark II replaced the obsolete Mark VI AA tanks that had been in the four-vehicle anti-aircraft troop in a British armoured regiment or infantry tank battalion, starting with the Normandy landings. The lack of German air targets meant they were largely used against ground targets. These regimental AA troops in France in 1944 used a mix of Crusader Mark IIs, Crusader AA Mk IIIs (which had a coaxial machine gun as well), and similarly armed Centaur AA tanks (based on an early version of the Cromwell that was also no longer useful as a battle tank).

Survivors

About 21 Crusaders still exist intact in various parts of the world. The most notable places with the Crusaders are South Africa with 8 known survivors, a running Crusader Mk III at Bovington Tank Museum at England, and an anti-aircraft version at Musée des Blindés in France.

Media

Skins
Images

See also

Vehicles with the same chassis:

Vehicles with the same weapon systems:

Vehicles with similar weapon systems:

External links


Nuffield Mechanizations and Aero Limited
Cruiser Tanks 
Tank, Cruiser, Mk III (A13 Mk I)  A13 Mk I · A13 Mk I (3rd R.T.R.)
Tank, Cruiser, Mk IV (A13 Mk II)  A13 Mk II · A13 Mk II 1939
Tank, Cruiser, Mk VI, Crusader (A15)  Crusader II · Crusader "The Saint" · Crusader III
Tank Destroyers  Tortoise
SPAAs  Crusader AA Mk I · Crusader AA Mk II
Export  ▄Crusader Mk.II

Britain anti-aircraft vehicles
Crusader AA  Crusader AA Mk I · Crusader AA Mk II
Wheeled  Staghound AA · AEC AA
Radar SPAAG  Chieftain Marksman
Missile SPAA  Stormer HVM
Other  Light AA Mk I · Falcon
Canada  Skink
South Africa  Ystervark · Bosvark · ZA-35