
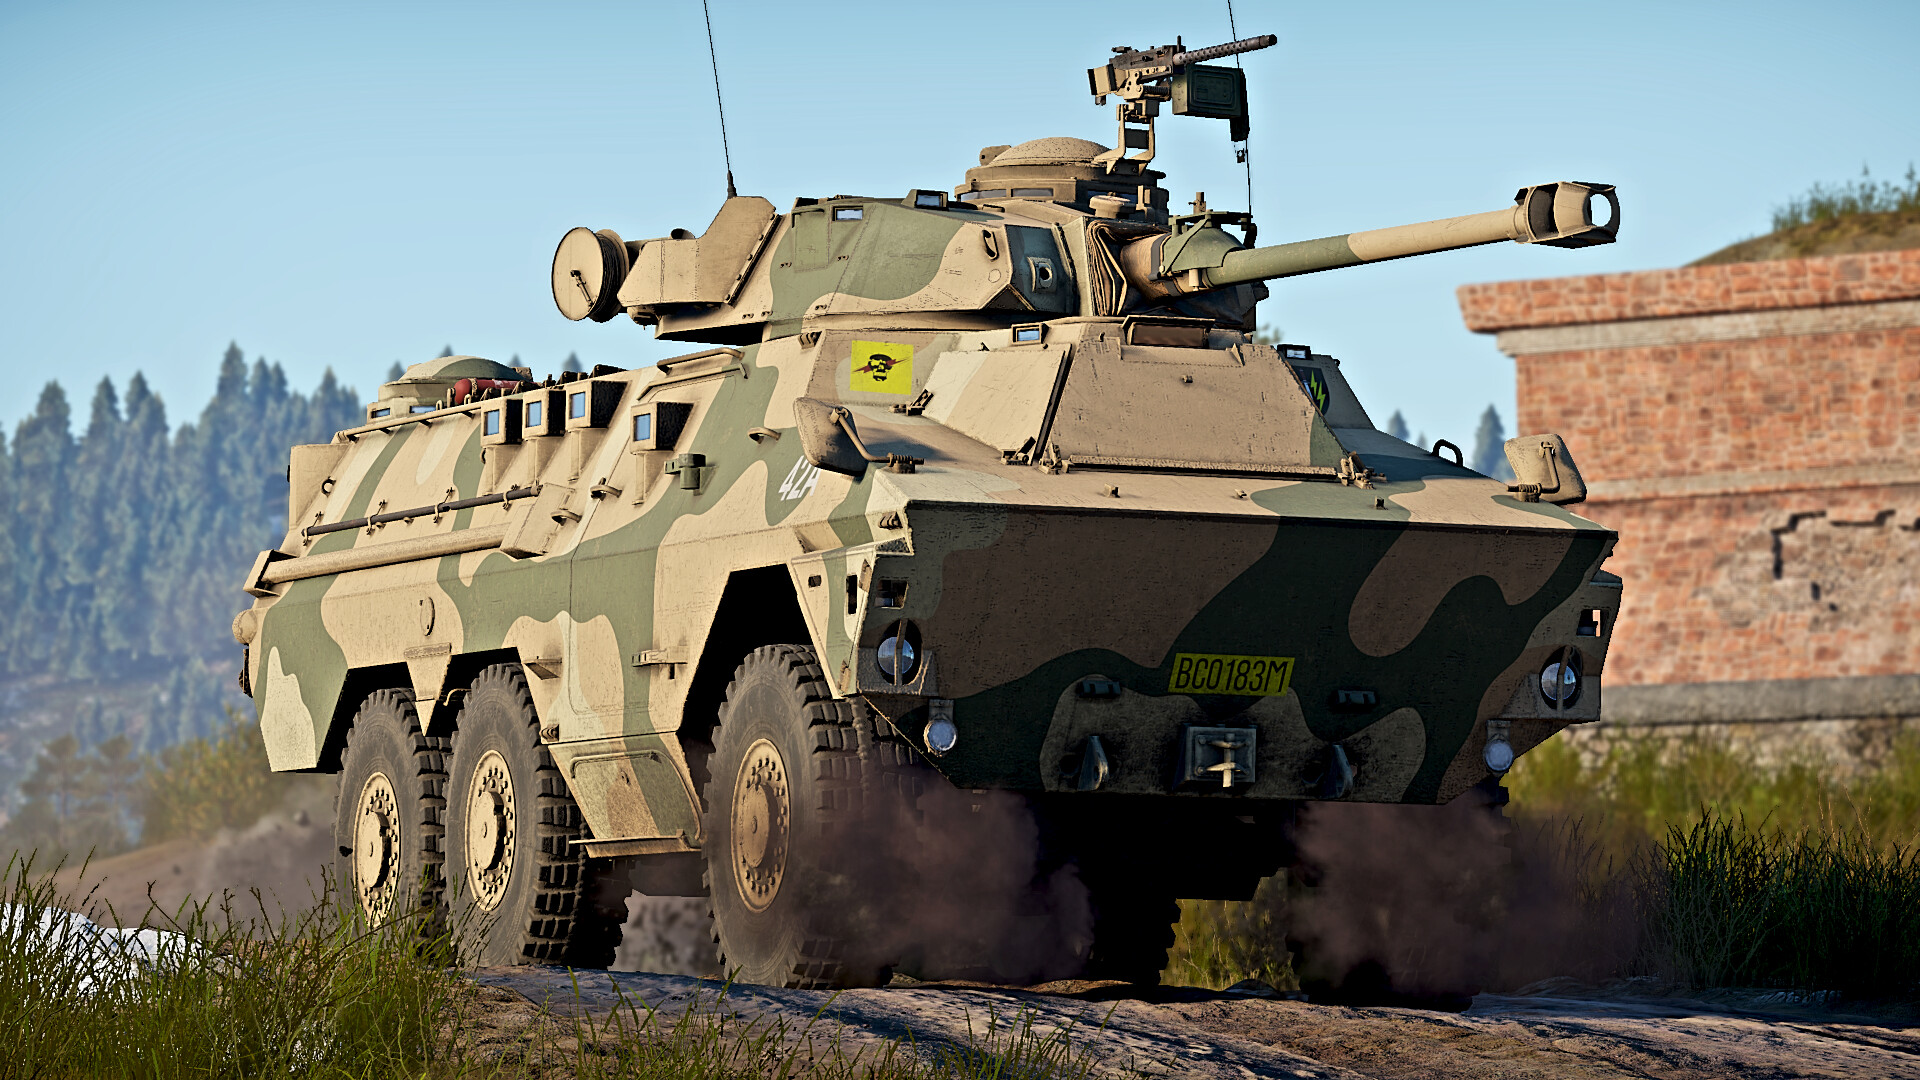
The Ratel 90 is an South African Light Tank in the British Tech tree. It is part of the Ratel family of fighting vehicles, a series of 6 wheeled IFV’s developed to replace the obsolete Alvis Saracen APC in South African Service. The Ratel 90 is a variant of the Ratel platform fitted with the turret of the Eland 90, and was utilized in the direct fire support role against enemy armour and fortifications. With a top speed of 65 mph, and a main armament that can penetrate 350mm of armour, it is a fairly decent light tank. However, with minimal armour protection, and a large silhouette, the Ratel 90 can be difficult to use effectively.
| Pros | Cons |
| Strong gun firing a powerful shell | Weak armour (No more than 20mm) |
| High top speed | Poor acceleration |
| Scouting modification | Large silhouette |
| Good gunner zoom | Low crew count, a hit in the turret will most likely destroy the vehicle |
Weaponry
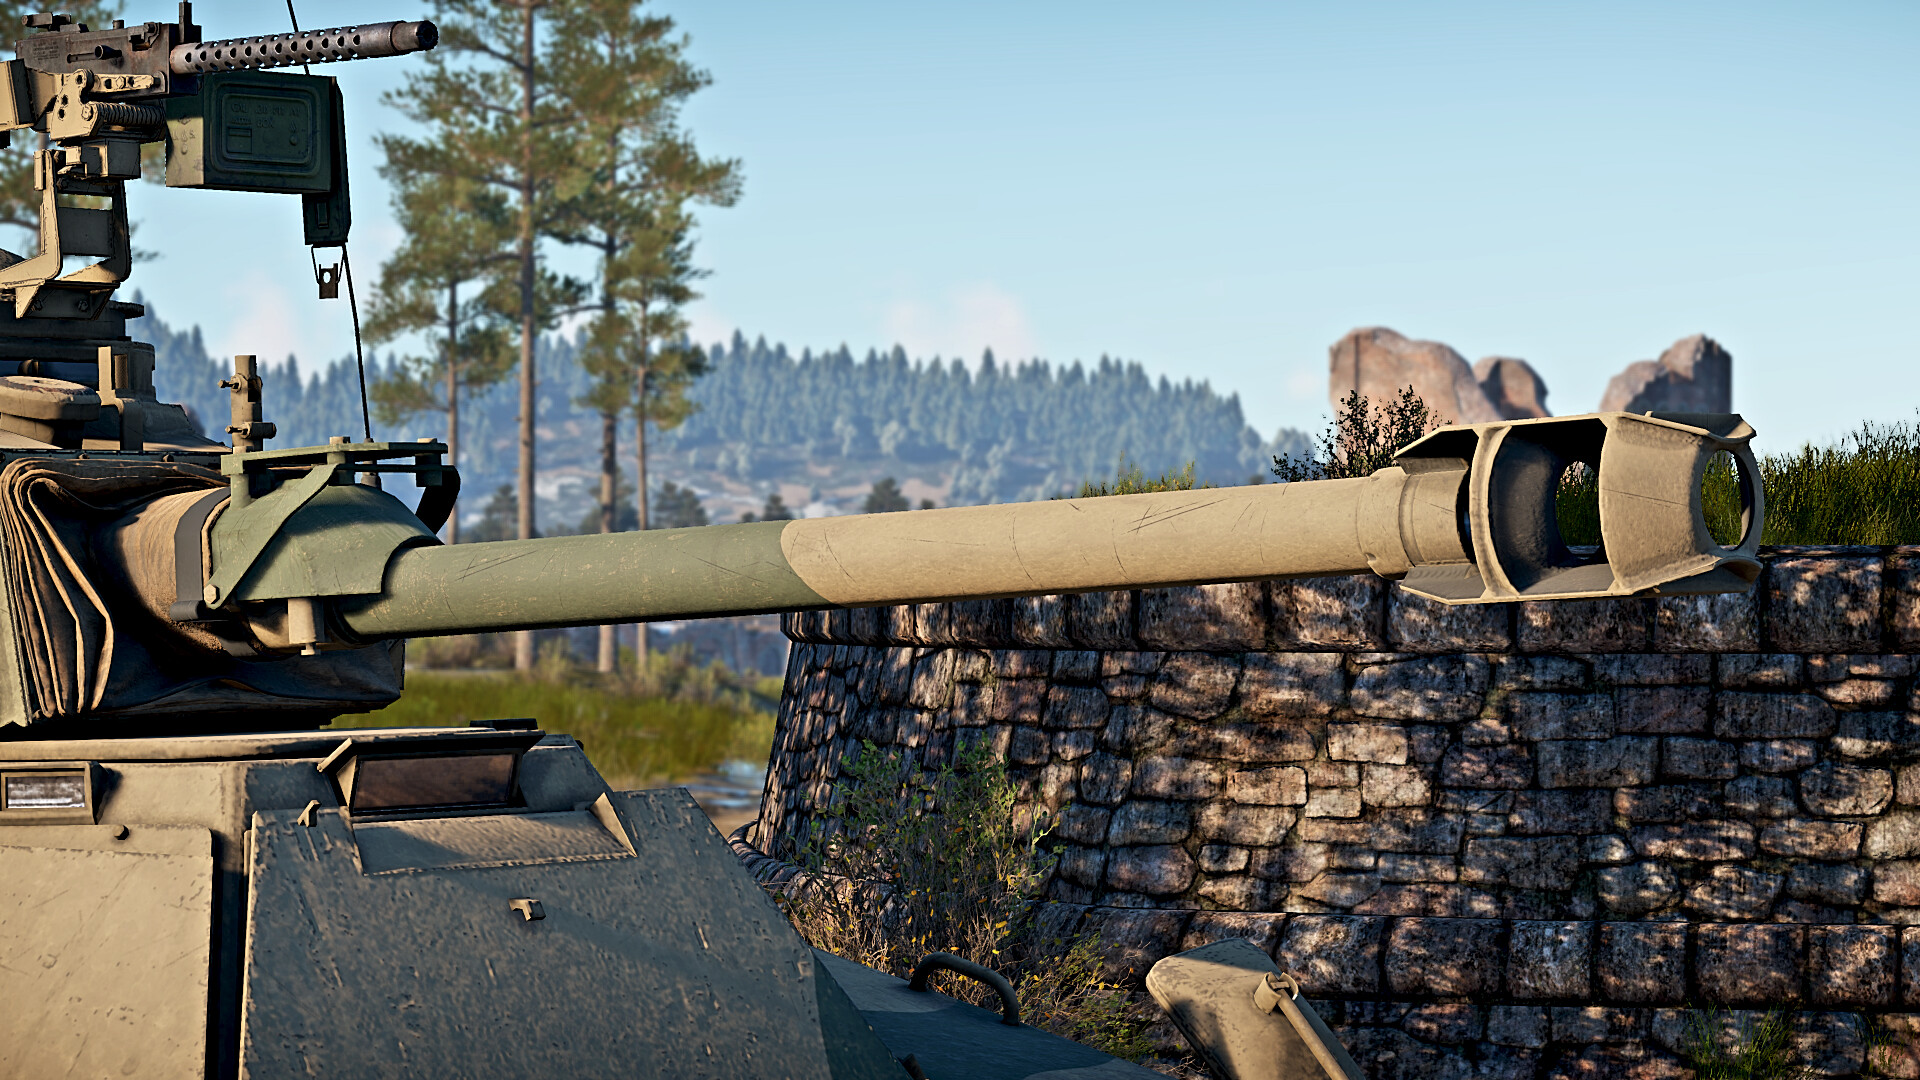
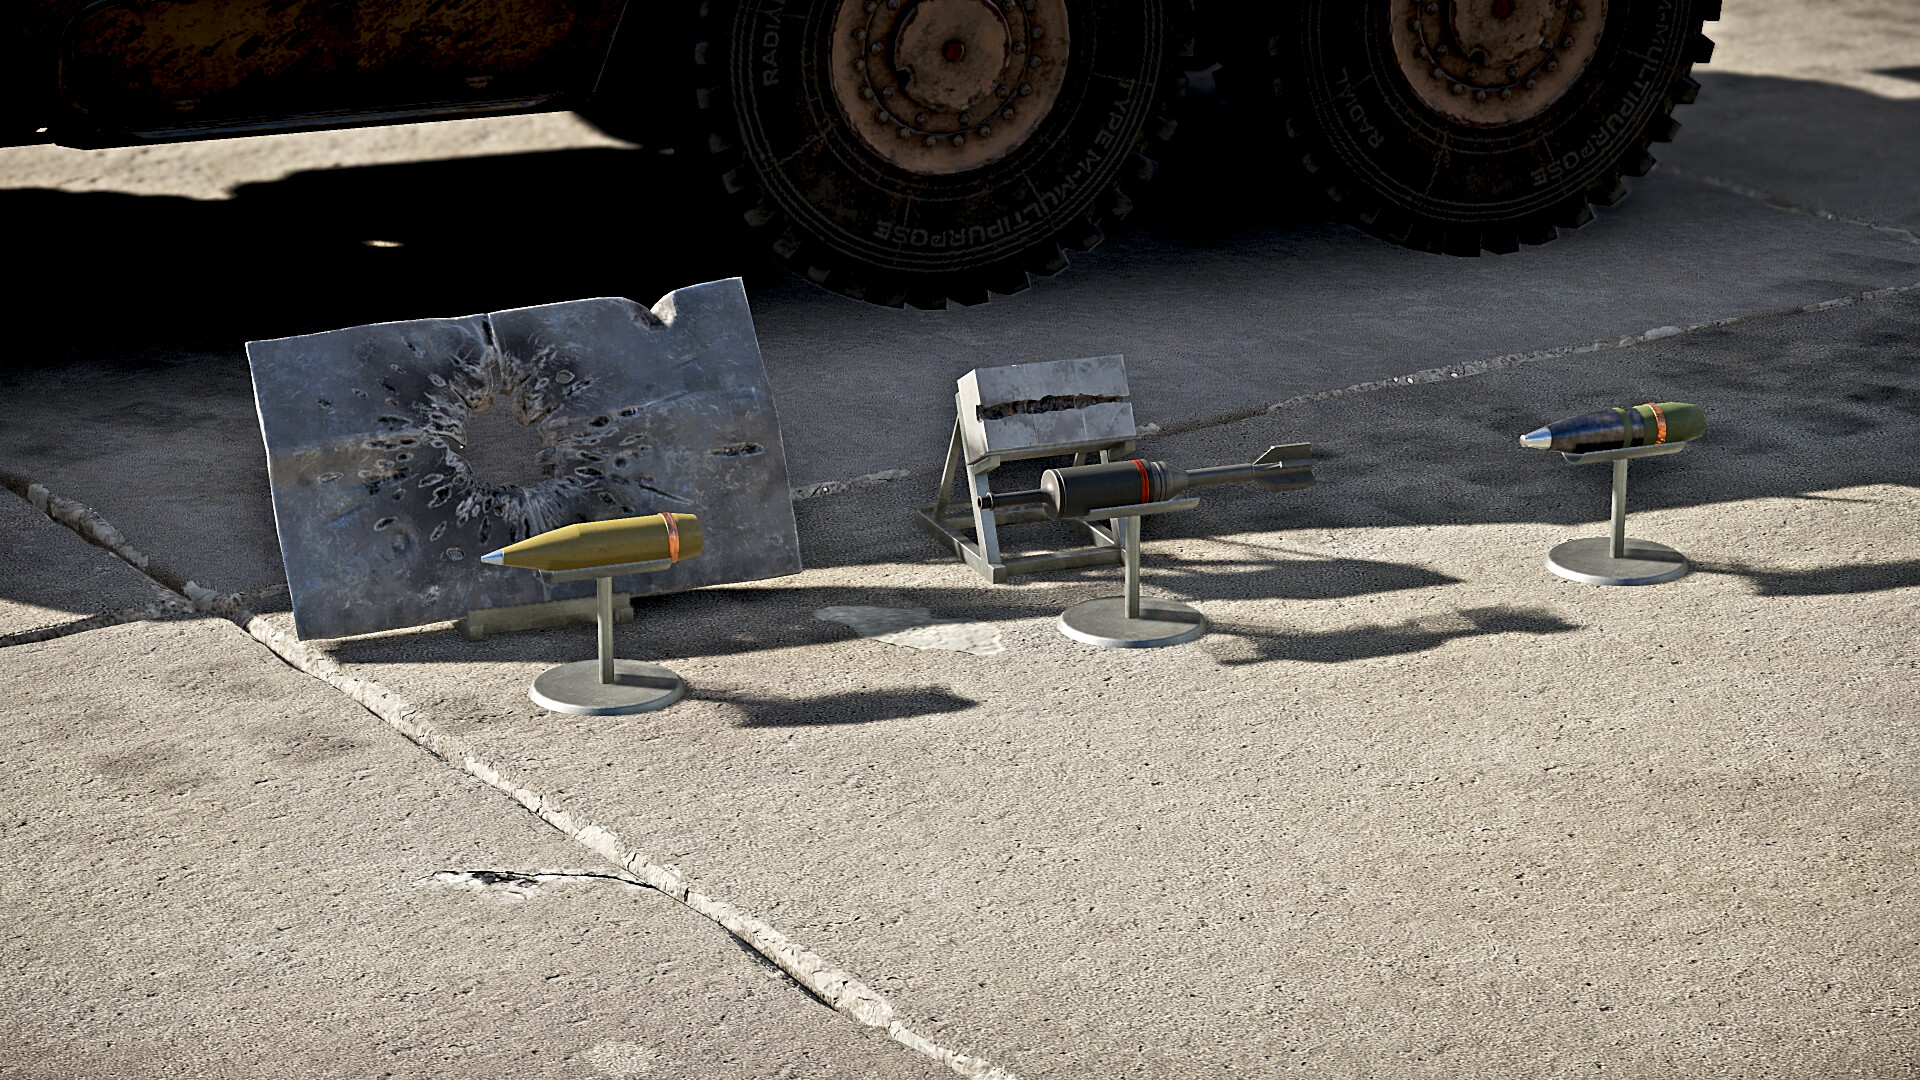
The main armament of the Ratel 90 is the 90 mm GT-2 cannon, a South African licensed copy of the French DEFA F1 cannon. It is the same gun fitted to the Panhard AML 90 family, specifically the Eland 90, as both the Ratel 90 and the Eland 90 share the same turret. It only fires chemical based rounds, which have the benefit of not losing armour penetration over range. The three shell types are as follows:
| Ammunition | Type | Armour Penetration at 0° |
| OCC 90-62 | HEAT-FS | 350mm |
| OE 90 F1 | HE | 13mm |
| OFUM PH90-F2 | Smoke | 5mm |
The GT-2 cannon is well suited for fighting all enemies, as the HEAT-FS round will easily penetrate most enemies you will face, even the heavily armoured Tiger II from all ranges! It is the first vehicle in the British Tech tree to be armed with HEAT-FS, a common shell in other South African vehicles in the tree, and helps teach newer players the benefits and deficiencies of HEAT-FS. It comes with good zoom on the gunners optic, between 5.7x–6.0x, which allows for medium range engagements that are recommended for this vehicle. However, you should note that it is a low-velocity gun, so use of sight distance control (manual gun elevation) is a must for most engagements that you will participate in.
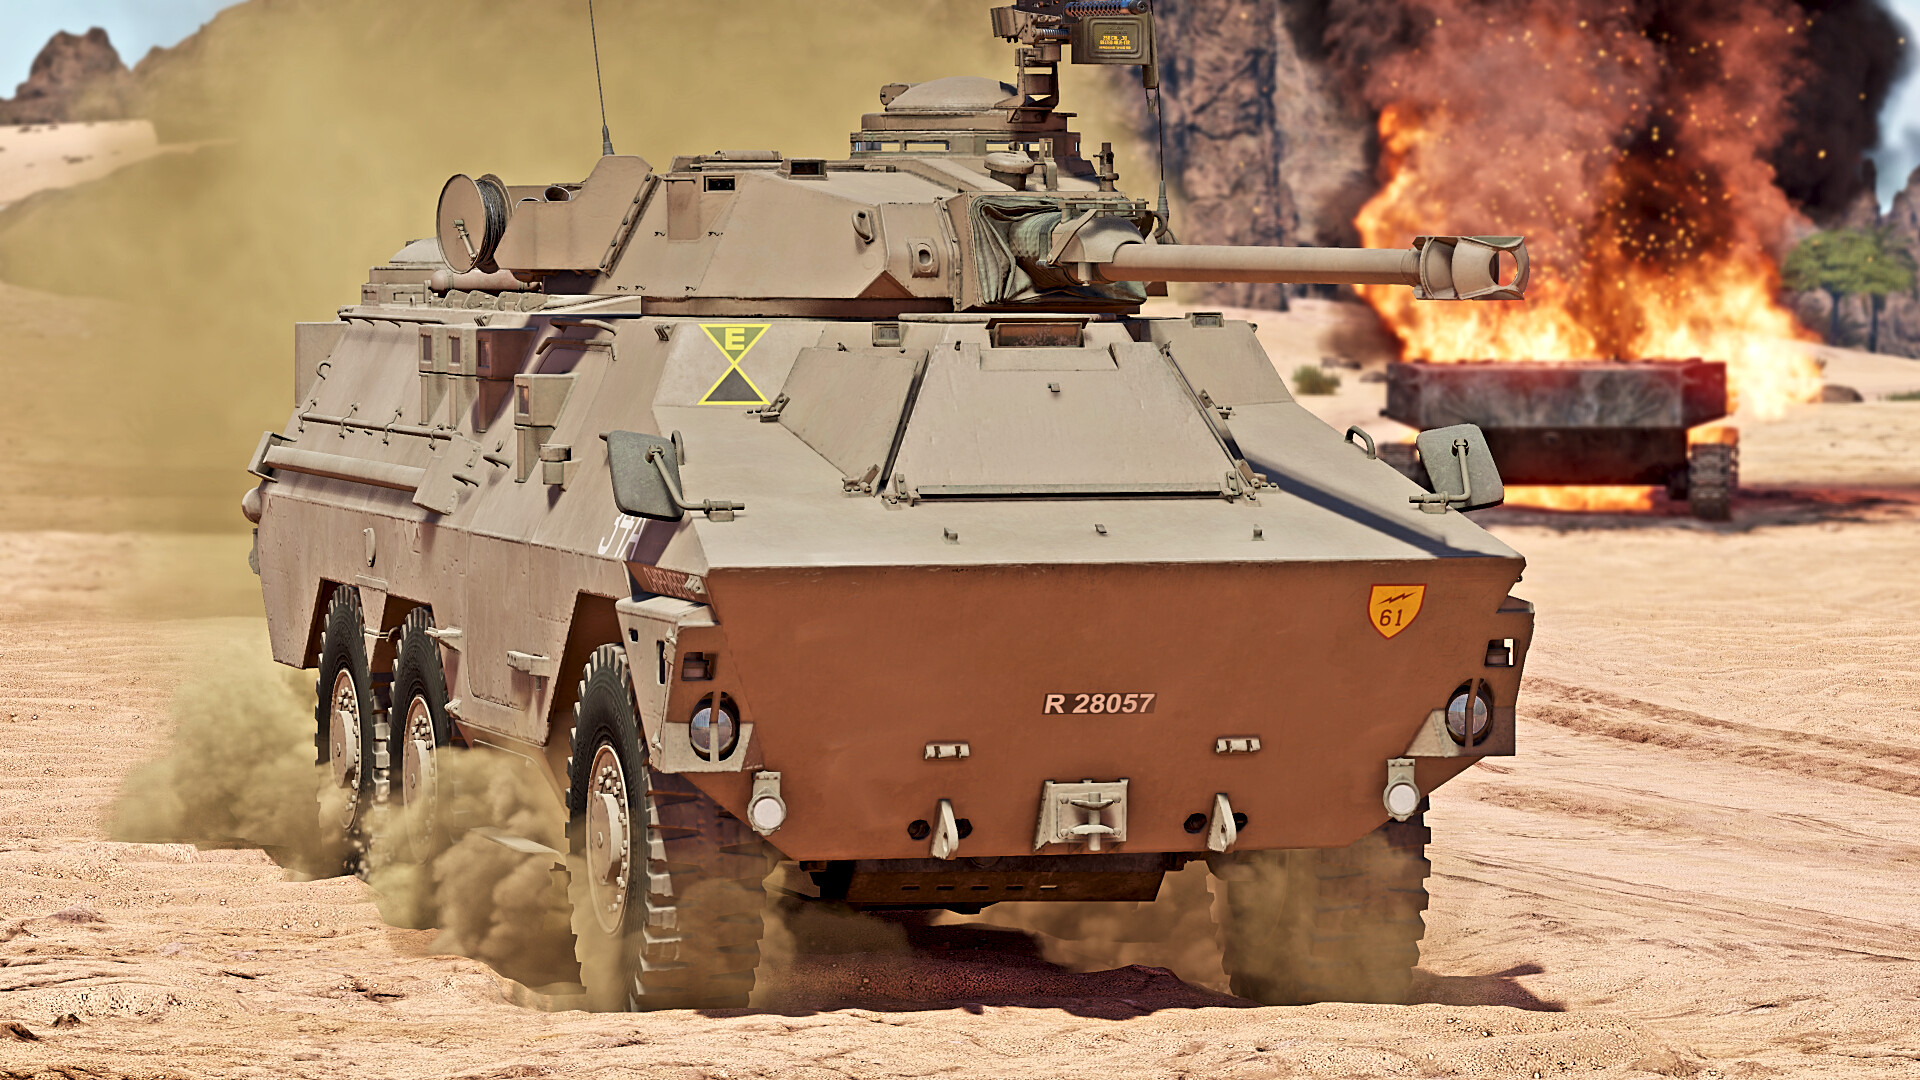
The OCC 90-62 has 670g of explosive filler, more then enough to overpressure lightly armoured vehicles. It is possible to kill an M18 with a single round to the commander! Due to its high penetration of 350mm against 0°s of armour, it can be used for long-range sniping, and is best in attacks from the side, where it can penetrate the sides of heavier tanks. Focus on ammo racks for a quicker kill, or the turret to easily wipe out the turret crew to allow you to get a second shot off before the enemy’s crew returns.
I would recommend taking around 20 shells for the Ratel 90, as the ready rack mounted below the turret holds 10 shells, with another 10 as backup. The other ammo storage is towards the rear of the vehicle, near the engine, and mounted quite high up in the hull. This is quite an exposed position, but the strange placement of the ammo rack towards the rear of the vehicle will keep it safer than the ready rack mounted below the turret.
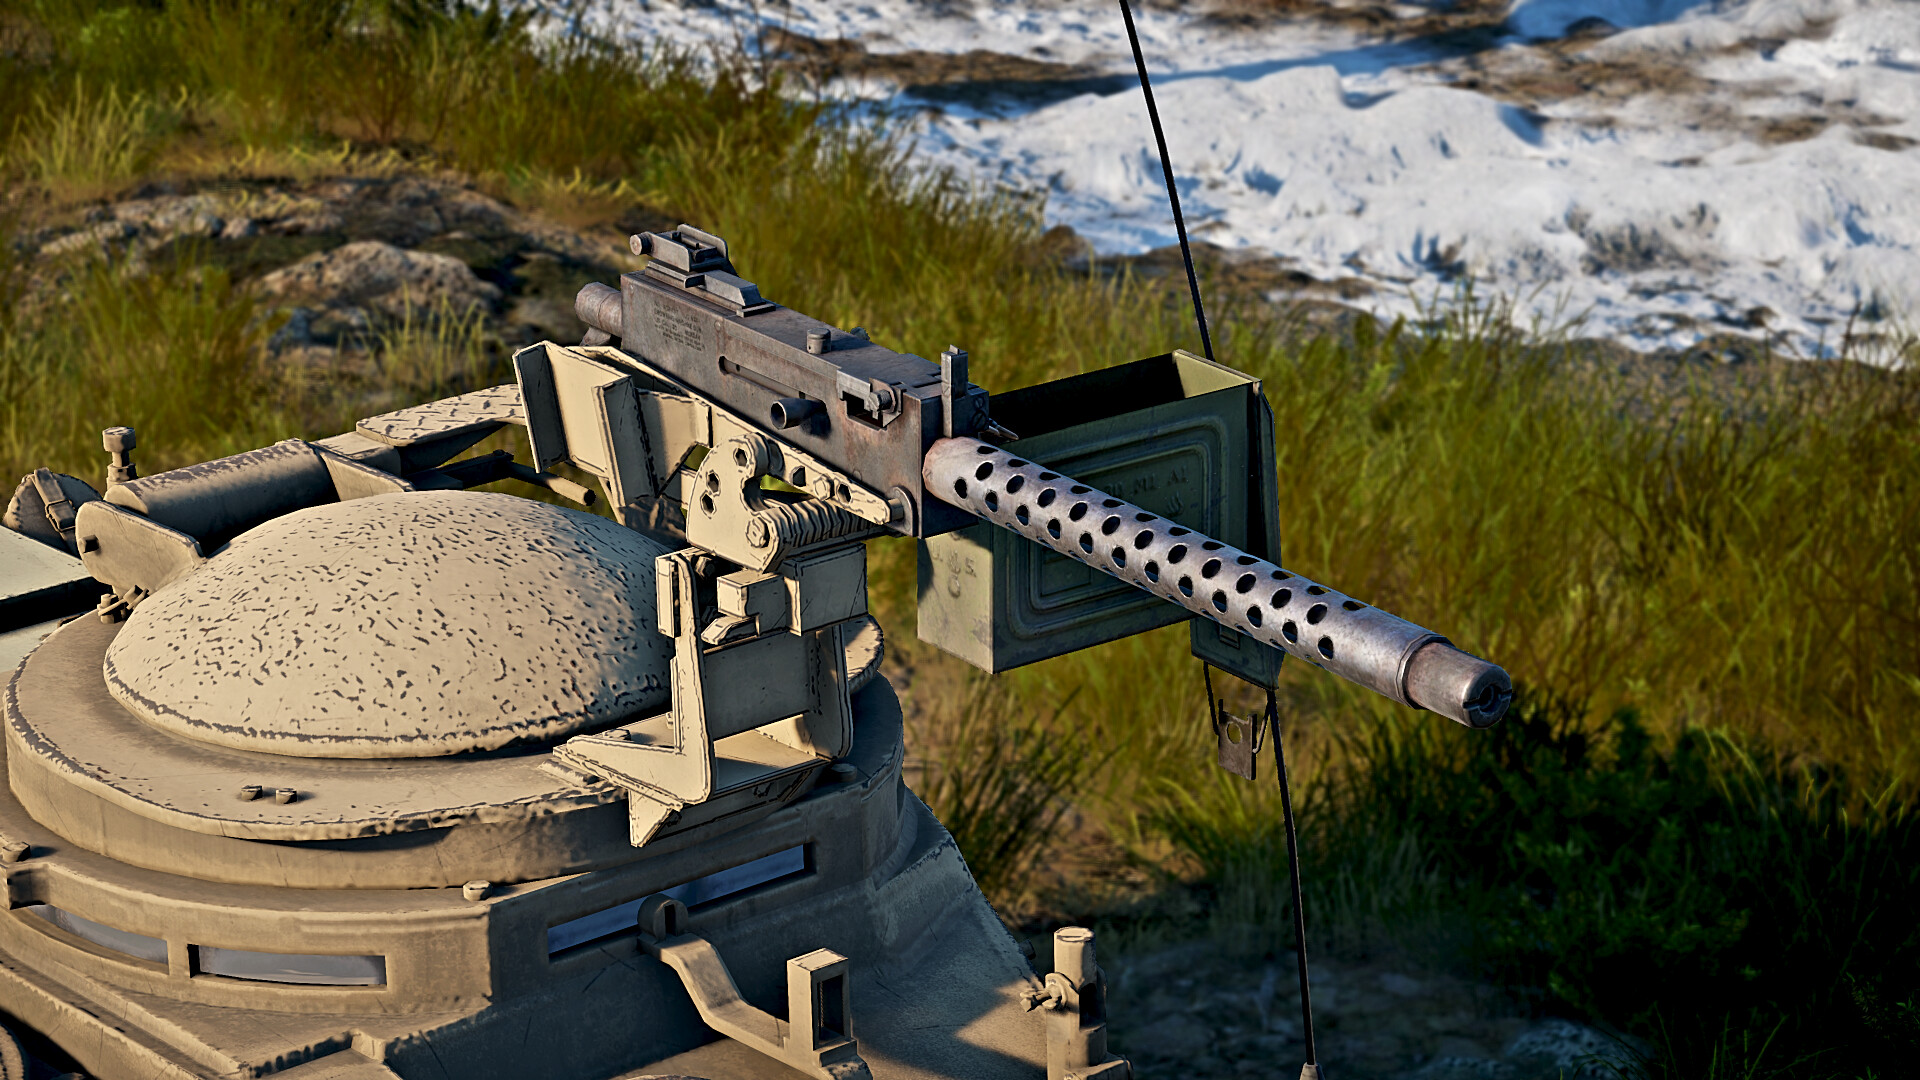
The Ratel 90 also has a pair of 7.62mm Browning MG4 machine guns, with one fitted to the turret in an AA position, and the other being mounted coaxially alongside the main cannon. The 7.62mm lacks the sufficient armour penetration to be lethal against anything but open top or extremely lightly armoured vehicles, but can be used to clear any fences or walls that could block your HEAT-FS before firing.
Mobility
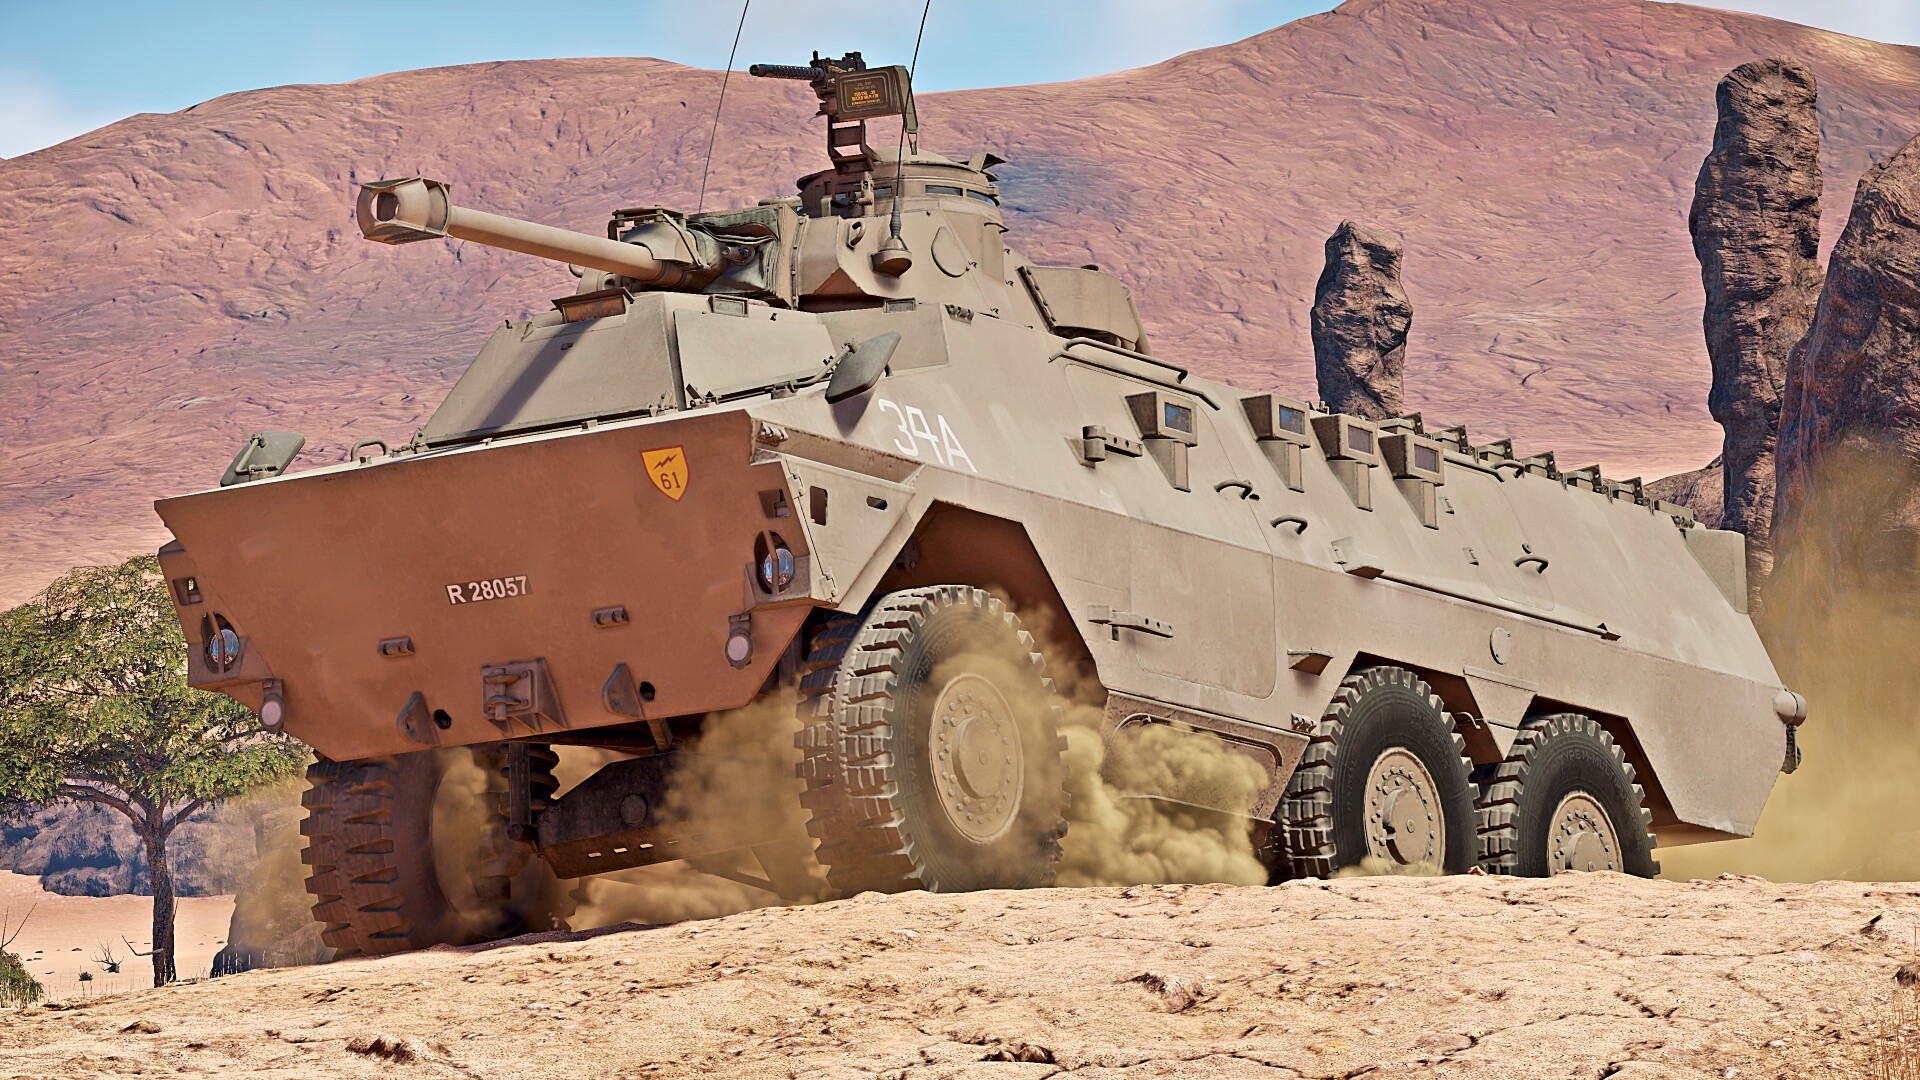
The Ratel 90 has a top speed of 65mph (104 km/h), and a decent acceleration. You will easily be able to outpace heavy tanks and other slow moving teammates at the starting rush for the capture points, especially on urban maps.
The wide turning circle that comes with wheeled vehicles is a downside, especially when coupled with the huge size of the Ratel platform, so it is difficult to manoeuvre quickly. As with all wheeled vehicles, it is useful to brake when turning, as due to being wheeled rather than tracked, the Ratel does not lose too much forward momentum while cornering, which can end the vehicle up crashing into a building or other immovable object. This sudden uncontrolled stop can seriously endanger the vehicle if you are close to the enemy.
Avoid direct contact with the enemy if possible, as the wheeled design will not allow you to make a fast turn for a getaway. Try to flank around the enemy, or race to good sniping or ambush spots. The Ratel 90 performs better on larger maps, as it has the required space to accelerate. The 65mph top speed is near impossible to achieve in normal matches, so you will probably be travelling at between 20 to 40 mph depending on the surface, the amount of mobility modifications researched and other factors such as terrain elevation and direction of travel.
Armour & Survivability
Due to the Ratel’s poor armour and small crew count, its survivability is quite sub-par, even compared to many of its contemporaries. However, the large empty space used in reality for carrying troops, and the beefy engine at the rear can stop a poorly placed shot, allowing you to return fire on your attacker. The turret of the Ratel 90 is considerably larger than the one fitted to its sister, as it is fitted with a 90mm low velocity cannon over the Ratel 20's 20mm autocannon. This makes the Ratel extremely hard to conceal in flat and open terrain, and it is best to hide it among terrain features such as forests, rocks or buildings. Note that the Ratel can be too long to hide behind smaller buildings.
With the Ratel, it is best to avoid being shot in the first place as almost any hit will send you straight back to the hangar. To improve survivability, try to steer clear of direct engagements by flanking or laying in ambush. If the enemy sees you, use the good reverse speed to get yourself out of trouble, use the smoke grenades or smoke shell to mask your vehicle or shoot them before they can target you.
Tactics
The least effective tactic of using the Ratel is in a direct firefight. Your low crew count, large size and weak armour do not combine to make a useful brawler. The playstyle should focus on recon and opportunistic target eliminations, playing it in the fire support role that the real Ratel 90 was designed for. Use it as a fast moving flanker, making use of the powerful main gun and the scouting ability to support your heavier armoured teammates from the sides.
The Ratel is a wheeled vehicle, and when coming out of spawn, you can travel faster than the majority of your teammates. You won’t be able to compete with vehicles such as the M18 in terms of acceleration, even though your top speed is higher, so it is best to follow them to the capture points and try and stick to the roads until you reach the point or come into contact with the enemy.
After spotting an enemy, try to avoid head on contact, as the Ratel’s gun lacks a stabiliser so it is best to stop before firing. This gives a wary enemy enough time to shoot you while you wait for your gun to elevate, so try and get into a position where the enemy is unaware of you and ambush them with a well placed shot to the side. Attack enemies before they have noticed you, blasting them with HEAT-FS to the ammo or turret to quickly destroy/disable them.
If the situation becomes unfavourable, track or barrel the enemy to allow you to escape, as you are immune to machine guns that are fitted to most enemies. Be extra wary however of American tanks, as the Ratel is not .50 cal proof, and most American tanks are fitted with the M2 Browning that will easily shred your tank.
The Ratel, being a wheeled design, can struggle in urban combat, as its size and large turning circle can cause you to get stuck in positions that smaller tracked vehicles would not struggle with. Remember this when you are fighting amongst buildings as you can be caught off guard and crash as you try and make your escape, essentially handing your foes an easy kill. The Ratel performs best on open maps with plenty of cover and terrain features, using the low height of the turret to peak over hills or the good forward and reverse speed to get into and then attack from solid cover.
If you can’t engage an enemy, scout them. This gives you points, especially if the enemy is destroyed while actively scouted by you. This also allows your team to bail you out if you get stuck in trouble (i.e. you lose your transmission and the enemy is approaching your position), while still earning spawn points you can use to spawn again or spawn in CAS (the airstrike modification helps with this) to support your team.
I would also like to thank F-16D Barak II for editing the article and Keebird for working their magic with the screenshots

