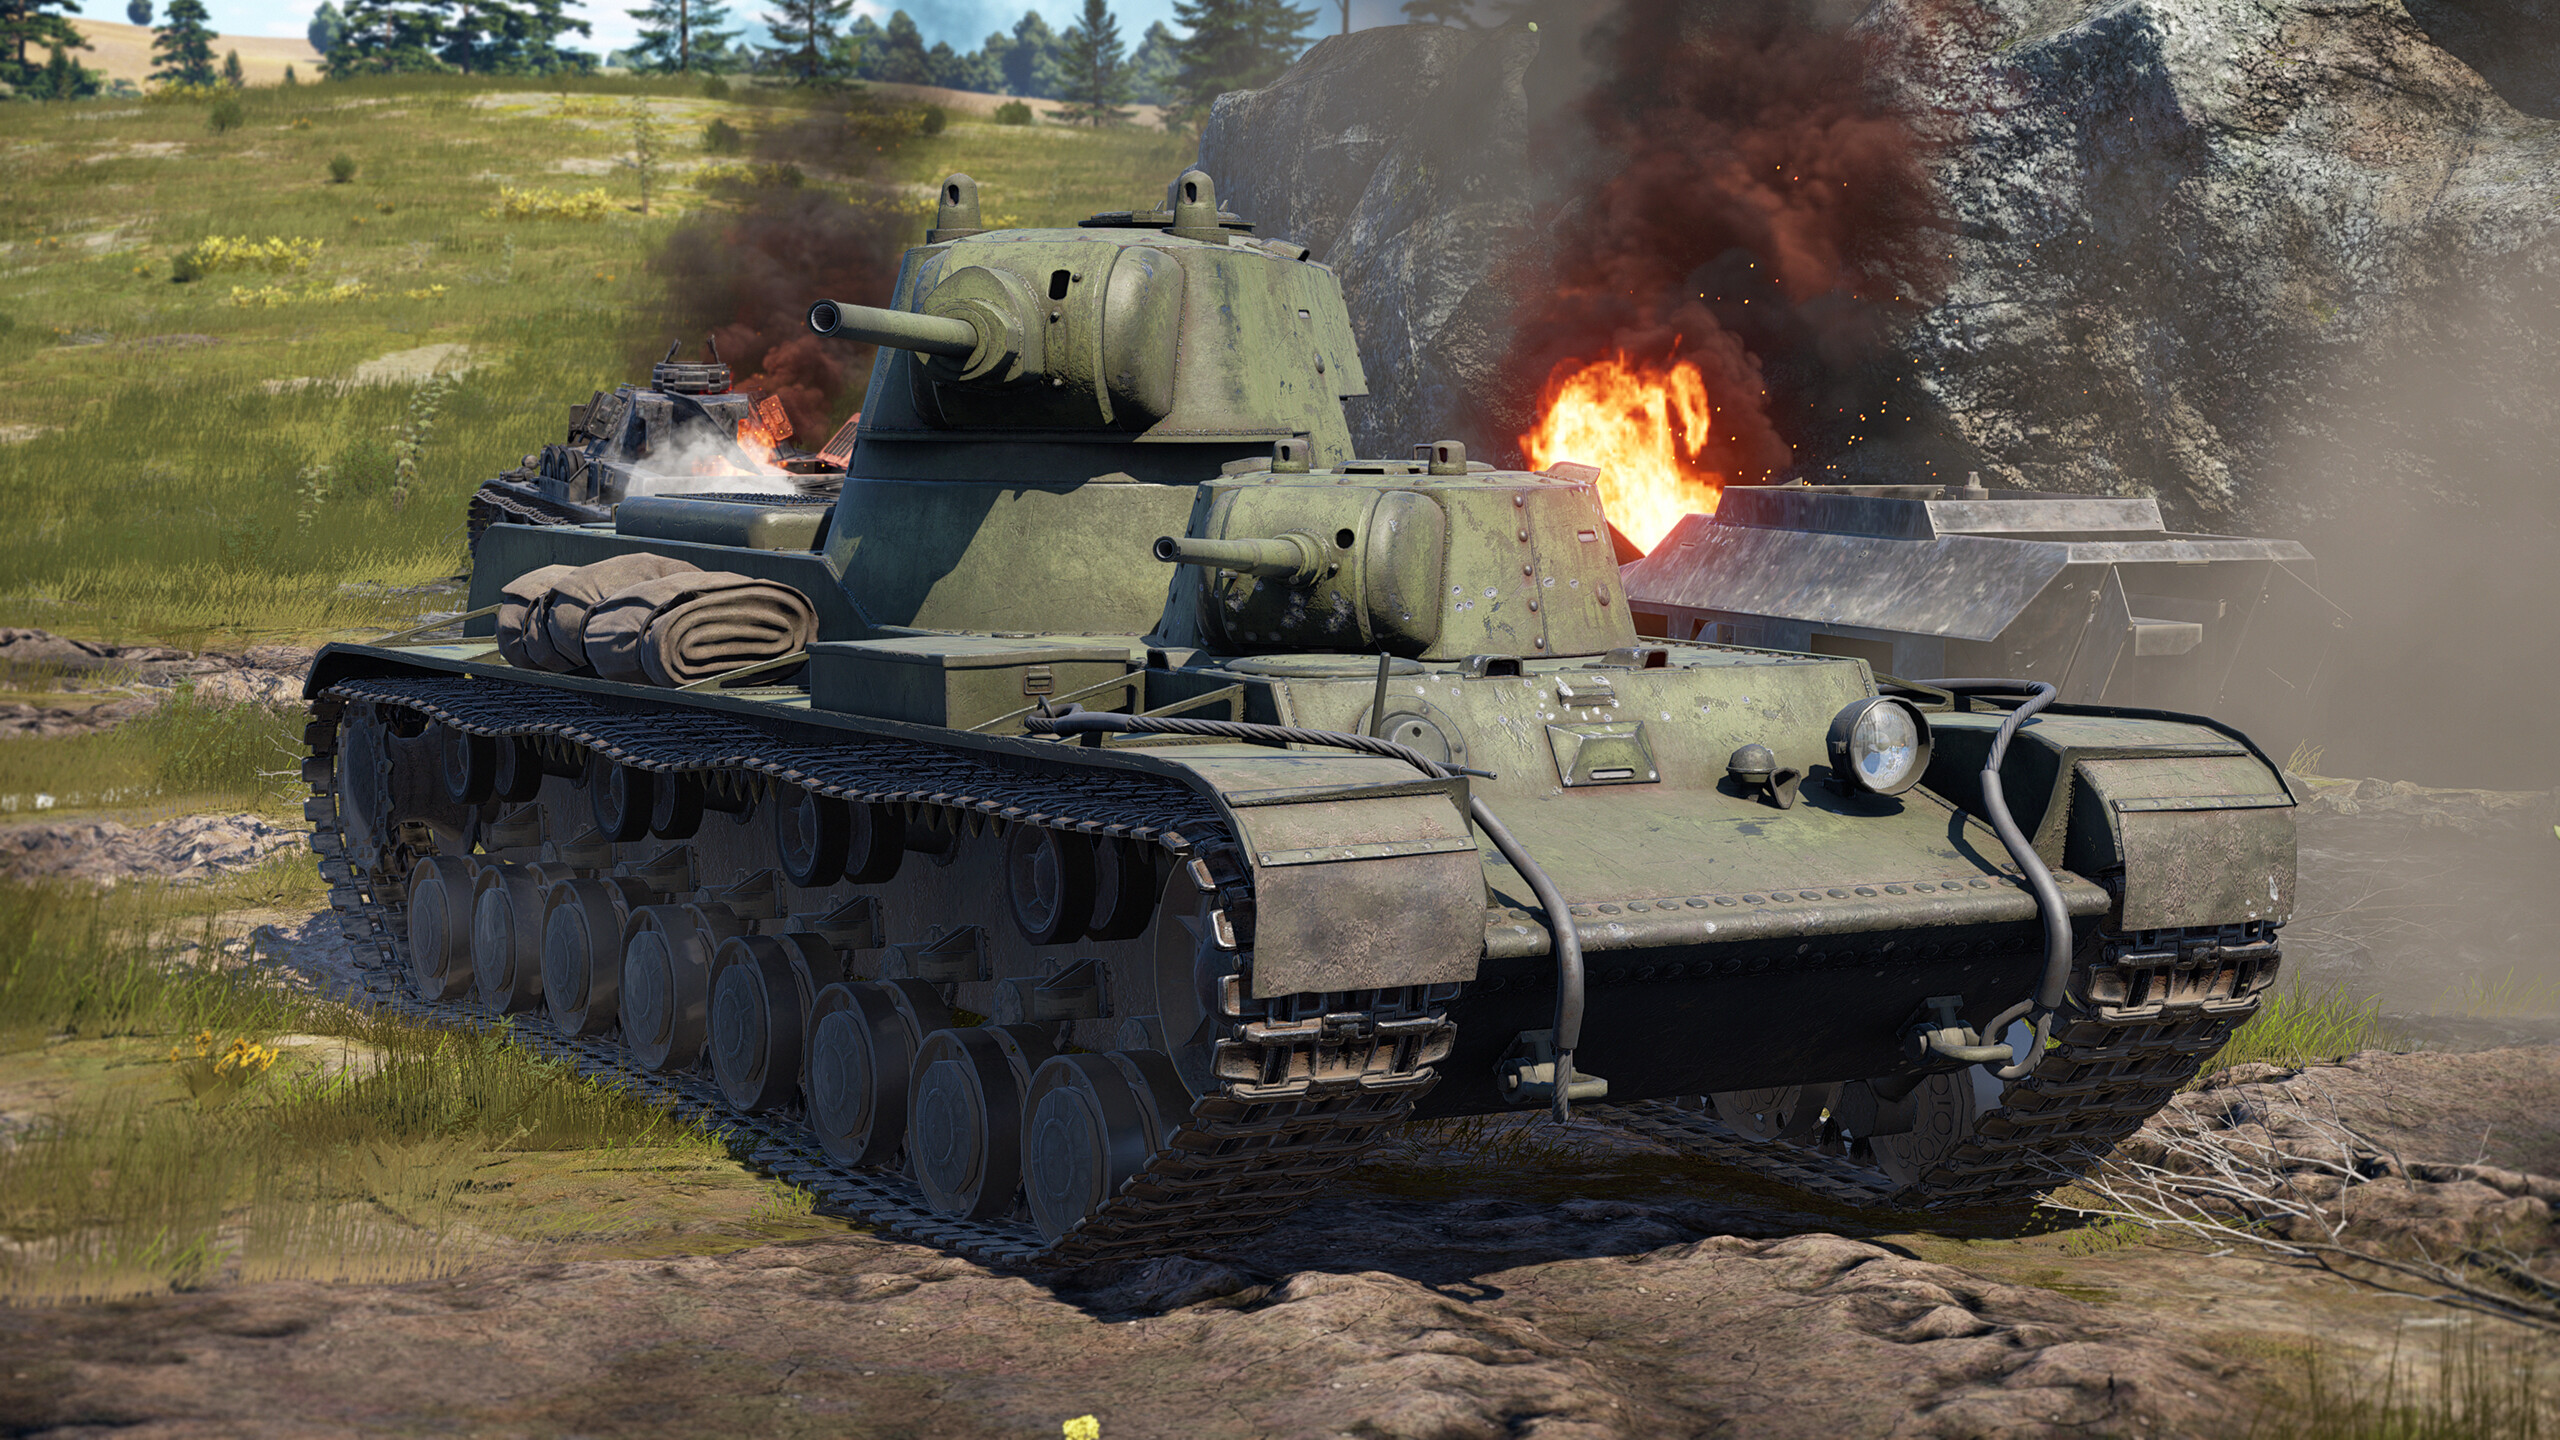
The SMK is a very unique vehicle. Featuring a highly unusual layout and weapons complement, presenting a very large profile and offering surprisingly adequate mobility, it can be very challenging to use for new owners. The aim of this article is therefore to help the reader understand how to best utilize and combat this monster of a tank.
| Pros | Cons |
| Two cannons in separate turrets | Very large profile |
| Thick frontal hull armor | Plenty of weakspots |
| Decent mobility | Mediocre penetration |
| Rear-facing DShK machine gun |
Survivability & Armor
Both for using and combating the SMK, the player will find it very useful to familiarize themselves with its armor and module layout. It is very unusual, thanks to the vehicle’s generally unconventional design, and so deserves some in-depth study.
The Module Layout
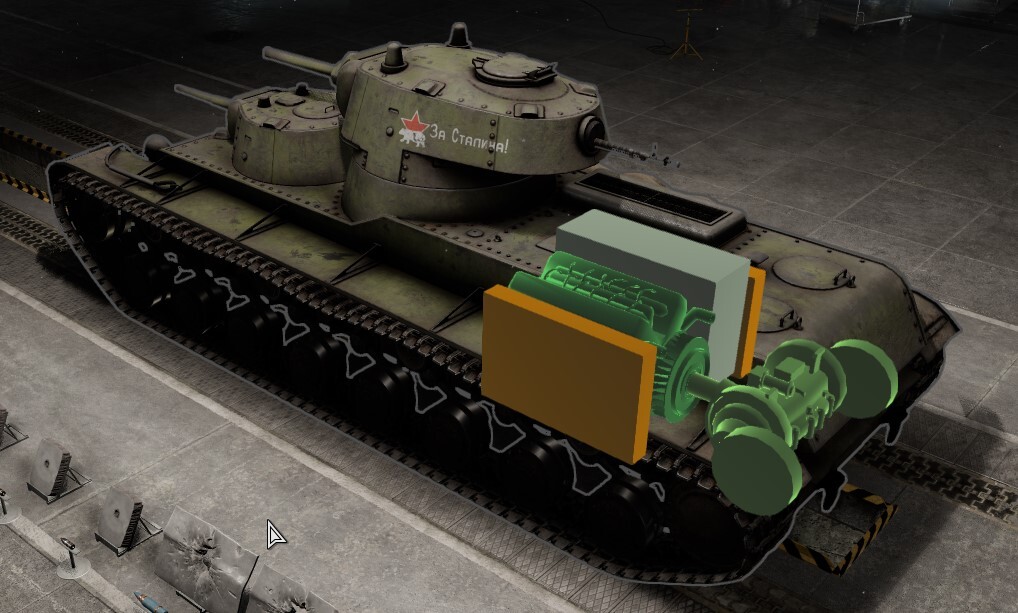
The rear of the vehicle contains the usual modules, that being the engine, transmission, radiator and fuel tanks. The transmission is very short, extending to the rear drive wheel right behind the engine. Thanks to this, it will very rarely be damaged by enemy fire, making the SMK difficult to immobilize mechanically.
The central section houses the fighting compartment for the main 76mm turret, equipped with all the modules, crew and ammunition required for its use. Inside the turret sit the Gunner and Loader for the main gun, as well as the vehicle’s Commander. The back of the turret is lined with 12 shells for the 76mm L-11 cannon, while the very back houses the rear-facing 12.7mm DShK machine gun.
Underneath the main turret’s fighting compartment sits a massive ammunition rack housing approximately three hundred shells, some arranged in a ring with the rest lined up underneath it. Because of the large amount of ammunition this ammo rack can carry, it is recommended to bring no more than 30 shells into action, as otherwise the center of the vehicle’s side profile becomes a serious weakspot.
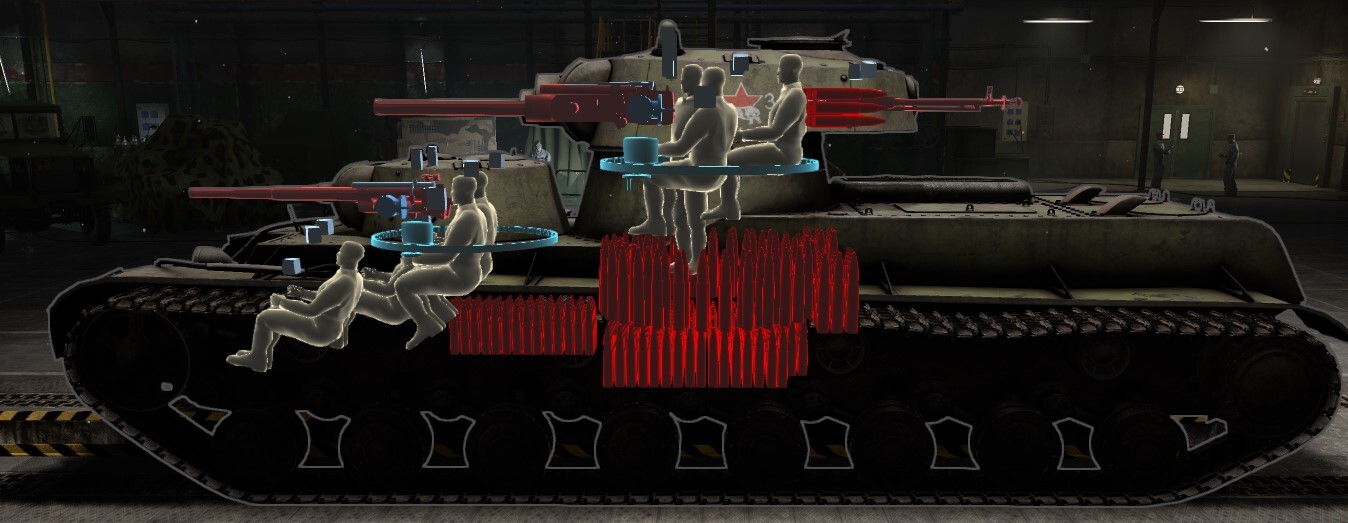
The front of the vehicle houses the auxiliary 45mm 20-K turret, the crew and modules needed to operate it, as well as the Loader and Gunner to operate the gun. In addition, the very front naturally also houses the vehicle’s Driver as well as an extra Machine Gunner.
The auxiliary turret also houses the vehicle’s only functional front-facing machine gun in the form of a DT. An additional ammo rack for the auxiliary 45mm is located underneath the small turret on the right side of the hull, creating yet another weakspot to flanking fire.
The Armor Layout
The SMK’s overall armor protection leaves much to be desired, but the front of the vehicle’s hull offers impressive armor protection. The base plates are 75mm thick, but being heavily angled, the upper frontal plate reaches an impressive effective thickness of around 250mm, with the lower frontal plate reaches an admirable 125mm. This makes the front of the hull very difficult to penetrate for many vehicles the SMK faces in combat, but this effect is spoiled by the flat, almost unangled plate sitting just above the 250mm one which offers only around 85mm of protection.
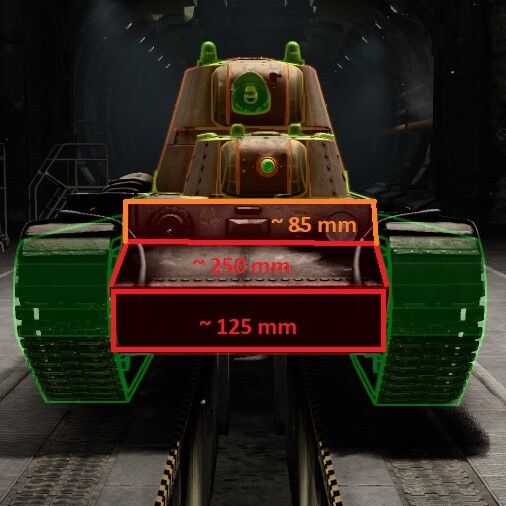
Above the hull plates are the turrets, which feature an all-round armor thickness of only 60mm. Because of this, the turrets should be considered one of the SMK’s weakspots. The drawback of targeting the turrets is that due to them being separate housings, incapacitating either of them will almost always mean the second turret is still able to return fire, posing a threat during the player’s reload.
Which turret should be targeted first is largely up to the player, but the ideal weakspot should still be considered the 85mm flat plate, as penetrating it could allow the player’s shell to travel through the frontal fighting compartment and into the vulnerable ammo stowage section underneath the main turret, likely detonating it.
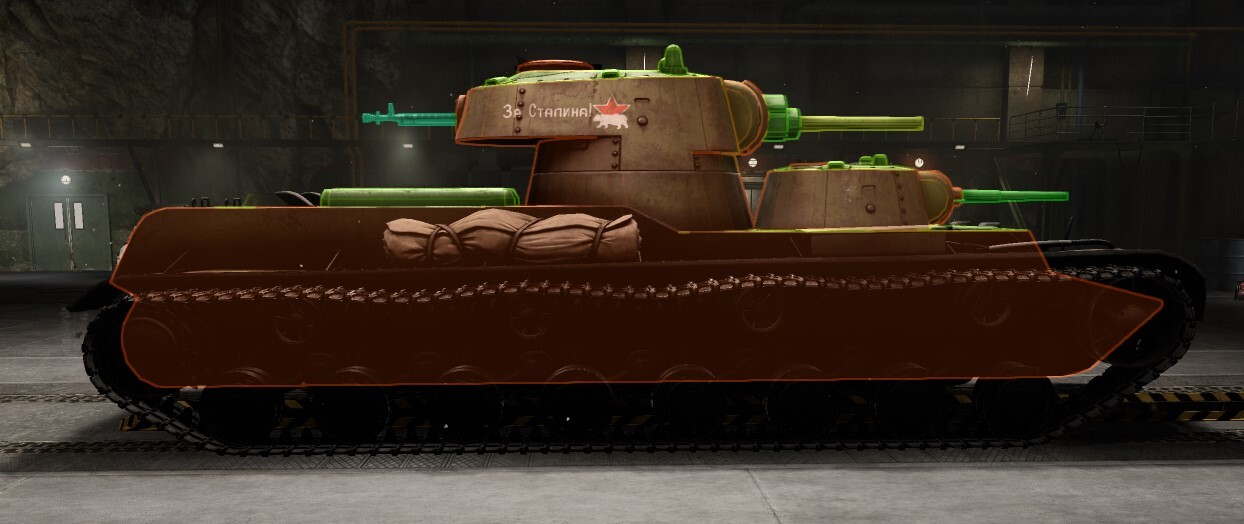
The SMK’s side armor is rather unimpressive, only totaling up to 60mm. This leaves it vulnerable to most cannons it faces in battles, including some higher-caliber autocannons seen at the battle rating such as Bofors guns. With how large of a profile it presents from the side, the user should watch out for flanking attacks, as the SMK’s slow turret traverse means the player doesn’t get much time to react to them.
It is important to note that the elevated “neck” the main turret is placed on is a very large and poorly protected target, offering only the usual 60mm of armor all-round. This weakspot essentially eliminates most benefits of angling the SMK’s hull, since this “neck” area will almost always be visible and vulnerable to enemy fire.
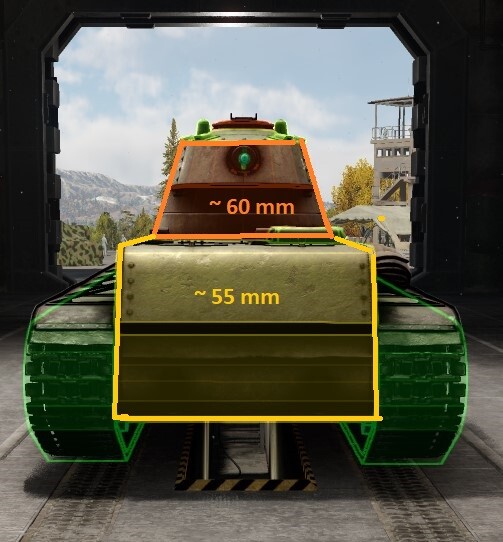
The rear of the SMK is little different from the sides, offering 55mm of protection for the engine deck, with the rear of the main gun turret bearing the standard 60mm of armor. This protection leaves much to be desired, but the large engine and transmission mean that most shots into the rear of the vehicle will not make it into the fighting compartment, therefore only immobilizing the tank rather than causing more serious damage.
The roof of the SMK is protected by 30mm of armor alongside the entire length of the tank, which is enough to make the vehicle invulnerable to strafing from most aerial weaponry as well as to largely prevent overpressure from HE shells impacting near the hull roof.
The Mobility
While the SMK is not exactly what one would call mobile, it’s surprisingly fast considering its size. Its top speed is unremarkable at 35 km/h, but it is able to reach it quickly, accelerating from a standstill to 30 km/h in around 8 seconds and to 35 km/h in around 12. This is thanks to its good power to weight ratio of around 15.5 hp/t, which is higher than that of most contemporary heavy tanks.
Reverse speed, however, is a different story. The SMK is only able to reverse at the breakneck speed of 4 km/h, and so it usually won’t be reversing out of danger.
The Armament
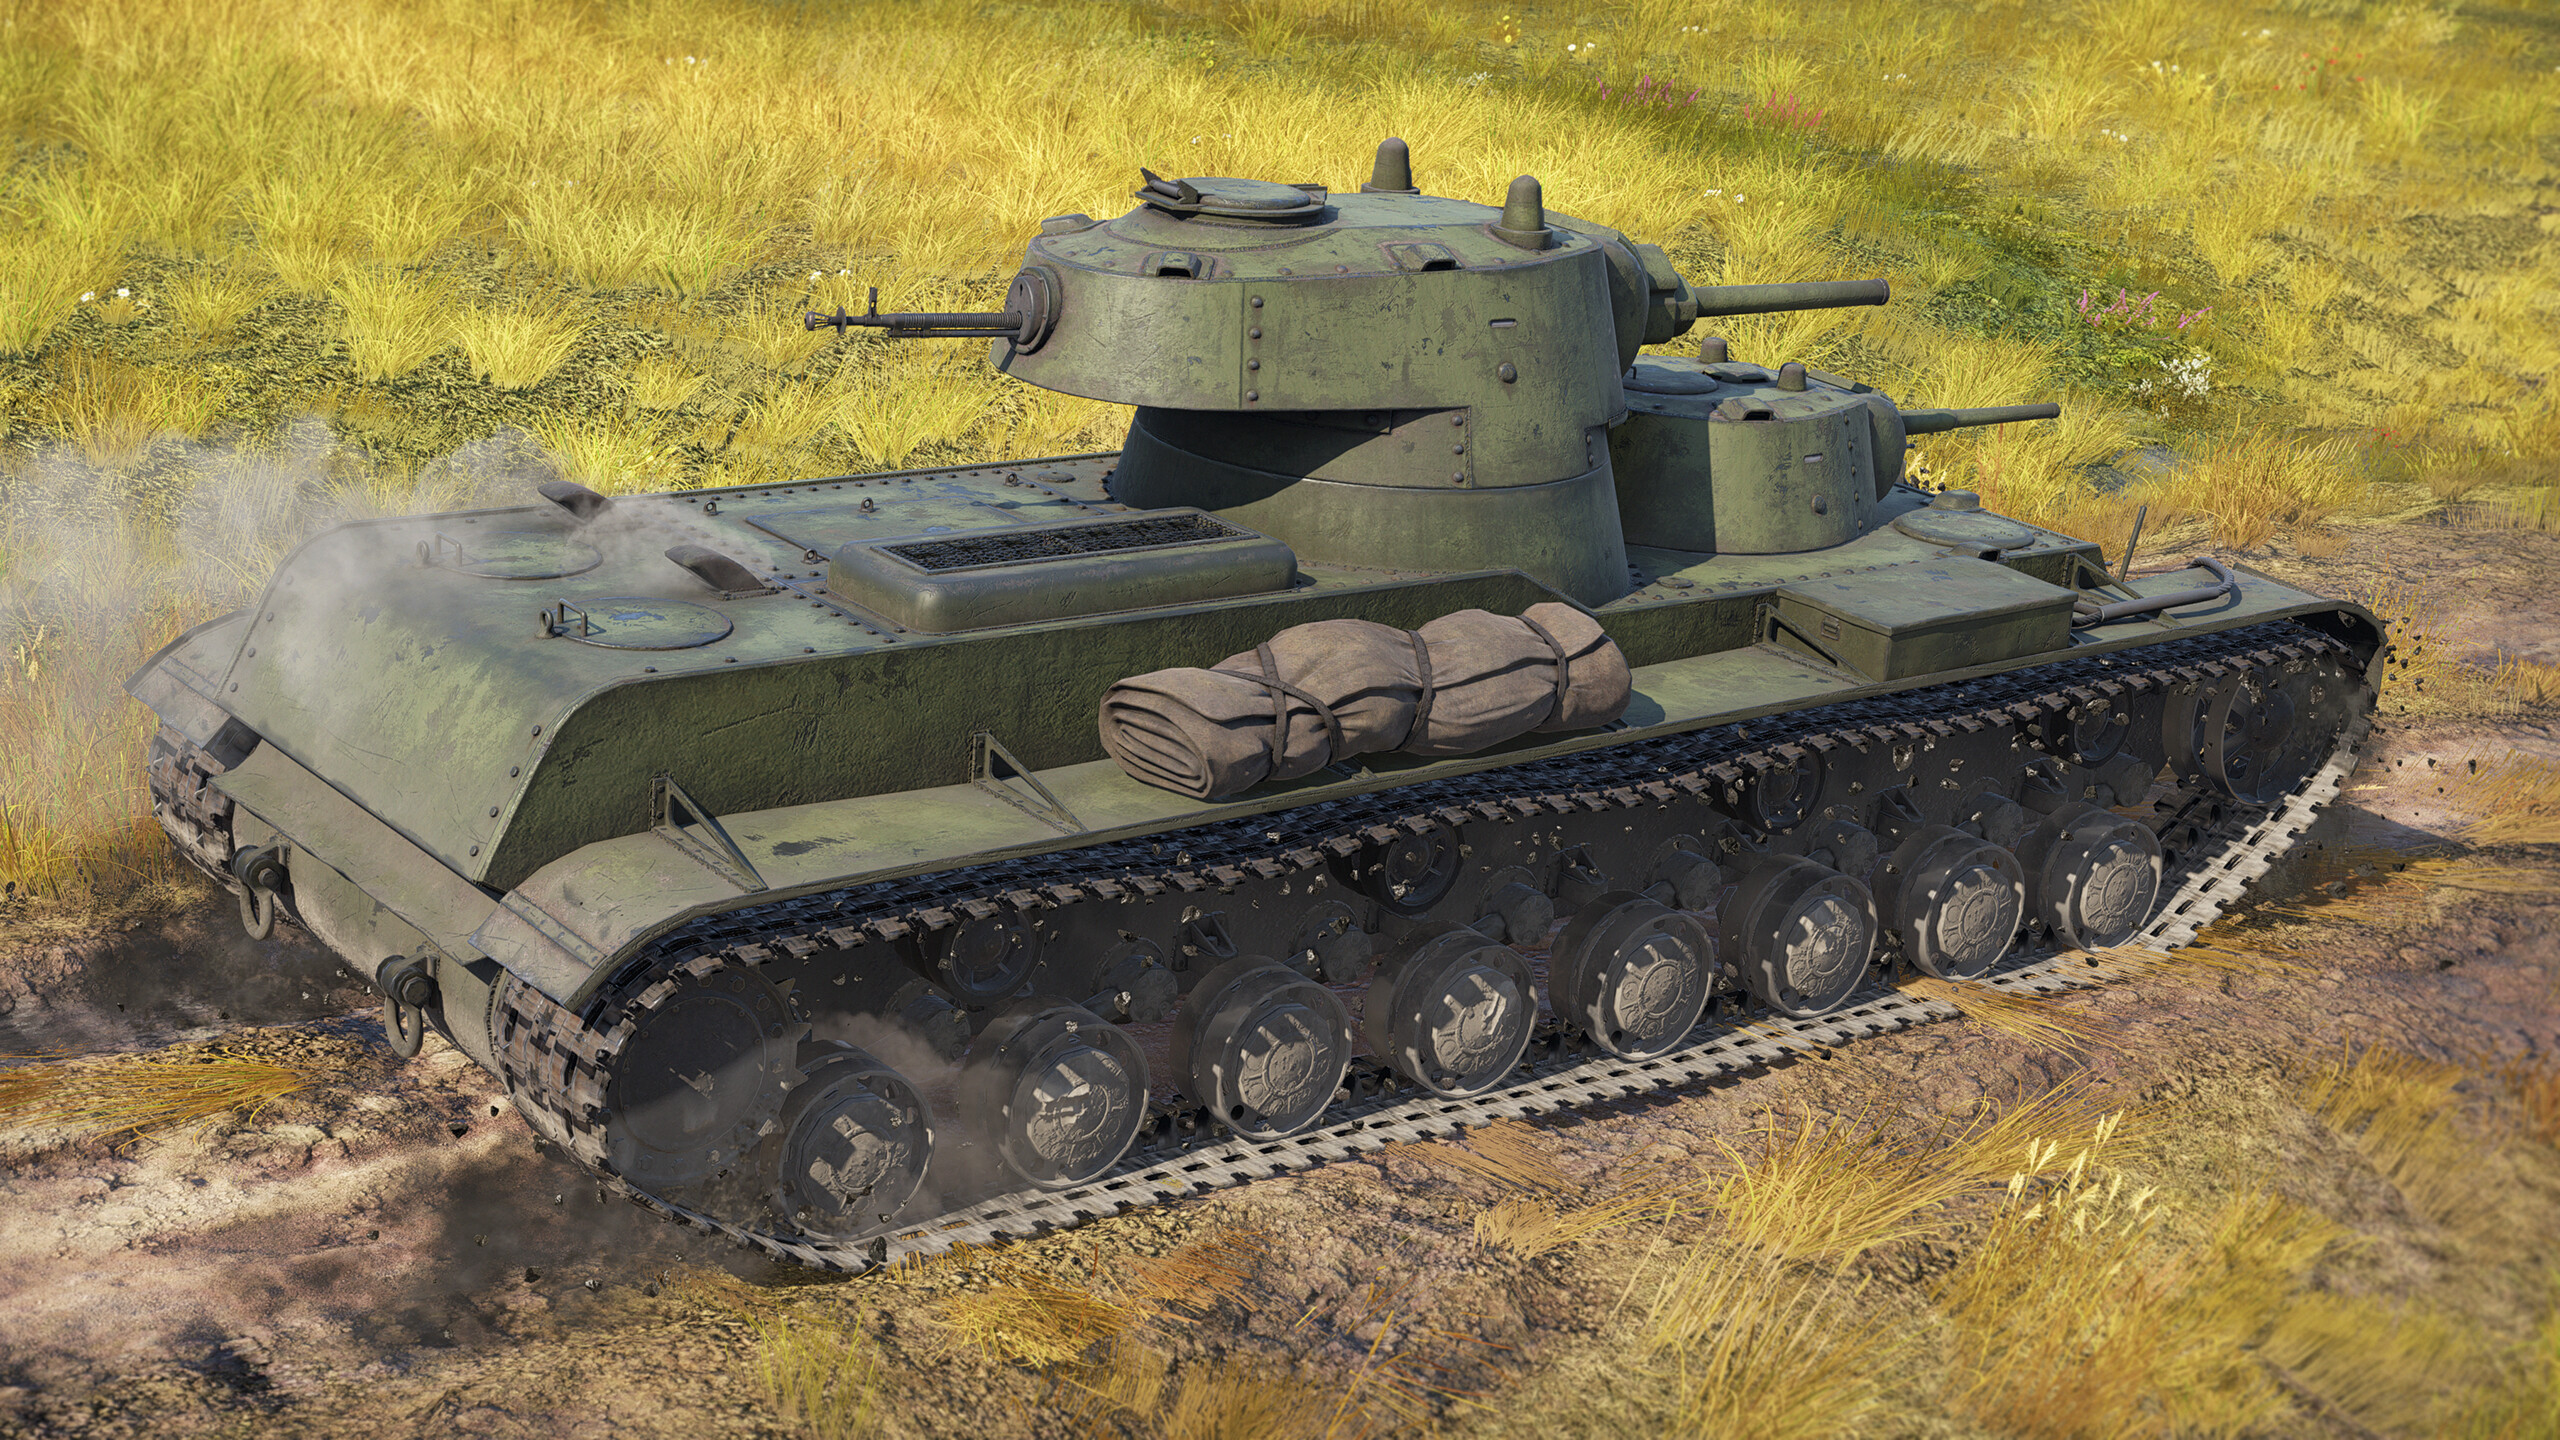
The SMK’s armament is likely its biggest asset, boasting a 76mm L-11 cannon as the main gun, located in a tall turret mounted on a pedestal at the center of the vehicle’s hull. This weapon’s performance is unremarkable, but its nature as a common armament for soviet vehicles around the SMK’s BR bracket should help the player familiarize themselves with it. The relatively short reload of around 7 seconds gives the player plenty of opportunities for follow-up shots in case of a miss. Its ballistics are not stellar, but the shell drop is not impactful enough to make aiming a challenge.
Ammunition (76mm)
The SMK is only capable of carrying up to two types of ammunition per cannon, and so the player should know the benefits and drawbacks of each shell in order to decide which to bring with them into battle.
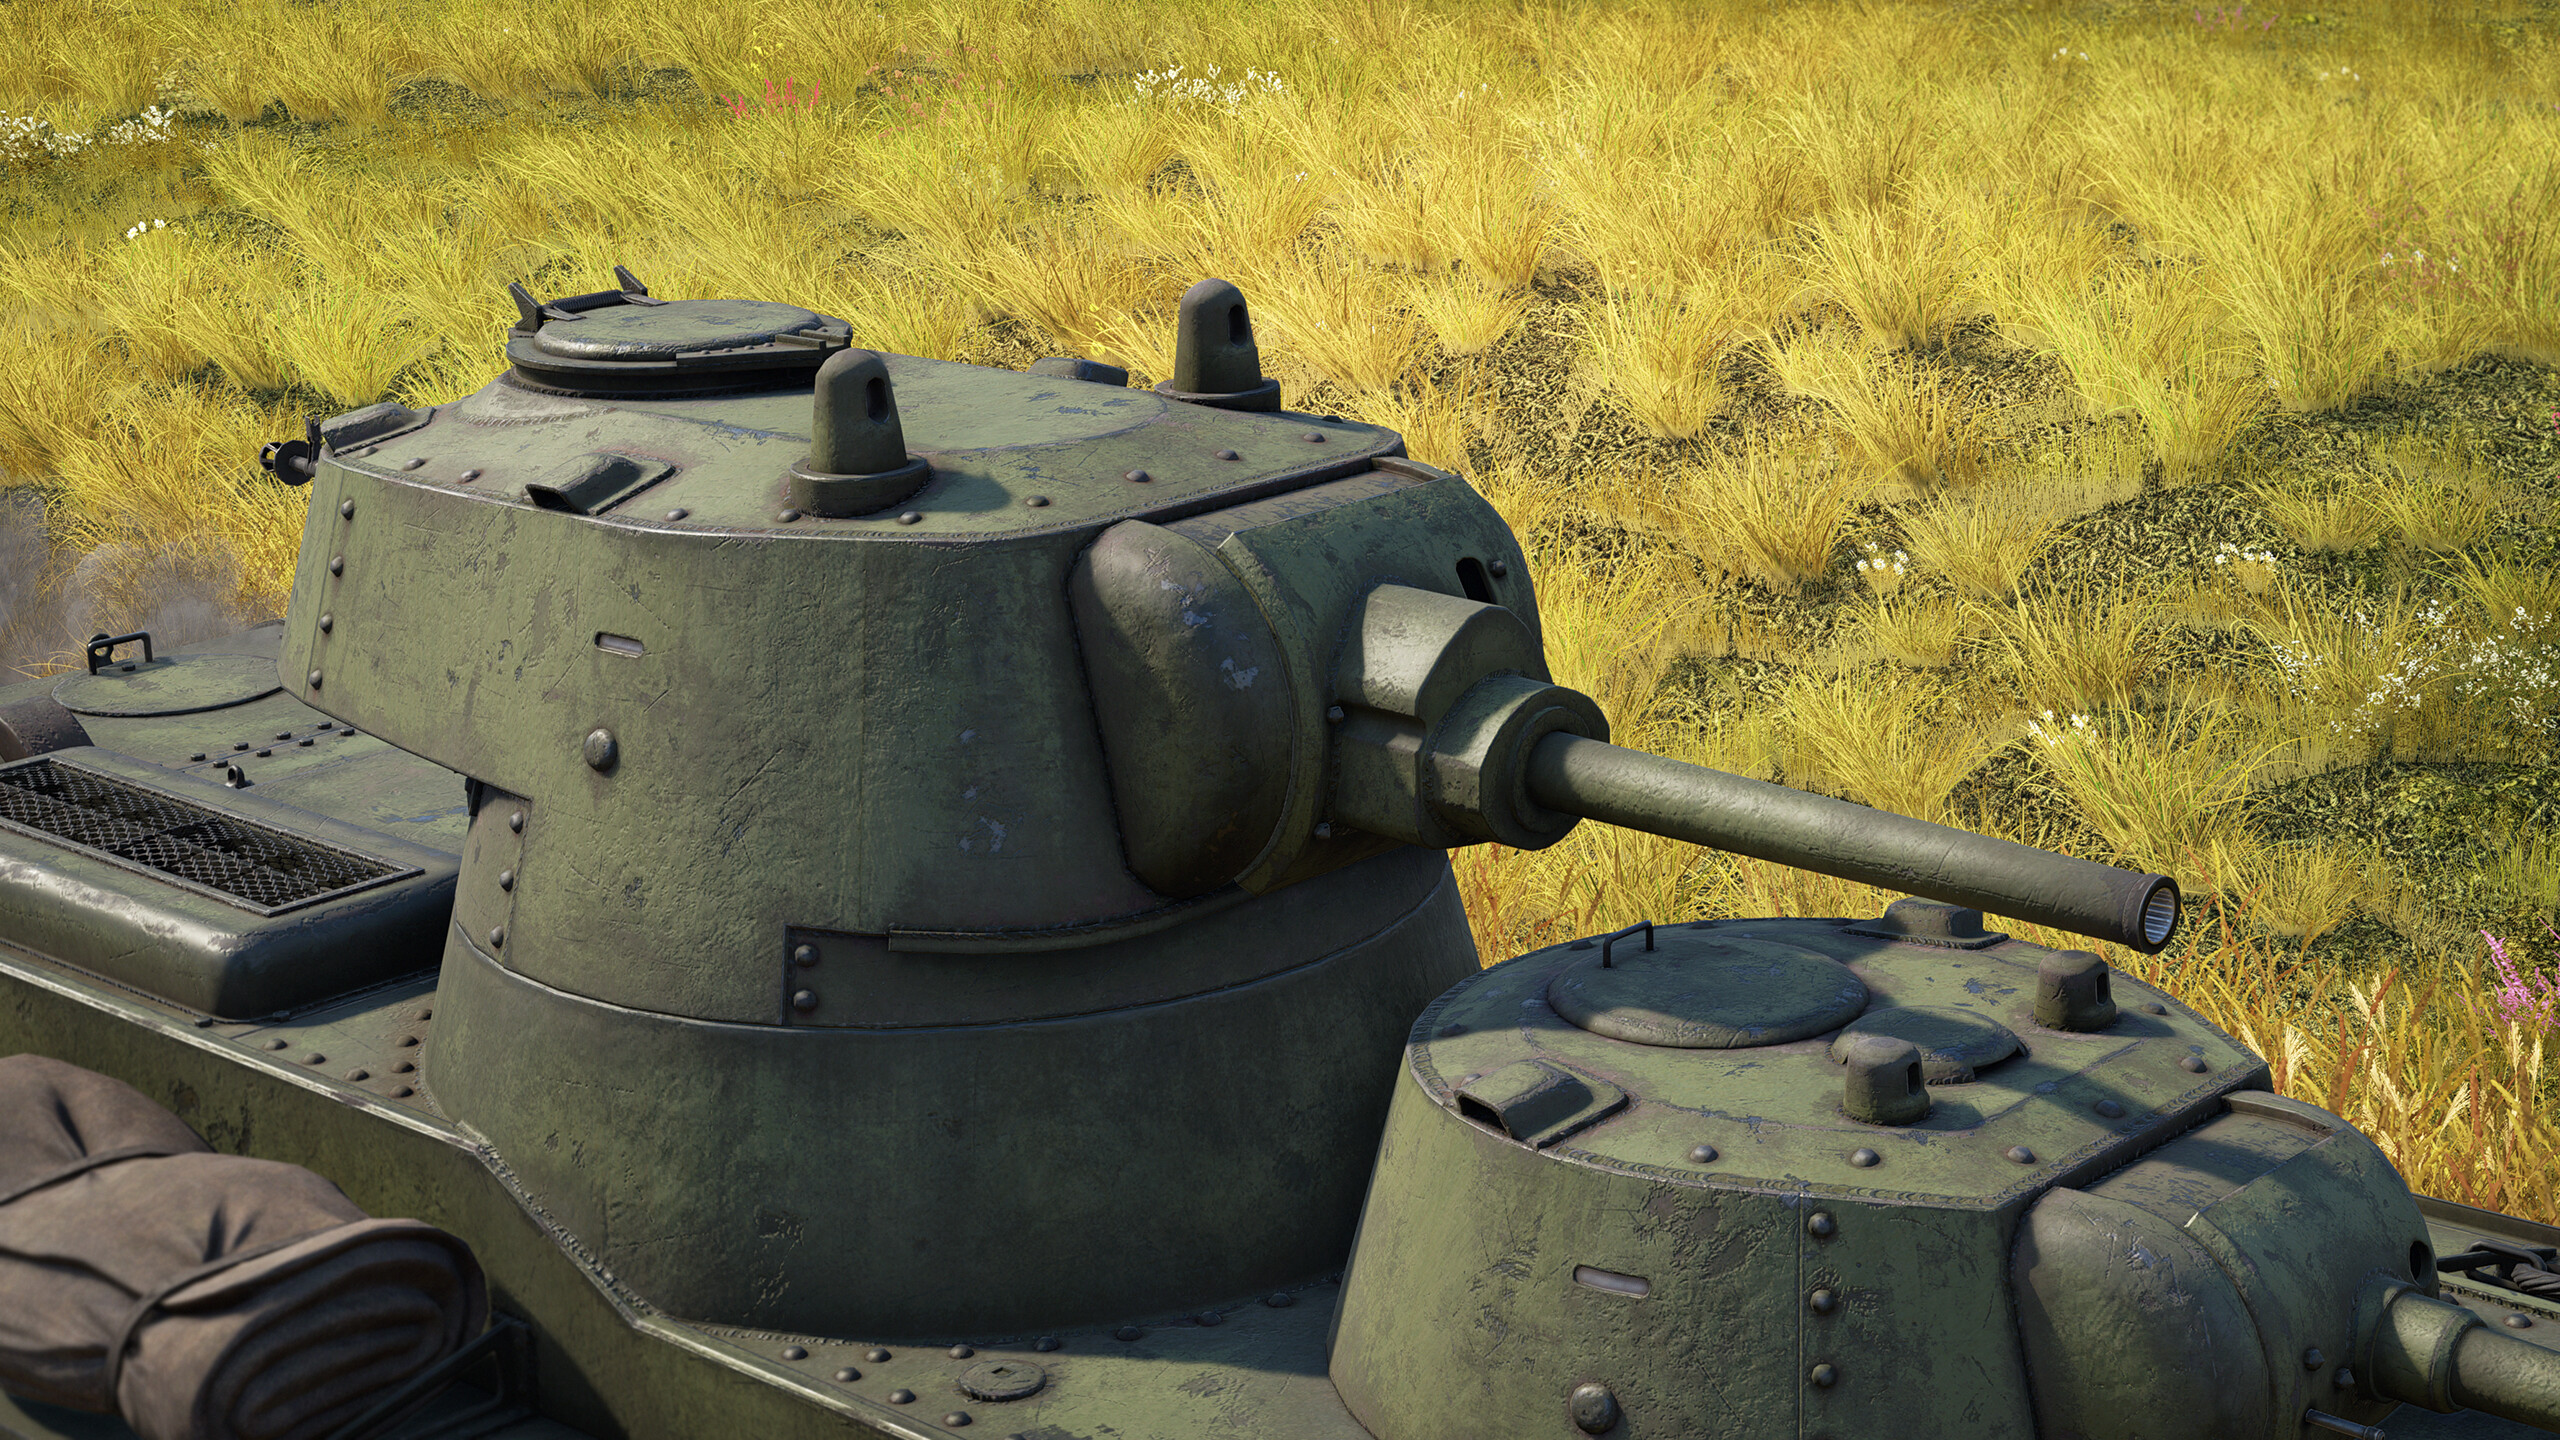
- The first and likely most common choice is the BR-350A APHEBC shell. It is a fairly potent, albeit unremarkable round offering 76mm of penetration and 150g of explosive mass. This round may struggle against well-armored heavy tanks within the SMK’s BR bracket such as the T14, but should suffice against most other targets, usually knocking them out with a single shot thanks to its explosive mass.
- The second, alternative option is the BR-350SP APBC shell. This round trades the 350A’s explosive filler for a notable increase in penetration, being able to pierce 88mm of armor. It is still an effective shell, but in some cases it may fail to knock enemy vehicles out with one shot. For this reason, it is generally recommended to only bring this shell in uptiered battles, where the SMK will be facing well-armored heavy tanks.
- The third round is the OF-350M HE round, and it is what the player should usually carry as the second ammunition type for the main cannon. It offers 612g of explosive mass and is almost always effective at knocking out open-topped targets with a single shot to center mass. Thus the player should always bring a few HE rounds with them into battle, only changing out the APBC/APHEBC shells depending on the matchup.
- The fourth and final ammunition type is the Sh-354T Shrapnel round. The Sh-354T’s fuze sensitivity of 14mm means it may often fail to fuze against very thin armor, while targets with sufficient armor to necessitate the use of a Shrapnel round over an HE round may as well be shot at with an APBC/APHEBC shell instead. The Shrapnel round is therefore too situational in most scenarios to justify bringing into battle over HE rounds.
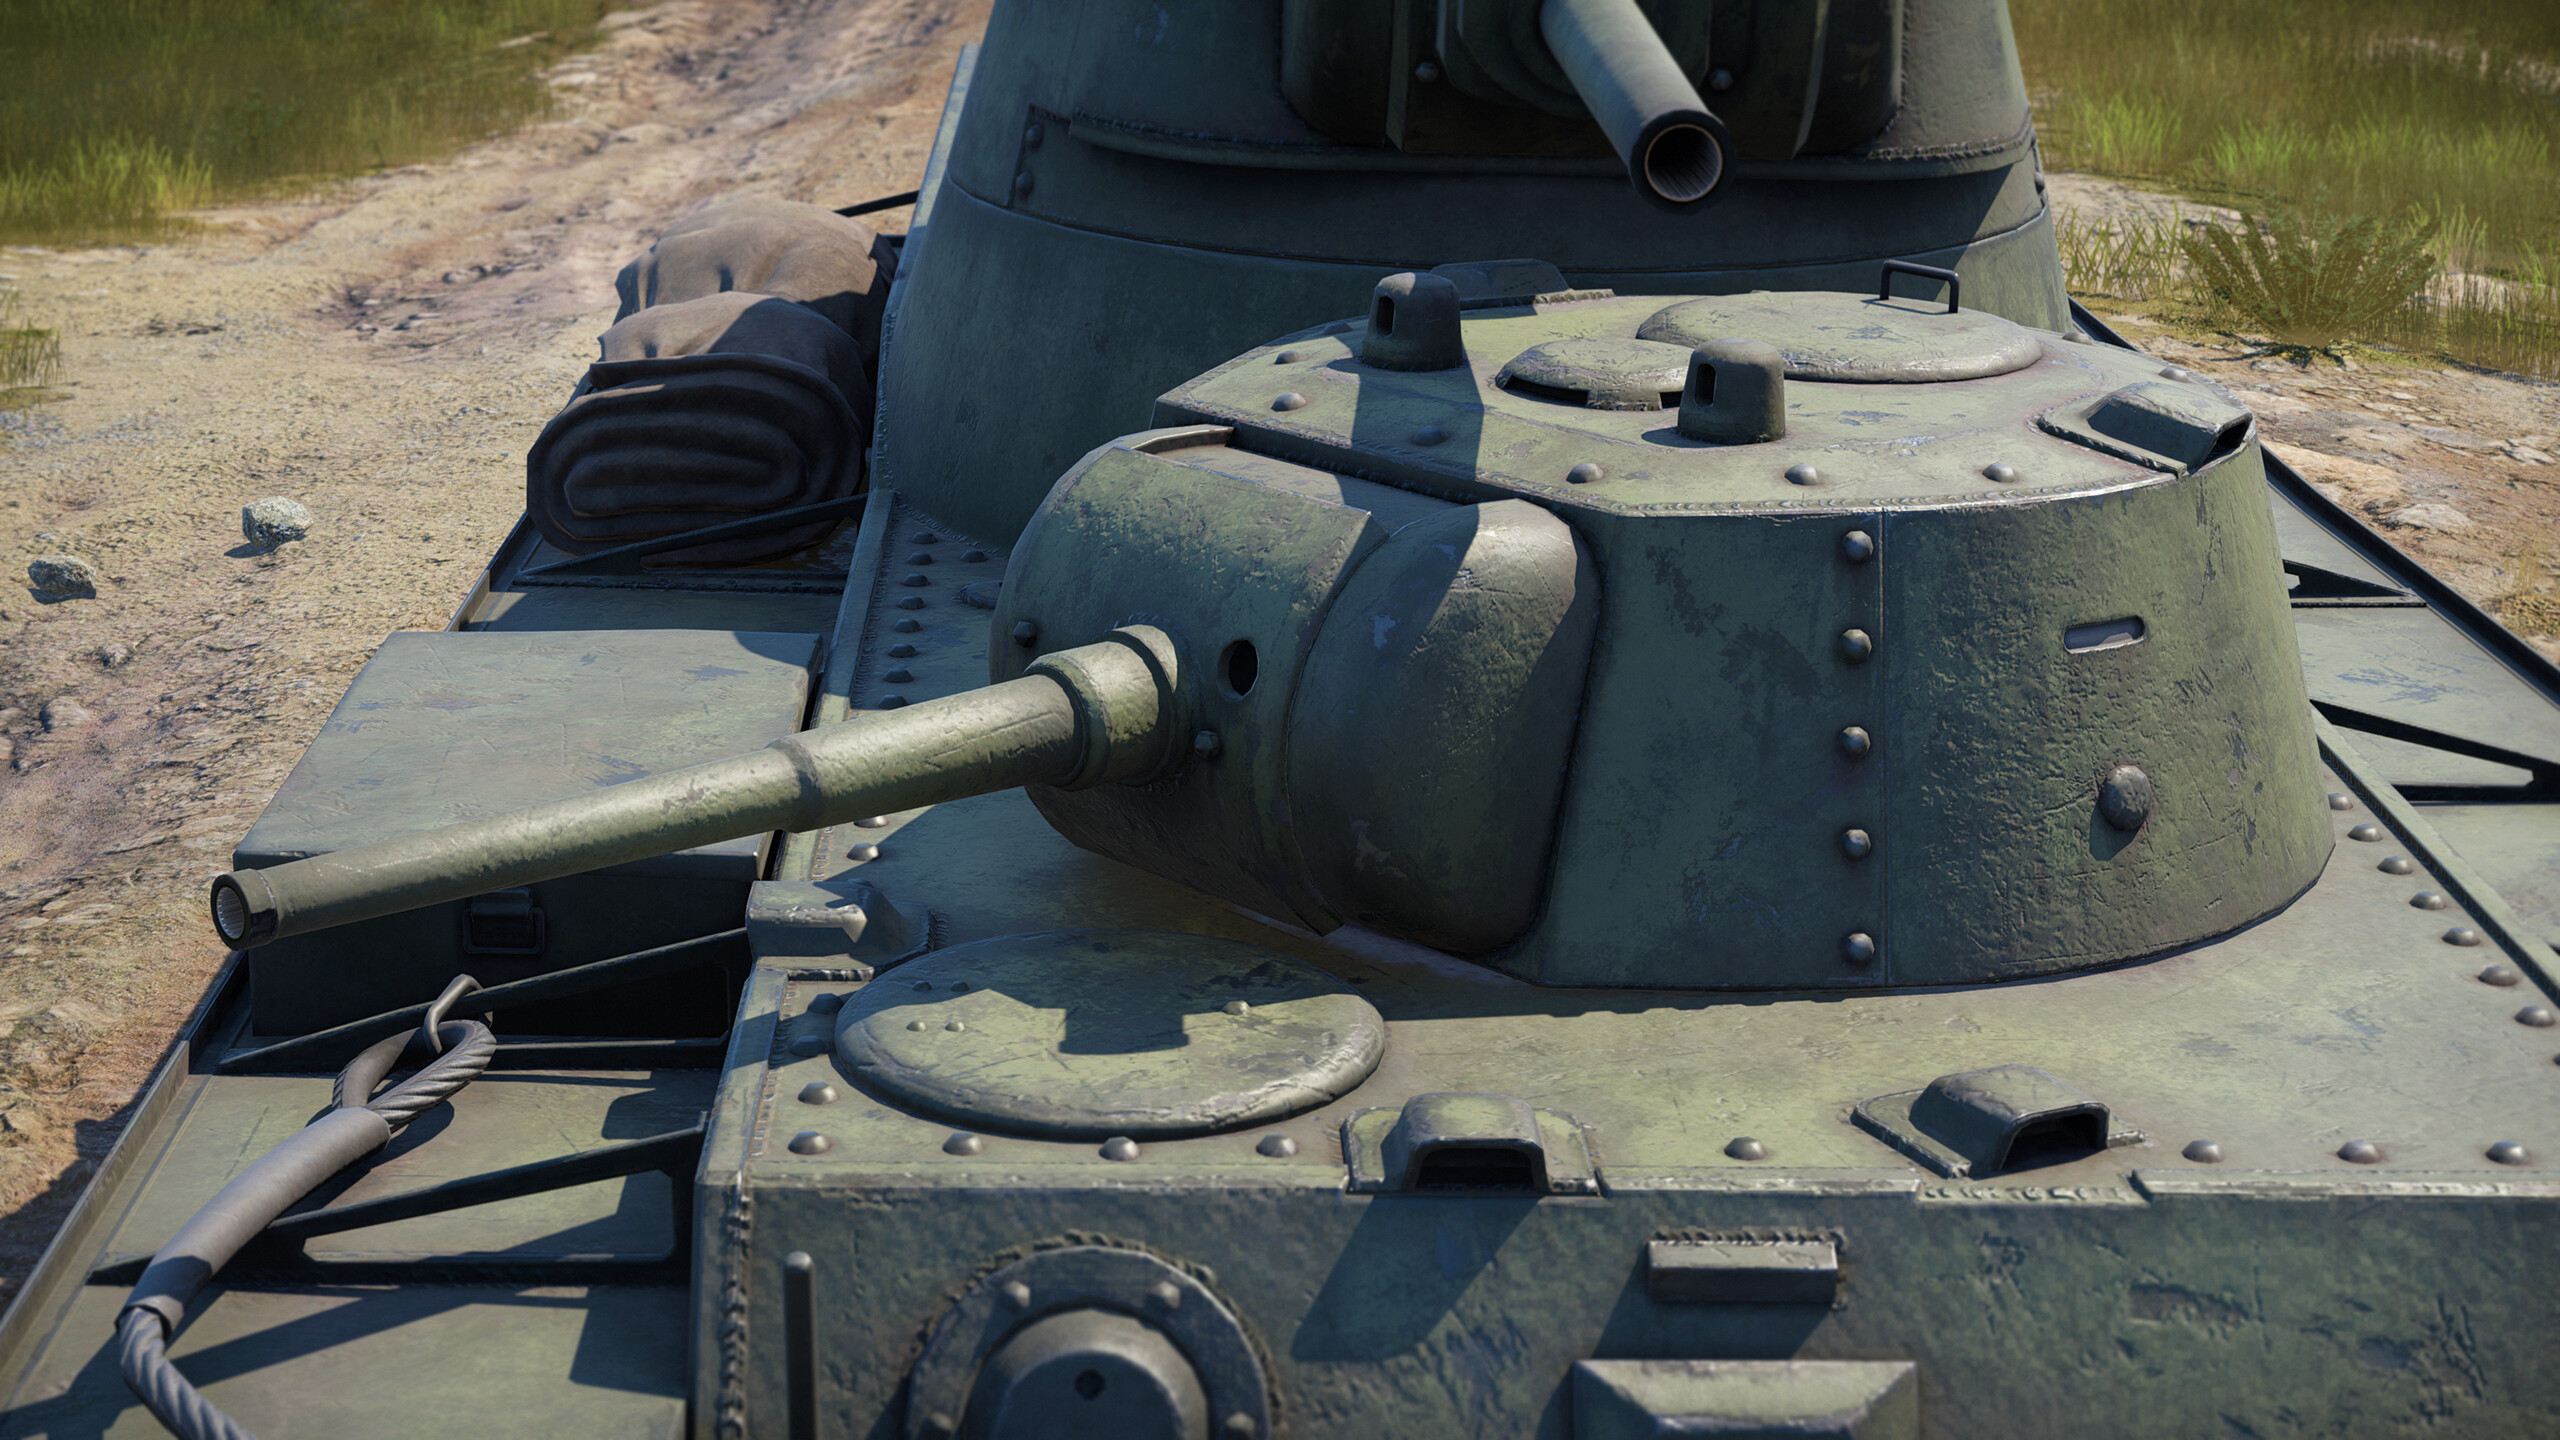
The SMK’s armament does not end with the L-11, however. It is also equipped with a 45mm 20-K cannon in a smaller turret placed at the front of the hull. This gun is useful as a source of additional firepower in cases when the main gun fails to knock out its target with a single shot. It reloads over twice as fast as the main gun, making it useful for maintaining harrassing fire at enemy targets and engaging multiple enemies simultaneously.
It also offers better ballistics and shell velocity than the L-11, thanks to its lighter ammunition, often making it easier to use against moving, far-off targets. However, its shells are weaker than those of the main gun, which is why they should be used in a finishing or secondary role.
Ammunition (45mm)
This secondary gun offers an identical range of shell types to the L-11, with the exception of the Shrapnel shell being replaced by an APCR shell.
- The first shell type is the BR-240 APHEBC round. Similarly to the BR-350A of the main gun, it is a decent shell offering 67mm of penetration and 29g of explosive mass. This round is the most versatile out of those available to the 20-K, capable of crippling many vehicles the SMK can face and sometimes capable of knocking out lighter vehicles in one shot.
- The second shell type is the BR-240SP APBC round. Similarly to the 350SP, it trades the BR-240's explosive filler for 3mm of extra penetration, making it capable of piercing 70mm of armor. It is, however, not recommended to bring this shell over the standard BR-240, as the extra pen is not worth the loss of explosive filler.
- The third round is the O-240 HE shell. It offers 118g of explosive mass and is moderately effective at knocking out open-topped vehicles. While useful on its own, should the player bring 76mm HE rounds for the main gun into battle as recommended, there is little reason to bring the O-240.
- The fourth and final ammunition type is the BR-240P APCR round. This shell has very high penetration at point-blank range, but is unreliable and has very poor post-pen damage. Thus, while this round remains situationally viable against certain vehicles with flat armor plates, it is generally outclassed by the BR-240 or BR-240SP, as well as by the main gun.
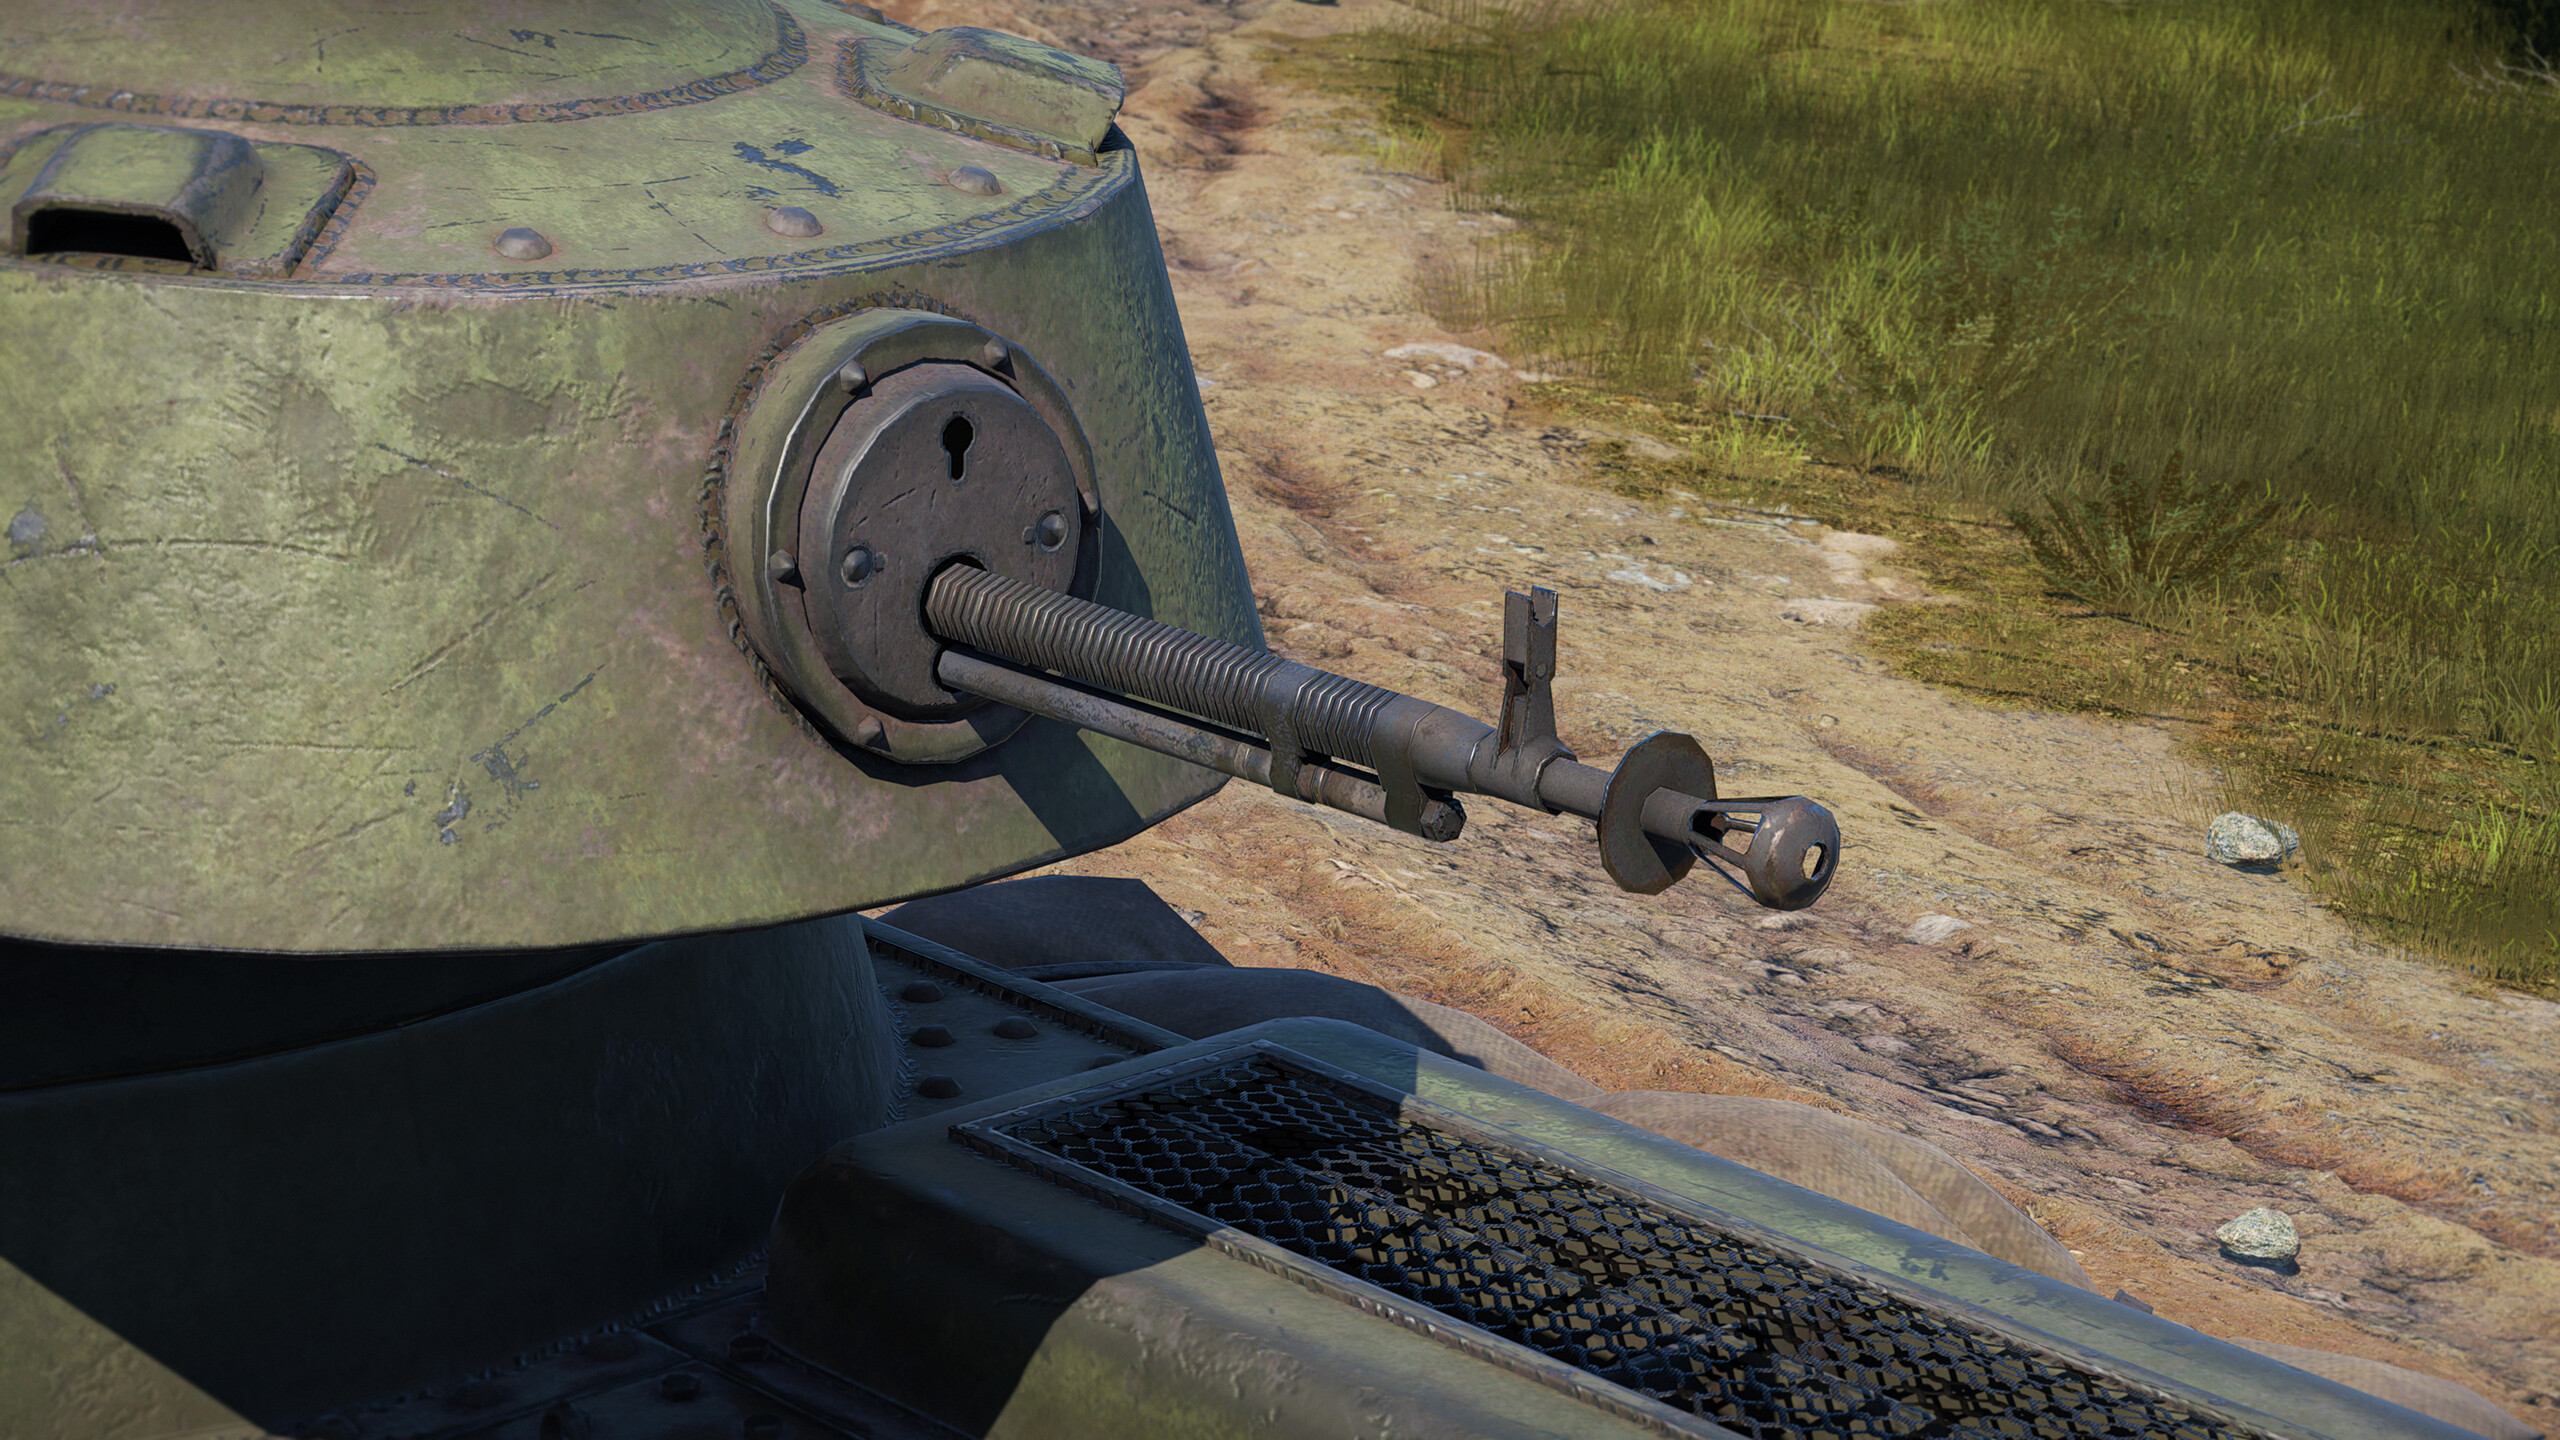
The final piece of notable armament on the SMK is in the form of the rear-facing DShK machine gun. It is mounted on the back of the main turret and is fully functional. In rare occasions, it can prove very effective as a surprise counter to flanking enemies that try to attack the SMK from the rear. It offers 32 mm of penetration, which tends to be more than enough to damage and knock out light tanks.
It is important to note that the DShK is manned by the Commander, therefore losing him means losing use of the machine gun as well. Additionally, its traverse is rather limited and controlling it may be tricky at first, but it becomes very simple once the player utilizes the “Select machine gun” feature in the game’s controls.
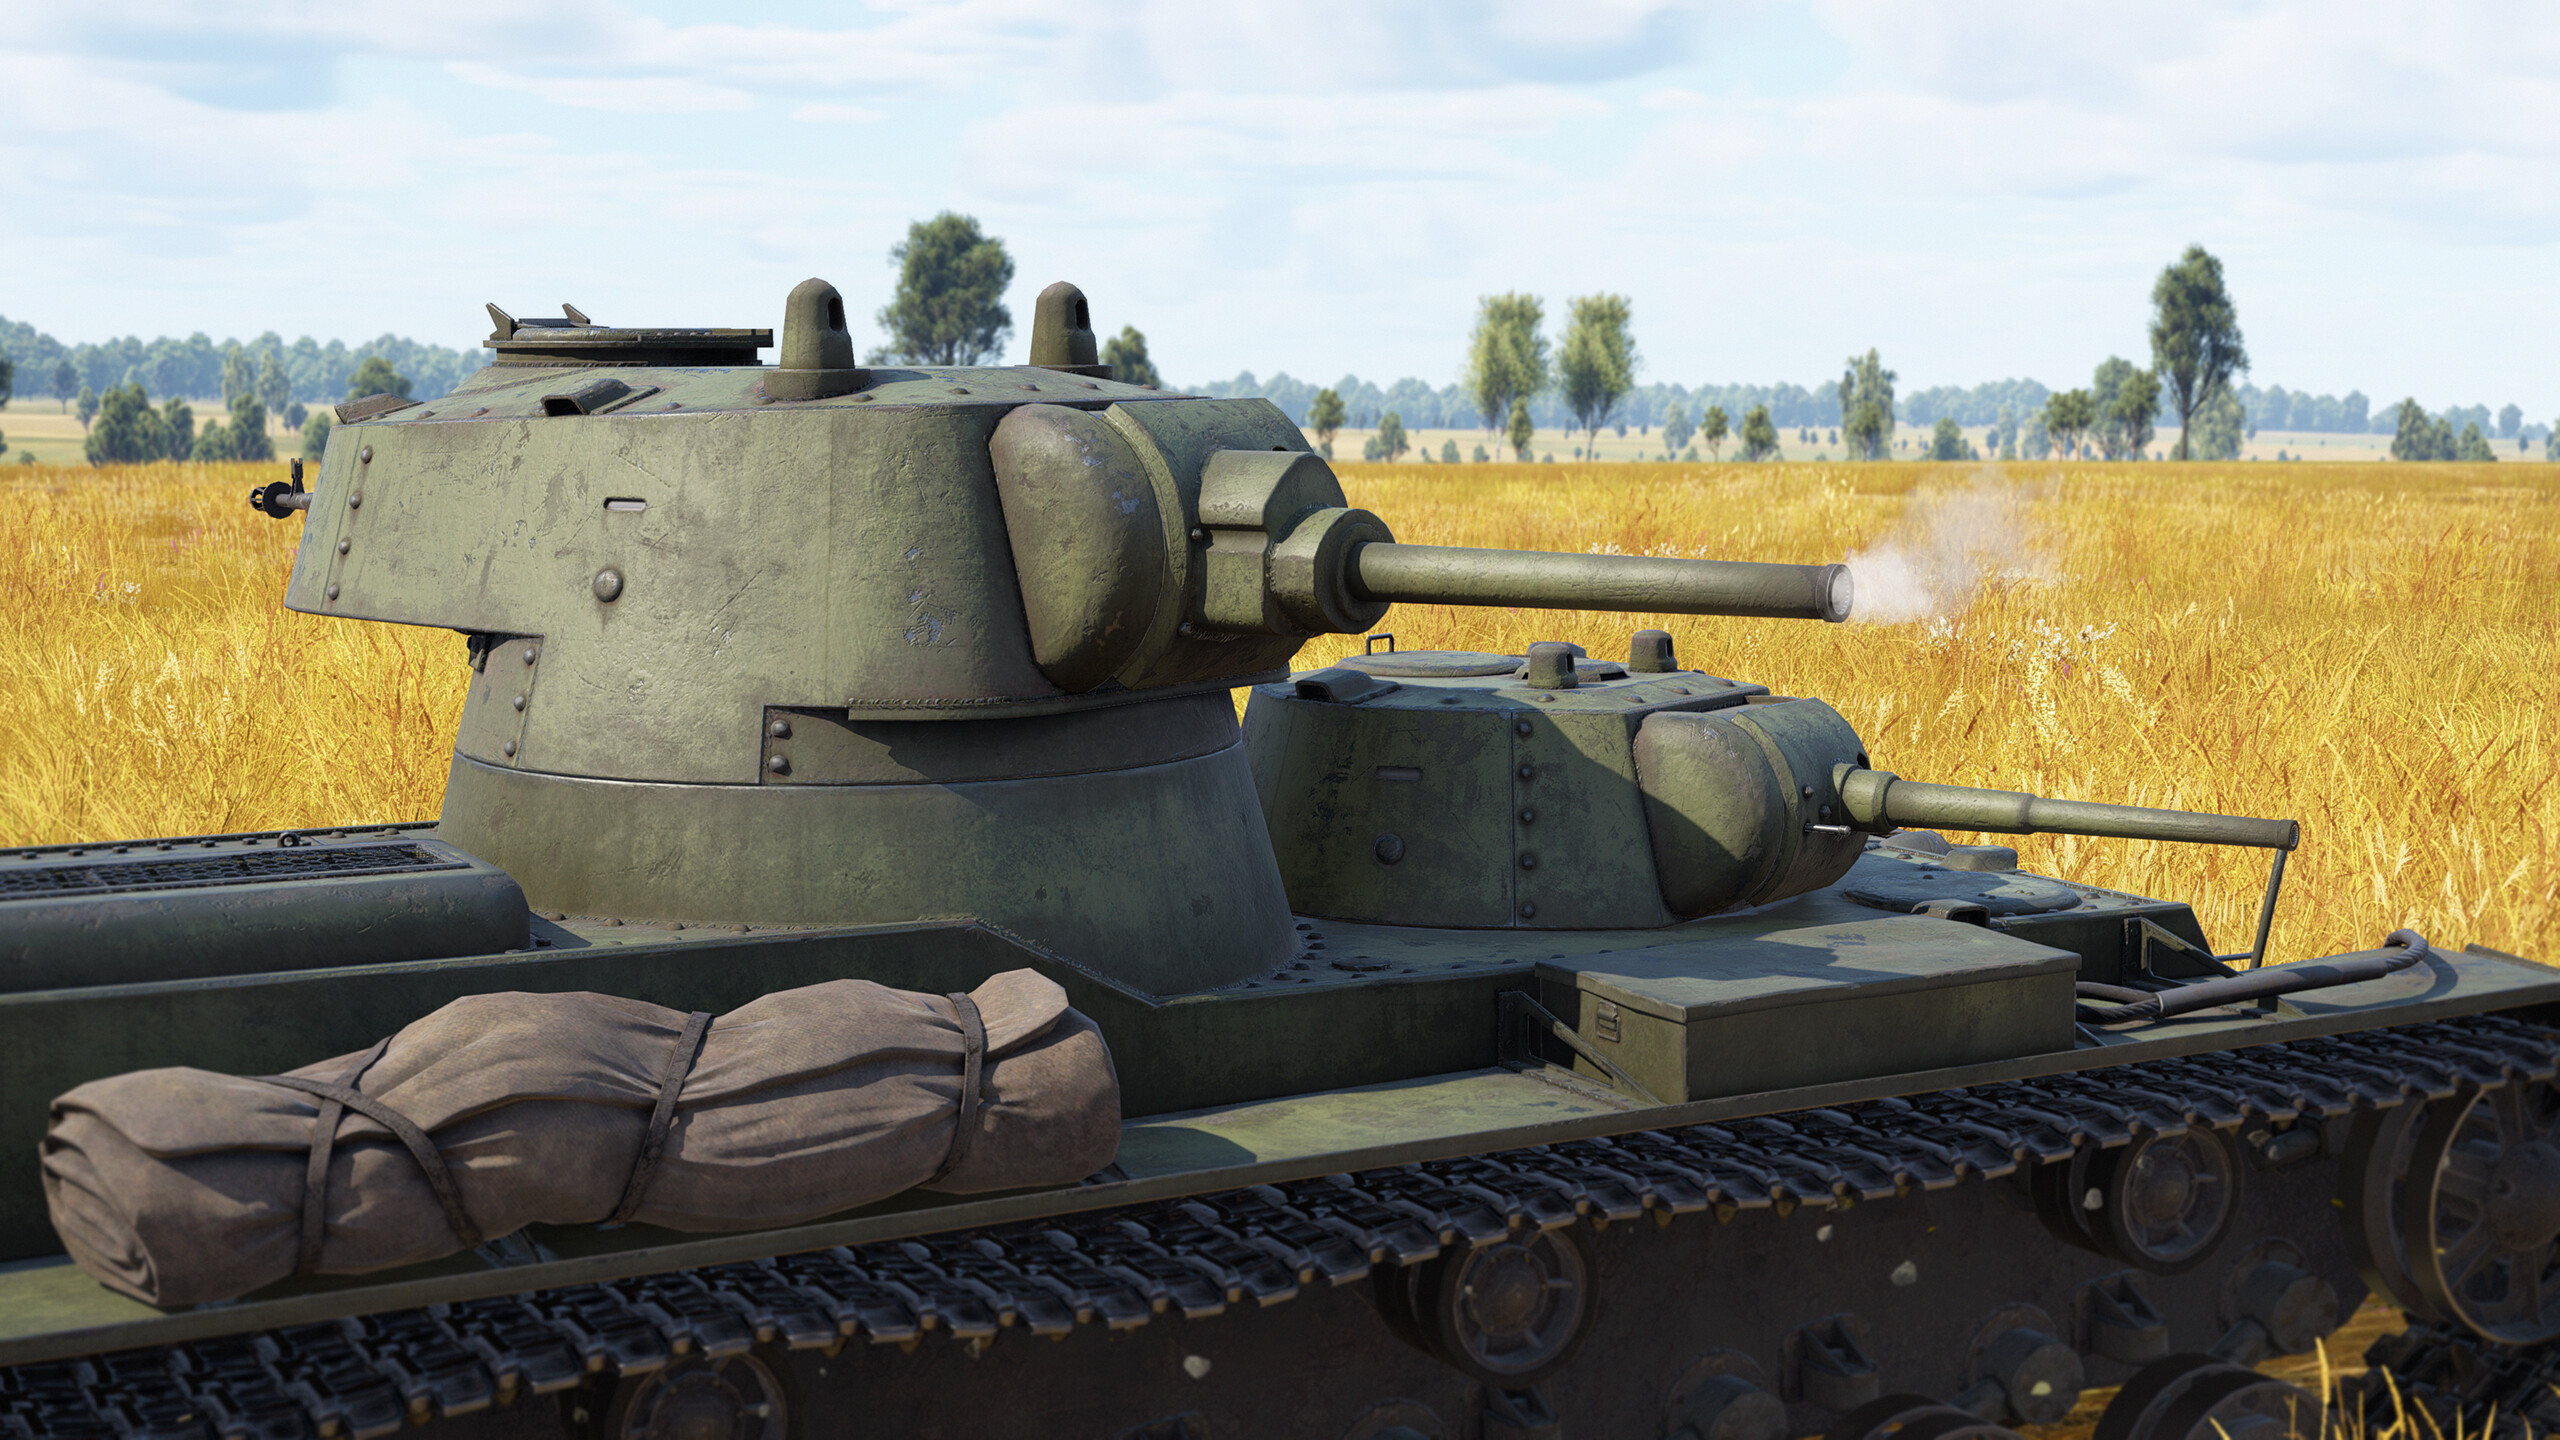
Ultimately, while individual pieces of the SMK’s armament may be rather unremarkable, the fact that they all come on one armored platform is the very thing that makes the SMK so unique. The cannons' placement in independent turrets allows the player to engage multiple targets simultaneously, while also increasing the survivability of each gun by isolating it from potential damage sustained by the other.
The DShK completes the package by providing the user with a way to fight back against flanking light tanks, a very common threat to all heavy tanks. Thus, the SMK boasts a 76mm cannon, an additional 45mm cannon, and a high-caliber machine gun. This kind of firepower is entirely unique in the SMK’s BR bracket, and very rare even on the scale of the entire game.
The Playstyle
The SMK is a large and sluggish target, with guns that offer unremarkable penetration capabilities. While their post-penetration damage is quite good, they won’t do any damage if they fail to pierce enemy armor, which will be a rather common occurrence, especially in uptiers, if the user simply fires center-mass or from long distances. For these reasons, the SMK is best played up-close, but cautiously. Its size means it’s easy to spot, flank, and hit, because of which the user should be very careful not to overexpose themselves.
Urban areas are the preferable environment for an SMK, as at close ranges the user can make the most of their impressive firepower and aim for weakspots on enemy vehicles, mitigating the rounds' unimpressive penetration. Nonetheless, it is best to stay near allies even in urban areas to prevent devastating flanks from enemy tanks.
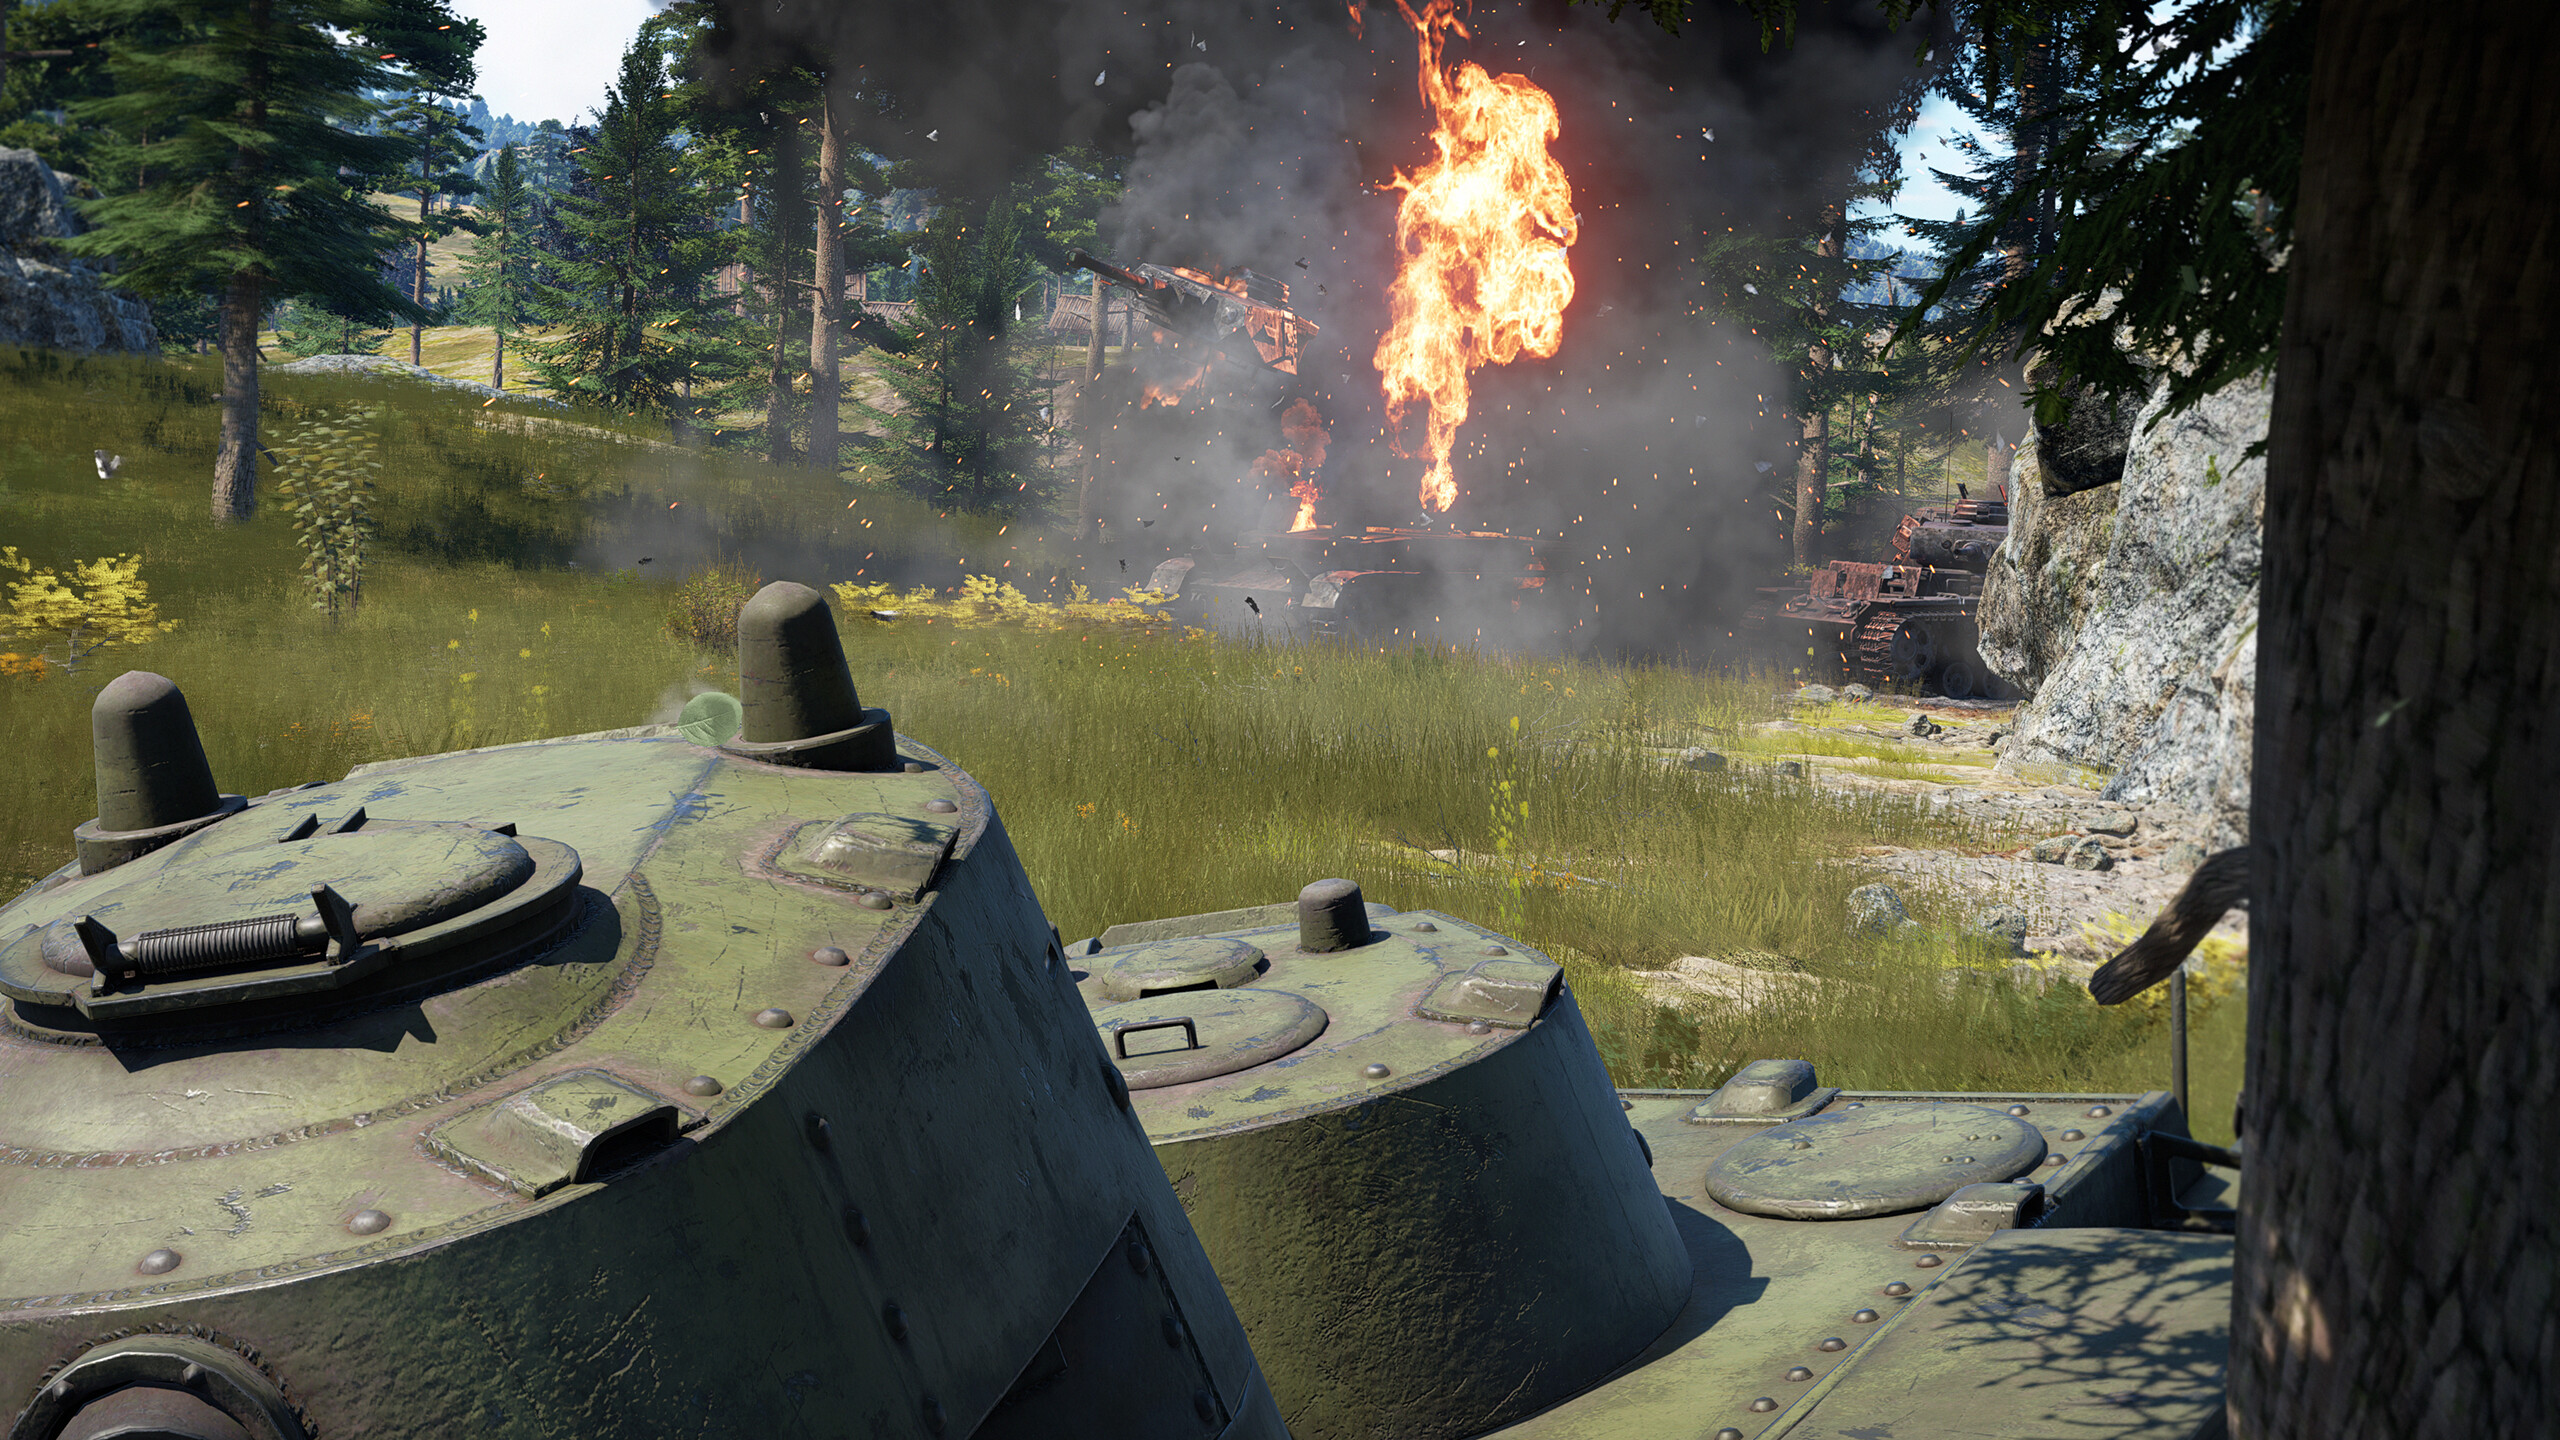
Should the player find themselves on an open map, it should be imperative to find cover from which to fire from, which ideally exposes only the main turret. The user cannot forget that the SMK is, quite frankly, huge. This makes it an easy target at ranges, especially to powerful German guns in its BR bracket. Relying on mobility or concealment is not an option, and relying on armor should only be a last resort. One should feel confident to push only if it’s into more cover ahead, or if they’re sure the area is clear.
The status of a heavy tank and two cannons may make one overconfident in their survivability, but this is an error. The SMK is essentially a BT-7 welded onto a KV-1, and poorly at that.The hull armor is strong as an emergency asset, but will not protect the tank from the main ammunition storage section detonating, which will happen very often from shots to the sides of the vehicle or “neck” of the main turret.
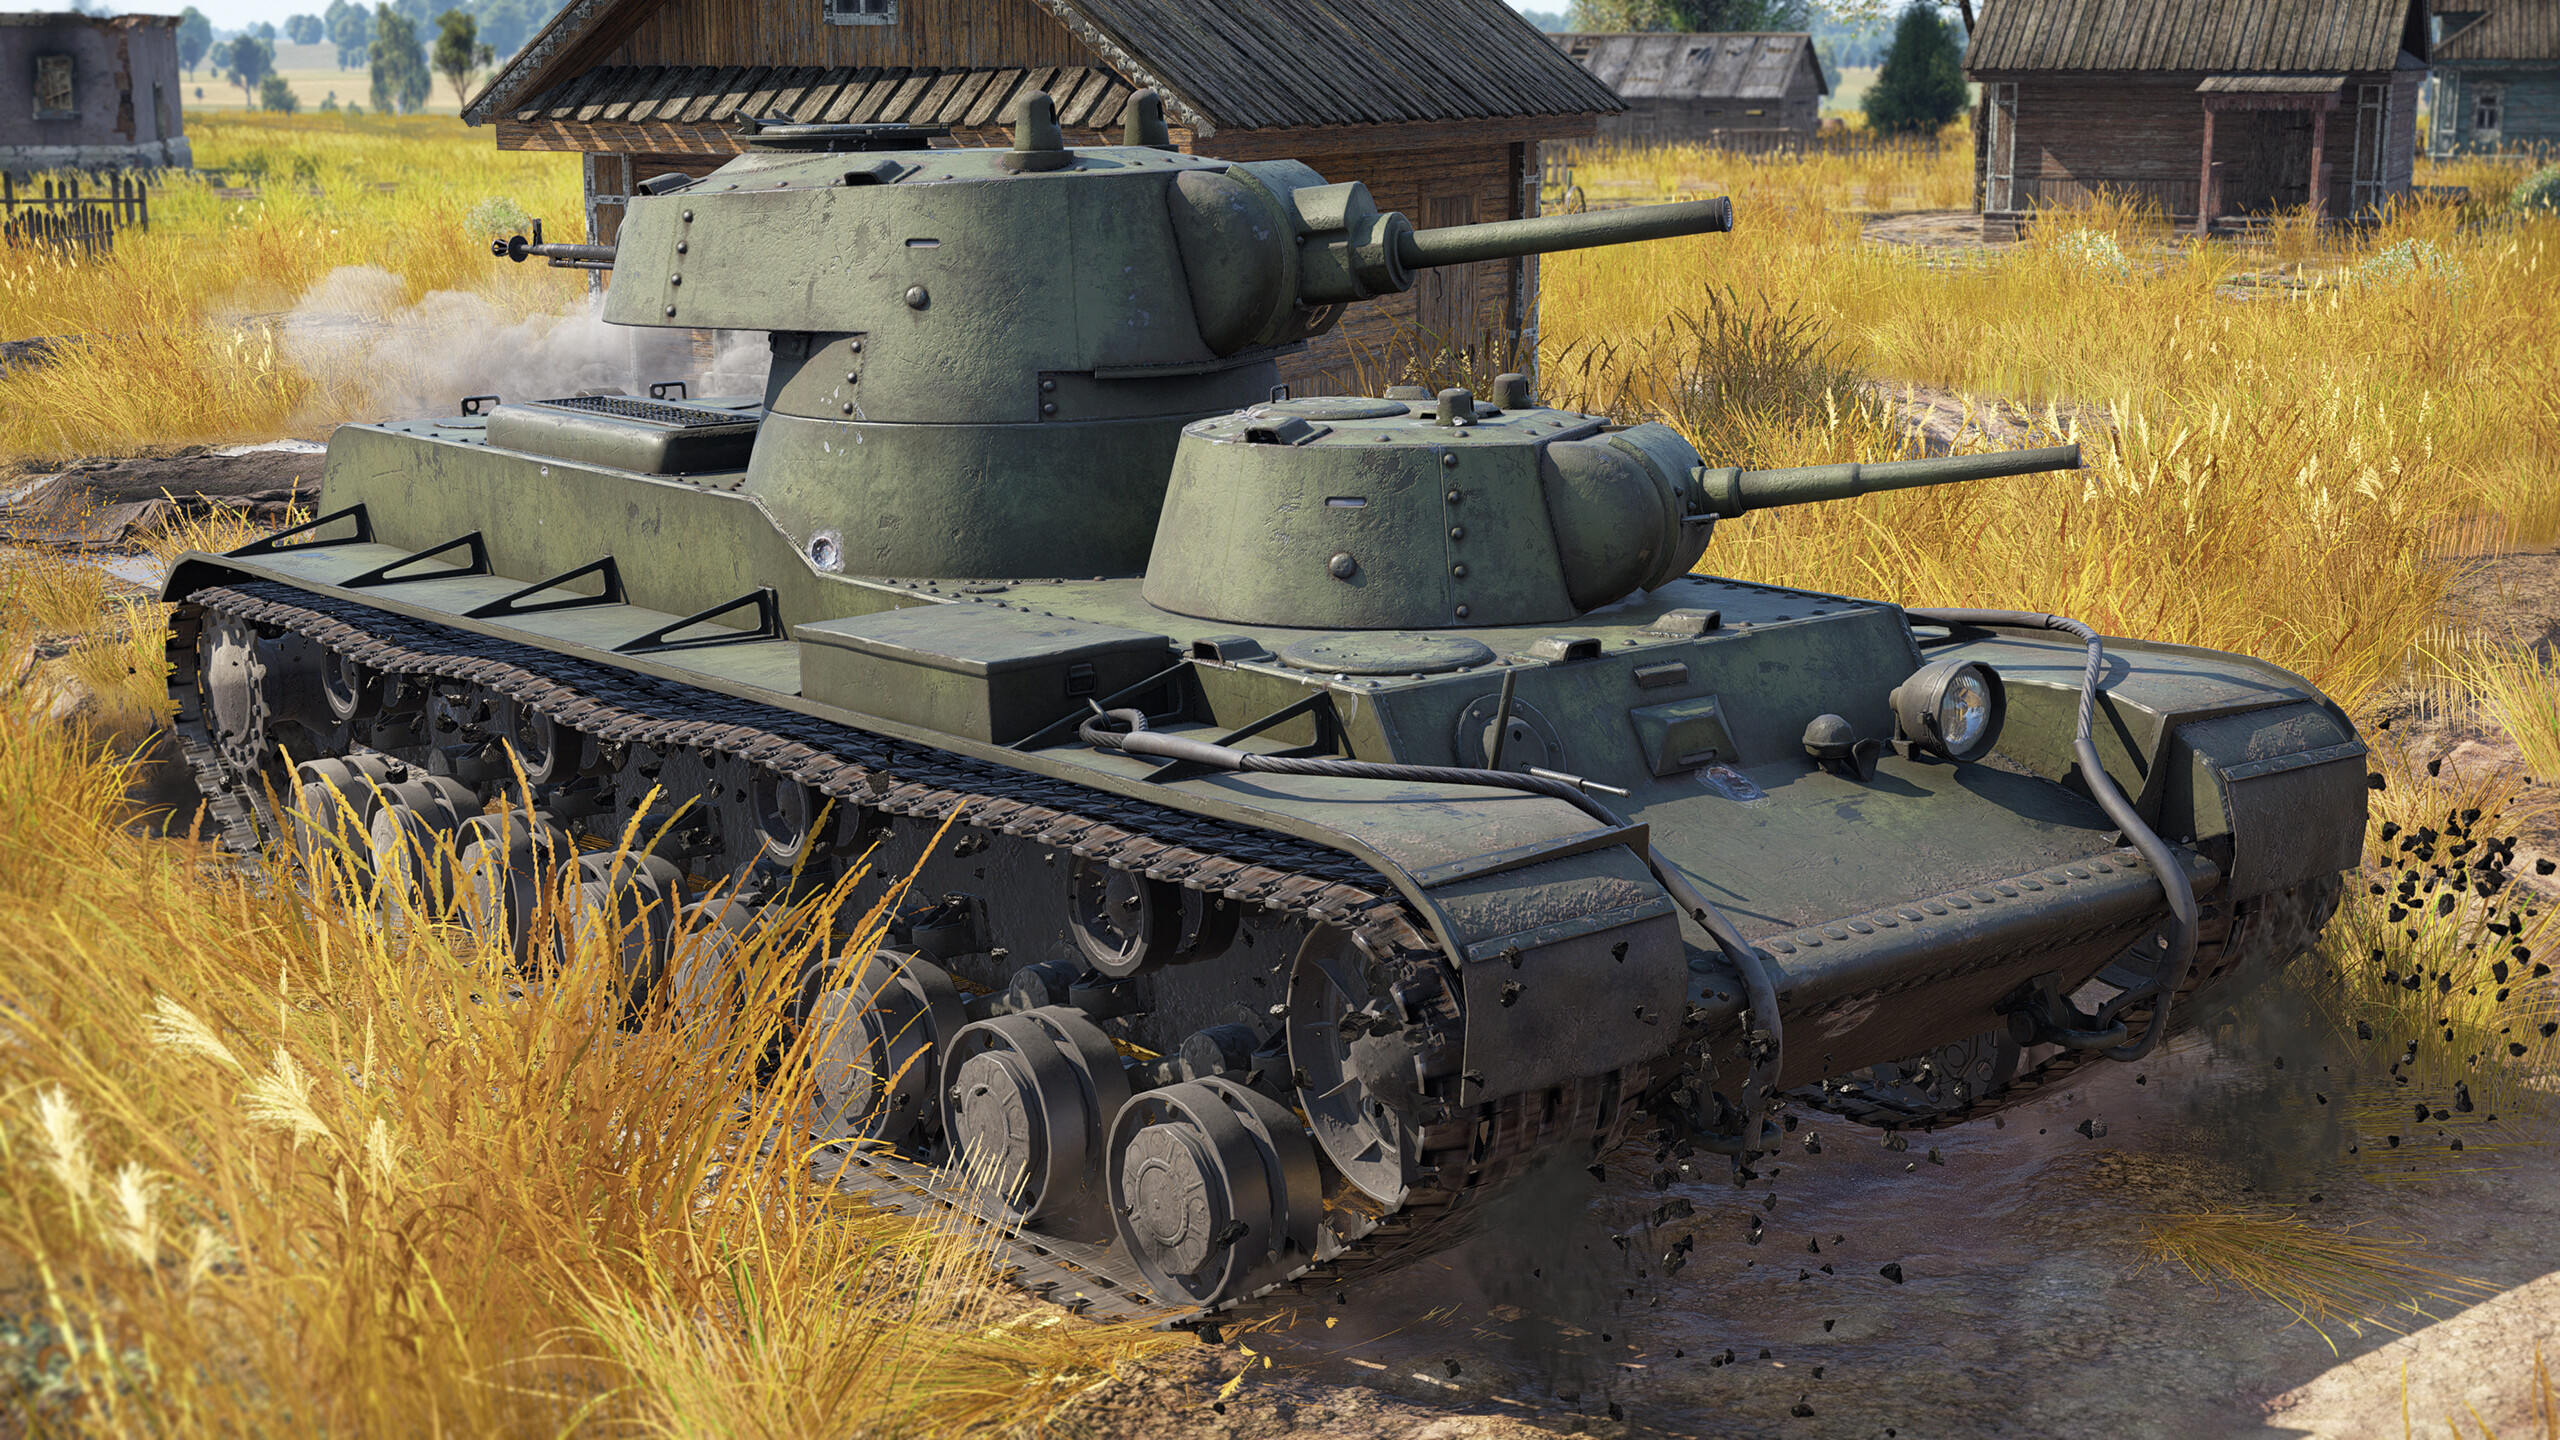
Due to the unexpectedly good mobility boasted by this behemoth, it would be recommended to use it as a first spawn in maps with urban areas, as the player can use it to quickly get to advantageous positions and surprise enemy light tanks with a sudden attack from a superheavy. Furthermore, the start of a match means most enemy tank destroyers will not yet be in position, thus the SMK can push to urban areas across open fields with more confidence. Making use of the large tank before the appearance of aircraft in the match can bring the user much success.
Special thanks to GiMei for providing beautiful screenshots of the SMK!