
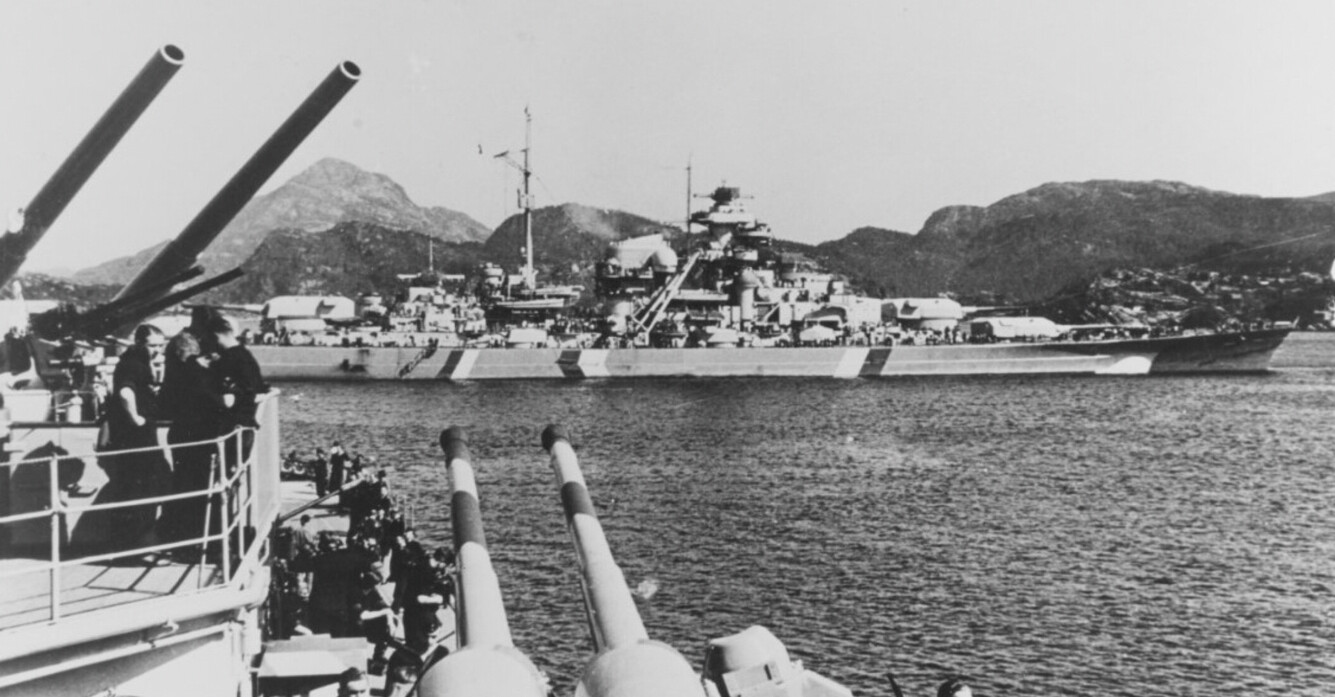
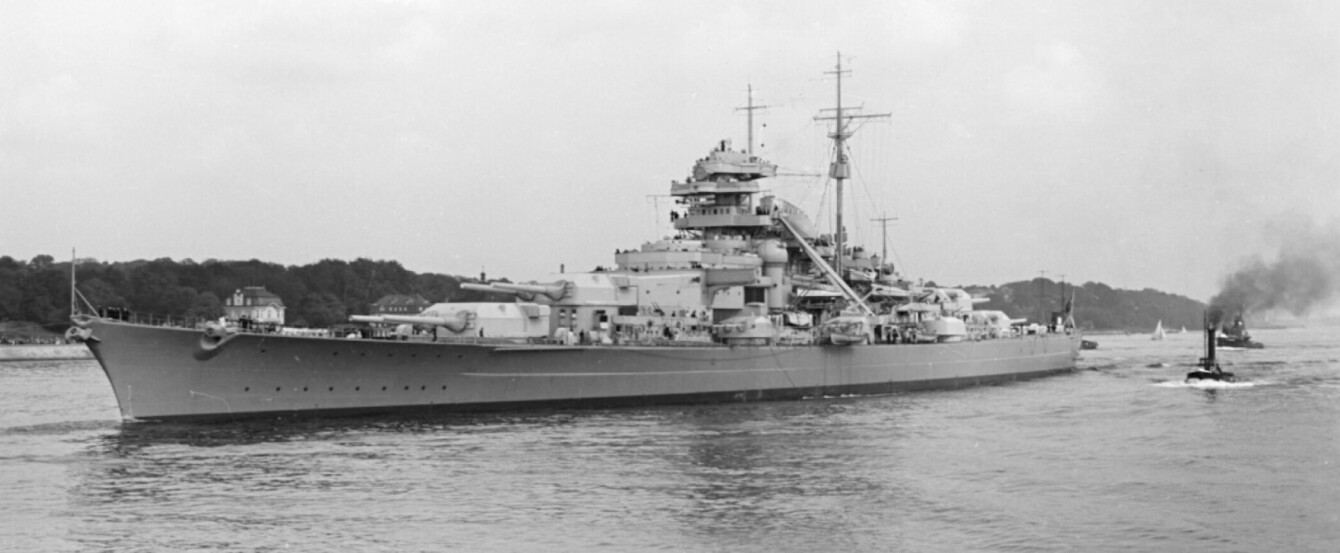
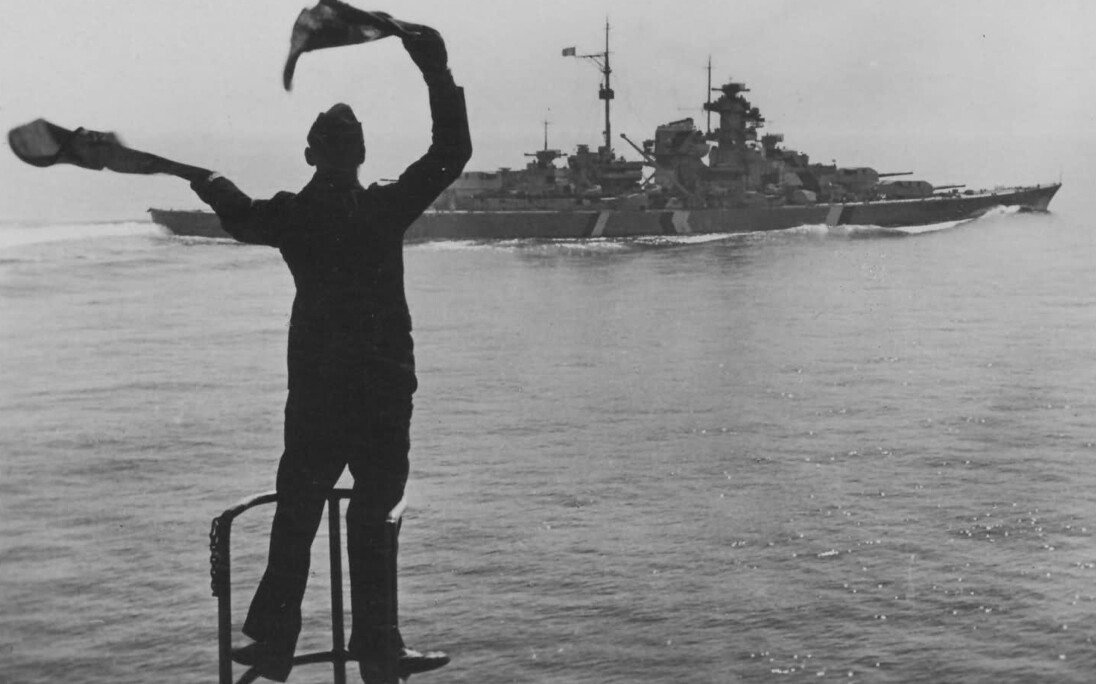
833 days, that was the lifespan of the Bismarck, from her launch to her scuttling on May 27, 1941. She was one of the largest and most famous battleships in the world like the Japanese Yamato and the American Missouri. The Bismarck belonged to the Bismarck class, which also included her sister ship, the Tirpitz. The Bismarck rose to fame by sinking HMS Hood on May 24, 1941, earning a worldwide reputation as one of the deadliest battleships ever built. In just five minutes, the HMS Hood was destroyed. Afterwards, the British Royal Navy hunted the Bismarck across the North Atlantic. Following a torpedo attack by a squadron of Swordfish torpedo bombers, she lost her rudder and became unable to maneuver. On May 27, 1941, her crew finally scuttled the Bismarck in the Atlantic Ocean, while the ship continued to engage numerous British battleships, cruisers, and destroyers.
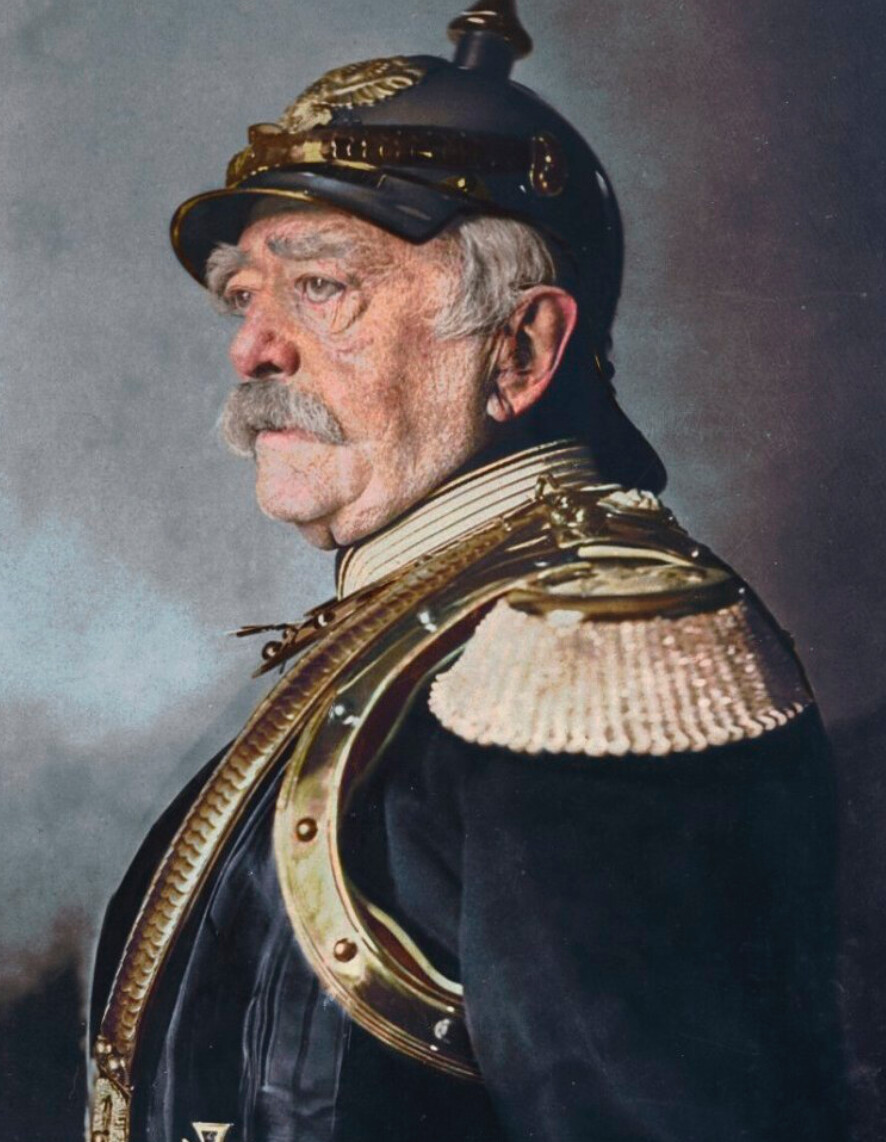
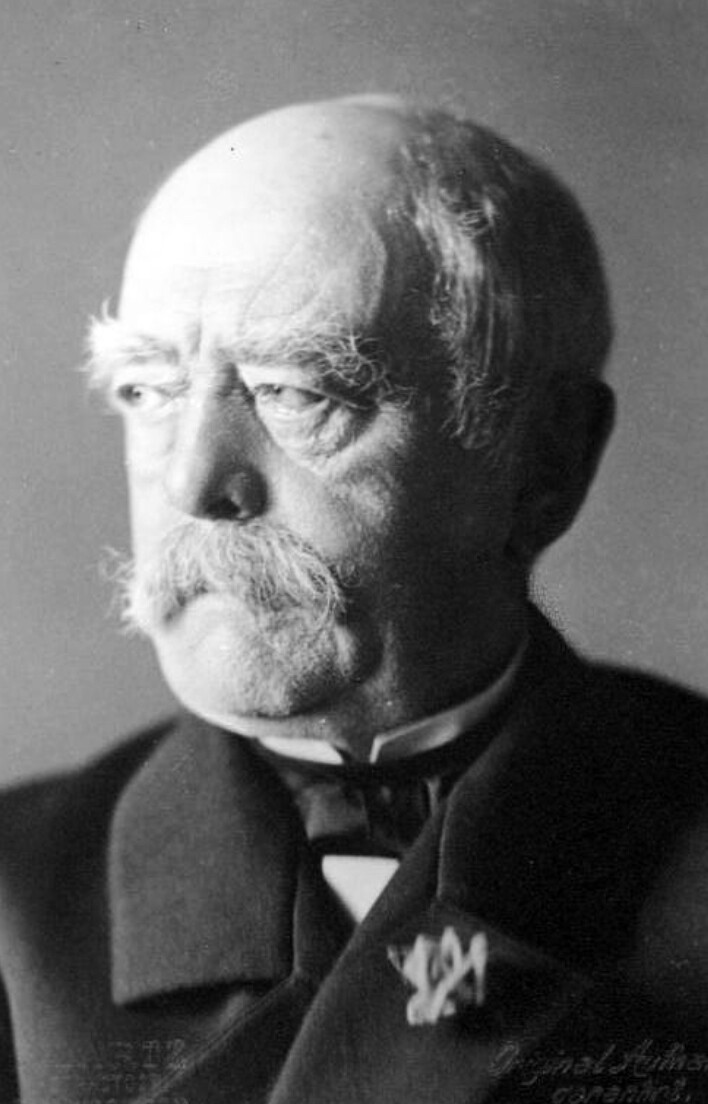
Fun Fact: the Bismarck was named after the German Chancellor Otto von Bismarck, who was the first Chancellor of Prussia from 1871 to 1890.
Overview
| Ship type | Battleship | |
| Class | Bismarck class | |
| Length | 250.5 meters (total length) | 241.5 meters (construction waterline) |
| Width | 36 meters | |
| Height | 53.5 meters (to the top of the chimney) | |
| Depth | Max. 9.9 meters | |
| Construction number | 509 | |
| Construction costs | 196.8 million Reichsmark | (converted to current price ca €= 984 million €/ $ = 1.158 billion $) |
| Keel laying | 1 July 1936 | Hamburg |
| Launch | 14 February 1939 | Hamburg |
| Displacement | Construction: 45,950 t | Max: 53,500 t |
| Main armament | 8 × 38 cm SK C/34 (L/52) | (1,004 rounds) |
| Secondary armament | 12 × 15 cm SK C/28 (L/55) | (1,288 rounds) |
| Anti Air armament | 16 × 10.5 cm SK C/33 (L/65) 16 × 3.7 cm SK C/30 (L/83) 18 × 2 cm Flak C/38 (L/65) | (6,825 rounds) (34,100 rounds) (44,000 rounds) |
| Crew | 2,092 regular men | 128 naval staff |
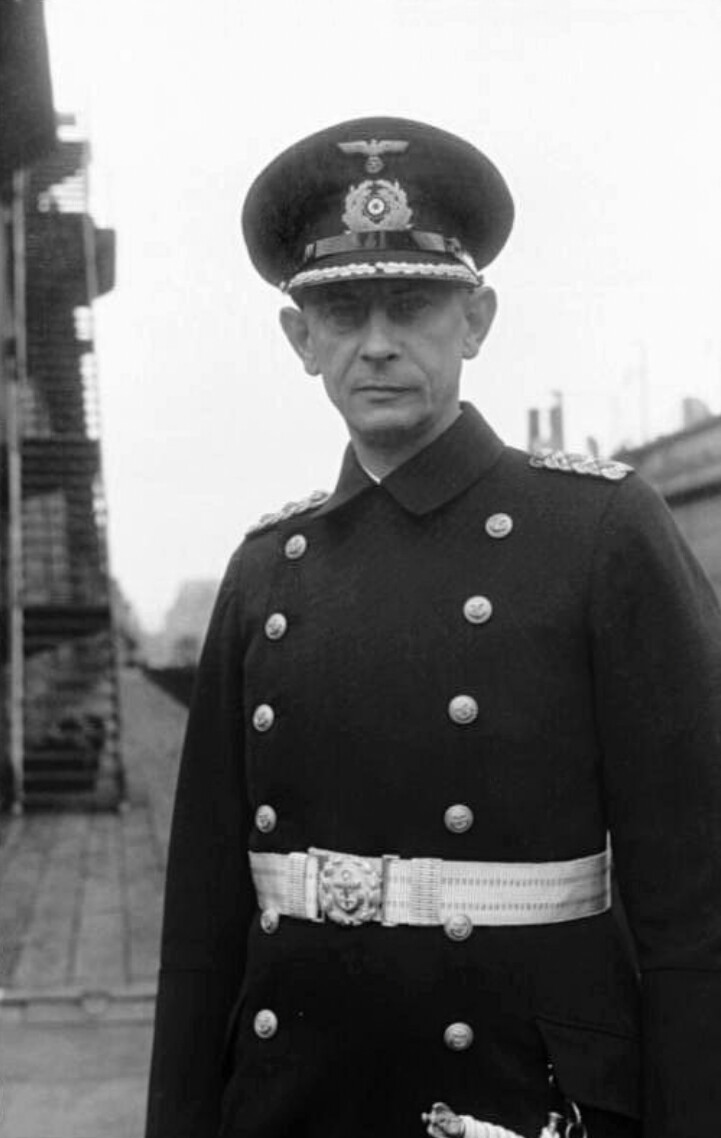
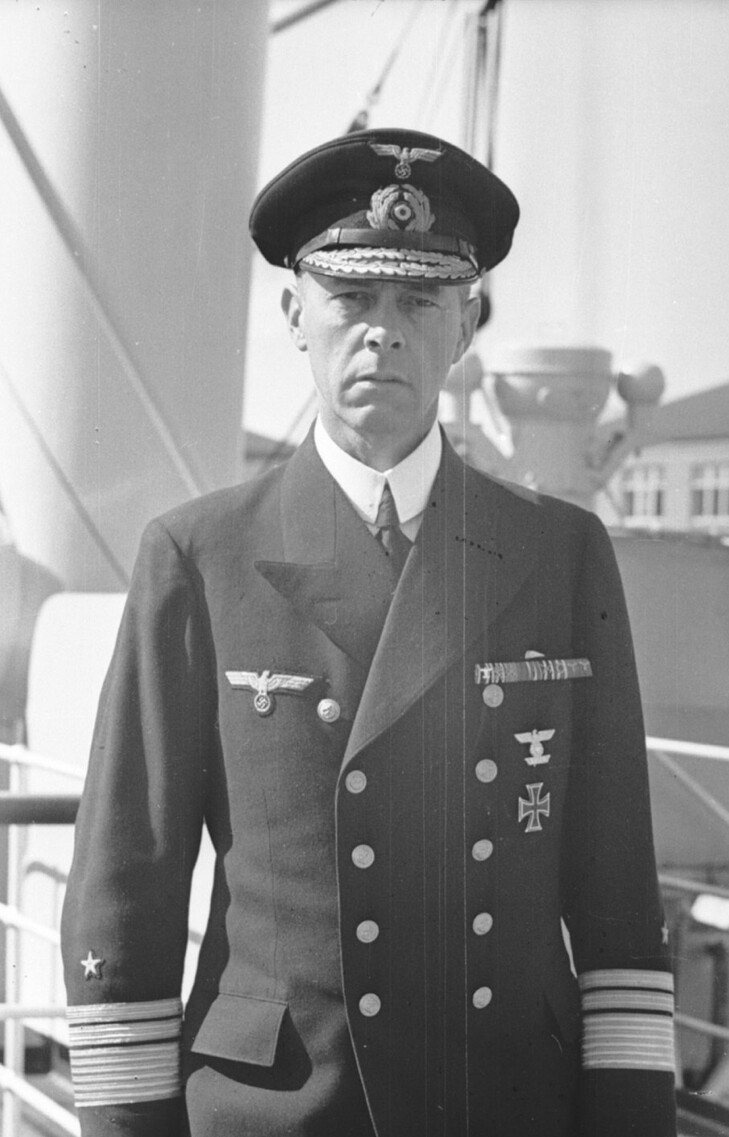
| Supreme commanders | Captain Ernst Lindemann | Fleet Chief Günther Lütjens |
| Planes | 4 Arado Ar 196 | |
| Engine | 12 steam boilers | 3 sets of steam turbines |
| Top speed | 57 km/h | 30.6 knots |
| Shipyard | Blohm & Voss | Hamburg |
| Whereabouts | Sunk: Scuttled May 27, 1941 | Coordinates 48° 10′ N, 16° 12′ W |
Development
After the First World War, the Treaty of Versailles limited Germany to building warships with a maximum displacement of 10,000 tons. This restriction ended on 16 March 1935, when the Nazis terminated the treaty. The Anglo-German Naval Agreement of 18 June 1935 then permitted Germany to construct battleships exceeding 10,000 long tons (1 long ton = 1,016 kg). At that time, France was considered the most likely opponent in a naval war against Germany. The design was therefore based on the most modern French battleship at the time, the Dunkerque. Therefore, speed and armor protection were particularly important in the design of the Bismarck. Around 1933/34, the Bismarck-class concept was given the code name “Battleship F” for the project.
According to the engineers' designs, the main armament was to be eight 38 cm SK C/34 guns in four twin turrets to provide considerable firepower against enemy battleships. The Bismarck’s medium artillery was to consist of twelve 15 cm SK C/28 guns, also mounted in twin turrets. To provide sufficient anti-aircraft defense, the Bismarck had around 50 anti-aircraft guns, categorized as heavy, medium, and light. The heavy anti-aircraft guns consisted of sixteen 10.5 cm SK C/33 guns in eight twin mounts. The four forward anti-aircraft guns were of the C/33na model in the C/31 twin mount, and the rear ones were of the C/33 type. It was considered a temporary provisional measure; it was to receive the C/37 model after its return from Operation Rheinübung. The medium anti-aircraft defense consisted of a further sixteen 3.7 cm SK C/30 guns in eight twin mounts; the light anti-aircraft defense consisted of eighteen 2 cm Flak C/38 guns, two quadruple and ten single mounts.
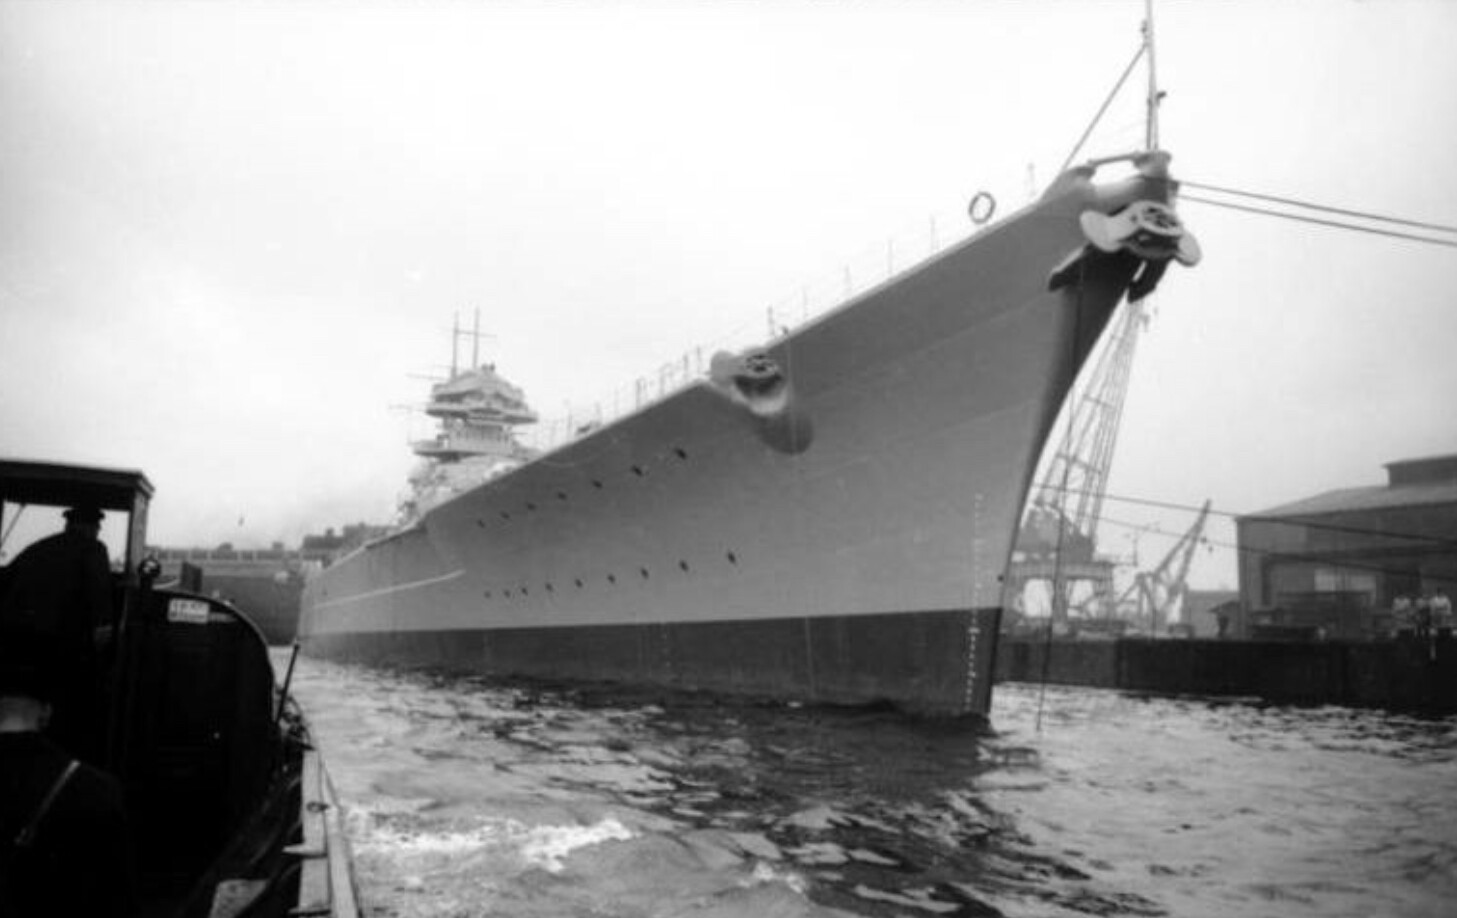
The Bismarck was the lead ship and main ship of the Bismarck class. During construction in Hamburg, the ship’s size and draft were designed to ensure operational capability in the Kaiser Wilhelm Canal and at the Wilhelmshaven naval base. Therefore, the Bismarck was 250.5 meters long and 36 meters wide, with a maximum draft of 9.9 meters.
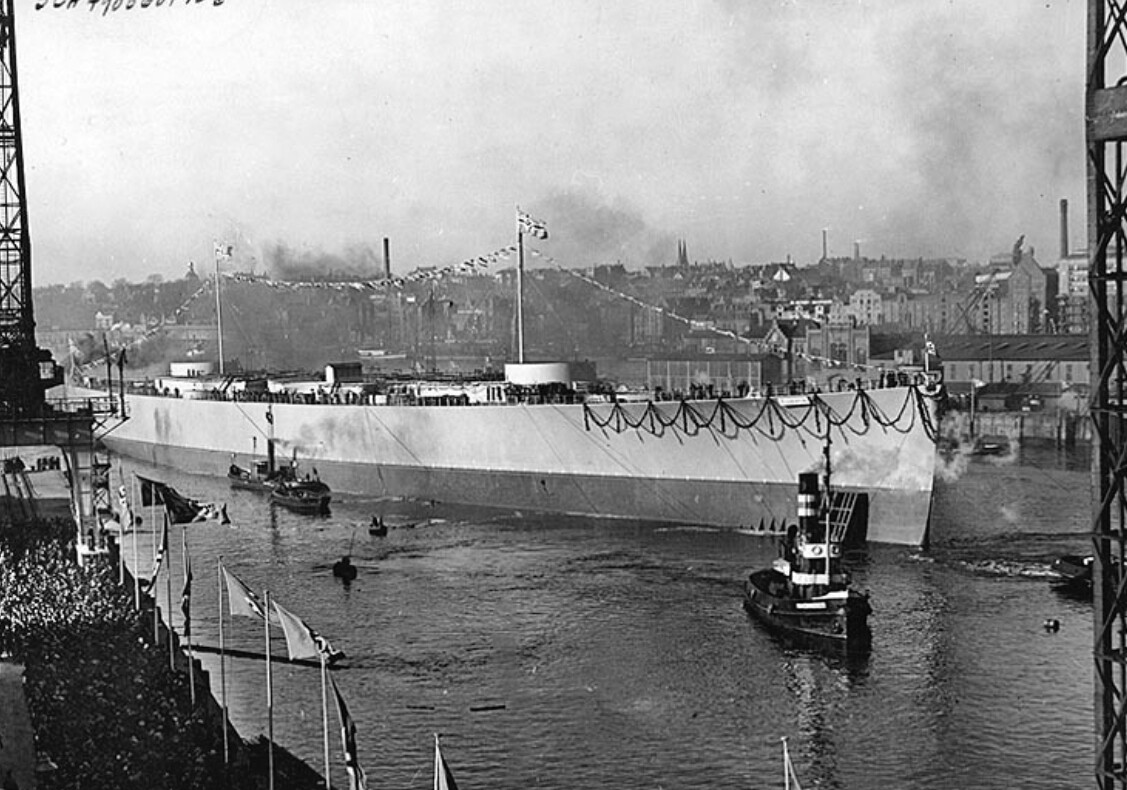
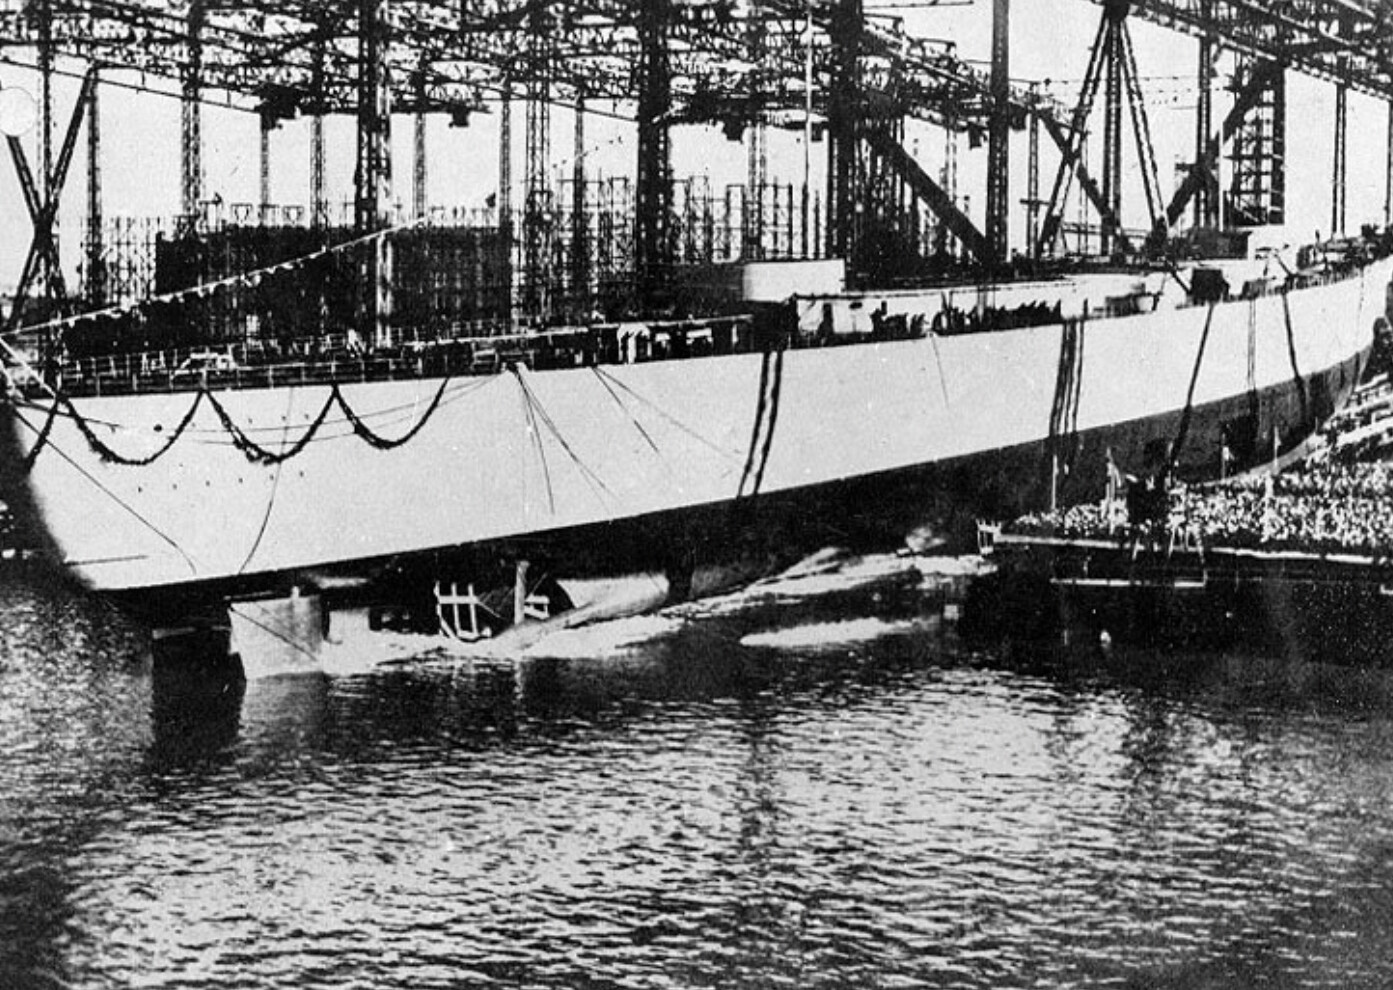
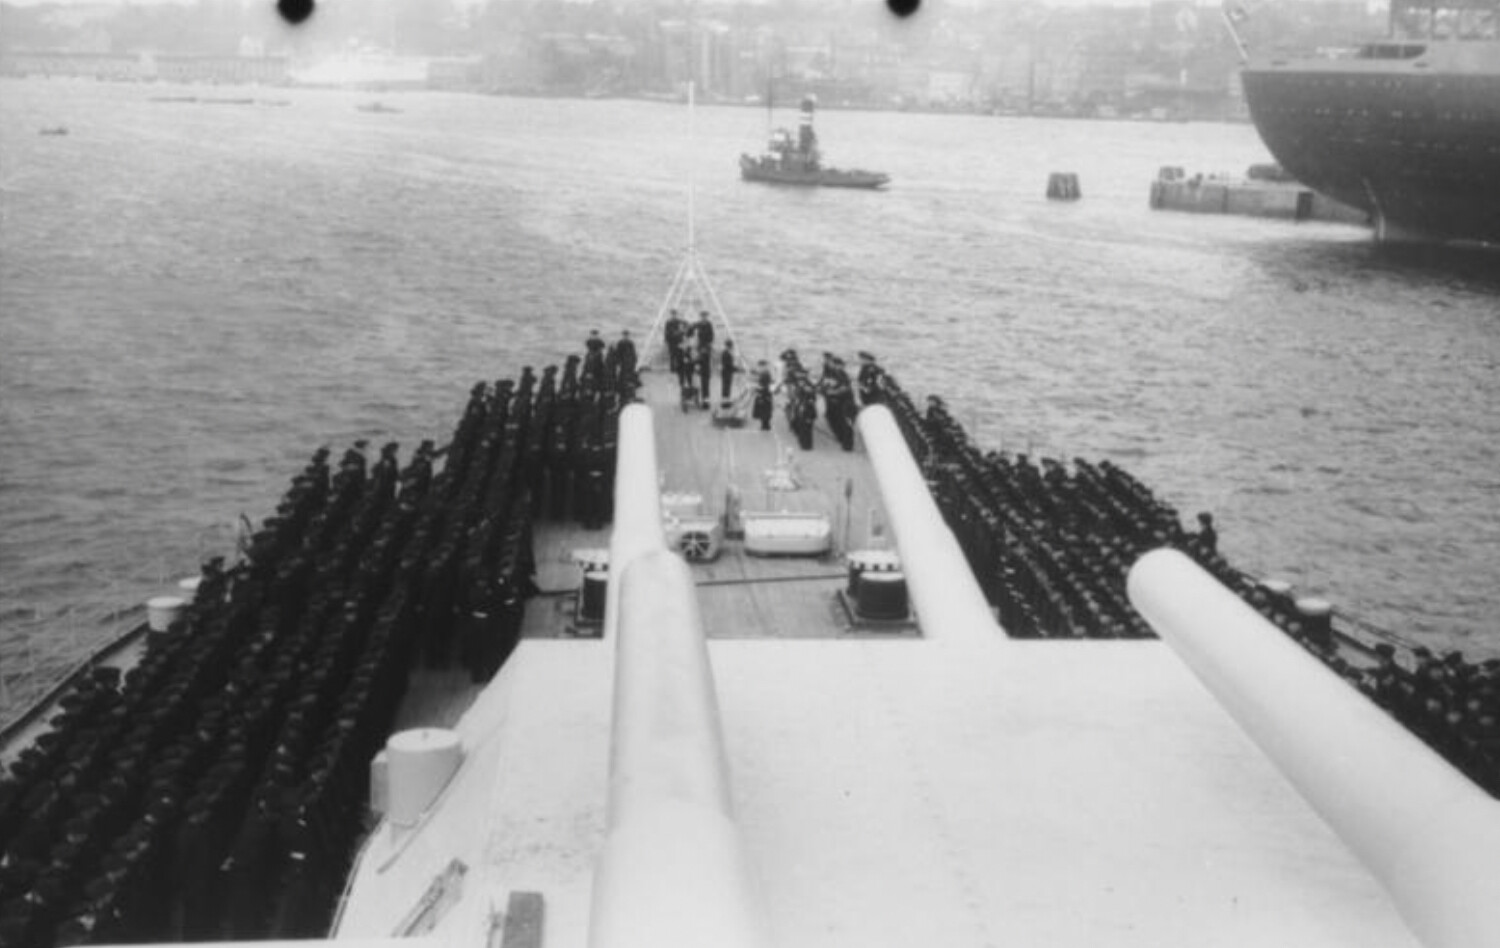
On July 1, 1936, the Bismarck was laid down on Slipway 9 at Blohm & Voss in Hamburg. Over the next two years and seven months, the Bismarck’s hull was completed, allowing for the launch on time on February 14, 1939. Adolf Hitler, along with several other high-ranking figures, was present at the launching ceremony, which was expected to be attended by a total of 60,000 spectators. The ship, officially designated “Battleship F,” was christened after her grandfather, Bismarck, by Dorothea von Löwenfeld, the wife of Vice Admiral Wilfried von Löwenfeld and granddaughter of the former Prussian Minister-President and German Chancellor Otto von Bismarck.
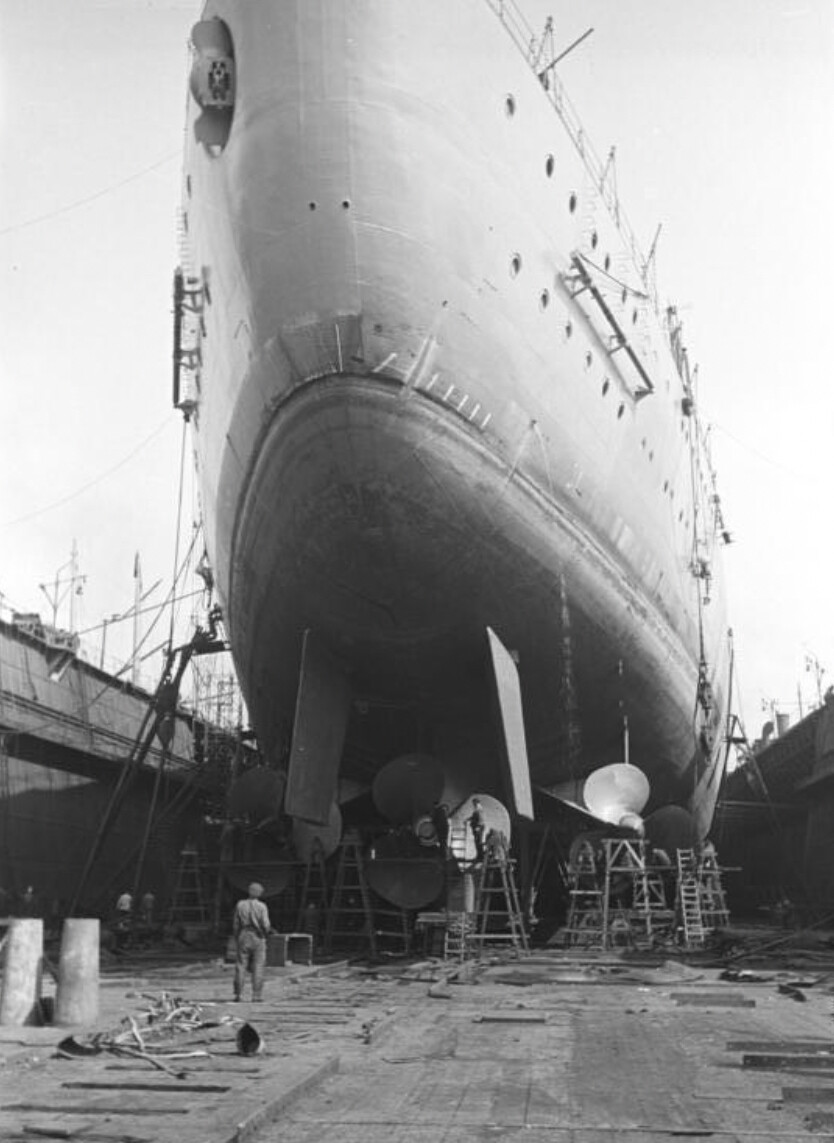
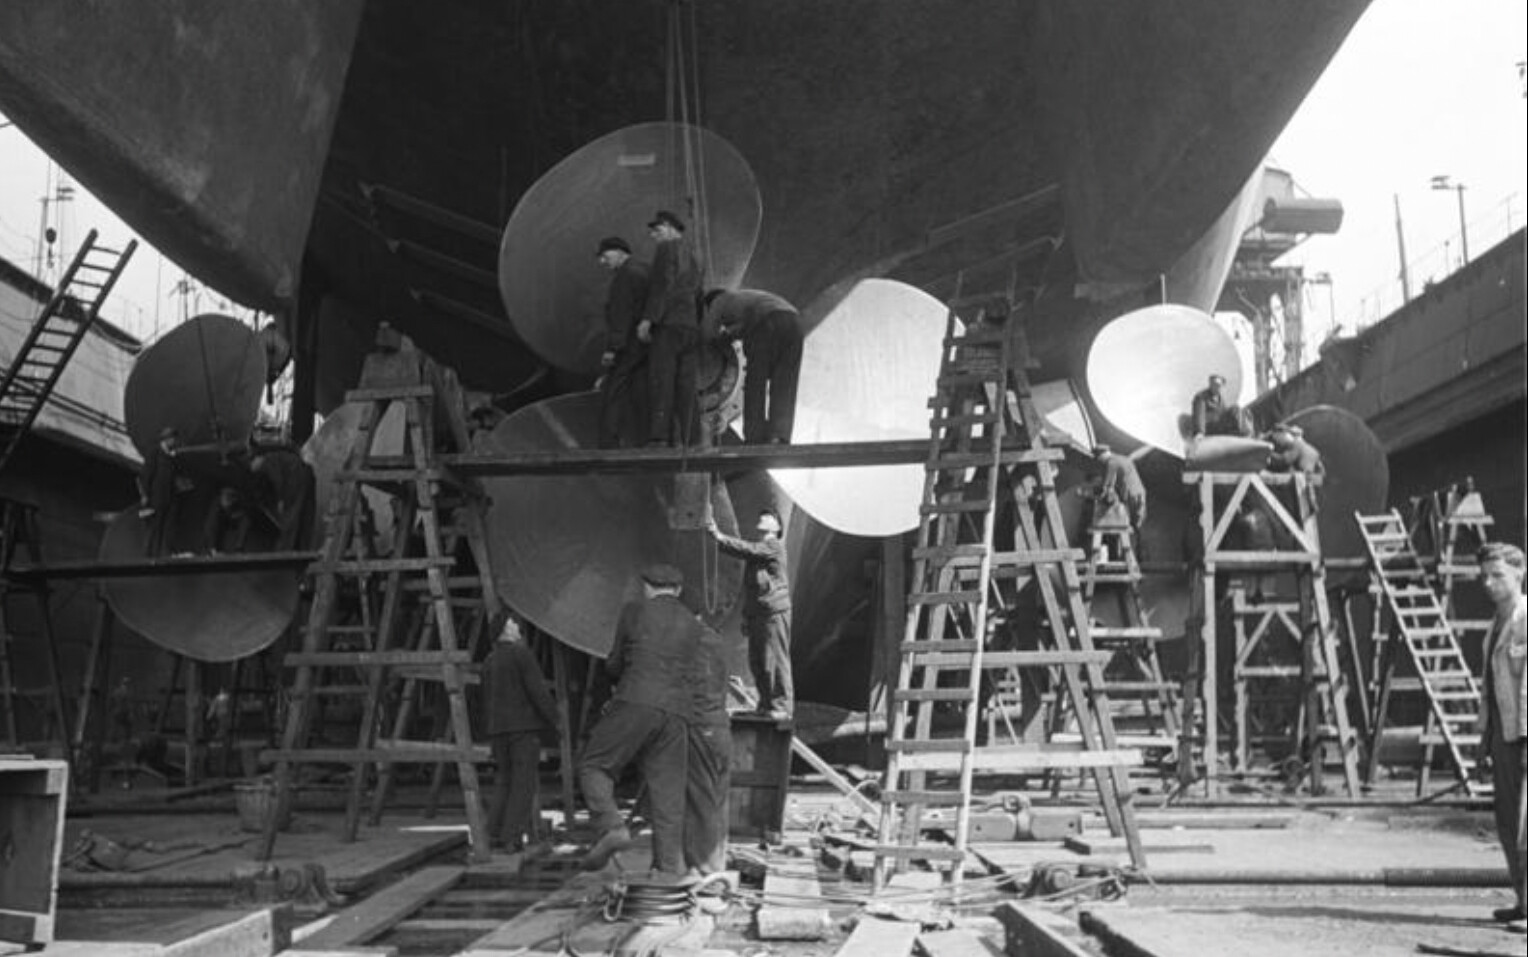
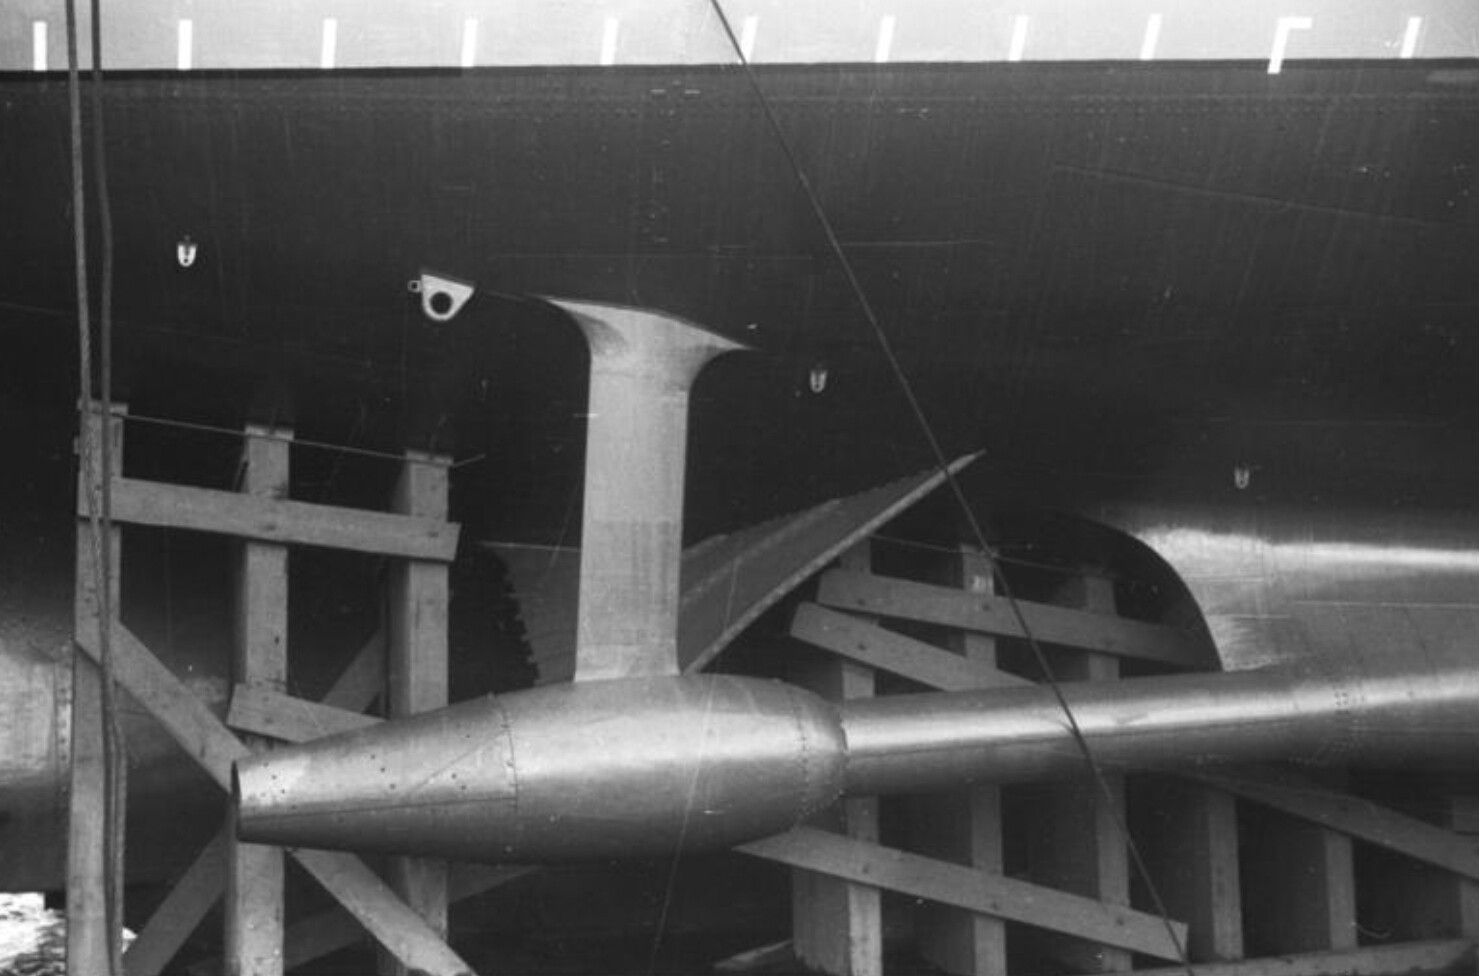
After the celebrations, the Bismarck was moved to a fitting-out pier at the shipyard. Over the next few months, further major and minor jobs were completed and carried out on the Bismarck. Among other things, as with the previous ships Gneisenau and Scharnhorst, the old bow was replaced with a new Atlantic bow and the ship’s interior was freshly fitted. The fitting-out phase lasted one year and six months and was completed despite the German invasion of Poland. In April 1940, the first crew members arrived in Hamburg, and in June the ship was moved into a floating dock to install the propellers and rudder. In addition, magnetic self-protection was installed to better protect the Bismarck against magnetic mines and magnetically detonated torpedoes.
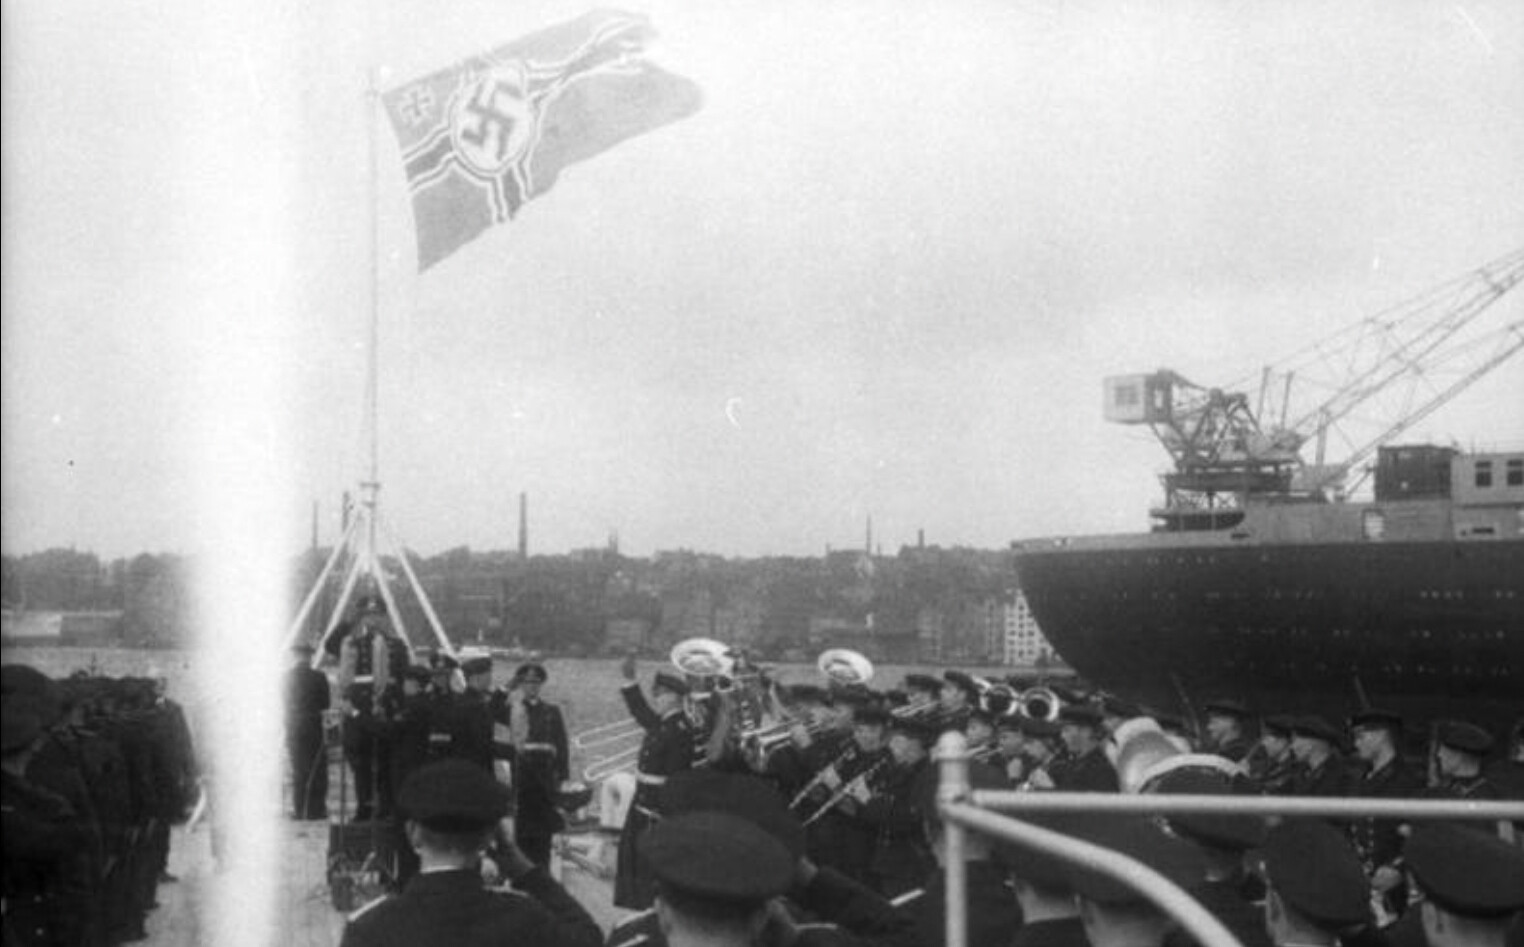
Fun Fact: During the commissioning ceremony of the Bismarck on 24 August 1940, the newly launched passenger ship Vaterland collided with the Bismarck, but neither ship suffered any damage.
First Ride
On September 15, the Bismarck departed Hamburg. In Brunsbüttel, she participated unsuccessfully in repelling a British air raid and was subsequently transferred through the Kaiser Wilhelm Canal to Kiel, where she moored on September 17. Ten days later, she departed for Gotenhafen for sea trials in the Baltic Sea.
Fun fact: For personal reasons, Captain Lindemann ordered that the Bismarck be referred to using the masculine pronoun on the radio and within the ship, rather than the feminine pronoun. In German, the feminine pronoun would be “Die Bismarck” and the masculine pronoun would be “Der Bismarck” Captain Lindemann held this view partly because, on the one hand, the Bismarck was a battleship in its class, and, on the other, the ship’s namesake was Otto von Bismarck. It was intended to represent the strength and authority of a battleship and of Otto von Bismarck.
Later, on December 9, the Bismarck returned to the Blohm & Voss shipyard in Hamburg for final repairs and refinements. After the work was completed, the Bismarck was declared operational on January 24, 1941. Thus, the German Navy received its first proper battleship. However, because the Kaiser Wilhelm Canal was blocked by an ore carrier sunk by British bombers, the Bismarck was initially unable to use the canal and could not leave Hamburg for the time being.
While the Bismarck had to wait in Hamburg, other ships were being built at the Blohm & Voss site, including U 556, a Type VII C submarine. The commander of this submarine was Herbert Wohlfarth, who asked Ernst Lindemann, the Bismarck’s captain, to have the Bismarck’s band played at his submarine’s commissioning. In return, Wohlfarth agreed with Lindemann to sponsor the Bismarck and U 556 and promised to assist the Bismarck in any situation.
Interesting fact: It was ironic that on the eve of the Bismarck’s last battle, the crew of this submarine spotted the aircraft carrier Ark Royal, from which the torpedo bombers that were to damage the Bismarck’s rudder had just launched. However, due to a lack of torpedoes, the submarine was unable to attack. Later, it was also this submarine that received orders to retrieve the Bismarck’s war log; However, this order reached the U 556 too late, only after the battleship had sunk.
On March 6, 1941, the Bismarck left Hamburg for the last time and returned to Gotenhafen for her first real operation in the Atlantic.
From Hunter …
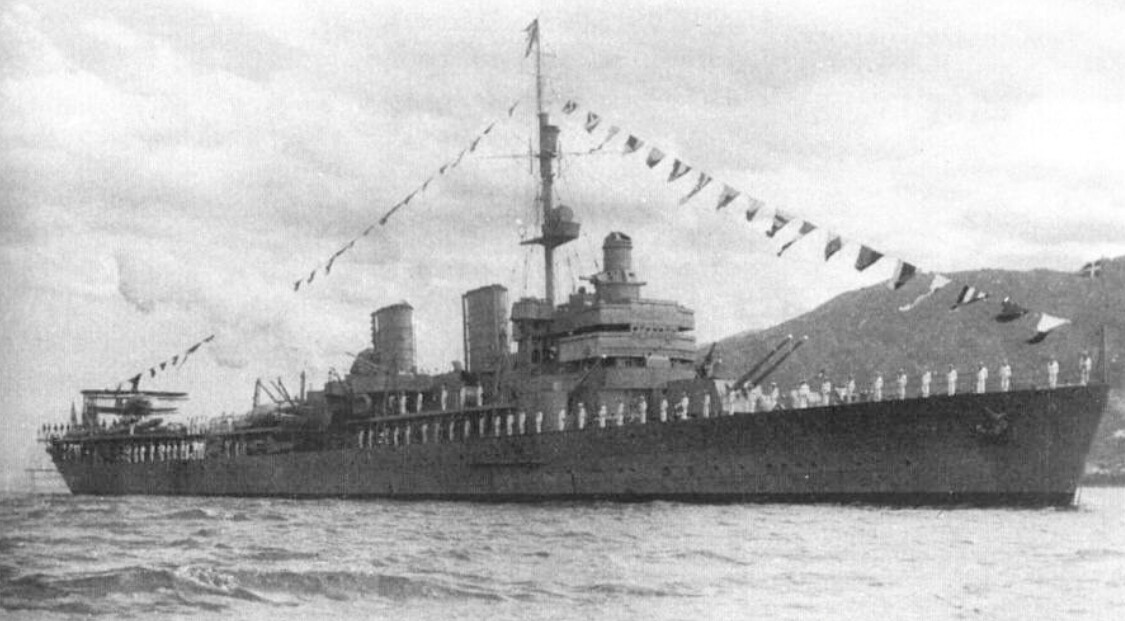
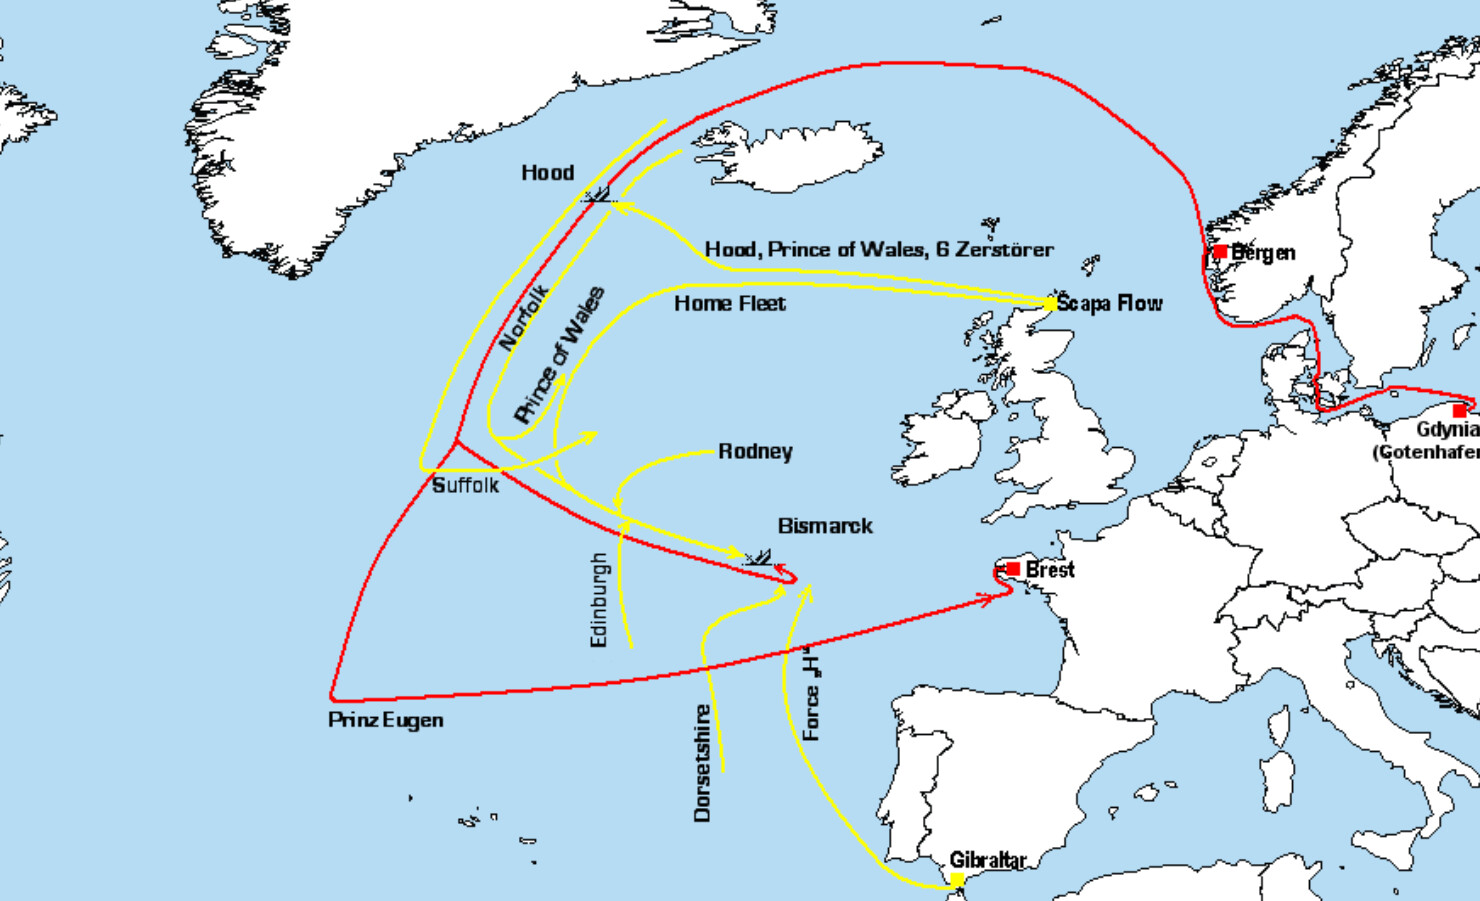
Once the Bismarck was operational, Grand Admiral Erich Raeder planned and decided to deploy the Bismarck in the Atlantic. She was to be deployed alongside the heavy cruiser Prinz Eugen to attack heavily protected convoys. This operation was called “Operation Rheinübung” (Operation Rhine Exercise). The commander was Flotten Admiral Günter Lütjens, who led the formation from the Bismarck and also commanded the Bismarck together with Captain Ernst Lindemann.
With the arrival of the Prinz Eugen in Gotenhafen, Operation Rheinübung could begin. After repairing a ship’s crane on the Bismarck, she and the Prinz Eugen left Gotenhafen at 11:30 on May 18, 1941, bound for Bergen. At Cape Arkona, both ships encountered the destroyers Z 16 (Type 1934 Destroyer) and Z 23 (Type 1936 Destroyer). The Z 10 (Type 1934 Destroyer) also joined them in the Fehmarn Belt.
During the voyage to the Skagerrak, the convoy was sighted by several ships, including the Swedish cruiser Gotland, which reported the sighting of the Bismarck to Swedish headquarters, which in turn reported it to British Naval Headquarters. Subsequently, the British Admiralty, Sir Dudley Pound, also learned of the Bismarck.
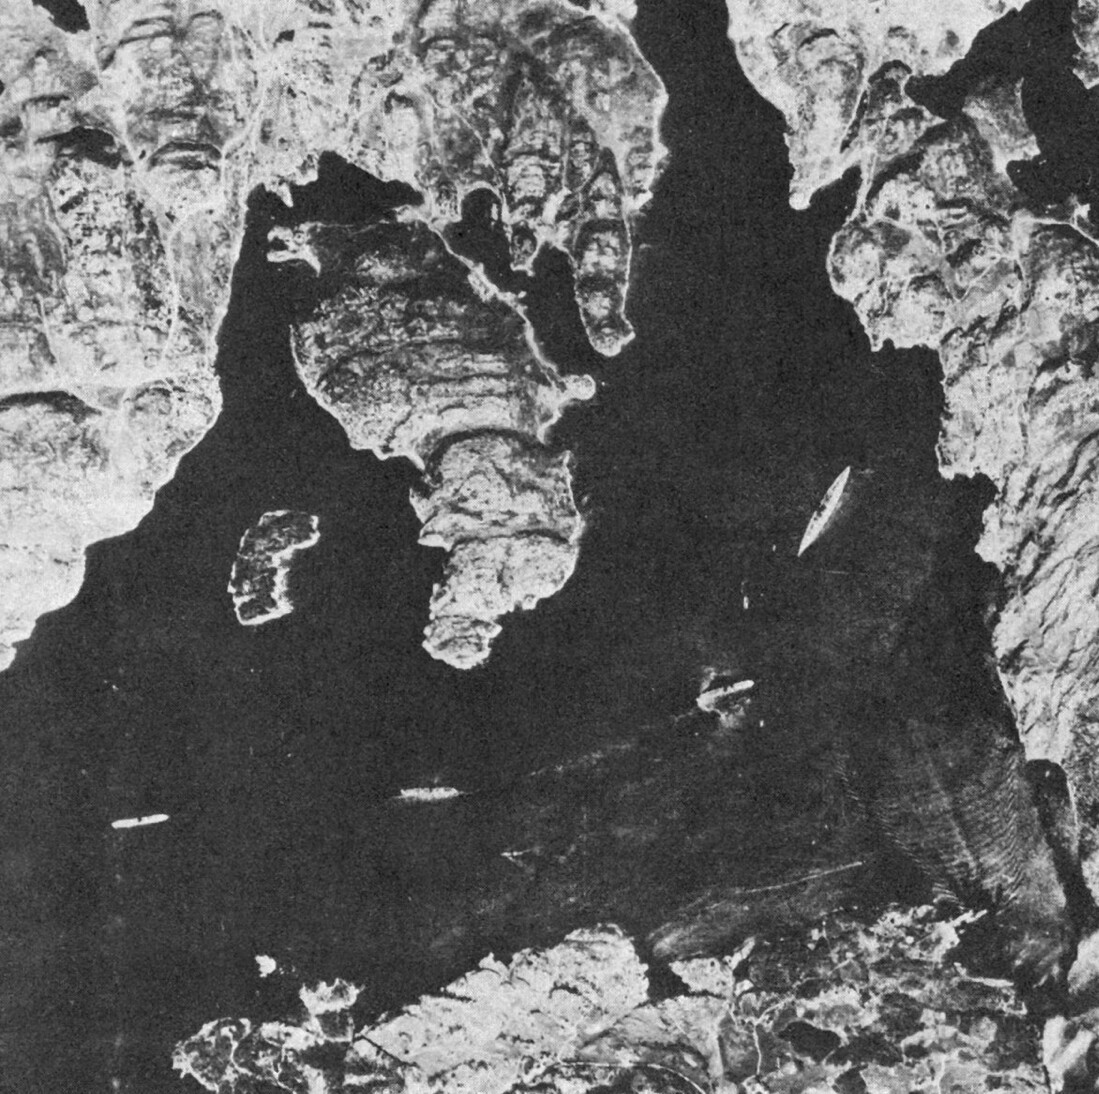
Meanwhile, the Prinz Eugen and the Bismarck anchored in the Grimstadfjord, where the destroyers separated from the Bismarck and the Prinz Eugen and they then left Admiral Lütjens to break through the Denmark Strait into the Atlantic. He hoped that the convoy would not be discovered by the British patrols and coastal parties.
However, they were photographed by a British Spitfire in the Grimstadfjord. After that, the Bismarck and the Prinz Eugen left the fjord together and headed for the Denmark Strait.
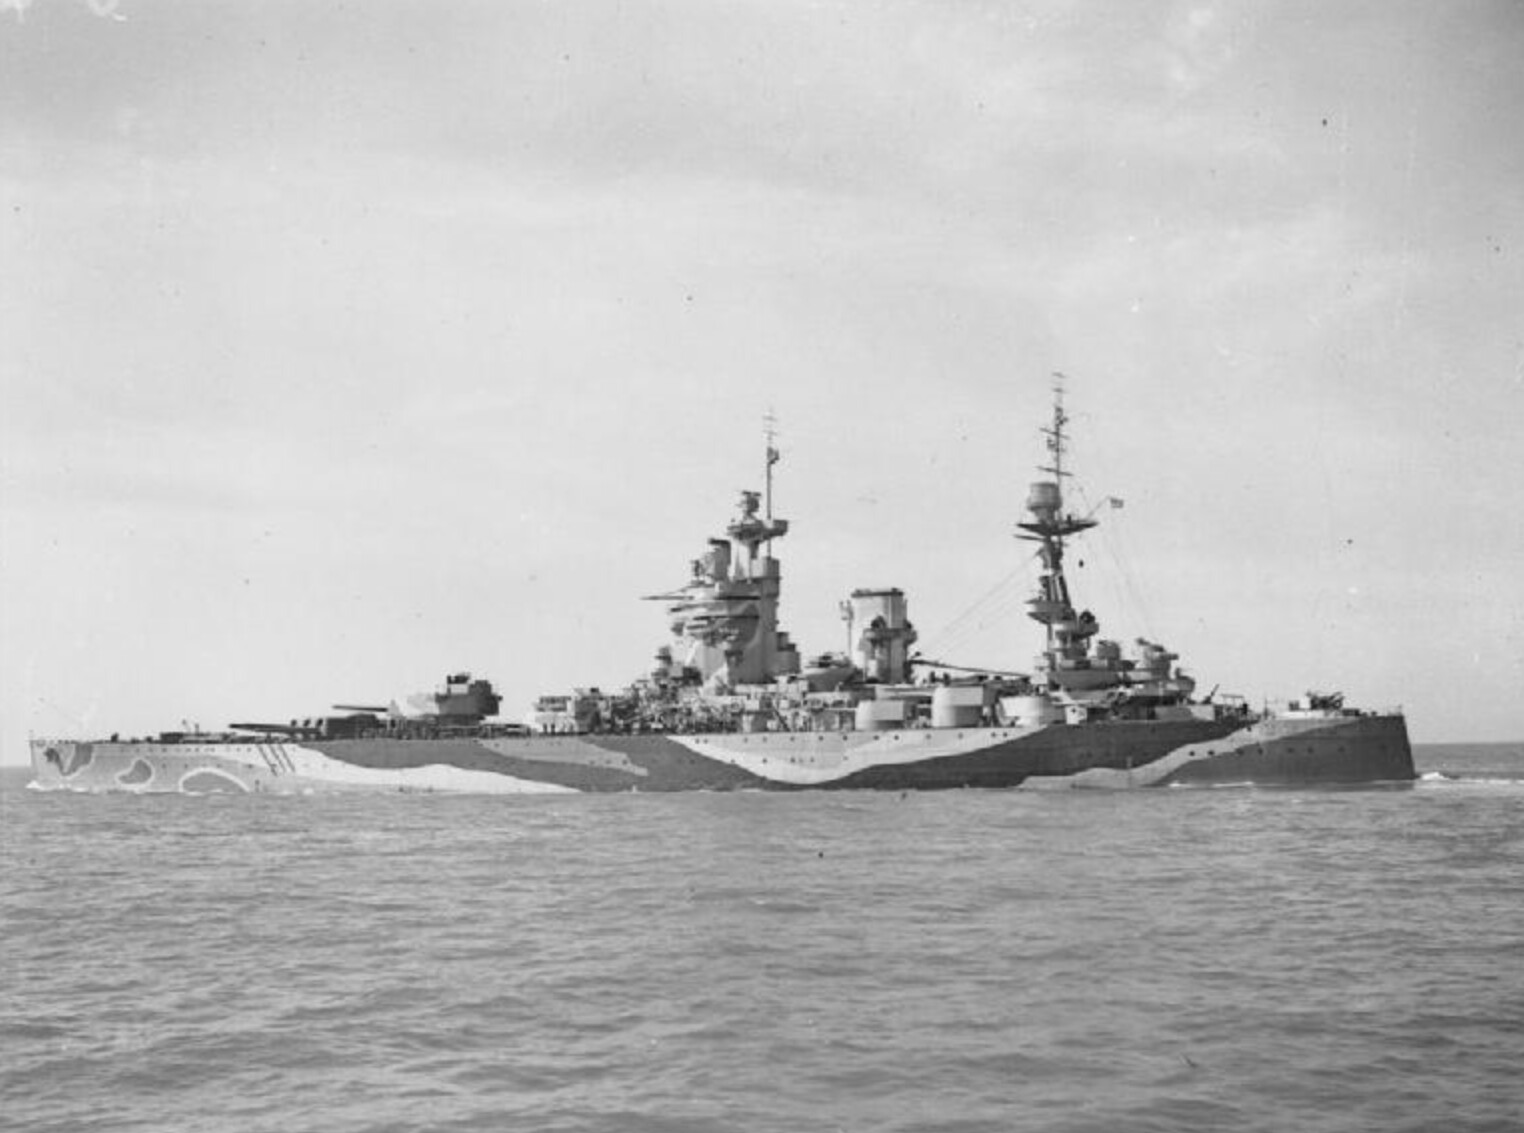
The Royal Navy, under Admiral Sir John Tovey, launched a large-scale operation to intercept the German battleships. Tovey divided his available units into two main groups. One of these groups was commanded by Vice Admiral Lancelot Holland. It consisted of the battlecruiser Hood, the newly commissioned battleship Prince of Wales, and six destroyers. This battle group was deployed south of Iceland and, on the evening of May 23, marched to the southern exit of the Denmark Strait to intercept the German force.

The accompanying British destroyers could not keep up with the high speed of the Hood and the Prince of Wales and thus fell behind. When the Suffolk lost radar contact with the Bismarck and the Prinz Eugen around midnight, Holland ordered the destroyers to disperse and expand the search over a wide area.
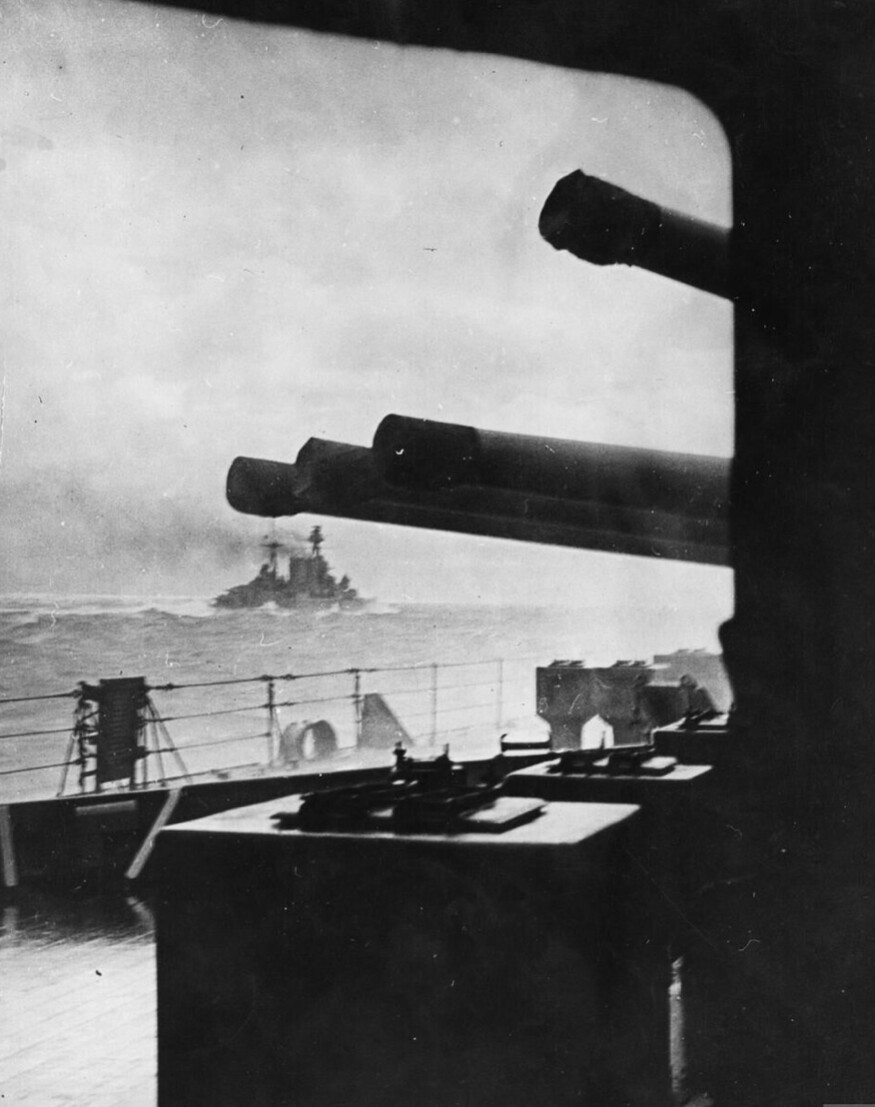
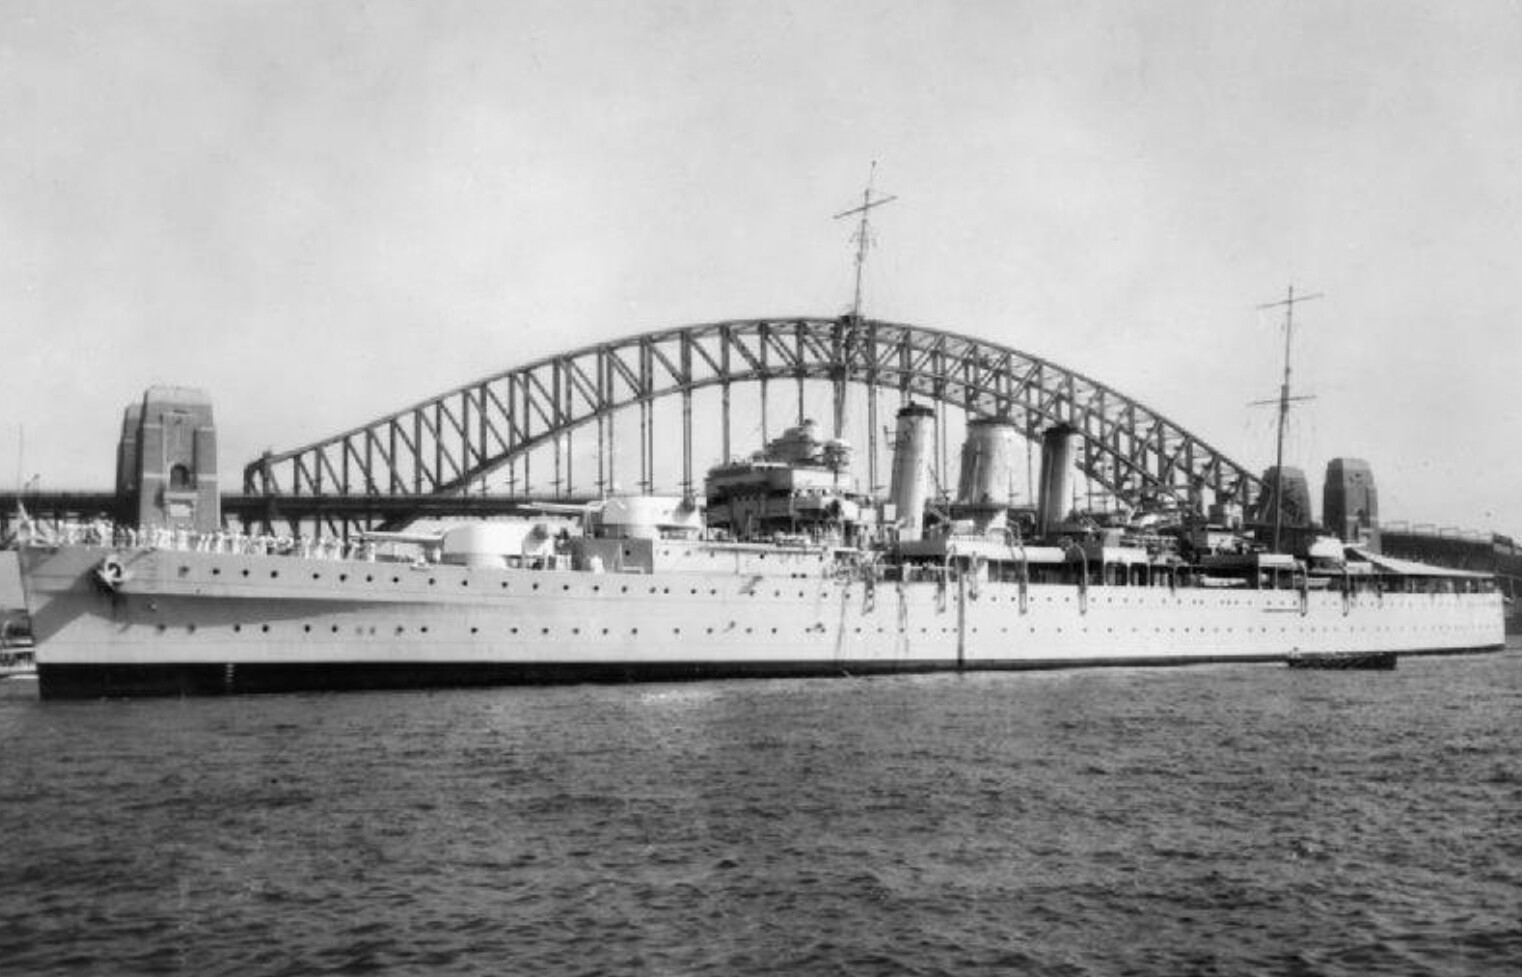
On the evening of May 23, 1941, the Bismarck and the Prinz Eugen were sighted by the heavy cruisers Suffolk and Norfolk. The Norfolk was then shelled by the Bismarck, while the Norfolk and the Suffolk spotted the Bismarck and the Prinz Eugen. The British ships did not engage in the fight and turned away. They hid in a bank of fog and thus escaped the Bismarck and the Prinz Eugen. The Prinz Eugen then took over leadership of the group, as the Bismarck’s radar had been damaged by a pressure wave from its own main armament and was out of service. At around 5:29 a.m. on the morning of May 24, the Hood and the Prince of Wales were sighted by the Bismarck, and shortly afterwards, eight minutes later, the British ships also sighted the German ships.
Vice Admiral Holland attempted to close the gap. The reason for this was to offer less surface area for attack, as the Hood’s weakness was her horizontal deck armor, which was inadequately armored and particularly vulnerable to vertical fire at long range. By 5:52 a.m., the range had already dropped to less than 26 km, when Vice Admiral Holland ordered them to fire on the Prinz Eugen, which they mistakenly believed to be the Bismarck. Shortly thereafter, the Prince of Wales fired on the actual Bismarck, which they believed to be the Prinz Eugen.
When the Prince of Wales opened fire on the Bismarck, Adalbert Schneider, the first gunnery officer aboard the Bismarck, twice asked for permission to return fire, but Lütjens hesitated. Due to Großadmiral Raeder’s order not to engage in unnecessary skirmishes with British capital ships, Captain Lindemann disagreed, and Lütjens and Lindemann argued over permission to fire, with Lütjens still citing Großadmiral Raeder’s order. To which Lindemann replied, verbatim: “Ich lasse mir doch mein Schiff nicht unter dem Arsch wegschießen. Feuererlaubnis.” (In English: “I’m not going to let them shoot my ship out from under my ass. Permission to fire.”) whereupon the Bismarck and the Prinz Eugen opened fire, which Lütjens tacitly accepted and tolerated Lindemann’s order.
The Bismarck and the Prinz Eugen were quickly able to target the Hood and the Prince of Wales. With just the fourth salvo, the Prinz Eugen hit the Hood with one of its 20.3 cm shells, which detonated in the reserve ammunition chamber of a 10.2 cm gun and started a fire that was quickly extinguished. The Bismarck itself was already “covering” (German: deckend) with the Hood with its third salvo, meaning it had hit or almost hit the Hood.
The Hood and the Prince of Wales took significantly longer to correct and aim their guns. It wasn’t until the seventh salvo that the Prince of Wales fired a covered salvo at the Bismarck. This was due, among other things, to technical problems with the sighting system and the power supply: The Prince of Wales was still in its testing phase, the crew was not well-coordinated, and several guns repeatedly failed due to power supply defects.
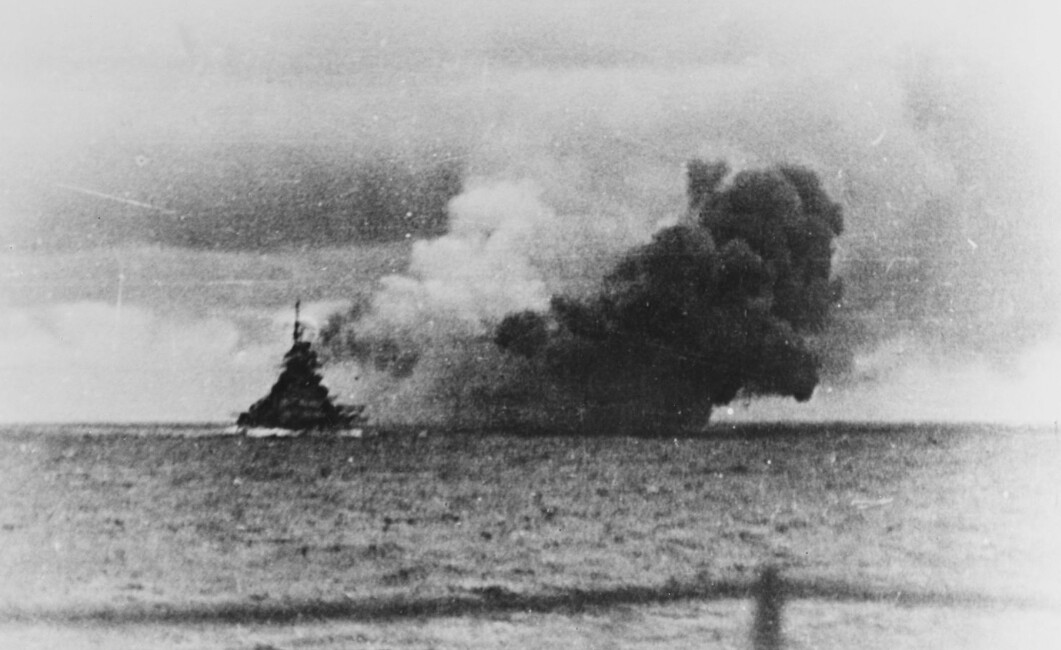
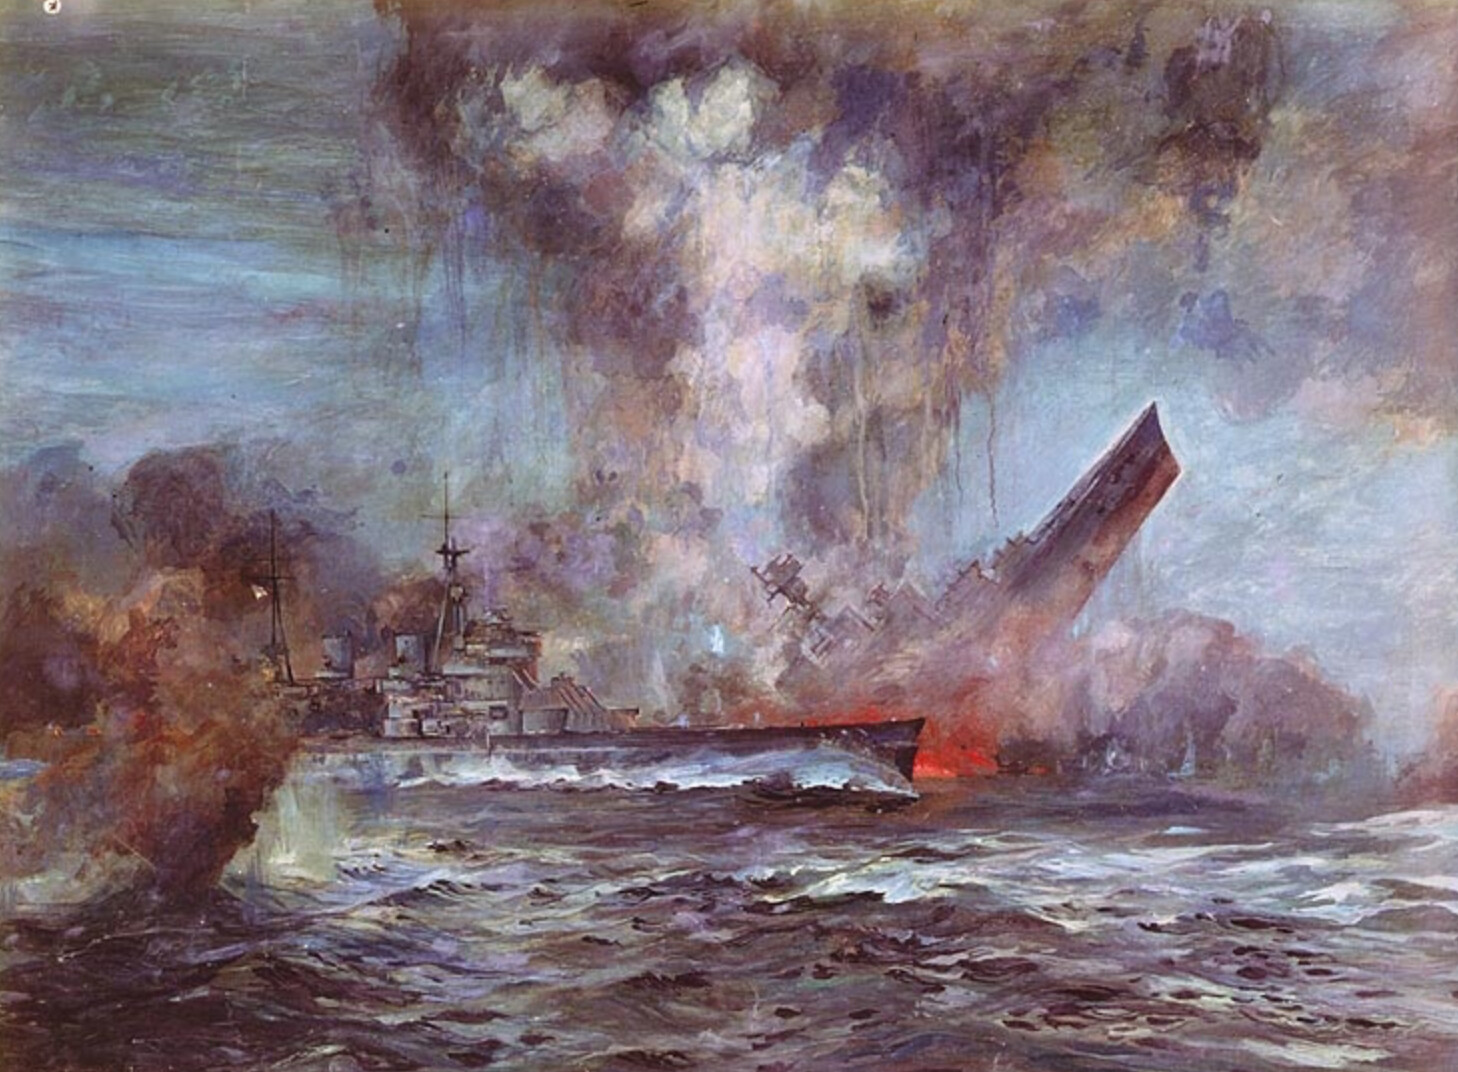
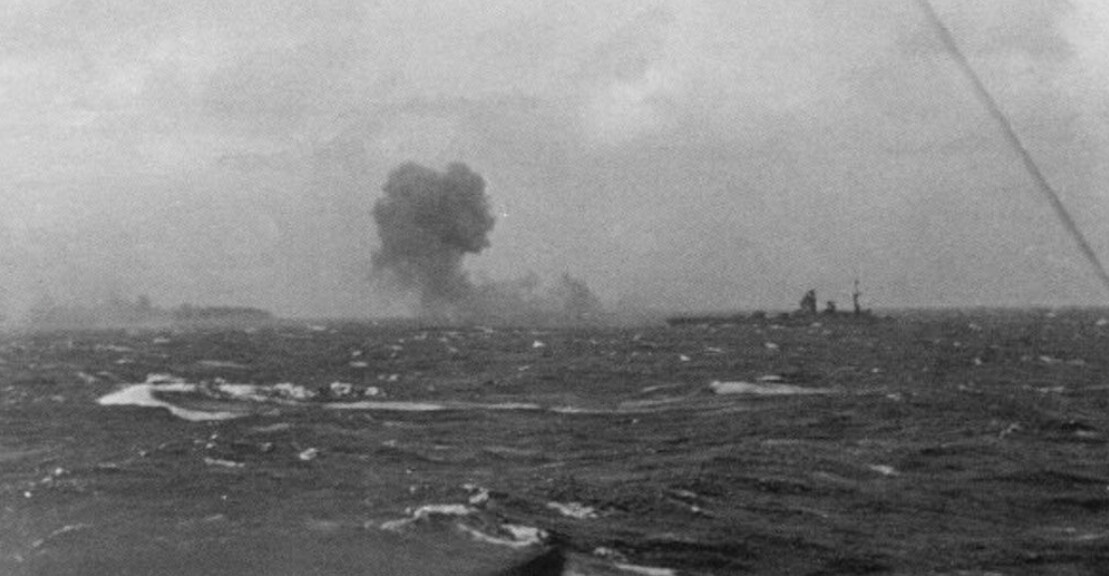
At 6:00 a.m., Holland ordered a course change to bring Hood’s rear gun turrets into play. During this maneuver, at 6:01 a.m., a 38 cm shell from Bismarck’s fifth salvo struck, causing a devastating explosion in one of Hood’s rear ammunition chambers. The shell penetrated the thinly armored deck and presumably detonated in the area of the 102-mm ammunition chamber. A massive secondary detonation followed.
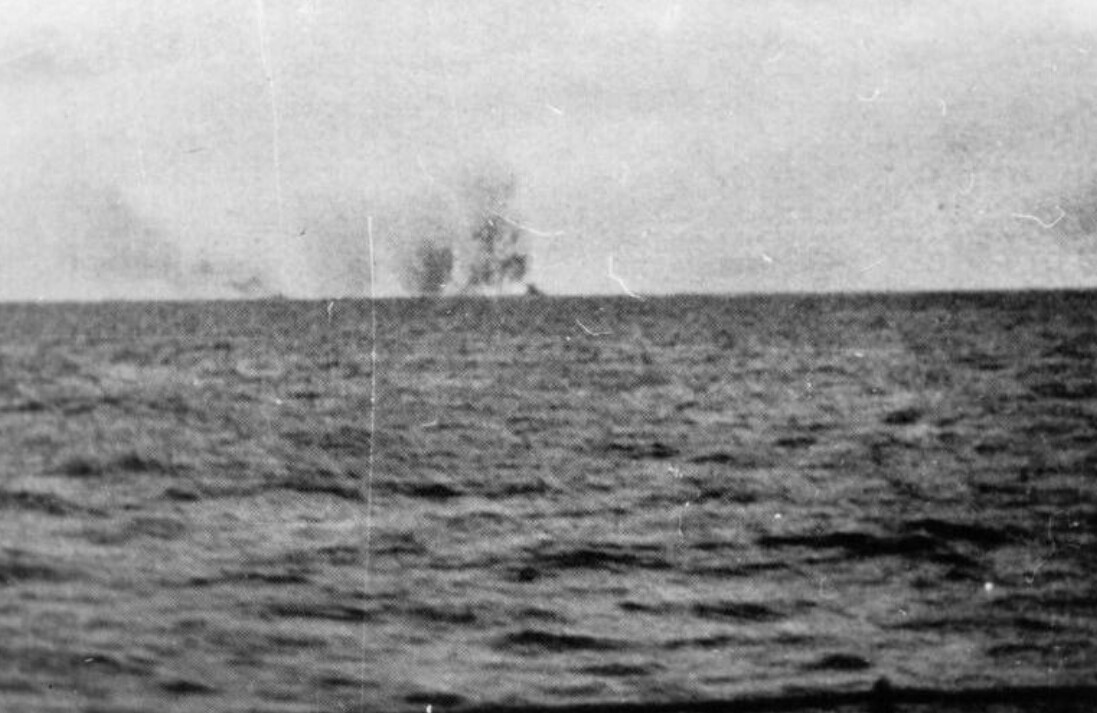
In less than three minutes, the Hood burst into two pieces due to the explosion and sank rapidly. Of the 1,419-man crew, only three sailors survived. Admiral Holland was also killed. The Prince of Wales sustained several heavy hits and subsequently turned away. The Prinz Eugen sustained no hits, the Bismarck sustained three, the Hood sustained four, and the Prince of Wales sustained seven.
The Prince of Wales was now on her own and, by performing an evasive maneuver, avoided a collision with the sinking wreck of the Hood. Without this maneuver, she would likely have been caught in the sixth salvo from the Bismarck and possibly sunk herself, as the Bismarck had already shot by the time the fifth salvo hit. Despite the retreat, the Prince of Wales received four shots from the Bismarck and three from the Prinz Eugen during the battle. One of the heavy hits struck directly at the bridge, killing almost the entire bridge crew, including the commander. Only the Chief Signalmaster and a few others survived the impact. The Prince of Wales not only suffered severe damage from the Bismarck and the Prinz Eugen, but also lost several of her own guns due to a power failure.
Due to the existing damage and the inferior position, the Prince of Wales finally withdrew under cover of a smoke screen. Despite this success, Admiral Lütjens forbade the Bismarck’s captain from pursuing her. Lindemann repeatedly requested permission to pursue the stricken Prince of Wales, but Lütjens refused. He followed Raeder’s orders to avoid unnecessary risks and not seek further engagements with British cruisers. Instead, he ordered a course of 270°, westward to enter the Atlantic.
During the battle, the Bismarck fired a total of 93 armor-piercing 38 cm shells. She herself sustained three hits from the Prince of Wales, including one in a forward-deployed fuel bunker, resulting in the loss of approximately 1,000 tons of fuel. Seawater also entered additional fuel tanks, contaminating more fuel oil and rendering it unusable. A boiler room and a turbogenerator room were also flooded, reducing the Bismarck’s top speed to less than 30 knots (~55.5 km/h). The Prinz Eugen escaped unscathed. The British cruisers Suffolk and Norfolk, which continued to operate out of range of German guns, fired six salvos between 6:19 and 6:25 a.m., but these missed the Bismarck and the Prinz Eugen and had no effect.
The three sailors from the Hood who survived the massive explosion were Ted Briggs, Robert Tilburn, and Bill Dundas. They were clinging to debris in the icy seawater of the Denmark Strait. About an hour after the Hood’s sinking, the British destroyer HMS Electra rescued the three shipwrecked sailors and brought them back to England, where they reported extensively on the Hood’s sinking.
… To Hunted
After the sinking of the Hood, the Bismarck and the Prinz Wugwn withdrew. The loss of fuel during the battle made it impossible for the Bismarck to return to its planned route to Norway. Admiral Lütjens therefore decided to set a course for the French port of Brest, where German air power and submarines were stationed and could offer protection from British attacks. Hence the 270° west heading to cross the Atlantic to Brest.
But the Bismarck was now the most searched ship in the Atlantic after sinking the Hood. The British Admiralty did everything possible to track down and destroy the German battleship. Admiral Tovey, with the King George V and the Repulse, as well as the Renown and the aircraft carriers Ark Royal and Victorious, was mobilized. At the same time, several cruisers and destroyers secured the sea area west of the Bay of Biscay.
At 6:18 p.m. on May 24, Admiral Lütens relieved Prinz Eugen of her duties and ordered her to conduct independent commerce warfare and attack convoys independently. The British responded with extensive convoy diversions, including convoys HX126, SC31, HX127, OB323, and OB324. Bismarck and Prinz Eugen conducted a decoy maneuver to evade radar detection of Norfolk and Suffolk, thus successfully separating. Prinz Eugen took on fuel from the tanker Spichern. Within 13.5 hours, 2,915 cubic meters of fuel oil were loaded onto Prinz Eugen. She began her deployment on May 26, but engine failure forced her to head for the port of Brest, which she reached undetected on June 1.
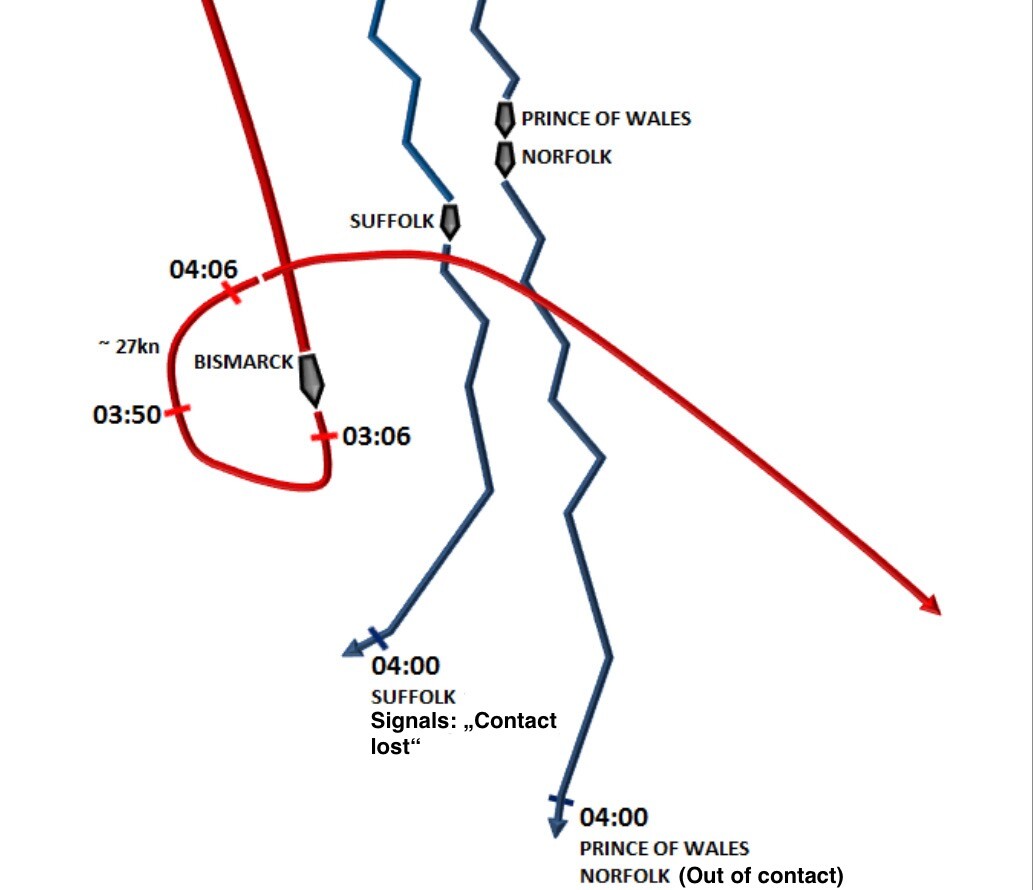
On the night of May 24-25, the Suffolk again located the Bismarck by radar. The Norfolk joined shortly thereafter, and together they maintained contact with the Bismarck without engaging in any engagement. On May 25, the Bismarck briefly managed to shake off her pursuers in heavy seas by changing course and skillfully maneuvering to avoid them. In addition, an error in the British position report led Admiral Tovey in the wrong direction. The Bismarck initially snaked its way undetected in a serpentine line toward the French coast.
However, on May 26, at 10:52 a.m., a Catalina flying boat spotted the Bismarck again, revealing a large, dark object at sea that was leaving a trail of oil. At first, it was only suspected that it might be the Bismarck, but it later became clear. The Ark Royal’s 14 Swordfish torpedo bombers immediately launched an attack, as the Ark Royal was also in the North Atlantic at the time.
Fun fact: nearby, the British cruiser Sheffield maintained contact with the Bismarck after re-sighting her, while Force H set its course in her direction. They first sighted the Sheffield and mistook her for the Bismarck and attacked her. They launched newer magneto-firing torpedoes, which, however, caused no damage because they ultimately failed to detonate. When the misunderstanding arose, the 14 Swordfish flew back to the Ark Royale and reloaded torpedoes with normal impact fuses.
In this incident, the Swordfish would have had much less effective weapons when attacking the Bismarck, which could have completely changed the outcome of the hunt.
The British decoded parts of the German radio messages and identified a likely course for the Bismarck. A total of seven German submarines waiting in the Bay of Biscay were diverted there. On the evening of May 26, they were only a few kilometers away from the Bismarck and the British formation Force H, which included the Ark Royal, which was sailing from Gibraltar. At 7.48 p.m. U 556 sighted the formation. The 14 Swordfish torpedo aircraft of the aircraft carrier were just launching their attack on the Bismarck again. Due to the ideal firing position between the two ships, which did not zigzag courses and had no destroyer escort, both the Ark Royal and the accompanying battlecruiser Renown could have been sunk in quick succession. As we already know, however, U 556 no longer had any torpedoes and therefore had to make do with the formation’s contact reports.
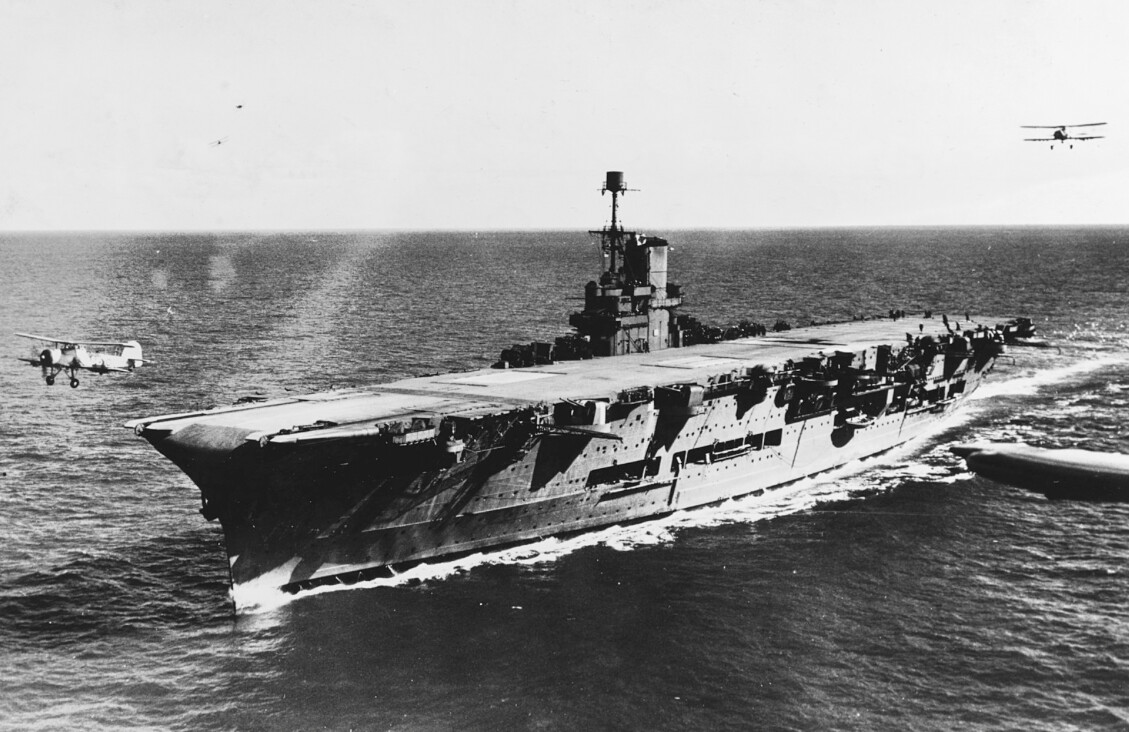
During the second approach to the Bismarck, the 14 Swordfish bombers correctly targeted the Bismarck in the middle of a storm. The anti-aircraft guns engaged the aircraft, subjecting them to heavy defensive fire, while the Swordfish pilots aimed their torpedoes at the Bismarck, preferentially at the stern to hit the delicate rudder and drive shafts. The 14 Swordfish were too slow for the Bismarck’s modern anti-aircraft fire control systems, making it impossible to accurately determine the aircraft’s distance to the ship. Finally, pilot John Moffat landed the fatal hit on the Bismarck’s rudder with his Swordfish. Two of the other torpedoes landed amidships on the port side of the Bismarck, but without much effect. At approximately 9:30 p.m., the Bismarck reported a hit from an aircraft torpedo.
The rudder was now jammed at a 12-degree angle to port. Despite a great effort, the Bismarck’s crew was unable to repair the damage. Sea trials in the Baltic Sea had already shown that under such conditions, the ship could not stay on course by counter-steering using different propeller speeds. The prevailing wind pushed the Bismarck northwest toward the pursuing British ships. To avoid drifting without propulsion, the ship maintained a speed of a few knots with the propulsion system, which was still fully intact, and the propellers, which were also undamaged. The ship ultimately steered toward its pursuers at a slow speed and was unable to escape to France.
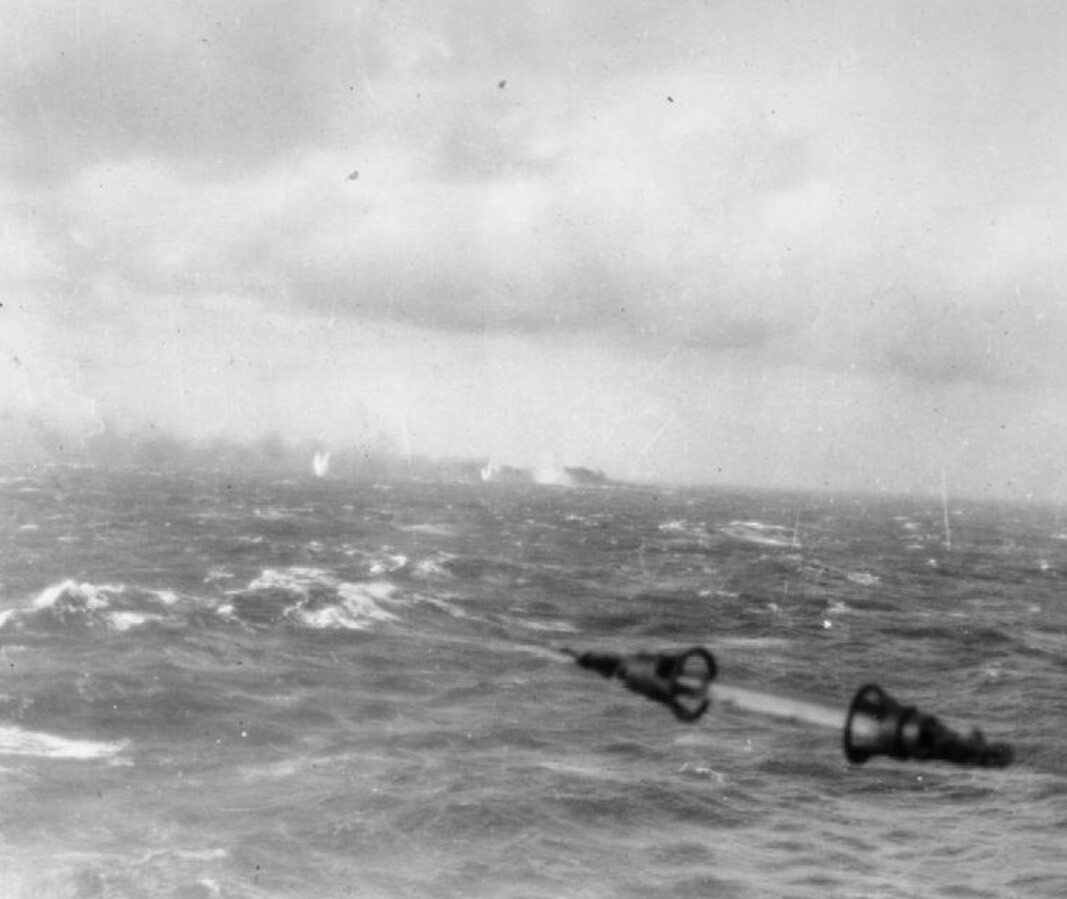
During the following night of May 26-27, a battle broke out between the damaged Bismarck and the 4th British Destroyer Flotilla under Captain Philip Vian. The five destroyers Cossack, Maori, Sikh, Zulu, and the Polish Piorun attacked the Bismarck with torpedoes, but were unable to score any hits due to the darkness, poor weather conditions, and heavy defensive fire from the Bismarck.
The damaged rudder system could not be repaired again when the Bismarck’s crew attempted to do so. Numerous attempts were also made to steer the ship against the wind pressure by varying the propeller speeds, removing the rudder itself, or constructing a replacement rudder from the door of the standby hangar. However, all of these attempts were thwarted by the high seas. The Bismarck’s crew realized that the ship could not be saved. On the morning of May 27, 1941, the plan was to use one of the ship’s aircraft to transport the war diary to safety. However, the attempt failed because both aircraft catapults were damaged. Because of the fire hazard posed by the refueled aircraft, the aircraft was instead tipped overboard.
Subsequently, all German submarines lying in ambush off the Bay of Biscay received orders to approach and defend the Bismarck. The Bismarck’s war diary was also to be retrieved by a submarine. Since the aircraft plan had failed, Lütjens requested a submarine to retrieve the war diary in his last radio message at 7:10 a.m. At that time, U 556, under Korvettenkapitän Herbert Wohlfahrt, was north of and within range of the Bismarck and was supposed to retrieve the war diary, but the attempt failed. Otherwise, U 74, under Eitel-Friedrich Kentrat, was closest to the Bismarck, south of the ship, but was unable to intervene due to damage. At medium southern distance, measured in terms of the distance to the battleship, U 552 under the command of Kapitänleutnant Herbert Schneider, U 98 without torpedoes under Kapitänleutnant Robert Gysae as well as U 97 under Kapitänleutnant Udo Heilmann and U 48 with Kapitänleutnant Herbert Schultze were near the Bismarck.
On the morning of May 27, 1941, the Bismarck was rediscovered by the Norfolk at 7:53 a.m. Vice-Admiral Tovey’s battle group, aboard the battleship King George V, sighted the Bismarck at around 8:45 a.m. At 8:47 a.m., the battleship Rodney opened fire on the Bismarck.
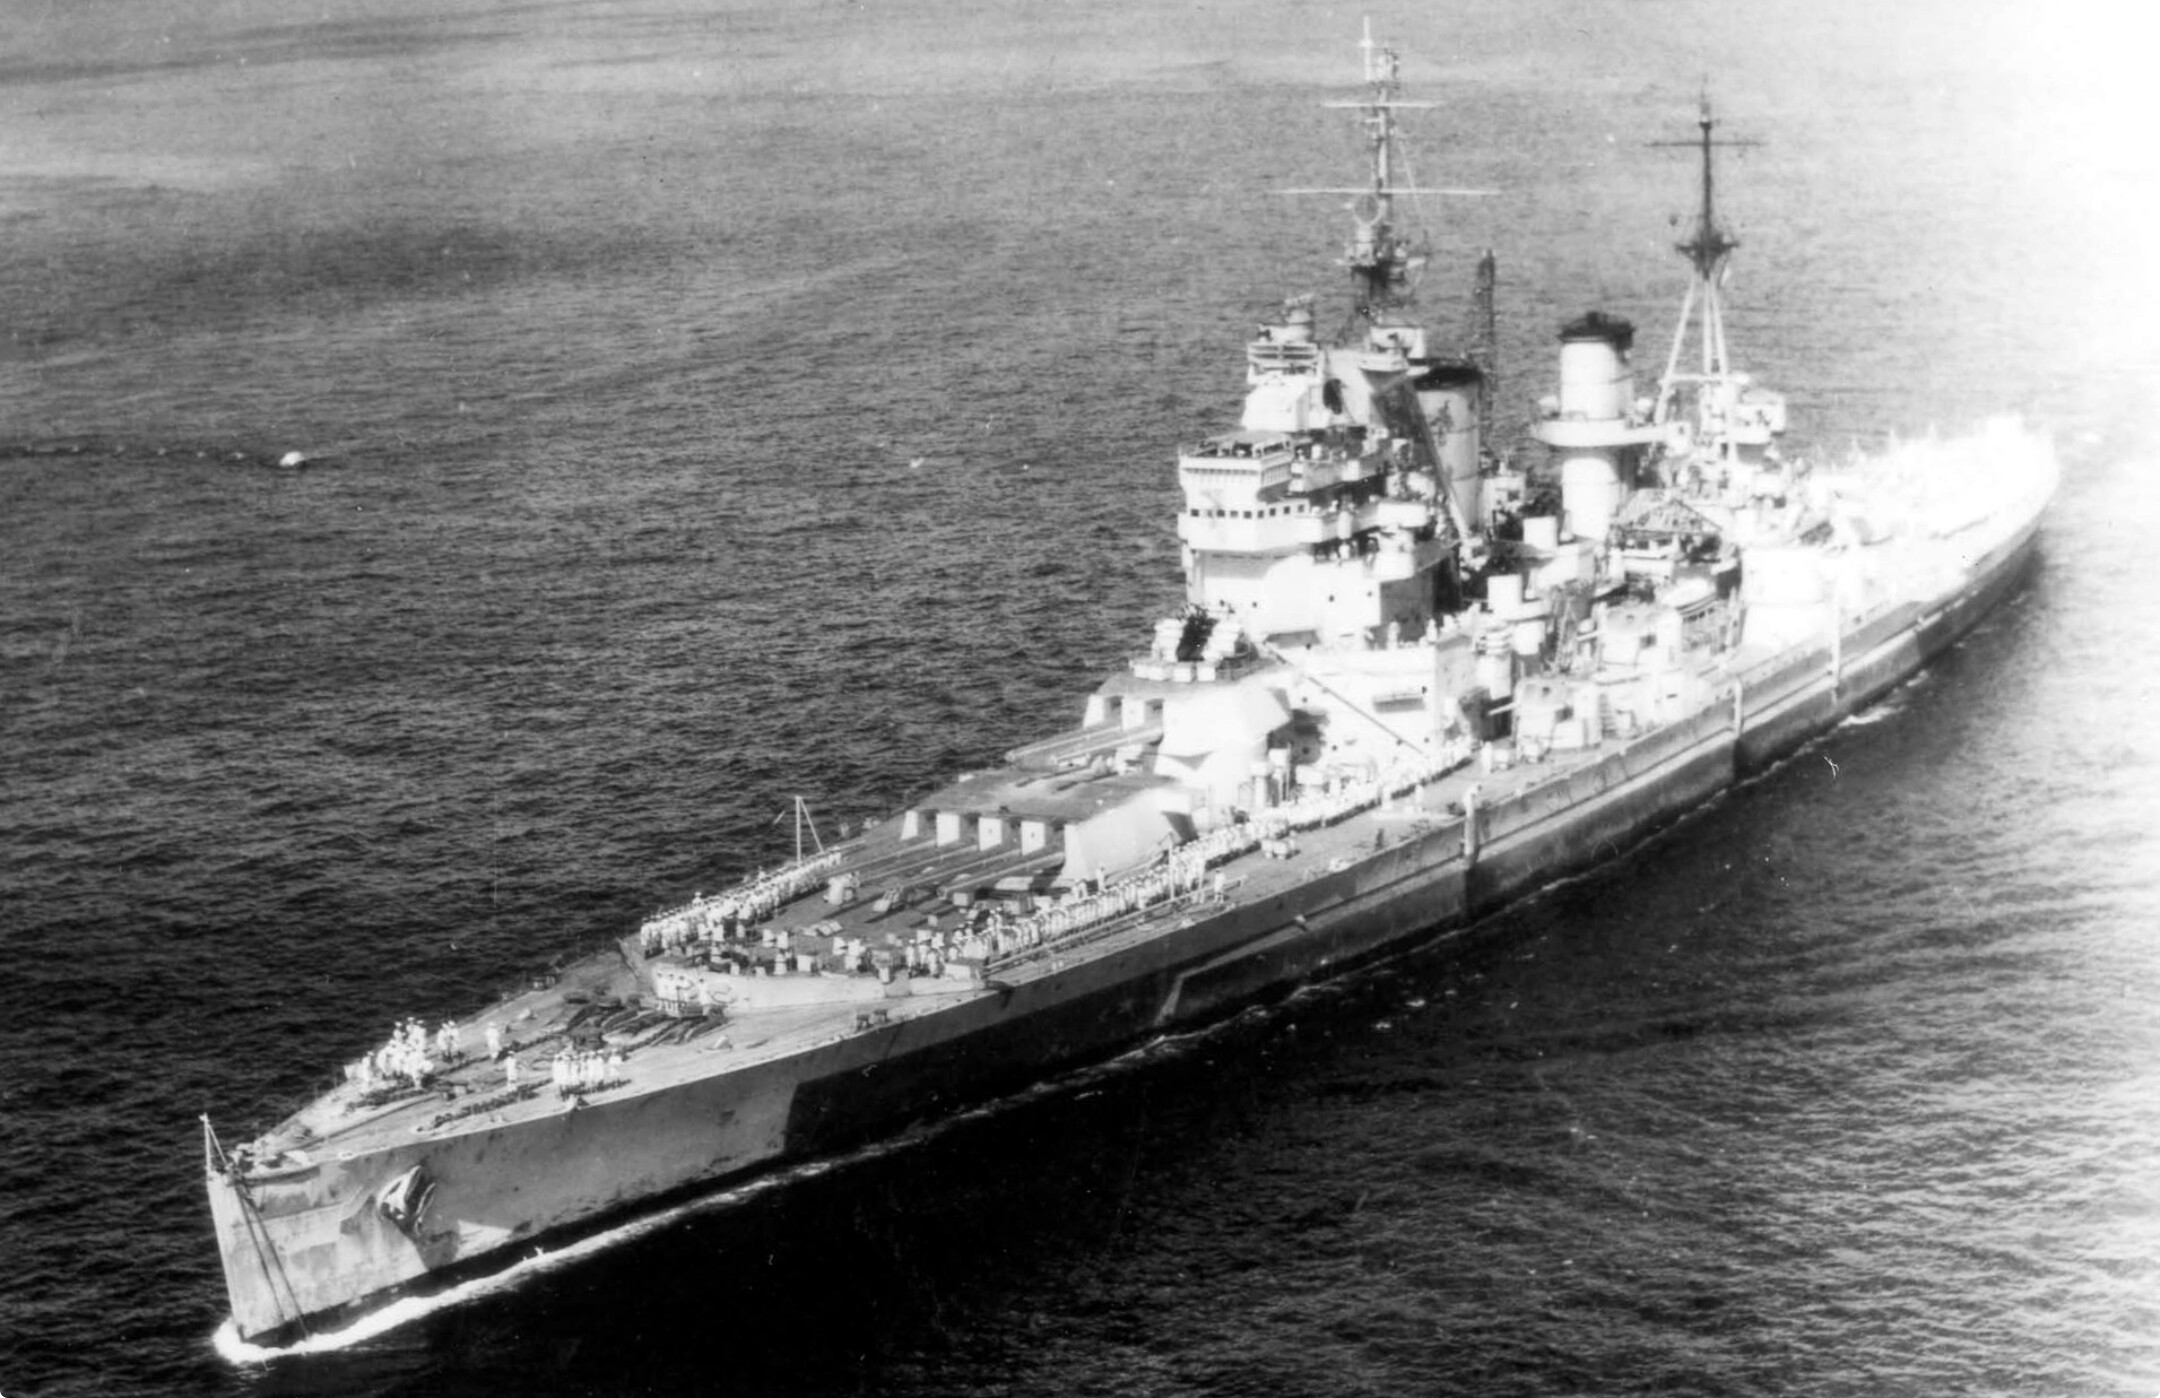
One minute later, the Bismarck began firing back. The King George V opened fire at 8:48 a.m., while the Norfolk did not do so until around 8:54 a.m. One of the first hits from the Rodney disabled the main gun control center. At 9:02 a.m., the turret “Bruno” (second bow gun) was knocked out by a shell from the Rodney.
Meanwhile, the Bismarck fired at the British ships with its “Cäsar” and “Dora” turrets (First and second stern guns), succeeding in causing minor damage to the Rodney. At 9:15 a.m., a hit from the King George disabled the last functioning control center, making it impossible to centrally coordinate the Bismarck’s fire. At 9:21 a.m., a blast occurred in turret “Dora,” permanently disabling the gun turret. Around this time, it was finally clear that the Bismarck was incapacitated and lost.
The Bismarck’s First Officer, Fregattenkapitän Oels, then gave the order to scuttle the ship, as Admiral Lütjens and Captain Lindemann were presumably already dead by this time, though their exact time of death cannot be determined. He personally went to the engine room to deliver the order. The crew then prepared several explosive devices (Maßnahme V / Measure V) under the command of the Second Chief Engineer, Kapitänleutnant Gerhard Junack, who survived the sinking. After a nine-minute delay, these devices destroyed the Bismarck’s seawater cooling vents in the bottom of the hull. In addition, all watertight compartments along the shaft tunnels were opened so that the incoming water could quickly flood the ship, the engine room, and the rest of the hull. Turret “Anton” (first bow turret) failed at 9:30 a.m. out. At 9:40 a.m., the Dorsetshire opened fire on the ship. At this point the Bismarck was already fully ablaze, but the hull was still almost undamaged except for the opening in the hull that had been blown up by the ship itself.
At 10:15, Admiral Tovey ordered his ships to abandon the fighting, as the battleships urgently needed to return to British waters due to fuel shortages. Instead, the Dorsetshire was to deliver the final blow to the Bismarck. Three more torpedoes were fired from the Dorsetshire at the Bismarck, which was already stern-deep in the water at the time. However, these torpedoes caused no damage to the Bismarck upon impact.
After the last torpedo hit on the Dorsetshire, the Bismarck began to slowly heel to port, which is why this third torpedo hit is sometimes seen as the trigger for the sinking. At about the same time, however, the measures presumed to have been taken to scuttle the ship, such as detonating explosives and opening the bottom valves, also took effect. According to the reports of the survivors in the water, the sinking itself was astonishingly quick. Now listing heavily to port, the Bismarck began to turn rapidly and then sink swiftly keel up. After this 180° turn, the four 38 cm gun turrets, held in place only by their own weight of around 1,000 tons, fell from their barbettes and sank out, separated from the ship, to the seabed.
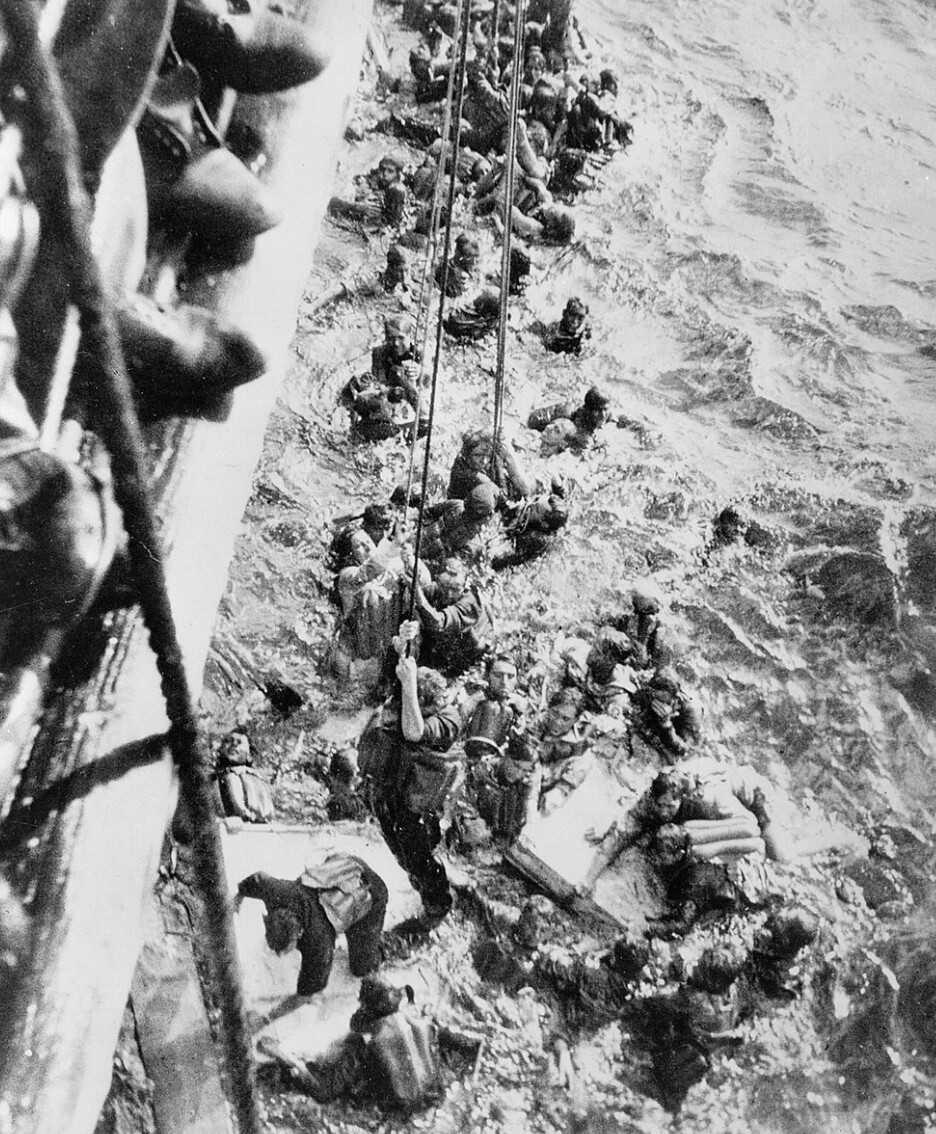
The Bismarck sank at around 10:40 a.m. in the Atlantic, about 1,000 kilometers west of Brest, at coordinates 48° 10′ N, 16° 12′ W. The Dorsetshire and the destroyer Maori rescued more than 110 men. Of the Bismarck’s original crew of 2,221, 400 to 500 survived in the water due to a submarine alarm reported by a ship. This submarine alarm later turned out to be false, and many of the crew, were left at sea and died of hypothermia or drowning.
That same evening, the German submarine U 74 found three more Bismarck crew members and took them aboard (Die Matrosengefreiten / the sailors Georg Herzog, Otto Höntzsch, and Herbert Mantey). Six German submarines subsequently searched for survivors for four days, finding only debris and a few bodies. On May 29, the weather observation ship Sachsenwald rescued two more survivors (Maschinengefreiter / Engineer Corporal Walter Lorenzen and Otto Maus) from the water. Thus, only 115 men survived the sinking of the Bismarck.
After the battle, which lasted one hour and 30 minutes, during which the Bismarck was shelled by British ships The Bismarck’s heavy artillery ceased firing after about an hour due to a lack of ammunition or the excessive damage, which prevented it from firing back. The same happened to the medium artillery, which had to cease firing approximately 10 to 20 minutes after the start of the battle.
During the engagement with the Bismarck, the British ships fired a total of 2,876 shells at the Bismarck. The number of crew members at the time of the sinking varies depending on the source, from over 2,000 to over 2,200.
Interesting fact: There is a sailor’s legend that the Bismarck had a ship’s cat, which even survived the sinking of the Bismarck and was rescued by the destroyer HMS Cossack. It was then considered its own ship’s cat and named Oscar. When the Cossack later sank, Oscar is said to have become the ship’s cat of the Ark Royal until she too sank, and the cat also survived. It was then considered a harbinger of bad luck and was no longer used as a ship’s cat. Although it is noteworthy, this is only a myth and a legend. Based on research by historians, they came to the conclusion that the Bismarck did not have a ship’s cat.

The next day, the British destroyer Mashona fell victim to an attack by the German Air Force as the British ships retreated to Great Britain and, along with HMS Hood, was the only British ship to sink in the Bismarck operation.
A total of 8 battleships and battlecruisers, 2 aircraft carriers, 4 heavy and 7 light cruisers, 21 destroyers, and 6 submarines, as well as several land-based aircraft, participated in the pursuit of Bismarck. The Royal Navy’s battleships Rodney and King George V, as well as the heavy cruisers Norfolk and Dorsetshire, participated in the final engagement.
In his later final report on the sinking of the Bismarck, British Admiral Tovey wrote: “The Bismarck had put up a most gallant fight against impossible odds worthy of the old days of the Imperial German Navy, and she went down with her colors flying.”
Video: A British propaganda video shows the hunt at the Bismarck:
The wreck
On June 8, 1989, the wreck of the Bismarck was discovered at a depth of 4,800 meters by American deep-sea explorer Robert Ballard. Ballard had already searched for the wreck of the Bismarck in the summer of 1988, but had been unsuccessful.
The wreck of the Bismarck lies upright on one side of an extinct underwater volcano in the remnants of a mudslide triggered by the sinking itself. The hull is in good condition and largely intact. Only the stern broke off due to structural damage as the ship sank. Only a single conning tower was discovered in the debris field; the rest may have been buried by the landslide. The conning tower was also found near the wreck, which was lying on top of the artillery control post, and, among other debris.
An expedition in June 2001 discovered several horizontal cracks or slits while examining the hull, which were interpreted as damage caused by the ship sliding down the slope of the underwater volcano. No shell hits were found in the underwater part of the ship, and the number of hits on the surface of the hull was disproportionately small compared to the damage caused by shelling of the superstructure. Based on the data collected, it was concluded that the Bismarck had indeed sunk by scuttling.
Shortly afterward, in July 2001, a British expedition to the Bismarck took place under the command of David Mearns. However, this expedition concluded that the Bismarck had been sunk by Dorsetshire’s torpedoes. Mearns believed the previously discovered slits were torpedo damage that had been magnified by movement in the seabed. The expedition had already deployed underwater robots, but these did not penetrate the ship’s interior to document critical torpedo damage and thus confirm this hypothesis. Therefore, this hypothesis could not be confirmed and is not officially the reason for the Bismark’s sinking.
An expedition led by director James Cameron in 2002 to film the documentary “Expedition Bismarck” provided the missing footage. The research submarines Mir I and II explored the breaches, and an examination of the torpedo bulkheads using camera robots found no significant damage to the ship. One torpedo hit was discovered, but other than a hole in the external armor and the resulting flooding of the watertight compartment, no critical damage to the hull was caused. This supported the theory that the Bismarck sank as a result of her own scuttling. The expedition also counted only four artillery shells that penetrated the belt armor and found one of the rudders badly bent and wedged against the center propeller. This was the decisive damage that disabled the Bismarck on her last and only mission. However, the damage could also have been caused when the hull hit the seabed and then slid down the slope of the volcano. Officially, The sinking of the Bismarck is directly attributable to the self-scuttling actions of the Bismarck’s crew, but officially, John Moffat also contributed significantly to the sinking of the Bismarck.
Video
Thank you for reading :)
Sources
- [Wiki DE] Bismarck (Schiff, 1940)
- [Wiki DE] Bismarck Klasse
- [Wiki DE] Unternehmen Rheinübung
- [Wiki DE] Prinz Eugen (Schiff, 1940)
- [Wiki DE] Günther Lütjens
- [Wiki DE] Ernst Lindemann
- [Wiki DE] Hood (Schiff, 1920)
- [Wiki DE] King George V (Schiff, 1940)
- [Wiki DE] Ark Royale (Schiff, 1938)
- [Wiki DE] U 556
- [Wiki DE] Otto von Bismarck
- [Wiki DE] Bordkatze der Bismarck
- [Welt DE] Zwei Granaten der “Bismarck” ließen die “Hood” explodieren
- [Welt DE] Hitlers Superschlachtschiff sprengte alle Dimensionen
- [NDR DE] Schlachtschiff “Bismarck”: 833 Tage vom Stapellauf bis Untergang
- [MDR DE] Schlachtschiff Bismarck — Todesfahrt im Atlantik
- [YouTube: Terra X & ZDF DE] Der Untergang des Schlachtschiffs “Bismarck”
- [Wiki EN] Operation Rheinübung
- [Wiki EN] John Moffat (Royal Navy Officer)
- [Wiki EN] Battle of the Denmark strait

