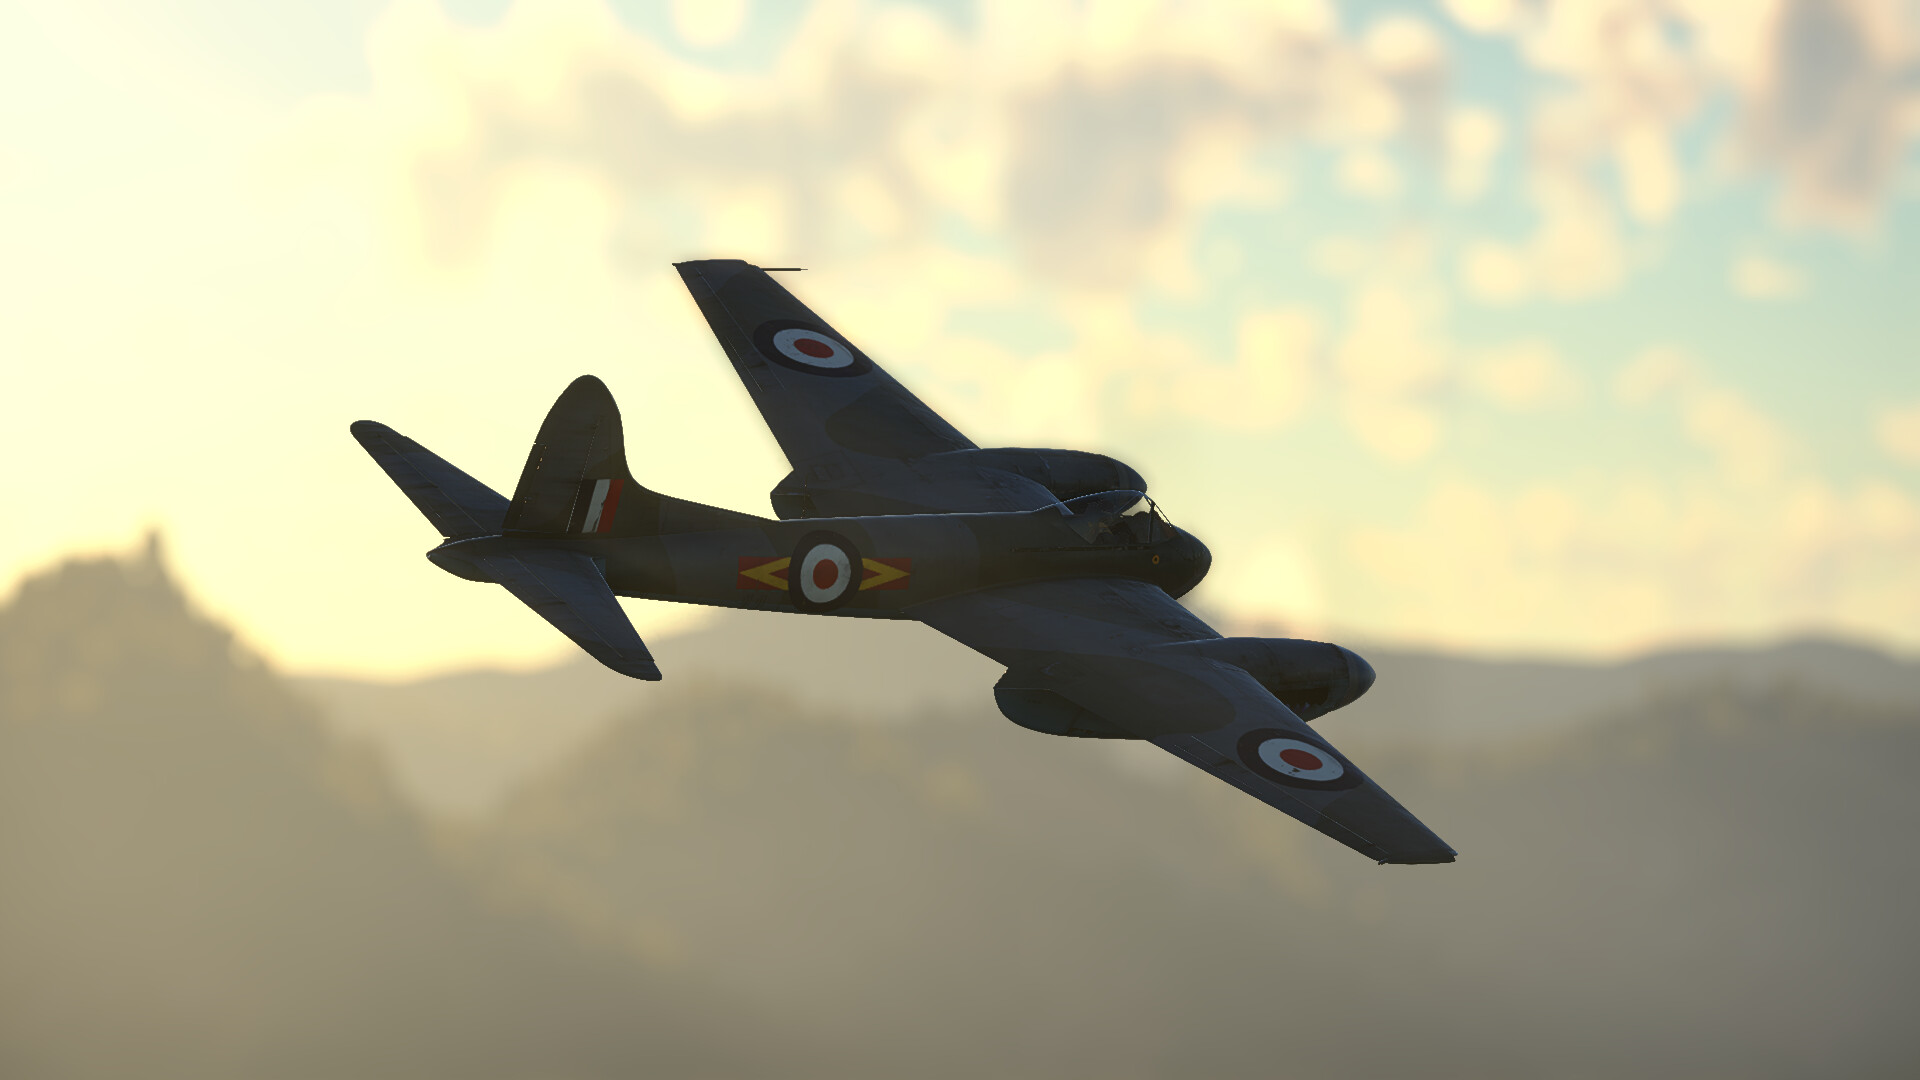
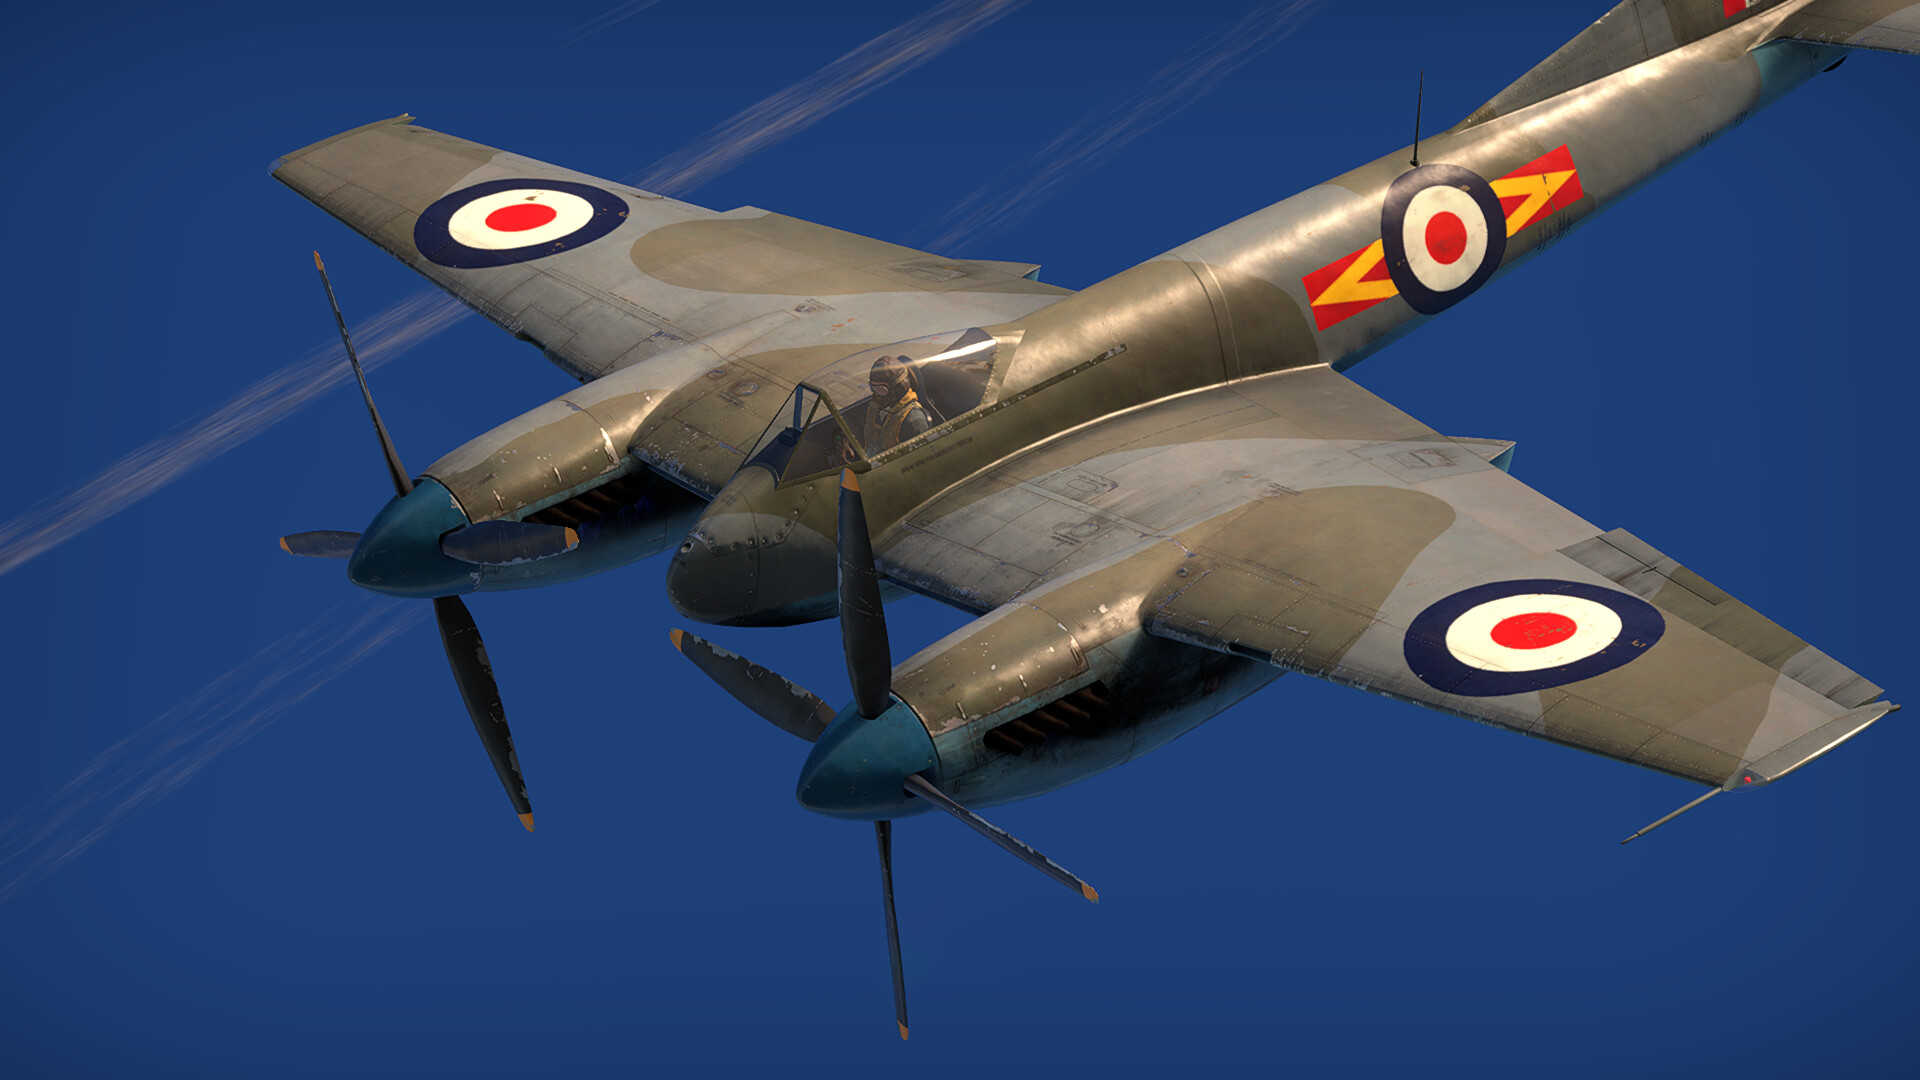
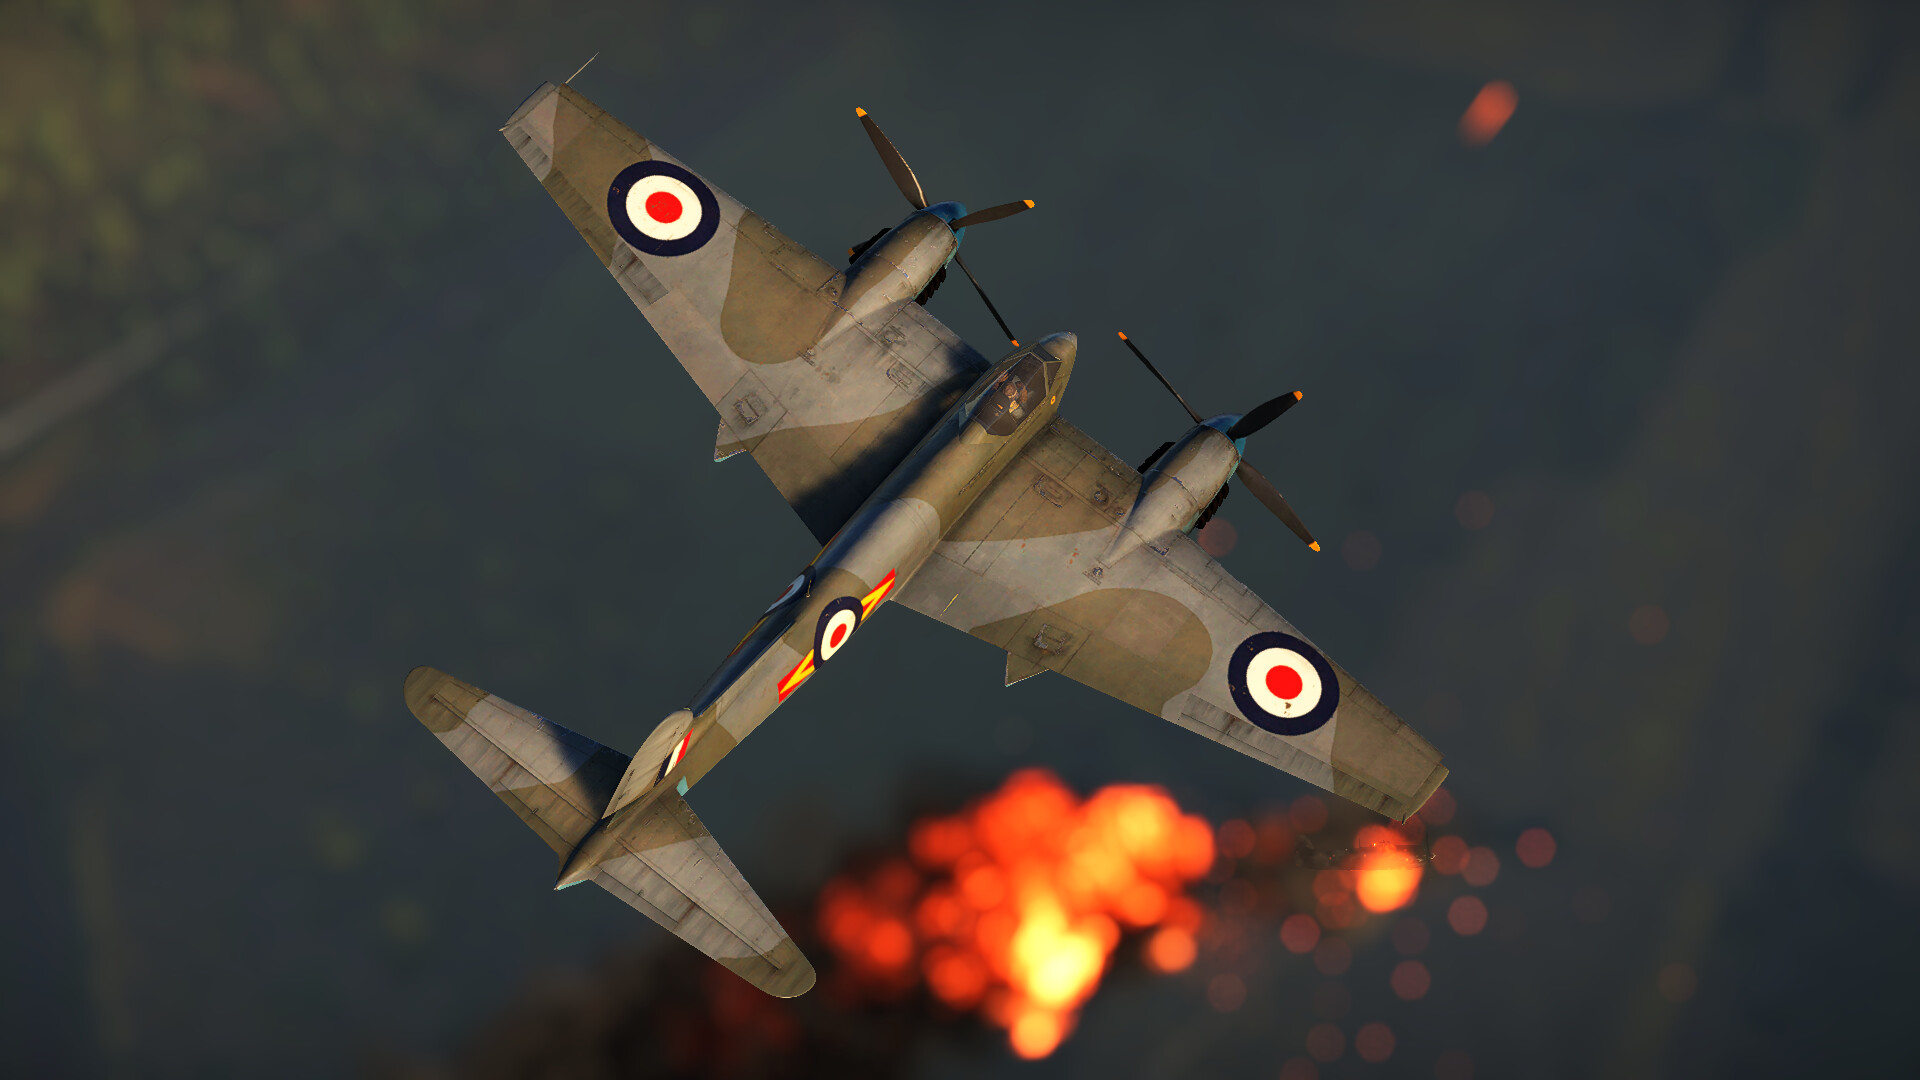
The Hornet is a British single-seat two-engine heavy fighter developed by de Havilland as a successor to the iconic Mosquito. Entering service in 1946, it had outstanding performance for a piston-engine aircraft. However, it was too late to fight in WW2 and was doomed to be outclassed by jet-powered fighters in the new era of aviation. Nevertheless, the plane participated in the so-called Malayan Emergency as a ground striker. In this article, we will look at the Hornet’s characteristics, playstyle, and how to use it properly.
| + PROS | − CONS |
|---|---|
| Extremely fast | Bad turn rate |
| Stellar rate of climb | Awkward roll rate |
| Good easy-to-use weaponry | Low flaps rip speed |
| Excellent stability and ease of learning (SB) | Big target |
| Superb visibility (SB) |
Flight performance
Famous British test pilot Eric “Winkle” Brown, who flew 487 aircraft types during his life, described the Hornet as overpowered. And not in the modern sense of how powerful the plane is against its opponents — though it certainly can put up a fight — but rather referencing how the Hornet’s engines were too powerful for the airframe.
And this word best describes the performance of this fighter. Two Merlin engines are the main strong side of the Hornet: they produce so much power that manoeuvres in the vertical plane are rocket-like. Consequently, the acceleration and climb rate are stellar, and there are almost no rivals in this regard. Partly thanks to the laminar flow wings, the Hornet is also one of the fastest propeller-driven aircraft.
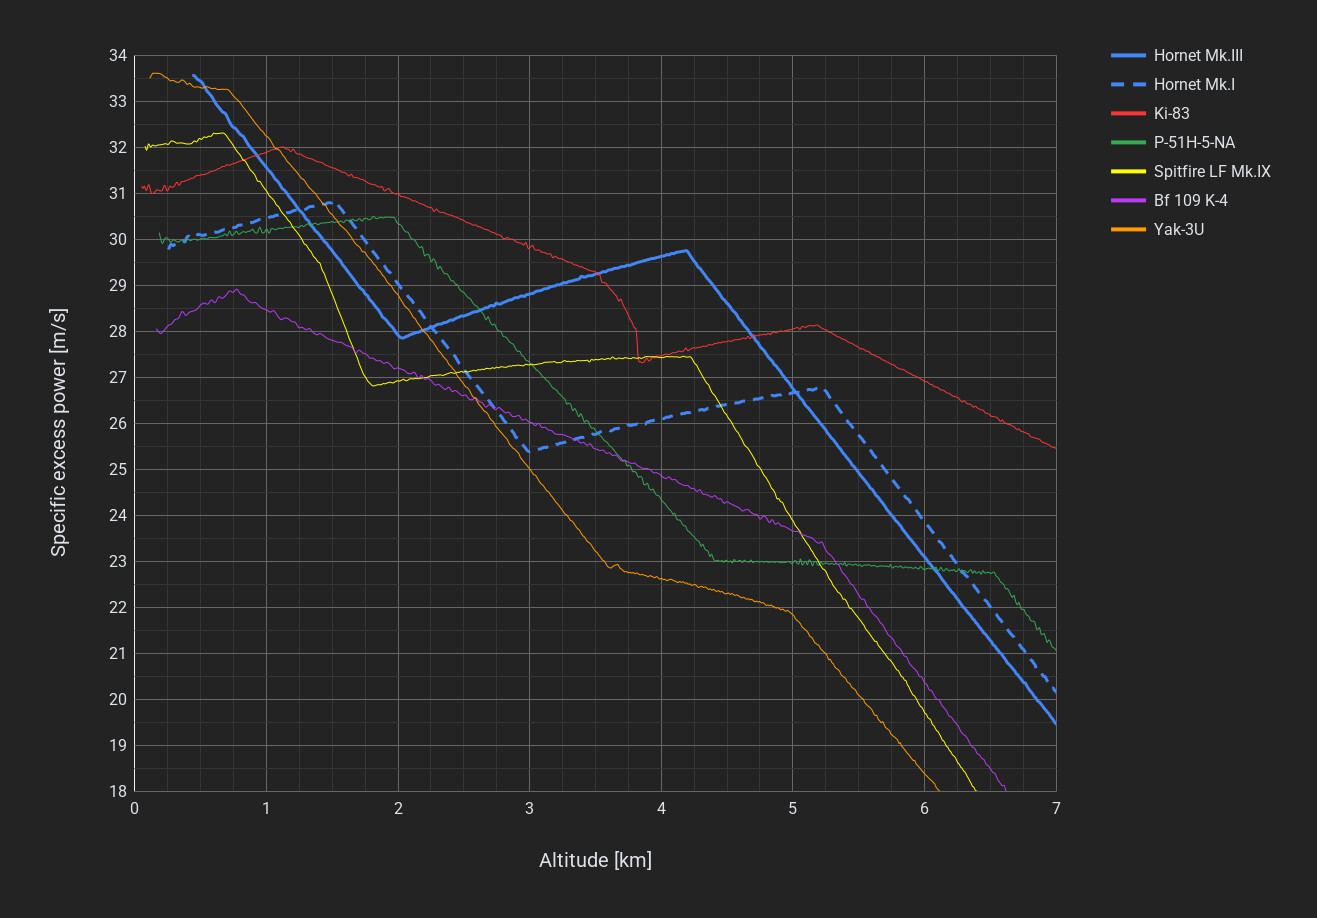
Below is a graph showing the specific excess power of both Hornets and other fighters at different altitudes, given a constant IAS of 300 km/h and maximum throttle. Basically, it’s a graph of climb rate and low-speed acceleration at various altitudes.
| 1 km | 2 km | 3 km | 4 km | 5 km | 6 km | 7 km |
| 3300 ft | 6600 ft | 9800 ft | 13,100 ft | 16,400 ft | 19,700 ft | 23,000 ft |
(rounded to hundreds)
Overview
Specific excess power is a crucial metric of aircraft performance, representing the rate of energy change. In short, it defines the acceleration and climb rate of the aeroplane at any given moment.
Planes with more SEP have more freedom in any situation, as they can gain energy more quickly, either in the form of altitude or speed. It’s important to note that SEP doesn’t necessarily align with top speed; rather, it affects how fast the top speed can be achieved.
The provided graph only represents SEP at 300 km/h IAS; it doesn’t paint the whole picture of the aircraft’s performance at all speeds. It’s useful for a general understanding of the plane’s performance at low speeds, where most dogfights happen.
Understand a bit deeper
Let’s first understand what the name “specific excess power” means.
Power is defined as the rate of transfer/change of energy over time.
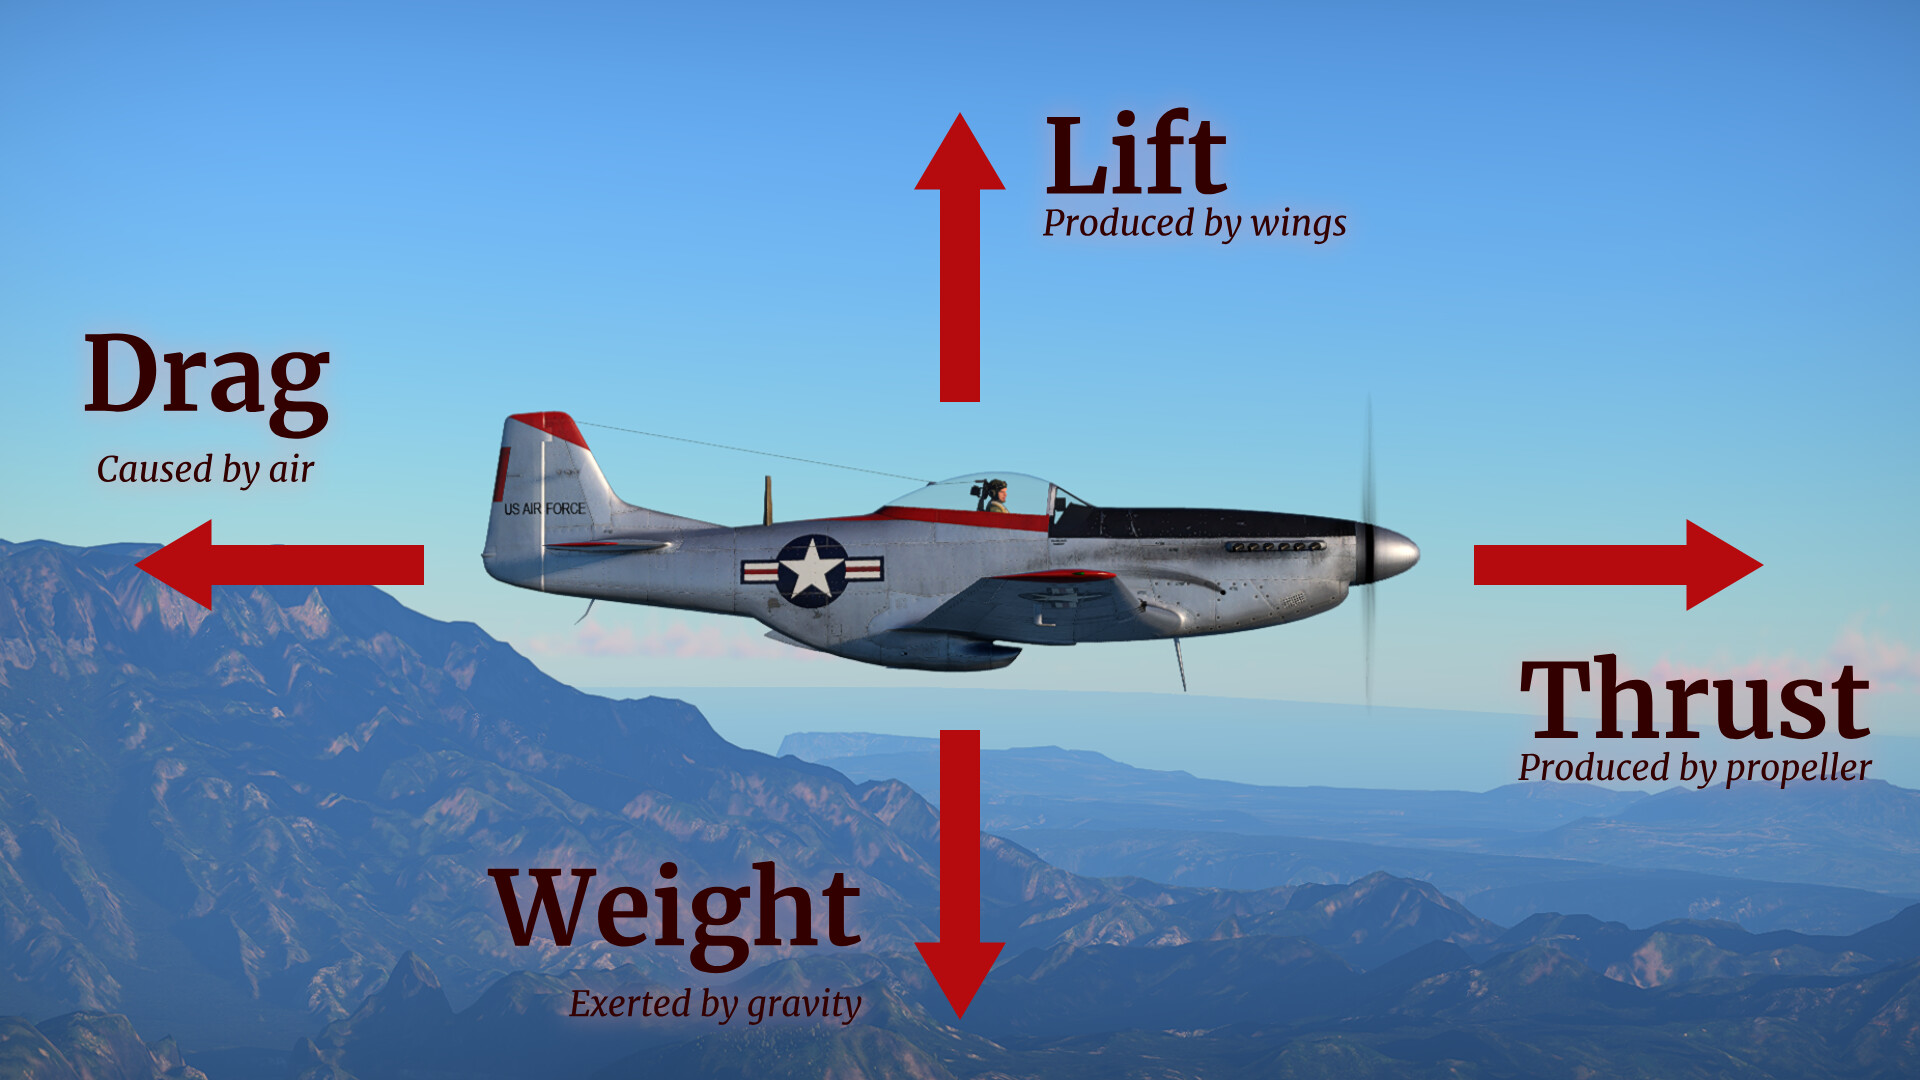
Some of the engine power is used to overcome drag, and what remains is called excess power — this is what can be used to gain speed or altitude.
“Specific” means we divide this value by the aircraft’s weight to normalise it — heavier planes need more power to achieve the same performance, and this allows for fair comparisons across different aircraft. In general, when referring to energy in the context of aviation, we are talking about the specific energy, energy divided by weight. SEP is the rate of change of specific energy.
Mathematically:
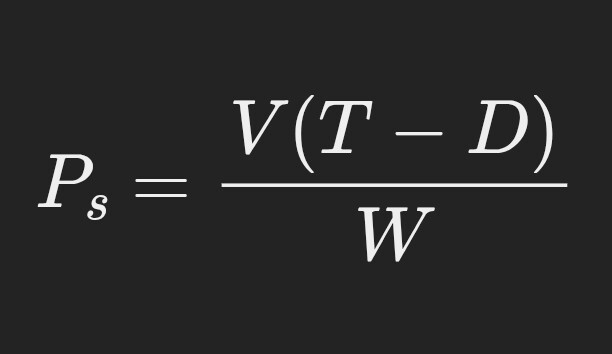
Where
Pₛ — specific excess power;
V — velocity;
T — thrust;
D — drag;
W — weight.
As you may remember from physics class, velocity times force equals power. In our formula, V × T is often called power available, and V × D — power required (that is, required to overcome drag). Their difference, alternatively written as V × (T − D), is the excess power. Divided by weight, it becomes specific excess power.
Velocity here is usually measured in metres per second, and forces in newtons. Newtons cancel out, and we’re left with SEP measured in m/s. Alternatively, N × m/s = W (watt, a unit of power). Thus, SEP is also measured in W/N. These units are identical, but in most cases, SEP is written in m/s.
When thrust equals drag, the SEP is zero, and the aircraft doesn’t gain or lose any energy — steady level flight. When thrust is bigger than drag, the SEP is positive and the aeroplane can direct the gained energy into kinetic (speed), potential (altitude), or both at the same time.
When the aircraft climbs at a constant airspeed, its acceleration is zero; hence, all power is directed into the climb. In this case, the rate of climb is equal to SEP in m/s. However, planes rarely climb like this because they need to keep IAS constant, not airspeed. The plane must accelerate to compensate for the decreasing air pressure with altitude and keep IAS constant. Part of the power is used for the acceleration, and less goes into the climb. Thus, the climb rate is just short of the SEP value.
Not many can keep up with the Hornet Mk.III. From the graph, the Yak-3U has a slight edge in SEP below 2 km, but is completely outclassed higher. The P-51H has an advantage only at 2 km and above 6 km. Finally, the Ki-83 has an even bigger upper hand from 1 km to 3.5 km, and above 4.5 km. This fighter is the most serious threat.
The Hornet Mk.I has a harder time against these opponents. While still a very powerful plane, it lacks the 150 octane fuel modification, which is critical for the engines' performance. The Mk.I is more equal to other fighters, such as the Spitfire LF Mk.IX or P-51H, and in terms of SEP, it’s weaker than the Ki-83 at all altitudes.
The Hornet, being a heavy fighter, is clearly not the most agile on the scene. Its turn and roll performance at low speeds is poor, which is to be expected. It’s better the faster you go, but still not competitive enough to engage in turnfights. The Mk.I is also lighter, and thus more agile, than the Mk.III, albeit not by much.
Both Hornet Mk.I and Hornet Mk.III have the same critical speeds. Combat flaps rip at 369 km/h, takeoff at 356 km/h, and landing at 287 km/h, while the structural limit is 826 km/h. The flaps' limit is quite low, so be careful not to lose them — the Hornet can gain speed very rapidly.
Weaponry
Armament is one of the strong sides of the Hornet, consisting of four 20 mm Hispano Mk.V cannons. These guns are long-range, accurate, and have decent damage. Hispano Mk.V also has a good rate of fire, which is 25% higher than in Hispano Mk.II, found in Mosquitoes, most Spitfires, and other earlier British planes. Unlike almost every other RAF fighter, where weapons are placed in the wings, the Hornet has cannons arranged in the nose — such is an advantage of a heavy fighter configuration. All of this accounts for a very effective main armament — it’s quite destructive and easy to hit with.
Each Hispano cannon has 190 rounds and shoots at a rate of 750 rounds per minute. An easy calculation gives us just above 15 seconds of trigger time, which is enough for most cases. Considering ammunition, there are three belts you want to use: Ground targets, Air targets, and Stealth. The first one is the most effective against tanks, obviously. Half of its shells are armour-piercing and can devastate a relatively light target. Against enemy planes, you can choose between the last two. Stealth consists purely of HEI and SAP-I shells, which are the most effective for destroying aircraft. In Air targets, one-fifth of rounds are AP-T. They aren’t as good, but they’re tracers, so it’s much easier to aim.
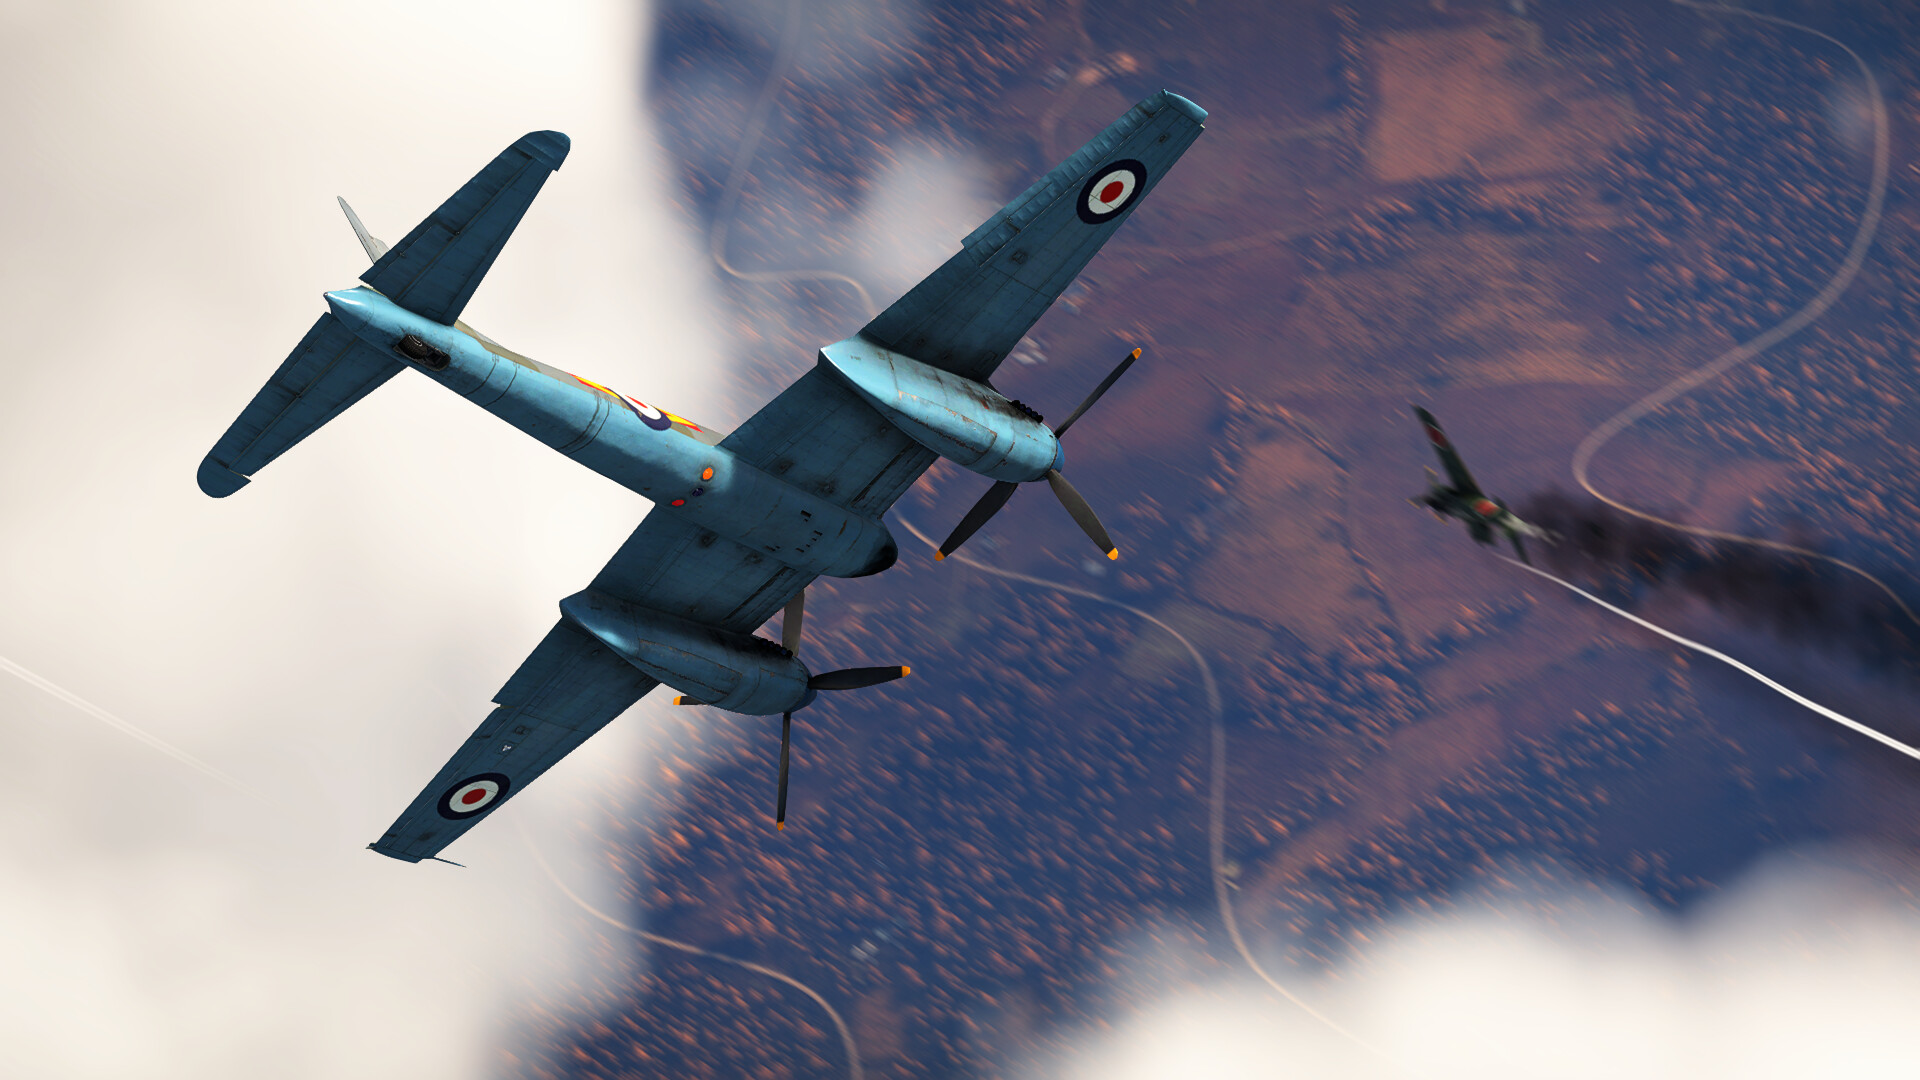
The Hornets can carry a considerable amount of ground ordnance under the wings. They can equip 8 rockets of 2 types: armour-piercing and high-explosive. Regardless, they are very hard to aim because of their location. The most effective suspended armament is the more conventional bombs — two 500 lbs or 1000 lbs. They are, however, tricky to use as well. The plane is very unbalanced after the first bomb is dropped, which makes the recovery from the dive significantly harder. Do not hold the pitch-up button — you will roll heavily to one side and risk crashing. Dive at a shallower angle and recover using mouse aim, and the instructor will help counteract the weight inequality. While you have one bomb, you’re vulnerable as it’s hard to manoeuvre with an imbalance. Try to drop it on the next target as soon as possible.
Survivability
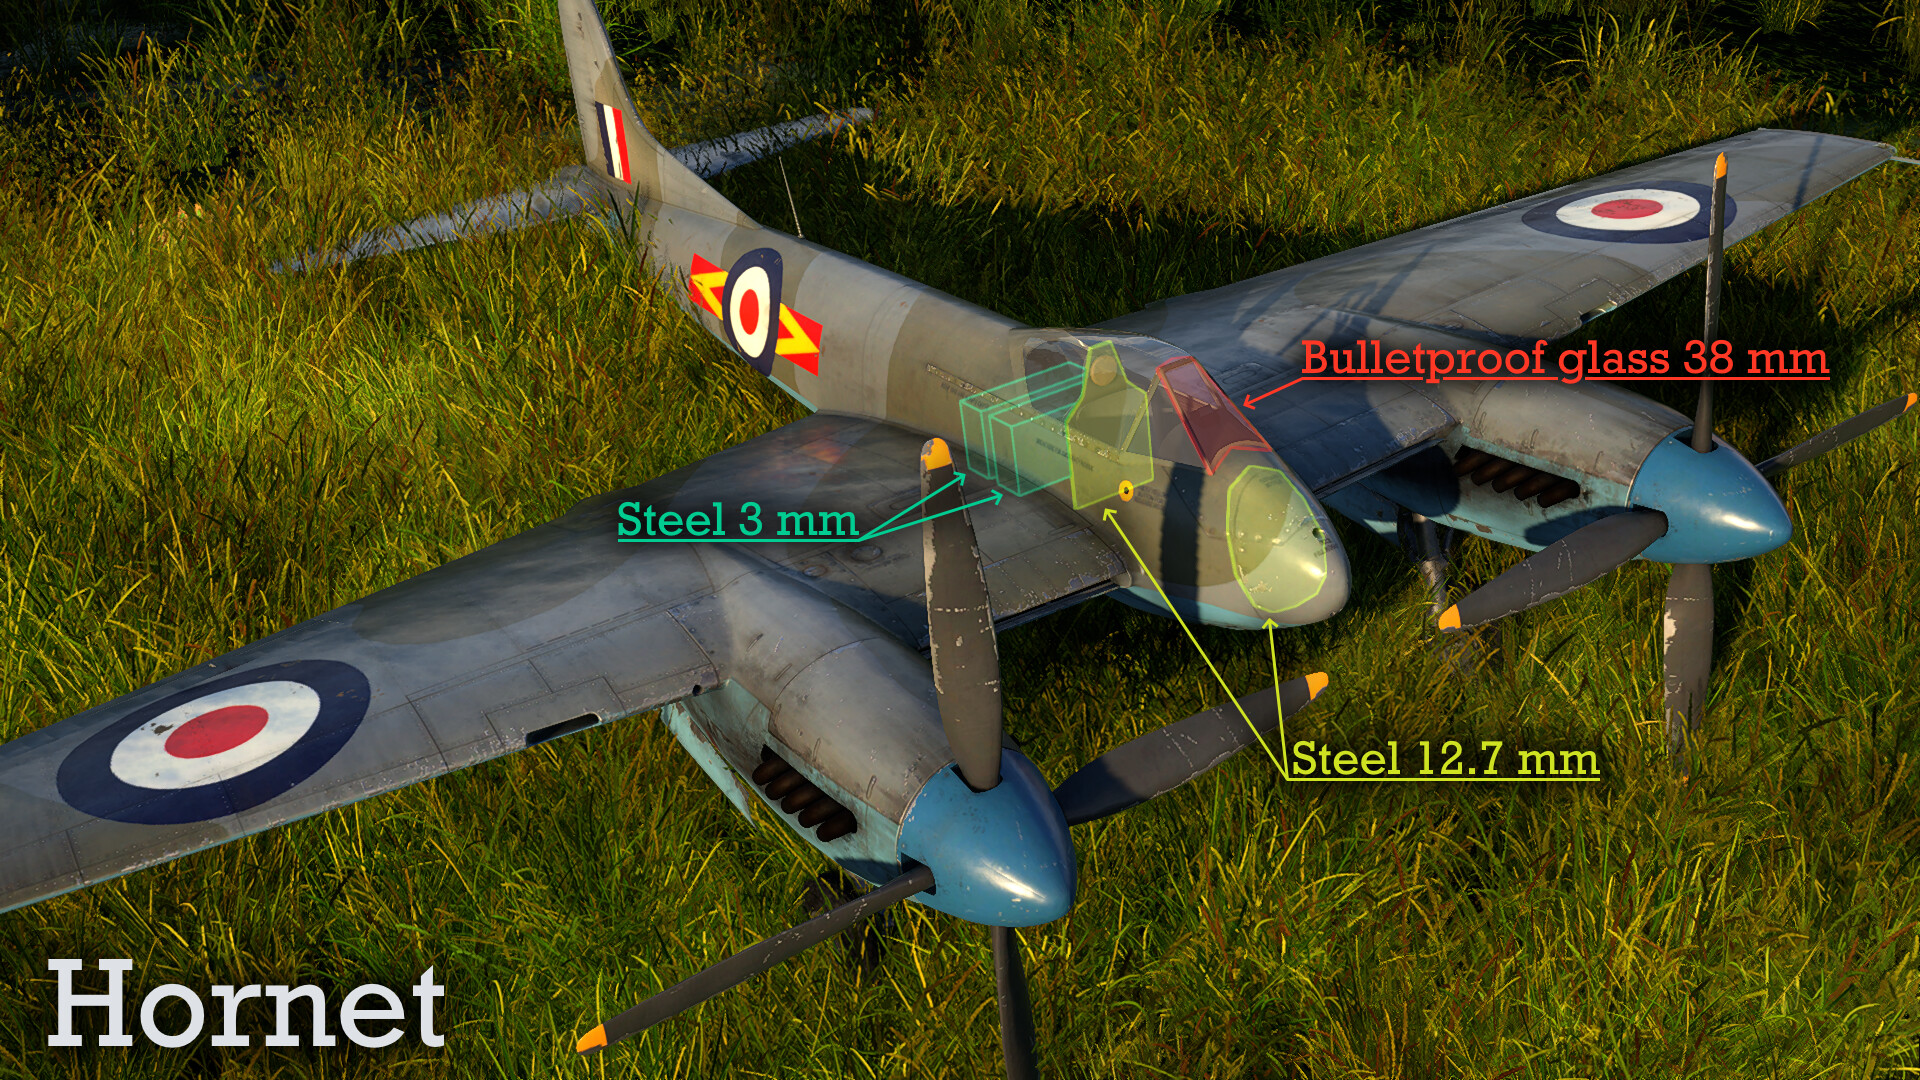
Hornets aren’t the best at surviving enemy fire. The armour protects the pilot, both from behind and from the front, and is relatively OK at doing it. The 12.7 mm plates will most likely stop fragmentation damage from HE shells and significantly reduce impact from AP rounds. And despite the plane being made mostly of wood, the airframe can take quite a lot of damage.
However, this is not enough. The Hornet is a large target which is very easy to hit. The fuel tanks, radiators, and engines are close to each other, all located in the big wings of the aircraft. Even a few hits may make your game much harder, as the plane will bleed more energy and/or lose power, which is essential for such a plane that can’t rely on anything else. If you are in the line of fire, it’s probably already too late. Luckily, the Hornet’s speed and climb rate will help you stay out of most trouble.
Usage in battles
Air RB
The Hornet’s characteristics shape its strict play style, as the aircraft excels in some areas but struggles in others. If you play it wrong, there’s not much you can do in the Hornet to save the situation. But if played correctly, it may be one of the best fighters at its rank because of its unparalleled advantages. One of such advantages is the crucial climb rate — it’s nothing short of spectacular. Moreover, Hornet is classified as an air defence fighter, which gives it an air spawn at the start of an air RB match. This leads to it being the highest fighter in the game most of the time, though there are a few rivals.
Due to the lack of manoeuvrability, there are only two viable tactics: boom’n’zoom and energy fighting. The former is relatively straightforward: dive on the target and climb back up. However, you need to be careful nonetheless. It’s often hard to hit an agile target because of a mediocre turn and roll rate. With such powerful energy generation, it’s easy to overshoot. Poor agility means you should never overcommit to a target; this will lead to the enemy getting on your six without much effort. A zoom climb will make you untouchable, and that’s your priority — staying alive to make another pass. The Hornet doesn’t have an airbrake, so watch out for your speed during dives.
Using your energy is perhaps the most potent tactic of the Hornet due to the plane’s unrivalled power-to-weight ratio. Combined with its initial altitude advantage, the pilot has everything going for them. Use manoeuvres in the vertical plane, as most enemies won’t be able to follow you. Make the opponent turn and climb for you, bleeding their speed. Once stalled out, use your flaps to get the nose on target. Be careful not to lose them because they have an underwhelming rip speed, and it will be hard to fight without flaps. Use the hammerhead turns to conserve energy while reversing the direction of the flight.
Air SB
The Hornet is a good plane to start with in simulator mode. This fighter offers great stability in flight, which is particularly helpful to new players and makes control relatively easy. The two propellers spin in opposite directions, making takeoffs very simple and improving the overall stability. A clear bubble canopy provides excellent visibility on all sides, perhaps excluding below, as the large wings block the view. A gyroscopic sight makes aiming a bit easier. Hornet is a perfect heavy fighter and interceptor for hit-and-run tactics. Make swift attacks and climb away from the enemy, just as in RB.
Enemies worth noting
P-51H is one of the most dangerous propeller-driven aircraft one can face. Even though the Hornet is just as potent, this Mustang remains a powerful opponent. P-51H has an edge in almost all metrics except for the climb rate. It’s around the same speed or even faster and, of course, more agile. Make sure to be higher and don’t miss opportunities to attack Mustangs while they aren’t watching.
Another American fighter to beware of is the F2G Super Corsair. Its immensely powerful engine provides excellent speed, dive, and vertical performance. However, F2G loses much of its potential at higher altitudes, where Hornet outclimbs and out-accelerates it without much of a problem.
Perhaps one of the greatest rivals is the Japanese Ki-83. While not as popular or known, this interceptor is dangerous because of its flight performance. Ki-83's SEP (and thus climb rate) is even better than the Hornet’s on most heights, which means you can’t use the huge power advantage against it. Furthermore, Ki-83 — while not as agile as most single-engine fighters — will easily out-turn the Hornet at low to medium speeds, especially with its strong flaps. One of the only hopes is the speed, as the British fighter still leads in this metric by a great margin.

The Hornet sometimes fights early jets like the F-80, F-84, Me 262, etc. Though fast in a straight line, they lack acceleration and climb rate. By exploiting this, you can almost always have an advantage in altitude. Plan your attacks carefully, as they can dive and extend away. If you follow in a dive, you will lose your advantage and become vulnerable while not catching a faster jet. Better keep your altitude and position.
Manual engine control
Engines are the most critical part of the Hornet, and it’s essential to prevent their overheating and loss of power using MEC. Bind the engine control mode, radiators, and supercharger gear switch. Turn the MEC on (“engine control mode”) and open the radiators to about 20–30%, depending on the map and altitude, adjusting as needed if the temperatures continue to rise. Now, you can WEP almost indefinitely! However, don’t forget about the supercharger. To maintain the performance, switch to the second stage at approximately 2000 m at 300 km/h or 2400–2500 m at 400–500 km/h Hornet Mk.III. When flying Mk.I, the switch altitude is 3000 m at 300 km/h or approximately 3400–3500 m at 400–500 km/h. And don’t forget to switch back if diving to the ground.