
In War Thunder, the T-80s are among the pinnacle of Russian MBTs. They are fast, have a good gun, and decent armour. They excel at many roles, and at all ranges. The T-80U-E1 is a modification of the existing T-80U, with better thermals and a slightly better turret traverse. This variant is technologically superior to most other T-80s apart from the T-80BVM. How is this vehicle played?

| Pros | Cons |
| Good top speed of 70km/h | Lackluster armour versus kinetic rounds |
| Good gun, with a variety of high penetration shells | No laser warning receiver |
| It is very maneuverable | Slow vertical gun traverse |
| It has ERA giving good protection versus chemical munitions | Terrible reverse speed |
| Good turret rotation speed | Gun depression and elevation angles are both quite low |
Armament
Like many T-80s, the T-80U-E1 is armed with a 125 mm 2A46M-4 cannon that fires a wide variety of munitions. This gives versatility over many ranges, depending on whether you want to snipe or brawl. Being a premium vehicle, it means you get access to all these munitions, so there are a couple of them that you should avoid.
- 3BK18M HEATFS — 550mm of penetration on a flat surface. It has a muzzle velocity of 905m/s. However, this shell has terrible post penetration damage. This is best used for sniping against tanks, as it has consistent penetration at any range. It works on both MBTs, with high penetration, and light vehicles due to overpressure.
- 9M119M1 ATGM — A barrel launched ATGM with a velocity of 470m/s and a maximum range of 5 km. Highest penetration of all rounds available, at 850 mm on a flat surface. However, it can be intercepted by APS, and needs a line of sight to be controlled. It goes where the barrel is pointing, so you have to focus on a target for a long period of time, and it has the same explosives used in the 3BK18M, meaning it has terrible post penetration damage and should target weakspots. You can only load in 28 at a time, unlike the 46 with other rounds. It can also overpressure MBTs. Should only be used at extreme ranges. Like the HEAT-FS round, it has consistent penetration, but it has more of it. However, you do need that line of sight. Works on both MBTs due to penetration, and light vehicles due to over pressure.
- 3OF26 EDKV — high explosive shell, with an equivalent of 5.2kg of TNT. Very useful against light vehicles, can even be used against MBTs (by targeting cupolas and optics on the roof), and a fuse can be set on it for use against aircraft. Always make sure to have a few of these ready to be loaded. Bad muzzle velocity of 850m/s.
- 3BM42 APFSDS — muzzle velocity of 1700m/s, with a penetration at point blank on a flat surface of 457mm. Don’t use this shell, the other sabot round is much better than this one, with almost 100mm more penetration.
- 3BM46 APFSDS — Your main round. It has a muzzle velocity of 1700m/s, penetration of 532mm at point-blank range on a flat surface, more damage the more armour is penetrated. This is the best round you have access to, with good penetration, velocity, and post-penetration damage. This is your main anti-MBT armament, with good penetration, post-penetration damage, and as such is your go to shell in brawls and ambushes. However, due to its somewhat mediocre penetration compared to other tanks it faces, weak spots should almost always be targeted.
This T-80 is equipped with an autoloader, allowing a consistent 6.5s reload. This means that autoloader hits could cause an ammunition explosion, and if the autoloader is knocked out, the tank cannot reload until it is repaired.
With a good repertoire of shells, the T-80U-E1 excels at all ranges. You also get access to a .50 caliber machine gun and a 7.62mm machine gun, for knocking out light vehicles or for destroying obstacles. This, paired with a turret rotation speed of 40 degrees a second horizontally and 4.4 vertically, makes this tank a beast. You do lack gun depression though. While the gun is very good, let’s take a look at how the armour holds up.
Armour (and general survivability)
This T-80 is equipped with advanced composite armour and ERA. This gives amazing protection from chemical munitions, allowing you to occasionally tank hits from ATGMs. The composite armour allows somewhat decent protection against kinetic projectiles — only the Obj-292, DM-53 from the 120mm gun off of the Leopard 2A7V and the LOSAT can penetrate the upper front plate. The ERA the tank is equipped with is Kontact-5 ERA, which, apart from providing good protection against chemicals munitions (namely HEAT-FS projectiles) actually improves the armour slightly against kinetic projectiles (APFSDS).
There are two glaring weakspots — these are the lower frontal plate and an area next to the cannon where the breech can be destroyed. These can be easily exploited by any semi-decent player, and others can just penetrate you frontally.
While the armour is adequate, crew survivability is at a minimum. With a total of 3 crewmembers, all tightly packed together, almost every penetrating shot will kill you, and losing one crewmember means you lose access to the .50 cal. Luckily, the commander can fire in this tank, giving you some more time in which to shoot the enemy if you lose your gun.

Mobility
The T-80U-E1 has a 1250hp engine, and with a weight of 47t, it has a 26.6hp/t power to weight ratio. This gives it a top speed of 70km/h, very fast for MBTs, and this allows you to rush around the map. Unfortunately, you only have a 11km/h reverse speed, meaning once you are in engagements, you cannot leave them.
As compared to other MBTs that you will encounter, like the M1A2 SEP V2 or the Leopard 2A7V, you are faster. This gives you an edge, allowing you to reach key positions early on in the match. The only tanks that will be able to match you for speed are wheeled vehicles, but these can reach up to 100km/h so it’s not even close. Overall, your mobility nicely complements the armour and armament, and due to your low profile and high speeds, you are very hard to hit.

Overall playstyle
There are many ways you can play this tank. I’ll go over the main three here.
Sniping
With your good armour, in an open map in a hull down position, with the assistance of either the ATGMs or your laser rangefinder and sabots, you can hit targets across the map. Make sure never to stay in one place, as sniping requires an open map, making it very easy for the enemy to pinpoint your location, however this may be hard due to your low profile and camouflage netting.
If you can stay out of sight (and by that, out of mind), you can shoot multiple ATGMs in quick succession, which will very quickly disable the enemy. A map I have found is really good for sniping on is Fire Arc (previously Kursk), as you can get to a position near the A point where the road the enemy will use to the B point is visible. The lesson there is, try to get sight on high-traffic routes. As stated before, don’t stay in one place, have multiple spots which you can quickly reach due to your good top speed, and you will be a thorn in the enemies side.
Brawling/Ambushes
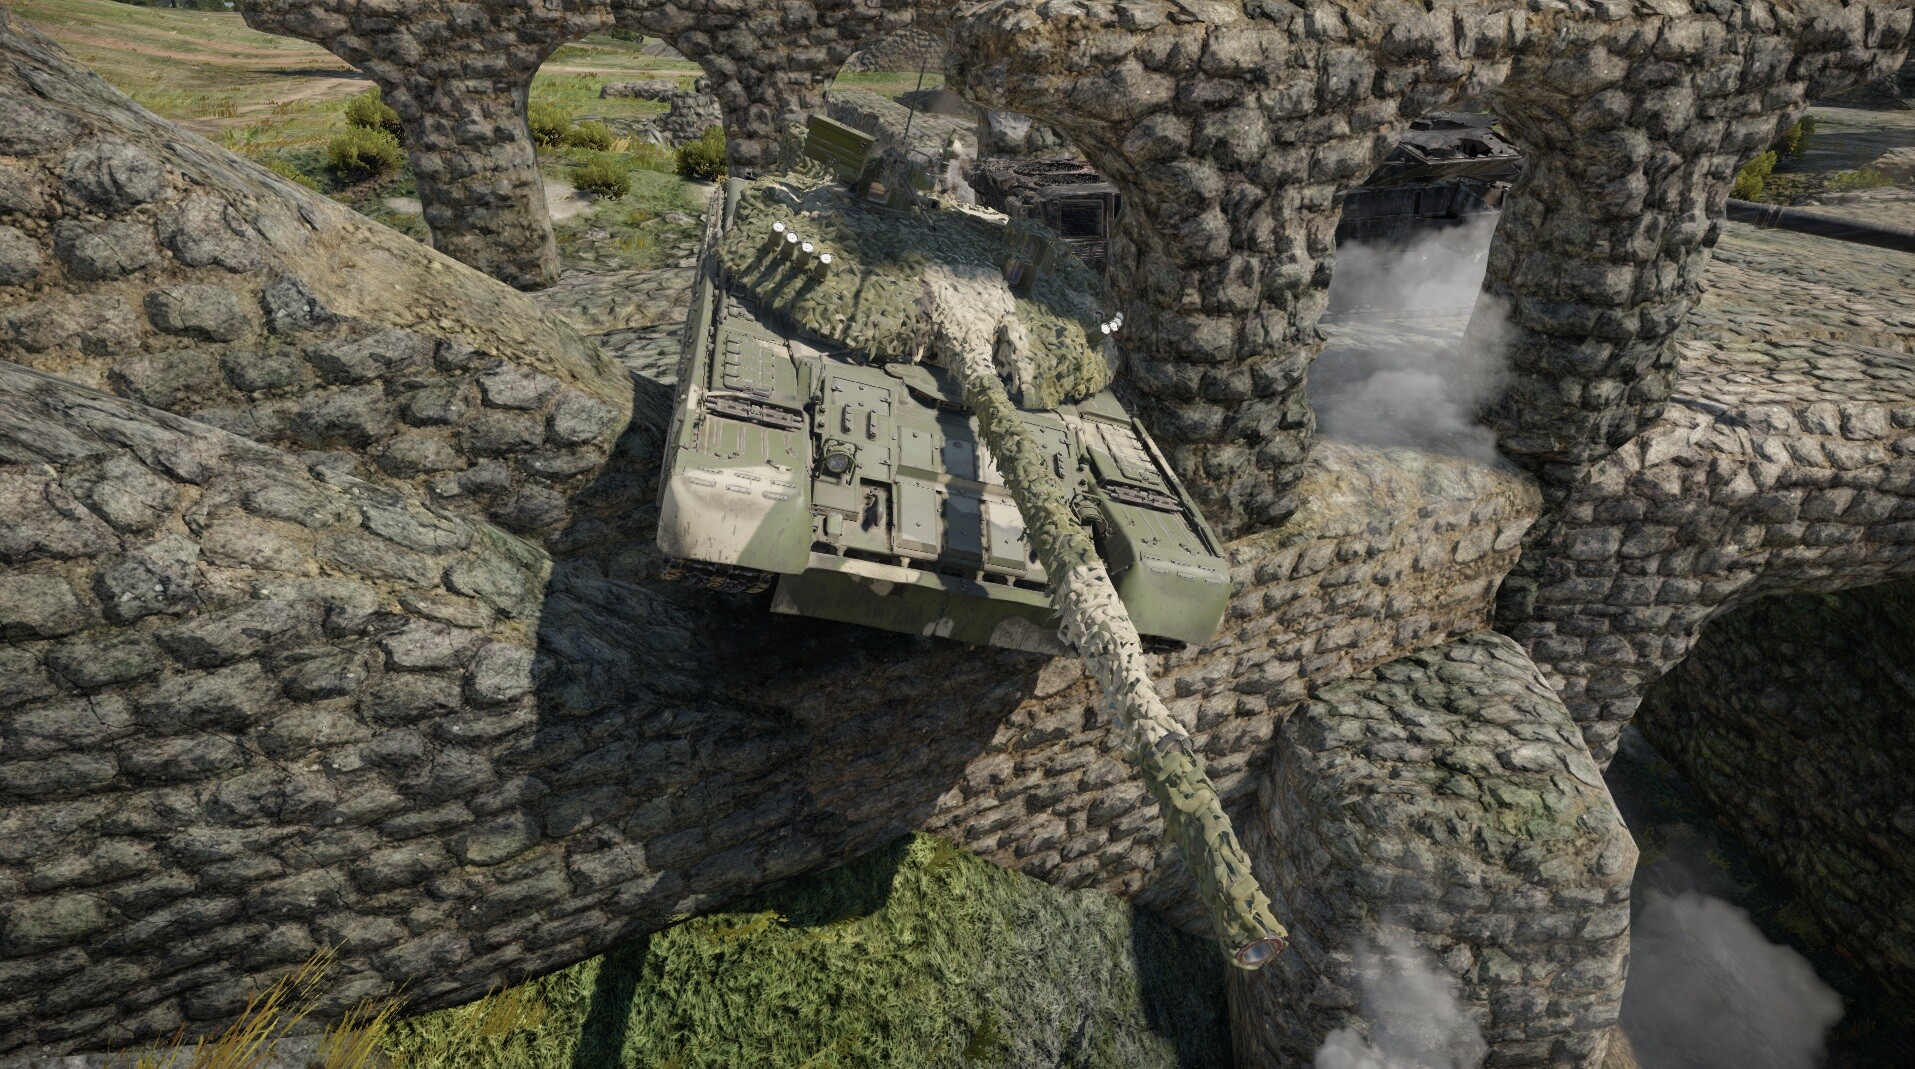
As seen in the image, for ambushes, you can easily get into a position in which, even with your limited gun depression, you can shoot many enemies. It might be hard to escape due to your reverse speed, so keep that in mind. This can easily catch the enemy off guard. Brawling may be slightly harder, while you do have good armour, Leopards, LOSATs and ATGMs can penetrate you frontally, while everyone else knows you weakspots as this is a very common tank to fight against. When utilised correctly in brawls, you can quickly rack up some easy kills.
Constant movement reduces the enemy’s chances to hit you. The less opportunities the enemy gets to shoot at you, the better. By either peeking or buzzing around them like an annoying midge, you can keep them off balance while your teammates move in for the kill. This will require co-ordination, so you better hope your team knows what they’re doing. This is a tactic best used in urban maps, like Sun City, Alaska, or Seversk-13.
Flanking
This is an easy one — stick to cover, and hope that the enemy does not have the same idea. Try to stay out of open areas and unseen by scout drones or aircraft, and if all goes well, you should be rewarded with the vulnerable sides of a tank. Once you get a kill, move to a different position to prevent the enemy from seeing your location, and repeat.
Unfortunately, this is not the most effective idea, because you will face many experienced players who all want to be intelligent and try to strike where your team isn’t looking. Anyone can pull off a flank, you’ve just got to hope the enemy doesn’t have the same idea.
Conclusion
This vehicle has available to it a wide range of munitions. This allows it to excel at all ranges, whether at point blank or from kilometres away. It is a jack of all trades, master of none, however that does not stop it from doing well in what you want it to. Whether to fill out a lineup or just for the grind, it’s a great vehicle, so try it out!
I hope this guide helped!

Credits
Thanks to Dozer and Inceptor57 for helping me edit this article!


