
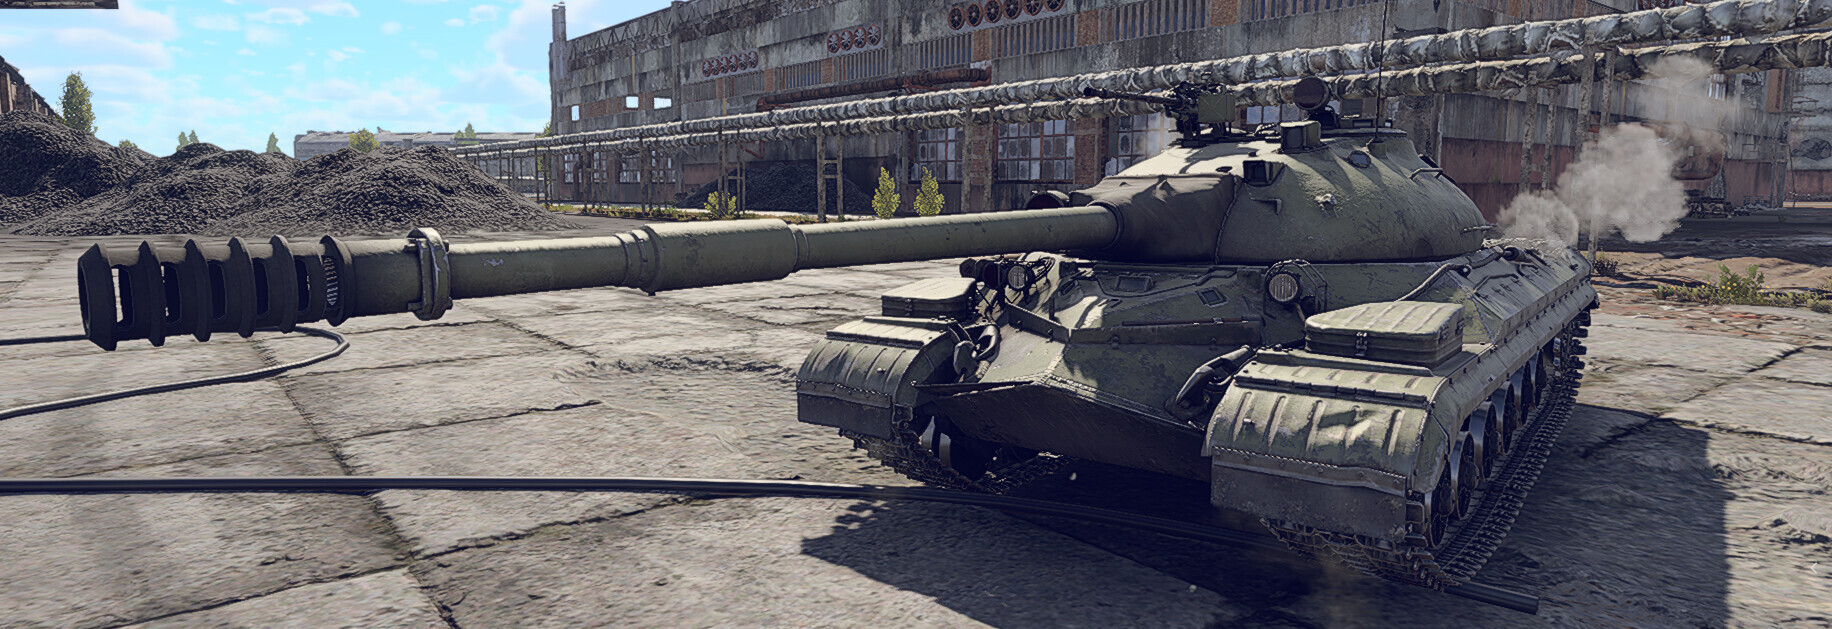
The T-10M was the final variant of the T-10 series of tanks and the last Soviet heavy tank, which was adopted in 1961. It was a overhaul of the of the series incorporating some of the most advanced features at the time such as the T2S-29-14 “Udar” fire control system featuring a automatic lead calculator, which made it a very formidable enemy.

| Pros: | Cons: |
| Superb turret armour and good hull protection against kinetic rounds. | Armour protection is very lacking against chemical energy rounds, some APDS rounds and APFSDS. |
| Devastating 122mm cannon with a 2-axis stabliser and great turret rotation speed. | A rather lenghty reload. |
| Crew layout makes taking out the tank’s crew in a single shot quite hard. | Ammo placement makes it dangerous to take a lot of rounds. |
| Good mobility for a heavy tank. | Bad gun depression. |
| Two 14.5mm KPVT machineguns. | Due to the pike nose armour, the tank can’t be angled effectively. |
Hull armour protection
The T-10M’s pike nose armour protection will be well known to players which used the IS-3, the further you go from the middle the more protection will the UFP give. The upper front plate has excelent protection against full calibre kinetic energy projectiles, such as M358 round found on the M103 heavy tank. This makes the T-10M a very potent tank in downtiers. The pike nose UFP will also give good protection against some subcalibre APDS rounds (there are some which can easily penetrate it). However aside from all of those positives, there are quite a lot of negatives in the form of weakspots. The driver’s hatch and the LFP are some of the major ones. The armour can’t also effectively protect against chemical energy, some APDS and most APFSDS rounds, it is also impossible to angle the armour for greater protection (you always need to remember the “Front Towards Enemy” rule).
Turret armour protection
Moving on to the turret, the protection here is much better than the hull. Most of the rounds from the tanks which you will often meet can’t easily penetrate the turret front aside from some weakspots such as the upper part of it and the gunner’s sight, however non explosive AP rounds won’t cause critical damage after penetrating for the first time. One big upside of the turret is that it can protect against many early APFSDS rounds from the front (shots from the sides will penetrate without issues.)
Survivability
The T-10M has quite good survivability thanks to the crew layout. Using non explosive AP rounds it is very hard to knock out the crew in a single shot. APHE rounds mostly won’t even penetrate your armour. The biggest issue however is the ammo layout.
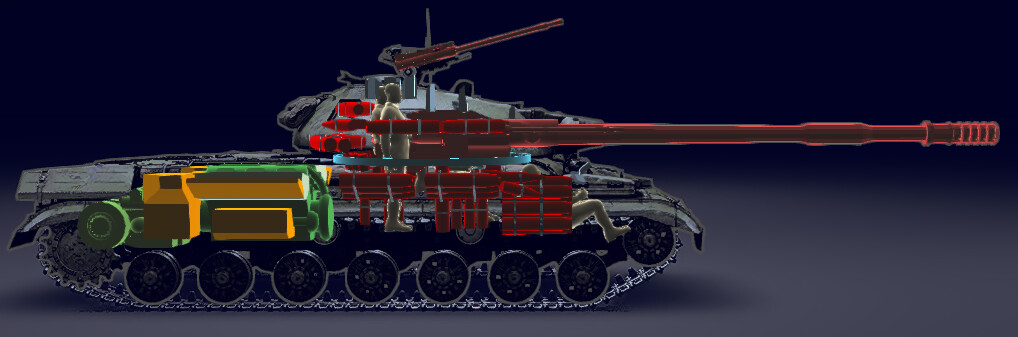
The hull is littered with ammo causing pretty much any shot that penetrates to cause a ammo explosion. It is recommended to take at most 12 rounds to reduce the risk of that happening (after you get the hang of shell ballistics you should reduce that amount to 10 rounds). Hits from non explosive rounds to the side have a good chance to not destroy the tank if you take the optimal amount of rounds. You also get ESS and smoke barrels to conceal your or allies.
Mobility
T-10M has excellent mobility for a heavy tank. Thanks to a good HP/t ratio of 15, it has similar mobility to the T-55A, but also has greater reverse speed of 10km/h compared to the 8km/h of the T-55A. Thanks to this, it can keep up with medium tanks and engage enemies early or make it to good spots quickly.
Firepower

The T-10M has been equiped with the M62-T2S 122mm cannon. This makes it comparable to the earlier IS series tanks, however now it has access to more advanced rounds.Compared to other IS series tanks it also has greatly increased turret rotation speed and a faster reload.
- BR-472: this round is great against softer targets and in downtiers, however it is important to know weakspots to use it effectively. Compared to earlier IS series rounds it has greater penetration, but gets less explosive filler. Any BR-472 shell that penetrates will deal fatal damage to a enemy tank. It can work great by itself but it is good to take some APDS alongside it.
- 3BM-11: this round will be a good choice for most types of targets. Thanks to the huge amount of penetration and decent angled performance it will be able to deal with even the toughest tanks, though the post penetration damage is lacking compared to full calibre AP rounds.
- 3BK9: this round is a sidegrade to 3BM-11. Offering low damage with very good penetration over great distances, but can be easily defeated by ERA and composite armour. Once researched it should be used instead of the HE round as it can still overpressure soft targets.
As a bonus, the T-10M has been equiped with two 14.5mm KPVT machineguns (one in a pintle mount operated by the loader and the other as a gunner’s coax.)


Notable enemies
This section will cover some of the notable enemies which can be quite dangerous and how to counter them frontally.
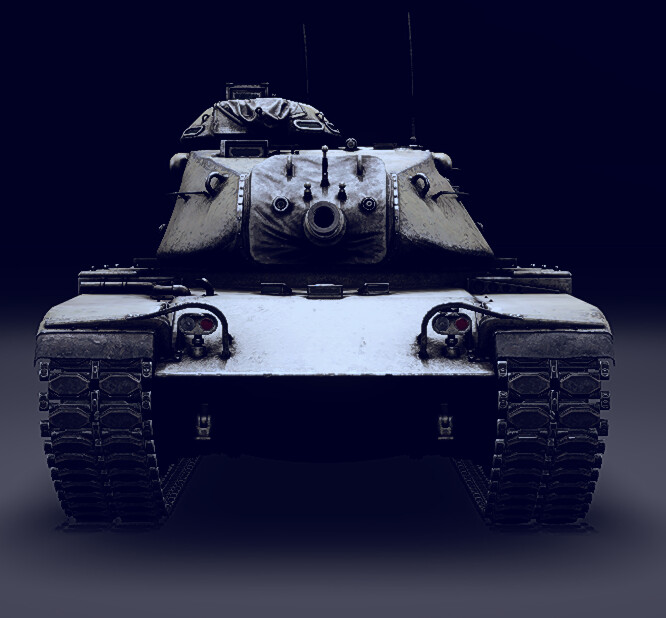
M48A2 G A2/Leopard A1A1

The M48A2 G A2 can be quite a dangerous enemy. The DM23 APFSDS and DM-12 HEAT-FS rounds which it has access to can easily penetrate the UFP of the T-10M. If you encounter it while using BR-472 you should aim for either the LFP or turret cheeks close to the gun mantlet. You can also aim for the cupola (although you need to aim very low at it to make the round fuse inside the tank, instead of outside). While using 3BM-11 you can aim at the right side of the hull to detonate the ammunition (this applies to BR-472 but you need to aim for the LFP). It is also recommended to stay hull down to not expose your hull.

The Leopard A1A1 uses the same ammunition as the M48A2 making it a very dangerous enemy to the T-10M. Due to its weak armour you aim for any part with BR-472/3BM-11 to penetrate it. With 3BM-11 you should shoot the right side of the LFP to detonate the ammo or shoot the left side to knockout 3 crew members to destroy the vehicle. Same as with the M48A2 you should not expose your hull.
Chieftain Mk.3/Mk.5
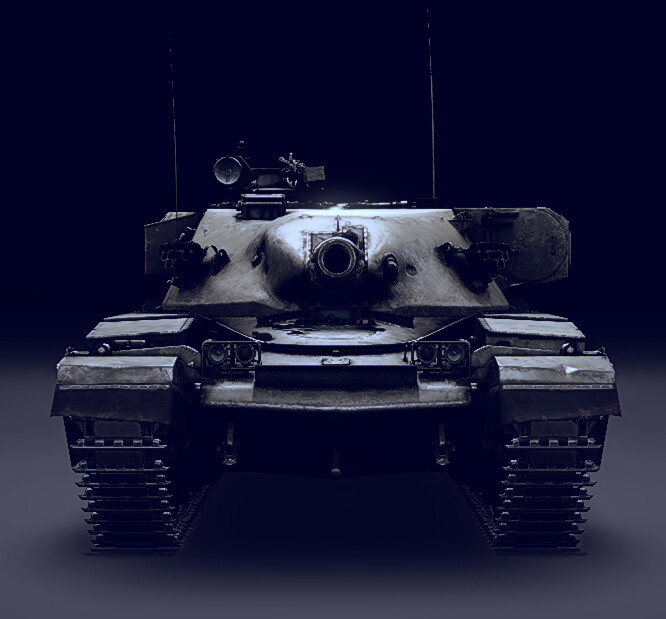
The Chieftain series have very powerful rounds which can easily penetrate your UFP and LFP. While using BR-472 you can shoot the LFP to take it out, you can also aim for the gunner’s sight to destroy it. While using 3BM-11 you should aim for the right turret cheek (don’t aim too far to the right because then the round won’t penetrate) or the middle of the hull (slightly to the left) to knockout 3 crew members.
M60A1
The M60A1 can be a tough nut to crack. It has access to simmilar rounds that the M48A2 G uses (however it doesn't get access to APFSDS) so you should stay hull down while fighting it. When using BR-472 the only good way to take it out is to aim for the middle of the cupola or the turret ring, however when using 3BM-11 destroying the tank becomes much easier. You can now fully penetrate the UFP and LFP allowing you to shoot the right side and detonate the ammunition. When the enemy is hull down you can shoot the right part of turret cheek near the mantlet to cause an ammo explosion (don’t aim too far to the right because you won’t be able to penetrate).
Summary
Thanks to the new ammunition, greater moblity and better reload speeds compared to the IS series it can now be used more aggresively compared to its ancestors making it a very potent breakthrough tank in both uptiers, and downtiers.

