Difference between revisions of "RN Raimondo Montecuccoli"
(→Survivability and armour) (Tag: Visual edit) |
(Edits) |
||
| Line 10: | Line 10: | ||
=== Survivability and armour === | === Survivability and armour === | ||
<!-- ''Talk about the vehicle's armour. Note the most well-defended and most vulnerable zones, e.g. the ammo magazine. Evaluate the composition of components and assemblies responsible for movement and manoeuvrability. Evaluate the survivability of the primary and secondary armaments separately. Don't forget to mention the size of the crew, which plays an important role in fleet mechanics. Save tips on preserving survivability for the "Usage in battles" section. If necessary, use a graphical template to show the most well-protected or most vulnerable points in the armour.'' --> | <!-- ''Talk about the vehicle's armour. Note the most well-defended and most vulnerable zones, e.g. the ammo magazine. Evaluate the composition of components and assemblies responsible for movement and manoeuvrability. Evaluate the survivability of the primary and secondary armaments separately. Don't forget to mention the size of the crew, which plays an important role in fleet mechanics. Save tips on preserving survivability for the "Usage in battles" section. If necessary, use a graphical template to show the most well-protected or most vulnerable points in the armour.'' --> | ||
| − | With 578 crew members, and an armour belt of 60 mm, the Raimondo Montecuccoli boasts one of the most reliable hulls for taking damage from the front. | + | With 578 crew members, and an armour belt of 60 mm, the Raimondo Montecuccoli boasts one of the most reliable hulls for taking damage from the front. 25 mm of steel armour also surrounds the ship alongside the forward fuel tanks, allow the ship to take prolonged fire while leaving its crew and modules protected. However when approached from the side the decent 60 mm armour belt turns into a downside, as it is easily penetrated by lower ranked vessels such as the [[Sumner (DD-692)|Sumner]]. The rear ammo rack is particularly easy to destroy because of its location at the water line, and the lack of modules around it to absorb damage. |
=== Mobility === | === Mobility === | ||
<!-- ''Write about the ship's mobility. Evaluate its power and manoeuvrability, rudder rerouting speed, stopping speed at full tilt, with its maximum forward and reverse speed.'' --> | <!-- ''Write about the ship's mobility. Evaluate its power and manoeuvrability, rudder rerouting speed, stopping speed at full tilt, with its maximum forward and reverse speed.'' --> | ||
| − | |||
{{NavalMobility}} | {{NavalMobility}} | ||
| + | |||
| + | The Montecuccoli is tied with the Attilio Regolo as the fastest cruiser at 72 km/h forward, while also boasting a high reverse speed of 32 km/h, while the Regolo can only reach a top speed of 26 km/h in reverse. This high speed allows the Montecuccoli to dominate maps where it can push capture points or switch objectives quickly when needed. | ||
== Armament == | == Armament == | ||
| Line 23: | Line 24: | ||
{{main|152/53 mm O.T.O. Mod.1929 (152 mm)}} | {{main|152/53 mm O.T.O. Mod.1929 (152 mm)}} | ||
| − | The Montecuccoli is equipped with | + | The Montecuccoli is equipped with 8 dual-mounted 152/53 mm O.T.O Mod.1929 cannons. This armament is divided between both sides of the ship allowing for good firing angles. The best round for the ship is the APHEBC Palla with a penetration of 282 mm at 1,000 m and an explosive mass of 800 g. This shell allows the Montecuccoli to reliably frontally penetrate other ships' bows to damage modules and ammunition racks when being pushed. As backup rounds the ship also carries two HE rounds labelled HE Dirompente with 29 mm of penetration at any range or angle with an explosive mass of 2.39 kg, but the HE-TF round is also given a time fuse allowing it to be more versatile. Because of the precarious ammunition rack location along the waterline, it is recommended to bring around 500 rounds of APHEBC for the primary round, and around 250 rounds of HE-TF to be used against smaller boats and aircraft. |
=== Secondary armament === | === Secondary armament === | ||
| Line 29: | Line 30: | ||
{{main|100 mm/47 O.T.O. Mod. 1928 (100 mm)}} | {{main|100 mm/47 O.T.O. Mod. 1928 (100 mm)}} | ||
| − | Equipped with | + | Equipped with 6 dual-mounted 100 mm/47 O.T.O Mod. 1928 cannons, the Montecuccoli is blessed with reliable secondary armament to be used when the primary armament is disabled. When used aggressively, it is suggested to load primarily the APHE round because of its 150 mm of penetration at 100 m, and its 820 g explosive mass. This shell is reliable to disable the main turrets on other cruisers. However the HE-TF Contro-aerea is also useful as an anti-aircraft shell, as well as using its 17 mm of penetration at any angle to deliver 1.3 kg of explosive mass to smaller PT boats. |
=== Anti-aircraft armament === | === Anti-aircraft armament === | ||
<!-- ''An important part of the ship's armament responsible for air defence. Anti-aircraft armament is defined by the weapon chosen with the control <code>Select anti-aircraft weapons</code>. Talk about the ship's anti-air cannons and machine guns, the number of guns and their positions, their effective range, and about their overall effectiveness – including against surface targets. If there are no anti-aircraft armaments, remove this section.'' --> | <!-- ''An important part of the ship's armament responsible for air defence. Anti-aircraft armament is defined by the weapon chosen with the control <code>Select anti-aircraft weapons</code>. Talk about the ship's anti-air cannons and machine guns, the number of guns and their positions, their effective range, and about their overall effectiveness – including against surface targets. If there are no anti-aircraft armaments, remove this section.'' --> | ||
| − | {{main | + | {{main|37 mm/54 Breda Mod.32 (37 mm)|20 mm/70 Oerlikon Mk.II (20 mm)}} |
| − | The Montecuccoli is adequately protected from aircraft by | + | The Montecuccoli is adequately protected from aircraft by 8 dual-mounted 37 mm/54 Breda Mod.32 autocannons, and 10 single-mounted 20 mm/70 Oerlikon Mk.2 autocannon. In conjunction with the secondary armament, the AI will have no trouble removing smaller targets during a battle leaving the player safe to engage larger targets with the primary armament. |
=== Torpedo armament === | === Torpedo armament === | ||
| Line 41: | Line 42: | ||
{{main|S.I. 270/533,4X7,2 Tipo M (533 mm)}} | {{main|S.I. 270/533,4X7,2 Tipo M (533 mm)}} | ||
| − | Graced with | + | Graced with 533 mm steam-turbined S.I. 270/533,4X7,2 Tipo M torpedoes in dual mounts along the sides of the main funnel, the Montecuccoli can achieve excellent firing angles for these torpedoes while also leaving them protected while charging an enemy. With torpedo mode enabled, the torpedoes travel 12 km with a speed of 56 km/h, while disabled the torpedo travels 4 km at a speed of 93 km/h. Because of the low amount of torpedoes (4 total), it is recommended to disable the torpedo mode as it allows the ship to more reliably aim the torpedoes while brawling. |
== Usage in battles == | == Usage in battles == | ||
<!-- ''Describe the technique of using this ship, the characteristics of her use in a team and tips on strategy. Abstain from writing an entire guide – don't try to provide a single point of view, but give the reader food for thought. Talk about the most dangerous opponents for this vehicle and provide recommendations on fighting them. If necessary, note the specifics of playing with this vehicle in various modes (AB, RB, SB).'' --> | <!-- ''Describe the technique of using this ship, the characteristics of her use in a team and tips on strategy. Abstain from writing an entire guide – don't try to provide a single point of view, but give the reader food for thought. Talk about the most dangerous opponents for this vehicle and provide recommendations on fighting them. If necessary, note the specifics of playing with this vehicle in various modes (AB, RB, SB).'' --> | ||
| − | The Raimondo Montecuccoli is second only to the Admiral Graf Spee in its ability to absorb damage using its | + | The Raimondo Montecuccoli is second only to the Admiral Graf Spee in its ability to absorb damage using its bow's large size, and lack of modules, allowing the ship to safely charge objectives or enemies. In addition to its high speed and excellent firing angles on the 4 torpedoes, it is best recommended to point the bow of the ship towards an enemy and close into the 4 km range of the torpedoes to get reliable kills on other cruisers that can't react to the positioning the Montecuccoli can achieve. This strategy works best against ships such as the [[Admiral Hipper]], and [[Sverdlov]]. These ships lack the firepower to reliably disable the Montecuccoli, or adequately avoid the excellent torpedo spread the Montecuccoli can use. While this is the most enjoyable usage of the Montecuccoli, it isn't reliable for sustained gameplay as the ship can easily be flanked and destroyed after reaching the enemy lines. Ships such as the Admiral Graf Spee, Brooklyn, and Mogami can also counter this playstyle by using their excellent guns to penetrate the excellent bow protection to destroy the Montecuccoli. An alternative usage is as a stationary sniper after reaching an unexpected location by using its high speed. This playstyle eliminates the flanking threat, but limits the effectiveness of the guns and torpedoes. |
=== Modules === | === Modules === | ||
| Line 52: | Line 53: | ||
! Seakeeping | ! Seakeeping | ||
! colspan="2" | Unsinkability | ! colspan="2" | Unsinkability | ||
| − | ! colspan=" | + | ! colspan="3" | Firepower |
| − | |||
|- | |- | ||
| I | | I | ||
| − | |Dry-Docking | + | | Dry-Docking |
| − | |Tool Set | + | | Tool Set |
| | | | ||
| | | | ||
| | | | ||
| − | |Anti-Air Armament Targeting | + | | Anti-Air Armament Targeting |
|- | |- | ||
| II | | II | ||
| − | |Rudder Replacement | + | | Rudder Replacement |
| − | |Fire Protection System | + | | Fire Protection System |
| − | |Smokescreen | + | | Smokescreen |
| − | |152 mm APHEBC Palla | + | | 152 mm APHEBC Palla |
| − | |100 mm APHE Perforante | + | | 100 mm APHE Perforante |
| − | |Auxiliary Armament Targeting | + | | Auxiliary Armament Targeting |
|- | |- | ||
| III | | III | ||
| − | |Propeller Replacement | + | | Propeller Replacement |
| − | |Shrapnel Protection | + | | Shrapnel Protection |
| − | |Ventilation | + | | Ventilation |
| − | |Improved Rangefinder | + | | Improved Rangefinder |
| − | |100 mm HE- | + | | 100 mm HE-TF Contro-aerea |
| − | |Primary Armament Targeting | + | | Primary Armament Targeting |
|- | |- | ||
| IV | | IV | ||
| − | |Engine Maintenance | + | | Engine Maintenance |
| − | |New Pumps | + | | New Pumps |
| − | |Ammo Wetting | + | | Ammo Wetting |
| − | |152 mm HE Dirompente | + | | 152 mm HE Dirompente |
| − | |Torpedo Mode | + | | Torpedo Mode |
| | | | ||
|- | |- | ||
| Line 97: | Line 97: | ||
* Excellent forward protection | * Excellent forward protection | ||
* Excellent torpedo firing angles | * Excellent torpedo firing angles | ||
| − | * Effective primary armament | + | * Effective primary armament |
| − | |||
| − | |||
'''Cons:''' | '''Cons:''' | ||
* Inadequate ammo protection | * Inadequate ammo protection | ||
| − | * Limited | + | * Limited torpedo quantity |
* Inadequate torpedo range | * Inadequate torpedo range | ||
| − | |||
| − | |||
== History == | == History == | ||
<!-- ''Describe the history of the creation and combat usage of the ship in more detail than in the introduction. If the historical reference turns out to be too long, take it to a separate article, taking a link to the article about the ship and adding a block "/History" (example: <nowiki>https://wiki.warthunder.com/(Ship-name)/History</nowiki>) and add a link to it here using the <code>main</code> template. Be sure to reference text and sources by using <code><nowiki><ref></ref></nowiki></code>, as well as adding them at the end of the article with <code><nowiki><references /></nowiki></code>. This section may also include the ship's dev blog entry (if applicable) and the in-game encyclopedia description (under <code><nowiki>=== In-game description ===</nowiki></code>, also if applicable).'' --> | <!-- ''Describe the history of the creation and combat usage of the ship in more detail than in the introduction. If the historical reference turns out to be too long, take it to a separate article, taking a link to the article about the ship and adding a block "/History" (example: <nowiki>https://wiki.warthunder.com/(Ship-name)/History</nowiki>) and add a link to it here using the <code>main</code> template. Be sure to reference text and sources by using <code><nowiki><ref></ref></nowiki></code>, as well as adding them at the end of the article with <code><nowiki><references /></nowiki></code>. This section may also include the ship's dev blog entry (if applicable) and the in-game encyclopedia description (under <code><nowiki>=== In-game description ===</nowiki></code>, also if applicable).'' --> | ||
| − | The Raimondo Montecuccoli was designed in the third group of Condottieri-class light cruisers by Ansaldo, and Genoa. Named after the 17th century Italian general Raimondo Montecuccoli, the cruiser was involved in battles such as the | + | The Raimondo Montecuccoli was designed in the third group of Condottieri-class light cruisers by Ansaldo, and Genoa. Named after the 17th century Italian general Raimondo Montecuccoli, the cruiser was involved in battles such as the Battle of Punta Stilo, and convoy attacks during the Battle of Pantelleria. The ship eventually ended surviving the war and acting as a training cruiser until 1961. |
== Media == | == Media == | ||
| Line 122: | Line 118: | ||
* ''links to approximate analogues of other nations and research trees.'' --> | * ''links to approximate analogues of other nations and research trees.'' --> | ||
''Links to articles on the War Thunder Wiki that you think will be useful for the reader, for example:'' | ''Links to articles on the War Thunder Wiki that you think will be useful for the reader, for example:'' | ||
| − | |||
* ''reference to the series of the ship;'' | * ''reference to the series of the ship;'' | ||
* ''links to approximate analogues of other nations and research trees.'' | * ''links to approximate analogues of other nations and research trees.'' | ||
| Line 132: | Line 127: | ||
* ''other literature.'' --> | * ''other literature.'' --> | ||
''Paste links to sources and external resources, such as:'' | ''Paste links to sources and external resources, such as:'' | ||
| − | |||
* ''topic on the official game forum;'' | * ''topic on the official game forum;'' | ||
* ''encyclopedia page on the ship;'' | * ''encyclopedia page on the ship;'' | ||
Revision as of 09:47, 25 June 2020
Contents
Description

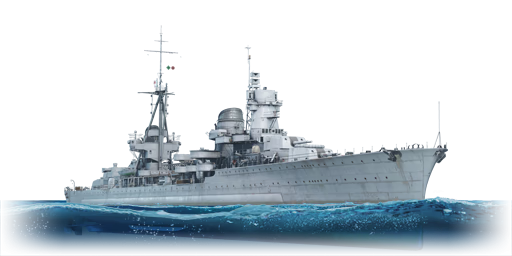
The Raimondo Montecuccoli-class, RN Raimondo Montecuccoli, 1943 is a rank IV Italian light cruiser
with a battle rating of 5.3 (AB) and 5.7 (RB/SB). It was introduced in Update "Starfighters".
General info
Survivability and armour
With 578 crew members, and an armour belt of 60 mm, the Raimondo Montecuccoli boasts one of the most reliable hulls for taking damage from the front. 25 mm of steel armour also surrounds the ship alongside the forward fuel tanks, allow the ship to take prolonged fire while leaving its crew and modules protected. However when approached from the side the decent 60 mm armour belt turns into a downside, as it is easily penetrated by lower ranked vessels such as the Sumner. The rear ammo rack is particularly easy to destroy because of its location at the water line, and the lack of modules around it to absorb damage.
Mobility
| Mobility Characteristics | |||
|---|---|---|---|
| Game Mode | Upgrade Status | Maximum Speed (km/h) | |
| Forward | Reverse | ||
| AB | |||
| Upgraded | 84 | 38 | |
| RB/SB | |||
| Upgraded | 72 | 32 | |
The Montecuccoli is tied with the Attilio Regolo as the fastest cruiser at 72 km/h forward, while also boasting a high reverse speed of 32 km/h, while the Regolo can only reach a top speed of 26 km/h in reverse. This high speed allows the Montecuccoli to dominate maps where it can push capture points or switch objectives quickly when needed.
Armament
Primary armament
The Montecuccoli is equipped with 8 dual-mounted 152/53 mm O.T.O Mod.1929 cannons. This armament is divided between both sides of the ship allowing for good firing angles. The best round for the ship is the APHEBC Palla with a penetration of 282 mm at 1,000 m and an explosive mass of 800 g. This shell allows the Montecuccoli to reliably frontally penetrate other ships' bows to damage modules and ammunition racks when being pushed. As backup rounds the ship also carries two HE rounds labelled HE Dirompente with 29 mm of penetration at any range or angle with an explosive mass of 2.39 kg, but the HE-TF round is also given a time fuse allowing it to be more versatile. Because of the precarious ammunition rack location along the waterline, it is recommended to bring around 500 rounds of APHEBC for the primary round, and around 250 rounds of HE-TF to be used against smaller boats and aircraft.
Secondary armament
Equipped with 6 dual-mounted 100 mm/47 O.T.O Mod. 1928 cannons, the Montecuccoli is blessed with reliable secondary armament to be used when the primary armament is disabled. When used aggressively, it is suggested to load primarily the APHE round because of its 150 mm of penetration at 100 m, and its 820 g explosive mass. This shell is reliable to disable the main turrets on other cruisers. However the HE-TF Contro-aerea is also useful as an anti-aircraft shell, as well as using its 17 mm of penetration at any angle to deliver 1.3 kg of explosive mass to smaller PT boats.
Anti-aircraft armament
The Montecuccoli is adequately protected from aircraft by 8 dual-mounted 37 mm/54 Breda Mod.32 autocannons, and 10 single-mounted 20 mm/70 Oerlikon Mk.2 autocannon. In conjunction with the secondary armament, the AI will have no trouble removing smaller targets during a battle leaving the player safe to engage larger targets with the primary armament.
Torpedo armament
Graced with 533 mm steam-turbined S.I. 270/533,4X7,2 Tipo M torpedoes in dual mounts along the sides of the main funnel, the Montecuccoli can achieve excellent firing angles for these torpedoes while also leaving them protected while charging an enemy. With torpedo mode enabled, the torpedoes travel 12 km with a speed of 56 km/h, while disabled the torpedo travels 4 km at a speed of 93 km/h. Because of the low amount of torpedoes (4 total), it is recommended to disable the torpedo mode as it allows the ship to more reliably aim the torpedoes while brawling.
Usage in battles
The Raimondo Montecuccoli is second only to the Admiral Graf Spee in its ability to absorb damage using its bow's large size, and lack of modules, allowing the ship to safely charge objectives or enemies. In addition to its high speed and excellent firing angles on the 4 torpedoes, it is best recommended to point the bow of the ship towards an enemy and close into the 4 km range of the torpedoes to get reliable kills on other cruisers that can't react to the positioning the Montecuccoli can achieve. This strategy works best against ships such as the Admiral Hipper, and Sverdlov. These ships lack the firepower to reliably disable the Montecuccoli, or adequately avoid the excellent torpedo spread the Montecuccoli can use. While this is the most enjoyable usage of the Montecuccoli, it isn't reliable for sustained gameplay as the ship can easily be flanked and destroyed after reaching the enemy lines. Ships such as the Admiral Graf Spee, Brooklyn, and Mogami can also counter this playstyle by using their excellent guns to penetrate the excellent bow protection to destroy the Montecuccoli. An alternative usage is as a stationary sniper after reaching an unexpected location by using its high speed. This playstyle eliminates the flanking threat, but limits the effectiveness of the guns and torpedoes.
Modules
| Tier | Seakeeping | Unsinkability | Firepower | |||
|---|---|---|---|---|---|---|
| I | Dry-Docking | Tool Set | Anti-Air Armament Targeting | |||
| II | Rudder Replacement | Fire Protection System | Smokescreen | 152 mm APHEBC Palla | 100 mm APHE Perforante | Auxiliary Armament Targeting |
| III | Propeller Replacement | Shrapnel Protection | Ventilation | Improved Rangefinder | 100 mm HE-TF Contro-aerea | Primary Armament Targeting |
| IV | Engine Maintenance | New Pumps | Ammo Wetting | 152 mm HE Dirompente | Torpedo Mode | |
Pros and cons
Pros:
- Highest top speed for a cruiser
- Excellent forward protection
- Excellent torpedo firing angles
- Effective primary armament
Cons:
- Inadequate ammo protection
- Limited torpedo quantity
- Inadequate torpedo range
History
The Raimondo Montecuccoli was designed in the third group of Condottieri-class light cruisers by Ansaldo, and Genoa. Named after the 17th century Italian general Raimondo Montecuccoli, the cruiser was involved in battles such as the Battle of Punta Stilo, and convoy attacks during the Battle of Pantelleria. The ship eventually ended surviving the war and acting as a training cruiser until 1961.
Media
Excellent additions to the article would be video guides, screenshots from the game, and photos.
See also
Links to articles on the War Thunder Wiki that you think will be useful for the reader, for example:
- reference to the series of the ship;
- links to approximate analogues of other nations and research trees.
External links
Paste links to sources and external resources, such as:
- topic on the official game forum;
- encyclopedia page on the ship;
- other literature.
| Italy light cruisers | |
|---|---|
| Condottieri-class | RN Bartolomeo Colleoni · RN Raimondo Montecuccoli · RN Eugenio di Savoia · RN Duca degli Abruzzi |
| Capitani Romani-class | RN Attilio Regolo |
| Etna-class | RN Etna |
