|
|
| (15 intermediate revisions by 6 users not shown) |
| Line 1: |
Line 1: |
| | + | {{Specs-Card|code=germ_frigate_koln}} |
| | {{About | | {{About |
| | | about = German frigate '''{{PAGENAME}}''' | | | about = German frigate '''{{PAGENAME}}''' |
| | | usage = the light cruiser | | | usage = the light cruiser |
| | | link = Köln | | | link = Köln |
| − | }}
| |
| − | {{Specs-Card
| |
| − | |code=germ_frigate_koln
| |
| − | |images={{Specs-Card-Image|GarageImage_{{PAGENAME}}.jpg}}
| |
| | }} | | }} |
| | | | |
| | == Description == | | == Description == |
| | <!-- ''In the first part of the description, cover the history of the ship's creation and military application. In the second part, tell the reader about using this ship in the game. Add a screenshot: if a beginner player has a hard time remembering vehicles by name, a picture will help them identify the ship in question.'' --> | | <!-- ''In the first part of the description, cover the history of the ship's creation and military application. In the second part, tell the reader about using this ship in the game. Add a screenshot: if a beginner player has a hard time remembering vehicles by name, a picture will help them identify the ship in question.'' --> |
| | + | [[File:GarageImage_{{PAGENAME}}.jpg|420px|thumb|left]] |
| | + | {{Break}} |
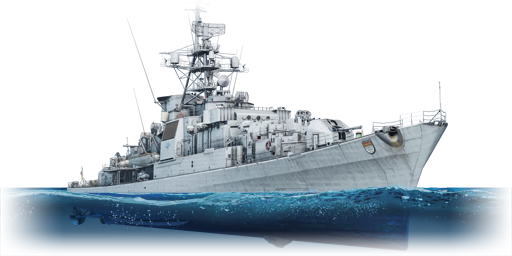
| | The '''{{Specs|name}}''' is a rank {{Specs|rank}} German frigate {{Battle-rating}}. It was introduced in [[Update 1.97 "Viking Fury"]]. | | The '''{{Specs|name}}''' is a rank {{Specs|rank}} German frigate {{Battle-rating}}. It was introduced in [[Update 1.97 "Viking Fury"]]. |
| | | | |
| | == General info == | | == General info == |
| | === Survivability and armour === | | === Survivability and armour === |
| − | {{Specs-Fleet-Armour}}
| + | Low hit resistance against Destroyers, etc. Expect to be sunk after few salvos. Fair hit resistance to small boats. |
| − | <!-- ''Talk about the vehicle's armour. Note the most well-defended and most vulnerable zones, e.g. the ammo magazine. Evaluate the composition of components and assemblies responsible for movement and manoeuvrability. Evaluate the survivability of the primary and secondary armaments separately. Don't forget to mention the size of the crew, which plays an important role in fleet mechanics. Save tips on preserving survivability for the "Usage in battles" section. If necessary, use a graphical template to show the most well-protected or most vulnerable points in the armour.'' -->
| |
| − | Overall, the survivability of the frigate is not comparable to cruisers or destroyers but is not lacklustre either. As a modern frigate, it lacks armour which is compensated by speed and firepower. Despite not being the most well-armoured frigate in the game compared to vessels at the battle rating, it is comparable to other Cold War vessels firepower wise and mobility wise, even comparable with early cruisers and destroyers. The number of crew members, despite being relatively high, are not sufficient if head-on engagements are planned, for this reason the frigate should not be used in the frontlines as it will be often destroyed with couple hits of enemy ships, specially those with high calibre weaponry.
| |
| | | | |
| − | The armour is sufficient enough to stop low calibre munitions at some extent. While not invincible, it is able to withstand even 105 mm shells with decent amount of casualties and damage. Do not rely on the armour unless enemy threat has firepower lower than 76 mm and even then, autocannons like the 40 mm Bofors mounted on USA and British ships will be able to cause critical damage if enough shots are fired.
| + | ''Talk about the vehicle's armour. Note the most well-defended and most vulnerable zones, e.g. the ammo magazine. Evaluate the composition of components and assemblies responsible for movement and manoeuvrability. Evaluate the survivability of the primary and secondary armaments separately. Don't forget to mention the size of the crew, which plays an important role in fleet mechanics. Save tips on preserving survivability for the "Usage in battles" section. If necessary, use a graphical template to show the most well-protected or most vulnerable points in the armour.'' |
| | | | |
| | === Mobility === | | === Mobility === |
| − | {{Specs-Fleet-Mobility}}
| + | ''Smaller than a destroyer but about as maneuverable.'' |
| − | <!-- ''Write about the ship's mobility. Evaluate its power and manoeuvrability, rudder rerouting speed, stopping speed at full tilt, with its maximum forward and reverse speed.'' -->
| |
| − | Mobility wise, it is one of the fastest frigates/destroyers seen in game as for now despite the ship displacement and size. As a "modern" frigate, it completely changes the doctrine of previous destroyers and frigates, meaning it compensates armour with speed. It is able to reach speeds above 40 knots (~75 km/h), making it terrifyingly fast for a ship of its size and firepower, almost on par with lighter frigates and sub-chasers ([[Albatros]], [[SKR-7]], etc.). It is more than capable of reaching the battlefield faster than other destroyers and will outrun cruisers and battleships. When it comes to manoeuvrability, the F220 leaves nothing to desire. It is able to do tight turns (relatively tight turns but with greater speed than other frigates) as well as accelerate and decelerate quickly. Thanks to the relatively small size of the ship, it is able to stay on shallow waters compared to other frigates and destroyers which are likely to get stuck on rocks and any other obstacles.
| |
| | | | |
| − | {{NavalMobility}}
| + | ''Write about the ship's mobility. Evaluate its power and manoeuvrability, rudder rerouting speed, stopping speed at full tilt, with its maximum forward and reverse speed.'' |
| − | | |
| − | === Modifications and economy ===
| |
| − | {{Specs-Economy}}
| |
| | | | |
| | == Armament == | | == Armament == |
| − | {{Specs-Fleet-Armaments}}
| |
| | === Primary armament === | | === Primary armament === |
| − | {{Specs-Fleet-Primary}}
| |
| − | <!-- ''Provide information about the characteristics of the primary armament. Evaluate their efficacy in battle based on their reload speed, ballistics and the capacity of their shells. Add a link to the main article about the weapon: <code><nowiki>{{main|Weapon name (calibre)}}</nowiki></code>. Broadly describe the ammunition available for the primary armament, and provide recommendations on how to use it and which ammunition to choose.'' -->
| |
| | {{main|100 mm/55 MLE model 53 (100 mm)}} | | {{main|100 mm/55 MLE model 53 (100 mm)}} |
| | | | |
| − | The F220 is armed with 2 x 100 mm/55 MLE model 53 semi-automatic cannons divided into 2 turrets, one at the aft and one at the bow. They are capable of decimating enemy vessels in seconds, including heavy cruisers. The 100 mm cannons have access to 2 types of shells, HE and HE-VT. Both shells have the exactly same performance with the exception of the proximity fuse the HE-VT gets. It is recommended to carry HE-VT as there are no downsides to it. HE-VT are an extra when it comes to air defence. They will decimate any enemy plane with the proximity fuse but they are only recommended to be used when attacking low speed aircraft (like bombers) at long ranges (past 10 km) as the relative low fire rate (15 RPM) and targeting speed will cause issues engaging faster aircraft (fighters or even attackers). It should be noted the 100 mm can be used with the tracking radar.
| + | Two somewhat rapid firing single barrel turrets. Requires lots of hits to be effective against destroyers. Note that destroyers require few hits |
| | | | |
| − | {{:100 mm/55 MLE model 53 (100 mm)/Ammunition|100 mm OEA F1 HE, 100 mm OPF F4 PFHE}} | + | ''Provide information about the characteristics of the primary armament. Evaluate their efficacy in battle based on their reload speed, ballistics and the capacity of their shells. Add a link to the main article about the weapon: <code><nowiki>{{main|Weapon name (calibre)}}</nowiki></code>. Broadly describe the ammunition available for the primary armament, and provide recommendations on how to use it and which ammunition to choose.'' |
| | | | |
| | === Secondary armament === | | === Secondary armament === |
| − | {{Specs-Fleet-Secondary}}
| |
| − | <!-- ''Some ships are fitted with weapons of various calibres. Secondary armaments are defined as weapons chosen with the control <code>Select secondary weapon</code>. Evaluate the secondary armaments and give advice on how to use them. Describe the ammunition available for the secondary armament. Provide recommendations on how to use them and which ammunition to choose. Remember that any anti-air armament, even heavy calibre weapons, belong in the next section. If there is no secondary armament, remove this section.'' -->
| |
| | {{main|40 mm/70 MEL58 (40 mm)}} | | {{main|40 mm/70 MEL58 (40 mm)}} |
| | | | |
| − | The F220 is armed with 6 x 40 mm/70 MEL58 automatic cannons divided into 2 dual-mounted turrets and 2 single-mount turrets. They are capable of shredding anything but cruisers. The 40 mm cannons only have access to HE and HE-VT, meaning they will do little to no damage to heavily armoured targets even at point blank range. The 40 mm are your main line of defence against light and medium armoured vessels as the fast rate of fire (0.4-second reload) will cause fatal damage with even just one burst. They are also your main line of defence against any aircraft at any range from 0 to 10 km (AI gunners will not engage targets past ~10 km). They will destroy incoming enemy aircraft within seconds. The captain is able to control them manually and use the tracking radar to engage air targets manually. It is recommended to let the AI gunners engage the targets when the threat is closer than 5 km as the captain will be able to focus on more threatening enemies (other vessels or even aircraft). When letting AI gunners engage targets, be aware of which targeting setting is set (airborne and surface, airborne, surface, none) as each turret will only engage one target at a time.
| + | ''Some ships are fitted with weapons of various calibres. Secondary armaments are defined as weapons chosen with the control <code>Select secondary weapon</code>. Evaluate the secondary armaments and give advice on how to use them. Describe the ammunition available for the secondary armament. Provide recommendations on how to use them and which ammunition to choose. Remember that any anti-air armament, even heavy calibre weapons, belong in the next section. If there is no secondary armament, remove this section.'' |
| | | | |
| − | {{:40 mm/70 MEL58 (40 mm)/Ammunition|40 mm M-DN51 HE-T, 40 mm HE-T-PF}} | + | === Torpedo armament === |
| | + | {{main|Mark 35 (533 mm)}} |
| | | | |
| − | === Additional armament ===
| + | Two fixed mounts aiming towards the front of the ship. |
| − | {{Specs-Fleet-Additional}}
| |
| − | <!-- ''Describe the available additional armaments of the ship: depth charges, mines, torpedoes. Talk about their positions, available ammunition and launch features such as dead zones of torpedoes. If there is no additional armament, remove this section.'' -->
| |
| − | {{main|Mark 35 (533 mm)|Type 95 depth charge|Mk.6 depth charge|M/50 Bofors}}
| |
| | | | |
| − | The F220 is armed with 4 single-tube torpedo launchers. These are your main weapon against heavily armoured threats or when doing sneak attacks at distance. The torpedo range is drastically different to the [[Lübeck F224]]. They have a max range of 13.71 km (instead of 5.49 km) and can be used at almost point blank, the torpedo must travel 50 m at minimum to be armed (most of the time "point blank" engagements will be between 100-500 m). Depending on the map, game mode and captain's discretion, torpedo depth can be adjusted in order to achieve multiple tasks.
| + | ''Torpedo launchers are standard equipment on many ships and boats. Torpedoes are a significant means of defeating an opponent. Evaluate the position of the torpedo launchers, discuss the ammunition available, firing specifics such as dead zones, features of the torpedoes themselves, etc. If there is no torpedo armament, remove this section.'' |
| | | | |
| − | '''1-meter depth''' - This is the most universal depth used for all types of engagements, being in deep or shallow waters. This depth is capable of hitting all sorts of vessels, including PT boats. The main downside is that enemy ships can see the water trail made by the torpedo which can make enemy vessels evade or fire at the torpedo.
| + | === Special armament === |
| | + | {{main|M/50 Bofors|Type 95 depth charge|Mk.6 depth charge}} |
| | | | |
| − | '''4-meter depth''' - This is the recommended depth when on deep water trying to do long range sneaky engagements to big ships (most of them have bulkheads more than 4 m under the waterline). This is one of the riskier techniques as there is no way to launch them on shallow waters (most shallow water maps have water depth of 2-3 m). Only the captain and the team will be able to see the torpedo symbol while traveling close to them and it will not leave any visible water trail compared to the 1 meter depth torpedo. | + | ''Depth charges, mines, rocket launchers and missiles are also effective in skilled hands and can take an off-guard opponent by surprise. Evaluate the ammunition of this type of armament and rate its performance in combat. If there are no special armaments, remove this section.'' |
| | | | |
| − | The F220 can be armed with Mk.6 depth charges. They are useless in all naval battles. It is not recommended to load them in the ship as they do not have any practical use in game. On the other hand, the Bofors rocket system has its advantages in various combat scenarios. First of all, said rockets have an explosive equivalent of 107 kg, almost the same as a 250 kg bomb. They are deadly against all light armoured targets and can be used to destroy unarmed vessels (like in Naval Enduring Confrontation) or to create heavy exterior damage to enemy ships (disable turrets, destroy smoke funnels, destroy bridge, etc). Aiming this rockets requires practice as the low speed makes the fire adjustment tricky. Always use rangefinder to aim vertically, do not attempt to eyeball it as they will be inaccurate.
| + | == Usage in battles == |
| | + | Too large to spawn with small boats and too small to deal with destroyers, etc., head towards the small boat spawn locations. Avoid solo engagements with destroyers. |
| | | | |
| − | === Radar ===
| + | ''Describe the technique of using this ship, the characteristics of her use in a team and tips on strategy. Abstain from writing an entire guide – don't try to provide a single point of view, but give the reader food for thought. Talk about the most dangerous opponents for this vehicle and provide recommendations on fighting them. If necessary, note the specifics of playing with this vehicle in various modes (AB, RB, SB).'' |
| − | [[File:F220 Radars.png|thumb|319x319px|Red: MV2/3Du FCR<br>Blue: M4/1Du FCR (currently not modeled as a functioning radar)<br>Green: M5/1Du FCR (currently not modeled as a functioning radar)<br>Orange: SGR103 air/surface search radar<br>Purple: M9/3Du FCR]]
| |
| − | The F220 has access to a SGR103 air/surface search radar, MV2/3Du, M4/1Du, M5/1Du, M9/3Du fire control radars (FCR), unique for this ship class. The SGR103 is located on top of the main mast. MV2/3Du is located on top of the bridge (refer to picture). M4/1Du is located in front of the mast. M5/1Du is located in the mast below the SGR103 radar. M9/3Du are located at the back of the ship on top of the superstructure behind the main mast. Currently only the MV2/3Du and M9/3Du are the only ones modeled as fire control radars in game. Enemy pilots are often unaware of the presence of the radar as they are uncommon in-game, use surprise to your advantage. Radars can give you a huge advantage with situational awareness as no plane will be able to catch you unsuspected. Be aware of radar interference (mountains, trees, tall structures in general) as they will affect both your search and tracking radar. There are blind spots with the radars which pilots can exploit but most of them will not do so as radars are uncommon in battles. As previously stated, tracking radar can be used to manually engage targets. It is recommended to use tracking radar when engaging immediate threats the gunners are not engaging or low speed flying aircraft at long ranges (bombers). Most of the time, the use of tracking radar will not be necessary as gunners will take care of aircraft while the captain is engaging enemy vessels.
| |
| | | | |
| − | {| class="wikitable" style="text-align:center" | + | === Modules === |
| − | ! colspan="4" | SGR103 - Air/surface Search Radar | + | {| class="wikitable" |
| | + | ! Tier |
| | + | ! Seakeeping |
| | + | ! colspan="2" | Unsinkability |
| | + | ! colspan="3" | Firepower |
| | |- | | |- |
| − | ! {{Annotation|Maximum<br/>Detection<br/>Range|The maximum possible range at which a target can be detected}}
| + | | I |
| − | ! {{Annotation|Guaranteed<br/>Detection<br/>Range|The range, below which, detection of a target is practically guaranteed}}
| + | | Dry-Docking |
| − | ! {{Annotation|Max Azimuth<br/>Scan Angle|How far to each side the radar can scan (widest search mode)}}
| + | | Tool Set |
| − | ! {{Annotation|Max Elevation<br/>Scan Angle|How far up and down the radar can scan (widest search mode)}}
| + | | |
| | + | | |
| | + | | |
| | + | | |
| | |- | | |- |
| − | | 120,000 m || 10,000 m || 360° || 0°/+85° | + | | II |
| | + | | Rudder Replacement |
| | + | | Fire Protection System |
| | + | | Smokescreen |
| | + | | |
| | + | | Auxiliary Armament Targeting |
| | + | | |
| | |- | | |- |
| − | ! colspan="4" | MV2/3Du & M9/3Du - Fire Control Radar
| + | | III |
| | + | | Propeller Replacement |
| | + | | Shrapnel Protection |
| | + | | Ventilation |
| | + | | Improved Rangefinder |
| | + | | Primary Armament Targeting |
| | + | | Depth Charges |
| | |- | | |- |
| − | ! {{Annotation|Maximum<br/>Tracking<br/>Range|The maximum range at which a target can be tracked}}
| + | | IV |
| − | ! {{Annotation|Minimum<br/>Tracking<br/>Range|The range below which targets cannot be tracked by the radar}}
| + | | Engine Maintenance |
| − | ! {{Annotation|Azimuth Tracking<br/>Angle|How far to each side the radar can track a target}}
| + | | New Pumps |
| − | ! {{Annotation|Elevation Tracking<br/>Angle|How far up and down the radar can track a target}}
| + | | Ammo Wetting |
| − | |- | + | | 100 mm OPF F4 PFHE |
| − | | 15,000 m || 100 m || ±150° || 0°/+80° | + | | 40 mm HE-T-PF |
| | + | | Rocket Launcher |
| | |- | | |- |
| | |} | | |} |
| − |
| |
| − | == Usage in battles ==
| |
| − | <!-- ''Describe the technique of using this ship, the characteristics of her use in a team and tips on strategy. Abstain from writing an entire guide – don't try to provide a single point of view, but give the reader food for thought. Talk about the most dangerous opponents for this vehicle and provide recommendations on fighting them. If necessary, note the specifics of playing with this vehicle in various modes (AB, RB, SB).'' -->
| |
| − | The Köln, as a Cold War frigate, has a very different playstyle to the WW2 frigates and destroyers, as armour is lacklustre and RPM is limited compared to some cruisers and destroyers. Thus, the Köln should be used as a support and anti air ship. The powerful 100 mm are able to decimate destroyers and even cruisers in minutes, not because of the rounds but for the rate of fire. The high speed and agility make it a decent runner when facing enemy ships and capping points. The torpedo can be formidable if used correctly, not only for the fact they are able to destroy whatever it hits but also because they are hard to aim due to the distances the Köln has to navigate in order to get into a decent launch distance. The 40 mm should be used as secondary weapons for everything but sinking heavily armoured ships. They are able to decimate light vessels in seconds as well as planes. For this same reason, the Köln should be used as an anti-air flagship as it is able to detect and engage enemy planes in a range of 130 km. Absolutely no aircraft will surprise the Köln while the search radar is active. The Köln, when used in Enduring Confrontation events, is the most reliable and "Jack-of-all-trades" ship seen in-game. Not only because it is able to dominate the skies but also because it is able to decimate enemy convoys within seconds with the firepower and torpedoes, specially if said convoys are unarmed cargo ships.
| |
| − |
| |
| − | Absolutely no battleship should be engaged with the 100 mm as they are mediocre and most of the time useless due to only using HE ammunition. However, they can damage and destroy outer modules like turrets, bridge, and smoke funnels, and can start fires. When facing heavily armoured vessels, torpedoes are a must as they will be your only reliable weapon against them. The Köln should zig-zag when being fired at as a single salvo is more than enough to instantly destroy you. Zig-zagging reduces the chances the enemy has to hit and due to the long reload, the Köln is able to close distance and fire torpedoes.
| |
| | | | |
| | === Pros and cons === | | === Pros and cons === |
| − | <!-- ''Summarise and briefly evaluate the vehicle in terms of its characteristics and combat effectiveness. Mark its pros and cons in the bulleted list. Try not to use more than 6 points for each of the characteristics. Avoid using categorical definitions such as "bad", "good" and the like - use substitutions with softer forms such as "inadequate" and "effective".'' -->
| + | ''Summarise and briefly evaluate the vehicle in terms of its characteristics and combat effectiveness. Mark its pros and cons in the bulleted list. Try not to use more than 6 points for each of the characteristics. Avoid using categorical definitions such as "bad", "good" and the like - use substitutions with softer forms such as "inadequate" and "effective".'' |
| | | | |
| | '''Pros:''' | | '''Pros:''' |
| | | | |
| − | * Superb speed | + | * |
| − | * Access to radar
| |
| − | * Fast targetting primary and secondary weaponry
| |
| − | * Superior air defence
| |
| − | * Fast rate of fire
| |
| − | * Long range torpedoes
| |
| − | * 360° radar coverage with FCR included
| |
| | | | |
| | '''Cons:''' | | '''Cons:''' |
| | | | |
| − | * Little to no armour | + | * |
| − | * Small crew number
| |
| − | * Static torpedo tubes
| |
| − | * Closely packed crew compartments
| |
| | | | |
| | == History == | | == History == |
| Line 124: |
Line 114: |
| | | | |
| | == Media == | | == Media == |
| − | <!-- ''Excellent additions to the article would be video guides, screenshots from the game, and photos.'' -->
| + | ''Excellent additions to the article would be video guides, screenshots from the game, and photos.'' |
| | | | |
| − | ;Skins
| + | == See also == |
| − | * [https://live.warthunder.com/feed/camouflages/?vehicle=germ_frigate_koln Skins and camouflages for the {{PAGENAME}} from live.warthunder.com.]
| + | ''Links to articles on the War Thunder Wiki that you think will be useful for the reader, for example:'' |
| | | | |
| − | == See also ==
| |
| − | <!-- ''Links to articles on the War Thunder Wiki that you think will be useful for the reader, for example:''
| |
| | * ''reference to the series of the ship;'' | | * ''reference to the series of the ship;'' |
| − | * ''links to approximate analogues of other nations and research trees.'' --> | + | * ''links to approximate analogues of other nations and research trees.'' |
| − | | |
| − | ;Related development
| |
| − | * [[Lübeck]] F224
| |
| | | | |
| | == External links == | | == External links == |
| | <!-- ''Paste links to sources and external resources, such as:'' | | <!-- ''Paste links to sources and external resources, such as:'' |
| | * ''topic on the official game forum;'' | | * ''topic on the official game forum;'' |
| | + | * ''encyclopedia page on the ship;'' |
| | * ''other literature.'' --> | | * ''other literature.'' --> |
| | | | |
| − | * [[wikipedia:K%C3%B6ln-class_frigate|[Wikipedia] Köln-class frigate]] | + | * [[wikipedia:K%C3%B6ln-class_frigate|[Wikipedia] Köln-class_frigate]] |
| | | | |
| − | {{ShipManufacturer Stülcken-Werft}}
| |
| | {{Germany frigates}} | | {{Germany frigates}} |
Köln
Research:320 000 
Purchase:860 000 
| This page is about the German frigate Köln F220. For the light cruiser, see Köln.
|
Description
The Köln-class, Köln F220 is a rank V German frigate
with a battle rating of 4.3 (AB/RB/SB). It was introduced in Update 1.97 "Viking Fury".
General info
Survivability and armour
Low hit resistance against Destroyers, etc. Expect to be sunk after few salvos. Fair hit resistance to small boats.
Talk about the vehicle's armour. Note the most well-defended and most vulnerable zones, e.g. the ammo magazine. Evaluate the composition of components and assemblies responsible for movement and manoeuvrability. Evaluate the survivability of the primary and secondary armaments separately. Don't forget to mention the size of the crew, which plays an important role in fleet mechanics. Save tips on preserving survivability for the "Usage in battles" section. If necessary, use a graphical template to show the most well-protected or most vulnerable points in the armour.
Mobility
Smaller than a destroyer but about as maneuverable.
Write about the ship's mobility. Evaluate its power and manoeuvrability, rudder rerouting speed, stopping speed at full tilt, with its maximum forward and reverse speed.
Armament
Primary armament
Two somewhat rapid firing single barrel turrets. Requires lots of hits to be effective against destroyers. Note that destroyers require few hits
Provide information about the characteristics of the primary armament. Evaluate their efficacy in battle based on their reload speed, ballistics and the capacity of their shells. Add a link to the main article about the weapon: {{main|Weapon name (calibre)}}. Broadly describe the ammunition available for the primary armament, and provide recommendations on how to use it and which ammunition to choose.
Secondary armament
Some ships are fitted with weapons of various calibres. Secondary armaments are defined as weapons chosen with the control Select secondary weapon. Evaluate the secondary armaments and give advice on how to use them. Describe the ammunition available for the secondary armament. Provide recommendations on how to use them and which ammunition to choose. Remember that any anti-air armament, even heavy calibre weapons, belong in the next section. If there is no secondary armament, remove this section.
Torpedo armament
Two fixed mounts aiming towards the front of the ship.
Torpedo launchers are standard equipment on many ships and boats. Torpedoes are a significant means of defeating an opponent. Evaluate the position of the torpedo launchers, discuss the ammunition available, firing specifics such as dead zones, features of the torpedoes themselves, etc. If there is no torpedo armament, remove this section.
Special armament
Depth charges, mines, rocket launchers and missiles are also effective in skilled hands and can take an off-guard opponent by surprise. Evaluate the ammunition of this type of armament and rate its performance in combat. If there are no special armaments, remove this section.
Usage in battles
Too large to spawn with small boats and too small to deal with destroyers, etc., head towards the small boat spawn locations. Avoid solo engagements with destroyers.
Describe the technique of using this ship, the characteristics of her use in a team and tips on strategy. Abstain from writing an entire guide – don't try to provide a single point of view, but give the reader food for thought. Talk about the most dangerous opponents for this vehicle and provide recommendations on fighting them. If necessary, note the specifics of playing with this vehicle in various modes (AB, RB, SB).
Modules
| Tier
|
Seakeeping
|
Unsinkability
|
Firepower
|
| I
|
Dry-Docking
|
Tool Set
|
|
|
|
|
| II
|
Rudder Replacement
|
Fire Protection System
|
Smokescreen
|
|
Auxiliary Armament Targeting
|
|
| III
|
Propeller Replacement
|
Shrapnel Protection
|
Ventilation
|
Improved Rangefinder
|
Primary Armament Targeting
|
Depth Charges
|
| IV
|
Engine Maintenance
|
New Pumps
|
Ammo Wetting
|
100 mm OPF F4 PFHE
|
40 mm HE-T-PF
|
Rocket Launcher
|
Pros and cons
Summarise and briefly evaluate the vehicle in terms of its characteristics and combat effectiveness. Mark its pros and cons in the bulleted list. Try not to use more than 6 points for each of the characteristics. Avoid using categorical definitions such as "bad", "good" and the like - use substitutions with softer forms such as "inadequate" and "effective".
Pros:
Cons:
History
The F220 Köln was the first ship out of six of the F120 "Köln" class. This class was one of the first to be built in Germany after World War 2 and the first in the world to feature a CODAG (combined diesel and gas) turbine system, allowing the F120 class ships to move above their cruising speed. Designed as escort ships to protect convoys, the F120 Frigates were specialized for Anti-Submarine Warfare.
F220 "Köln" was laid down by the end of December 1957 and finished about a year later in December 1958. The ship entered service on April 15th, 1961, serving in the 2. Escort Squadron stationed in Cuxhaven and later in the 2. Frigate Squadron stationed in Wilhelmshaven.
After serving in the West German Navy for 21 years, the ship was taken out of service on the 17th December 1982. Since 1989, the "Köln" serves as a hulk in Neustadt (Holstein).
Media
Excellent additions to the article would be video guides, screenshots from the game, and photos.
See also
Links to articles on the War Thunder Wiki that you think will be useful for the reader, for example:
- reference to the series of the ship;
- links to approximate analogues of other nations and research trees.
External links