Difference between revisions of "CCKW 353 (M45)"
(→Pros and cons) (Tag: Visual edit) |
(→Usage in battles) (Tag: Visual edit) |
||
| Line 119: | Line 119: | ||
<!-- ''Describe the tactics of playing in the vehicle, the features of using vehicles in the team and advice on tactics. Refrain from creating a "guide" - do not impose a single point of view but instead give the reader food for thought. Describe the most dangerous enemies and give recommendations on fighting them. If necessary, note the specifics of the game in different modes (AB, RB, SB).'' --> | <!-- ''Describe the tactics of playing in the vehicle, the features of using vehicles in the team and advice on tactics. Refrain from creating a "guide" - do not impose a single point of view but instead give the reader food for thought. Describe the most dangerous enemies and give recommendations on fighting them. If necessary, note the specifics of the game in different modes (AB, RB, SB).'' --> | ||
''Describe the tactics of playing in the vehicle, the features of using vehicles in the team and advice on tactics. Refrain from creating a "guide" - do not impose a single point of view but instead give the reader food for thought. Describe the most dangerous enemies and give recommendations on fighting them. If necessary, note the specifics of the game in different modes (AB, RB, SB).'' | ''Describe the tactics of playing in the vehicle, the features of using vehicles in the team and advice on tactics. Refrain from creating a "guide" - do not impose a single point of view but instead give the reader food for thought. Describe the most dangerous enemies and give recommendations on fighting them. If necessary, note the specifics of the game in different modes (AB, RB, SB).'' | ||
| + | |||
| + | It is not recommended to bring out the CCKW 353 at the very start, because unlike certain SPAAs, this truck is not fast. | ||
| + | |||
| + | For anti air duty, find a spot somewhere between a friendly spawn and a cap point. This way you can react to unexpected situations effectively: if frontline teammates collapse, you can quickly retreat to spawn; if teammates advance, you can also keep up easily. Do not stay too close to the frontline, as you do not want to face enemy tanks. Unlike the similar M16 MGMC which can resist rifle-caliber bullets, the CCKW 353 does not offer any protection to anything, therefore to protect the two exposed drivers, you might want to find a hard cover, point the truch sideways to only expose the back turret and hide the drivers behind cover. This way strafing planes cannot hurt the drivers, increasing your survivability. Once enemy aircraft spawn, shoot sparse salvos towards them to draw their attention. Do not fire continuously yet, disguise yourself as a slow-firing SPAA (eg. Sd.Kfz.6/2) which is less fearsome in the minds of pilots. Upon seeing your tracers, most pilots might choose to go for a headon with SPAAs, knowing that most SPAAs are easy targets. As they dive towards you, fire a long burst and lay a stream of bullets in their flight path, remember to also aim up a little. A few hits from the .50 cals is enough to damage critical components such as cooling systems, control surfaces or even pilots. Keep firing prolonged bursts even when the target aircraft bank away, as they are now low and slow. If a plane drops bombs at you, immediately move back to cover. | ||
| + | |||
| + | Watch out for remaining ammunition. The CCKW 353 has 200 rounds each gun but reloading is very slow, making the CCKW 353 and the team vulnerable in the worst moments. Ammunition of less than 130 rounds (total of 4 mag) should be emptied and replaced with full magazines. | ||
| + | |||
| + | For anti tank duty, only target the ones you can penetrate, including armored cars, SPAAs, light tanks, tank destroyers, etc. With the quad .50 cals it is very easy to wipe out these targets with a short burst. Against tanks, you are very much defenceless but if you are in a safe position, shoot at their tracks or gun barrels. Although this might not damage anything, the hits will grant you assists when they are killed by your teammates. | ||
| + | |||
| + | Relocate immediately if the red "artillery fire" notification flashes. Shrapnels from nearby explosions can badly damage the truck's tires, transmission and crew. | ||
=== Modules === | === Modules === | ||
Revision as of 01:51, 22 December 2020
Contents
Description
.jpg)
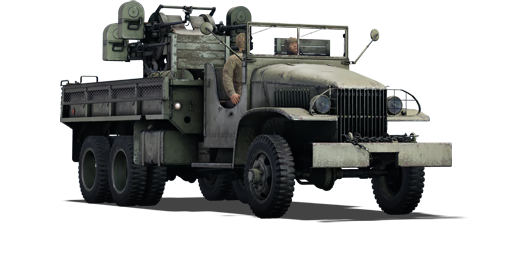
The CCKW 353 (M45) is a rank II Chinese SPAA
with a battle rating of 2.3 (AB/RB/SB). It was introduced in Update "Hot Tracks".
General info
Survivability and armour
Describe armour protection. Note the most well protected and key weak areas. Appreciate the layout of modules as well as the number and location of crew members. Is the level of armour protection sufficient, is the placement of modules helpful for survival in combat? If necessary use a visual template to indicate the most secure and weak zones of the armour.
Armour type:
| Armour | Front (Slope angle) | Sides | Rear | Roof |
|---|---|---|---|---|
| Hull | ___ mm | ___ mm Top ___ mm Bottom |
___ mm | ___ - ___ mm |
| Turret | ___ - ___ mm Turret front ___ mm Gun mantlet |
___ - ___ mm | ___ - ___ mm | ___ - ___ mm |
| Cupola | ___ mm | ___ mm | ___ mm | ___ mm |
Notes:
Mobility
| Game Mode | Max Speed (km/h) | Weight (tons) | Engine power (horsepower) | Power-to-weight ratio (hp/ton) | |||
|---|---|---|---|---|---|---|---|
| Forward | Reverse | Stock | Upgraded | Stock | Upgraded | ||
| Arcade | 70 | 10 | 8 | 134 | 179 | 16.75 | 22.38 |
| Realistic | 65 | 9 | 83 | 94 | 10.38 | 11.75 | |
Armaments
Main armament
Give the reader information about the characteristics of the main gun. Assess its effectiveness in a battle based on the reloading speed, ballistics and the power of shells. Do not forget about the flexibility of the fire, that is how quickly the cannon can be aimed at the target, open fire on it and aim at another enemy. Add a link to the main article on the gun: {{main|Name of the weapon}}. Describe in general terms the ammunition available for the main gun. Give advice on how to use them and how to fill the ammunition storage.
| 12.7 mm M2HB (x4) | Turret rotation speed (°/s) | Reloading rate (seconds) | ||||||||||||
|---|---|---|---|---|---|---|---|---|---|---|---|---|---|---|
| Mode | Capacity (Belt) | Fire rate | Vertical | Horizontal | Stabilizer | Stock | Upgraded | Full | Expert | Aced | Stock | Full | Expert | Aced |
| Arcade | 3,600 (200) | 576 | -10°/+90° | ±180° | N/A | __._ | __._ | __._ | __._ | __._ | _.__ | _.__ | _.__ | _.__ |
| Realistic | __._ | __._ | __._ | __._ | __._ | |||||||||
Ammunition
- Common: API-T · I · AP · API-T: These rounds work well until the others are researched.
- API: API-T · AP-I · API-T: These are absolutely devastating in the AA role with slightly less performance against enemy tanks than AP.
- AP: AP · AP · API-T: These are best against enemy tanks at close range and do good damage to planes.
- APIT: API-T: Better than API in all regards but not as good against tanks as AP, this is the belt of choice in almost all situations. Since every bullet is a tracer, it makes destroying aircraft much easier and detectability is not greatly increased over AP-I, however is increased a bit over AP.
| Penetration statistics | ||||||
|---|---|---|---|---|---|---|
| Belt | Penetration @ 0° Angle of Attack (mm) | |||||
| 10 m | 100 m | 500 m | 1,000 m | 1,500 m | 2,000 m | |
| Common | 31 | 30 | 26 | 22 | 18 | 15 |
| API | 30 | 29 | 24 | 20 | 16 | 13 |
| AP | 31 | 30 | 26 | 22 | 18 | 15 |
| APIT | 30 | 29 | 24 | 20 | 16 | 13 |
| Belt details | |||||||||
|---|---|---|---|---|---|---|---|---|---|
| Belt | Type of warhead |
Velocity (m/s) |
Projectile Mass (kg) |
Fuse delay (m) |
Fuse sensitivity (mm) |
Explosive Mass (TNT equivalent) (g) |
Ricochet | ||
| 0% | 50% | 100% | |||||||
| APIT | API-T | 929 | 0.04 | N/A | N/A | N/A | 47° | 56° | 65° |
Ammo racks
| Full ammo |
1st rack empty |
2nd rack empty |
3rd rack empty |
4th rack empty |
5th rack empty |
6th rack empty |
Visual discrepancy |
|---|---|---|---|---|---|---|---|
| 18 | __ (+__) | __ (+__) | __ (+__) | __ (+__) | __ (+__) | __ (+__) | __ |
Usage in battles
Describe the tactics of playing in the vehicle, the features of using vehicles in the team and advice on tactics. Refrain from creating a "guide" - do not impose a single point of view but instead give the reader food for thought. Describe the most dangerous enemies and give recommendations on fighting them. If necessary, note the specifics of the game in different modes (AB, RB, SB).
It is not recommended to bring out the CCKW 353 at the very start, because unlike certain SPAAs, this truck is not fast.
For anti air duty, find a spot somewhere between a friendly spawn and a cap point. This way you can react to unexpected situations effectively: if frontline teammates collapse, you can quickly retreat to spawn; if teammates advance, you can also keep up easily. Do not stay too close to the frontline, as you do not want to face enemy tanks. Unlike the similar M16 MGMC which can resist rifle-caliber bullets, the CCKW 353 does not offer any protection to anything, therefore to protect the two exposed drivers, you might want to find a hard cover, point the truch sideways to only expose the back turret and hide the drivers behind cover. This way strafing planes cannot hurt the drivers, increasing your survivability. Once enemy aircraft spawn, shoot sparse salvos towards them to draw their attention. Do not fire continuously yet, disguise yourself as a slow-firing SPAA (eg. Sd.Kfz.6/2) which is less fearsome in the minds of pilots. Upon seeing your tracers, most pilots might choose to go for a headon with SPAAs, knowing that most SPAAs are easy targets. As they dive towards you, fire a long burst and lay a stream of bullets in their flight path, remember to also aim up a little. A few hits from the .50 cals is enough to damage critical components such as cooling systems, control surfaces or even pilots. Keep firing prolonged bursts even when the target aircraft bank away, as they are now low and slow. If a plane drops bombs at you, immediately move back to cover.
Watch out for remaining ammunition. The CCKW 353 has 200 rounds each gun but reloading is very slow, making the CCKW 353 and the team vulnerable in the worst moments. Ammunition of less than 130 rounds (total of 4 mag) should be emptied and replaced with full magazines.
For anti tank duty, only target the ones you can penetrate, including armored cars, SPAAs, light tanks, tank destroyers, etc. With the quad .50 cals it is very easy to wipe out these targets with a short burst. Against tanks, you are very much defenceless but if you are in a safe position, shoot at their tracks or gun barrels. Although this might not damage anything, the hits will grant you assists when they are killed by your teammates.
Relocate immediately if the red "artillery fire" notification flashes. Shrapnels from nearby explosions can badly damage the truck's tires, transmission and crew.
Modules
| Tier | Mobility | Protection | Firepower | ||
|---|---|---|---|---|---|
| I | Tires | Parts | API | Horizontal Drive | |
| II | Suspension | Brake System | FPE | AP | Adjustment of Fire |
| III | Filters | Crew Replenishment | APIT | Elevation Mechanism | |
| IV | Transmission | Engine | Artillery Support | ||
Pros and cons
Pros:
- Powerful quad .50 cals that can shred planes with well-aimed bursts within 1 km, and have a good chance of setting aircraft on fire
- AP shells are powerful enough to damage or even destroy enemy light tanks and other SPAAs such as LVT (A)s, and Flakpanzer I
- .50 cal bullets have nicer velocity and accuracy than some cannons
- Nice vertical traverse of -10/+90 degrees, giving it great terrain adaptation
- Large ammo capacity, each magazine holds 200 rounds, allowing for prolonged firing
- Fast on flat ground or on road
- Good acceleration on hard surface
- Fast turret traverse allows following aircraft easily
- Due to its lower gun mount, it is a lower target comparing to the similar M16 MGMC
- Is a narrow vehicle, can squeeze into tight spots
Cons:
- Extremely low survivability: the truck provides absolutely no protection to the crew, even against light MG, nearby bombs, artillery strikes, let alone cannon shells
- Open topped design makes it vulnerable to strafing planes, especially cannon-armed ones such as He 112 A-0
- Guns cannot depress and aim towards the front as they are obstructed by the driving compartment. This can be lethal in a frontal encounter
- Cannot hurt conventional armoured vehicles like M3 Stuart due to its low penetration
- Awful mobility on muddy, snowy and desert areas, for example in White Fortress, Frozen Pass and Sinai
- Long reload time of around 15 seconds makes it defenceless for a long time in an intense battle
- Engine catches fire easily when hit
- No weight to pull: Towing or pushing allies is nearly impossible unless it is a lighter vehicle
- Only 1 spare crew member
- Cannot turn on the spot, as it is fully wheeled
- Entire crew is exposed; a plane ramming you can knock out the crew
History
Describe the history of the creation and combat usage of the vehicle in more detail than in the introduction. If the historical reference turns out to be too long, take it to a separate article, taking a link to the article about the vehicle and adding a block "/History" (example: https://wiki.warthunder.com/(Vehicle-name)/History) and add a link to it here using the main template. Be sure to reference text and sources by using <ref></ref>, as well as adding them at the end of the article with <references />. This section may also include the vehicle's dev blog entry (if applicable) and the in-game encyclopedia description (under === In-game description ===, also if applicable).
Media
Excellent additions to the article would be video guides, screenshots from the game, and photos.
See also
Links to the articles on the War Thunder Wiki that you think will be useful for the reader, for example:
- reference to the series of the vehicles;
- links to approximate analogues of other nations and research trees.
External links
Paste links to sources and external resources, such as:
- topic on the official game forum;
- other literature.
| China anti-aircraft vehicles | |
|---|---|
| Radar SPAAG | PGZ09 |
| Gun and Missile SPAAG | PGZ04A |
| Other | ZSD63/PG87 · WZ305 |
| Germany | ␗Sd.Kfz.222 |
| North Vietnam | Phòng không T-34 |
| USA | CCKW 353 (M45) · ␗M42 |
| USSR | Tor-M1 |
