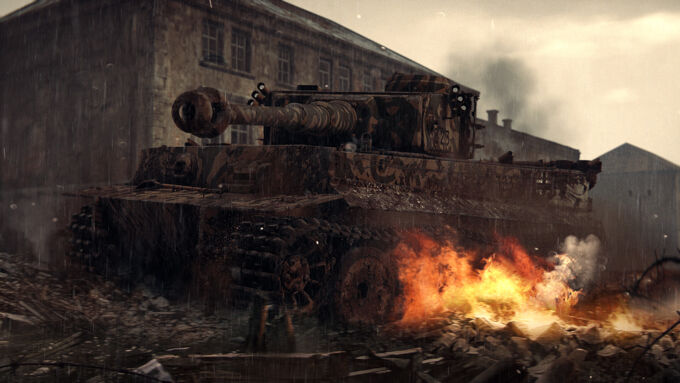
Among the many armored vehicles that saw service during World War II, few have attained the mythic status of the Panzerkampfwagen VI, also known as the Tiger I. This 57-ton beast marks the beginning of the German heavy tank line and is a textbook example of a tank of its class, capable of inflicting and taking heavy damage due to its powerful armament and thick armor protection.
| PROS | CONS |
| Excellent main armament that will one shot almost all vehicles | Sluggish turret traverse speeds especially when stock |
| All-around good armor for its BR | Flat armor profile |
| Good mobility for a heavy tank | (Tiger H1) Turret cupola presents a weak spot from any angle |
| Good gun elevation and depression angles | Ammo storage in the sponsons are an easy target for enemies |
Armament
The 8.8 cm Kampfwagenkanone 36 or KwK 36 is the Tiger’s main armament, which features excellent ballistics and armor penetration even at ranges over a kilometer away. The Tiger is also a relatively stable firing platform, thus if you are on flat terrain you are able to somewhat accurately fire on the move.
In terms of gun handling, the cannon has decent elevation characteristics with -8 degrees of gun depression and 16 degrees of gun elevation. The turret traverse is rather sluggish, with stock traverse speeds being 7.1 dg/s (H1) and 8.3 dg/s (E).
The following ammo is worth using:
- PzGr. 39 — The stock PzGr. 39 is an APCBC (Armor Piercing Capped Ballistic Capped) shell that, with good armor penetration performance and a decent amount of HE filler, is capable of defeating most enemy vehicles at the BR. It should be used as your primary ammunition when first playing the Tiger I.
- PzGr. — It is an unlockable APCBC shell that has very similar ballistic performance to the PzGr. 39 with slightly inferior armor penetration. Whilst it is easy to gloss over this round because of that, the PzGr.'s main draw is the sheer amount of explosive filler packed into it, rivaling even the Soviet 122mm. This means that a penetrating hit will almost certainly one-shot an enemy tank and even overpressure open-topped vehicles. Bring this shell as your primary ammunition once it is unlocked.
- Sprgr. L/4.5 — The Sprgr. L/4.5 is the stock high explosive shell for the Tiger. This shell should be used exclusively for targeting and destroying soft targets like open-topped vehicles or trucks and should only be brought in small quantities.
Armor and Survivability
| Front | Sides | Rear | |
| Upper Hull | 100 mm @ 9° | 80 mm @ 0° | 80 mm @ 9° |
| Lower Hull | 100 mm @ 25° | 60 mm @ 0° | 80 mm @ 9° |
| Turret | 135-180 mm | 82 mm @ 0° | 82 mm @ 0 |
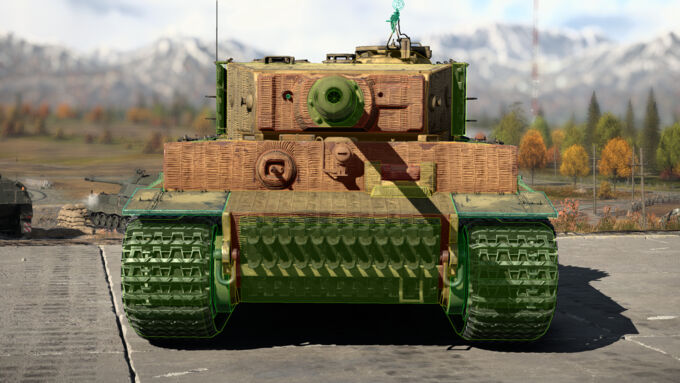
In terms of armor protection, the Tiger is decently armored with frontal armor thickness of 100 mm on the upper and lower hull, 60 mm sloped at 80 degrees on the frontal 'step', and the variably thick gun mantlet being at minimum 135 mm. The upper sides, and rear of the hull are 80 mm thick, the lower sides of the hull are 60mm thick, and the sides and rear of the turret are 82 mm thick. On the Tiger H1, your commander’s cupola is a weak spot from any angle, and a hit to it can knock out your turret.
While the armor is thick for its battle rating, its flat design makes it unlikely to ricochet any incoming shells on its own. To remedy this issue, it is good practice to position your vehicle at a 40-degree angle to your enemy; this will significantly decrease the chances of a shell penetrating your vehicle.
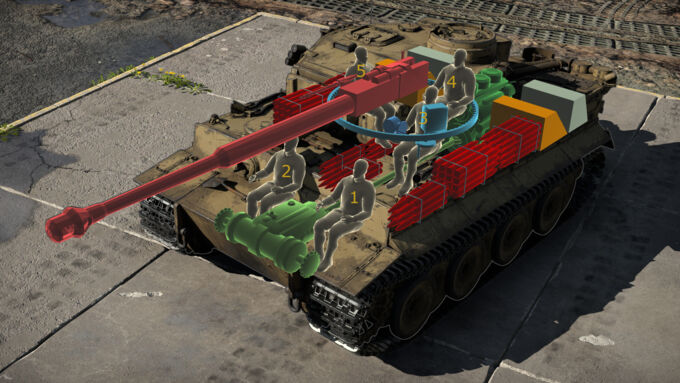
The Tiger I features a five man crew consisting of a driver (1), machine gunner (2), gunner (3), commander (4), and loader (5). The spacing of these crew members means that at times a penetrating hit may only incapacitate some of the crew, giving you a chance to retaliate against the enemy.
The large frontally mounted transmission may also absorb most of the damage of shells that penetrate the lower frontal plate whilst the rear of your tank is protected by the engine, radiators, and fuel tanks alongside an armored bulkhead separating the engine and crew compartment.
Both the H1 and E are equipped with smoke grenade launchers, allowing you to obscure the vision of your opponents in order to either advance or retreat without the risk of exposing yourself to your enemy’s line of sight.
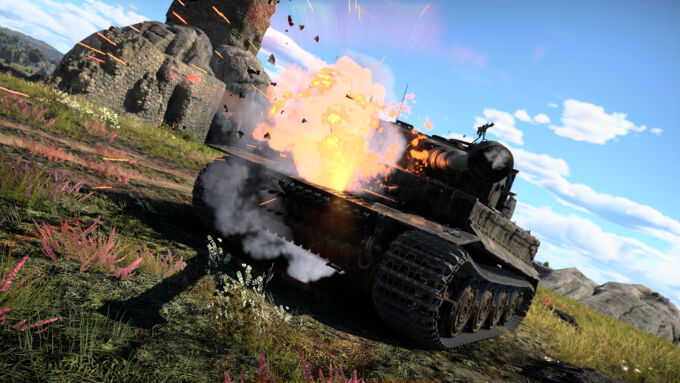
However, a glaring issue with the Tiger is the placement of its ammunition storage. Located in the hull sponsons are up to 70 shells that are in a prime location to be hit by enemy fire. A single shot into these areas will almost certainly result in an ammunition detonation if they are filled at the time.
To minimize the risk of an ammunition detonation it is important to limit the amount of rounds you take into any given battle. Generally speaking it is recommended to take at most 20 to 25 rounds in any given match.
Mobility
For a heavy tank and especially a tank that weighs nearly 60 tons, the Tiger I has a decent power to weight ratio of between 11.34 hp/t (H1) and 12.21 hp/t (E). In terms of top speed the Tiger I is surprisingly fast with a 27.9 mph (44.9 kph) forward top speed and a respectable 5.2 mph (8.36 kph) reverse speed.
These two factors combined means that the Tiger I has mobility that rivals or even exceeds that of some medium tanks and allows it to reposition itself around the map in order to flank, capture objectives, or acquire a better firing position.
On top of this the Tiger I has access to neutral steering - allowing the vehicle to pivot on the spot without having to change its position.
Usage in battle
Sniper: The Tiger can function well as a sniper due to its powerful cannon being effective even at long distances and its armor being able to absorb the impact of enemy fire quite easily at a distance. The Tiger’s -8 degrees of gun depression means that you can utilize terrain to go 'hull down', meaning only exposing your thickly armored turret while firing upon an enemy.
Brawler: The Tiger is a dangerous opponent at close ranges as well. By utilizing angling, you can make yourself a tough nut to crack even at point-blank range. Though your sluggish turret traverse renders you vulnerable to being outflanked by lighter and more agile vehicles such as the M18 Hellcat, so it is essential to maintain situational awareness. Turning your hull with your turret also makes it easier to get your gun on target in these close-range situations.
Notable Enemies:
Light Tanks/Mobile TDs:
- Of all varieties, these vehicles can pose a threat to you if allowed to get on your side. Thus it is important to keep your head on a swivel and watch your flanks. Do not forget to load HE for open-topped vehicles!
Medium Tanks:
- Panther: The Panther’s upper front plate is impenetrable to the Tiger’s cannon, yet its turret can be penetrated. Take care to aim towards the center of the gun mantlet or the portions of the turret not protected by the gun mantlet. Another critical weakness of the Panther is its abysmal reverse speed of -2 mph. If the Panther is out of position it cannot retreat swiftly.
- M26: In all of its variations, the Pershing is a dangerous opponent for the Tiger I with all their cannons being able to frontally penetrate a Tiger even at an angle. For the normal Pershing, its weak spots are the neck of the turret, its machine gun port, and the driver’s and radio operator’s hatches.
Heavy Tanks:
- M4A3E2 (76) W: The Jumbo in both of its variants boasts very thick frontal armor that is highly resistant to the KwK 36. Its main weak spot is the machine gun port, but some other locations are the neck of the turret if you are close enough or the lower sides of the hull if the Jumbo is angling too much.
- T26E1-1: The T26E1-1 'Super Pershing' shares many of the same weak spots as its original counterpart, but boasts extra protection along its frontal hull and turret front. Though its cannon has a long reload that is almost double that of the Tiger’s, so if the Super Pershing misses its shot, you can exploit its downtime.
- T26E5: For the T26E5 'Jumbo Pershing', the neck of the turret is the only reliable frontal weak spot; thus, it might be better to shoot out the cannon barrel and then get on the Jumbo’s side.
- T29/T30/T34: This line of American heavy tanks features the same hull and turret and differs only in armament; however, all of those armaments will obliterate your Tiger from any angle. Their weak spots are the corners of their lower front plate and the area around the machine gun port. The tried-and-true method of shooting out their barrel is also viable.
- IS-2/44: The IS-2's infamous 122mm cannon can make quick work of the Tiger I, but its long 20+ second reload means that if you catch it after it fires, it is defenseless. From the front, you can penetrate the lower glacis, the turret cheeks, and the commander cupola.
Tank Destroyers:
- T95: The Doom Turtle is essentially impenetrable from the front, and its 105mm cannon is a dangerous threat. Its primary weak spot is the cupola on top of the vehicle. If you manage to outflank the T95, shoot the area directly beneath the cupolas.
- Tortoise: Shooting the commander’s cupola will cripple the vehicle’s crew, although be warned that it is not guaranteed that the shell will kill the gunner. If at close enough range, you can target the machine gun port as well.
- Ho-Ri Prototype: The Ho-Ri prototype is an absolute monster to fight head-on, with the only weak spot being the cheeks of the superstructure where the armor is 120mm thick. However, it should be noted that due to the vehicle’s crew layout, it is nearly impossible to one-shot it unless an ammo rack hit.
