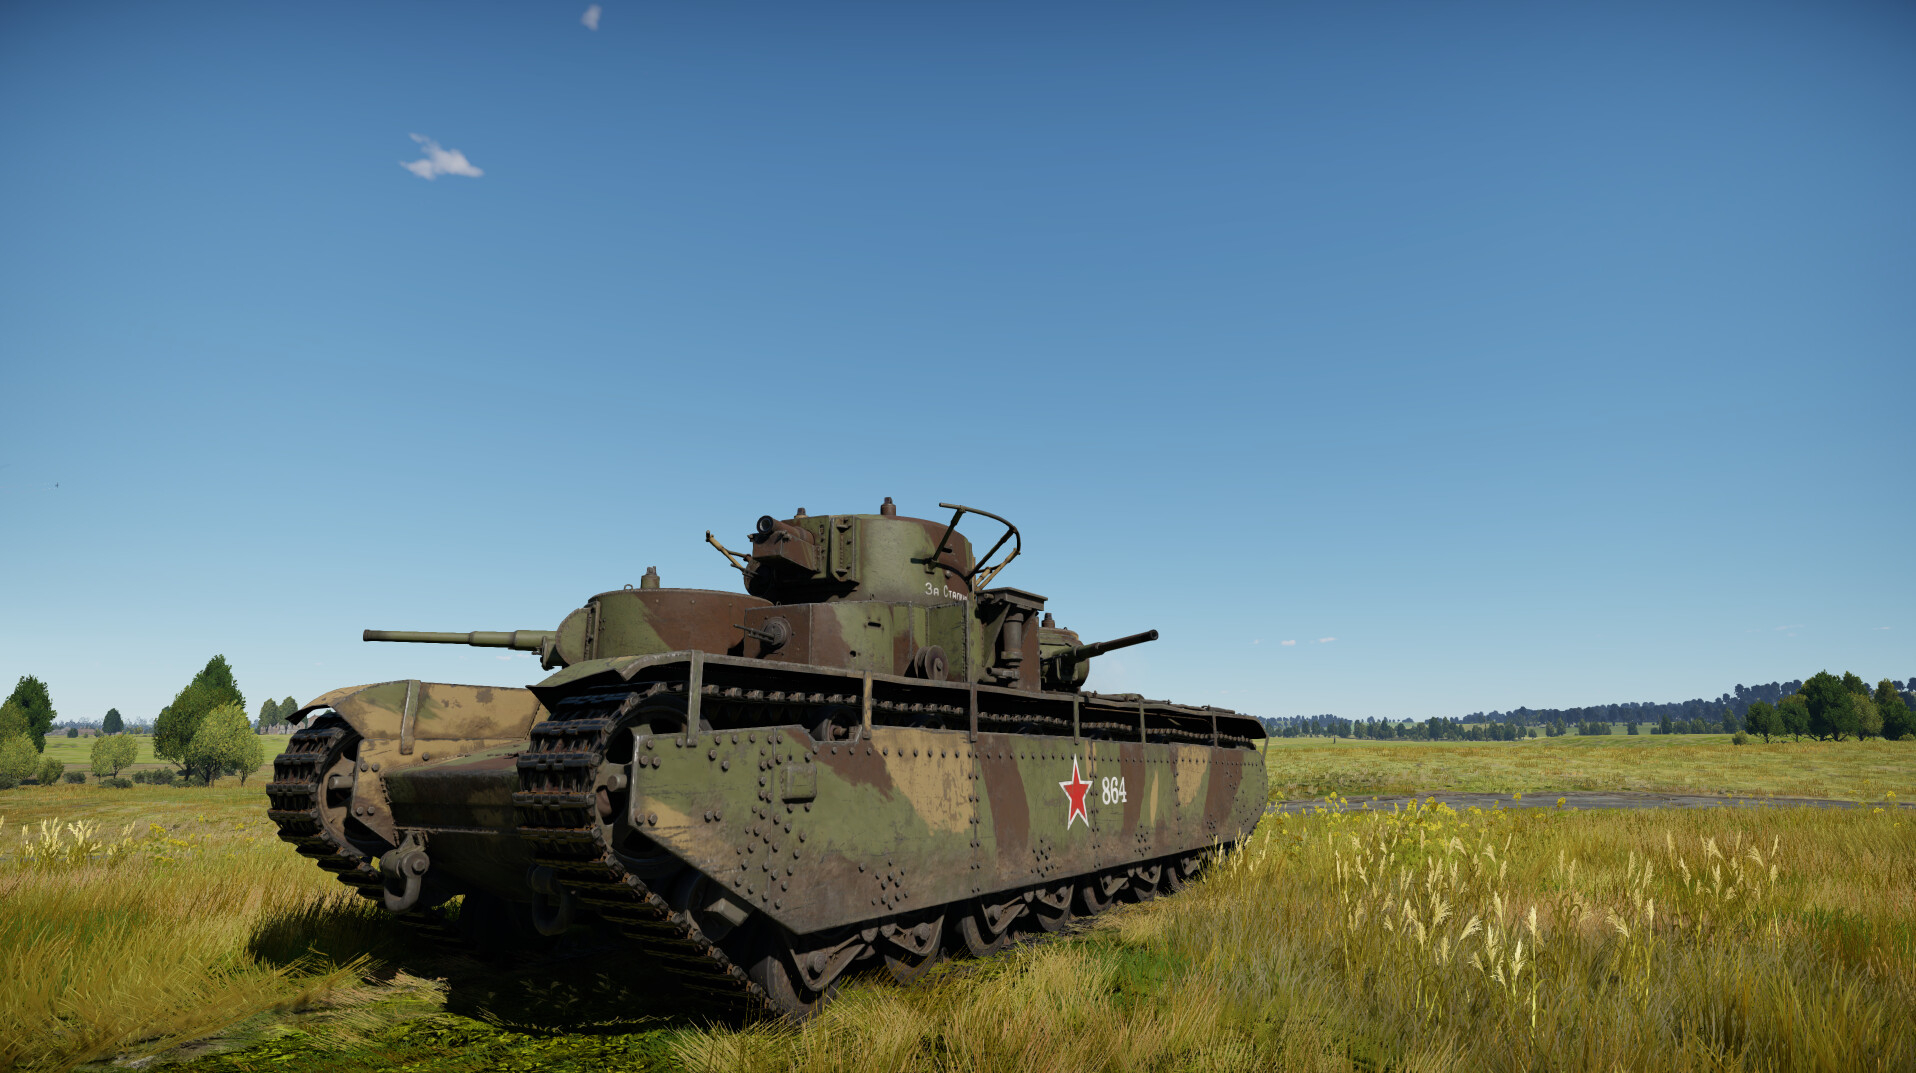
A ten-meter long behemoth with five turrets and three cannons. A fever dream? Possibly. But also the Soviet T-35 heavy tank. While awe-inspiring for both enemies and allies alike, the thin armor and slow speed of this monster make its playstyle somewhat trickier than just holding W and occasionally clicking your left mouse button. This article thus seeks to provide some clarity on all aspects of this heavy tank, to make it easier to grasp for its new owners.
| Pros | Cons |
| Three cannons in separate turrets | Thin armor |
| Large crew, high survivability | Poor mobility |
| Five machine guns | Very large profile |
| High explosive filler on main gun |
The Module Layout
Given its size, the T-35's module layout is quite complex. The vehicle’s engine, radiator and three fuel tanks are located at the rear of the vehicle, with the transmission extending only a very short distance from the engine to the rear drive wheel. The fighting compartment can essentially be split into three sections, as the crew detachments manning each section are largely separated from one another.
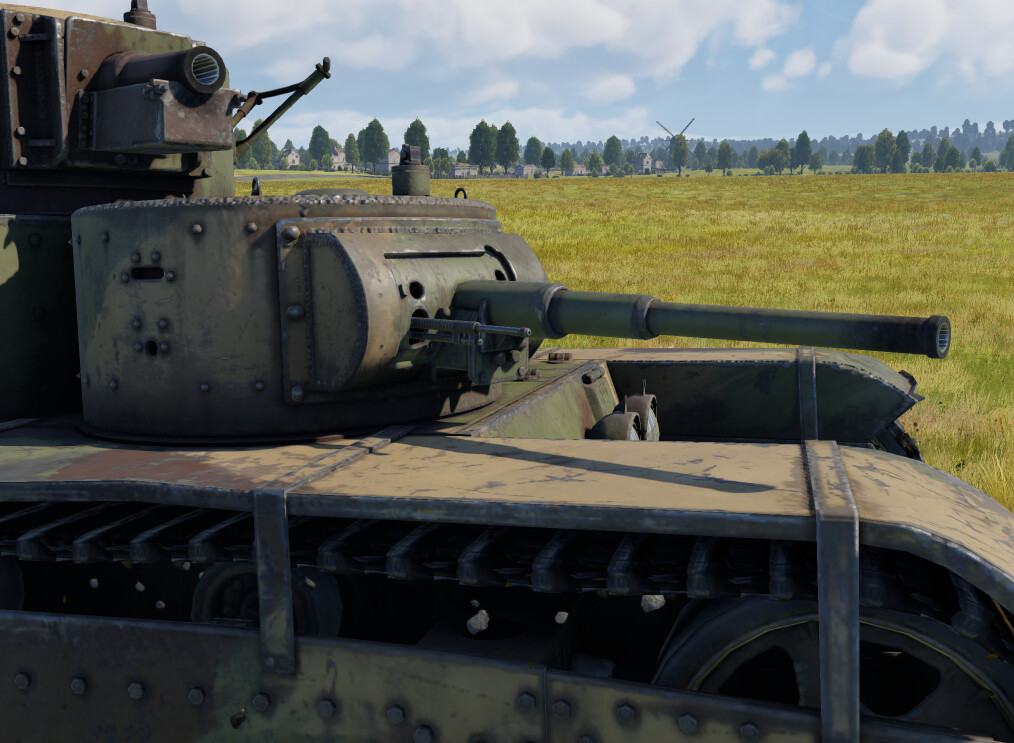
The front section houses the driver, the first 45mm turret, and a machine gun turret, both forward-facing. The 45mm turret is manned by a gunner and a loader, while the machine gunnet turret is only operated by a single crew member, bringing the total crew count of this section to four. The 45mm and machine gun turrets, being separated from the tank’s main central superstructure and taking up a large section of the vehicle’s frontal profile, serve as an effective shell trap. Shots that hit this section will rarely manage to pierce through both front and rear armor of the turrets, the crew members manning them, and the armor of the central superstructure itself. This means that the main 76mm turret will often remain operational even after the vehicle takes a hit from the front, allowing the user to quickly return fire at the enemy.
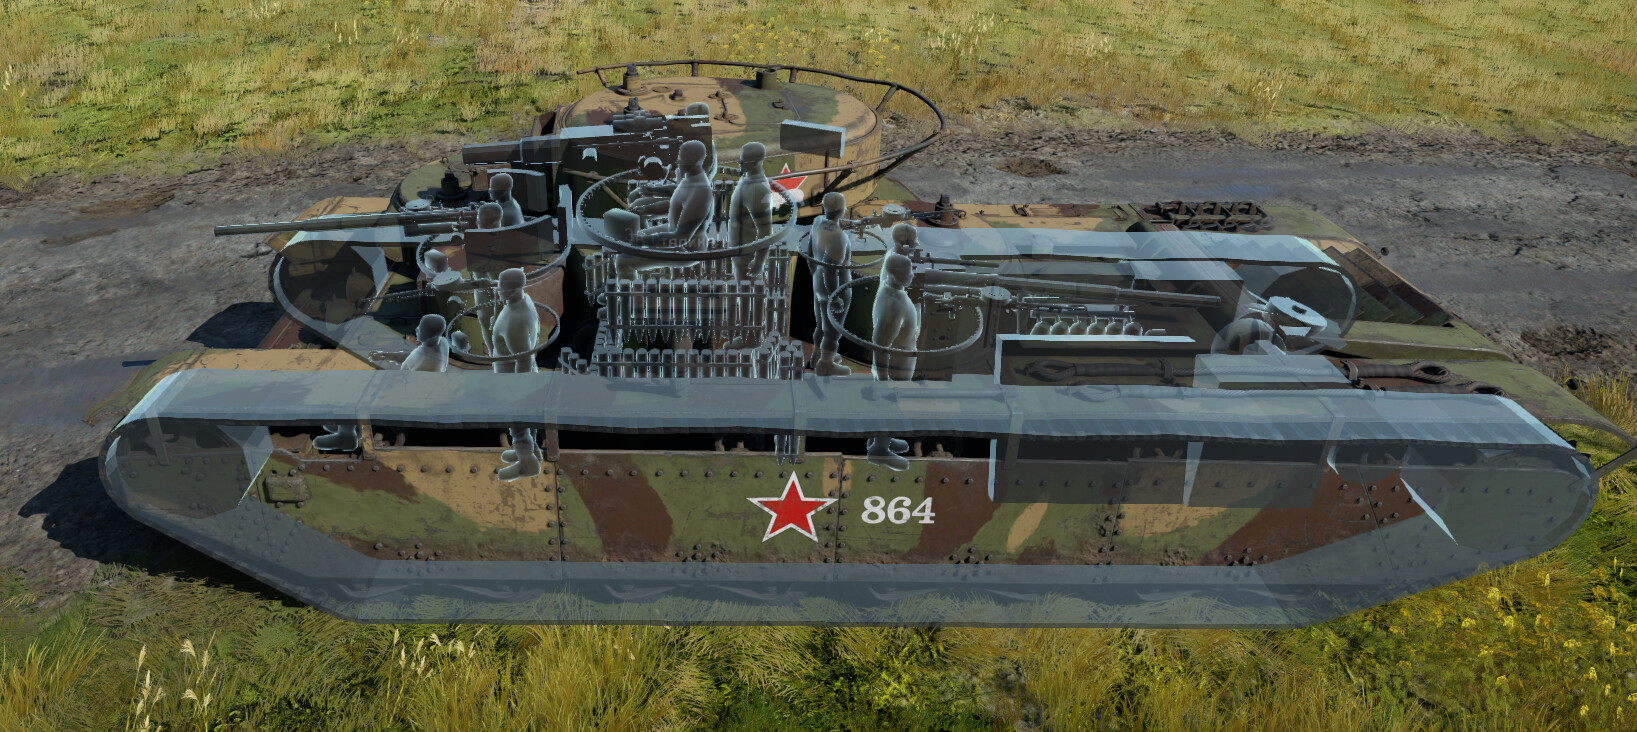
The central section houses the main 76mm turret and the ammunition for it. Inside the turret sits the tank’s commander, as well as the gunner and loader operating the main gun. The area below the main turret is largely taken up by ammunition for the 76mm cannon, but is otherwise devoid of any modules or crew. Bringing a limited amount of ammunition into battle thus renders that area into a shot trap, where most shells will harmlessly pass through without dealing any significant damage. Bringing approximately 30 rounds for the 76mm cannon and 60 rounds for the 45mm cannons should be more than sufficient, while also significantly reducing the risk of ammo detonation. Surprisingly, the rear of the main turret does not contain any ammunition, and houses only a radio.
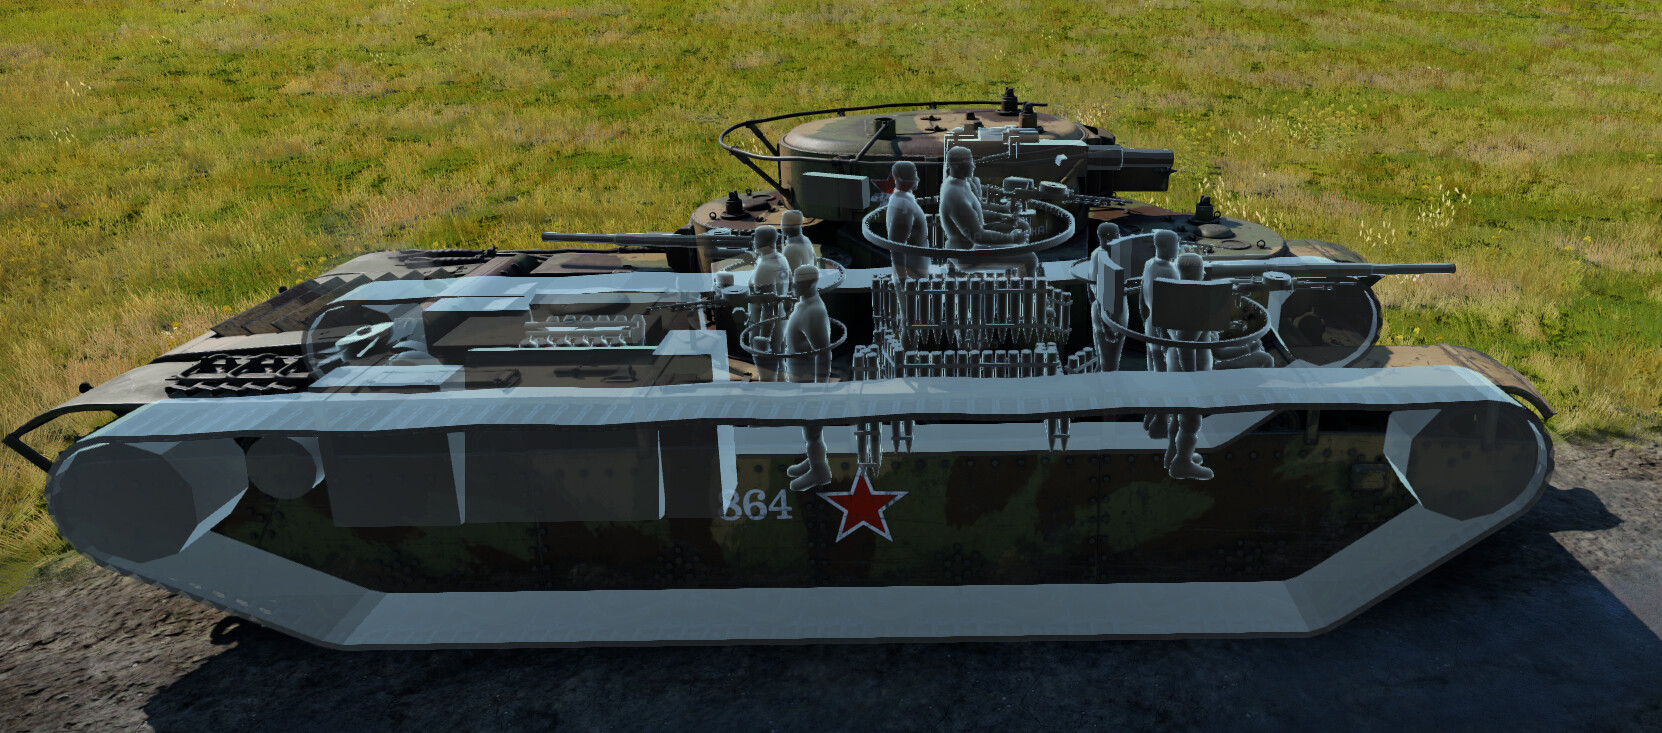
The rear section is largely identical to the frontal one, with the obvious exception of having no driver. It houses the second 45mm turret and another machine gun turret. Both are rear-facing, however, and are therefore unable to help the player if they’re firing at an enemy in front of the tank. Its position at the back of the tank lends it a high degree of protection from enemy shells that hit the front of the vehicle, and its three crew members effectively function as a reserve from which to draw replacements for vital positions such as the driver’s or main gunner’s.
The Armor Layout
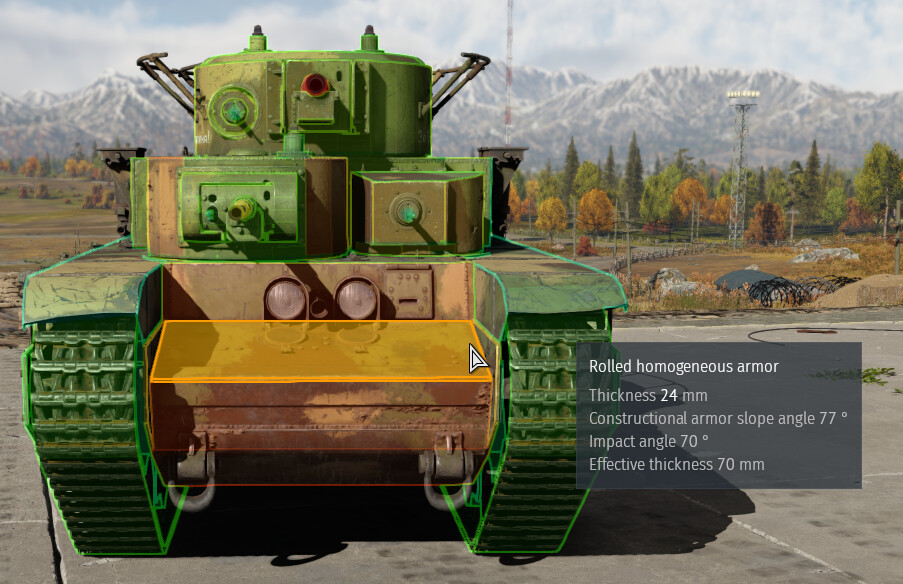
While the T-35's armor thickness is overall rather weak, its complex armor profile grants it surprisingly high survivability from some angles, especially the front and rear. The lower hull frontal armor is the thickest protecting the vehicle, with two mostly flat 30mm plates and between them a highly angled 24mm plate with 70mm of effective thickness.
The upper superstructure (behind the turrets) is frontally protected by only 20mm of armor, with the turret having an all-round thickness of 20mm as well. The frontal upper superstructure, however, is largely hidden behind the two auxiliary turrets, which in total (their front and rear armor combined) add up to around 38mm of additional frontal armor protecting the main gun, bringing the frontal protection of the upper superstructure up to around 60mm. One should keep in mind, however, that the auxiliary turrets themselves are very weakly protected (by only around 20-25mm all round), meaning that while frontal hits to the hull are unlikely to incapacitate the main gun, the 45mm turret is very likely to be knocked out of action.

The sides of the vehicle are the only angles from which the main turret is fully vulnerable. They are protected by 23mm of armor, with additional 10-11mm external plates protecting its upper and lower sides, respectively. This brings the total side armor of the vehicle to around 35mm, which is sufficient only at stopping high-caliber machine gun rounds and certain autocannons. Paired with its very large size, this makes the T-35 an exceptionally easy target to hit and damage from the flank. The player should therefore maintain vigilance for signs of enemy tanks trying to approach them from the side.
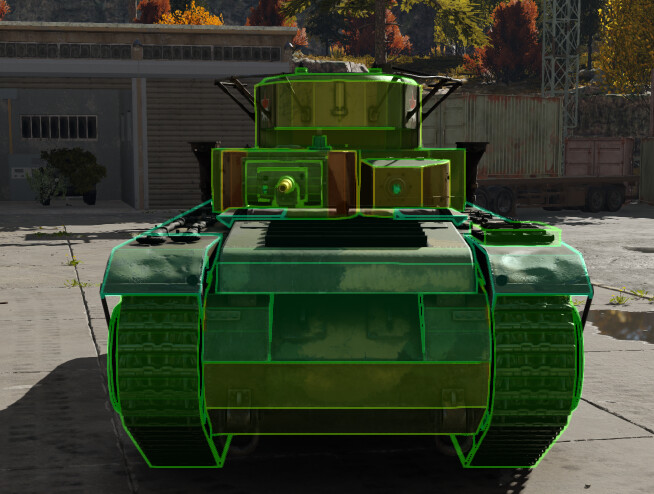
The rear of the T-35 benefits from auxiliary turrets protecting the main gun similarly to how the front does, but also receives the added protection of the very long engine deck. While the armor covering it is very thin, enemy shells are highly unlikely to pierce through the whole length of the transmission and then the engine to strike the crew members behind it. The upper superstructure’s rear armor is identical to the frontal one, at 20mm unangled. The auxiliary turrets and their armor are also identical to those present in the front of the tank. Thus, considering the engine deck, the vehicle can be considered more survivable from the rear than from the front.
The T-35's main turret can in many ways be considered the weakest part of the tank. For all the protection provided by auxiliary turrets and modules, the turret itself is extremely unlikely to stop a direct hit from even autocannons, let alone larger armament. Protected by only 20mm of armor, large, and fully visible from all angles, it should for all intents and purposes be considered the weakspot of the tank.
Ironically, the main turret’s protection is technically strongest in the rear, as there the armor protecting it is 21mm thick, rather than 20mm. Not that the extra milimeter is likely to make a difference. Either way, despite being essentially a weakspot, disabling the main turret will in no way render the T-35 helpless. Indeed, it is very difficult to incapacitate both a 45mm auxiliary turret and the main turret in a single hit, as a result of which the enemy that manages to disable either will still be vulnerable to return fire from the user while reloading. The 45mm turrets are more than capable enough to knock out vehicles with a single hit, which will be covered more thoroughly in the Armament section.
The Mobility
The T-35 is a slow, sluggish tank. There’s no other way to put it. This comes as no surprise, considering its rather gargantuan size, but is nonetheless something that must be kept in mind. Fortunately, the player is unlikely to forget that aspect of the T-35 as they steam along at the breakneck speed of 28 km/h, squinting through the dust kicked up by their teammates getting farther and farther away. The heavy tank’s acceleration is surprisingly decent, given its moderately high 9.6 HP/t ratio, thanks to which it will reach its top speed rather quickly. The top speed being only 28 km/h, however, means that the T-35 will lag behind allied tanks on the way to combat and will be slow to reposition in an emergency.
The slow repositioning is further solidified by the tank’s inability to effectively traverse its hull on the spot. It is capable enough of performing minor adjustments, but the player will quickly discover that the T-35's hull traversal speed of around 2°/s is insufficient for anything else. In this aspect, the player is thus advised to treat the tank like a wheeled vehicle, with hull traversal done with the help of minor forward and backwards movement.
The T-35's reverse speed also leaves much to be desired, but that comes with a certain benefit. Indeed, the T-35 is unable to reverse at a speed higher than 4 km/h, which while making it impossible to quickly retreat from a bad situation, also allows it to accurately fire even while reversing, as the speed is insufficient to cause the cannon to sway. This means that while the T-35 can only reverse at frustratingly slow speeds, it can return fire effectively while doing so.
The Armament
The armament of the T-35 to some extent makes up for its drawbacks. Equipped with a 76mm KT-28 main gun, two 45mm 20-K secondary cannons and five DT machine guns, it has by far the most firepower out of any tank at or near its Battle Rating. The positioning of the auxiliary turrets, while preventing the tank from focusing all its firepower on a singular enemy, also allows it to respond to flanking threats considerably faster than otherwise possible.
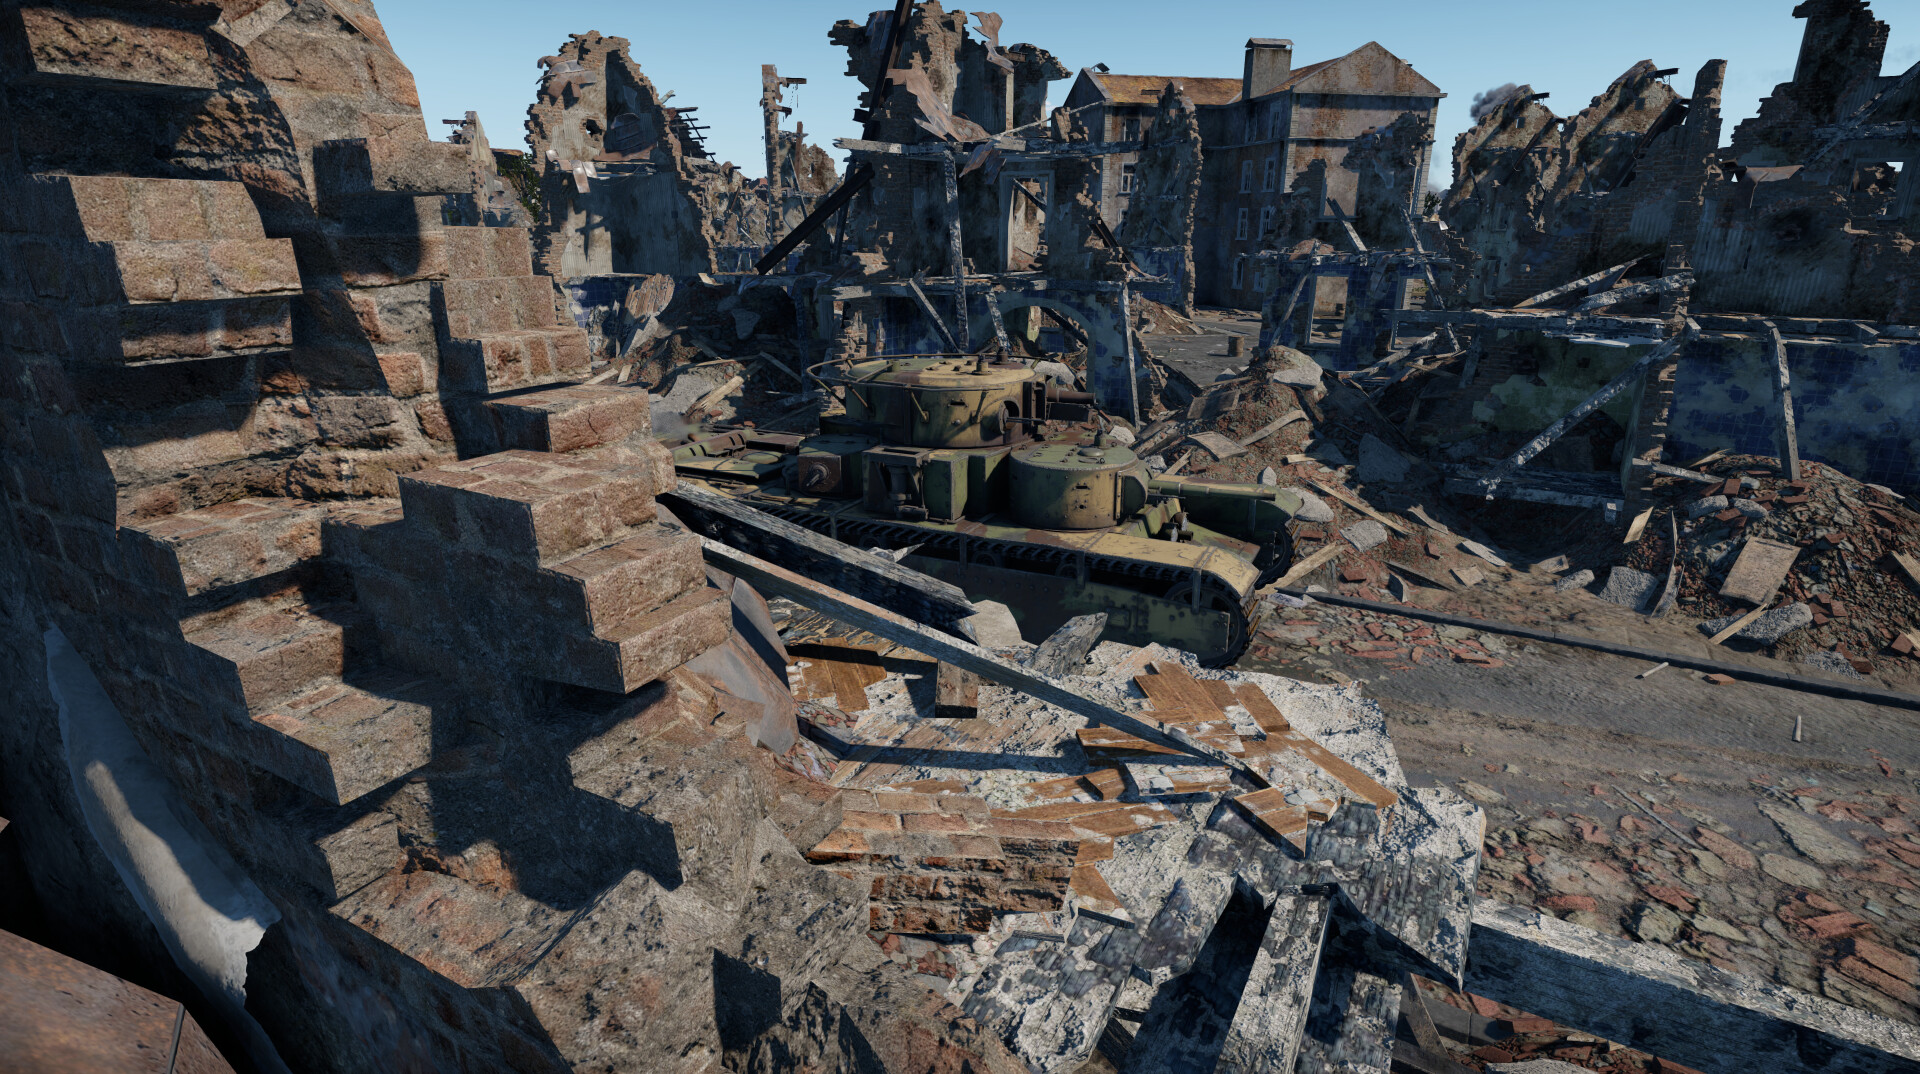
The rear-facing 45mm turret is likely to surprise some of the newer players one may encounter in the T-35's BR bracket, as they may not expect any vehicle to have rear-facing firepower and will thus confidently attack you from behind, focusing only on the main turret and not noticing the auxiliary 45mm traversing at them until it’s too late. In order to make the most use out of the T-35's firepower, however, one should know the blind spots of its auxiliary cannons. These can be seen in the image below.

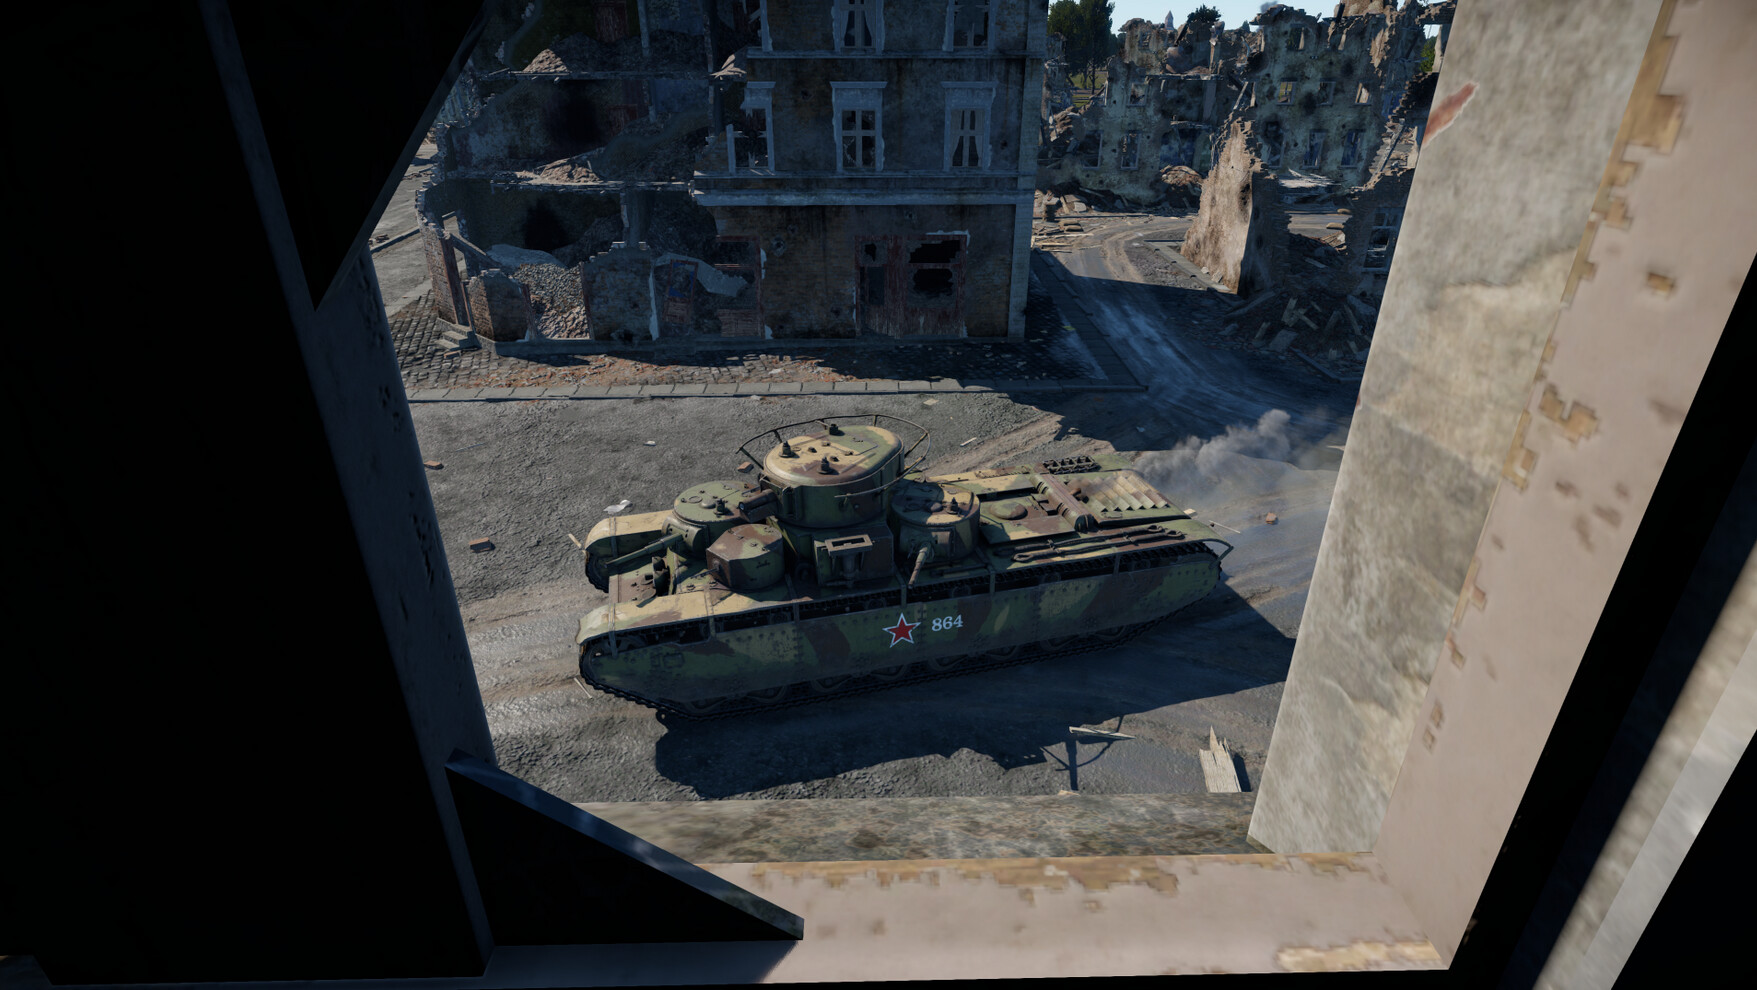
Combined with the main 76mm cannon’s rather underwhelming (terrible) maximum depression angle of five degrees and its mount being rather far from the ground, the vehicle actually possesses full blind spots into which it is unable to fire with any of its three cannons. These are areas inside the highlighted area seen above, right next to the tank. A smart enemy will thus be able to take hide in these blindspots and continuously fire at the T-35 as it is unable to fight back, which is a risk the user has to always be mindful of. An example of this from a real match can be seen below.
Regarding the T-35's shell selection, it is recommended to bring a reduced ammo load into battle due to the vehicle’s ammo racks being a major weakspot which, when hit, will often result in an immediate loss of the vehicle. For the 76mm cannon, it is advised to mainly bring the BR-350A (MD-5 fuze) APHEBC shell due to its satisfactory penetration capabilities and high explosive mass, as a result of which successful hits are likely to knock out enemy vehicles in one shot.
Bringing HE shells is generally not necessary, but one may bring a small amount of them in order to knock out open-topped vehicles more easily. The shrapnel shells, meanwhile, are not recommended due to them being largely useless by virtue of being outclassed by either of the other two available shell types in almost every way.
For the 45mm auxiliary cannons, only two shells are available, and the choice between them is up to the player. The BR-240SP shell possesses slightly better armor piercing capabilities, but lacks explosive filler. The BR-240, on the other hand, has marginally weaker (3mm) penetration but offers 29g of explosive filler, considerably increasing the amount of damage a successful penetration can cause. This article recommends using the BR-240 due to the largely negligible loss in penetration in return for a significant increase in post-pen damage, but either shell is viable and thus the choice belongs to the user.
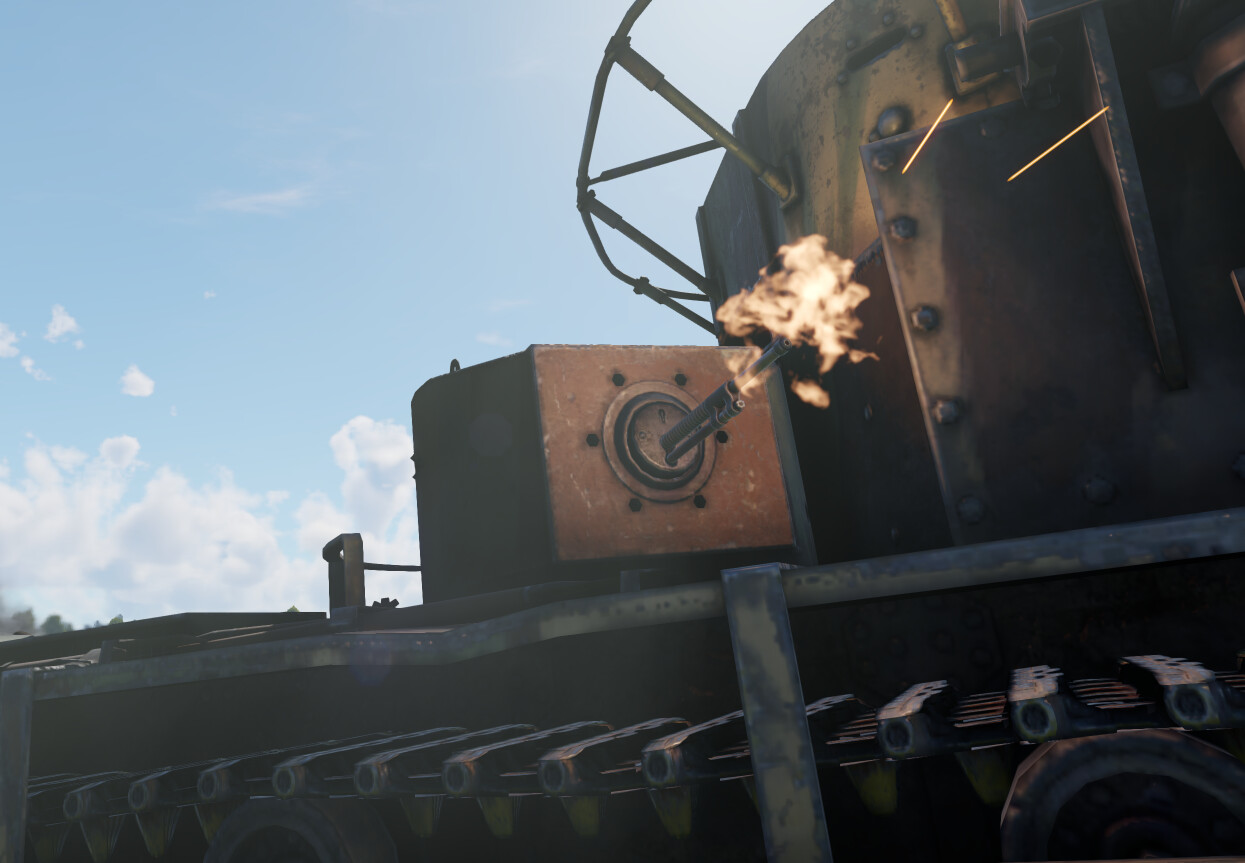
The T-35 is also equipped with a total of five DT machine guns, one in each turret. These machine guns, while in general not very useful against ground targets barring some open-topped exceptions, are surprisingly effective at harassing low-flying aircraft. Their even distribution means the T-35 has the coverage of two or three machine guns in any direction, while their decent traversal speed and good elevation angles make them effective at tracking the slow, low-flying biplanes commonly seen around the T-35's BR bracket. Should the user find themselves without any ground targets to fire at, serving as a makeshift SPAA on their way to combat is a viable passtime which is also likely to bear fruit in the form of shot down enemy aircraft.
The Playstyle
The T-35's nature as a slow, lumbering and rather poorly protected gun platform makes it shine in close-quarters, urban combat, but suffer in most other circumstances. The 76mm cannon is difficult to aim in long-distance engagements, and while the secondary 45mm is much better suited for long-range combat, the T-35 is still a very large target with poor protection, making it rather easy for concealed enemies to put round after round through its thin armor plating. The player should therefore do their best to fight in urban environments when possible, as the T-35's large size and poor mobility become less of a hindrance when fighting in narrow streets and alleyways.
Cities, however, come with their own risk, that being flanking attacks. As mentioned before, the T-35 can often respond to them more quickly than conventional tanks. It is still vulnerable to them, however, especially from vehicles equipped with autocannons.
Autocannons (alongside high-caliber HE howitzers, which are fortunately rare at this Battle Rating) can be aptly described as the T-35's worst enemy. Indeed, its overall thin armor protection as well as large profile, paired with autocannons being a very common armament seen on vehicles around the T-35's BR bracket, make them highly dangerous for this lumbering behemoth. While some autocannons may fail to pierce the T-35's frontal hull armor, there is nothing to stop them from tearing into its turrets and side armor. Autocannon-armed vehicles should therefore be the player’s priority targets, and knocking them out when possible before they utilize their high mobility to flank and subsequently destroy the T-35 should be paramount.
A certain trick the player may utilize when an enemy player is waiting around a corner is firing the secondary 45mm in order to trick them into pushing out, thinking the T-35 is reloading, upon which the user can quickly destroy them using their primary 76mm cannon. This can be done by setting a special keybind for firing only from secondary cannons, which is an action unbound by default.
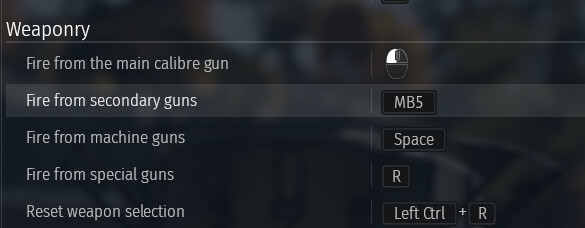
Having done this, the player will then be able to fire their secondary guns without firing their main cannon first in any ground vehicle that possesses secondary cannons, making it an overall useful setting, rather than one merely used in this individual trick.
This “fake miss” tactic might seem situational, but with the T-35's primary habitat being urban areas, it comes in handy more often than one would expect. Should the reader need additional visualization to know how exactly it is performed, an example can be seen in the short video below.
The T-35 can thus be summarized as a large, lumbering beast that performs best in urban areas. It possesses extraordinarily heavy armament for its Battle Rating, yet this strength is balanced by a myriad of weaknesses, including its slow speed, poor protection, very poor maneuverability, and large profile. As a result of this, while terrifying in the right hands, the T-35 takes some practice before it can be utilized to its fullest extent. Nonetheless, once the player gets the hang of this five-turreted behemoth, they will find it very fun and satisfying to use, as well as a generally quite viable lineup choice for urban maps.