Difference between revisions of "AH-1S Kisarazu"
(→Armaments: Reformatted) |
m (Changed a totally wrong thing in Pros/Cons) (Tag: Visual edit) |
||
| (45 intermediate revisions by 16 users not shown) | |||
| Line 1: | Line 1: | ||
| − | |||
| − | |||
| − | |||
| − | |||
| − | |||
{{Specs-Card | {{Specs-Card | ||
|code=ah_1s | |code=ah_1s | ||
| − | | | + | |store=6882 |
}} | }} | ||
== Description == | == Description == | ||
| − | <!-- ''In the description, the first part | + | <!--''In the description, the first part needs to be about the history of and the creation and combat usage of the aircraft, as well as its key features. In the second part, tell the reader about the aircraft in the game. Insert a screenshot of the vehicle. If the novice player does not remember the vehicle by name, he will immediately understand what kind of vehicle it is talking about.''--> |
| − | The '''{{Specs|name}}''' | + | [[File:GarageImage_{{PAGENAME}}.jpg|620px|thumb|left]] |
| − | + | {{break}} | |
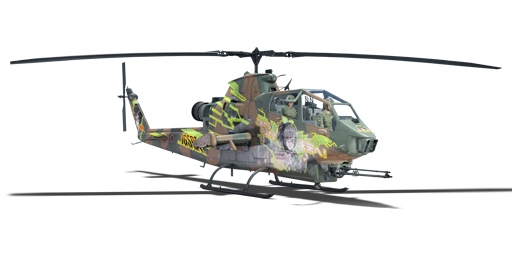
| − | + | The '''{{Specs|name}}''' is a gift rank {{Specs|rank}} Japanese attack helicopter {{Battle-rating}}. In addition, the '''{{Specs|name}}''' is the first vehicle in the game to feature a female flight crew. This helicopter was introduced in [[Update 1.89 "Imperial Navy"]]. | |
| − | |||
| − | |||
| − | |||
| − | |||
== General info == | == General info == | ||
| − | === Flight | + | === Flight Performance === |
| − | + | <!--Describe how the aircraft behaves in the air. Maximum speed, manoeuvrability, speed and allowable loads - these are the most important characteristics of the vehicle.--> | |
| − | <!-- | + | The AH-1S is a single turboshaft T53-L-703 power plant, it provides up to 1300 BHP & 210 Kgf with a mass of 350 Kg. This turboshaft engine is able to push the AH-1S to speeds in excess of 277 km/h whilst carrying wing mounted armaments. |
| − | The AH-1S | ||
{| class="wikitable" style="text-align:center" | {| class="wikitable" style="text-align:center" | ||
|- | |- | ||
| − | ! | + | ! colspan="4" | Characteristics |
| + | |- | ||
| + | ! colspan="4" | ''Stock'' | ||
| + | |- | ||
! colspan="2" | Max Speed<br>(km/h at 1,000 m) | ! colspan="2" | Max Speed<br>(km/h at 1,000 m) | ||
| − | ! rowspan="2" | Max altitude<br>( | + | ! rowspan="2" | Max altitude<br>(meters) |
| + | |- | ||
| + | ! AB | ||
| + | ! RB | ||
|- | |- | ||
| − | + | |266||259|| {{Specs|ceiling}} | |
|- | |- | ||
| − | ! | + | ! colspan="4" | ''Upgraded'' |
| − | |||
|- | |- | ||
| − | ! | + | ! colspan="2" | Max Speed<br>(km/h at 1,000 m) |
| − | | | + | ! rowspan="2" | Max altitude<br>(meters) |
| + | |- | ||
| + | ! AB | ||
| + | ! RB | ||
| + | |- | ||
| + | |288||277|| {{Specs|ceiling}} | ||
|- | |- | ||
|} | |} | ||
=== Survivability and armour === | === Survivability and armour === | ||
| − | + | <!--Examine the survivability of the helicopter. Note how vulnerable the structure is and how secure the pilot is, how many engines the vehicle has. Describe the armour, if there is any, also mention the vulnerability of other critical aircraft systems.--> | |
| − | <!-- | ||
| − | The AH-1S | + | The AH-1S is an armoured attack helicopter offering protection to the crew and engine: |
* Composite boron carbide seat enclosures, for both of the crew, with a thickness of 20 mm. | * Composite boron carbide seat enclosures, for both of the crew, with a thickness of 20 mm. | ||
| − | * A steel seat, which offers a thickness of 12 mm for the pilot only. | + | * A steel seat, which offers a thickness of 12 mm for the pilot only. |
* Steel plate covers, offering 12 mm of thickness over the turboshaft engine. | * Steel plate covers, offering 12 mm of thickness over the turboshaft engine. | ||
| − | The AH-1S | + | The AH-1S compensates with its small and nimble size compared to the [[Mi-24_(Family)|Mi-24 Hind's]] which are incredibly well armoured but are huge and slow in comparison. However, the AH-1S does not protect all of its critical components, such as: fuel tanks, transmission, propeller shaft & control surfaces with armour plating. Nor does it have armoured glass installed around the cockpit. |
| − | |||
| − | |||
| − | |||
== Armaments == | == Armaments == | ||
| − | |||
| − | |||
| − | |||
| − | |||
| − | |||
| − | |||
| − | |||
| − | |||
| − | |||
| − | |||
| − | |||
=== Offensive armament === | === Offensive armament === | ||
| − | + | <!--Describe the offensive armament of the aircraft, if any. Describe how effective the cannons and machine guns are in a battle, and also what belts or drums are better to use. If there is no offensive weaponry, delete this subsection.--> | |
| − | <!-- | ||
{{main|M197 (20 mm)}} | {{main|M197 (20 mm)}} | ||
The '''''{{PAGENAME}}''''' is armed with: | The '''''{{PAGENAME}}''''' is armed with: | ||
| − | * 1 x 20 mm M197 cannon | + | * 1 x 20 mm M197 cannon (750 rpg = 750 total) |
| − | |||
=== Suspended armament === | === Suspended armament === | ||
| − | {{ | + | [[File:AH1S_Arm.jpg|320px|thumb|right|The '''{{PAGENAME}}''' In-flight, Being redirected to a combat zone]] |
| − | <!-- | + | <!--Describe the aircraft's suspended armament: additional cannons under the wings, bombs, rockets and torpedoes. This section is especially important for bombers and attackers. If there is no suspended weaponry remove this subsection.--> |
| + | {{main|FFAR Mighty Mouse|BGM-71 TOW|M134 Minigun (7.62 mm)}} | ||
| − | The | + | The AH-1S offers a wide range of choice for secondary armament, up to 12 choices: |
| − | |||
| − | |||
| − | |||
| − | |||
| − | |||
| − | |||
| − | |||
| − | |||
| − | |||
| − | |||
| − | |||
| − | |||
| − | |||
| − | |||
| − | |||
| − | |||
| − | + | *Without load | |
| − | + | *28 x FFAR Mighty Mouse rockets | |
| − | * Without load | + | *76 x FFAR Mighty Mouse rockets |
| − | * 76 x FFAR Mighty Mouse rockets | + | *2 x 7.62 mm M134 Minigun machine gun |
| − | * | + | *2 x 7.62 mm M134 Minigun machine gun & 14 x FFAR Mighty Mouse rockets |
| − | * 4 x BGM- | + | *2 x 7.62 mm M134 Minigun machine gun & 38 x FFAR Mighty Mouse rockets |
| − | * 8 x BGM- | + | *4 x BGM-71 TOW missiles |
| − | * 2 x 7.62 mm M134 Minigun machine | + | *8 x BGM-71 TOW missiles |
| − | + | *4 x BGM-71 TOW missiles & 38 x FFAR Mighty Mouse rockets | |
| + | *8 x BGM-71 TOW missiles & 38 x FFAR Mighty Mouse rockets | ||
| + | *4 x BGM-71 TOW missiles & 2 x 7.62 mm M134 Minigun machine gun | ||
| + | *8 x BGM-71 TOW missiles & 2 x 7.62 mm M134 Minigun machine gun | ||
== Usage in battles == | == Usage in battles == | ||
| − | <!-- | + | <!--Describe the tactics of playing in the helicopter, the features of using vehicles in a team and advice on tactics. Refrain from creating a "guide" - do not impose a single point of view but give the reader food for thought. Examine the most dangerous enemies and give recommendations on fighting them. If necessary, note the specifics of the game in different modes (AB, RB, SB).--> |
| − | When playing the AH-1S | + | When playing the AH-1S, select the helipad which is in the ideal tactical location for your playstyle. Climb to around 1,500 meters, find a target, then descend on to them. For optimal effectiveness, it is important that you engage them from the rear of the side. As pilots primarily scan in front of themselves for targets, attacking from behind will give you the advantage of not being seen. When shadowing the target, approach as fast as possible to close the gap to within TOW range. After slowing, engage the sight stabilizer and fire the TOW missile and guide it to the target. |
| − | If the target tries to evade, keep the missile on the target and adjust to counter any manoeuvres your adversary may attempt. | + | If the target tries to evade, keep the missile on the target and adjust to counter any manoeuvres your adversary may attempt. |
| − | Perhaps most importantly, if out of TOW range, the missile will self-detonate and could give your position away, if your adversary is attentive and sees the explosion. | + | Perhaps most importantly, if out of TOW range, the missile will self-detonate and could give your position away, if your adversary is attentive and sees the explosion. |
| − | {{Notice|Remember you only have around one and a half miles before the missiles will | + | {{Notice|Remember you only have around one and a half miles before the missiles will denote by them self, you can only select to carry either 4 or 8 BG-71 Tow missiles.|!}} |
| − | After gaining experience while playing with the BGM-71 missiles, you will be able to determine when you are within range based on that experience. This also applies to any other type of missile in the game too. | + | After gaining experience while playing with the BGM-71 missiles, you will be able to determine when you are within range based on that experience. This also applies to any other type of missile in the game too. |
| − | When engaging in close quarters combat with other helicopters, the biggest threats are air to air missiles- The AH-1S | + | When engaging in close quarters combat with other helicopters, the biggest threats are air to air missiles- The AH-1S does not offer any protection against them with countermeasures such as flairs or IRCM. This means you need to stay alert, active & on the lookout for fast moving dots. If you see a small fast dot heading towards you, make very sharp abrupt turns, change height at the same time while turning and rolling. |
| − | {{Notice|These are the biggest threats to you in battle since they can carry air-to-air missiles|!!}} | + | {{Notice|These are the biggest threats to you in battle since they can carry air-to-air missiles|!!}} |
| − | * [[AH-1Z|AH-1Z Viper]] | + | *[[AH-1Z|AH-1Z Viper]] |
| − | * [[Mi-24P|Mi-24P Hind]] | + | *[[Mi-24P|Mi-24P Hind]] |
| − | * [[Mi-24V|Mi-24V Hind]] | + | *[[Mi-24V|Mi-24V Hind]] |
| − | * [[SA.341F_Gazelle|SA.341F Gazelle]] | + | *[[SA.341F_Gazelle|SA.341F Gazelle]] |
| − | * [[SA.342M_Gazelle|SA.342M Gazelle]] | + | *[[SA.342M_Gazelle|SA.342M Gazelle]] |
| − | {{Notice|You may even be able to shoot down missiles with the installed 20 mm triple rotary M197 cannon.|!}} | + | {{Notice|You may even be able to shoot down missiles with the installed 20 mm triple rotary M197 cannon.|!}} |
| − | When engaging other helicopters, the triple barrel rotary cannon makes short work of any adversary. Make sure to load it with the air target belt, aim for critical elements of the rival helicopters such as cockpit, engine and fuel tanks. If you have equipped your helicopter with the additional twin M134 miniguns, bring your target in front of you and open fire. They will obliterate the target and send a flaming wreck to the ground. The fast fire rate will chew through ammo at a rapid rate, but when fully loaded have 3,000 rounds in total. | + | When engaging other helicopters, the triple barrel rotary cannon makes short work of any adversary. Make sure to load it with the air target belt, aim for critical elements of the rival helicopters such as cockpit, engine and fuel tanks. If you have equipped your helicopter with the additional twin M134 miniguns, bring your target in front of you and open fire. They will obliterate the target and send a flaming wreck to the ground. The fast fire rate will chew through ammo at a rapid rate, but when fully loaded have 3,000 rounds in total. That’s 1,500 Rounds per mini gun, in addition to the 750 cannon rounds for the M197, potentially up to 3,750 rounds total! |
====Ground forces==== | ====Ground forces==== | ||
| − | [[File:AH1fS_Gunner_view.jpg|620px|thumb|right]] | + | [[File:AH1fS_Gunner_view.jpg|620px|thumb|right]] <!--class=dynamic_image]] - not sure what this was supposed to do for the image, was the image supposed to span the viewable page?--> |
| − | + | Playing the AH-1S in ground forces, it is recommended to load up the 8x BG-71 Tow missiles & 38x FFAR Might mouse missiles. The BG-71 will give you the penetration at range in order to terminate tankers and with safety from the Anti-Aircraft Missile equipped anti-air vehicles. It is a wise tactic that Anti-Aircraft Missile equipped anti-air vehicles to be terminated first. Then once terminated, move into the battlefield and dominate the tanks with the 38 x FFAR Might mouse missiles, which can cause a lot of damage and could potentially terminate up to 38 tanks with well-placed shots. | |
| − | The ideal tactic is to | + | The ideal tactic is to utilise the helicopter and the terrain. Such as maps which have forests and lots of tree lines, stay low over the trees and select your targets based on the threat to yourself first, then the impact to the team. |
For example, if you have seen no enemy SPAA vehicles or other helicopters, climb in height, hover, then fire one or two missiles. Then quickly break off the hover and move to another part of the map, this way it allows you to stay undetected, remain stealthy and become a major threat to the enemy team. | For example, if you have seen no enemy SPAA vehicles or other helicopters, climb in height, hover, then fire one or two missiles. Then quickly break off the hover and move to another part of the map, this way it allows you to stay undetected, remain stealthy and become a major threat to the enemy team. | ||
| + | |||
| + | Handling radar and Surface to Air missiles, when an enemy missile equipped SPAA is achieving a lock on, you will be notified with red arrows on the screen saying radar. To break the lock start rolling, gaining speed and the arrows will go away. If you are not successful, keep a close watch around the helicopter. At this, you will see white smoke coming from the ground, make very sharp abrupt turns. Change height at the same time while turning and rolling to avoid the missile. | ||
| + | |||
| + | {{Notice|Keep a close watch out for aircraft and other attack helicopters!|!!!}} | ||
| − | + | ===Modules=== | |
| − | + | {| class="wikitable" | |
| − | + | ! colspan="1" | Tier | |
| + | ! colspan="2" | Flight performance | ||
| + | ! colspan="1" | Survivability | ||
| + | ! colspan="2" | Weaponry | ||
| + | |- | ||
| + | | I | ||
| + | | Compressor | ||
| + | | | ||
| + | | Flack jacket | ||
| + | | Offensive 20 mm belts | ||
| + | | | ||
| + | |- | ||
| + | | II | ||
| + | | | ||
| + | | | ||
| + | | Helicopter frame | ||
| + | | New 20 mm cannons | ||
| + | | M200A1 | ||
| + | |- | ||
| + | | III | ||
| + | | Engine | ||
| + | | Replacing helicopter blades | ||
| + | | | ||
| + | | Gun pod M18A1 | ||
| + | | TOW | ||
| + | |- | ||
| + | | IV | ||
| + | | | ||
| + | | | ||
| + | | Cover | ||
| + | | New 7 mm MGs | ||
| + | | TOW 4 | ||
| + | |- | ||
| + | |} | ||
=== Pros and cons === | === Pros and cons === | ||
| − | <!-- '' | + | <!--''Summarize and briefly evaluate the vehicle in terms of its characteristics and combat effectiveness. Mark its pros and cons in the bulleted list. Try not to use more than 6 points for each of the characteristics. Avoid using categorical definitions such as "bad", "good" and the like - they have a substitution in the form of softer "inadequate", "effective".''--> |
'''Pros:''' | '''Pros:''' | ||
| Line 156: | Line 164: | ||
* Very agile, with secondary load outs installed | * Very agile, with secondary load outs installed | ||
* Good secondary weapon loadout | * Good secondary weapon loadout | ||
| + | * Fully spaded, all modules and armaments unlocked | ||
* Increased research points + silver lion gain | * Increased research points + silver lion gain | ||
| − | |||
| − | |||
| − | |||
| − | |||
| − | |||
| − | |||
'''Cons:''' | '''Cons:''' | ||
| − | * Slow takeoff | + | * Slow takeoff acceleration |
* No missile protection | * No missile protection | ||
| + | * No flares | ||
* No IRCM | * No IRCM | ||
| − | * No air-to-air missiles | + | * No sidewinder air-to-air missiles |
| − | |||
| − | |||
| − | |||
| − | |||
| − | |||
| − | |||
| − | |||
| − | |||
| − | |||
| − | |||
== History == | == History == | ||
| − | + | ''Describe the history of the creation and combat usage of the helicopter in more detail than in the introduction. If the historical reference turns out to be too big, take it to a separate article, taking a link to an article about the vehicle and adding a block "/ History" (example: <nowiki>https://wiki.warthunder.com/(Vehicle-name)/History</nowiki>) and add a link to it here using the <code>main</code> template. Be sure to reference text and sources by using <code><nowiki><ref></nowiki></code>, as well as adding them at the end of the article.'' | |
| − | |||
| − | |||
== Media == | == Media == | ||
| − | <!-- | + | <!--An excellent addition to the article will be video guides, as well as screenshots from the game and photos.--> |
| − | + | {{Youtube-gallery|OTnBvnPloN|Premium Vehicles - AH-1S Kisarazu}} | |
| − | |||
| − | |||
| − | |||
| − | |||
| − | |||
| − | |||
| − | |||
| − | |||
| − | |||
| − | |||
| − | |||
| − | {{Youtube-gallery| | ||
== See also == | == See also == | ||
| − | + | ''Links to the articles on the War Thunder Wiki that you think will be useful for the reader, for example:'' | |
| − | |||
| − | |||
| − | ; | + | * ''reference to the series of the aircraft;'' |
| − | * | + | * ''links to approximate analogues of other nations and research trees.'' |
| − | |||
| − | |||
| − | |||
== External links == | == External links == | ||
| − | <!-- | + | <!--Paste links to sources and external resources, such as: |
* ''topic on the official game forum;'' | * ''topic on the official game forum;'' | ||
| − | * ''other literature.'' --> | + | * ''encyclopedia page on helicopter;'' |
| − | + | * ''other literature.''--> | |
| − | |||
| − | + | * [[wt:en/news/6223-shop-the-japanese-cobra-available-for-purchase-en|[Shop<nowiki>]</nowiki> The Japanese “Cobra” available for purchase!]] | |
| − | |||
Revision as of 10:43, 30 October 2019
Contents
Description

The AH-1S Kisarazu is a gift rank VI Japanese attack helicopter
with a battle rating of 9.7 (AB/RB/SB). In addition, the AH-1S Kisarazu is the first vehicle in the game to feature a female flight crew. This helicopter was introduced in Update 1.89 "Imperial Navy".
General info
Flight Performance
The AH-1S is a single turboshaft T53-L-703 power plant, it provides up to 1300 BHP & 210 Kgf with a mass of 350 Kg. This turboshaft engine is able to push the AH-1S to speeds in excess of 277 km/h whilst carrying wing mounted armaments.
| Characteristics | |||
|---|---|---|---|
| Stock | |||
| Max Speed (km/h at 1,000 m) |
Max altitude (meters) | ||
| AB | RB | ||
| 266 | 259 | 3475 | |
| Upgraded | |||
| Max Speed (km/h at 1,000 m) |
Max altitude (meters) | ||
| AB | RB | ||
| 288 | 277 | 3475 | |
Survivability and armour
The AH-1S is an armoured attack helicopter offering protection to the crew and engine:
- Composite boron carbide seat enclosures, for both of the crew, with a thickness of 20 mm.
- A steel seat, which offers a thickness of 12 mm for the pilot only.
- Steel plate covers, offering 12 mm of thickness over the turboshaft engine.
The AH-1S compensates with its small and nimble size compared to the Mi-24 Hind's which are incredibly well armoured but are huge and slow in comparison. However, the AH-1S does not protect all of its critical components, such as: fuel tanks, transmission, propeller shaft & control surfaces with armour plating. Nor does it have armoured glass installed around the cockpit.
Armaments
Offensive armament
The AH-1S Kisarazu is armed with:
- 1 x 20 mm M197 cannon (750 rpg = 750 total)
Suspended armament

The AH-1S offers a wide range of choice for secondary armament, up to 12 choices:
- Without load
- 28 x FFAR Mighty Mouse rockets
- 76 x FFAR Mighty Mouse rockets
- 2 x 7.62 mm M134 Minigun machine gun
- 2 x 7.62 mm M134 Minigun machine gun & 14 x FFAR Mighty Mouse rockets
- 2 x 7.62 mm M134 Minigun machine gun & 38 x FFAR Mighty Mouse rockets
- 4 x BGM-71 TOW missiles
- 8 x BGM-71 TOW missiles
- 4 x BGM-71 TOW missiles & 38 x FFAR Mighty Mouse rockets
- 8 x BGM-71 TOW missiles & 38 x FFAR Mighty Mouse rockets
- 4 x BGM-71 TOW missiles & 2 x 7.62 mm M134 Minigun machine gun
- 8 x BGM-71 TOW missiles & 2 x 7.62 mm M134 Minigun machine gun
Usage in battles
When playing the AH-1S, select the helipad which is in the ideal tactical location for your playstyle. Climb to around 1,500 meters, find a target, then descend on to them. For optimal effectiveness, it is important that you engage them from the rear of the side. As pilots primarily scan in front of themselves for targets, attacking from behind will give you the advantage of not being seen. When shadowing the target, approach as fast as possible to close the gap to within TOW range. After slowing, engage the sight stabilizer and fire the TOW missile and guide it to the target.
If the target tries to evade, keep the missile on the target and adjust to counter any manoeuvres your adversary may attempt.
Perhaps most importantly, if out of TOW range, the missile will self-detonate and could give your position away, if your adversary is attentive and sees the explosion.
| Remember you only have around one and a half miles before the missiles will denote by them self, you can only select to carry either 4 or 8 BG-71 Tow missiles. |
After gaining experience while playing with the BGM-71 missiles, you will be able to determine when you are within range based on that experience. This also applies to any other type of missile in the game too.
When engaging in close quarters combat with other helicopters, the biggest threats are air to air missiles- The AH-1S does not offer any protection against them with countermeasures such as flairs or IRCM. This means you need to stay alert, active & on the lookout for fast moving dots. If you see a small fast dot heading towards you, make very sharp abrupt turns, change height at the same time while turning and rolling.
| These are the biggest threats to you in battle since they can carry air-to-air missiles |
| You may even be able to shoot down missiles with the installed 20 mm triple rotary M197 cannon. |
When engaging other helicopters, the triple barrel rotary cannon makes short work of any adversary. Make sure to load it with the air target belt, aim for critical elements of the rival helicopters such as cockpit, engine and fuel tanks. If you have equipped your helicopter with the additional twin M134 miniguns, bring your target in front of you and open fire. They will obliterate the target and send a flaming wreck to the ground. The fast fire rate will chew through ammo at a rapid rate, but when fully loaded have 3,000 rounds in total. That’s 1,500 Rounds per mini gun, in addition to the 750 cannon rounds for the M197, potentially up to 3,750 rounds total!
Ground forces

Playing the AH-1S in ground forces, it is recommended to load up the 8x BG-71 Tow missiles & 38x FFAR Might mouse missiles. The BG-71 will give you the penetration at range in order to terminate tankers and with safety from the Anti-Aircraft Missile equipped anti-air vehicles. It is a wise tactic that Anti-Aircraft Missile equipped anti-air vehicles to be terminated first. Then once terminated, move into the battlefield and dominate the tanks with the 38 x FFAR Might mouse missiles, which can cause a lot of damage and could potentially terminate up to 38 tanks with well-placed shots.
The ideal tactic is to utilise the helicopter and the terrain. Such as maps which have forests and lots of tree lines, stay low over the trees and select your targets based on the threat to yourself first, then the impact to the team.
For example, if you have seen no enemy SPAA vehicles or other helicopters, climb in height, hover, then fire one or two missiles. Then quickly break off the hover and move to another part of the map, this way it allows you to stay undetected, remain stealthy and become a major threat to the enemy team.
Handling radar and Surface to Air missiles, when an enemy missile equipped SPAA is achieving a lock on, you will be notified with red arrows on the screen saying radar. To break the lock start rolling, gaining speed and the arrows will go away. If you are not successful, keep a close watch around the helicopter. At this, you will see white smoke coming from the ground, make very sharp abrupt turns. Change height at the same time while turning and rolling to avoid the missile.
| Keep a close watch out for aircraft and other attack helicopters! |
Modules
| Tier | Flight performance | Survivability | Weaponry | ||
|---|---|---|---|---|---|
| I | Compressor | Flack jacket | Offensive 20 mm belts | ||
| II | Helicopter frame | New 20 mm cannons | M200A1 | ||
| III | Engine | Replacing helicopter blades | Gun pod M18A1 | TOW | |
| IV | Cover | New 7 mm MGs | TOW 4 | ||
Pros and cons
Pros:
- Great manoeuvrability
- Very agile, with secondary load outs installed
- Good secondary weapon loadout
- Fully spaded, all modules and armaments unlocked
- Increased research points + silver lion gain
Cons:
- Slow takeoff acceleration
- No missile protection
- No flares
- No IRCM
- No sidewinder air-to-air missiles
History
Describe the history of the creation and combat usage of the helicopter in more detail than in the introduction. If the historical reference turns out to be too big, take it to a separate article, taking a link to an article about the vehicle and adding a block "/ History" (example: https://wiki.warthunder.com/(Vehicle-name)/History) and add a link to it here using the main template. Be sure to reference text and sources by using <ref>, as well as adding them at the end of the article.
Media
See also
Links to the articles on the War Thunder Wiki that you think will be useful for the reader, for example:
- reference to the series of the aircraft;
- links to approximate analogues of other nations and research trees.
