
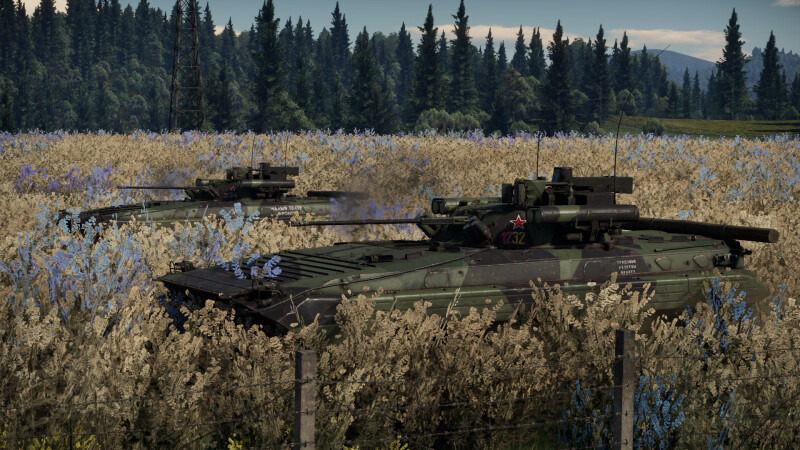
The BMP-2M is a variant of the base BMP-2, an IFV in the Russian tech tree. Being a squadron vehicle, it takes a while to unlock, and does not get any premium bonuses, meaning you will have to grind this from all the base modifications. It has gained quite the reputation in War Thunder, whether you like it or hate it, its just there, waiting for you. So how can it be used effectively, and what do you get with it?
Overview
| Pros | Cons |
| Good ATGMs | No armour |
| Decent top speed | Autocannon has limited penetration |
| Good autocannon with decent belts | Only has 8 ATGMs |
| Low profile | Top speed is sluggish compared to other light vehicles |
Breakdown of weapon systems
30mm 2A42 automatic cannon
The BMP-2M has a turret rotation speed of 42°/s horizontally and 24.5°/s vertically with a base crew, allowing you to quickly respond to threats. Unfortunately, the cannon suffers from the classic 'What's gun depression' by Russian engineers. With -4 degrees of vertical traverse and 74 degrees upwards, it is well suited to knocking out planes, but the gun depression means you cannot shoot from behind a hill. However, to make up for this, it gains access to a variety of belts. It gets 5 different belts, 3 of them with variations of AP-T and HEF-T, one APDS belt, and an APFSDS belt.
| Belt | Belt Filling | Penetration at 100m on a flat surface (mm) |
| Default | AP-T/HEF-I | 63 |
| 30mm HEI | HEF-I/HEF-I/HEF-I/AP-T | 63 |
| 30mm AP-T | AP-T/AP-T/AP-T/HEF-T | 63 |
| 30mm APDS | APDS/APDS/APDS/APDS/ HEF-T | 81 |
| 30mm APFSDS | APFSDS/APFSDS/APFSDS | 99 |
Each belt holds 250 rounds, and you can hold 2 belts, with a 1.3 second reload. This gives you an ample amount of ammunition. The APFSDS belt is enough to destroy many MBTs from the side, and probably all you will ever need to equip it with.
9M133 ATGMs

Getting access to 8 of these, with 1200mm of penetration at all ranges, these will be your best friend for taking out heavy targets. As illustrated before, you can penetrate anything, even the Abram's turret cheeks. 4 of these are ready-loaded, the others will need to be loaded in once all the others are fired. What differs these, mostly, from other ATGM carriers like the LOSAT (not really an ATGM carrier, but that's beside the point) or the Shturm-S, is that they can be fired on the move. You are able to fire all 4 ready loaded at a time, and then with a 20 second reload, you can use the other 4. One thing to note is you get access to proximity high explosive ATGMs, however these are only really useful against helicopters, due to their somewhat slow speed. In recent months, ATGM handling nerfs has struck the BMP-2M. They are somewhat more unresponsive. They swing a tiny bit after being launched, however once that is done, if the target is moving attempt to lead the target so the ATGM hovers over the image of the tank, or if they are stationary, try to launch at a range so the ATGM will finish swinging, and guide it towards there. I recommend having the mouse sensitivity set to a more middle-of-the-road setting, fast enough it feels responsive, but slow enough that the missile does not move every time you twitch while holding the mouse.
7.62mm machine gun/30mm automatic grenade launcher
Both of these weapons are niche, with the role that they would usually fill (taking out light tanks) being taken up by the 30mm autocannon. The 30mm grenade launcher can be used for indirect fire using the scout drone, or for destroying obstacles.
Mobility
With a top speed of 65km/h forward and 11km/h backwards, the BMP-2M has 400 horsepower and weighs 14.5 tons, giving it a power to weight ratio of 27.6 hp/t. While the mobility is akin to many MBTs, it is sufficient to move around the map. While moving, cover is your best friend, allowing you to peek up, fire and duck back down. Being amphibious can actually be kind of useful, as I doubt many players expect a BMP trying to impersonate warships by launching missiles from the water.
Armour
The BMP-2M has very little armour, only resistant up to .50 calibre on the side and back, and to about 20mm frontally, however, with lots of luck, you could survive APFSDS, where either the armour stops the round somehow, or because the armour is so thin, it passes right through. This is not the case most times, as with only 3 crew members, while they aren't close together they aren't far apart either, a single well placed (or lucky) shot can put you out of action for good. Getting access to a scout drone as well is useful, it allows you to mark targets on the map for friendly planes and helicopters to shoot, and due to the scouting mechanic, you can sit back, making sure your team can see all the enemies near you.

Overall Playstyle
There are multiple ways you can play the BMP-2M, whether it be a brawler, sniper or a support tank. I'll go over each of them separately here.
Brawling
If you unfortunately find yourself in a brawling position, you are in a tough spot. What you should try to do is go around the enemy, utilising ambushes in which you use the ATGMs to tear through the frontal armour, or if they are used up, then use the auto cannon to disable vital parts like the track, machine gun and main gun. Make sure you scout any enemies so your teammates can see them. Make sure you don’t end up in a frontal engagement with an MBT without ATGMs, you will most likely lose.
If in an urban map, try peeking when either you see an opportunity, or when the enemy is crippled by teammates. Using the ATGMs can be a gamble if there are objects, so if there are, use the autocannon on the barrel, then the tracks and go around the side. Otherwise, use the missiles. For obvious reasons, this is does not apply if multiple enemies are facing in multiple directions; launching a missile or firing the cannon will end in death. Cover is your best friend.
You don't particularly want to be brawling in the BMP, it is generally maps like the Sweden map or the buildings in Seversk-13 that are the problem. However, it excels in ambushes - which are perfect on those maps. Brawling is a little different - that's a head-on engagement. Ambushes are rapid strikes - like 'Boom and Zoom' for planes - only here, you appear fire an ATGM and once they are crippled, either finish them off or run, depending on how things are looking.

Sniping
Only one weapon works at this range - the ATGMs. With sufficient penetration to go through the frontal armour of most MBTs, the one downside is you need to maintain line of sight with the missile, giving your opponents plenty of time to accidentally or deliberately find you.
This only really works open maps, which unfortunately means it is easy to spot you with thermals or with an aircraft. Against aircraft, the IRST system can lock on to enemy planes within a reasonable radius, allowing you to track and blow them out of the sky. Maps that you might end up sniping on are the Arctic base, the Carpathians, or Mozdok.
Flanking
Due to your somewhat sluggish top speed, flanking is not really a great strategy, seeing as anything with a decent amount of speed, like most MBTs, might also have an idea. This means, as said before, you might get cornered by enemy tanks.
If you do decide to flank, you should attempt to peek out from behind buildings, like the small buildings on the Ardennes map, or use bushes, whether natural or bushes or golden eagle bushes for the tank, to help disguise yourself from thermals. You should use the main gun against lightly armoured targets, and the ATGMs against any MBTs or vehicles with heavier armour. The maps you would flank on are the same as what you would snipe on.

Support
If your ATGMs run out, as mentioned before, unless you want to try and use your autocannon for the vulnerable sides of MBTs, you can disable any and every vital part of a tank, keeping them pinned down while the fact you scouted them means your teammates are coming.
What you should watch out for is revenge CAS. It will happen, and the cannons found on planes will deal with your armour easily. This is why you are able to track aircraft - to put an end to them.
I hope this guide helped!
Credit -
DaBlitz_633 (first two images) WT Live // Images by DaBlitz_633
Fire 998 (image under Armour) WT Live // Image by Fire998
Laisy (image under Flanking) WT Live // Image by Laisy
csla1972 (image under Brawling) WT Live // Image by csla1972

