Difference between revisions of "Ro-Go"
m (→See also) (Tag: Visual edit) |
Tasty95215 (talk | contribs) m (Tag: Visual edit) |
||
| (27 intermediate revisions by 6 users not shown) | |||
| Line 1: | Line 1: | ||
| − | + | {{Specs-Card|code=jp_type_95_heavy}} | |
| − | |||
| − | |||
| − | |||
| − | |||
| − | {{Specs-Card | ||
| − | |code=jp_type_95_heavy | ||
| − | |||
| − | }} | ||
== Description == | == Description == | ||
| − | <!-- | + | <!--In the description, the first part should be about the history of the creation and combat usage of the vehicle, as well as its key features. In the second part, tell the reader about the ground vehicle in the game. Insert a screenshot of the vehicle, so that if the novice player does not remember the vehicle by name, he will immediately understand what kind of vehicle the article is talking about.--> |
| − | The '''{{Specs|name}}''' | + | [[File:GarageImage_{{PAGENAME}}.jpg|420px|thumb|left]] |
| − | + | {{break}} | |
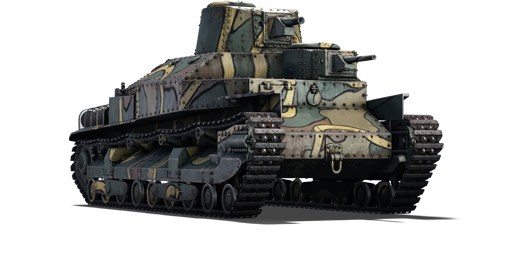
| − | + | The '''{{Specs|name}}''' is a premium rank {{specs|rank}} Japanese heavy tank {{Battle-rating}}. It was introduced in [[Update_1.67_"Assault"|Update 1.67 "Assault"]]. | |
== General info == | == General info == | ||
=== Survivability and armour === | === Survivability and armour === | ||
| − | + | <!--Describe armour protection. Note the most well protected and key weak areas. Appreciate the layout of modules as well as the number and location of crew members. Is the level of armour protection sufficient, is the placement of modules helpful for survival in combat? | |
| − | <!-- | + | |
| + | If necessary use a visual template to indicate the most secure and weak zones of the armour.--> | ||
| − | The Ro- | + | The Ro-go is an excellently protected vehicle for 1.3. Featuring armour thick enough to stop 12.7 mm machine-gun fire from all angles (except the roof), and even anti-tank guns if angled properly. The placement of modules deep down inside the hull, where most 1.3 players would never think of shooting, makes the chance that the ammo, engine, transmission and fuel tanks get hit rather low. Even the crew inside the tank are pretty well protected by the tank's armour, and if everything fails you still have the lone machine gunner in the back turret, which means that a lot of the time you will be able to make a partial recovery from getting shredded to pieces by the waves of Pz.IIs and M2A4s. |
'''Armour type:''' | '''Armour type:''' | ||
| Line 38: | Line 31: | ||
| Secondary Turret #2 || 14-15 mm (0-3°) || 25 mm || 25 mm || 13 mm | | Secondary Turret #2 || 14-15 mm (0-3°) || 25 mm || 25 mm || 13 mm | ||
|- | |- | ||
| − | + | ! Armour !! Sides !! Roof | |
|- | |- | ||
| + | | Cupola || 25 mm || 8-13 mm | ||
|} | |} | ||
'''Notes:''' | '''Notes:''' | ||
| Line 46: | Line 40: | ||
=== Mobility === | === Mobility === | ||
| − | |||
<!-- ''Write about the mobility of the ground vehicle. Estimate the specific power and manoeuvrability, as well as the maximum speed forwards and backwards.'' --> | <!-- ''Write about the mobility of the ground vehicle. Estimate the specific power and manoeuvrability, as well as the maximum speed forwards and backwards.'' --> | ||
| − | {{tankMobility|abMinHp=374|rbMinHp=256 | + | {{tankMobility|abMinHp= 374|rbMinHp= 256}} |
| − | |||
| − | |||
| − | |||
== Armaments == | == Armaments == | ||
| − | |||
=== Main armament === | === Main armament === | ||
| − | + | <!--Give the reader information about the characteristics of the main gun. Assess its effectiveness in a battle based on the reloading speed, ballistics and the power of shells. Do not forget about the flexibility of the fire, that is how quickly the cannon can be aimed at the target, open fire on it and aim at another enemy. Add a link to the main article on the gun: <code><nowiki>{{main|Name of the weapon}}</nowiki></code>. Describe in general terms the ammunition available for the main gun. Give advice on how to use them and how to fill the ammunition storage.--> | |
| − | <!-- | ||
{{main|Type 94 (70 mm)}} | {{main|Type 94 (70 mm)}} | ||
| − | {| class="wikitable" style="text-align:center" width="100 | + | {| class="wikitable" style="text-align:center" |
| + | |- | ||
| + | ! colspan="6" | [[Type 94 (70 mm)|70 mm Type 94]] | ||
| + | |- | ||
| + | ! colspan="3" rowspan="1" style="width:5em" |Capacity | ||
| + | ! rowspan="1" | Vertical <br> guidance | ||
| + | ! rowspan="1" | Horizontal <br> guidance | ||
| + | ! rowspan="1" | Stabilizer | ||
| + | |- | ||
| + | | colspan="3" | 100 || -10°/+22° || ±180° || N/A | ||
| + | |- | ||
| + | ! colspan="6" | Turret rotation speed (°/s) | ||
| + | |- | ||
| + | ! style="width:4em" |Mode | ||
| + | ! style="width:4em" |Stock | ||
| + | ! style="width:4em" |Upgraded | ||
| + | ! style="width:4em" |Prior + Full crew | ||
| + | ! style="width:4em" |Prior + Expert qualif. | ||
| + | ! style="width:4em" |Prior + Ace qualif. | ||
| + | |- | ||
| + | | ''Arcade'' || 7.44 || 10.30 || __.__ || __.__ || 14.72 | ||
|- | |- | ||
| − | + | | ''Realistic'' || 5.47 || 6.44 || __.__ || __.__ || 9.20 | |
|- | |- | ||
| − | ! | + | ! colspan="4" | Reloading rate (seconds) |
| − | |||
| − | |||
|- | |- | ||
| − | ! | + | ! colspan="1" style="width:4em" |Stock |
| − | + | ! colspan="1" style="width:4em" |Prior + Full crew | |
| + | ! colspan="1" style="width:4em" |Prior + Expert qualif. | ||
| + | ! colspan="1" style="width:4em" |Prior + Ace qualif. | ||
|- | |- | ||
| − | + | | 5.20 || __.__ || __.__ || 4.00 | |
| − | | | ||
|- | |- | ||
|} | |} | ||
| − | ==== Ammunition ==== | + | ===== Ammunition ===== |
| − | + | {| class="wikitable sortable" width="100%" style="text-align:center" | |
| − | + | ! colspan="8" | Penetration statistics | |
| − | + | |- | |
| + | ! rowspan="2" data-sort-type="text" | Ammunition | ||
| + | ! rowspan="2" class="unsortable" | Type of <br /> warhead | ||
| + | ! colspan="6" | '''Penetration''' '''''in mm''''' '''@ 0° Angle of Attack''' | ||
| + | |- | ||
| + | ! 10m | ||
| + | ! 100m | ||
| + | ! 500m | ||
| + | ! 1000m | ||
| + | ! 1500m | ||
| + | ! 2000m | ||
| + | |- | ||
| + | | Type 95 APHE || APHE ||21||20||18||16||14||13 | ||
| + | |- | ||
| + | | Type 92 HE || HE || 9 || 9 || 9 || 9 || 9 || 9 | ||
| + | |- | ||
| + | | Type 3 HEAT || HEAT ||80||80||80||80||80|| 80 | ||
| + | |- | ||
| + | |} | ||
| + | {| class="wikitable sortable" width="100%" style="text-align:center" | ||
| + | ! colspan="11" | Shell details | ||
| + | |- | ||
| + | ! rowspan="2" data-sort-type="text" | Ammunition | ||
| + | ! rowspan="2" class="unsortable" | Type of <br /> warhead | ||
| + | ! rowspan="2" |Velocity <br /> in m/s | ||
| + | ! rowspan="2" |Projectile<br />Mass in kg | ||
| + | ! rowspan="2" | ''Fuse delay'' | ||
| + | ''in m:'' | ||
| + | ! rowspan="2" | ''Fuse sensitivity'' | ||
| + | ''in mm:'' | ||
| + | ! rowspan="2" | ''Explosive Mass in g<br /> (TNT equivalent):'' | ||
| + | ! rowspan="2" | ''Normalization At 30° <br> from horizontal:'' | ||
| + | ! colspan="3" | ''Ricochet:'' | ||
| + | |- | ||
| + | ! 0% | ||
| + | ! 50% | ||
| + | ! 100% | ||
| + | |- | ||
| + | | Type 95 APHE || APHE ||300||4.45|| 1.2 ||14|| 170 || -1° || 47° || 60° || 65° | ||
| + | |- | ||
| + | | Type 92 HE || HE || 348 ||3.81|| 2.0 || 0.1 || 590 || +0° || 79° || 80° || 81° | ||
| + | |- | ||
| + | | Type 3 HEAT || HEAT || 200 ||3.35|| 0.0 || 0.1 || 601.6 || +0° || 62° || 69° || 73° | ||
| + | |- | ||
| + | |} | ||
| − | ==== [[Ammo racks]] ==== | + | ===== [[Ammo racks|Ammo racks]] ===== |
| − | + | {| class="wikitable sortable" style="text-align:center" | |
| − | |||
| − | {| class="wikitable" style="text-align:center" | ||
|- | |- | ||
| − | ! Full<br>ammo | + | ! class="wikitable unsortable" |Full<br /> ammo |
| − | ! 1st<br>rack empty | + | ! class="wikitable unsortable" |1st<br /> rack empty |
| − | ! 2nd<br>rack empty | + | ! class="wikitable unsortable" |2nd<br /> rack empty |
| − | ! 3rd<br>rack empty | + | ! class="wikitable unsortable" |3rd<br /> rack empty |
| − | ! | + | ! class="wikitable unsortable" |Visual<br /> discrepancy |
| − | |||
| − | |||
| − | |||
|- | |- | ||
| − | | '''100''' || 98 ''(+2)'' || 95 ''(+5 | + | | '''100''' || 98 ''(+2)'' || 95 ''(+5)'' || 1 ''(+99)''|| style="text-align:left" | No |
|- | |- | ||
|} | |} | ||
| − | |||
| − | + | Turret empty: 95 ''(+5)'' | |
| − | |||
| − | |||
| − | |||
=== Additional armament === | === Additional armament === | ||
| − | + | <!--Some tanks are armed with several guns in one or more turrets. Evaluate the additional weaponry and give advice on its use. Describe the ammunition available for additional weaponry. Give advice on about how to use them and how to fill the ammunition storage. If there is no additional weaponry remove this subsection.--> | |
| − | <!-- | ||
{{main|Type 94 (37 mm)}} | {{main|Type 94 (37 mm)}} | ||
| − | {| class="wikitable" style="text-align:center" width=" | + | {| class="wikitable" style="text-align:center" |
| + | |- | ||
| + | ! colspan="6" | [[Type 94 (37 mm)|37 mm Type 94]] | ||
| + | |- | ||
| + | ! colspan="6" | ''Secondary turret mount'' | ||
| + | |- | ||
| + | ! colspan="3" rowspan="1" style="width:5em" |Capacity | ||
| + | ! rowspan="1" | Vertical <br> guidance | ||
| + | ! rowspan="1" | Horizontal <br> guidance | ||
| + | ! rowspan="1" | Stabilizer | ||
|- | |- | ||
| − | + | | colspan="3" | 50 || -8°/+20° || ±110° || N/A | |
|- | |- | ||
| − | ! | + | ! colspan="4" | Reloading rate (seconds) |
| − | |||
| − | |||
|- | |- | ||
| − | ! | + | ! colspan="1" style="width:4em" |Stock |
| − | + | ! colspan="1" style="width:4em" |Prior + Full crew | |
| + | ! colspan="1" style="width:4em" |Prior + Expert Qualif. | ||
| + | ! colspan="1" style="width:4em" |Prior + Ace Qualif. | ||
|- | |- | ||
| − | + | | 4.3 || __.__ || __.__ || __.__ | |
| − | | | ||
|- | |- | ||
|} | |} | ||
| − | ==== Ammunition ==== | + | ===== Ammunition ===== |
| − | {{:Type | + | {| class="wikitable sortable" width="100%" style="text-align:center" |
| + | ! colspan="8" | Penetration statistics | ||
| + | |- | ||
| + | ! rowspan="2" data-sort-type="text" | Ammunition | ||
| + | ! rowspan="2" class="unsortable" | Type of <br /> warhead | ||
| + | ! colspan="6" | '''Penetration''' '''''in mm''''' '''@ 90°''' | ||
| + | |- | ||
| + | ! 10m | ||
| + | ! 100m | ||
| + | ! 500m | ||
| + | ! 1000m | ||
| + | ! 1500m | ||
| + | ! 2000m | ||
| + | |- | ||
| + | | Type 94 APHE || APHE ||34||33||27||22||17||14 | ||
| + | |- | ||
| + | |} | ||
| + | {| class="wikitable sortable" width="100%" style="text-align:center" | ||
| + | ! colspan="11" | Shell details | ||
| + | |- | ||
| + | ! rowspan="2" data-sort-type="text" | Ammunition | ||
| + | ! rowspan="2" class="unsortable" | Type of <br /> warhead | ||
| + | ! rowspan="2" |Velocity <br /> in m/s | ||
| + | ! rowspan="2" |Projectile<br />Mass in kg | ||
| + | ! rowspan="2" | ''Fuse delay'' | ||
| + | ''in m:'' | ||
| + | ! rowspan="2" | ''Fuse sensitivity'' | ||
| + | ''in mm:'' | ||
| + | ! rowspan="2" | ''Explosive Mass in g<br /> (TNT equivalent):'' | ||
| + | ! rowspan="2" | ''Normalization At 30° <br> from horizontal:'' | ||
| + | ! colspan="3" | ''Ricochet:'' | ||
| + | |- | ||
| + | ! 0% | ||
| + | ! 50% | ||
| + | ! 100% | ||
| + | |- | ||
| + | | Type 94 APHE || APHE || 575 ||0.7||1.2||9||9.4|| -1° || 47° || 60° || 65° | ||
| + | |- | ||
| + | |} | ||
| − | ==== [[Ammo racks]] ==== | + | ===== [[Ammo racks|Ammo racks]] ===== |
| − | [[File:Ammoracks_{{PAGENAME}} | + | [[File:Ammoracks_{{PAGENAME}}.png|right|thumbnail|300px|Ammo racks of the Ro-Go.]] |
| − | + | {| class="wikitable sortable" style="text-align:center" | |
| − | {| class="wikitable" style="text-align:center" | ||
|- | |- | ||
| − | ! Full<br>ammo | + | ! class="wikitable unsortable" |Full<br /> ammo |
| − | ! 1st<br>rack empty | + | ! class="wikitable unsortable" |1st<br /> rack empty |
| − | ! 2nd<br>rack empty | + | ! class="wikitable unsortable" |2nd<br /> rack empty |
| − | ! 3rd<br>rack empty | + | ! class="wikitable unsortable" |3rd<br /> rack empty |
| − | ! 4th<br>rack empty | + | ! class="wikitable unsortable" |4th<br /> rack empty |
| − | ! 5th<br>rack empty | + | ! class="wikitable unsortable" |5th<br /> rack empty |
| − | ! | + | ! class="wikitable unsortable" |Visual<br /> discrepancy |
| − | |||
|- | |- | ||
| − | | '''150''' || 146 ''(+4)'' || 141 ''(+9 | + | | '''150''' || 146 ''(+4)'' || 141 ''(+9)'' || 91 ''(+59)'' || 46 ''(+104)'' || 1 ''(+149)'' || style="text-align:left" | No |
|- | |- | ||
|} | |} | ||
| − | |||
| − | + | Turret empty: 141 (+9) | |
| − | |||
| − | |||
| − | |||
=== Machine guns === | === Machine guns === | ||
| − | + | <!--Offensive and anti-aircraft machine guns not only allow you to fight some aircraft but also are effective against lightly armoured vehicles. Evaluate machine guns and give recommendations on its use.--> | |
| − | <!-- | + | {{main|Type 97 tank (7.7 mm)}} |
| − | {{main|Type 97 (7.7 mm)}} | ||
| − | {| class="wikitable" style="text-align:center" | + | {| class="wikitable" style="text-align:center" |
| + | |- | ||
| + | ! colspan="7" | [[Type 97 tank (7.7 mm)|7.7 mm Type 97]] | ||
|- | |- | ||
| − | ! colspan=" | + | ! colspan="7" | ''Rear turret mount'' |
|- | |- | ||
| − | ! | + | ! colspan="4" rowspan="1" style="width:5em" |Capacity (Belt capacity) |
| + | ! rowspan="1" | Fire rate <br> (shots/minute) | ||
| + | ! rowspan="1" | Vertical <br> guidance | ||
| + | ! rowspan="1" | Horizontal <br> guidance | ||
|- | |- | ||
| − | | | + | | colspan="4" | 1,950 (20) || 499 || -8°/+20° || ±110° |
|- | |- | ||
|} | |} | ||
== Usage in battles == | == Usage in battles == | ||
| − | <!-- | + | <!--Describe the tactics of playing in the vehicle, the features of using vehicles in the team and advice on tactics. Refrain from creating a "guide" - do not impose a single point of view but instead give the reader food for thought. Describe the most dangerous enemies and give recommendations on fighting them. If necessary, note the specifics of the game in different modes (AB, RB, SB).--> |
| − | |||
| − | |||
| − | + | The Ro-go, like most landships, is the perfect vehicle to lead an assault. The Ro-go's relatively thick armour and impressive firepower mean that the Ro-go can deal a lot of punishment to the enemy. As well, if being the spearhead of an assault isn't your style, you can always use that sweet 200 m/s to annoy enemies who think that they are safe behind buildings, walls, rocks and even hills. | |
| − | |||
| − | |||
=== Pros and cons === | === Pros and cons === | ||
| − | <!-- | + | <!--Summarise and briefly evaluate the vehicle in terms of its characteristics and combat effectiveness. Mark its pros and cons in a bulleted list. Try not to use more than 6 points for each of the characteristics. Avoid using categorical definitions such as "bad", "good" and the like - use substitutions with softer forms such as "inadequate" and "effective".--> |
| − | |||
'''Pros:''' | '''Pros:''' | ||
| Line 188: | Line 268: | ||
* Six crew vehicle | * Six crew vehicle | ||
* The secondary frontal turret can act as a shield to absorb some hits | * The secondary frontal turret can act as a shield to absorb some hits | ||
| − | * Has | + | * Has relatively thick armour enough to stop heavy machine gun fire, and even some anti-tank weapons |
| − | * Good | + | * Good maneuverability for a heavy tank |
* 70 mm HEAT shells excel in both penetration and damage | * 70 mm HEAT shells excel in both penetration and damage | ||
* Modules are very well hidden in the vehicle | * Modules are very well hidden in the vehicle | ||
| Line 201: | Line 281: | ||
* Very slow | * Very slow | ||
* Penetration with standard APHE for both guns is lacking | * Penetration with standard APHE for both guns is lacking | ||
| − | * | + | * Hard to aim with HEAT |
| − | |||
| − | |||
== History == | == History == | ||
| − | <!-- ''Describe the history of the creation and combat usage of the vehicle in more detail than in the introduction. If the historical reference turns out to be too long, take it to a separate article, taking a link to the article about the vehicle and adding a block "/History" (example: <nowiki>https://wiki.warthunder.com/(Vehicle-name)/History</nowiki>) and add a link to it here using the <code>main</code> template. Be sure to reference text and sources by using <code><nowiki>< | + | <!--''Describe the history of the creation and combat usage of the ground vehicle in more detail than in the introduction. If the historical reference turns out to be too long, take it to a separate article, taking a link to the article about the vehicle and adding a block "/ History" (example: <nowiki>https://wiki.warthunder.com/(Vehicle-name)/History</nowiki>) and add a link to it here using the <code>main</code> template. Be sure to reference text and sources by using <code><nowiki><ref></nowiki></code>, as well as adding them at the end of the article. This section may also include the vehicle's dev blog entry (if applicable) and the in-game encyclopedia description (under <code><nowiki>=== In-game description ===</nowiki></code>, also if applicable).''--> |
| − | After World War I, the Imperial Japanese Army experimented with some possibility of multi-turreted tanks design based French Renault FT light tank. The development of the Type 95 Ro-Go heavy tank is based on the older version of the tank, the Type 91 heavy tank, which featured only a single 57 mm gun and two turrets, which both armed with a 6.5 mm machine guns. The tank had a maximum armour plate thickness of | + | After World War I, the Imperial Japanese Army experimented with some possibility of multi-turreted tanks design based French Renault FT light tank. The development of the Type 95 Ro-Go heavy tank is based on the older version of the tank, the Type 91 heavy tank, which featured only a single 57 mm gun and two turrets, which both armed with a 6.5 mm machine guns. The tank had a maximum armour plate thickness of 17 mm. Although the design was not successful and soon cancelled, this project became the stepping stone to the Type 95 Ro-Go tank. |
== Media == | == Media == | ||
| − | + | ''Excellent additions to the article would be video guides, screenshots from the game, and photos.'' | |
| − | + | == See also == | |
| + | ''Links to the articles on the War Thunder Wiki that you think will be useful for the reader, for example:'' | ||
| − | |||
| − | |||
| − | |||
| − | |||
| − | |||
| − | |||
| − | |||
* ''reference to the series of the vehicles;'' | * ''reference to the series of the vehicles;'' | ||
| − | * ''links to approximate analogues of other nations and research trees.'' | + | * ''links to approximate analogues of other nations and research trees.'' |
| − | |||
| − | |||
| − | |||
| − | |||
| − | |||
| − | |||
| − | |||
| − | |||
| − | |||
| − | |||
| − | |||
== External links == | == External links == | ||
| Line 240: | Line 301: | ||
* ''topic on the official game forum;'' | * ''topic on the official game forum;'' | ||
| + | * ''encyclopedia page on the tank;'' | ||
* ''other literature.'' | * ''other literature.'' | ||
| − | |||
{{Japan heavy tanks}} | {{Japan heavy tanks}} | ||
{{Japan premium ground vehicles}} | {{Japan premium ground vehicles}} | ||
Revision as of 05:51, 21 April 2020
Contents
Description

The Type 95 Ro-Go is a premium rank I Japanese heavy tank
with a battle rating of 1.3 (AB/RB/SB). It was introduced in Update 1.67 "Assault".
General info
Survivability and armour
The Ro-go is an excellently protected vehicle for 1.3. Featuring armour thick enough to stop 12.7 mm machine-gun fire from all angles (except the roof), and even anti-tank guns if angled properly. The placement of modules deep down inside the hull, where most 1.3 players would never think of shooting, makes the chance that the ammo, engine, transmission and fuel tanks get hit rather low. Even the crew inside the tank are pretty well protected by the tank's armour, and if everything fails you still have the lone machine gunner in the back turret, which means that a lot of the time you will be able to make a partial recovery from getting shredded to pieces by the waves of Pz.IIs and M2A4s.
Armour type:
- Rolled homogeneous armour
| Armour | Front (Slope angle) | Sides | Rear | Roof |
|---|---|---|---|---|
| Hull | 35 mm Front plates 25 mm (61°) Front glacis 25 mm (68°) Lower glacis |
30 mm (0-56°) Top 30 + 6 mm Bottom |
13 mm Top 25 mm (0-32°) Bottom |
13 mm |
| Main Turret | 30 mm (8-78°) Turret front 30 mm Gun mantlet |
25 mm (8-10°) 15 mm (2-34°) |
25 mm (8°) Machine gun port | 8 mm |
| Secondary Turret #1 | 30 mm (0-1°) Turret front 30 mm Gun mantlet |
25 mm | 25 mm | 8 mm |
| Secondary Turret #2 | 14-15 mm (0-3°) | 25 mm | 25 mm | 13 mm |
| Armour | Sides | Roof | ||
| Cupola | 25 mm | 8-13 mm |
Notes:
- Suspension wheels and tracks are 15 mm thick. Suspension bogies are 10 mm thick.
Mobility
| Game Mode | Max Speed (km/h) | Weight (tons) | Engine power (horsepower) | Power-to-weight ratio (hp/ton) | |||
|---|---|---|---|---|---|---|---|
| Forward | Reverse | Stock | Upgraded | Stock | Upgraded | ||
| Arcade | 25 | 7 | 25.5 | 374 | 553 | 14.67 | 21.69 |
| Realistic | 23 | 7 | 256 | 290 | 10.04 | 11.37 | |
Armaments
Main armament
| 70 mm Type 94 | |||||
|---|---|---|---|---|---|
| Capacity | Vertical guidance |
Horizontal guidance |
Stabilizer | ||
| 100 | -10°/+22° | ±180° | N/A | ||
| Turret rotation speed (°/s) | |||||
| Mode | Stock | Upgraded | Prior + Full crew | Prior + Expert qualif. | Prior + Ace qualif. |
| Arcade | 7.44 | 10.30 | __.__ | __.__ | 14.72 |
| Realistic | 5.47 | 6.44 | __.__ | __.__ | 9.20 |
| Reloading rate (seconds) | |||||
| Stock | Prior + Full crew | Prior + Expert qualif. | Prior + Ace qualif. | ||
| 5.20 | __.__ | __.__ | 4.00 | ||
Ammunition
| Penetration statistics | |||||||
|---|---|---|---|---|---|---|---|
| Ammunition | Type of warhead |
Penetration in mm @ 0° Angle of Attack | |||||
| 10m | 100m | 500m | 1000m | 1500m | 2000m | ||
| Type 95 APHE | APHE | 21 | 20 | 18 | 16 | 14 | 13 |
| Type 92 HE | HE | 9 | 9 | 9 | 9 | 9 | 9 |
| Type 3 HEAT | HEAT | 80 | 80 | 80 | 80 | 80 | 80 |
| Shell details | ||||||||||
|---|---|---|---|---|---|---|---|---|---|---|
| Ammunition | Type of warhead |
Velocity in m/s |
Projectile Mass in kg |
Fuse delay
in m: |
Fuse sensitivity
in mm: |
Explosive Mass in g (TNT equivalent): |
Normalization At 30° from horizontal: |
Ricochet: | ||
| 0% | 50% | 100% | ||||||||
| Type 95 APHE | APHE | 300 | 4.45 | 1.2 | 14 | 170 | -1° | 47° | 60° | 65° |
| Type 92 HE | HE | 348 | 3.81 | 2.0 | 0.1 | 590 | +0° | 79° | 80° | 81° |
| Type 3 HEAT | HEAT | 200 | 3.35 | 0.0 | 0.1 | 601.6 | +0° | 62° | 69° | 73° |
Ammo racks
| Full ammo |
1st rack empty |
2nd rack empty |
3rd rack empty |
Visual discrepancy |
|---|---|---|---|---|
| 100 | 98 (+2) | 95 (+5) | 1 (+99) | No |
Turret empty: 95 (+5)
Additional armament
| 37 mm Type 94 | |||||
|---|---|---|---|---|---|
| Secondary turret mount | |||||
| Capacity | Vertical guidance |
Horizontal guidance |
Stabilizer | ||
| 50 | -8°/+20° | ±110° | N/A | ||
| Reloading rate (seconds) | |||||
| Stock | Prior + Full crew | Prior + Expert Qualif. | Prior + Ace Qualif. | ||
| 4.3 | __.__ | __.__ | __.__ | ||
Ammunition
| Penetration statistics | |||||||
|---|---|---|---|---|---|---|---|
| Ammunition | Type of warhead |
Penetration in mm @ 90° | |||||
| 10m | 100m | 500m | 1000m | 1500m | 2000m | ||
| Type 94 APHE | APHE | 34 | 33 | 27 | 22 | 17 | 14 |
| Shell details | ||||||||||
|---|---|---|---|---|---|---|---|---|---|---|
| Ammunition | Type of warhead |
Velocity in m/s |
Projectile Mass in kg |
Fuse delay
in m: |
Fuse sensitivity
in mm: |
Explosive Mass in g (TNT equivalent): |
Normalization At 30° from horizontal: |
Ricochet: | ||
| 0% | 50% | 100% | ||||||||
| Type 94 APHE | APHE | 575 | 0.7 | 1.2 | 9 | 9.4 | -1° | 47° | 60° | 65° |
Ammo racks

| Full ammo |
1st rack empty |
2nd rack empty |
3rd rack empty |
4th rack empty |
5th rack empty |
Visual discrepancy |
|---|---|---|---|---|---|---|
| 150 | 146 (+4) | 141 (+9) | 91 (+59) | 46 (+104) | 1 (+149) | No |
Turret empty: 141 (+9)
Machine guns
| 7.7 mm Type 97 | ||||||
|---|---|---|---|---|---|---|
| Rear turret mount | ||||||
| Capacity (Belt capacity) | Fire rate (shots/minute) |
Vertical guidance |
Horizontal guidance | |||
| 1,950 (20) | 499 | -8°/+20° | ±110° | |||
Usage in battles
The Ro-go, like most landships, is the perfect vehicle to lead an assault. The Ro-go's relatively thick armour and impressive firepower mean that the Ro-go can deal a lot of punishment to the enemy. As well, if being the spearhead of an assault isn't your style, you can always use that sweet 200 m/s to annoy enemies who think that they are safe behind buildings, walls, rocks and even hills.
Pros and cons
Pros:
- Main gun with 70 mm HEAT and the secondary with 37 mm APHE are a deadly combination
- 70 mm's HEAT velocity of 200 m/s (one of the slowest in the game) means that it can shoot enemies behind cover
- Great gun depression and good elevation
- Six crew vehicle
- The secondary frontal turret can act as a shield to absorb some hits
- Has relatively thick armour enough to stop heavy machine gun fire, and even some anti-tank weapons
- Good maneuverability for a heavy tank
- 70 mm HEAT shells excel in both penetration and damage
- Modules are very well hidden in the vehicle
Cons:
- Slow turret traverse makes the Ro-Go easy to flank
- Features only a single machine gun in a rear turret
- Two massively different trajectories for the main guns
- Back turret ammo runs out very quickly
- Very slow
- Penetration with standard APHE for both guns is lacking
- Hard to aim with HEAT
History
After World War I, the Imperial Japanese Army experimented with some possibility of multi-turreted tanks design based French Renault FT light tank. The development of the Type 95 Ro-Go heavy tank is based on the older version of the tank, the Type 91 heavy tank, which featured only a single 57 mm gun and two turrets, which both armed with a 6.5 mm machine guns. The tank had a maximum armour plate thickness of 17 mm. Although the design was not successful and soon cancelled, this project became the stepping stone to the Type 95 Ro-Go tank.
Media
Excellent additions to the article would be video guides, screenshots from the game, and photos.
See also
Links to the articles on the War Thunder Wiki that you think will be useful for the reader, for example:
- reference to the series of the vehicles;
- links to approximate analogues of other nations and research trees.
External links
Paste links to sources and external resources, such as:
- topic on the official game forum;
- encyclopedia page on the tank;
- other literature.
| Japan heavy tanks | |
|---|---|
| Type 95 | Ro-Go |
| Germany | ▅Heavy Tank No.6 |
| Japan premium ground vehicles | |
|---|---|
| Light tanks | Ha-Go Commander · Type 16 (FPS) |
| Medium tanks | Chi-Ha Short Gun · Chi-He (5th Regiment) · Ka-Chi · Chi-Nu II · Type 74 (G) · Type 90B "Fuji" |
| Heavy tanks | Ro-Go · ▅Heavy Tank No.6 |
| Tank destroyers | Ho-Ri Prototype · Type 75 MLRS |
