
Modelling 1/72 planes, despite the overall smaller size of the model, is often more complex and generally different to 1/48 aircraft. A lot of the details are smaller and its harder to do the weathering to be to scale. Besides, if you have some gaps, they are more noticeable when the model is so small. But, the overall assembly generally takes much less time, so does the painting; models are cheaper and you can fit way more of the small ones on your shelf. And so, the author got his hands on the 1/72 Tamiya F4D-1 kit tooled back in 1998.
History
Towards the end of WW2, the Americans had captured a lot of advanced aeronautical technology in Germany, including Alexander Lippisch's works on delta-winged aircraft. Douglas company was particularly impressed by those works and presented their design in 1947. Meanwhile the US Navy required a fast interceptor with a high climb rate to shoot down Soviet bombers. And here is where Douglas' project came in.
Works on creating the mockup lasted until March 1949. Douglas designed a thin delta-wing aircraft powered by a single Westinghouse J40 jet engine, which was supposed to be replaced by J57 by the time the aircraft was to enter service. Previous plans of putting two J34 engines were rejected. Its main weaponry was supposed to be unguided rockets, but it was later decided to use 20 mm cannons.
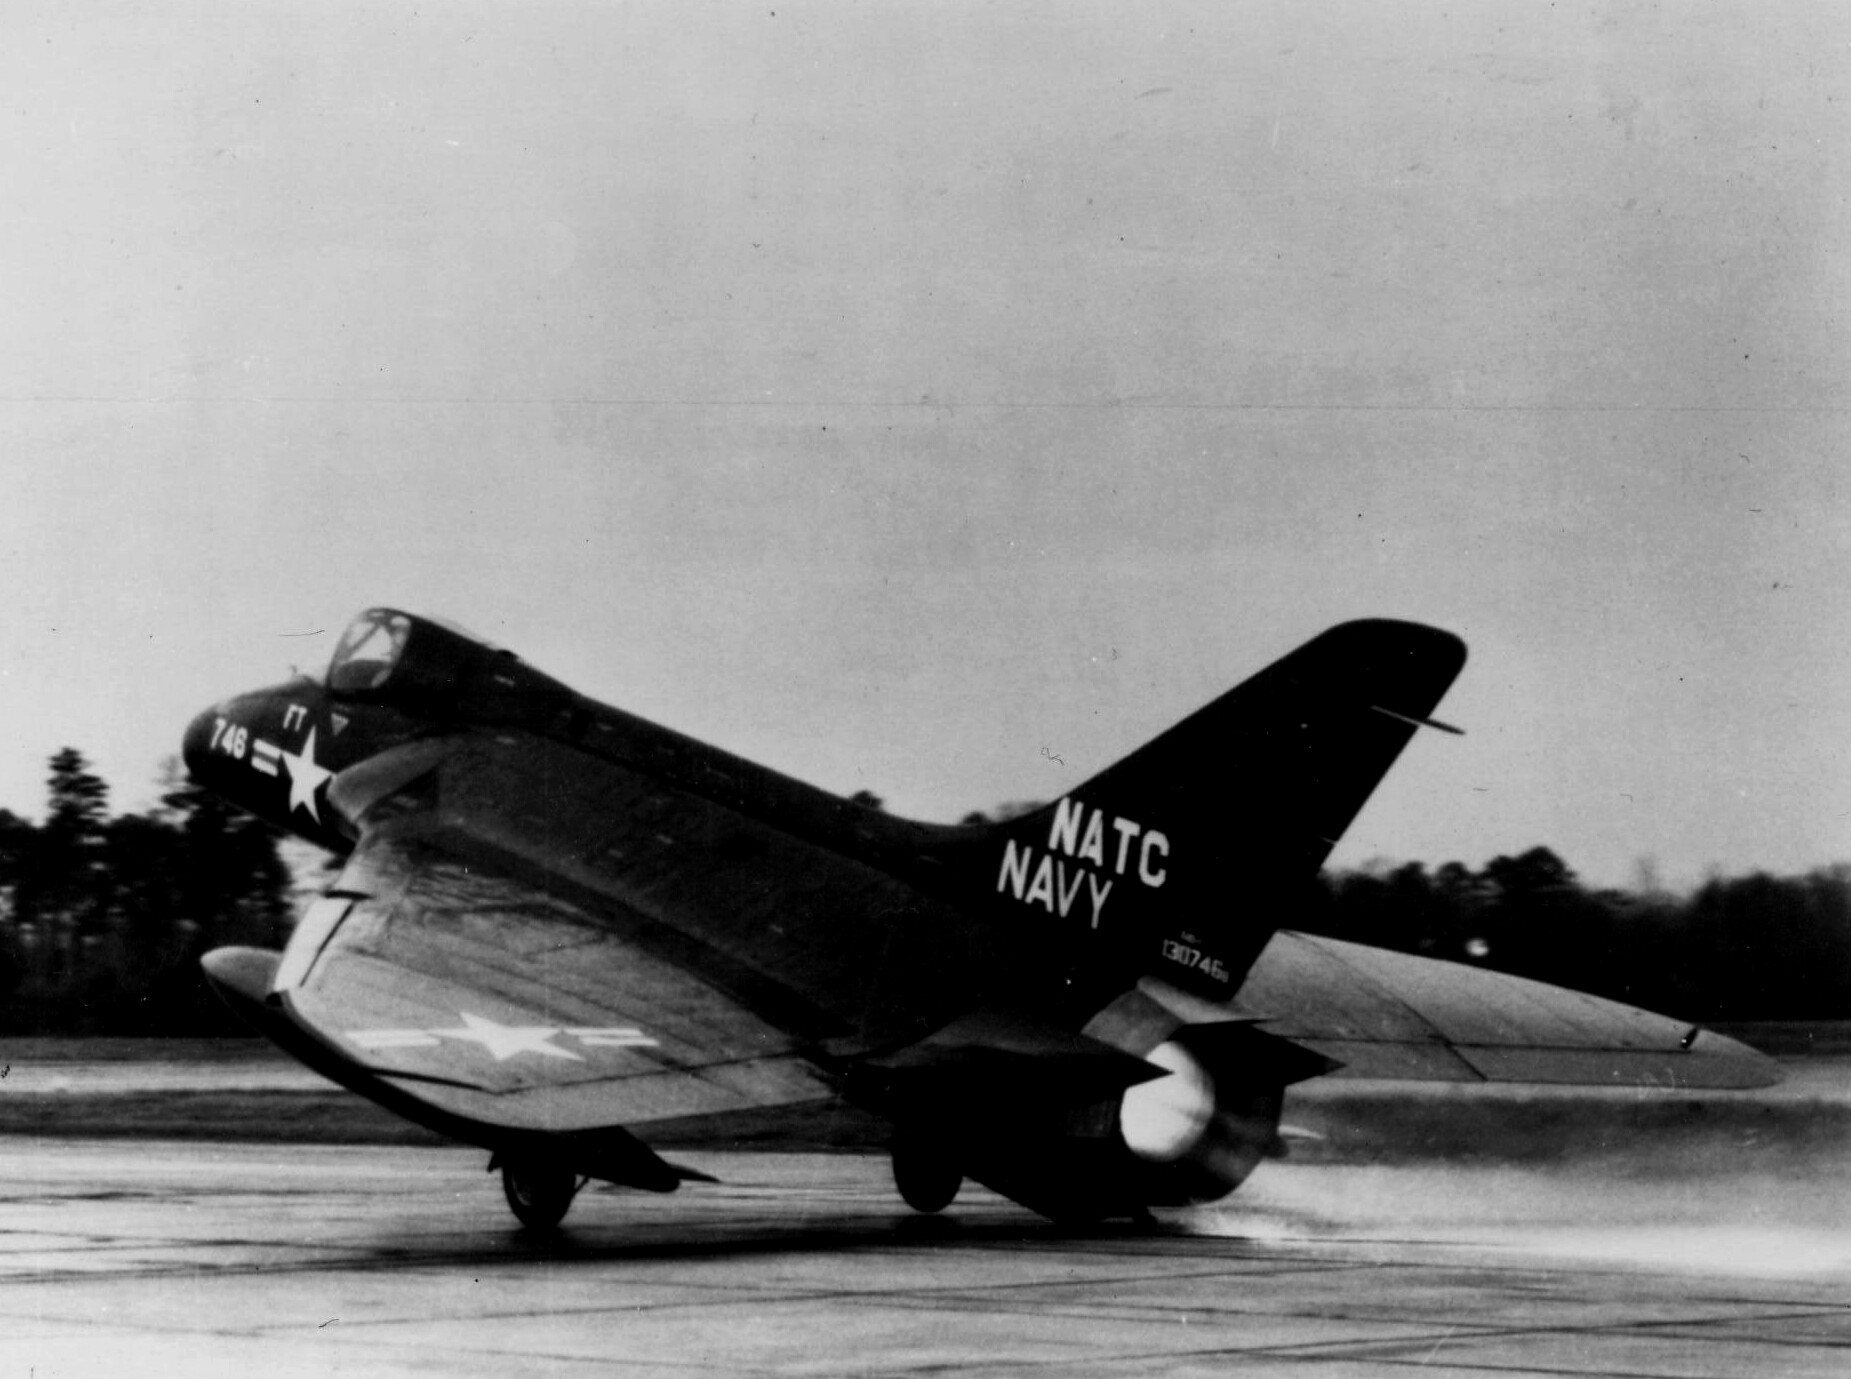
The maiden flight of the prototype happened only in January 1951, soon followed by the second prototype. This second aircraft set an absolute speed record of 1,211 km/h and 100 km closed course record of 1,171 km/h.
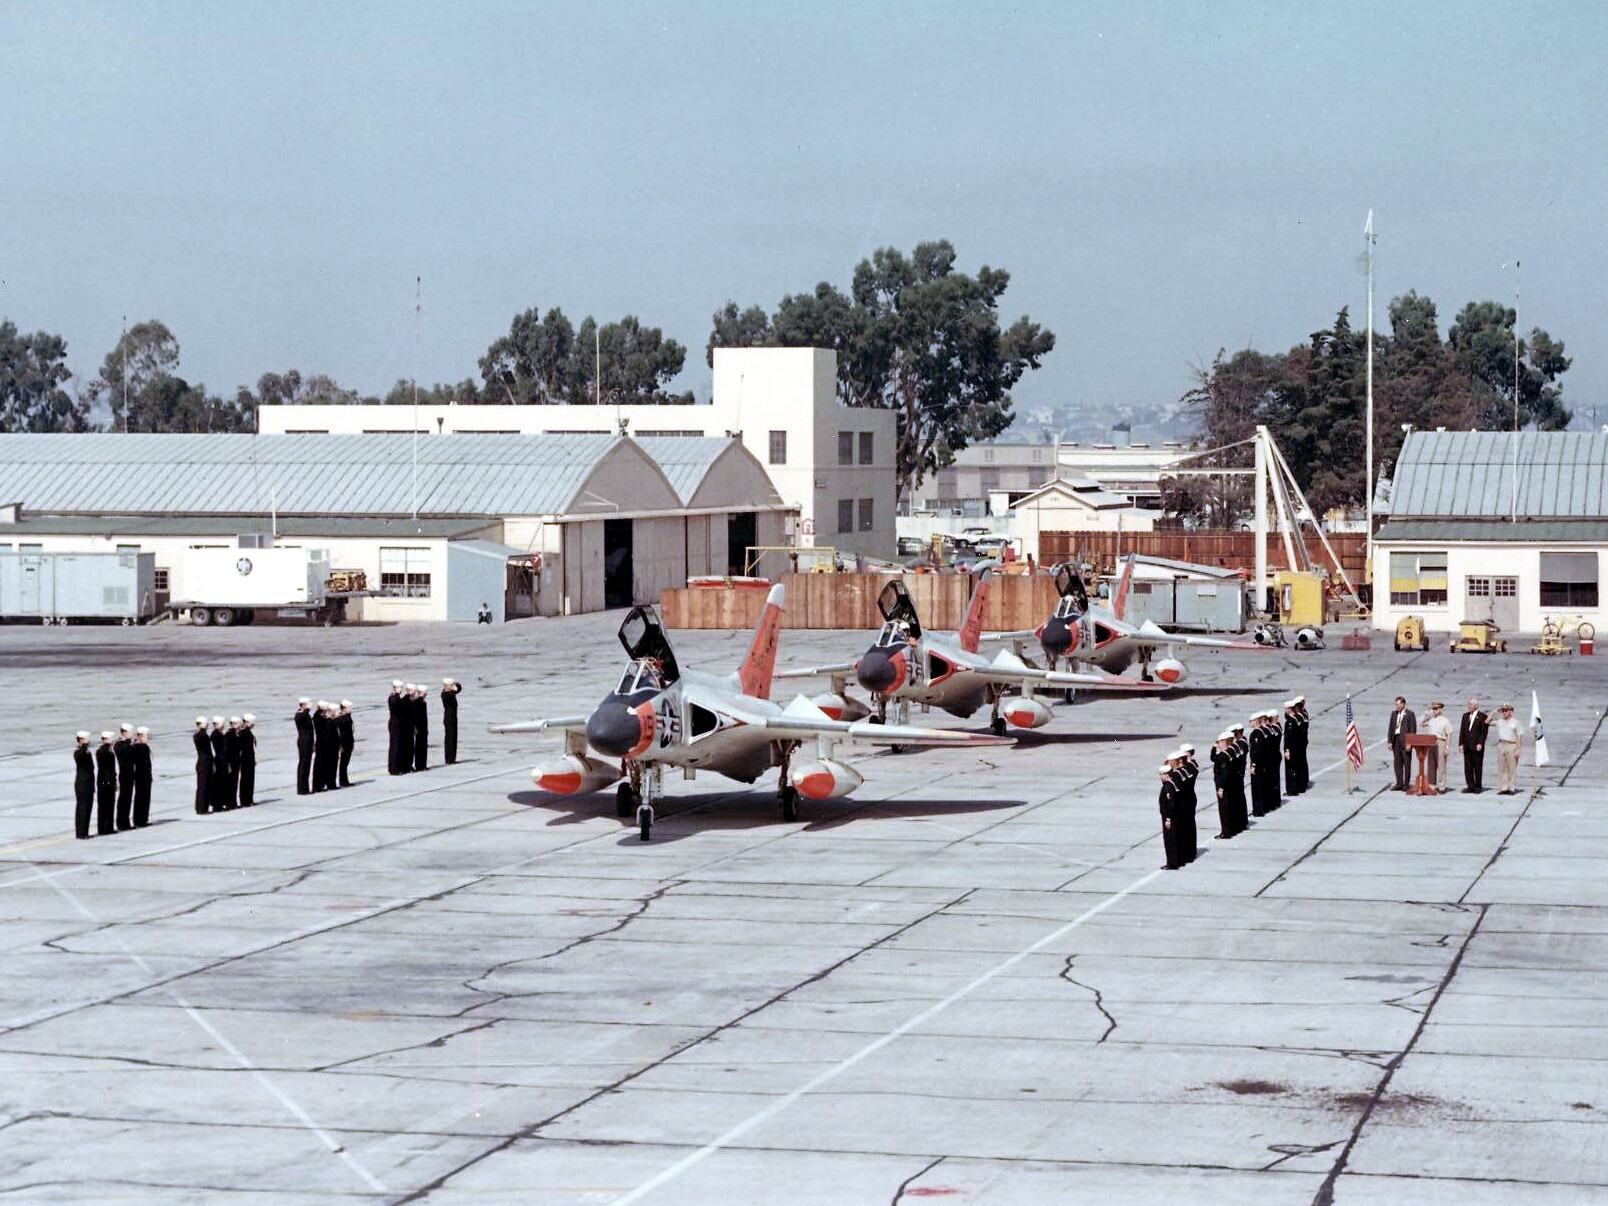
In October 1953, having improved the design and reliability of the plane, the F4D-1 was put into production, with the first production aircraft making first flight in June 1954. In 1956, the Skyray finally entered service. There were only 420 F4D-1s made, with it being the only mass-produced variant.
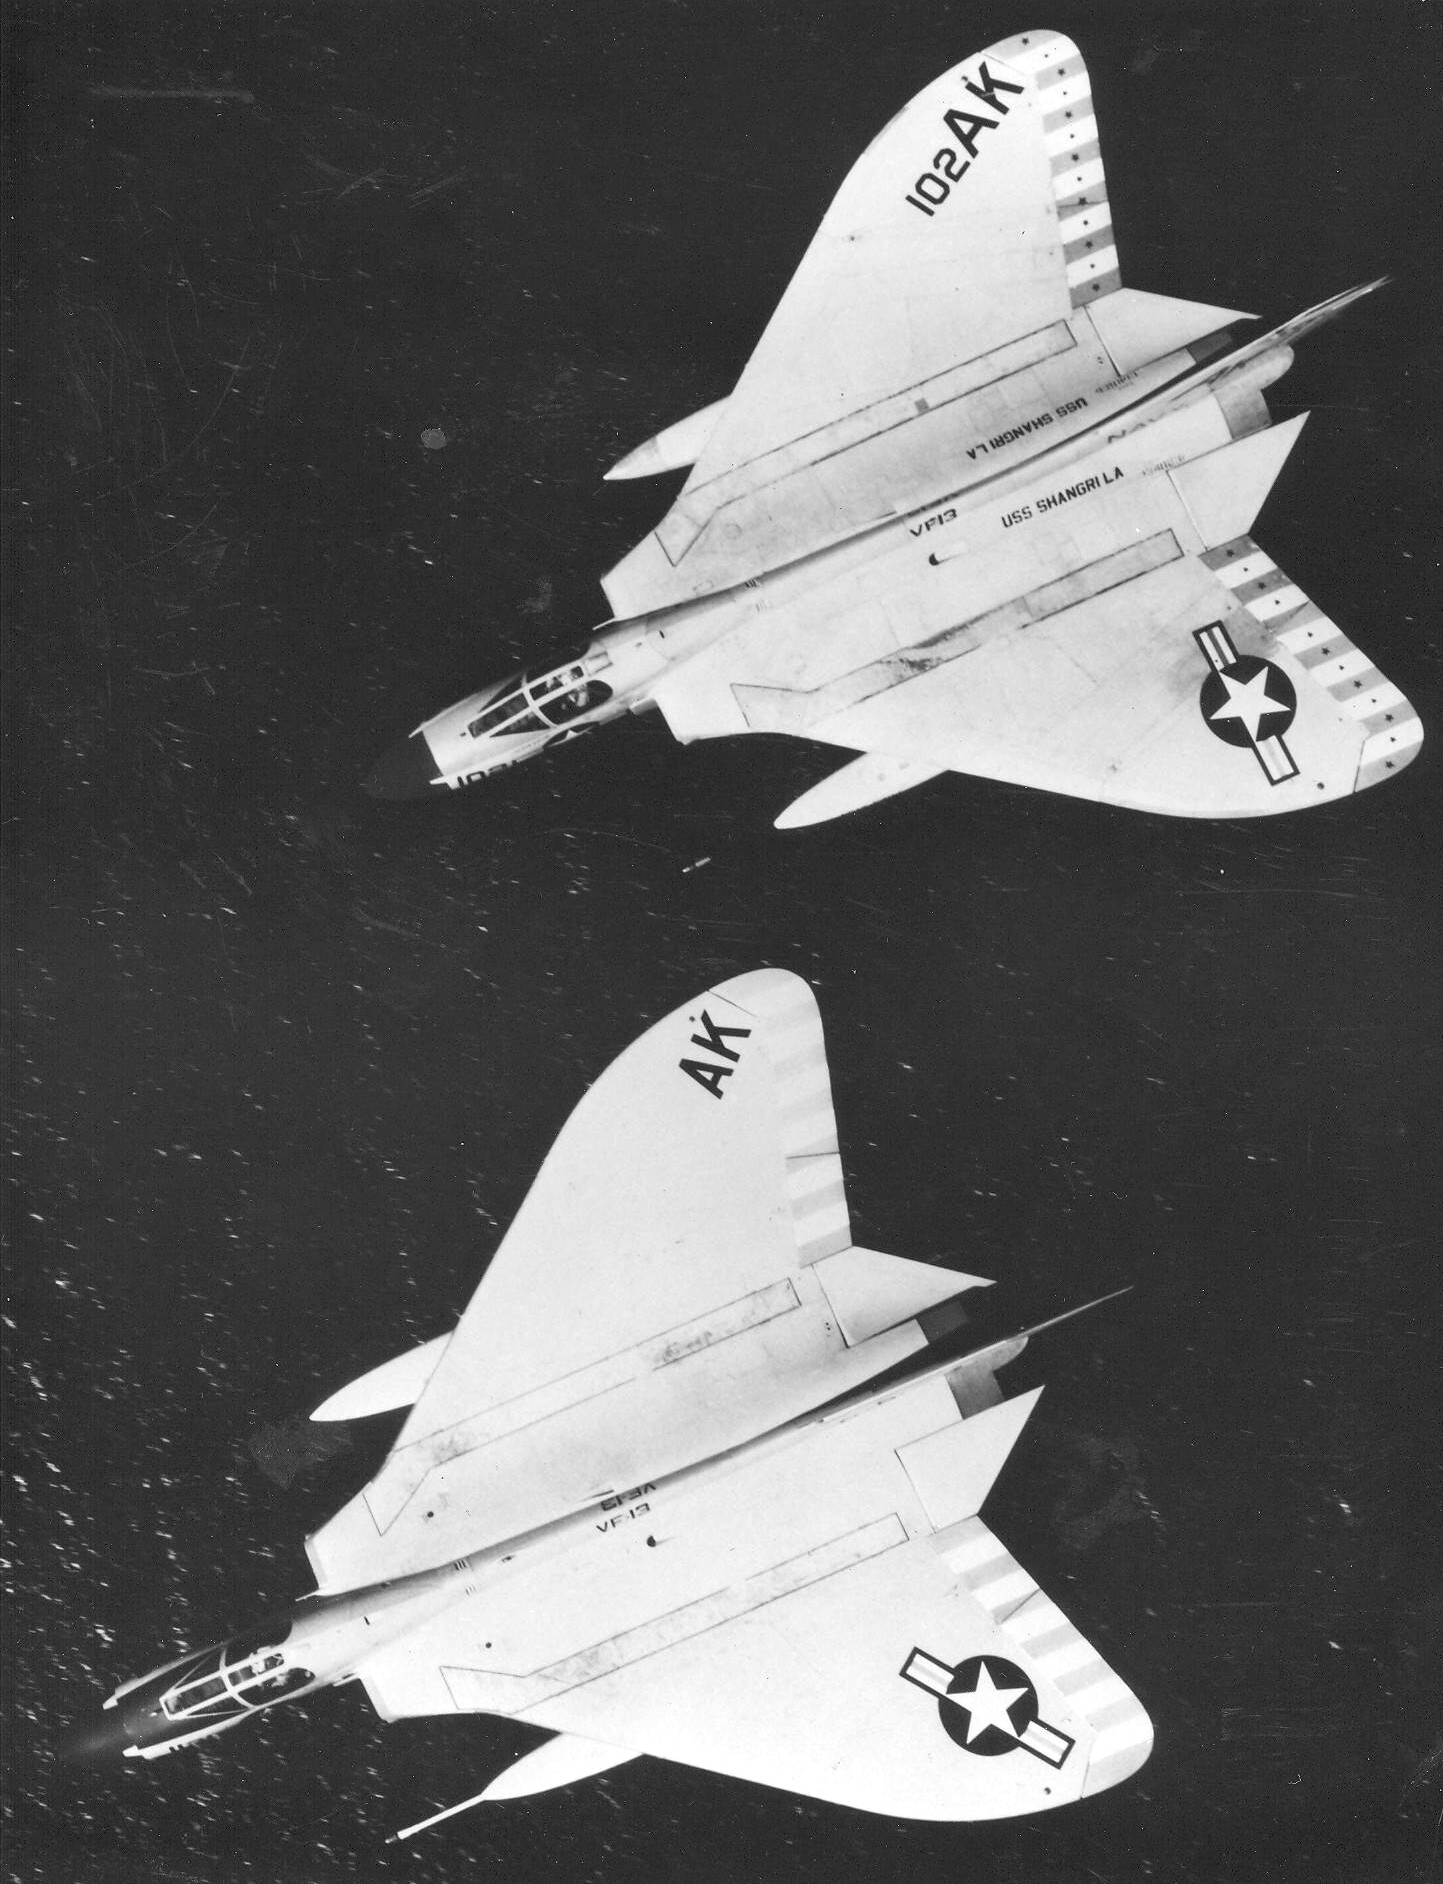
The F4D-1 was also the only delta-winged aircraft to see service in the US Navy. It was used by the Navy and USMC for 8 years, but didnt see any combat. The closest the plane got to a conflict were multiple scramble actions during the Taiwan Strait Crisis in the late 1950s.
Sources:
- History section of the Tamiya F4D-1 assembly manual
- Wikipedia
- Douglas F4D Skyray — Naval Fighters 13, Nick Williams, Steve Ginter
Tamiya F4D-1 1/72 scale model
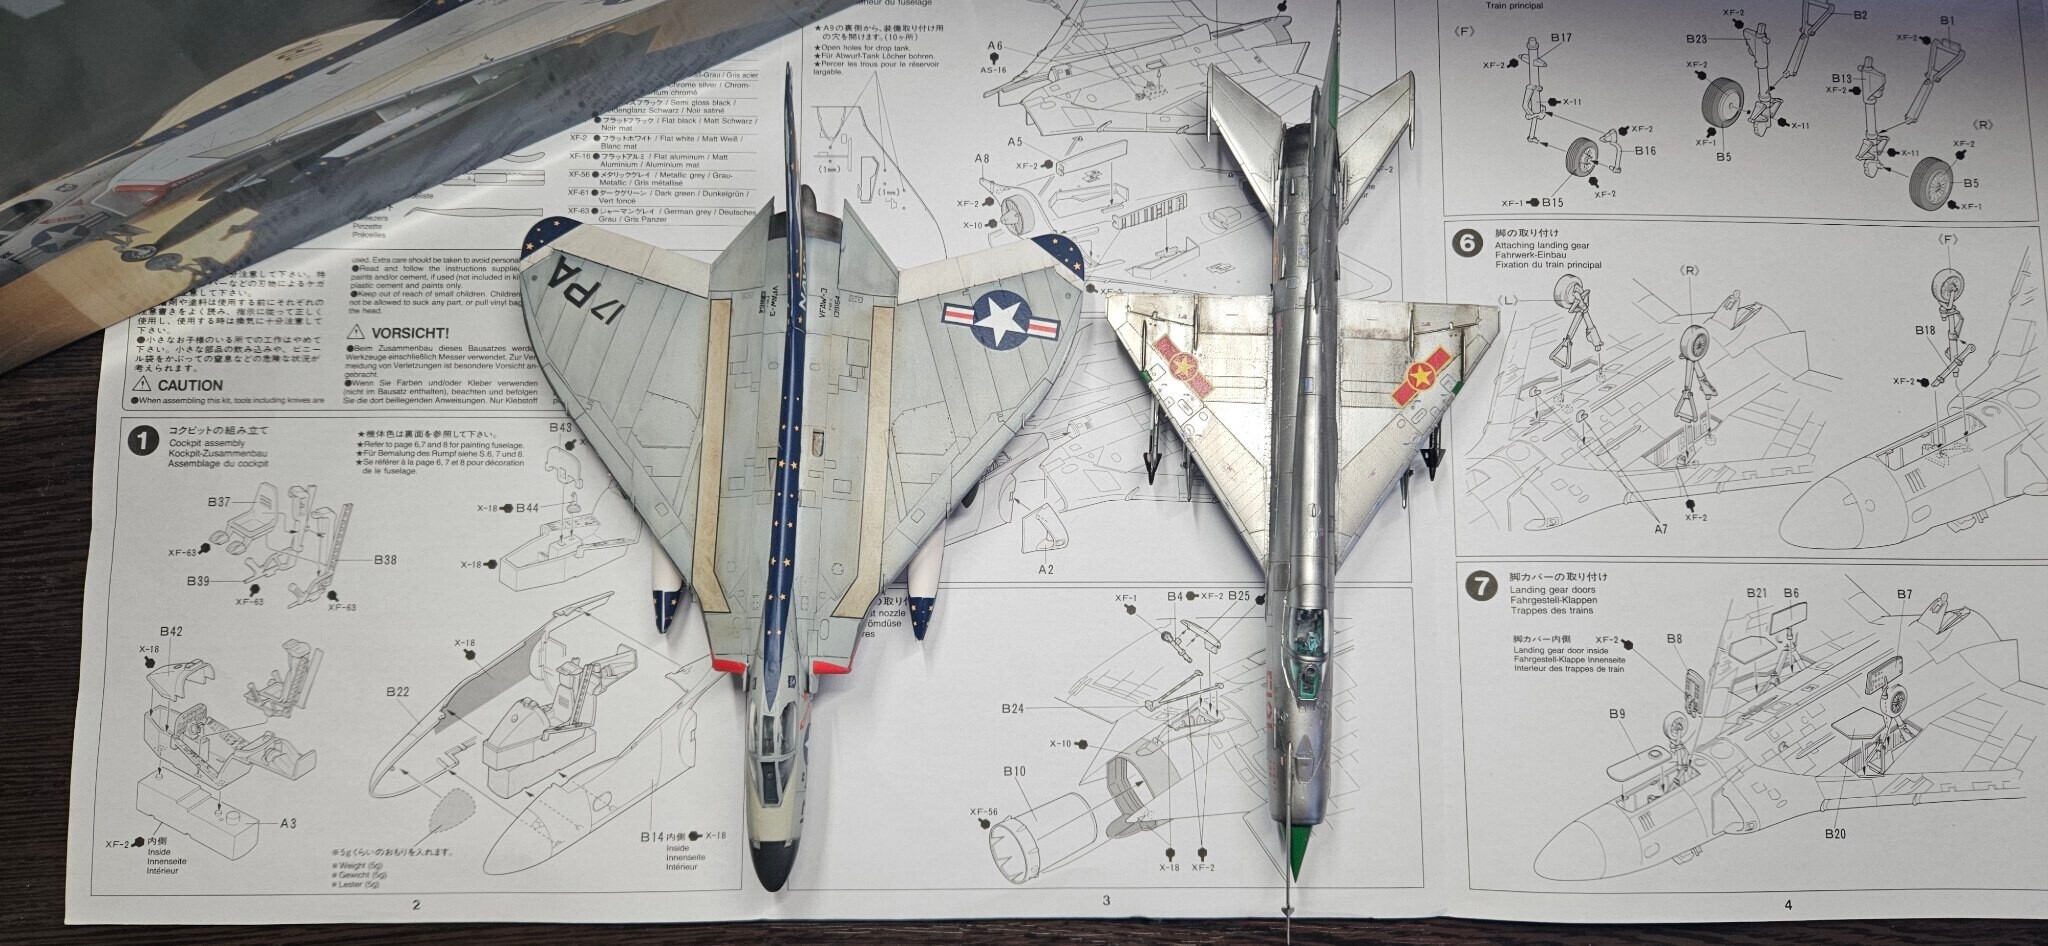
Tamiya made its F4D-1 tooling back in 1998. But for the lack of other easily available alternatives, it's probably still the best one. Tamiya also offers the model in 1/48 scale, but seems like it is out of print. At least I can only find it second-hand. The model I got was made in the Philippines.
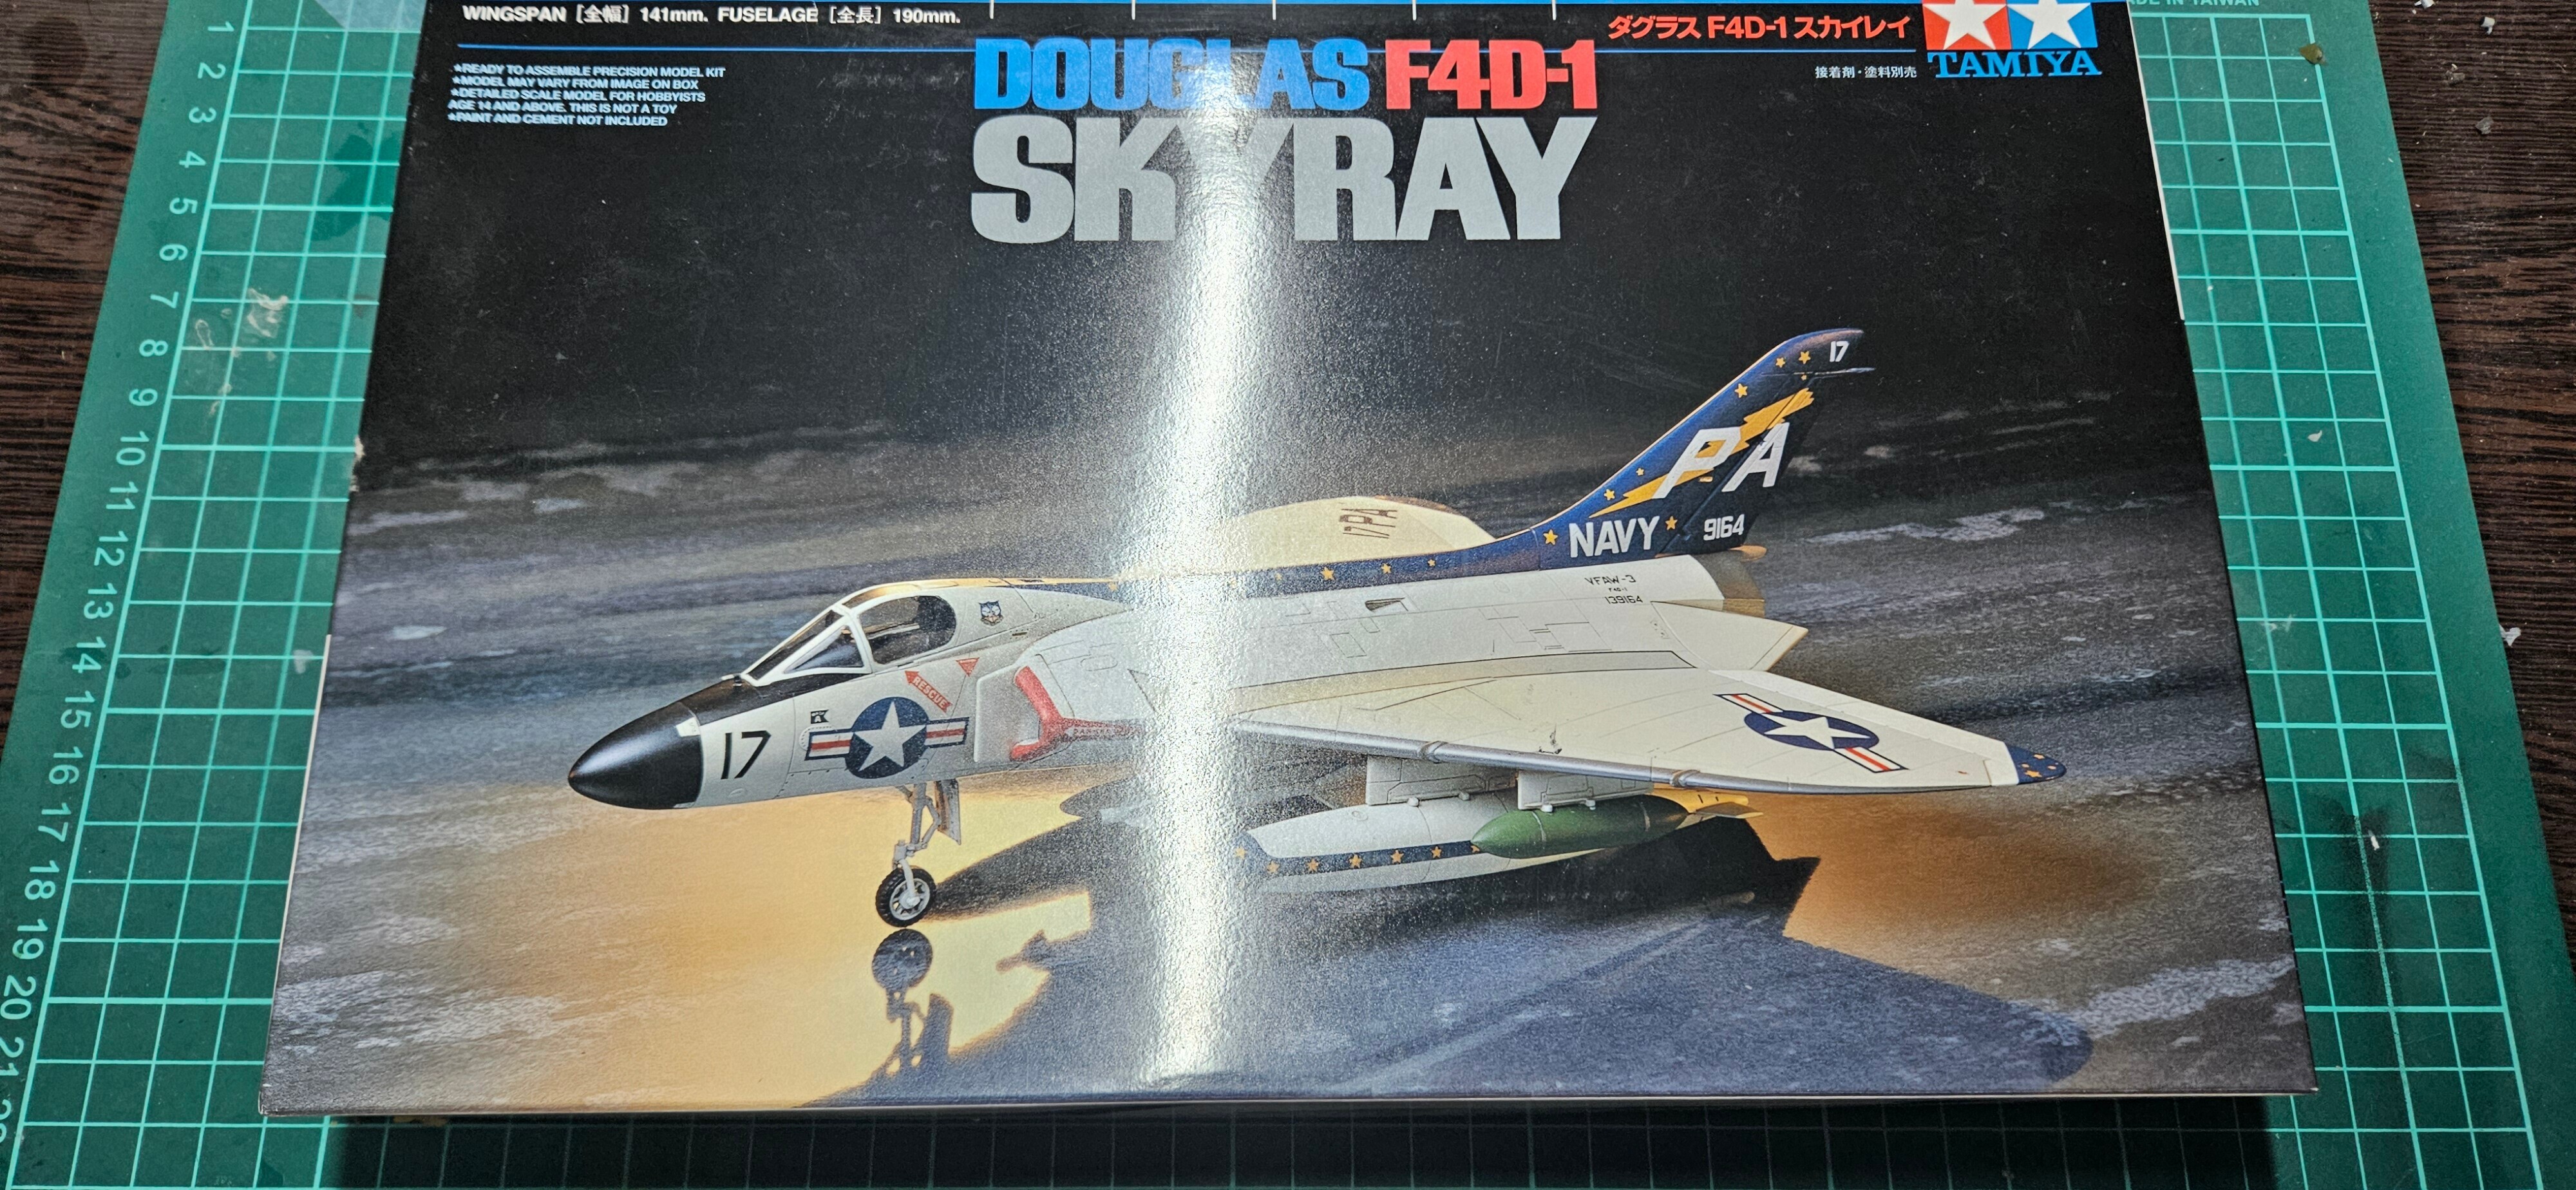
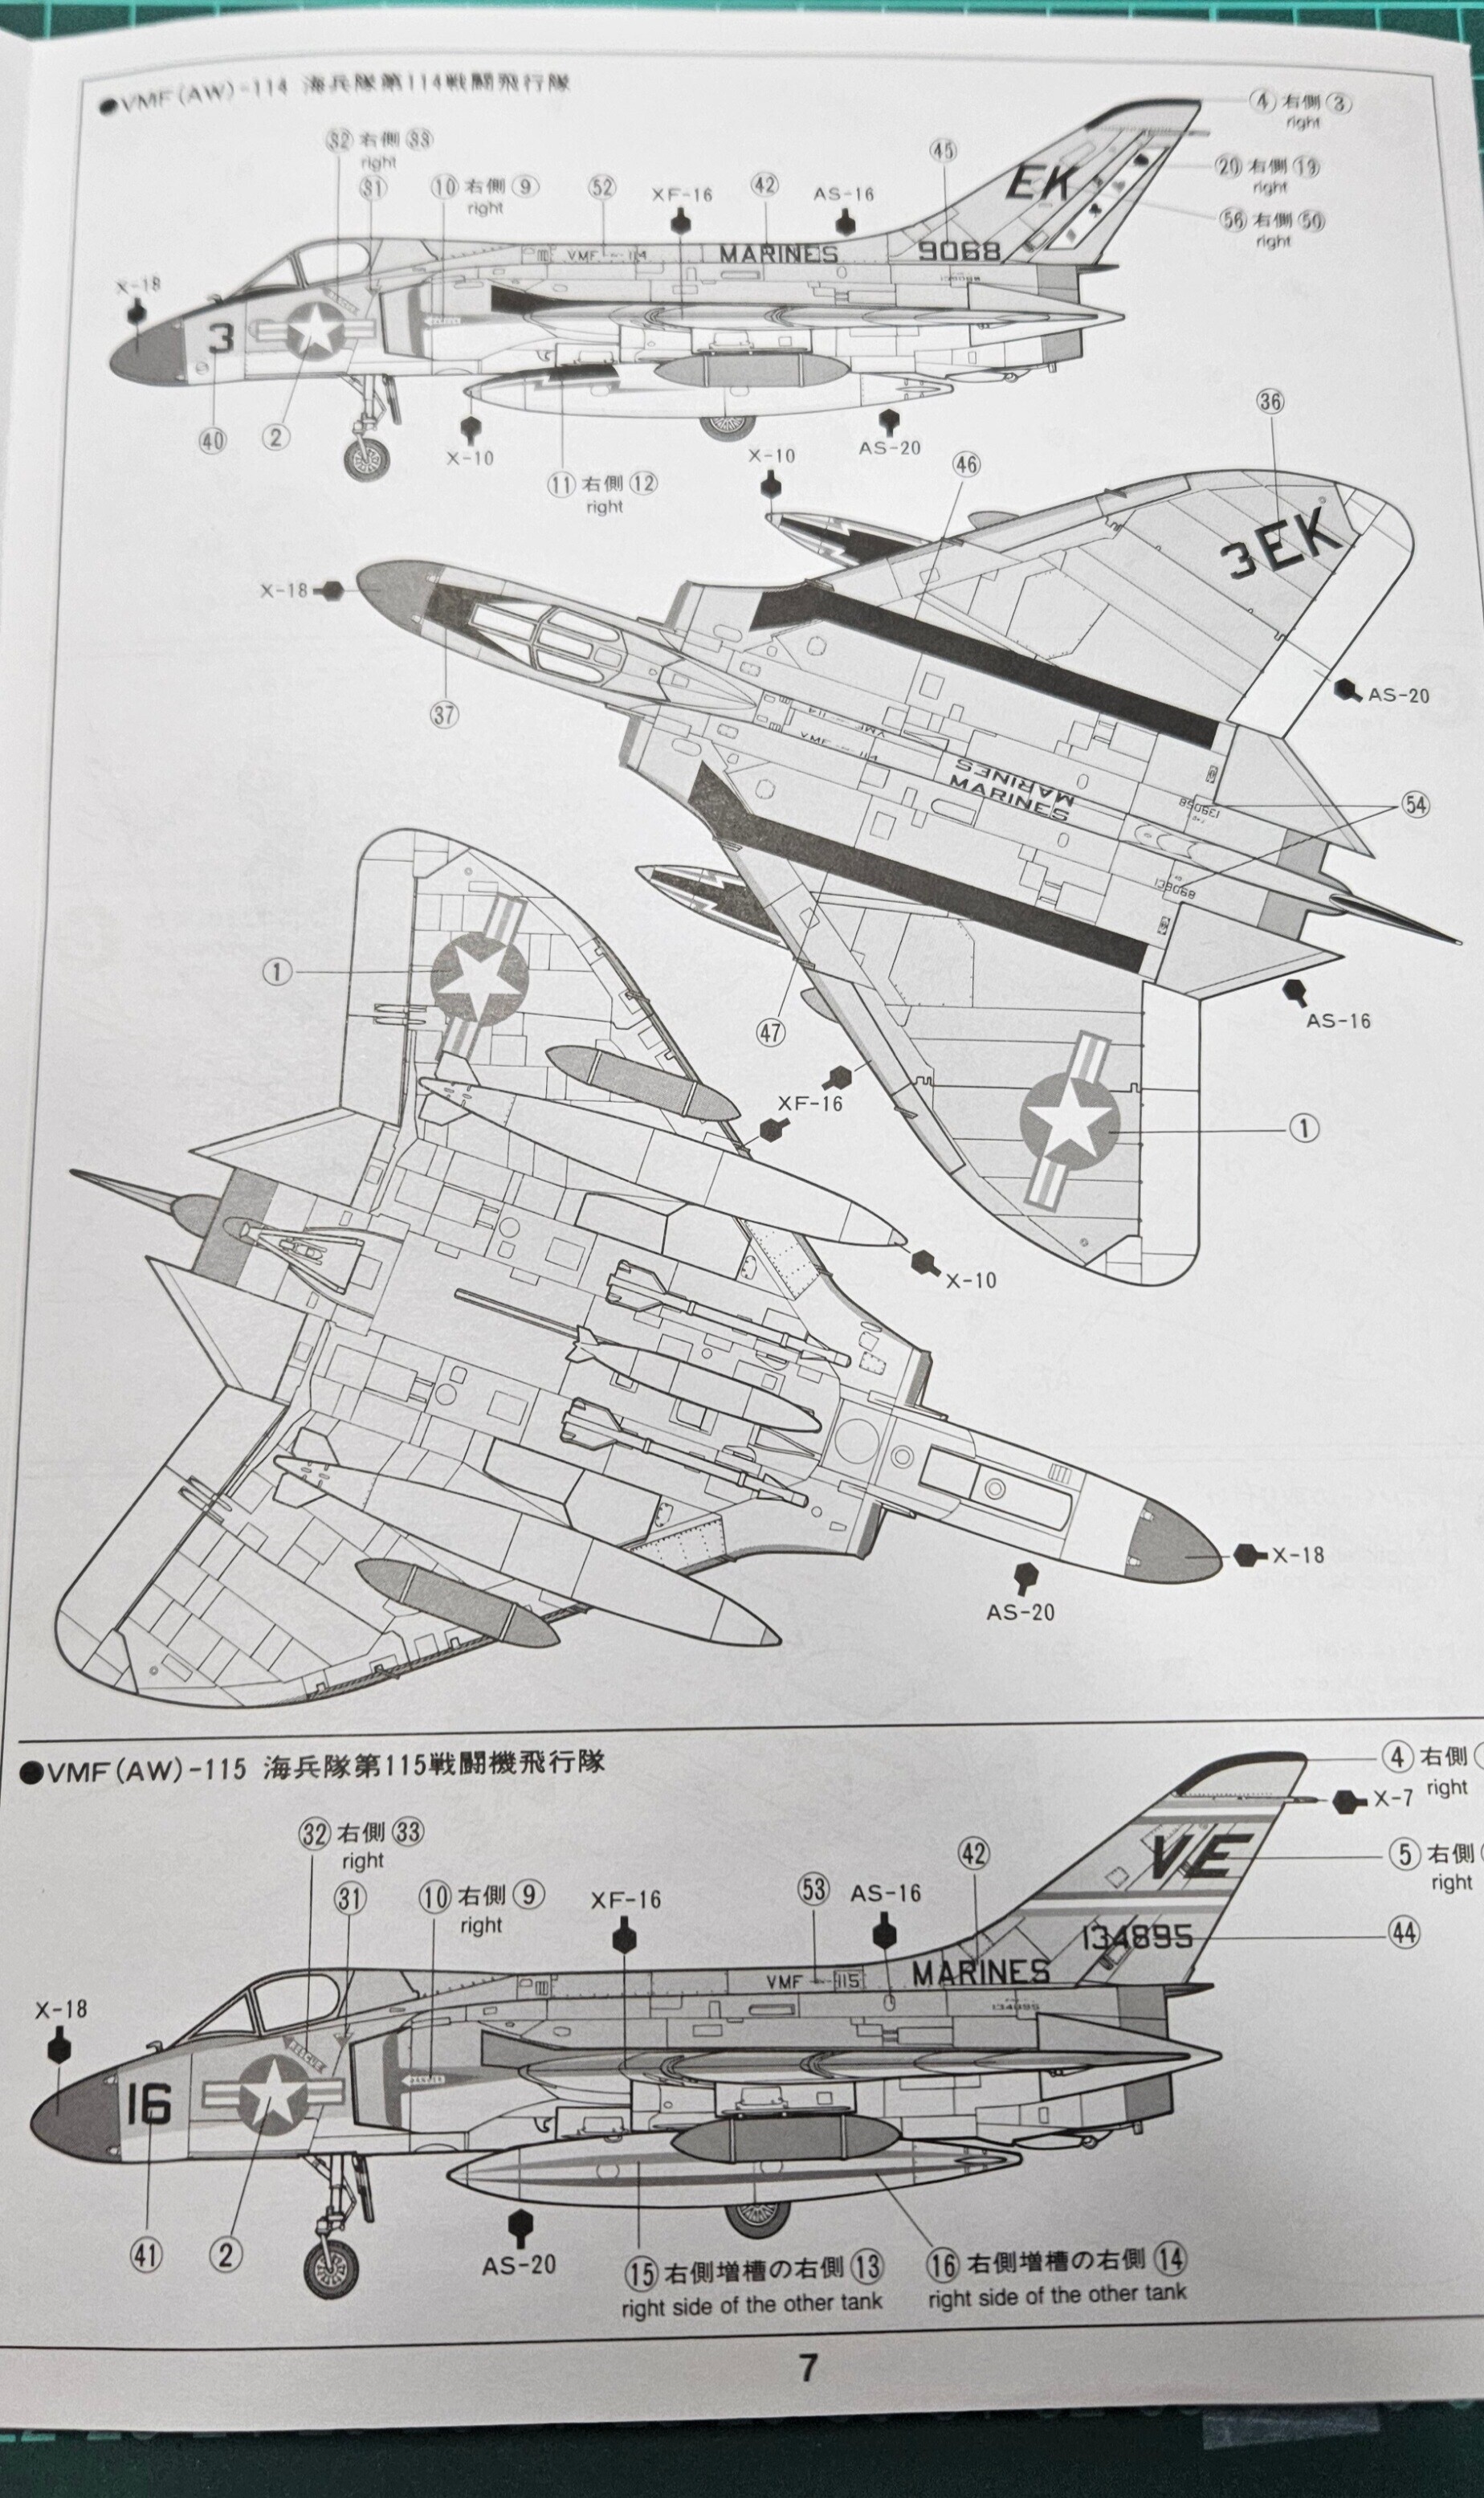
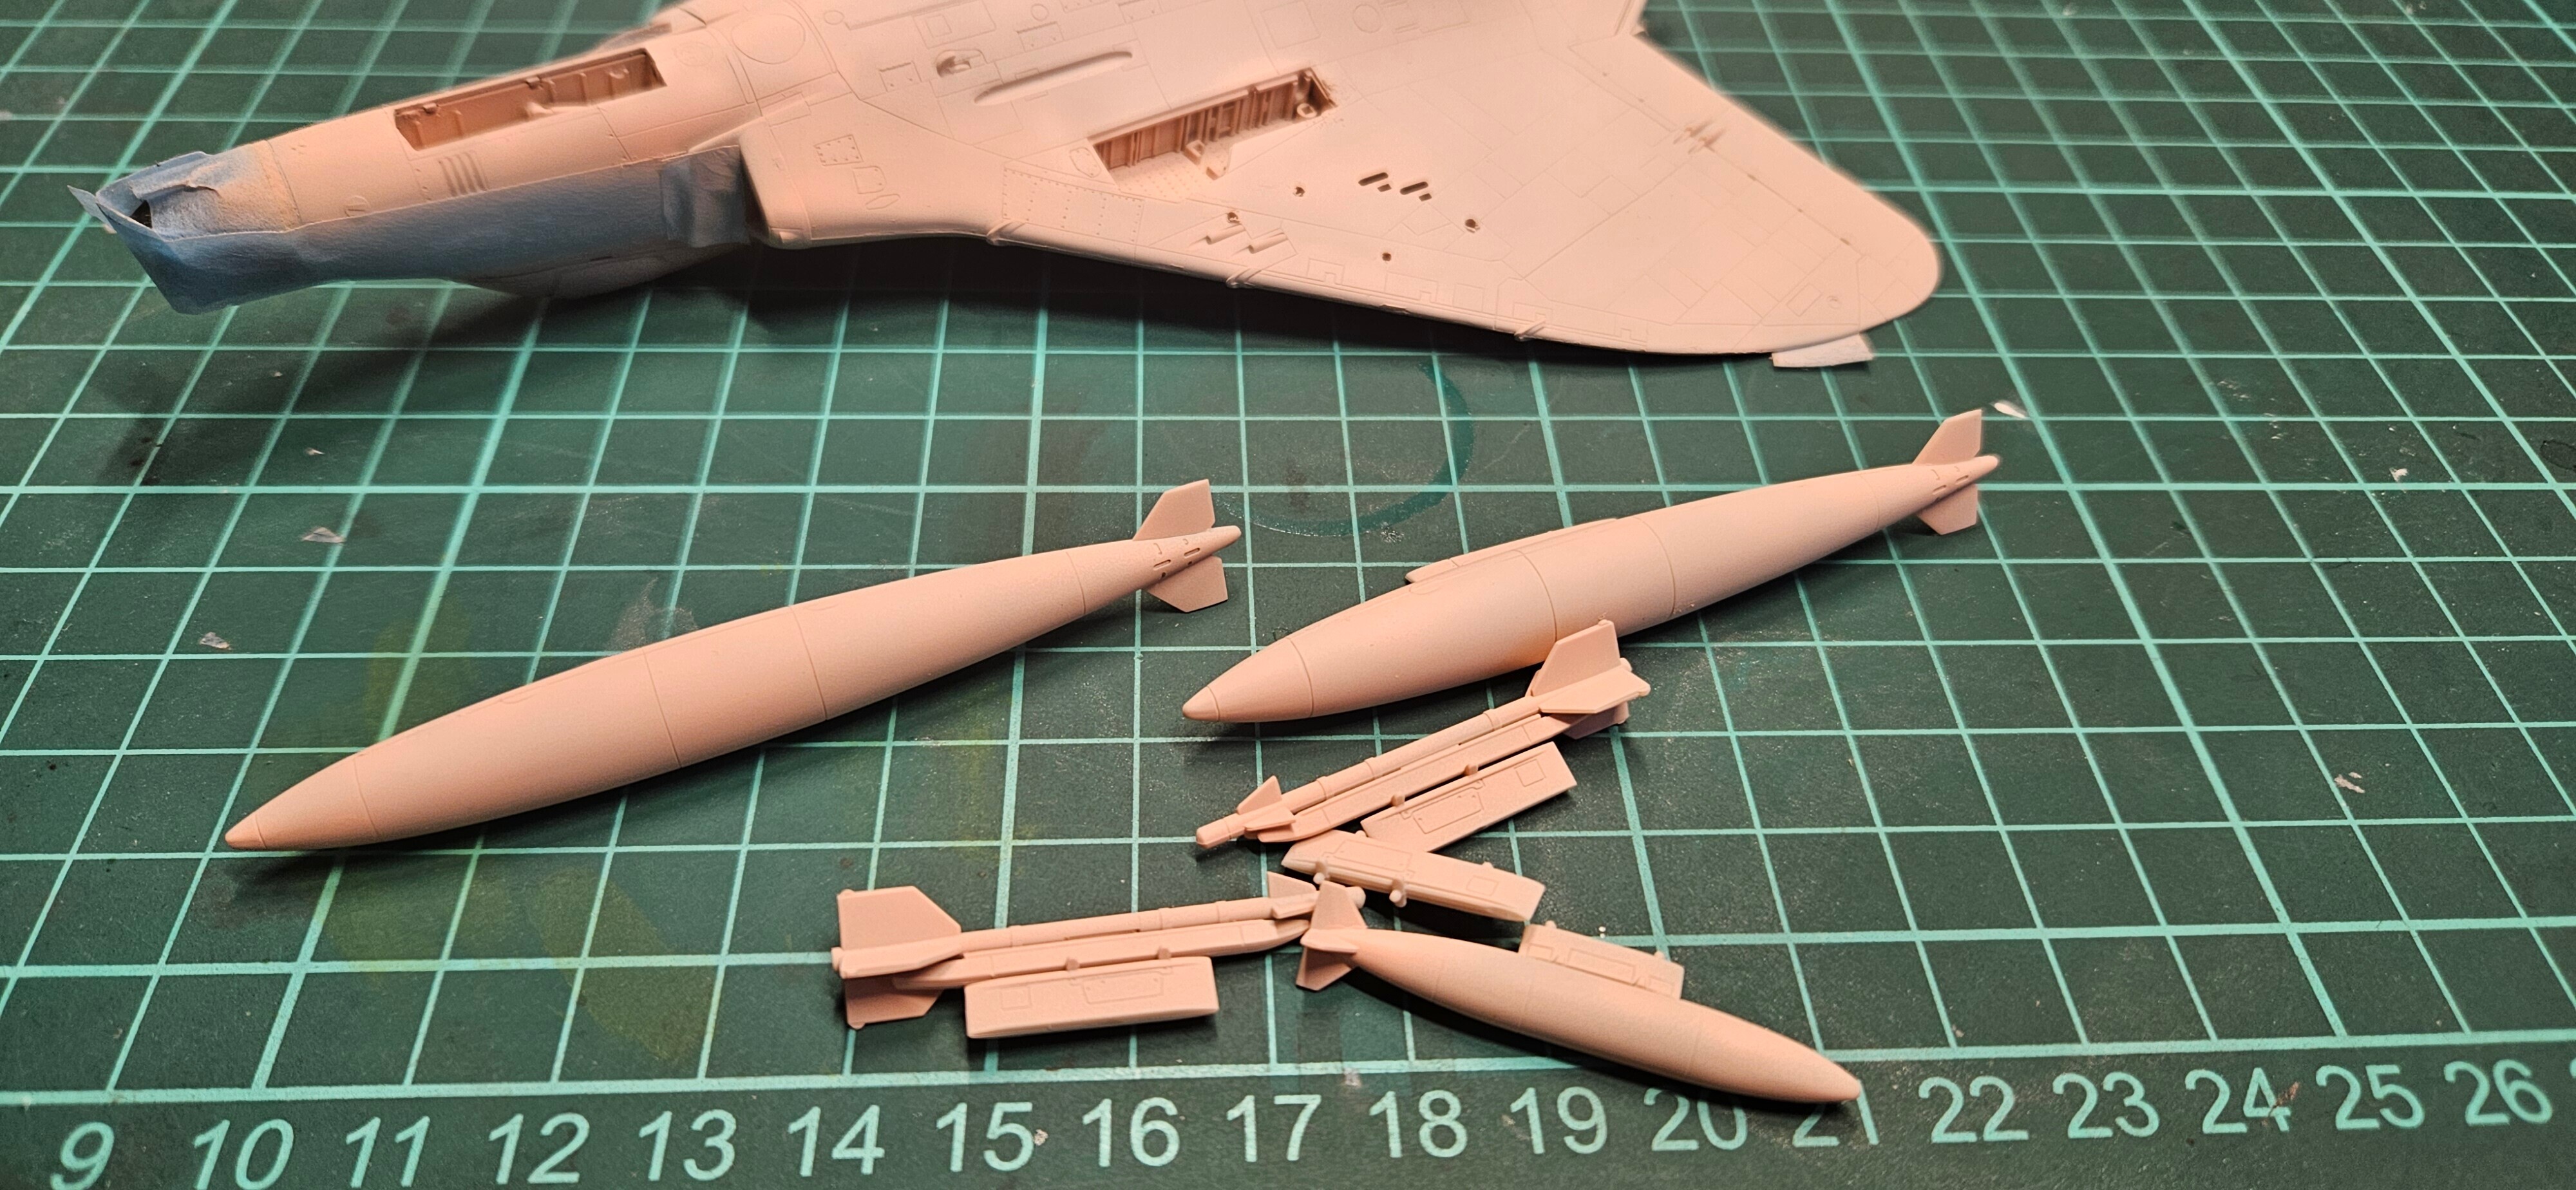
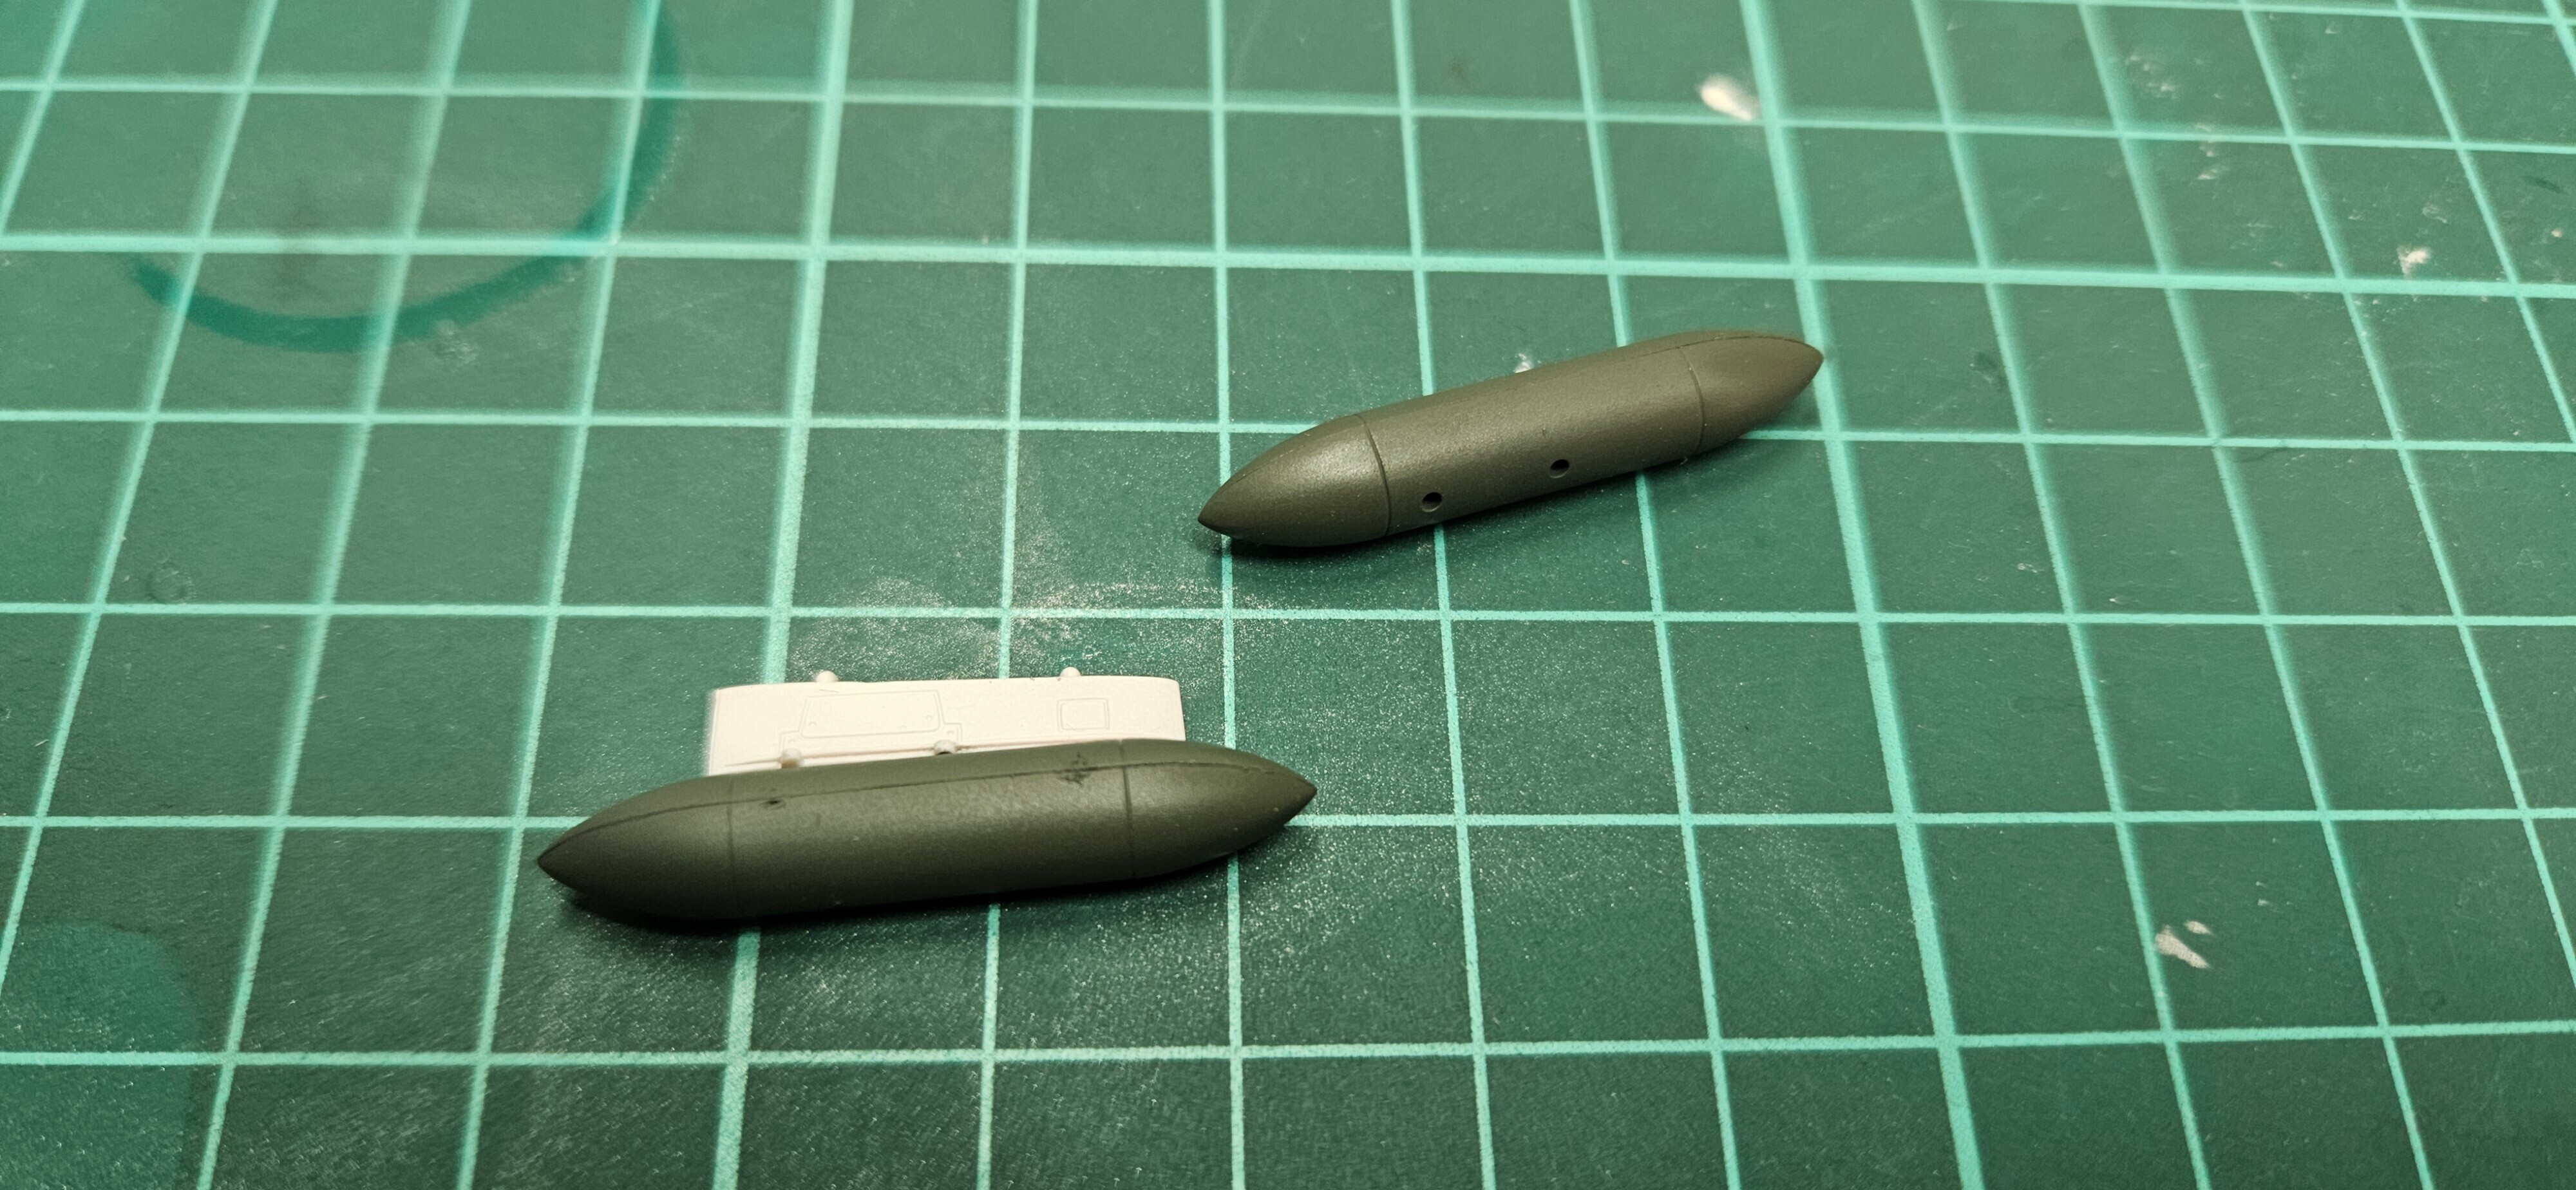
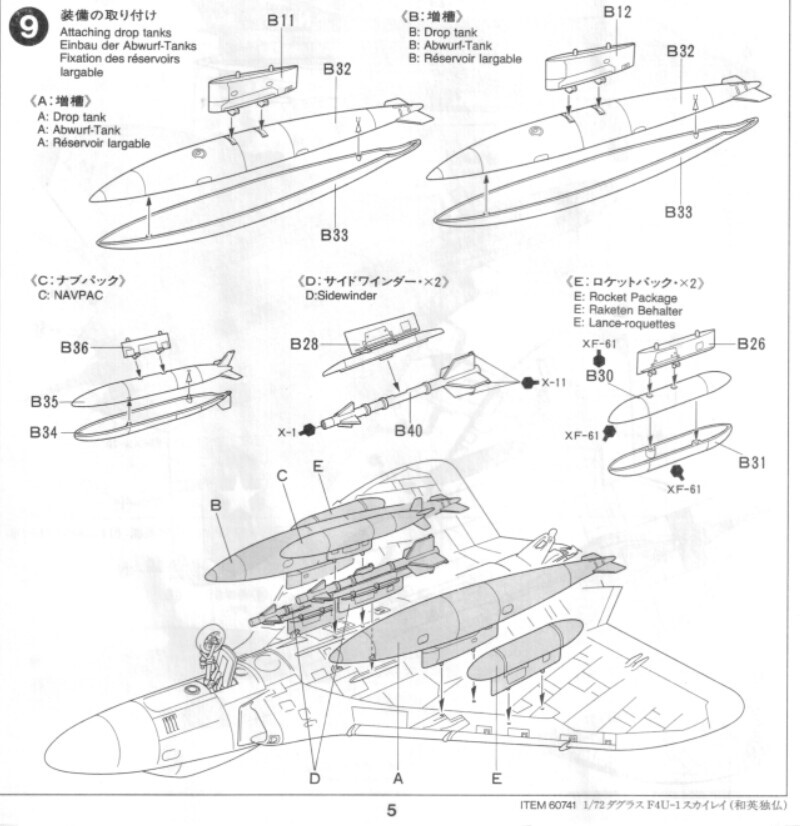
The kit offers 3 painting/decal options: Navy VF-3 and USMC VMF-114 and VFM-115. Payload options are rather big with two fuel tanks, navigation pod, two AIM-9 Sidewinders, and two unguided rocket pods. There is no pilot model.


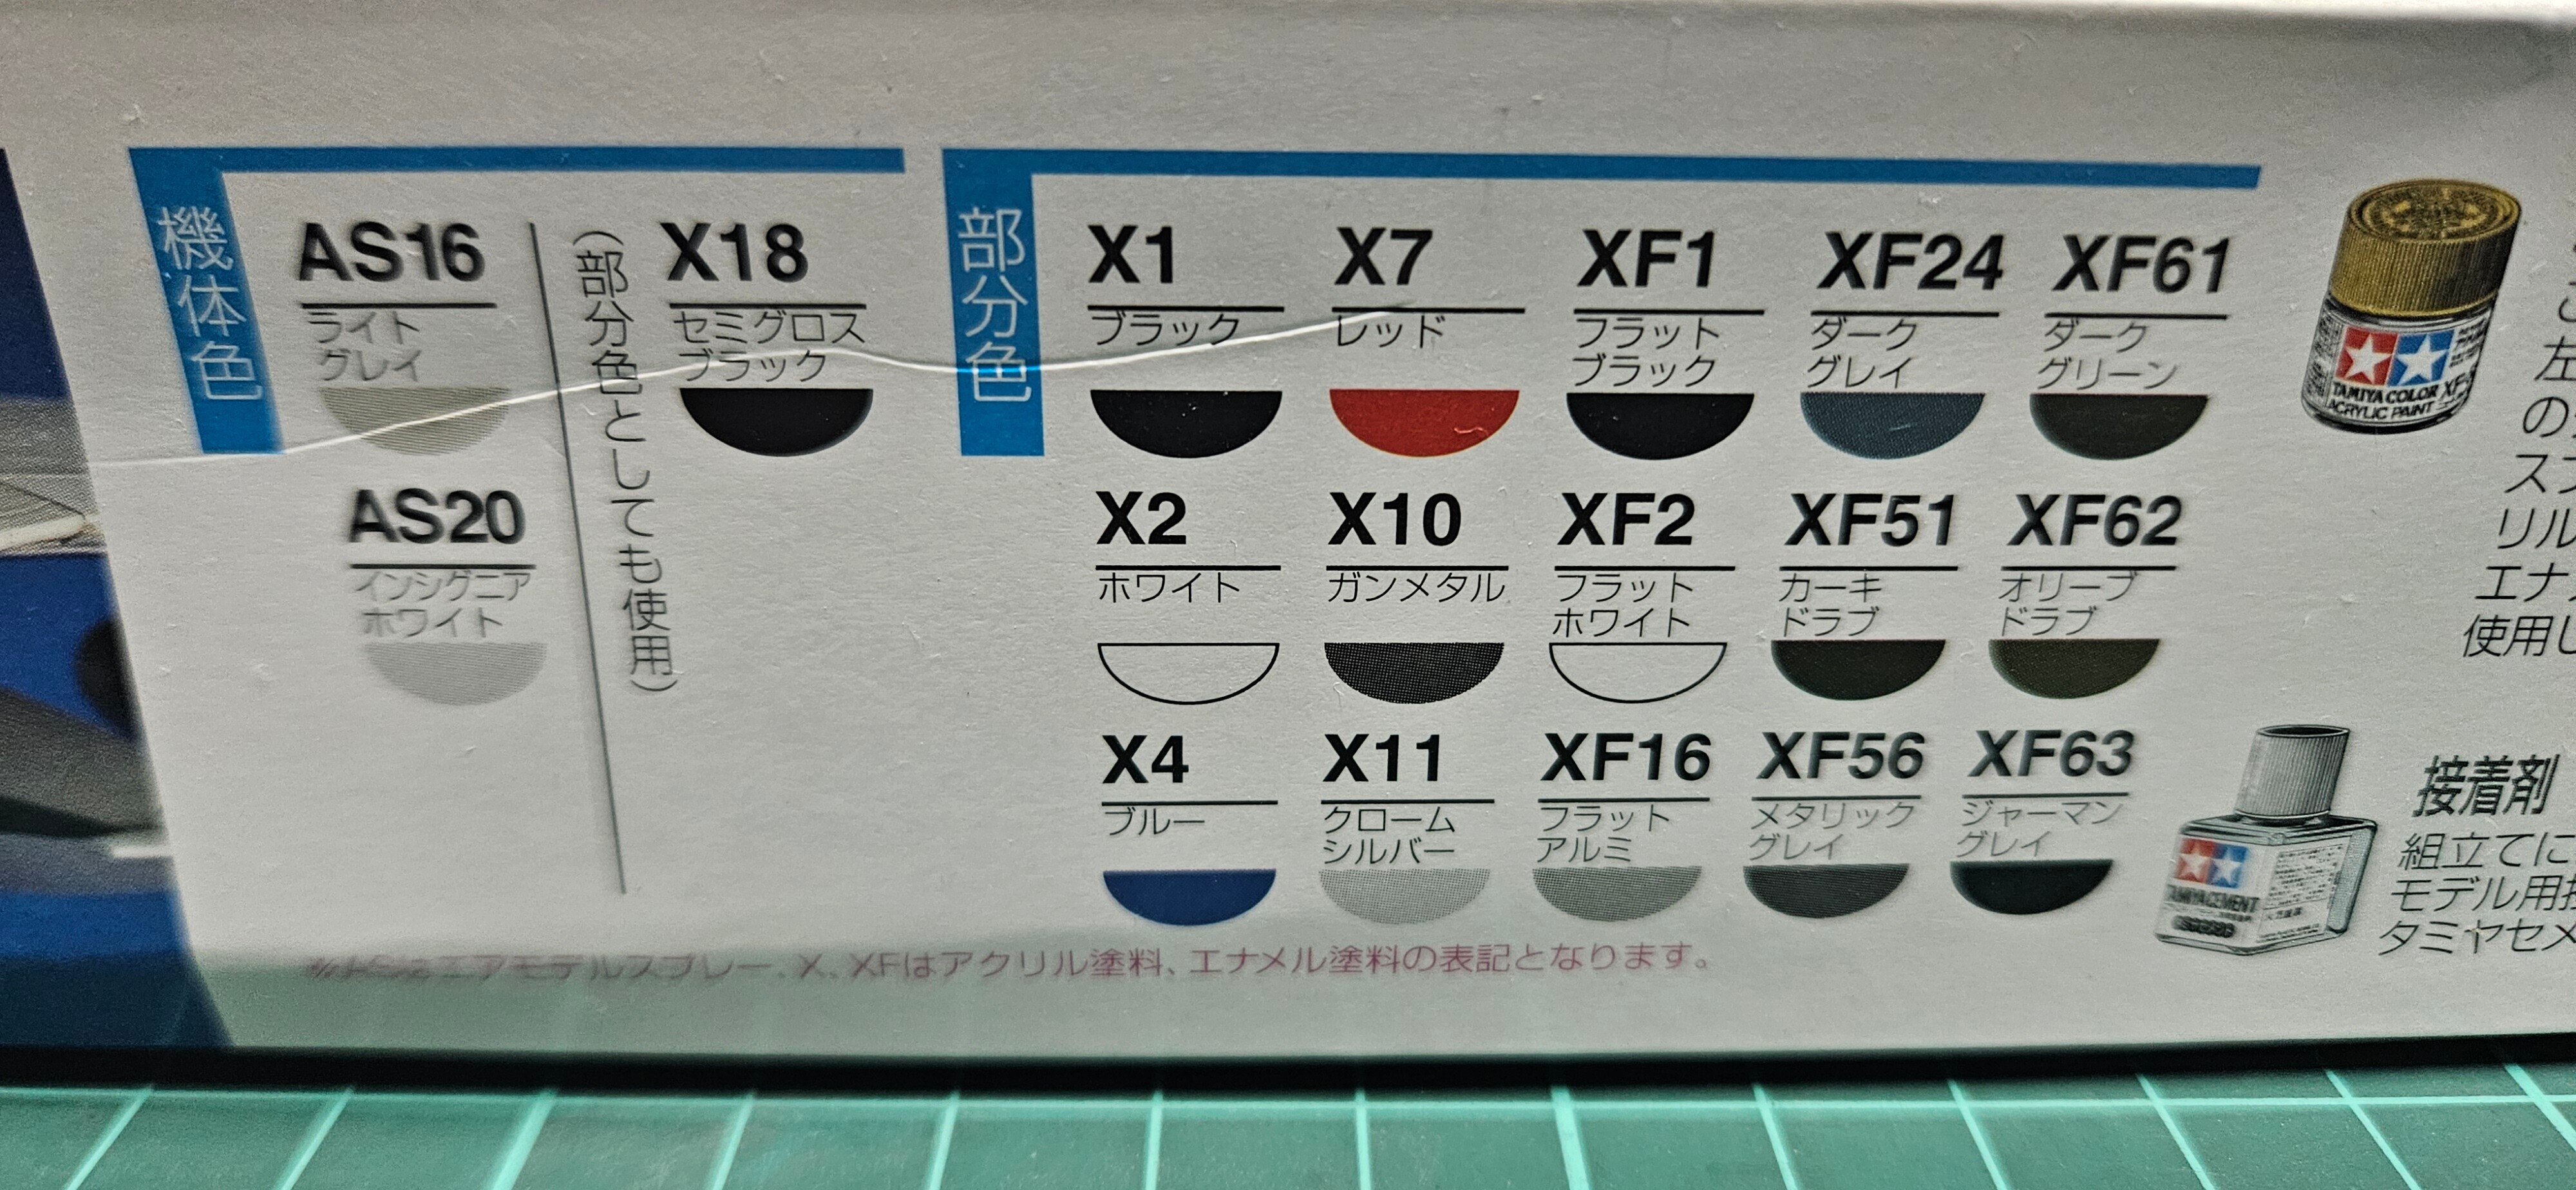
As always with Tamiya kits, they suggest you use and weirdly mix Tamiya paints and use Spray cans (please don't). I instead used Vallejo and Gunze colors. More info down below.
The kit came with just three sprues: two normal plastic and one transparent, all packaged in separate bags so that they dont scratch each other. Even with my limited time of modelling, packing all in one bag like Hasegawa, Zvezda or partially Eduard (often puts two sprues in one bag) often leads to parts breaking off or having awfully big scratches. The whole manual is black and white, but not overloaded like Zvezda or Hasegawa.
Assembly and painting
Instruments, paints, etc
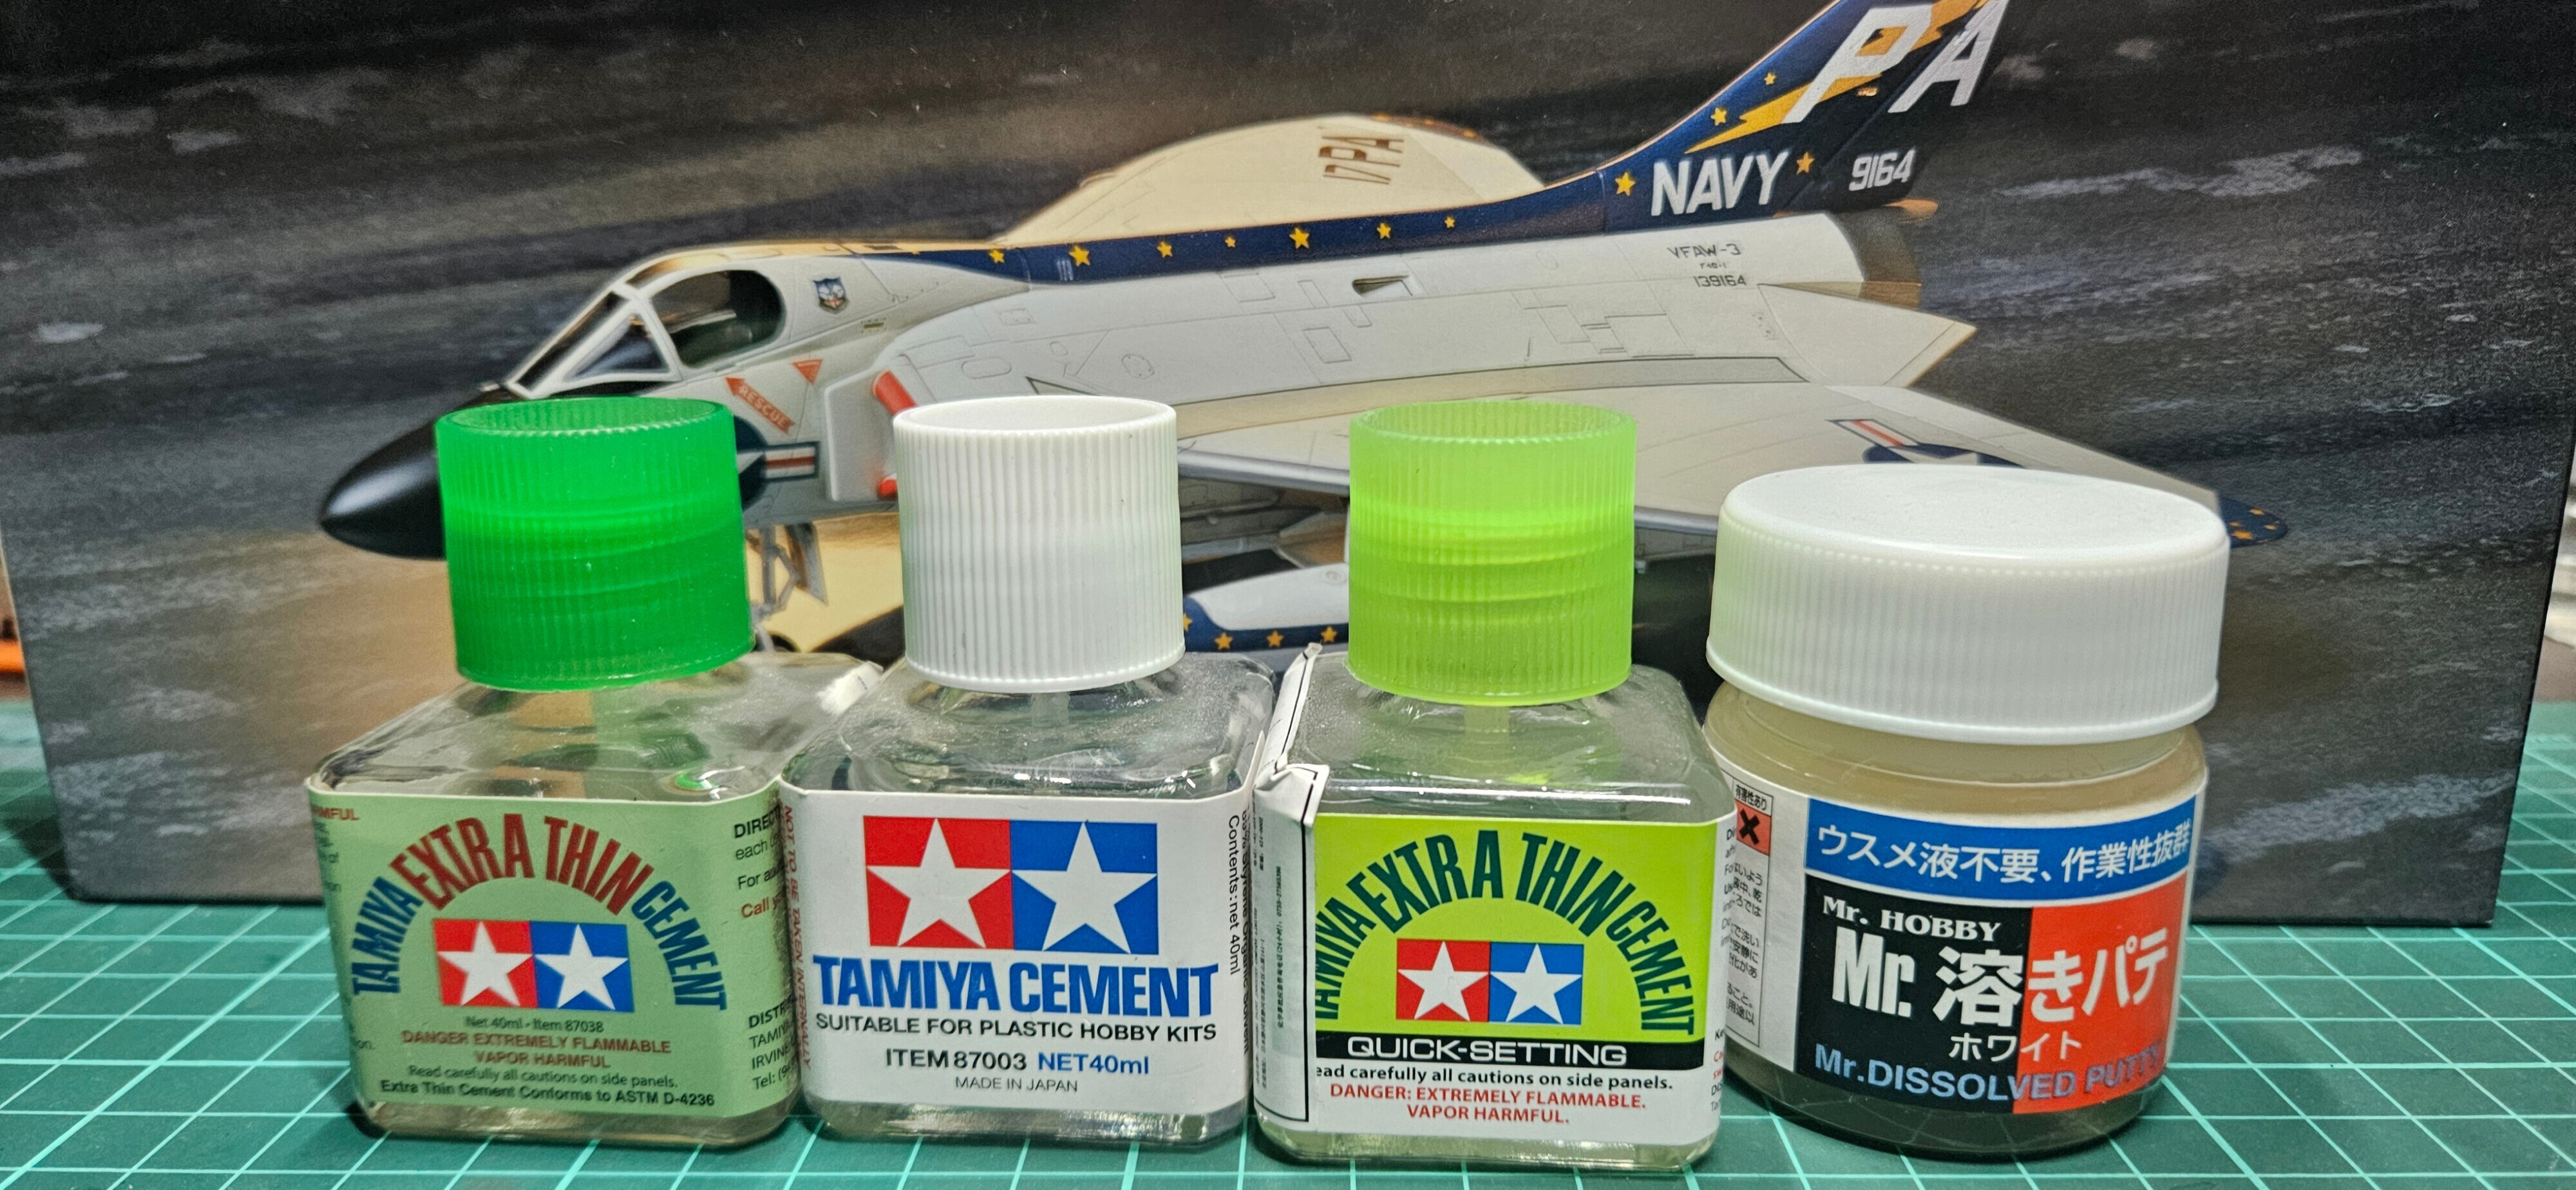
I don't think I should be the one to tell how to assemble a model since there are so many guides around, and people do their own stuff. But to go over it briefly: plastic cement, side-cutters, and hobby knife are a must. I use (but you absolutely don't have to) three types of cement: normal (white) Tamiya cement, Tamiya extra thin and Tamiya extra thin quick-setting. Why? I'm picky. You can do the whole thing with just extra thin. Optionally you can use PVA/White glue to attach the cockpit, but careful application of a tiny amount of extra thin is just fine. This model also requires a drill set.
As for painting, I mainly use an airbrush for overall coat and spray cans for varnishes. The normal brush is only used for little details like wheels and for panel liners.
Moving on to the paints:
| What for | Paint name | Commentary |
|---|---|---|
| Surfacer for better adhesion | Mr Finishing Surfacer 1500 Black for the top and Pink for the bottom | Best use black for both. Pink is not a neutral color and can be seen even with the paint on on top. |
| General coat | Vallejo Air range (specifics later) | Suffers from the tip dry and isnt that easy to thin. Better use Mr Color laquer range instead. |
| Engine and leading edge | Tamiya X-1 gloss Black, Mr Super Metallic 2 Silver, Ammo Mig Acrylic Filter Blue and Brown | X-1 for the base color, Mr Super Metallic for the metallic itself, Ammo Mig filters for simulating temperature wear on the engine |
| Nose of the aircraft | Tamiya XF-69 Nato Black | Not being pure black looks more realistic on the model. |
| Misc. | Vallejo Model Color Flat Flesh, Leather Brown, Silver | Various cockpit colors |
| Weathering | Mr Weathering Color Black, Ammo Mig Oilbrusher Starship Filth, Earth Clay | Panel lines, dirt on the walkway (?) decal. |
Vallejo is thinned by water (as I did not have flow improver/acrylic retarder at the time) and Mr Color, Tamiya paints with Mr Levelling Thinner. Did not keep records of thinning ratios.
Warning! Do not handbrush laquer paints or acrylic non-water-based paints. The results will be awful.
Cockpit assembly and painting
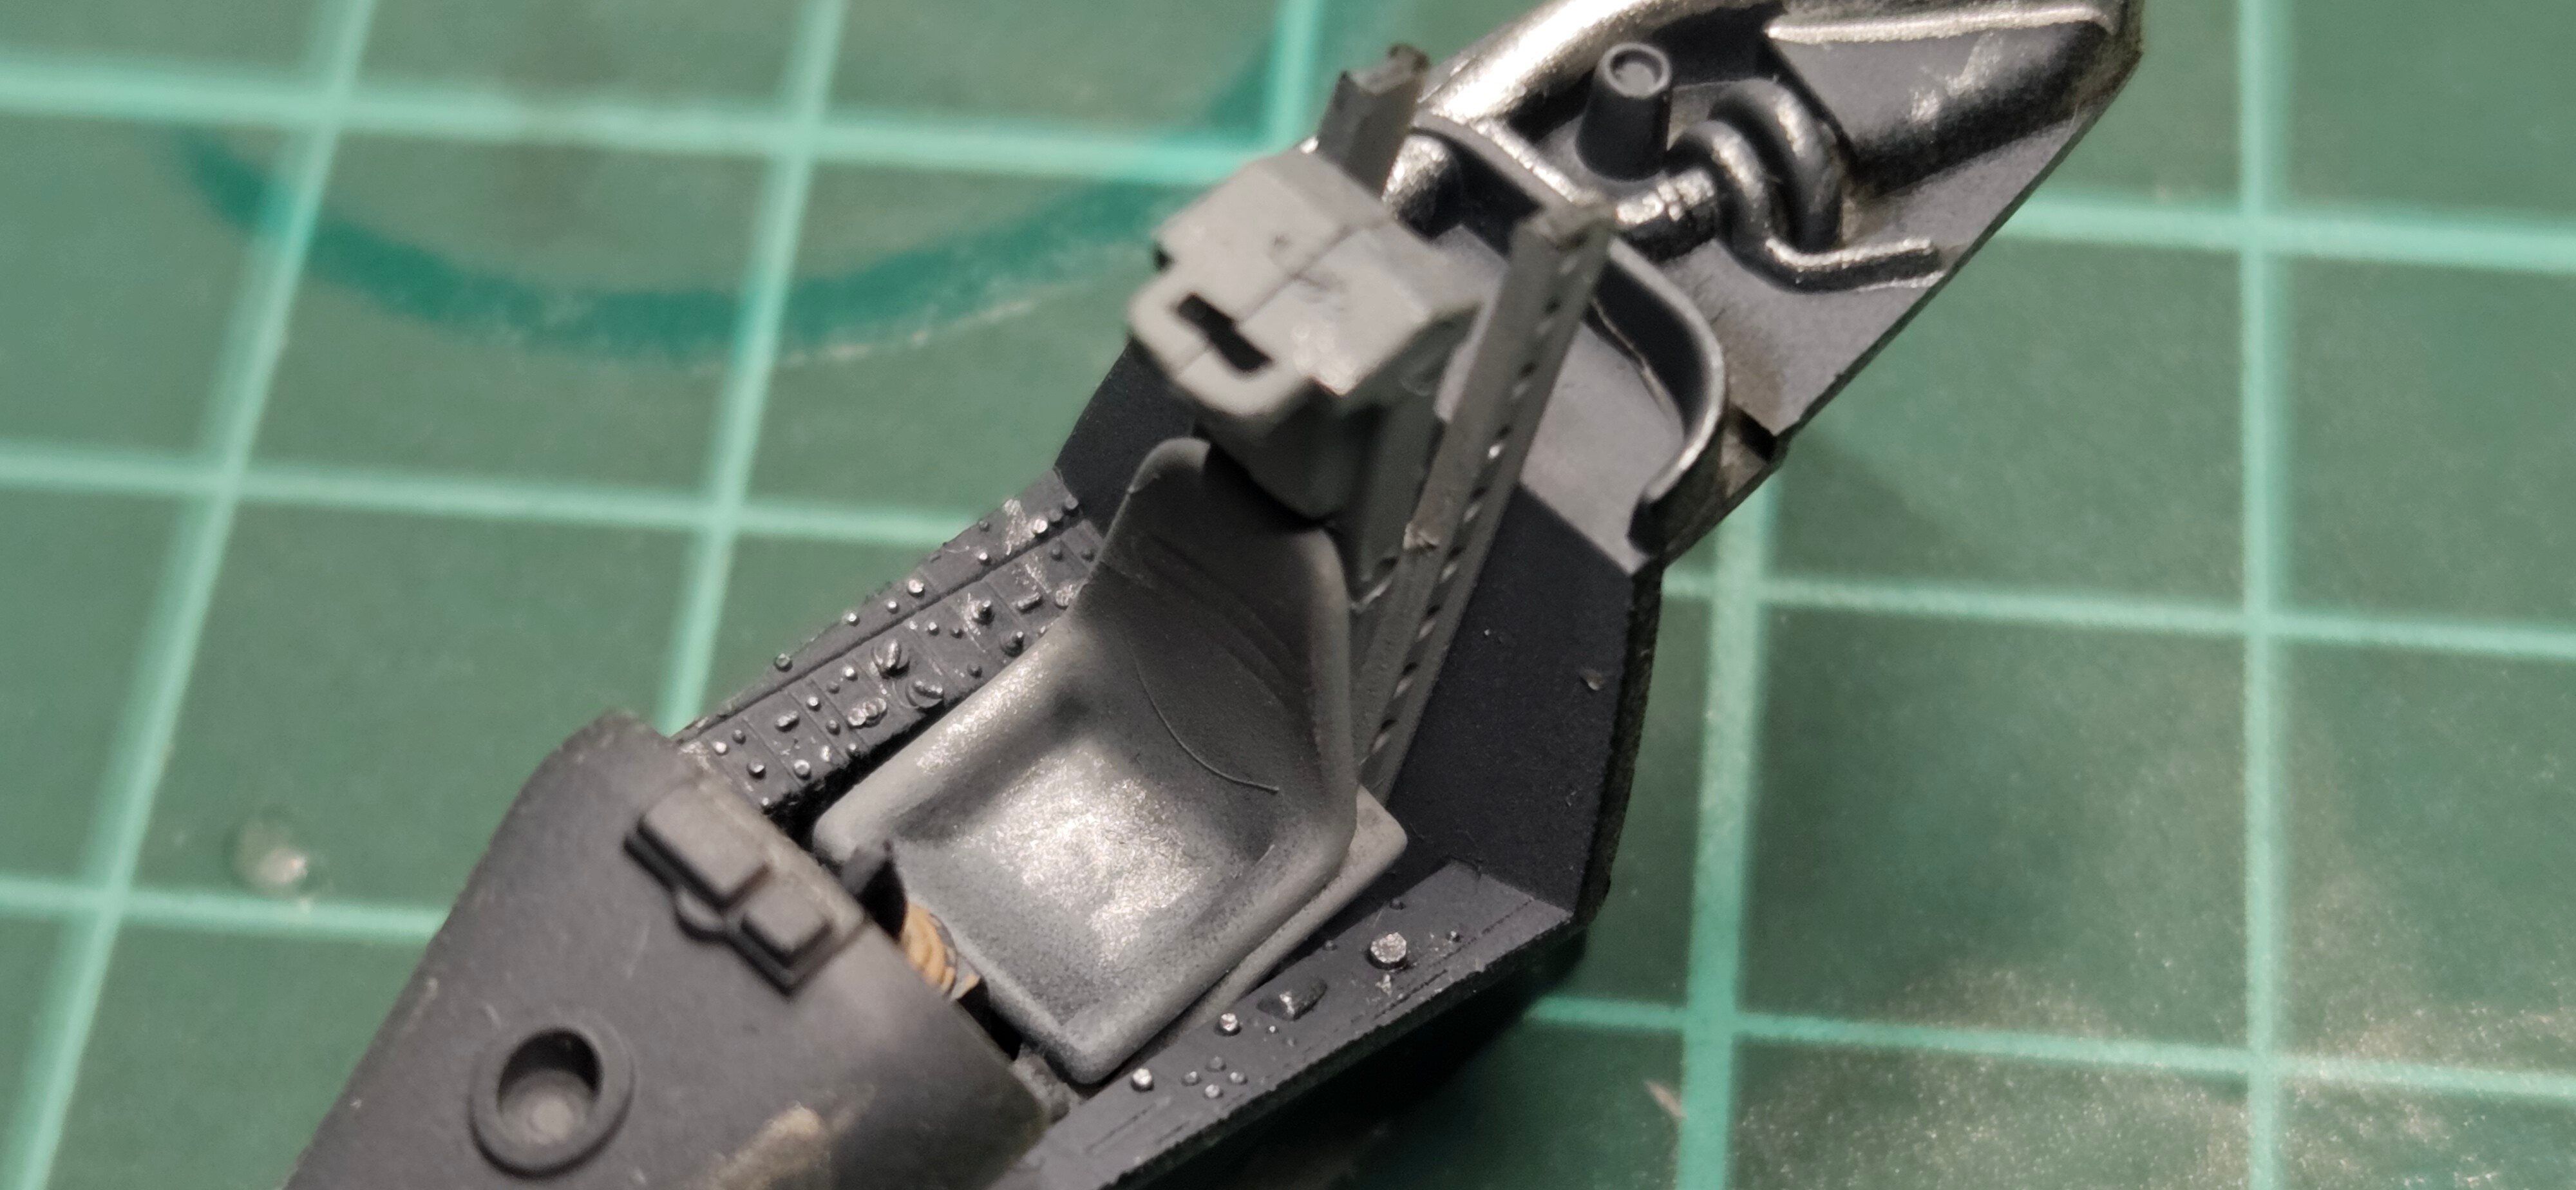
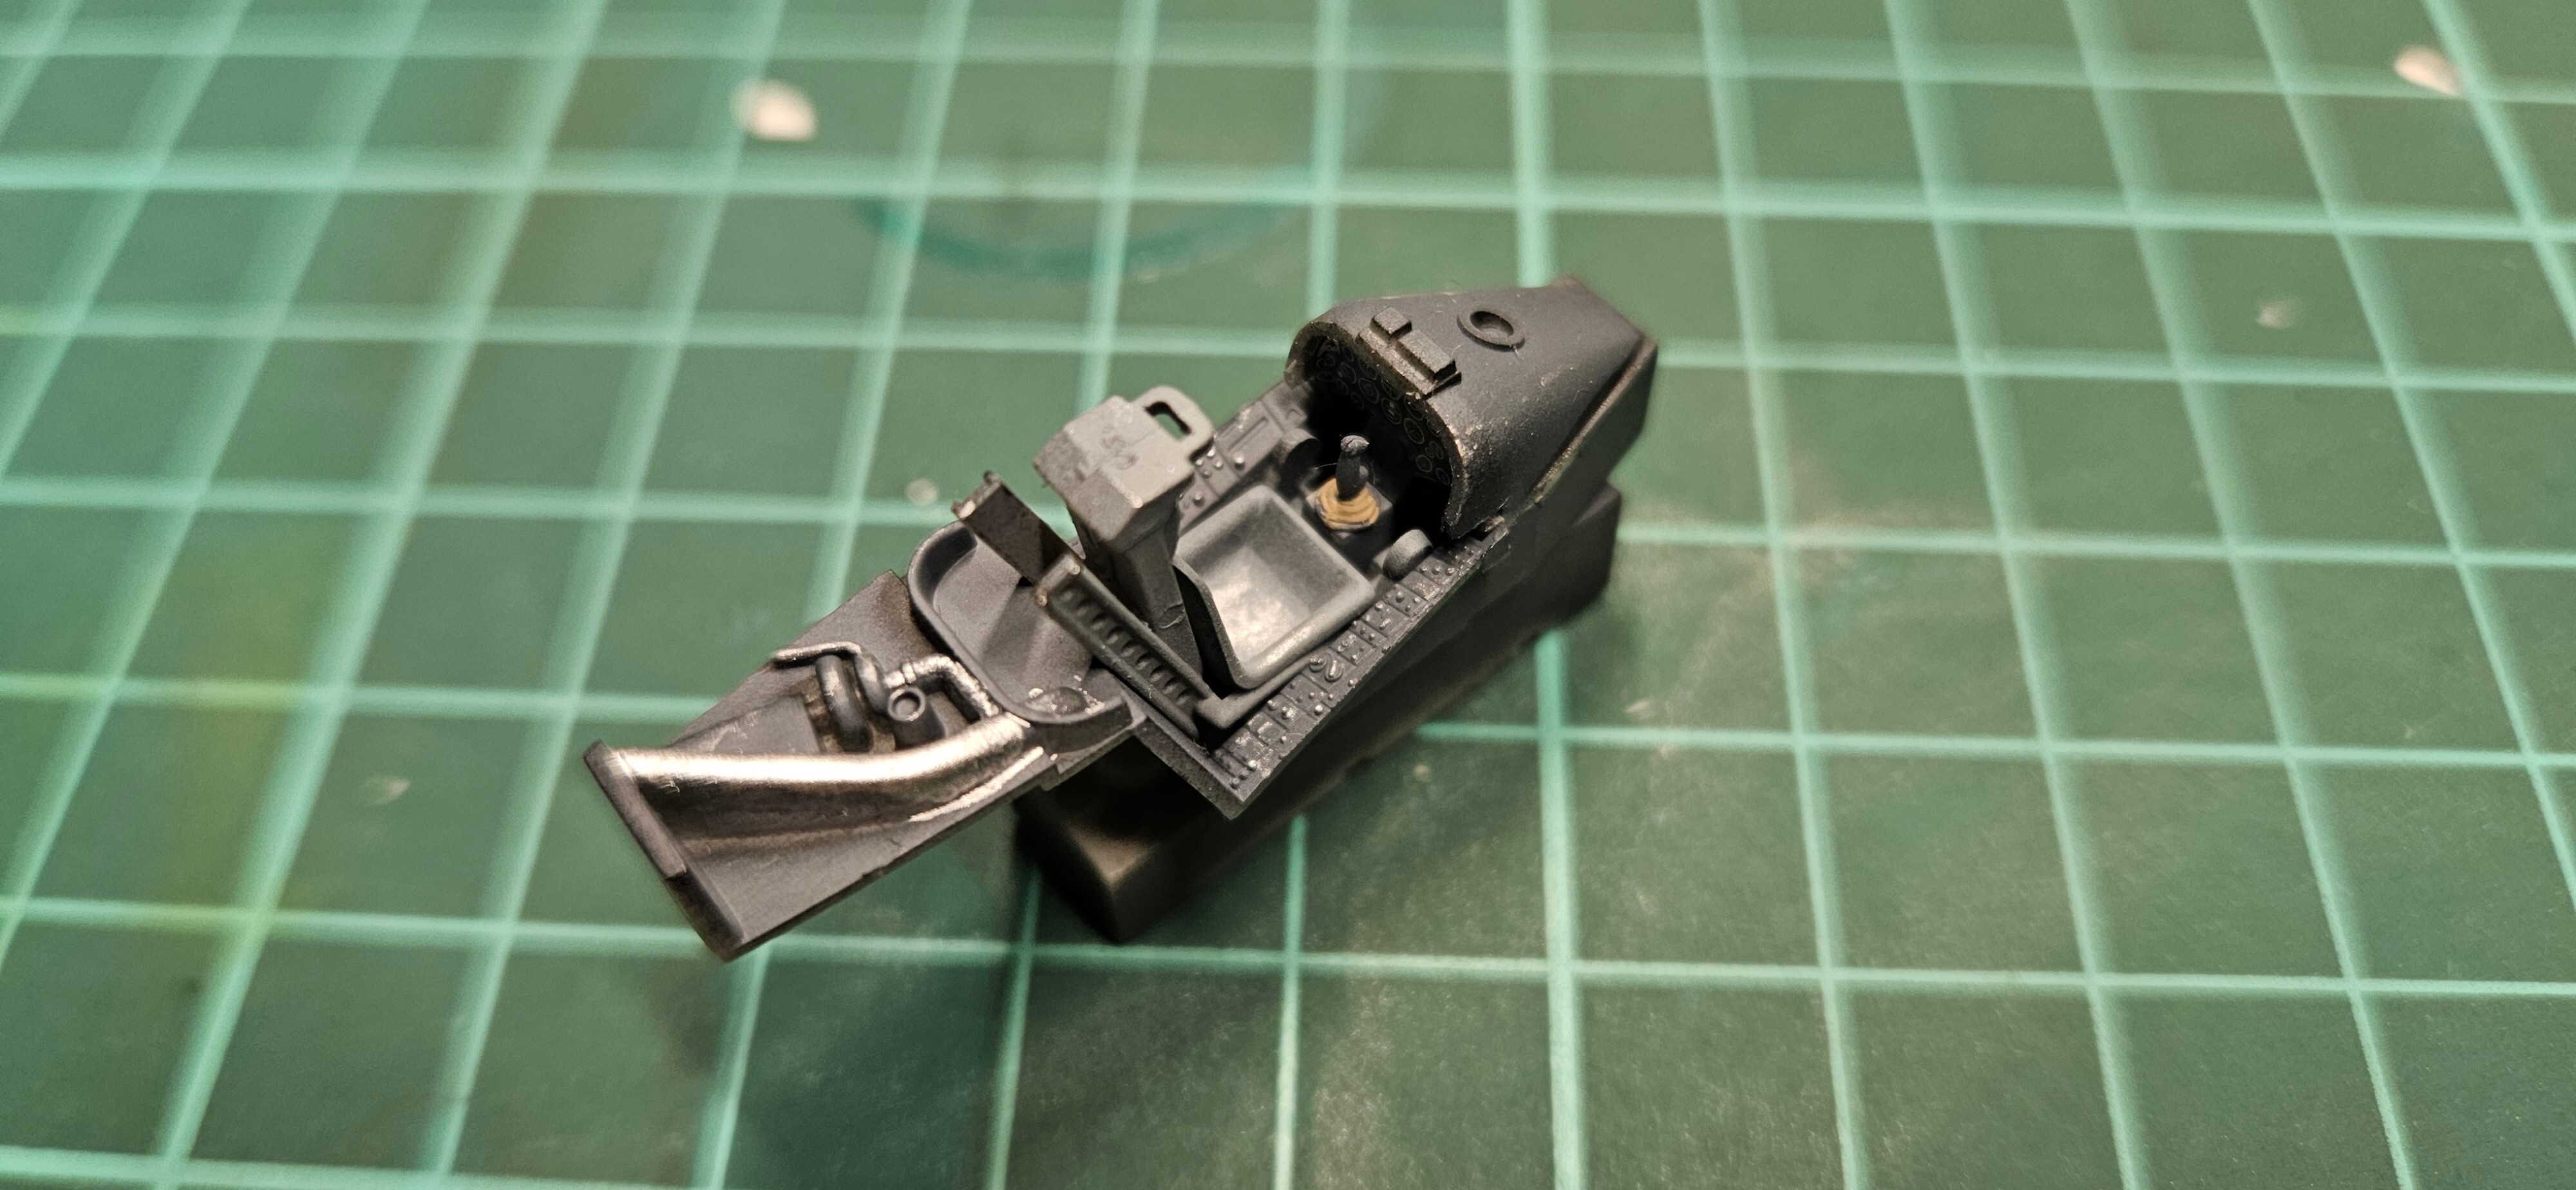
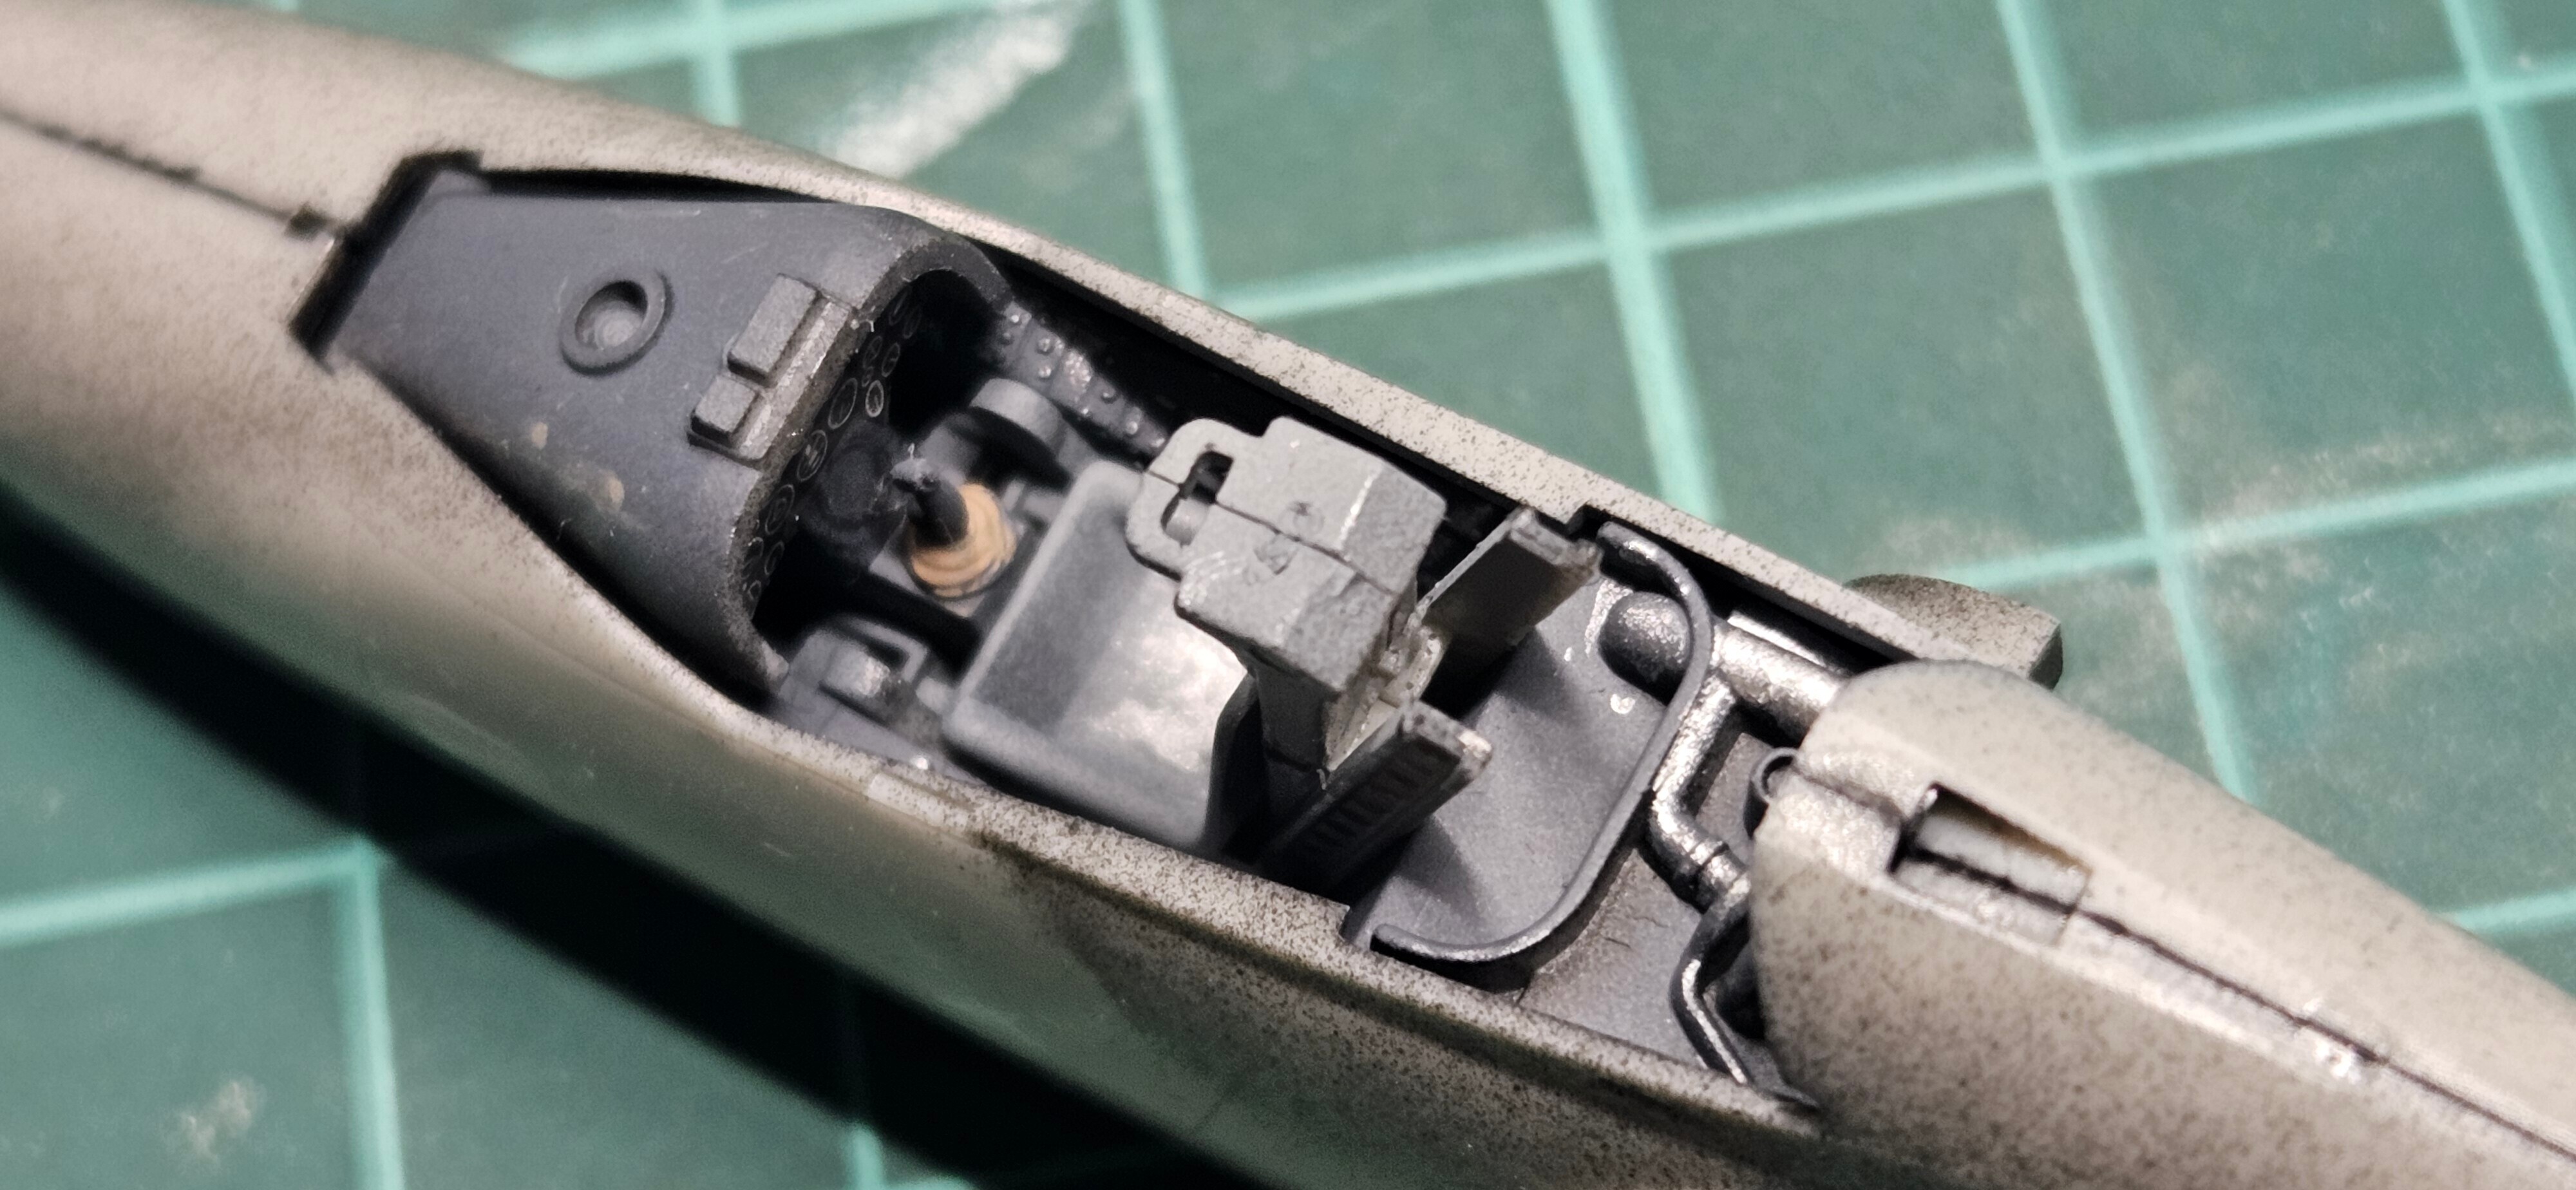
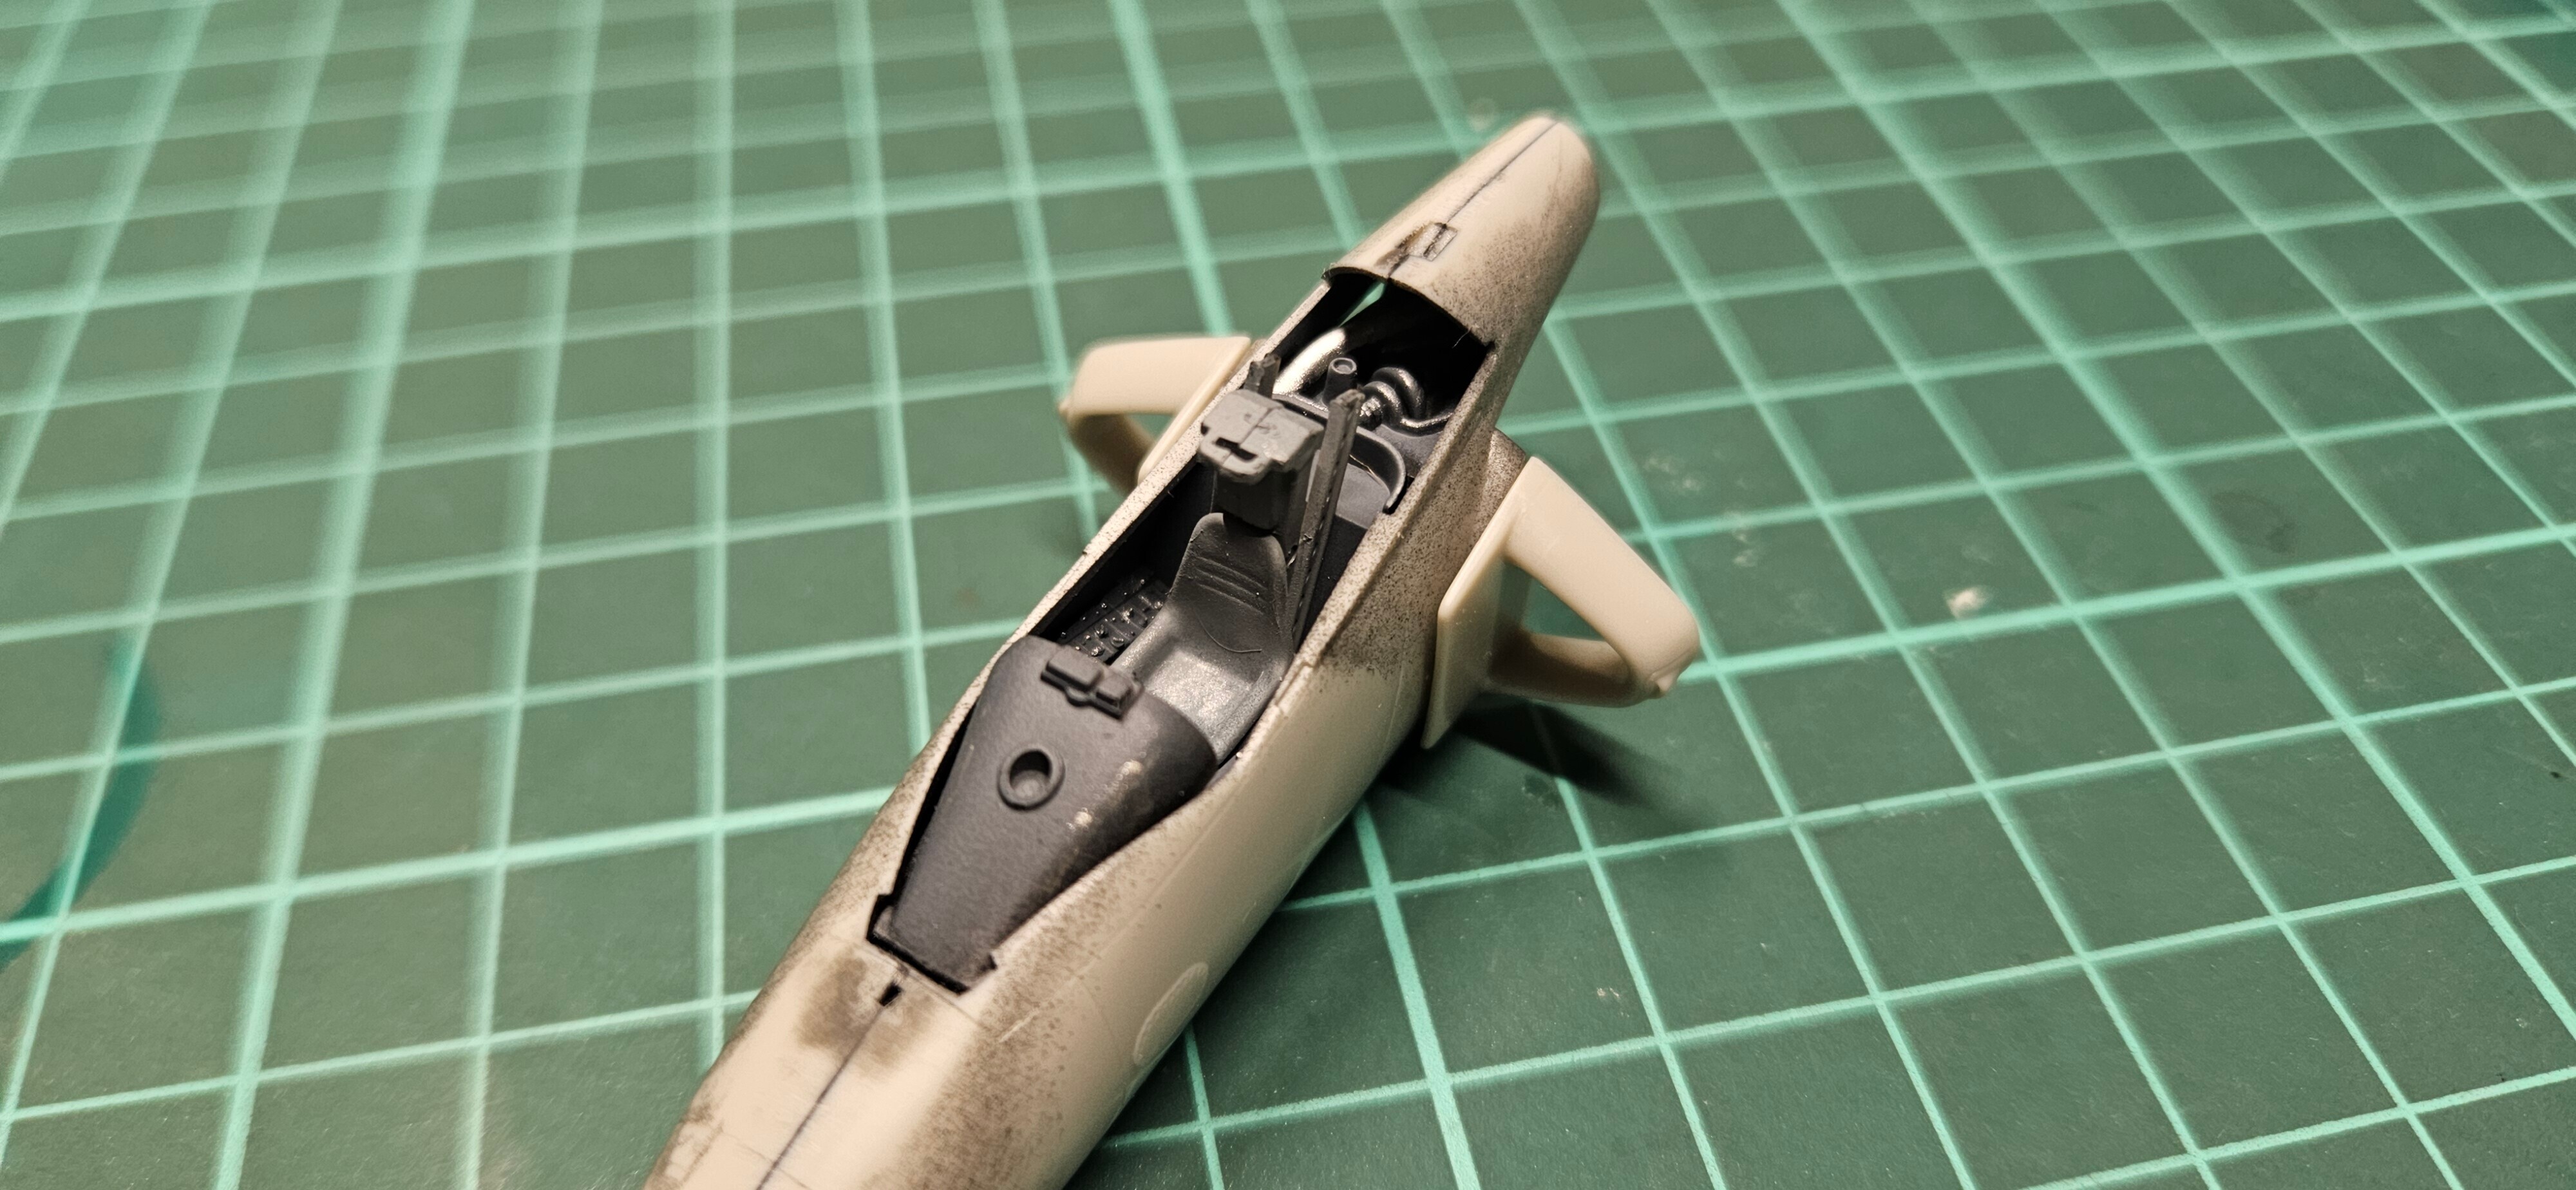
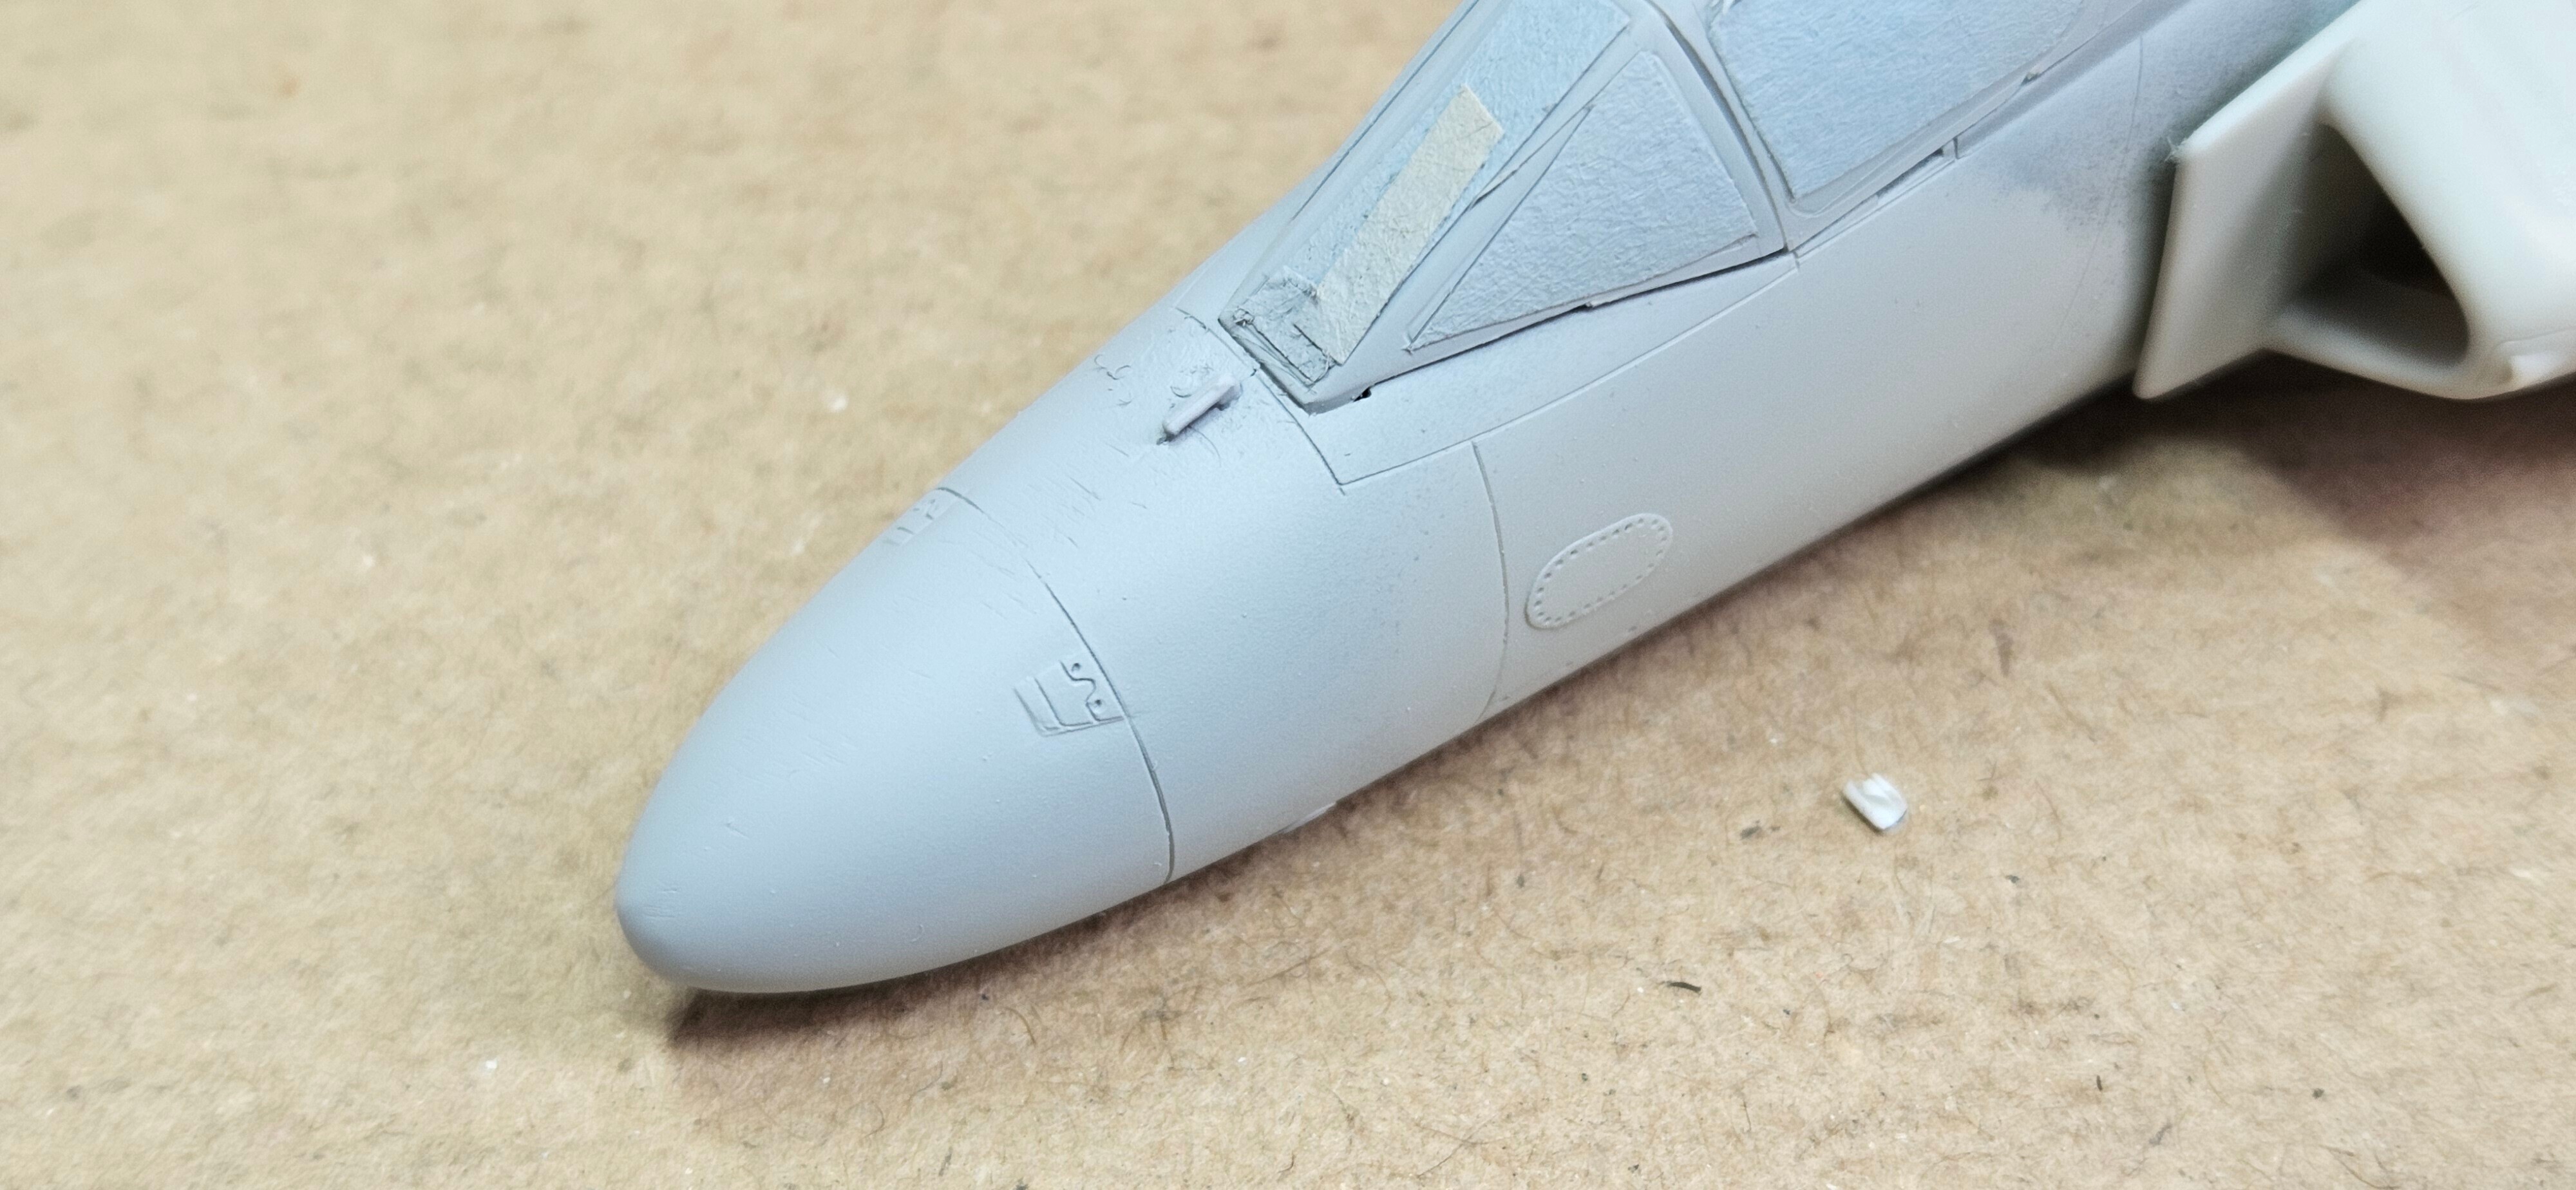
Despite the scale, the cockpit is decently detailed and is very easy to assemble. Not too simple like Hasegawa models and not overcomplicated like Eduard's. Everything has a specific hole for it so that you can't put it the wrong way around or in a wrong position (with parts this small, it's really easy to put the control stick in the wrong direction).
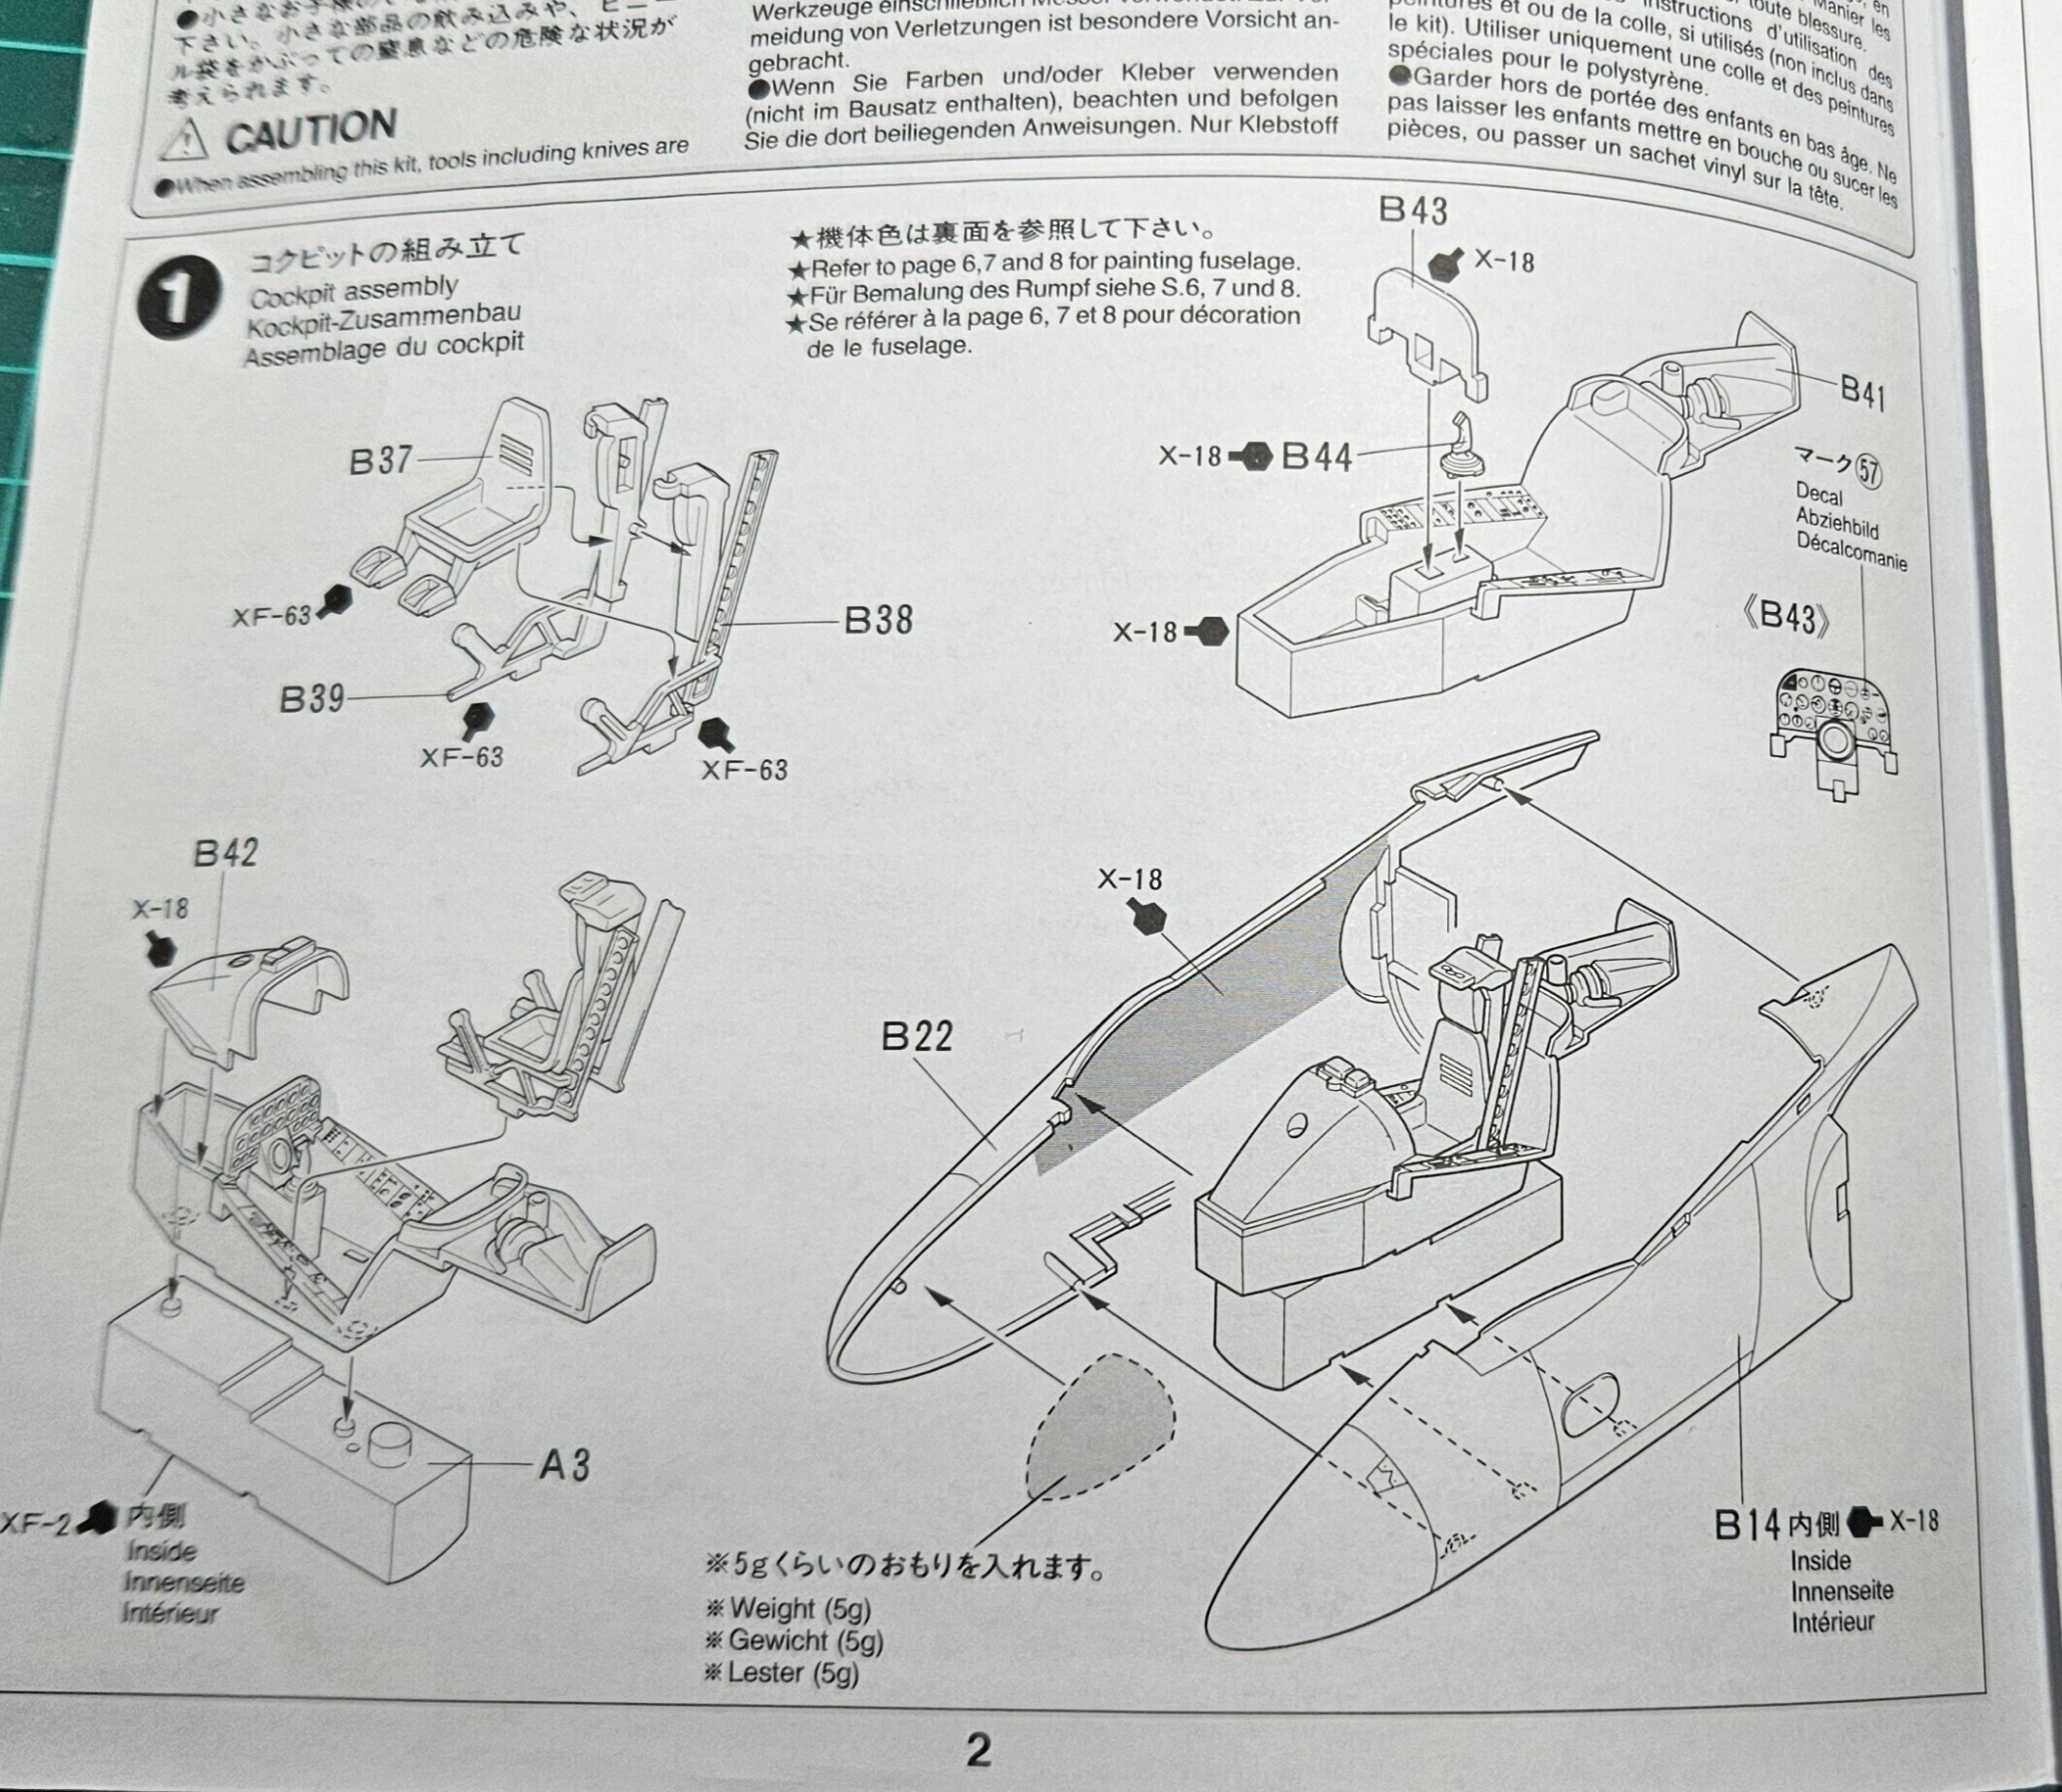
I painted the parts separately, as the seat and the rest of the cockpit are supposed to be different colors. Put the front panel decal on as per manual and then cemented it all together. The rubberry (?) part of the flight control stick was handbrushed with a mix of Vallejo Flat flesh and Leather Brown. The silver highlights were done with simply drybrushing it. Didnt end up ideal, but it is hard to see anything in the cockpit anyways when it is assembled.
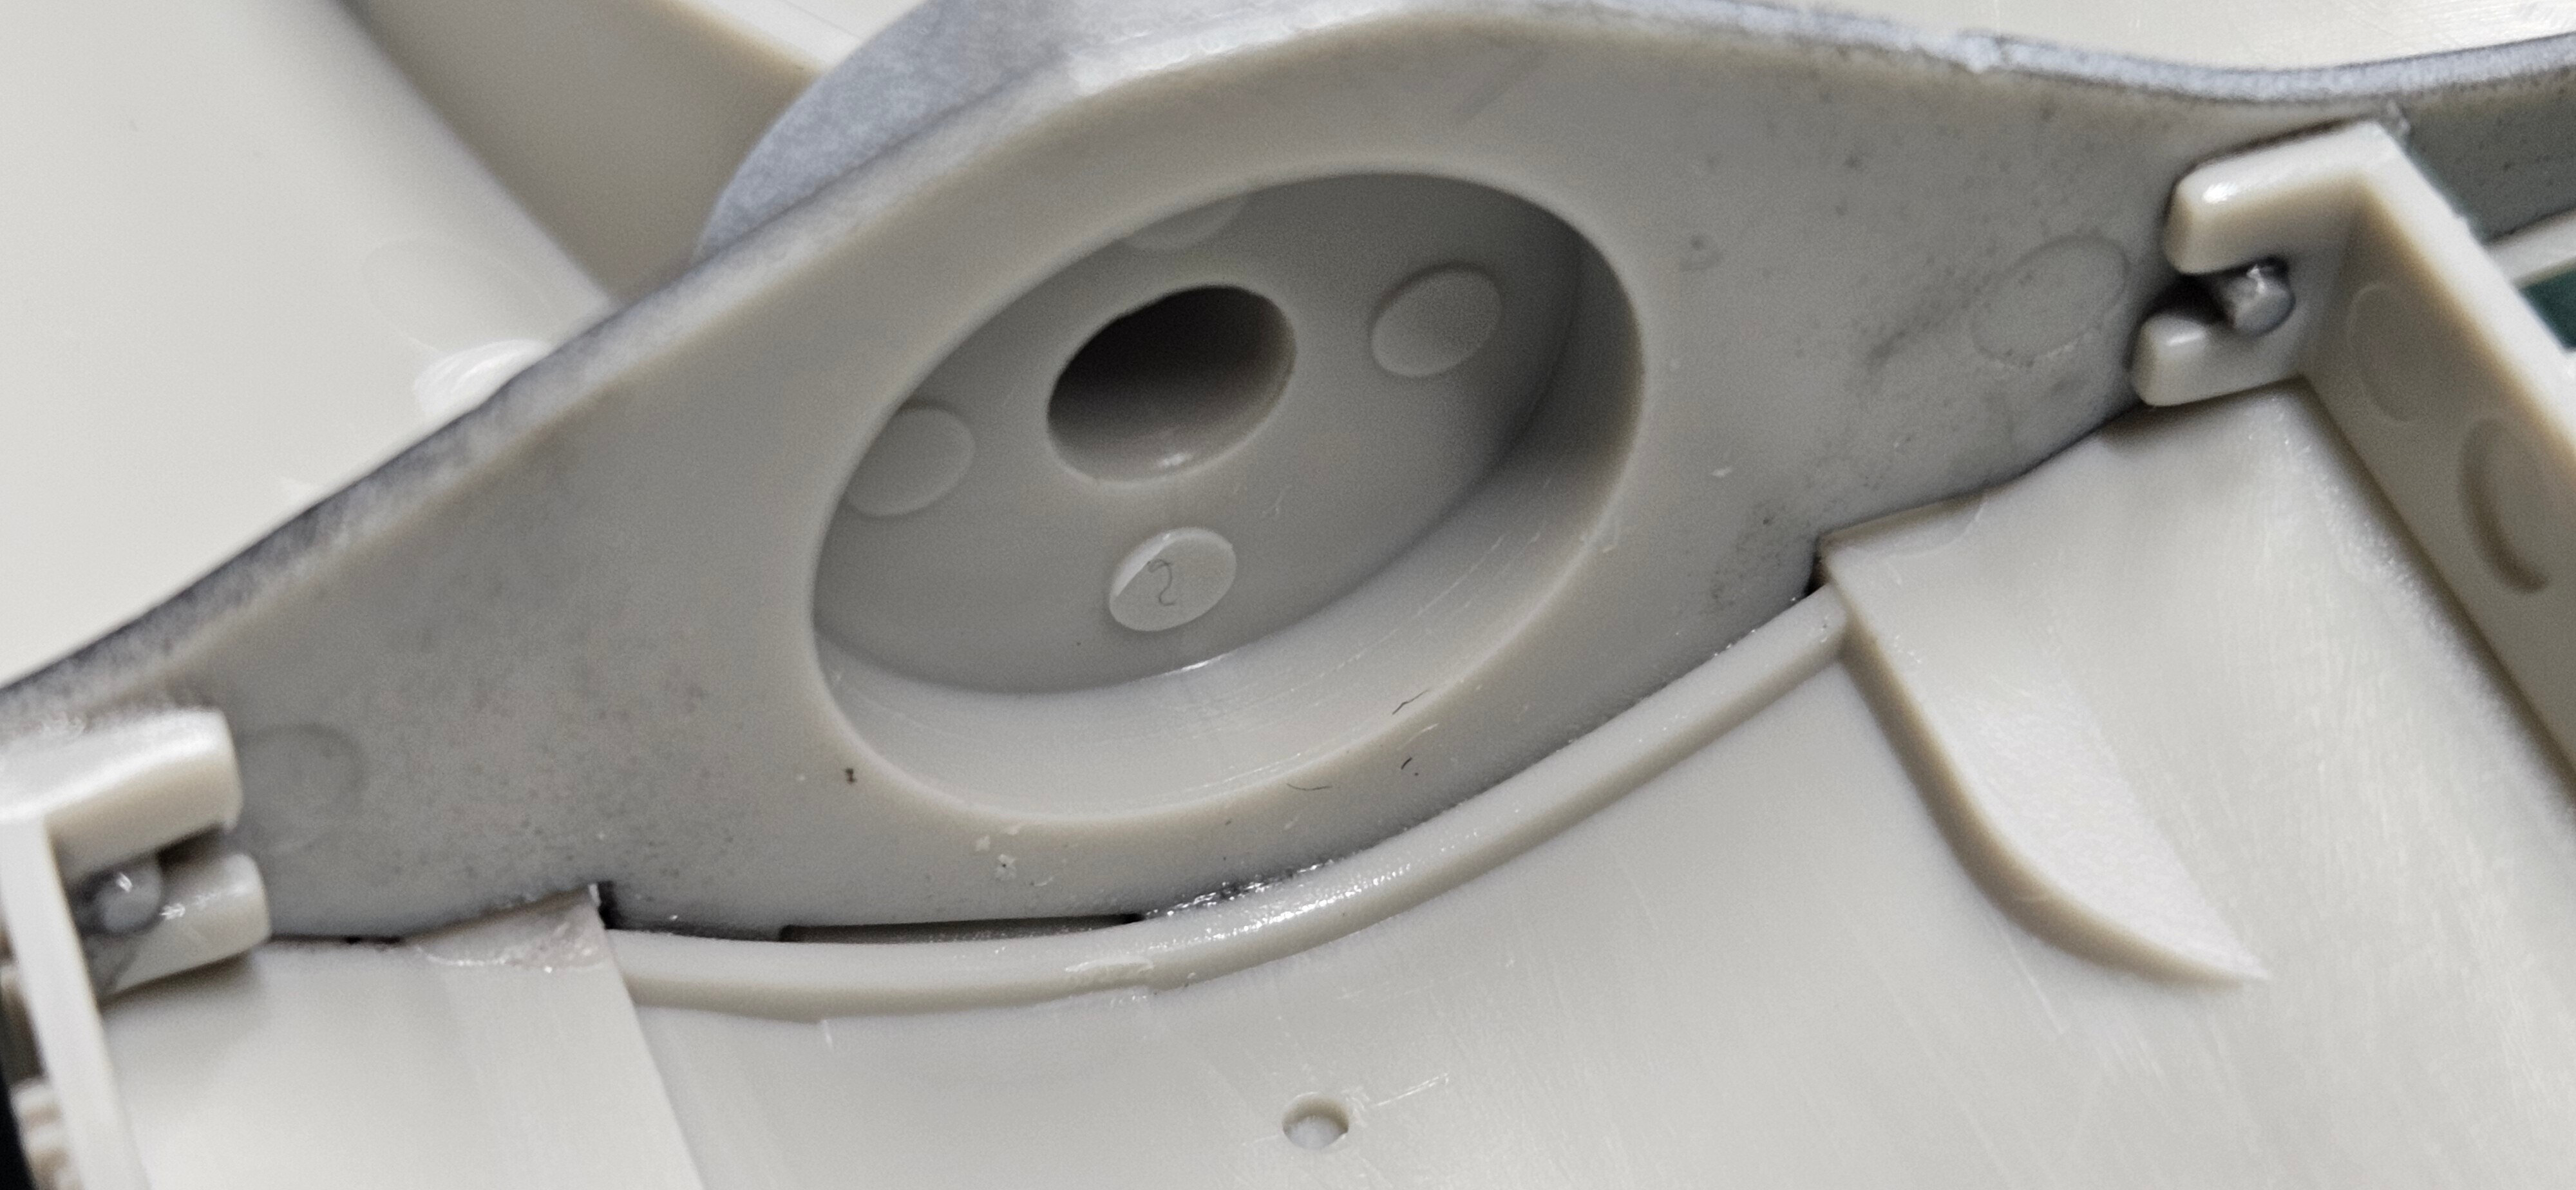
While the paint was drying, I poured some metallic ball filler in both sides of the nose where the radar is supposed to be as counterweight. You can simply buy those by looking for "Toy filler". Then I glued them in with superglue. After you're sure that all of them got properly glued, first cement the cockpit to one side of the nose, then put another with it. Hold it like that and run extra thin cement in the seam. As I used quick-setting, it held firm after a couple minutes.
Then simply sand the seam. I only had 140 and 2000-5000 Grit sandpaper at the time, so I couldnt really get rid of the seam as sandpaper was too soft. Ended up buying a whole set of 600-1500 Grit sandpaper right after that.
Main body assembly and painting
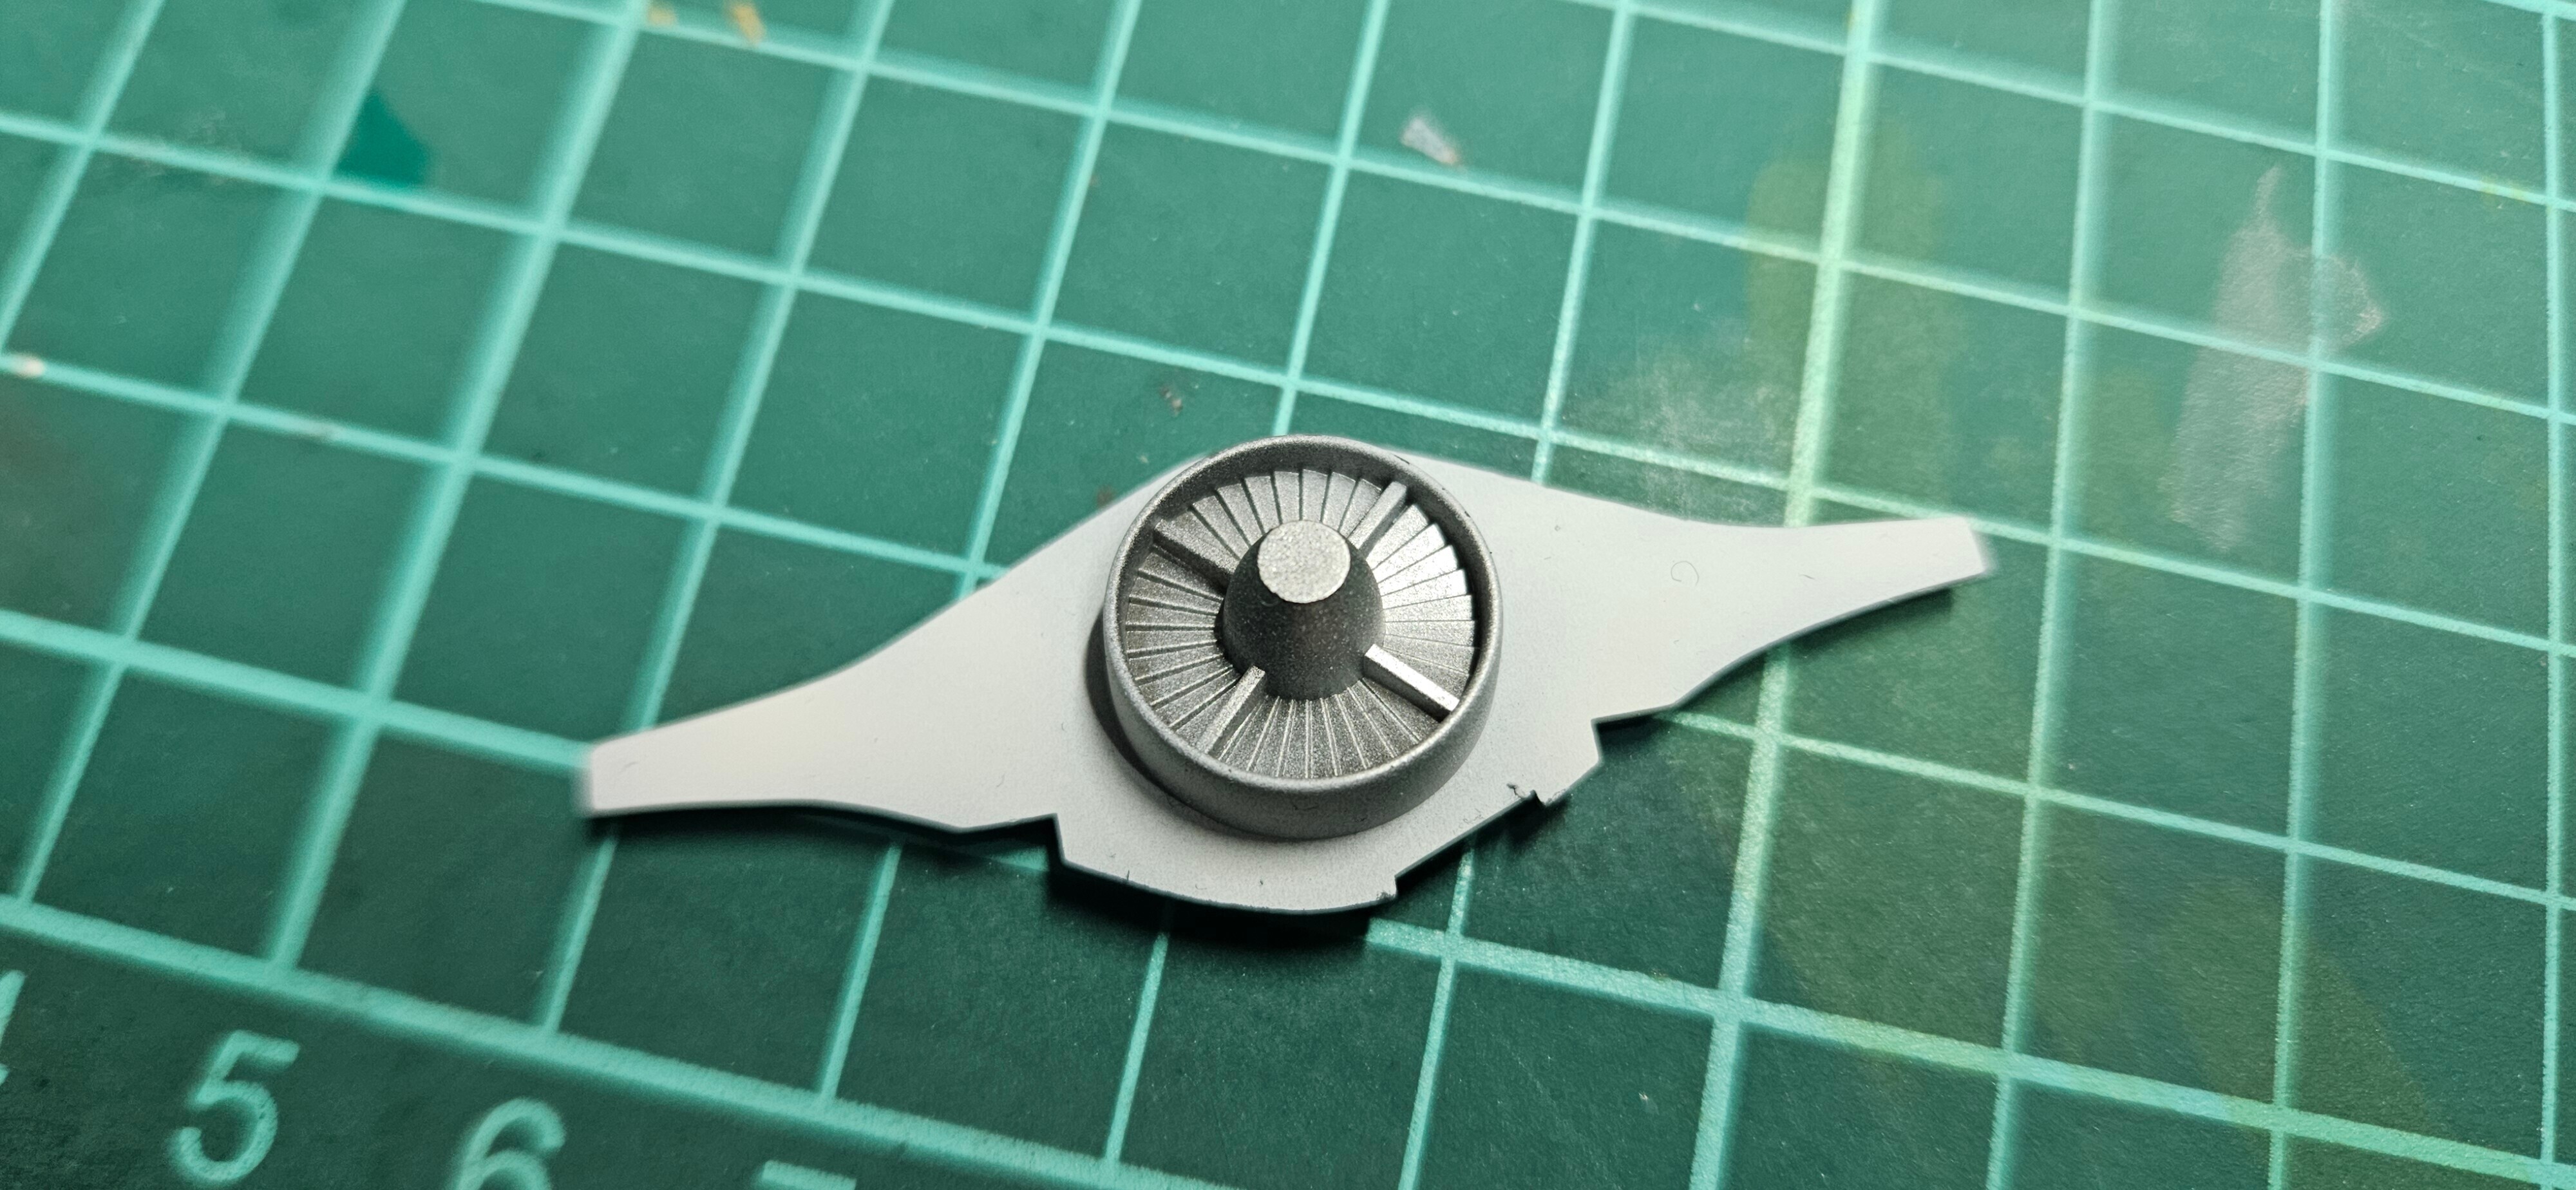
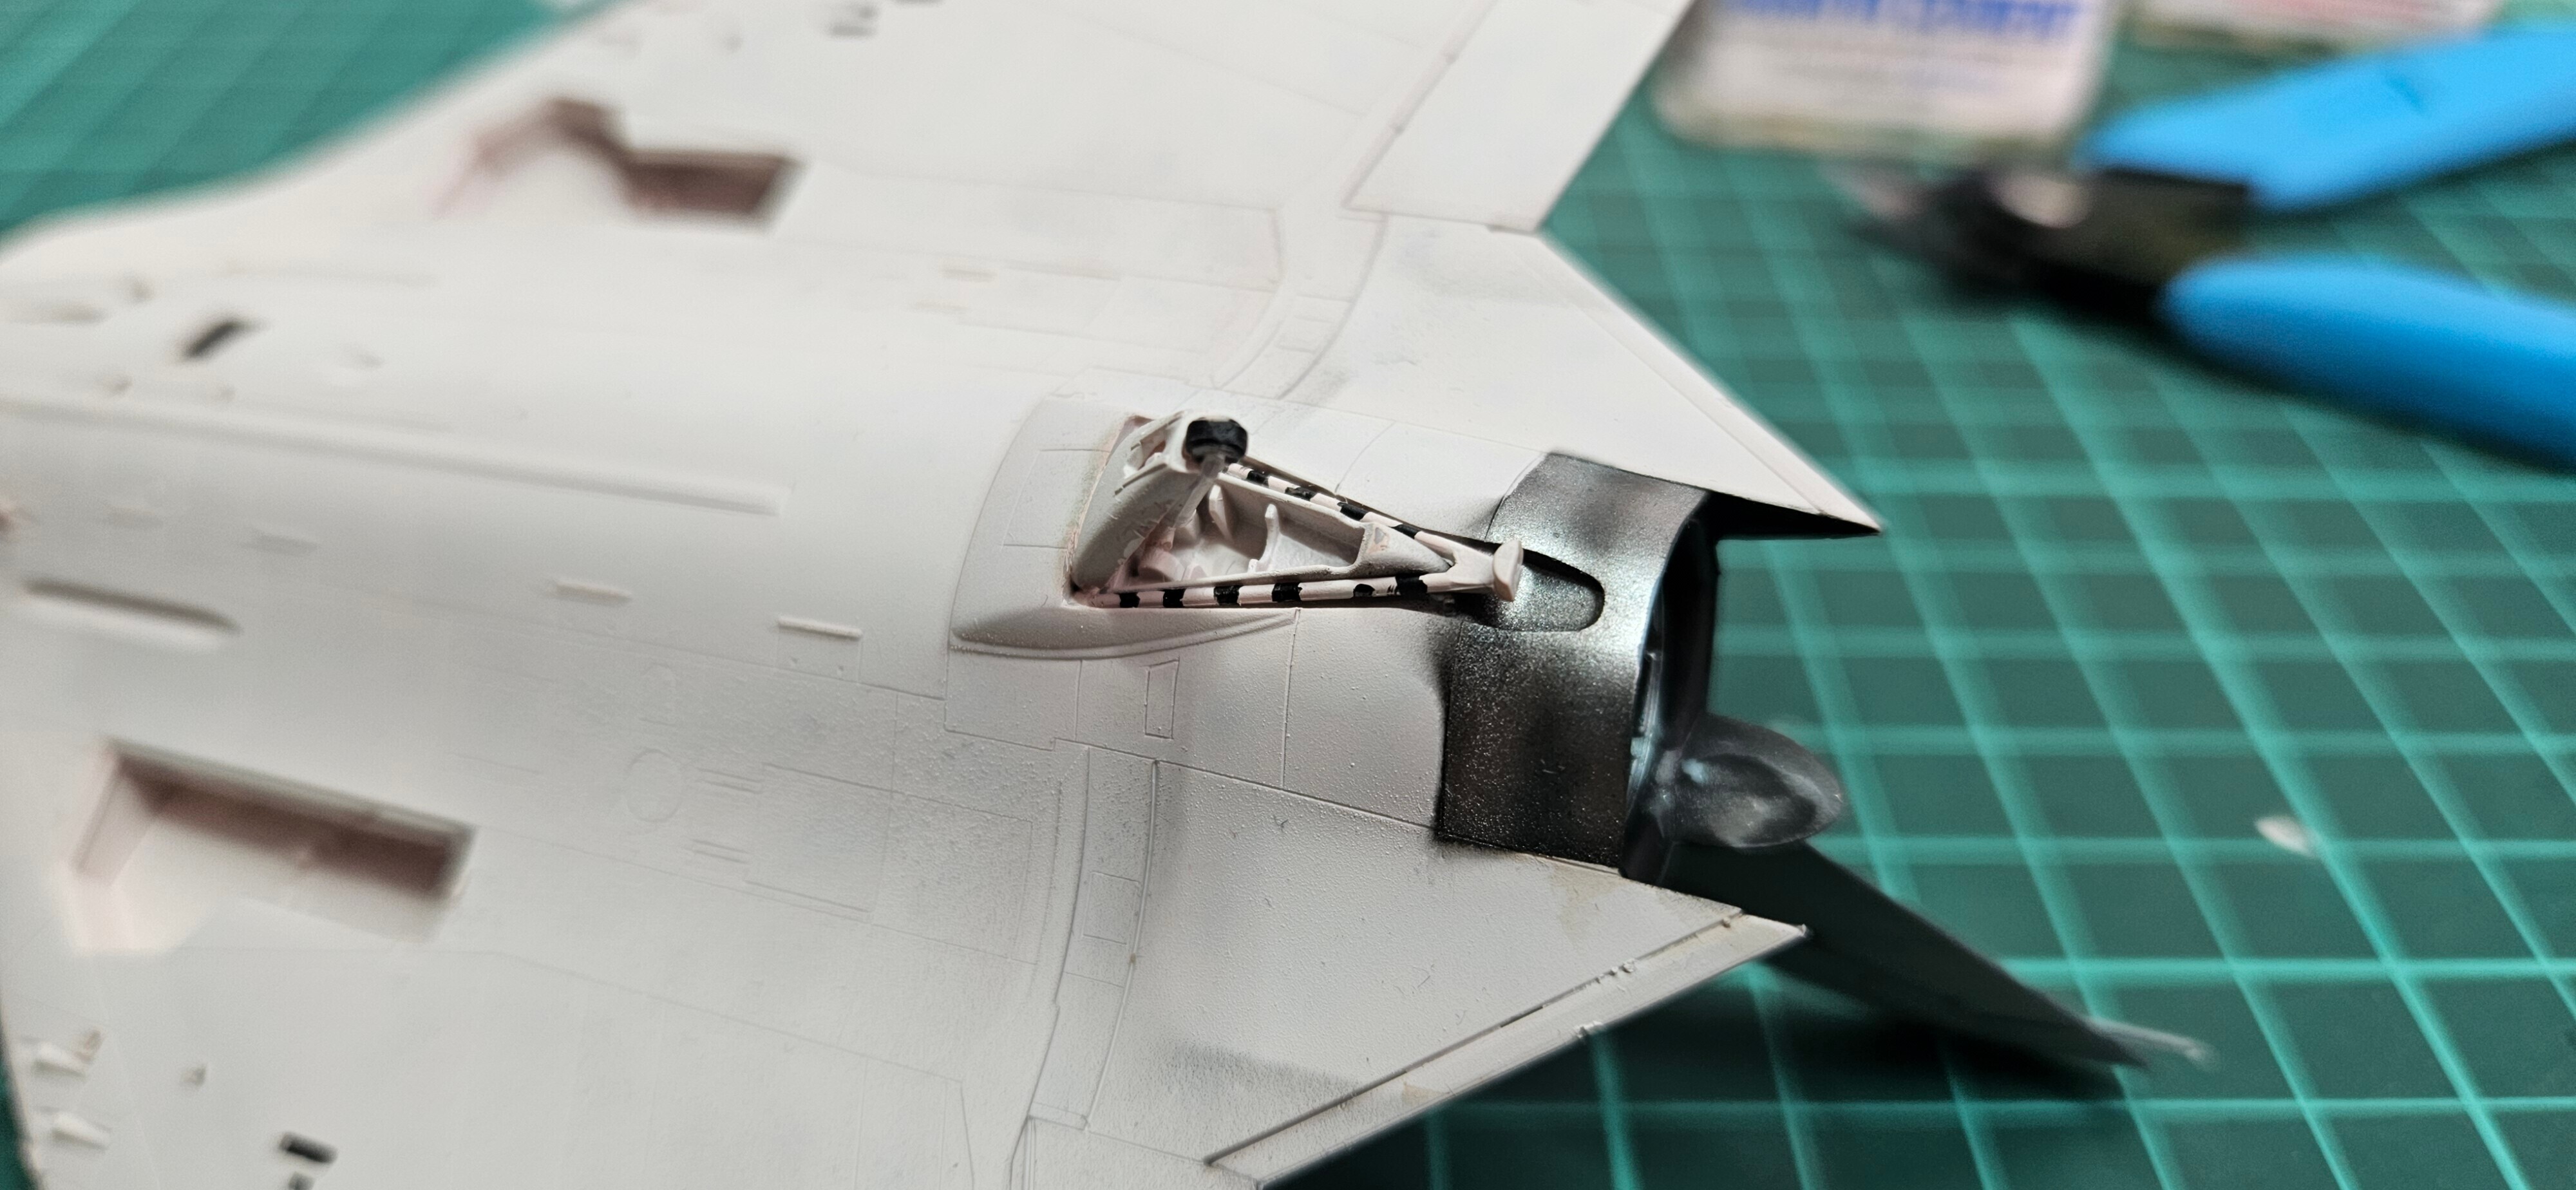
The work on the body begun with clipping off the compressor fan part and painting the fan in Mr Super Metallic Silver, while the rest with "Insignia white". This whole area can hardly be seen outside. Then just clip the main body off as well as landing gear bay sides as per manual and attach them like a jig with some cement along with it.
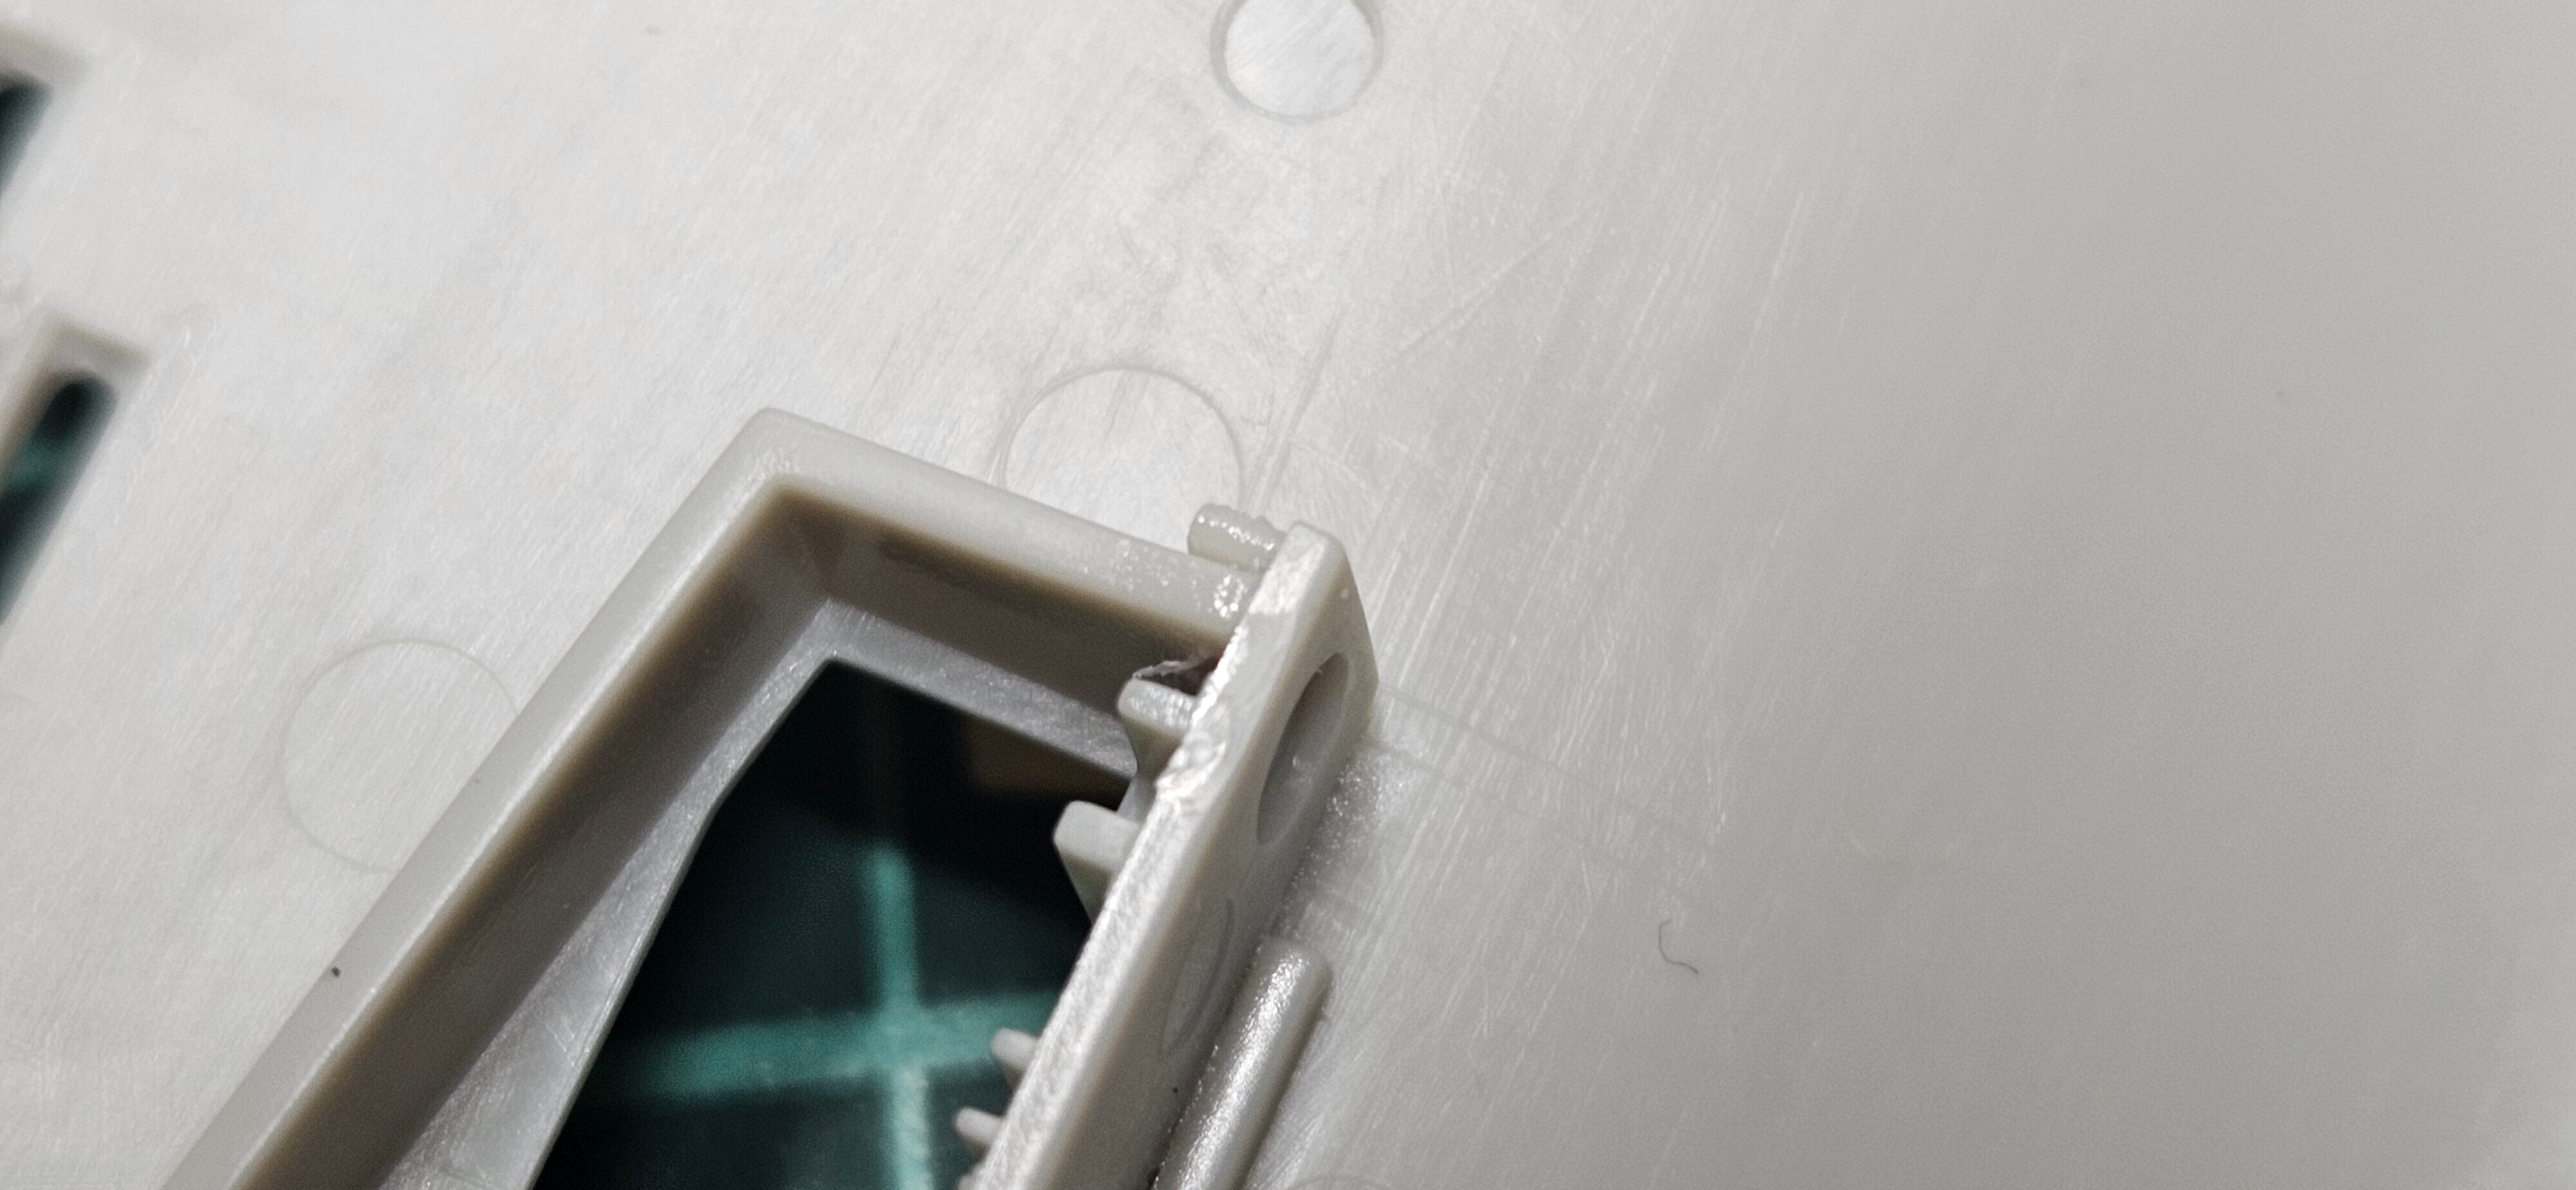
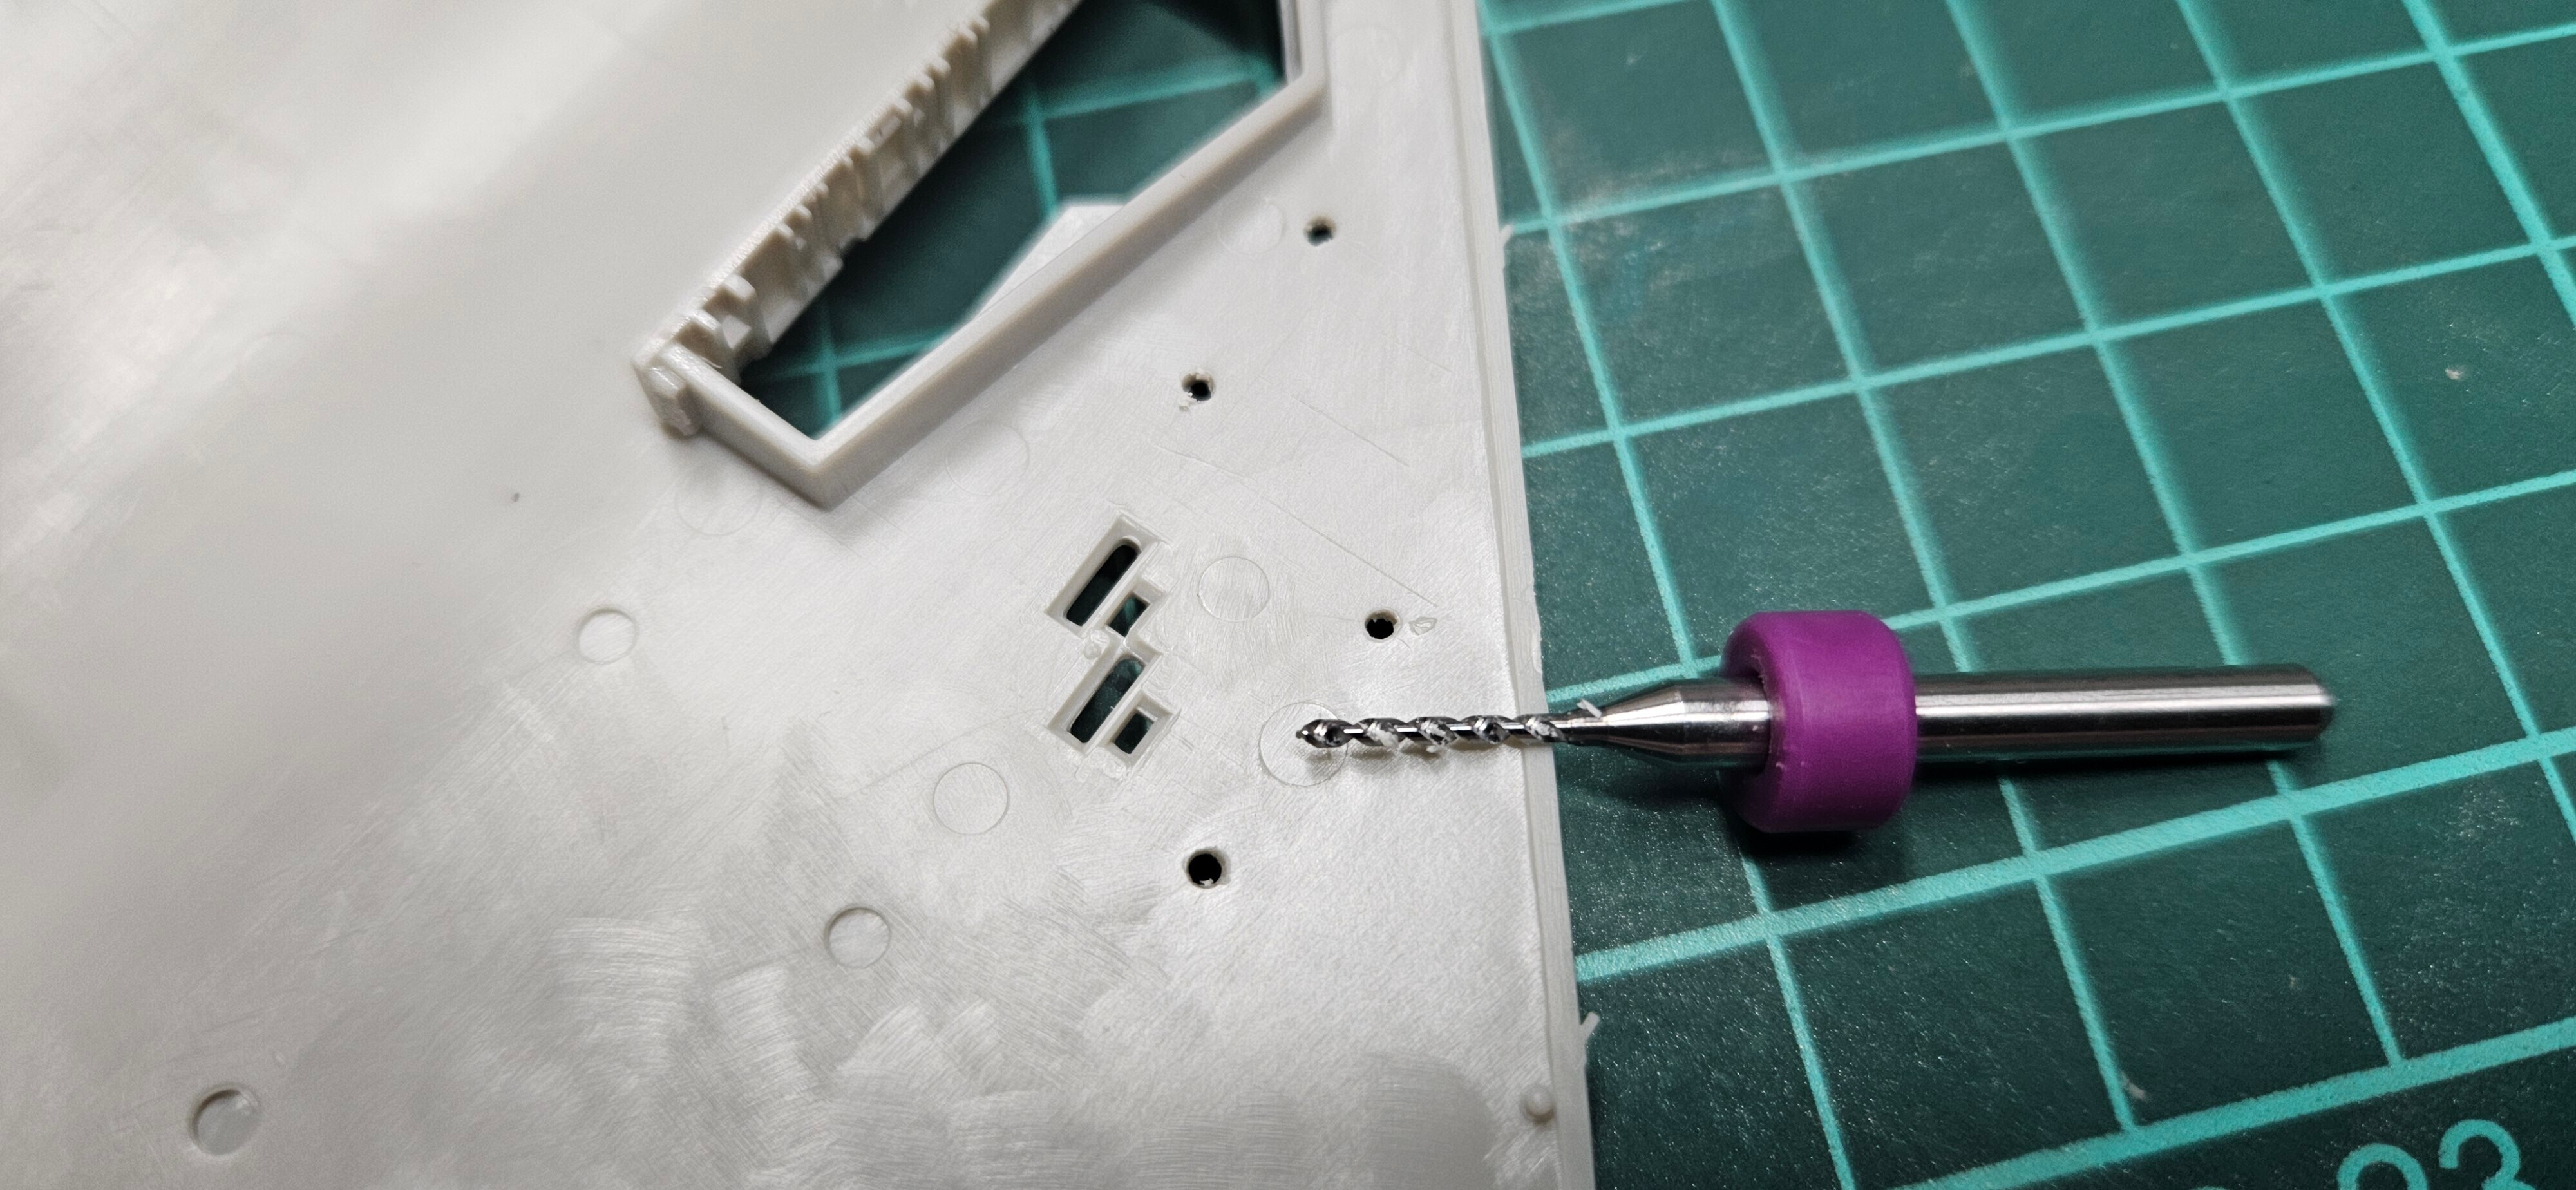
Then you need to drill. I have a cheap set of jeweler's drills, which is far from perfect but it does the job. 1mm drill just on some pre-made recesses and clean up with a hobby knife. Don't forget to put an exhaust part on the top side of the main body (or suffer through putting it blind with a set of tweezers for 30 minutes)!
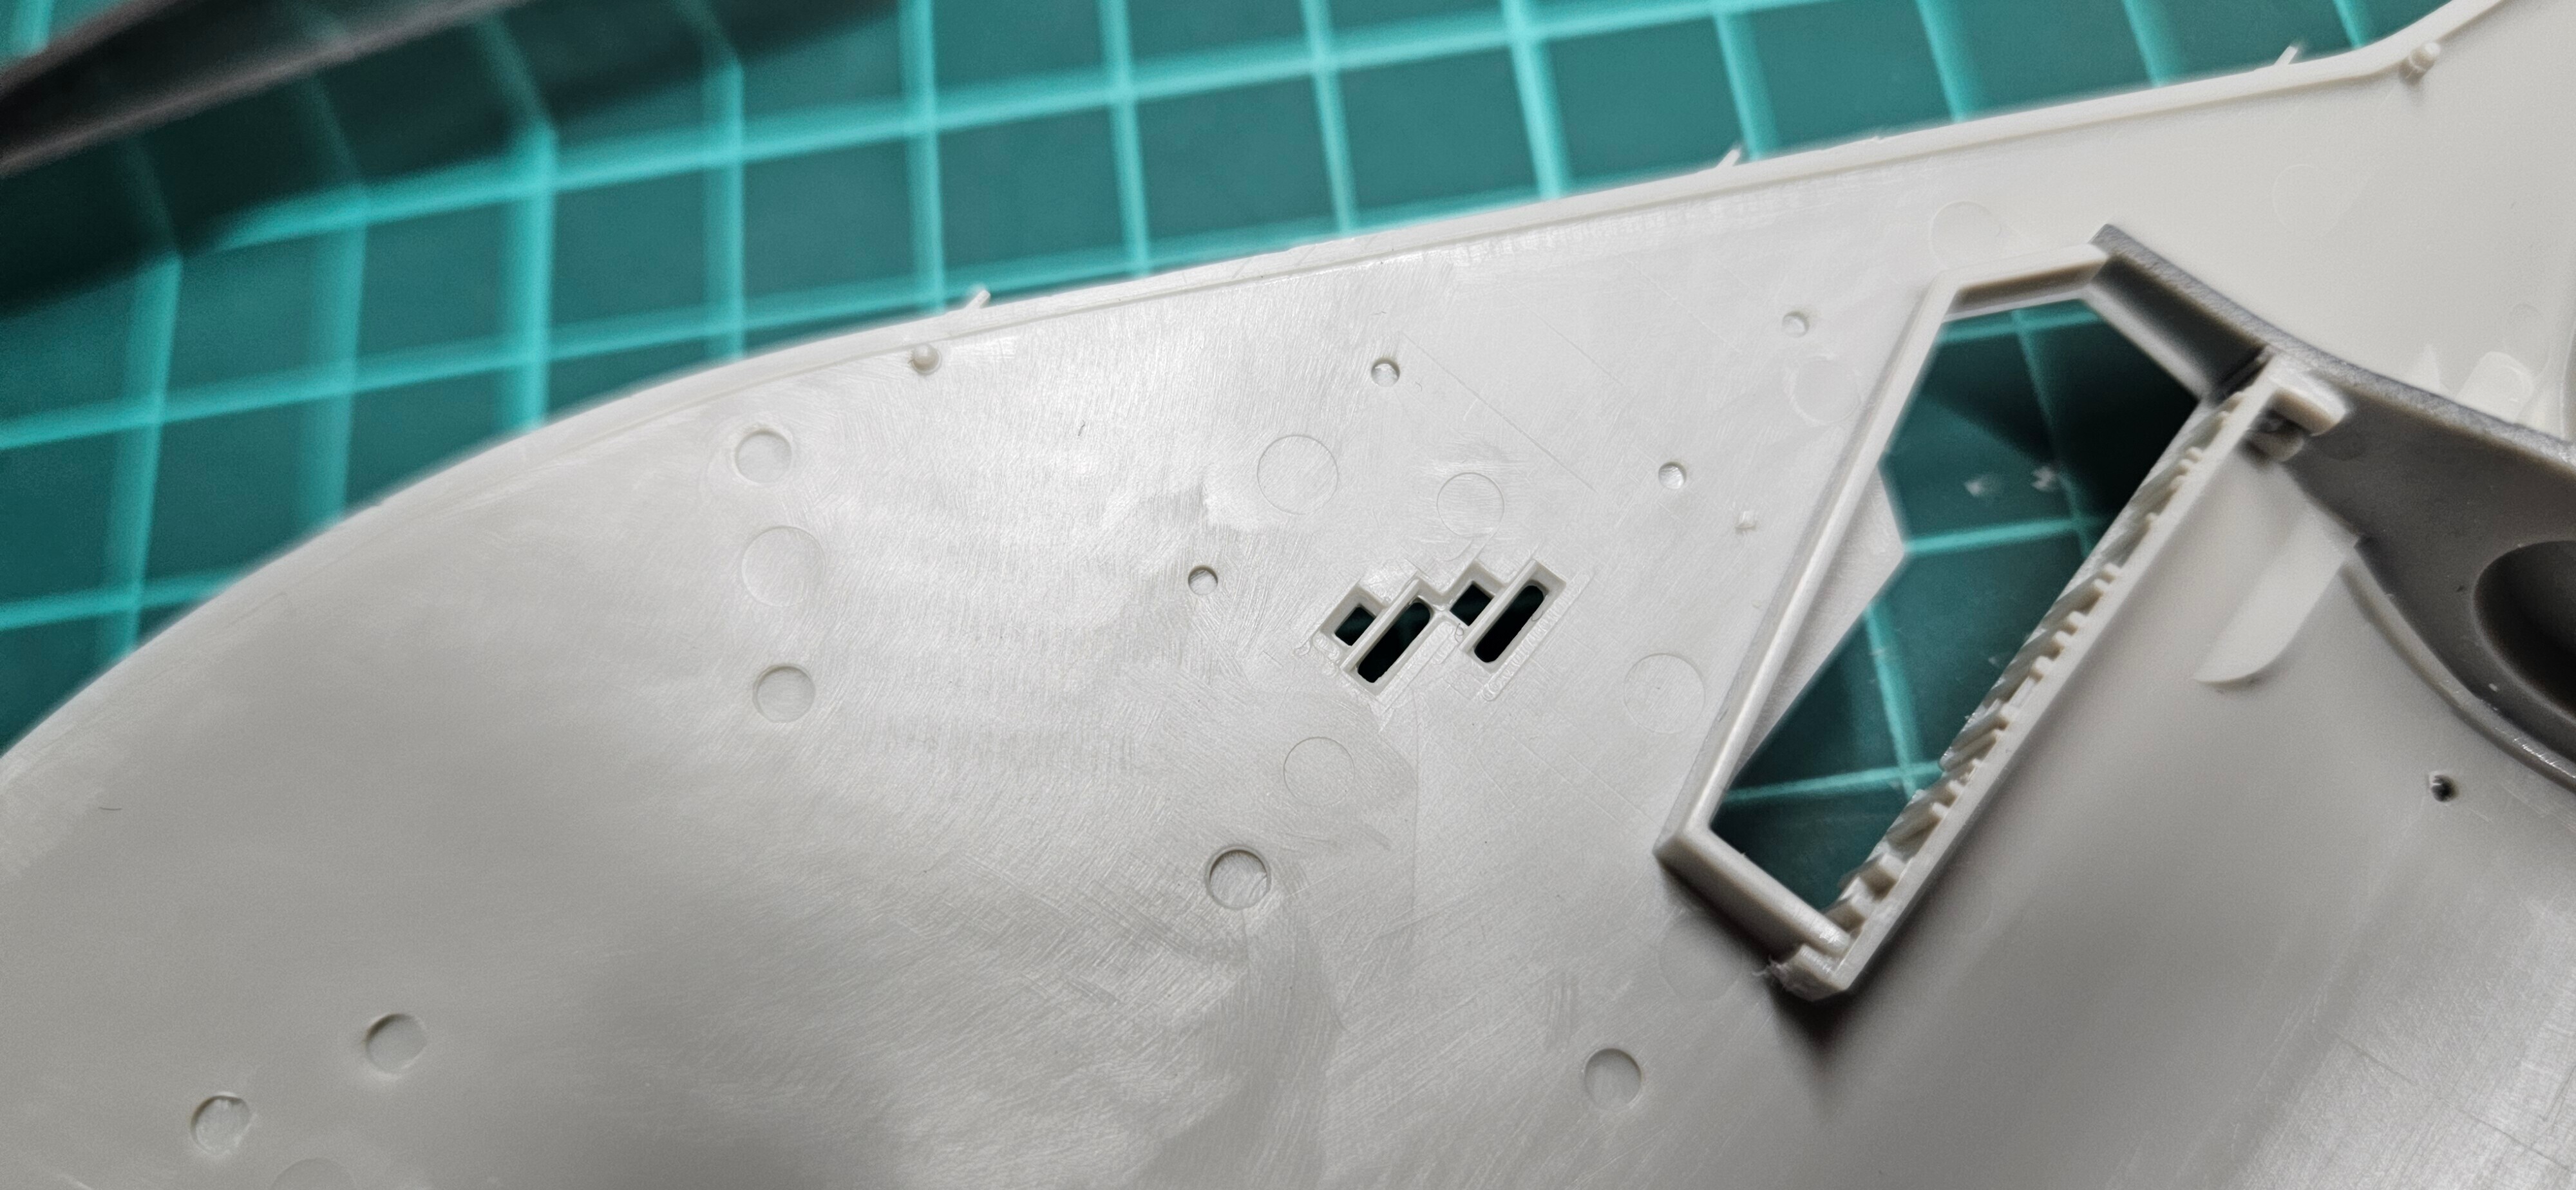
Then arguably the most annoying and tense part of assembly. You need to connect two fuselage parts. Hold them together and put extra thin in the seams and gaps, while pressing two sides together. Preferably use masking tape to hold them together as it will want to separate. Meanwhile I also cemented the air exhausts to the nose and then attached it to a drying main body. I left it like that overnight.
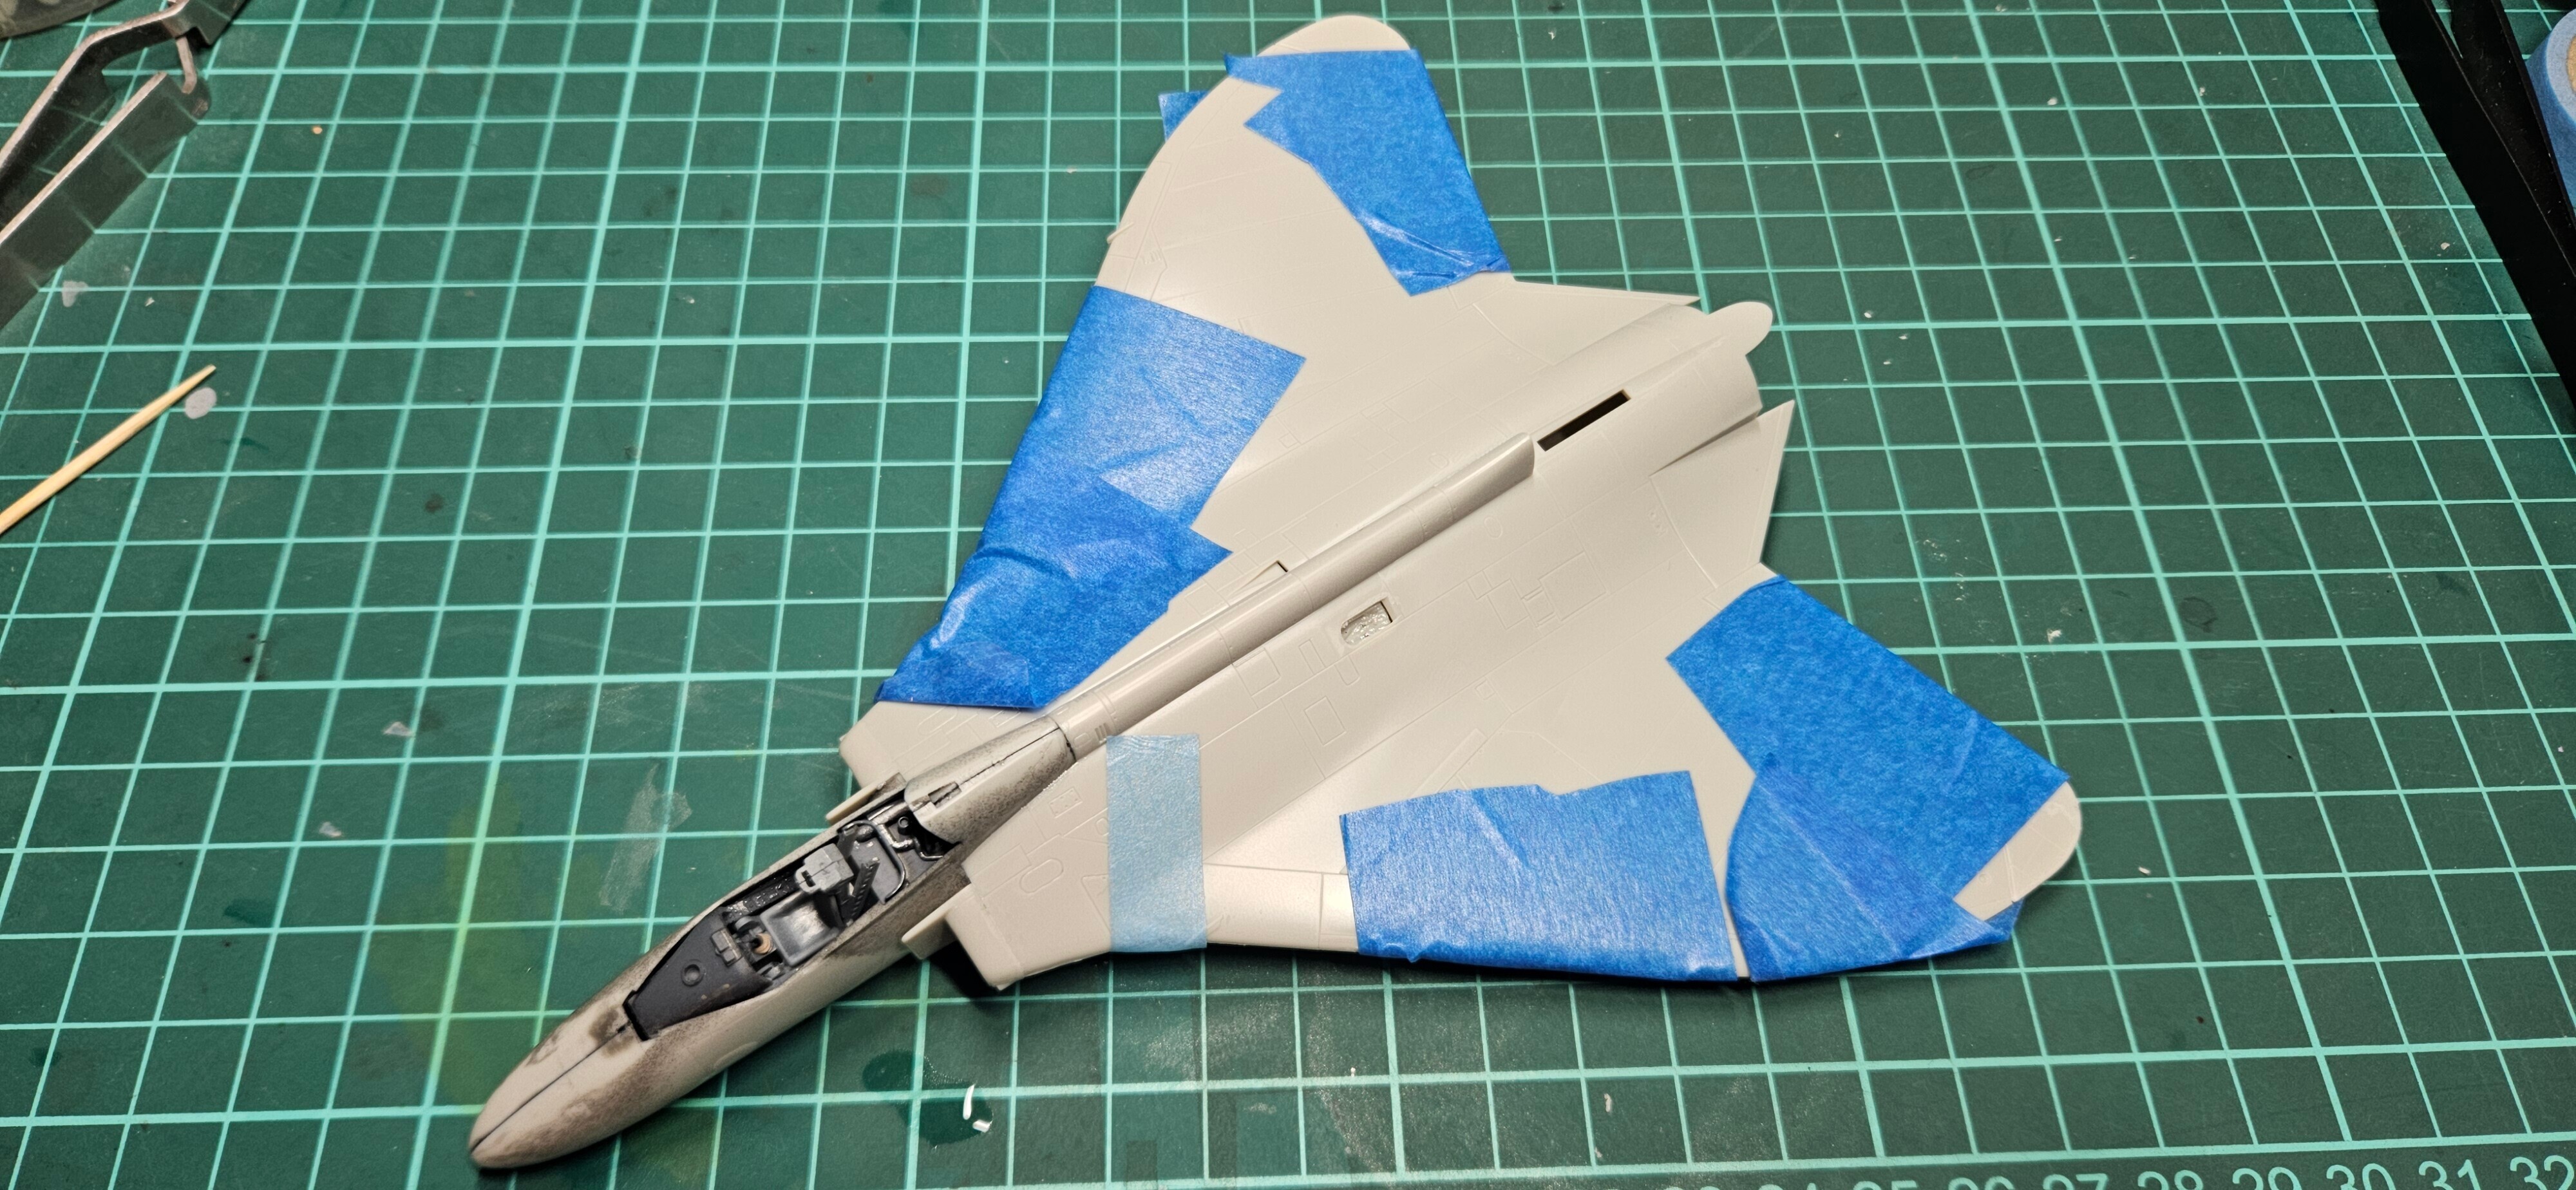
The next day it was time to put on the canopy. Before that, though, I separated it from the sprue, attached masking tape to each surface I wanted to mask, and then while looking against the bright lamp I carefully cut it out with a sharp blade.
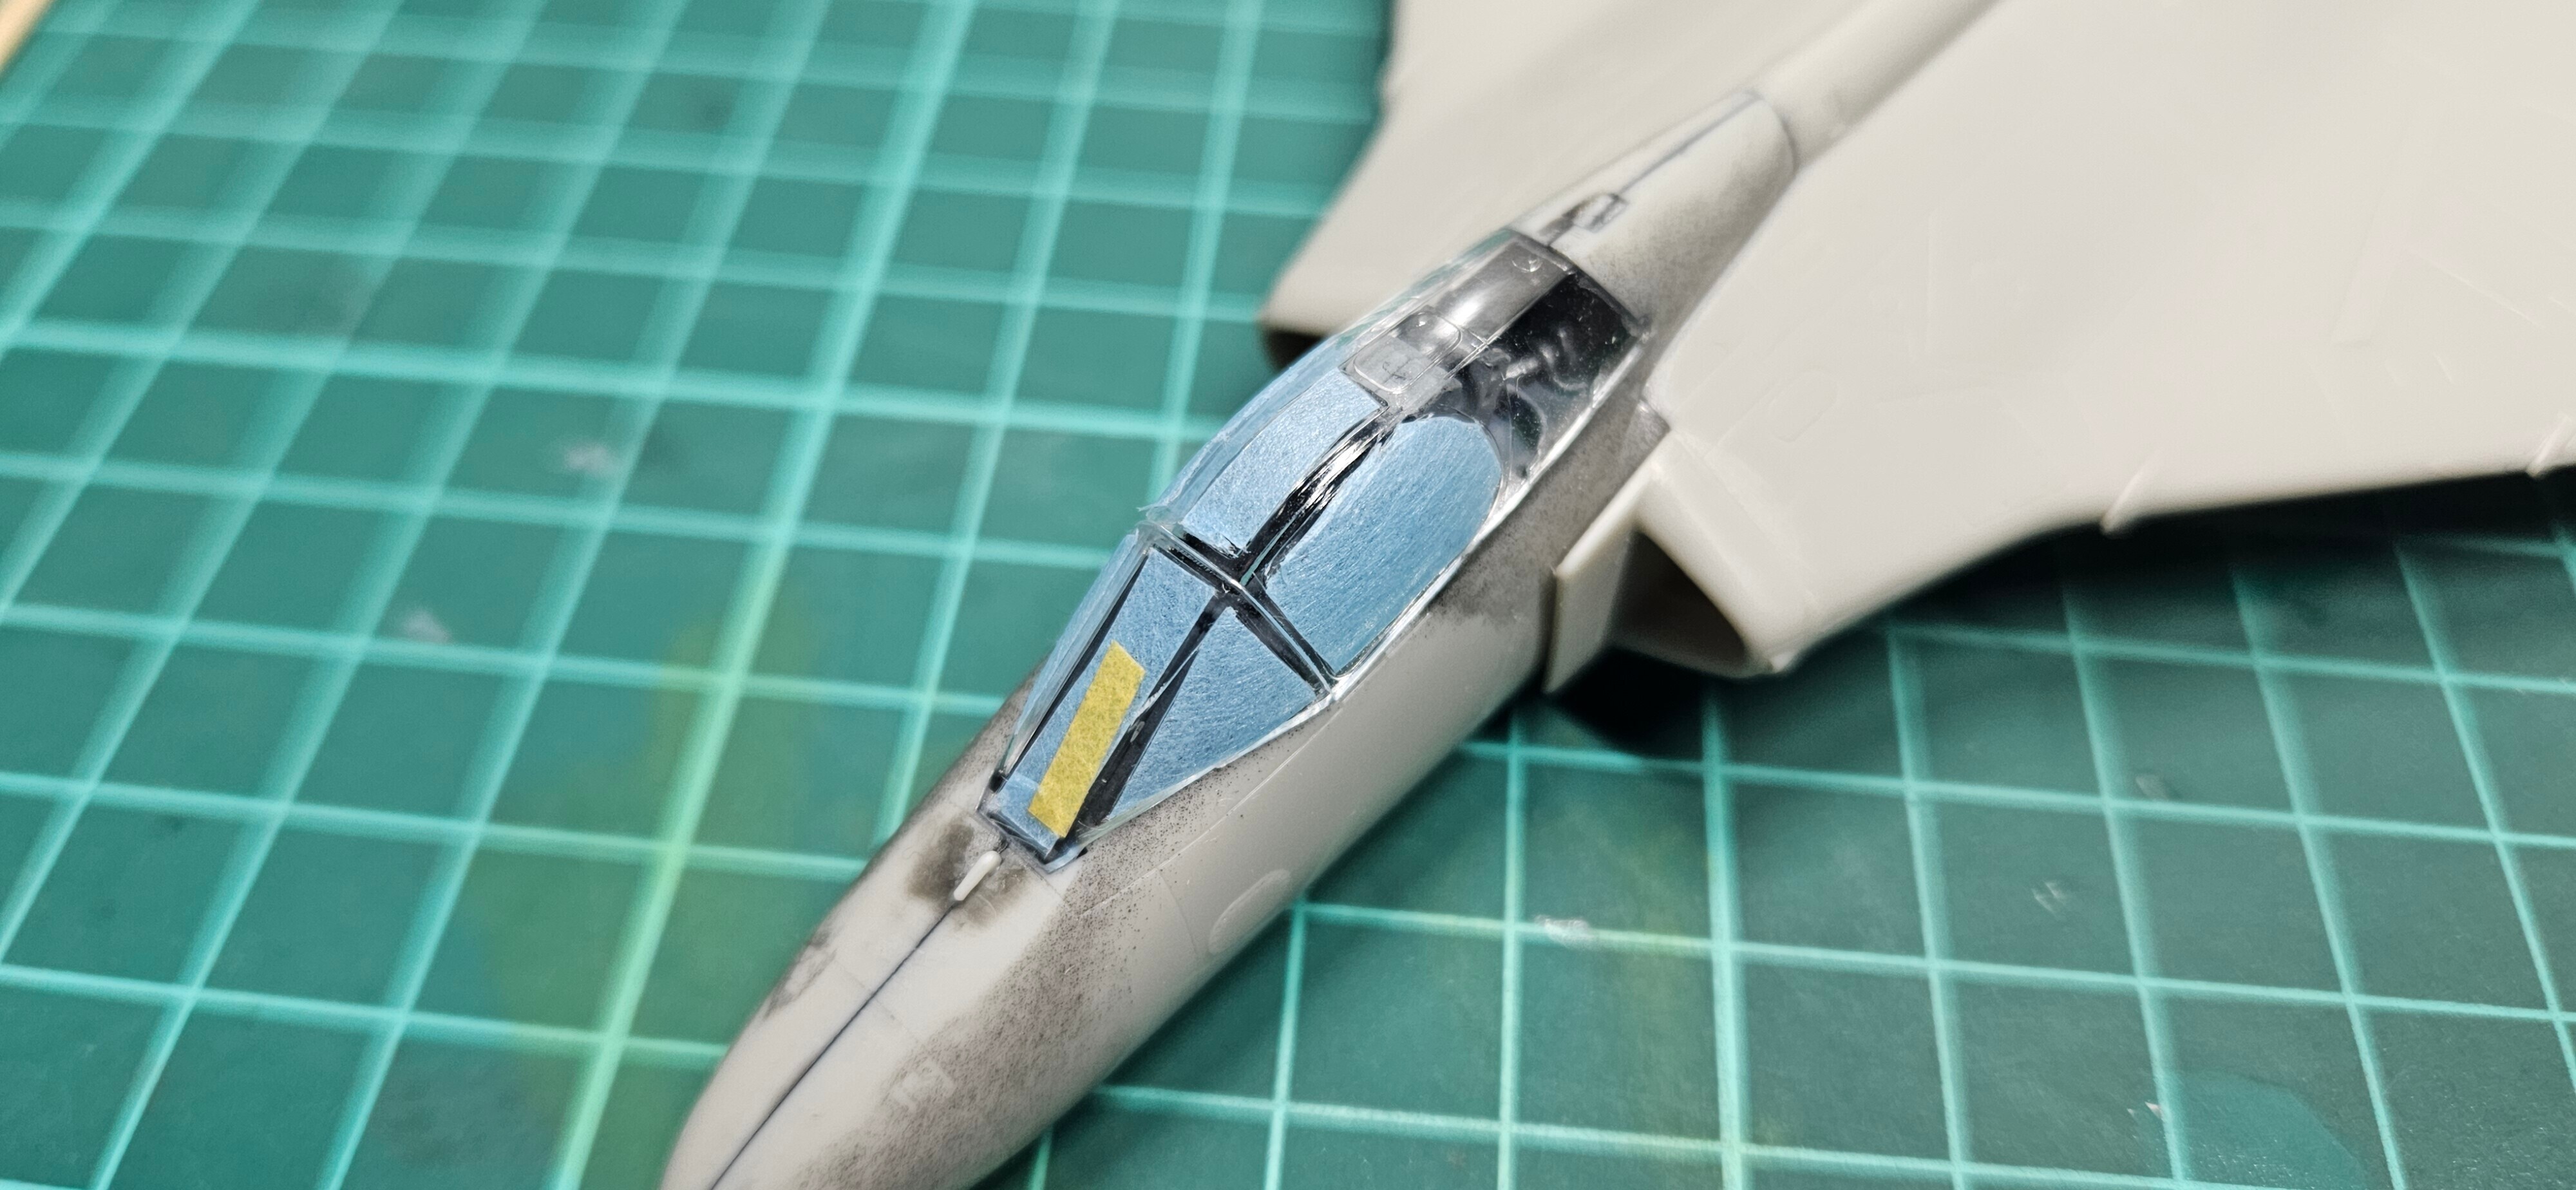
Beware! Masking tape is useless if you handbrush the model, as the paint will simply seep through and create even bigger issues for you.
Then surfacer. As I want to paint the nose black, I first used Mr Surfacer 1500 Grey thinned with Mr Levelling Thinner (MLT) on the radar dome and around the cockpit (as it's not too far from the grey used inside).
You do not need any priming if you handbrush.
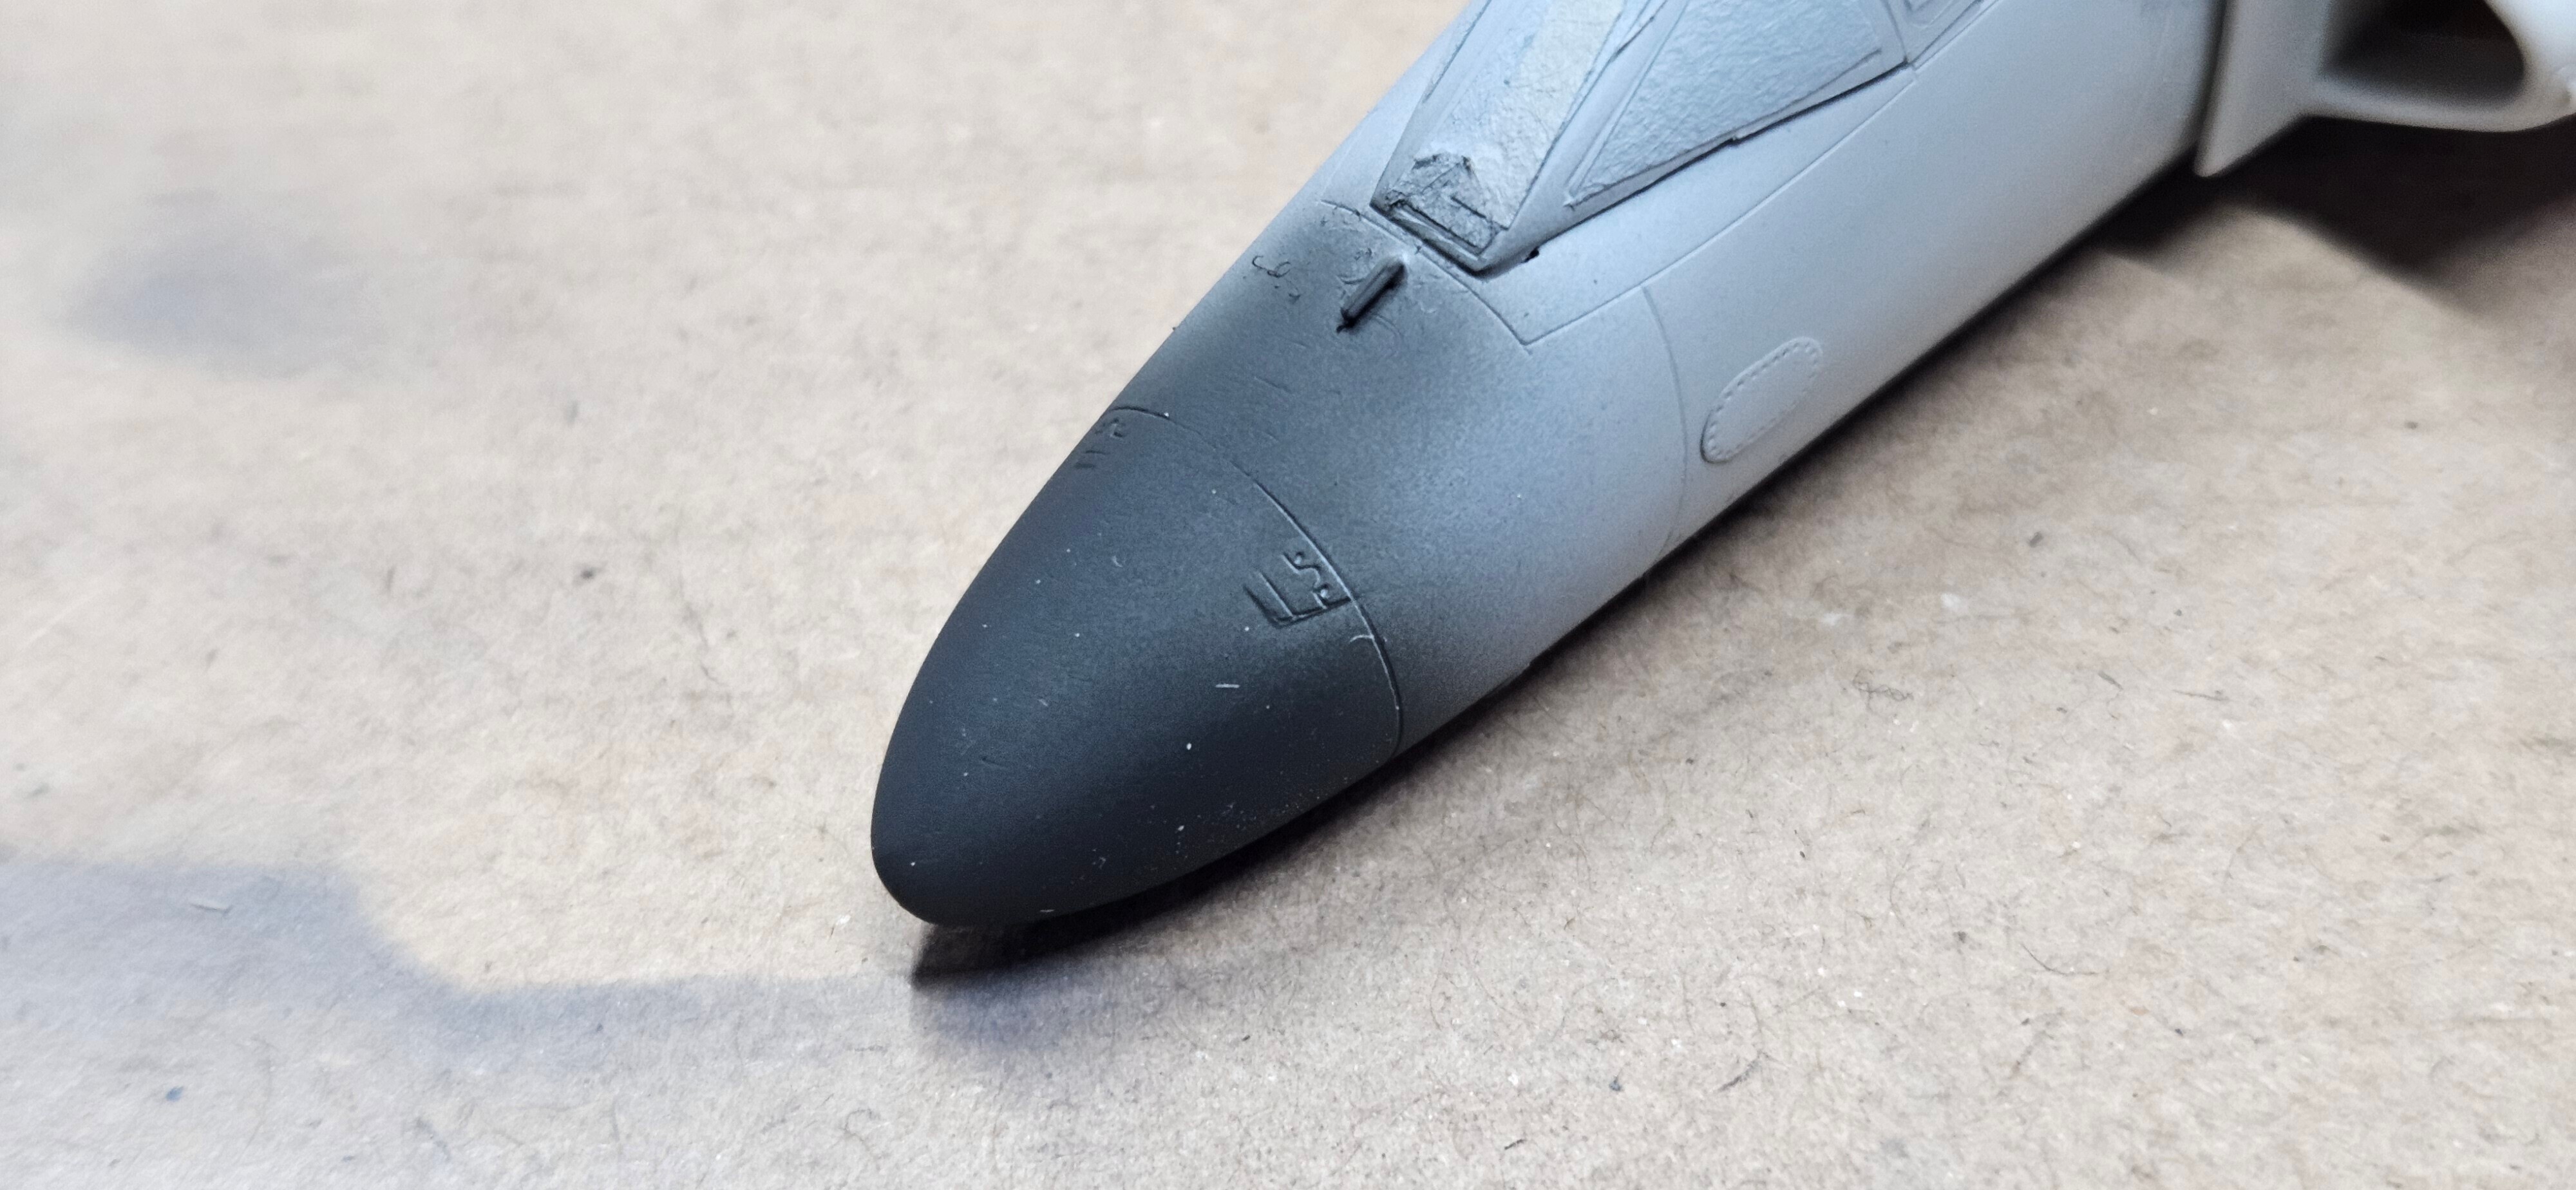
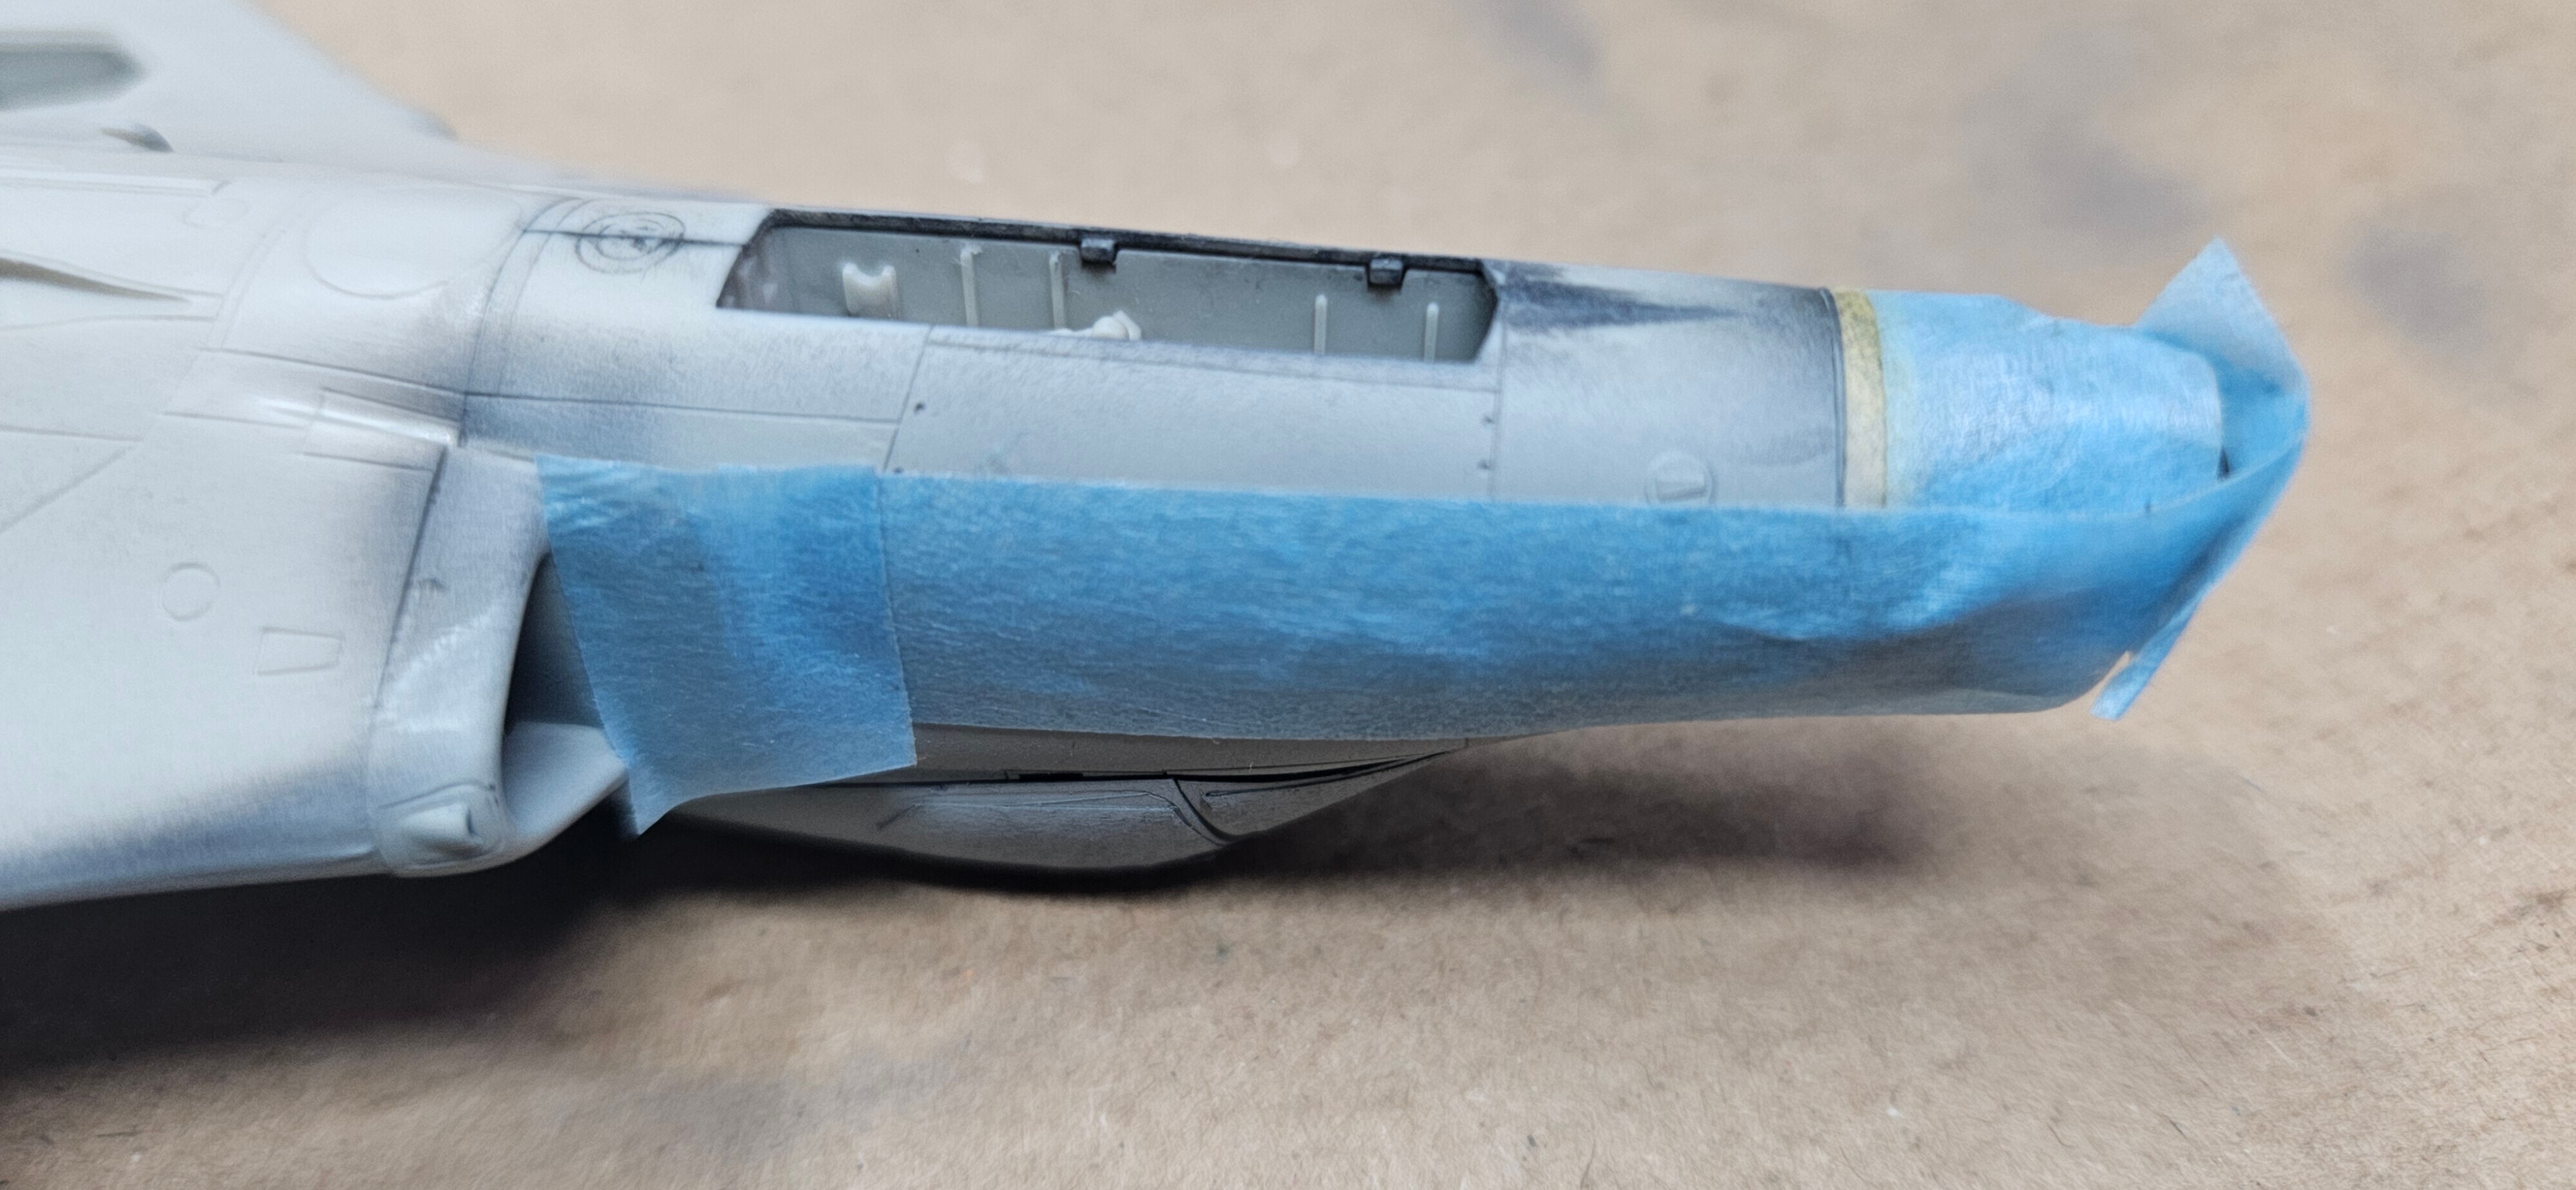
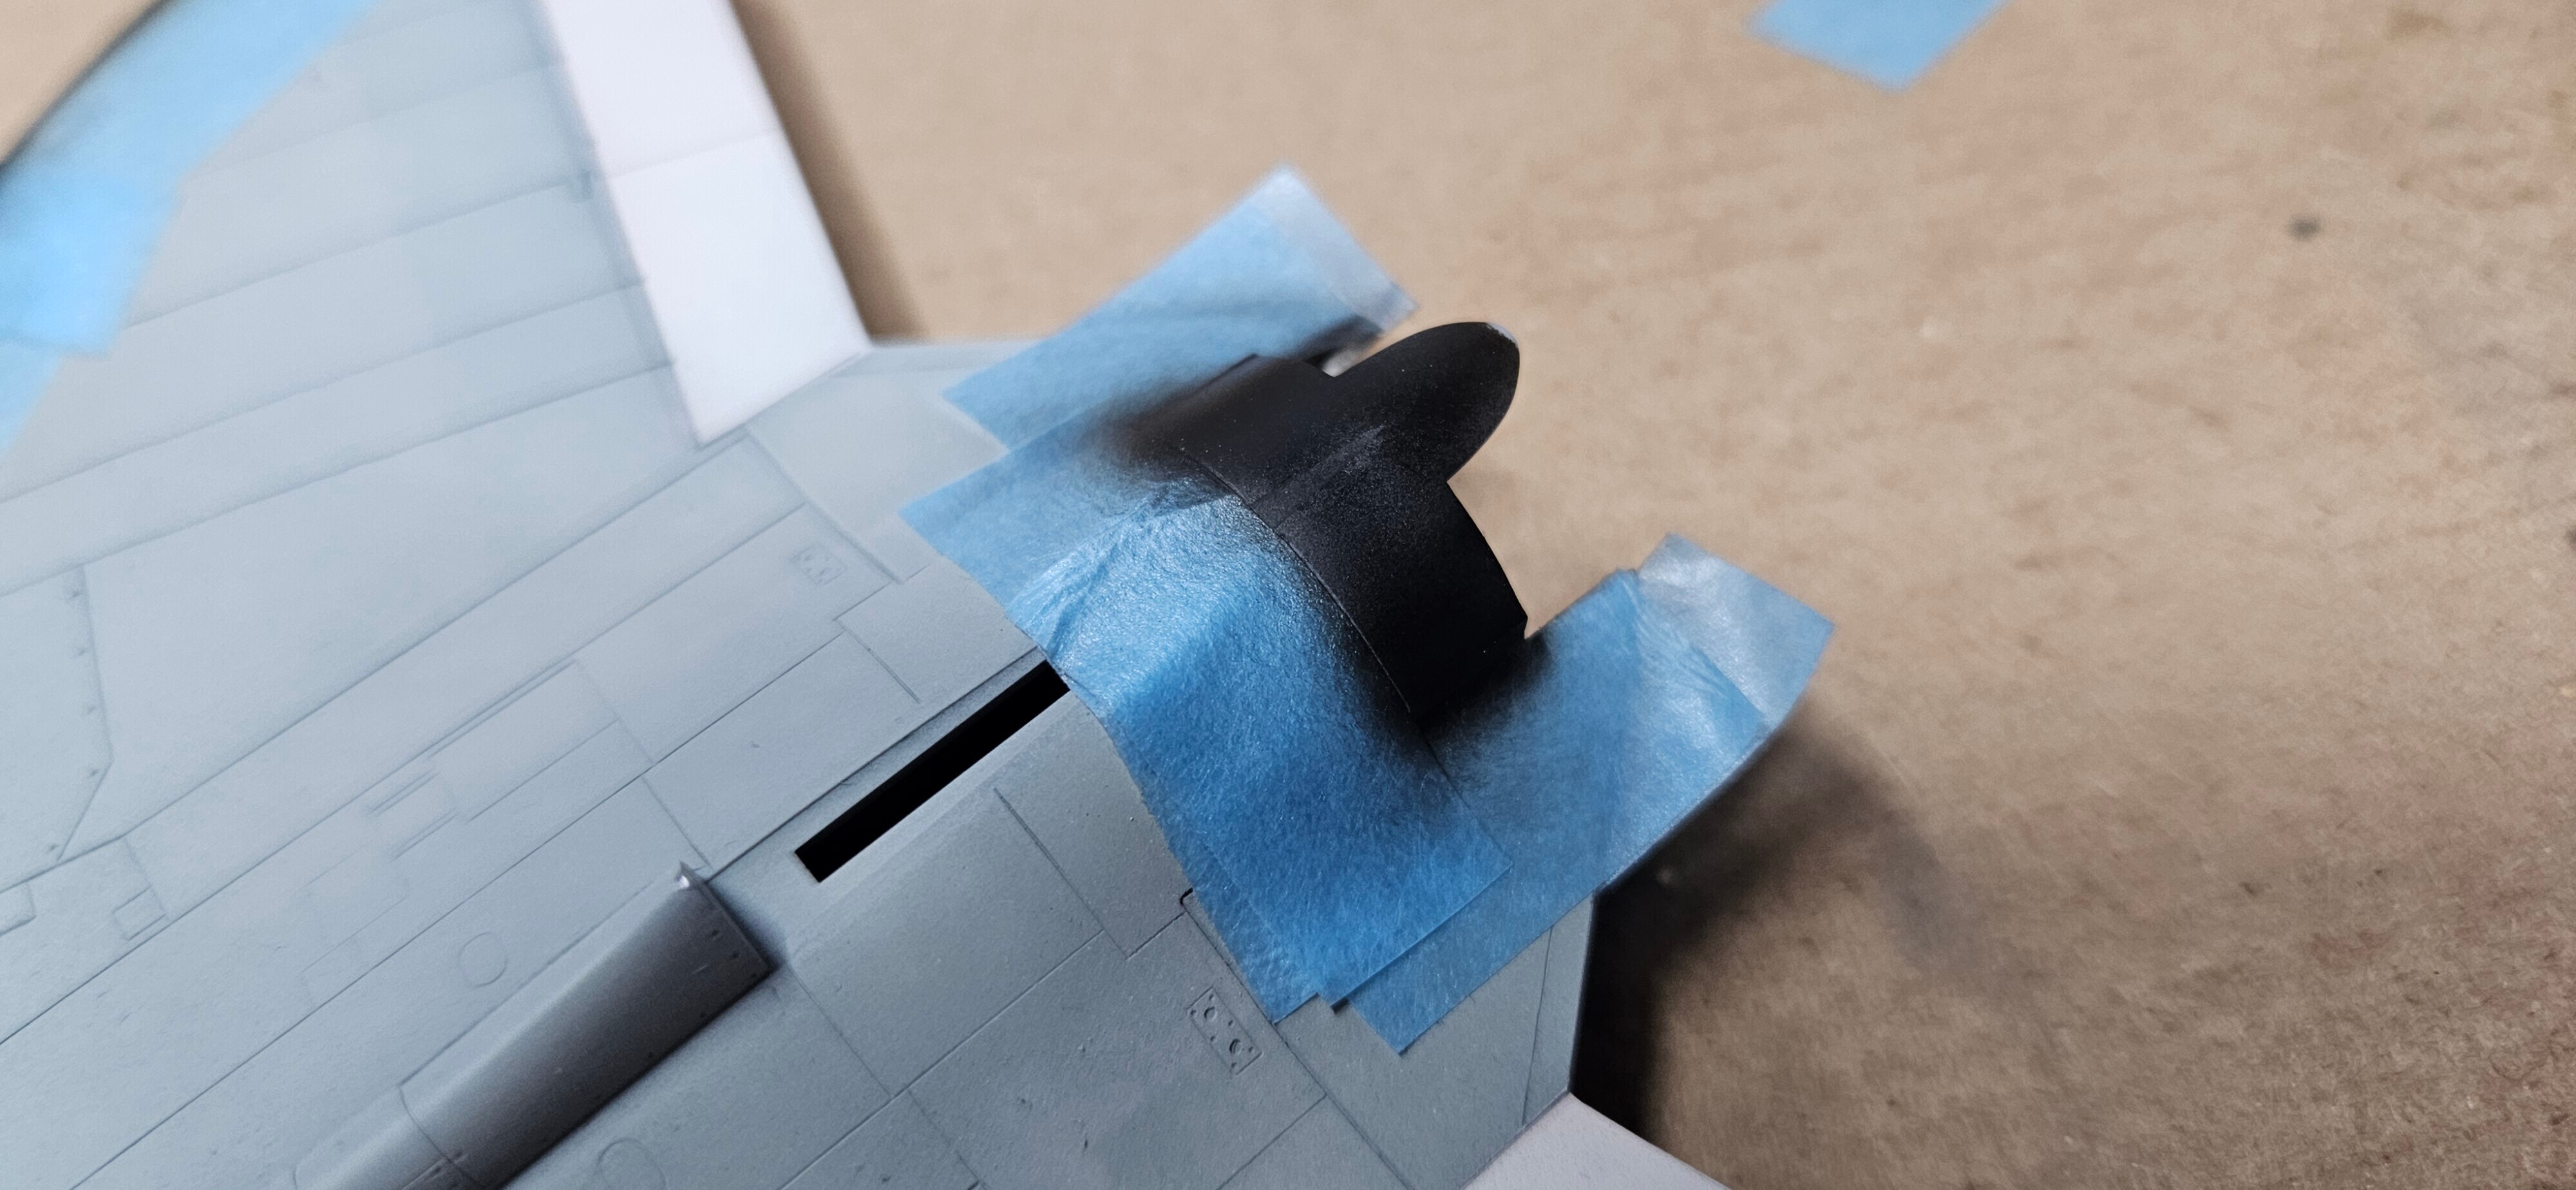
For the nose I used tamiya XF-69 NATO Black as it is not pure black and thus looks better on the model. I used MLT for thinning as well.
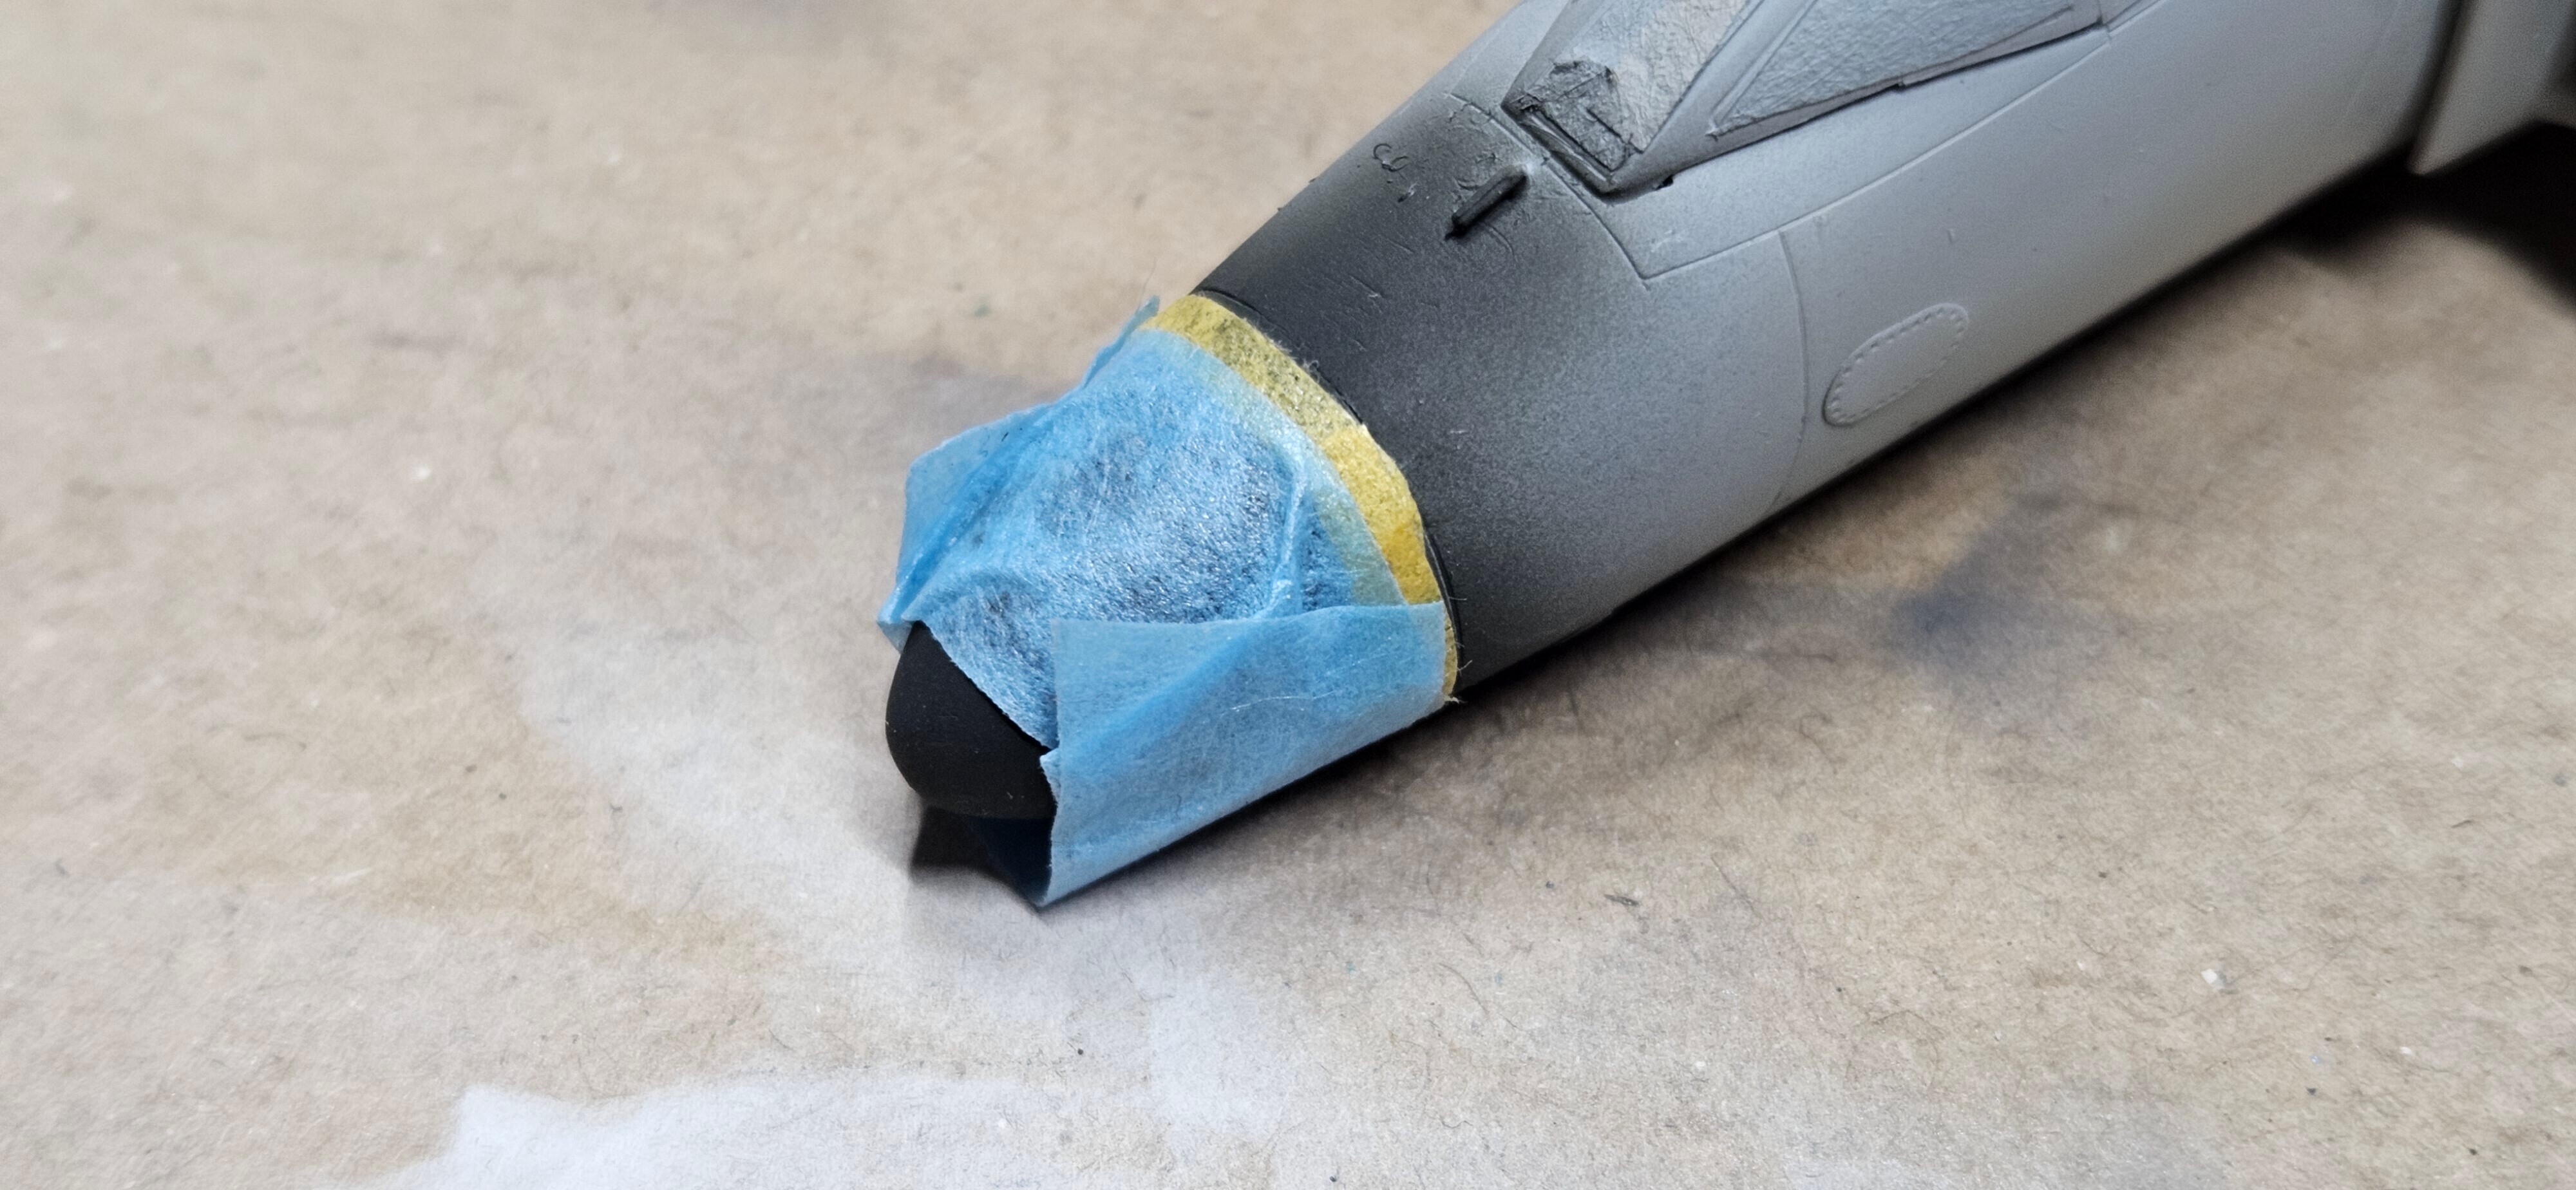
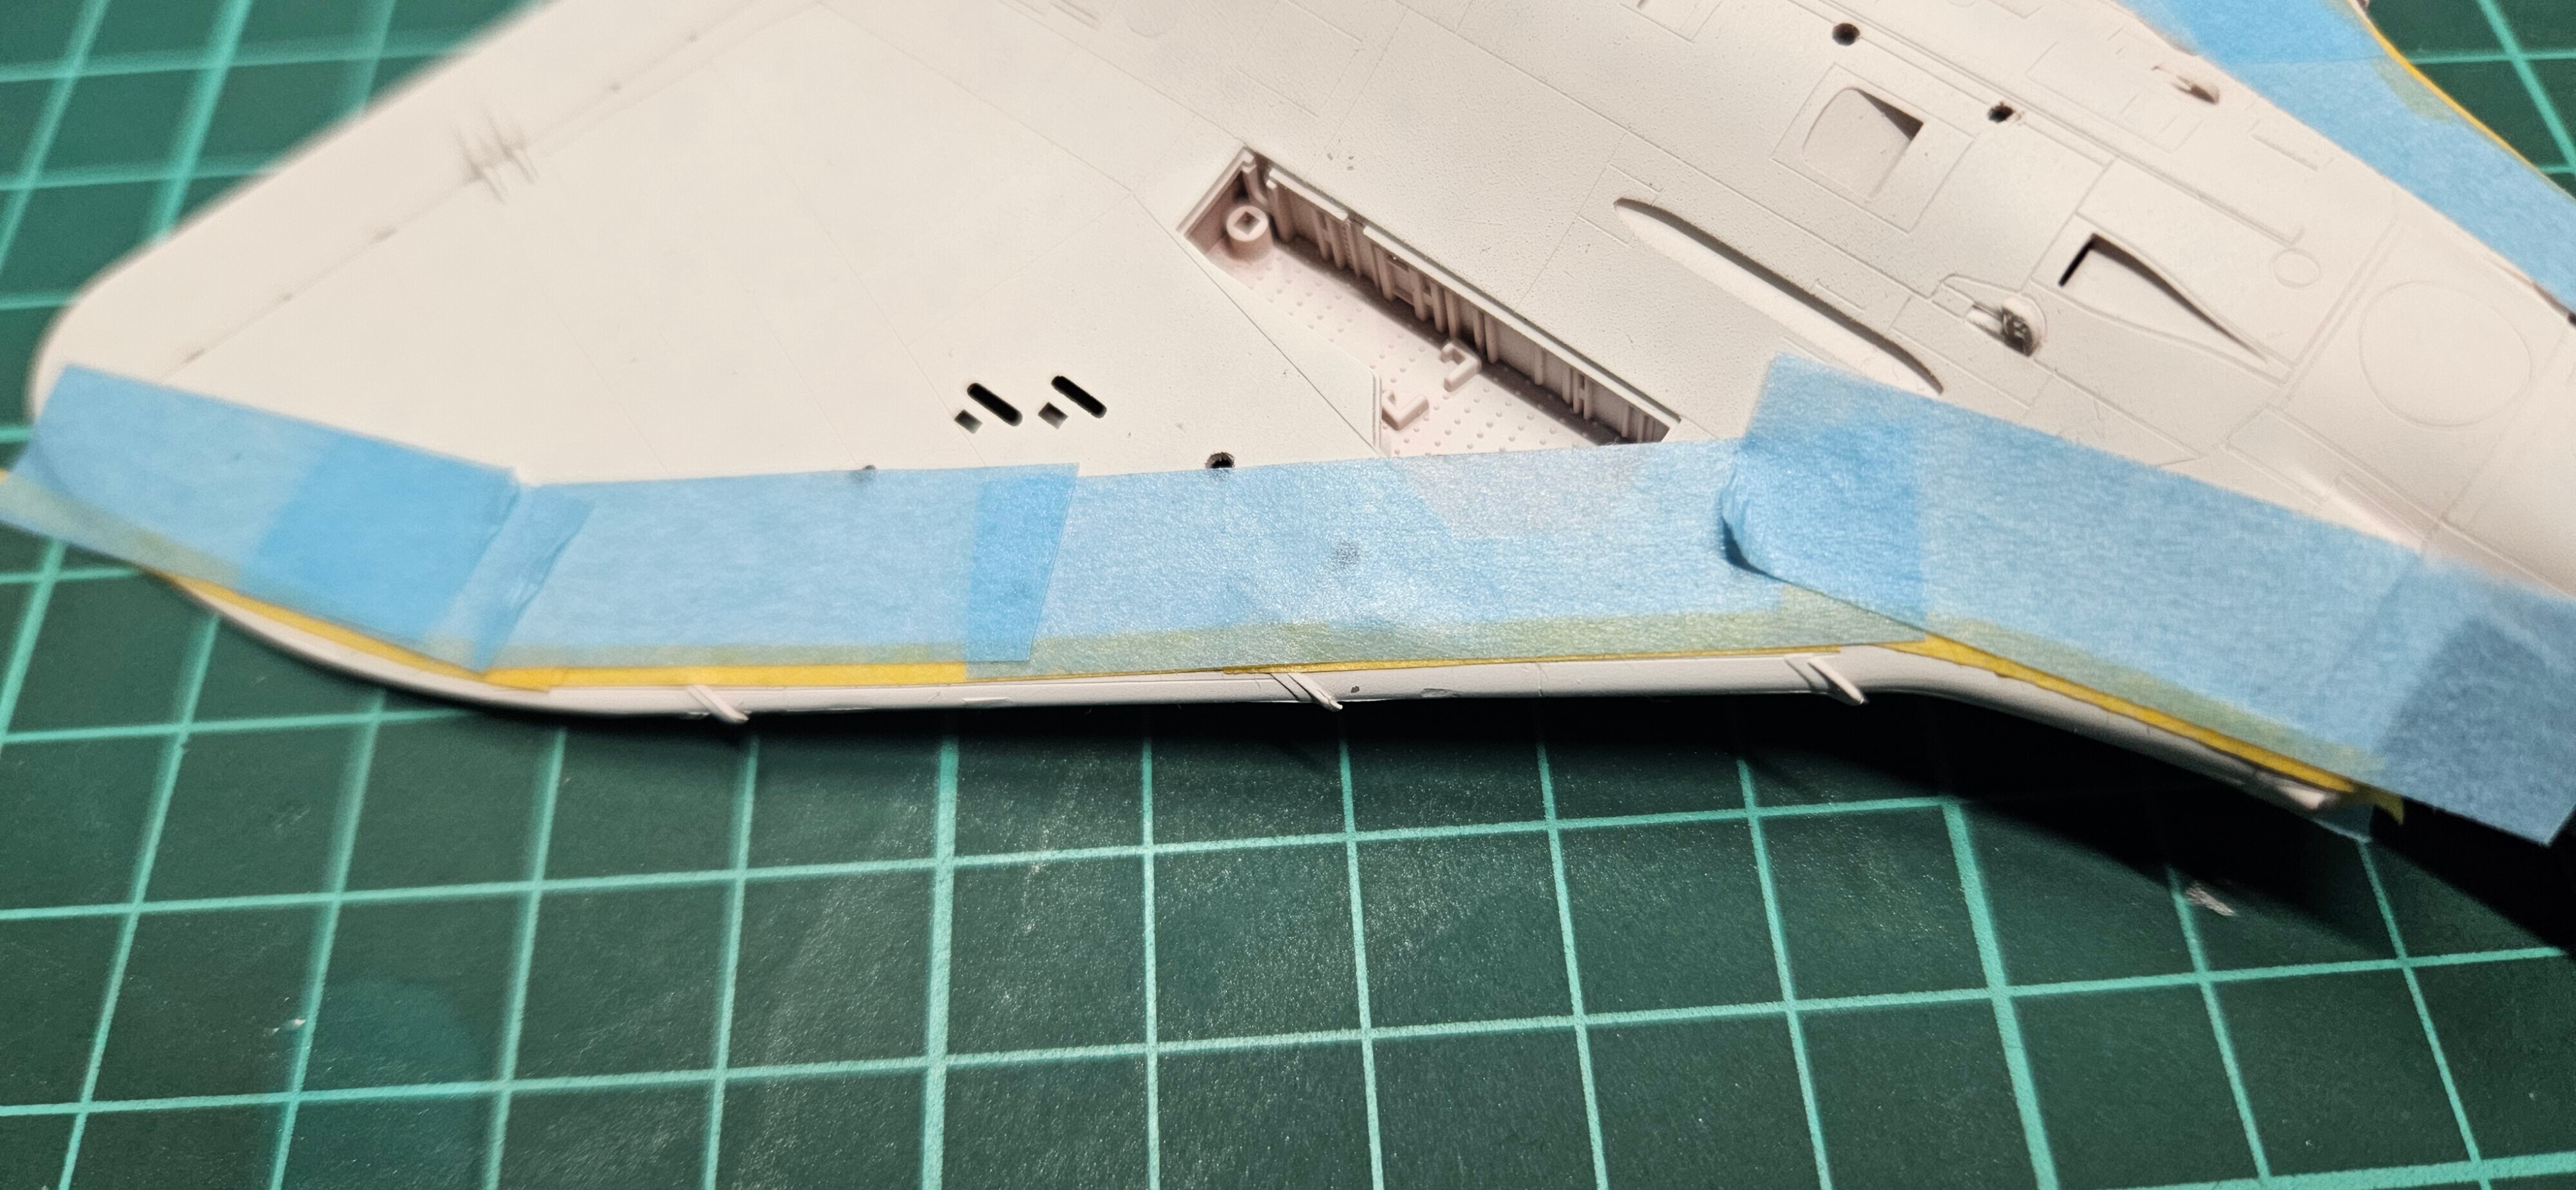
And then... Masking. I use thin, bendable tape to outline the edge, and a bigger tape in case of any overspray.
And then priming yet again. The top I primed with Mr Surfacer Black 1500 and thinned with MLT. I also primed the tail fin and rocket pods as those will be green.
And then I did pre-shading... but due to the paints and poor thinner used it will not be visible. But anyways, I used Mr Color 73 Aircraft Grey and thinned it with MLT yet again.
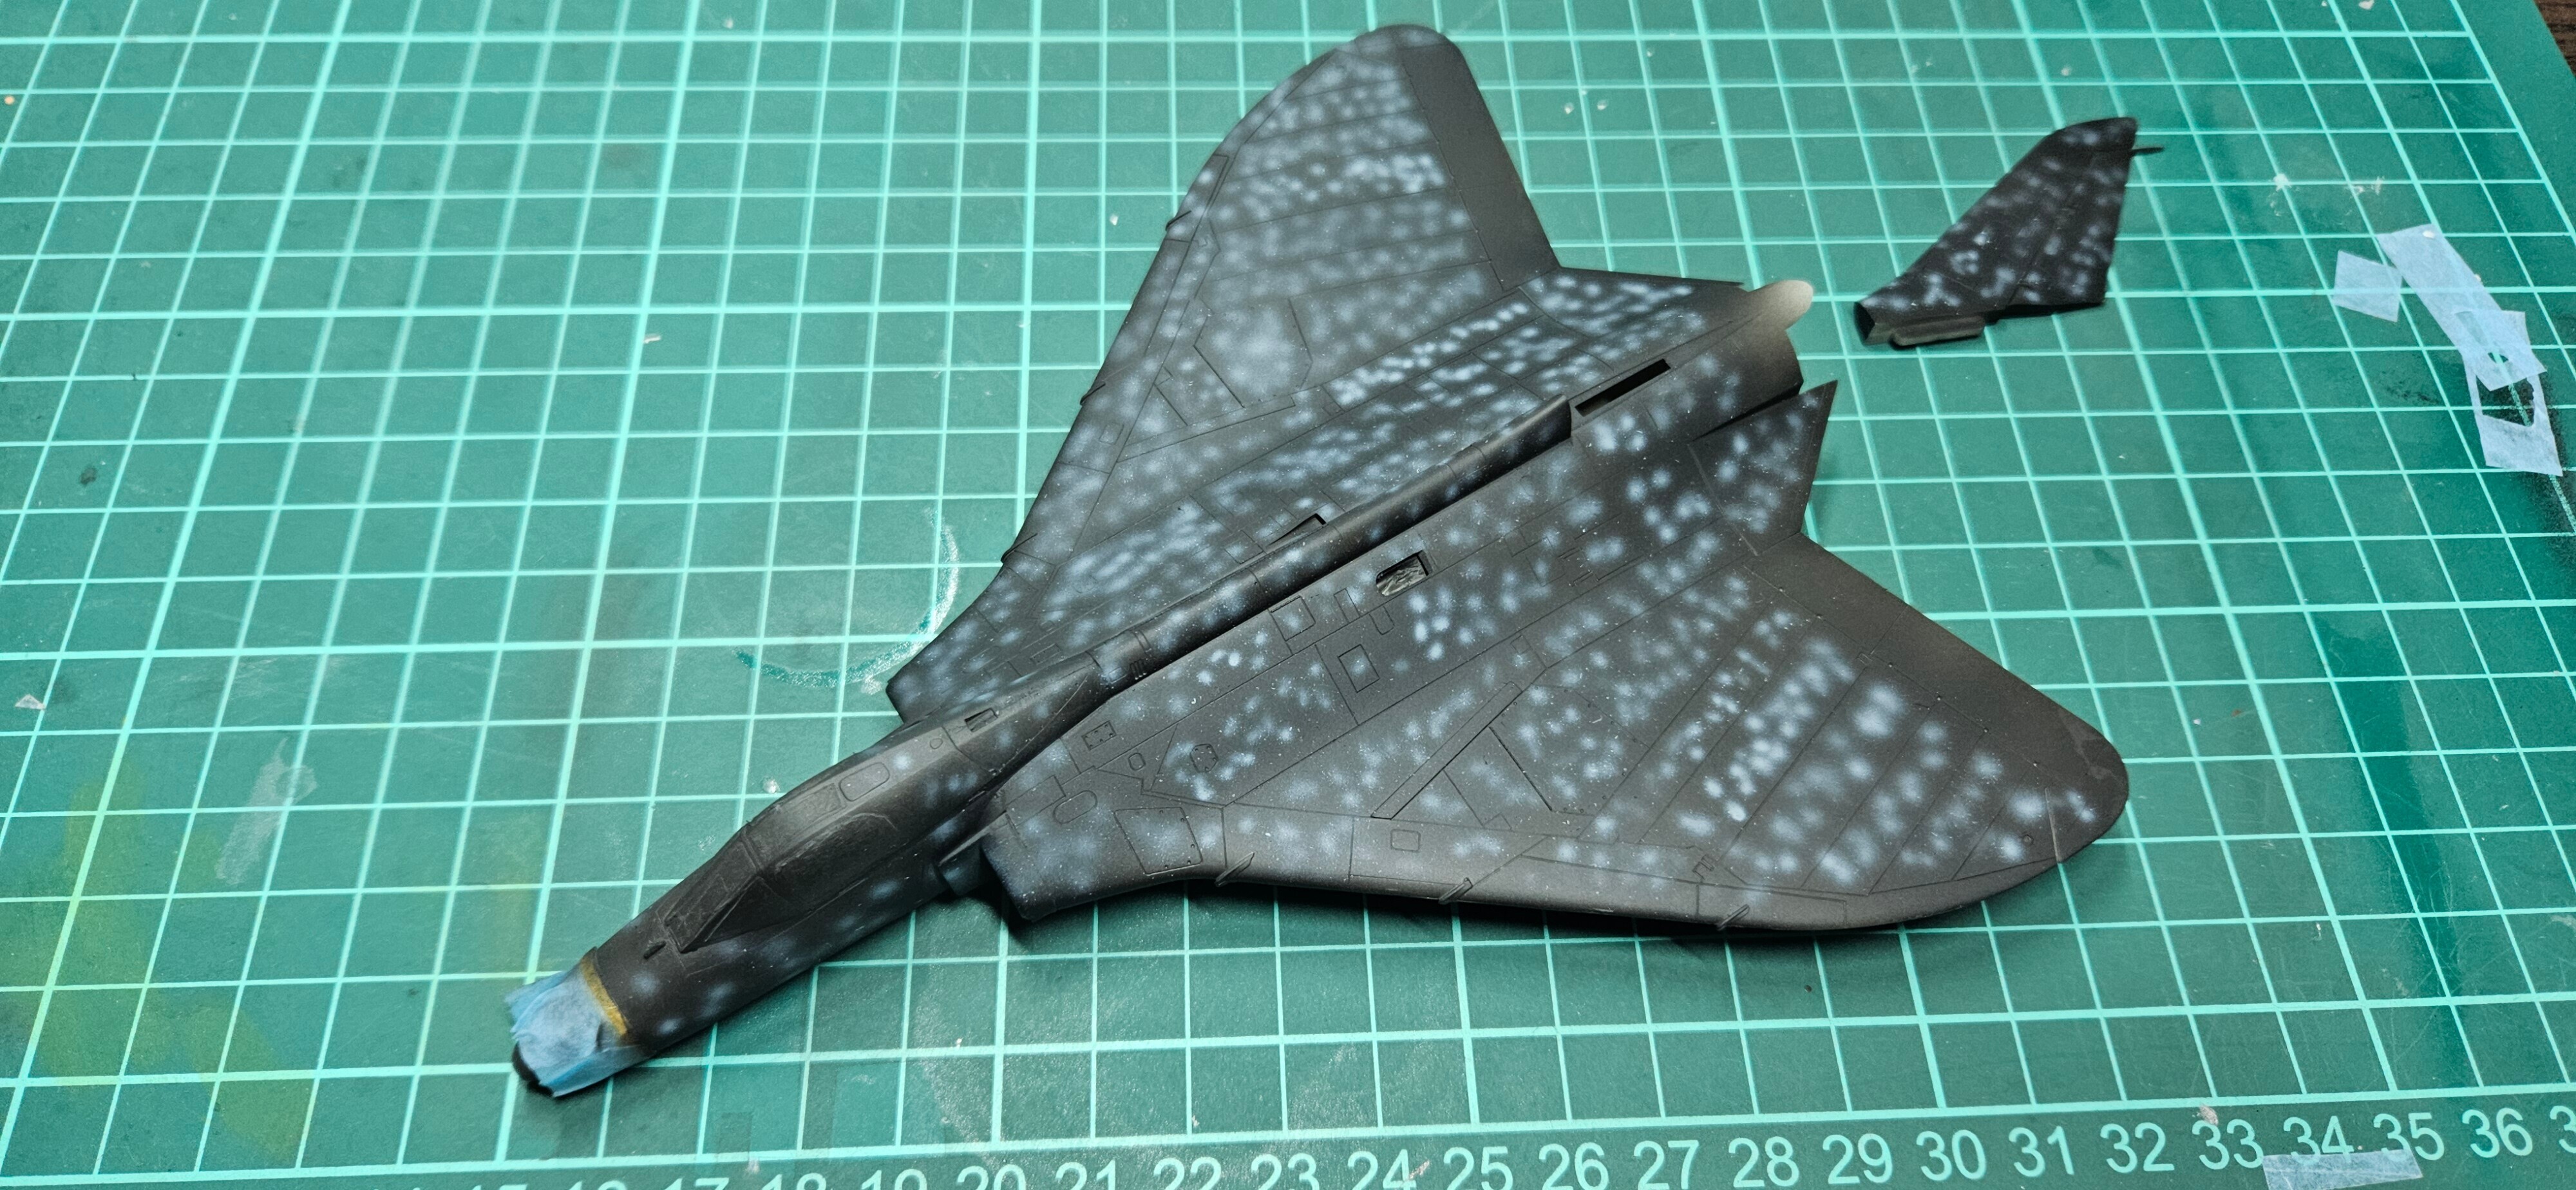
The most painful part of painting for me was with Vallejo Air range of paints. They require flow improver which I did not have, and they have awful resilience compared to any acrylic lacquers or just lacquers. For the top, Light Gull Grey AV71121 was used with tap water as a thinner. Had to do multiple layers because of it and any signs of preshading are just gone. I suggest instead doing it with Mr Color 11 Light Gull Grey.
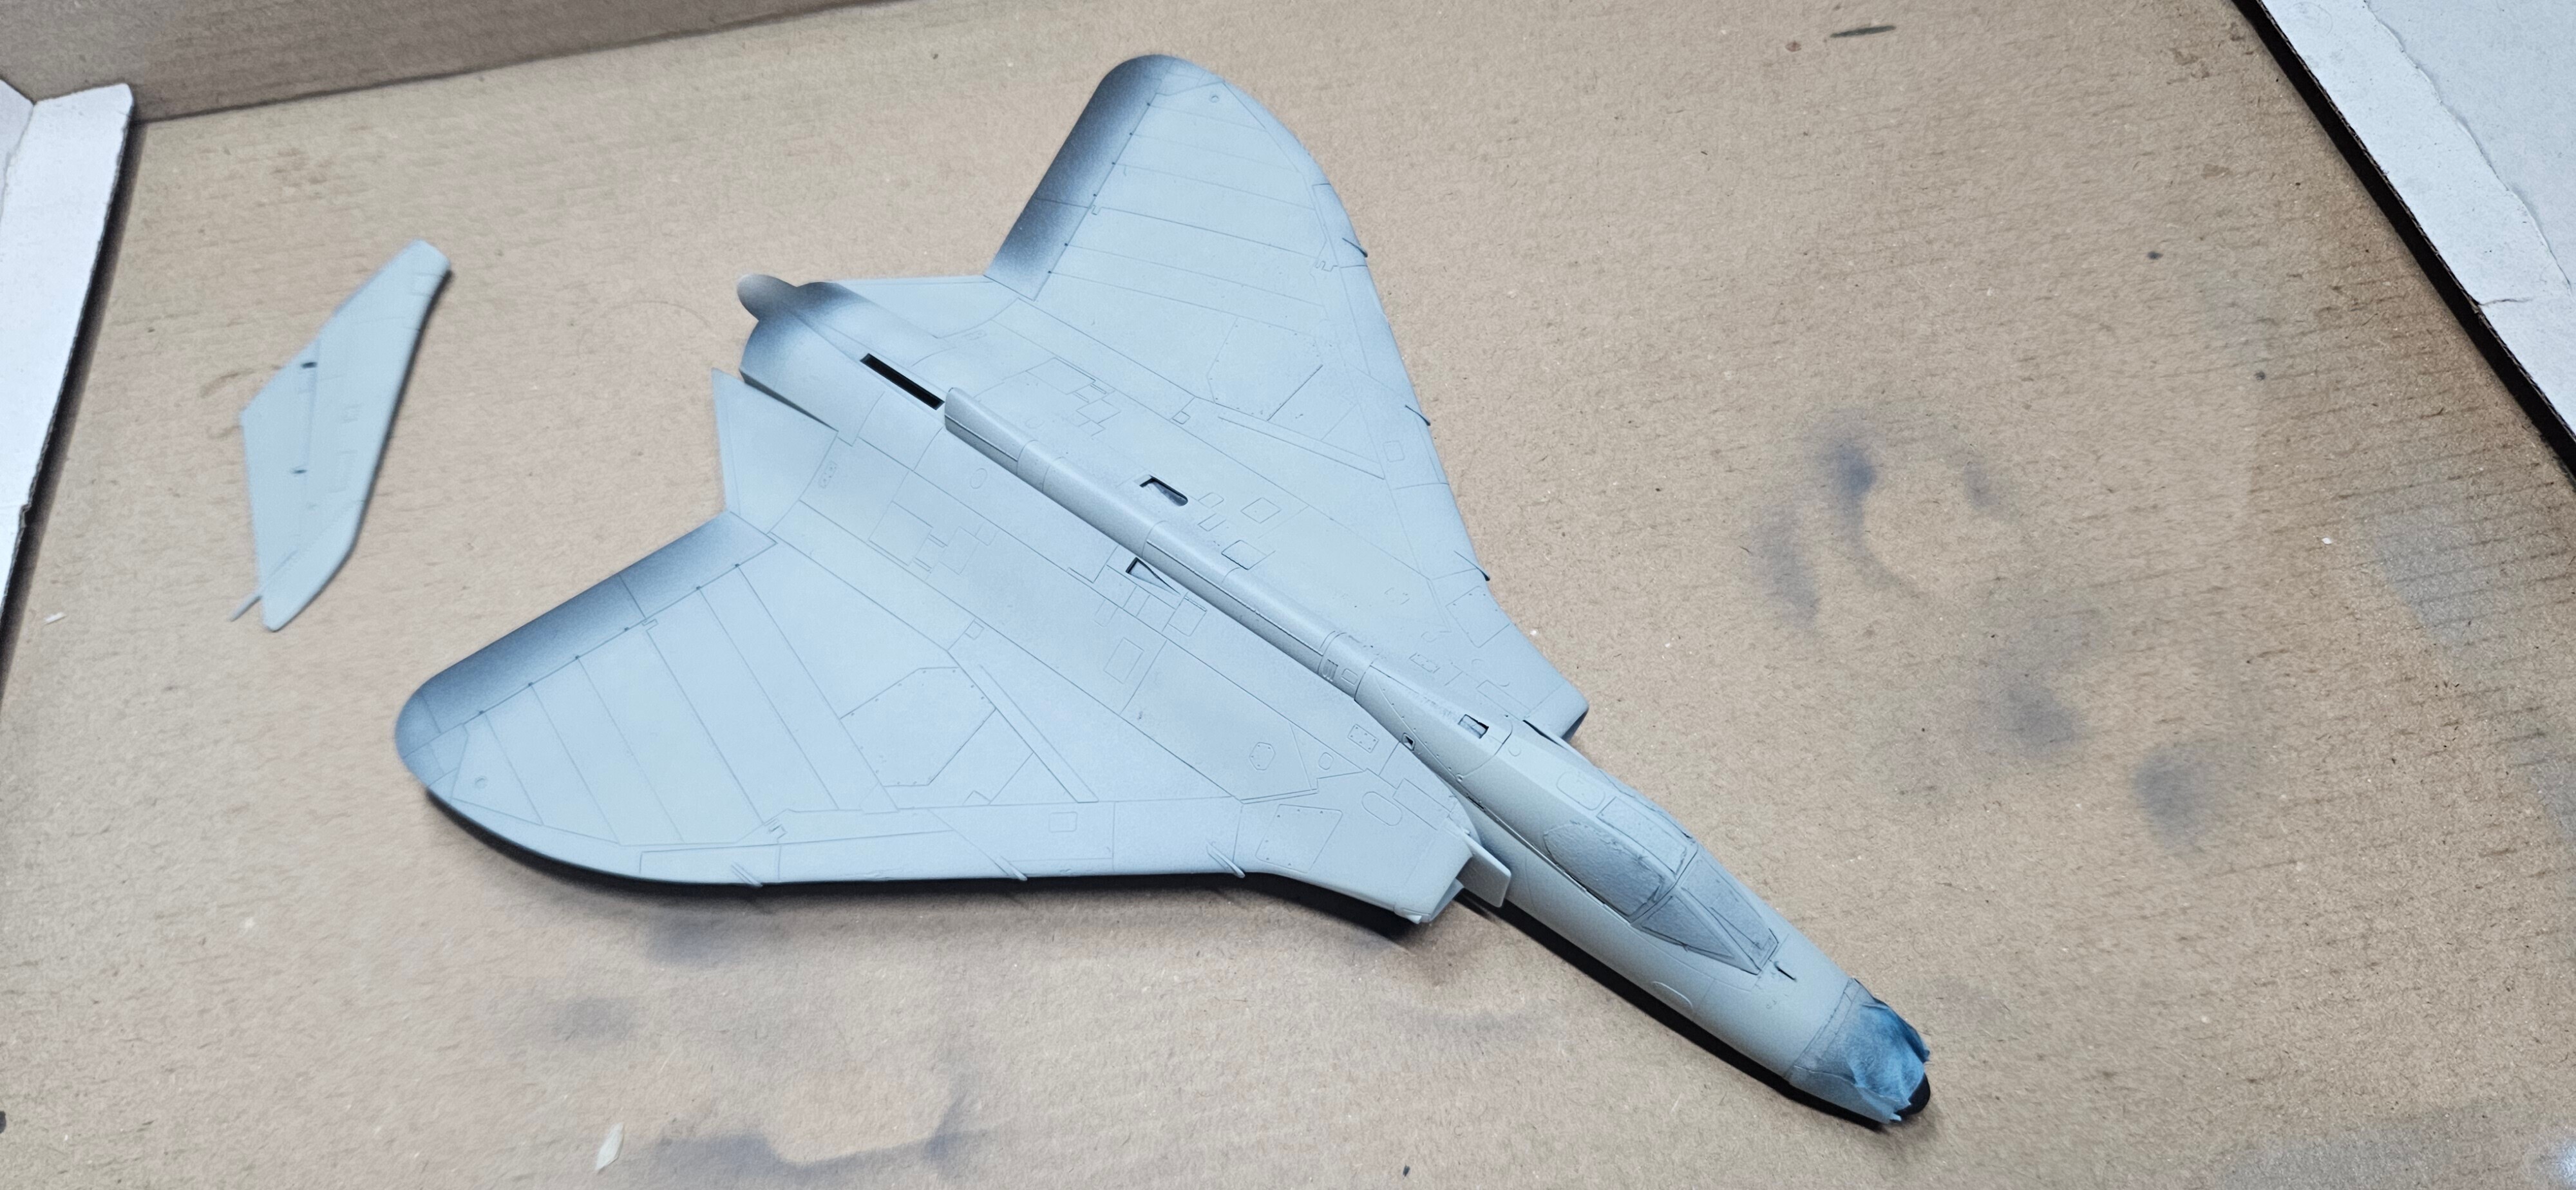
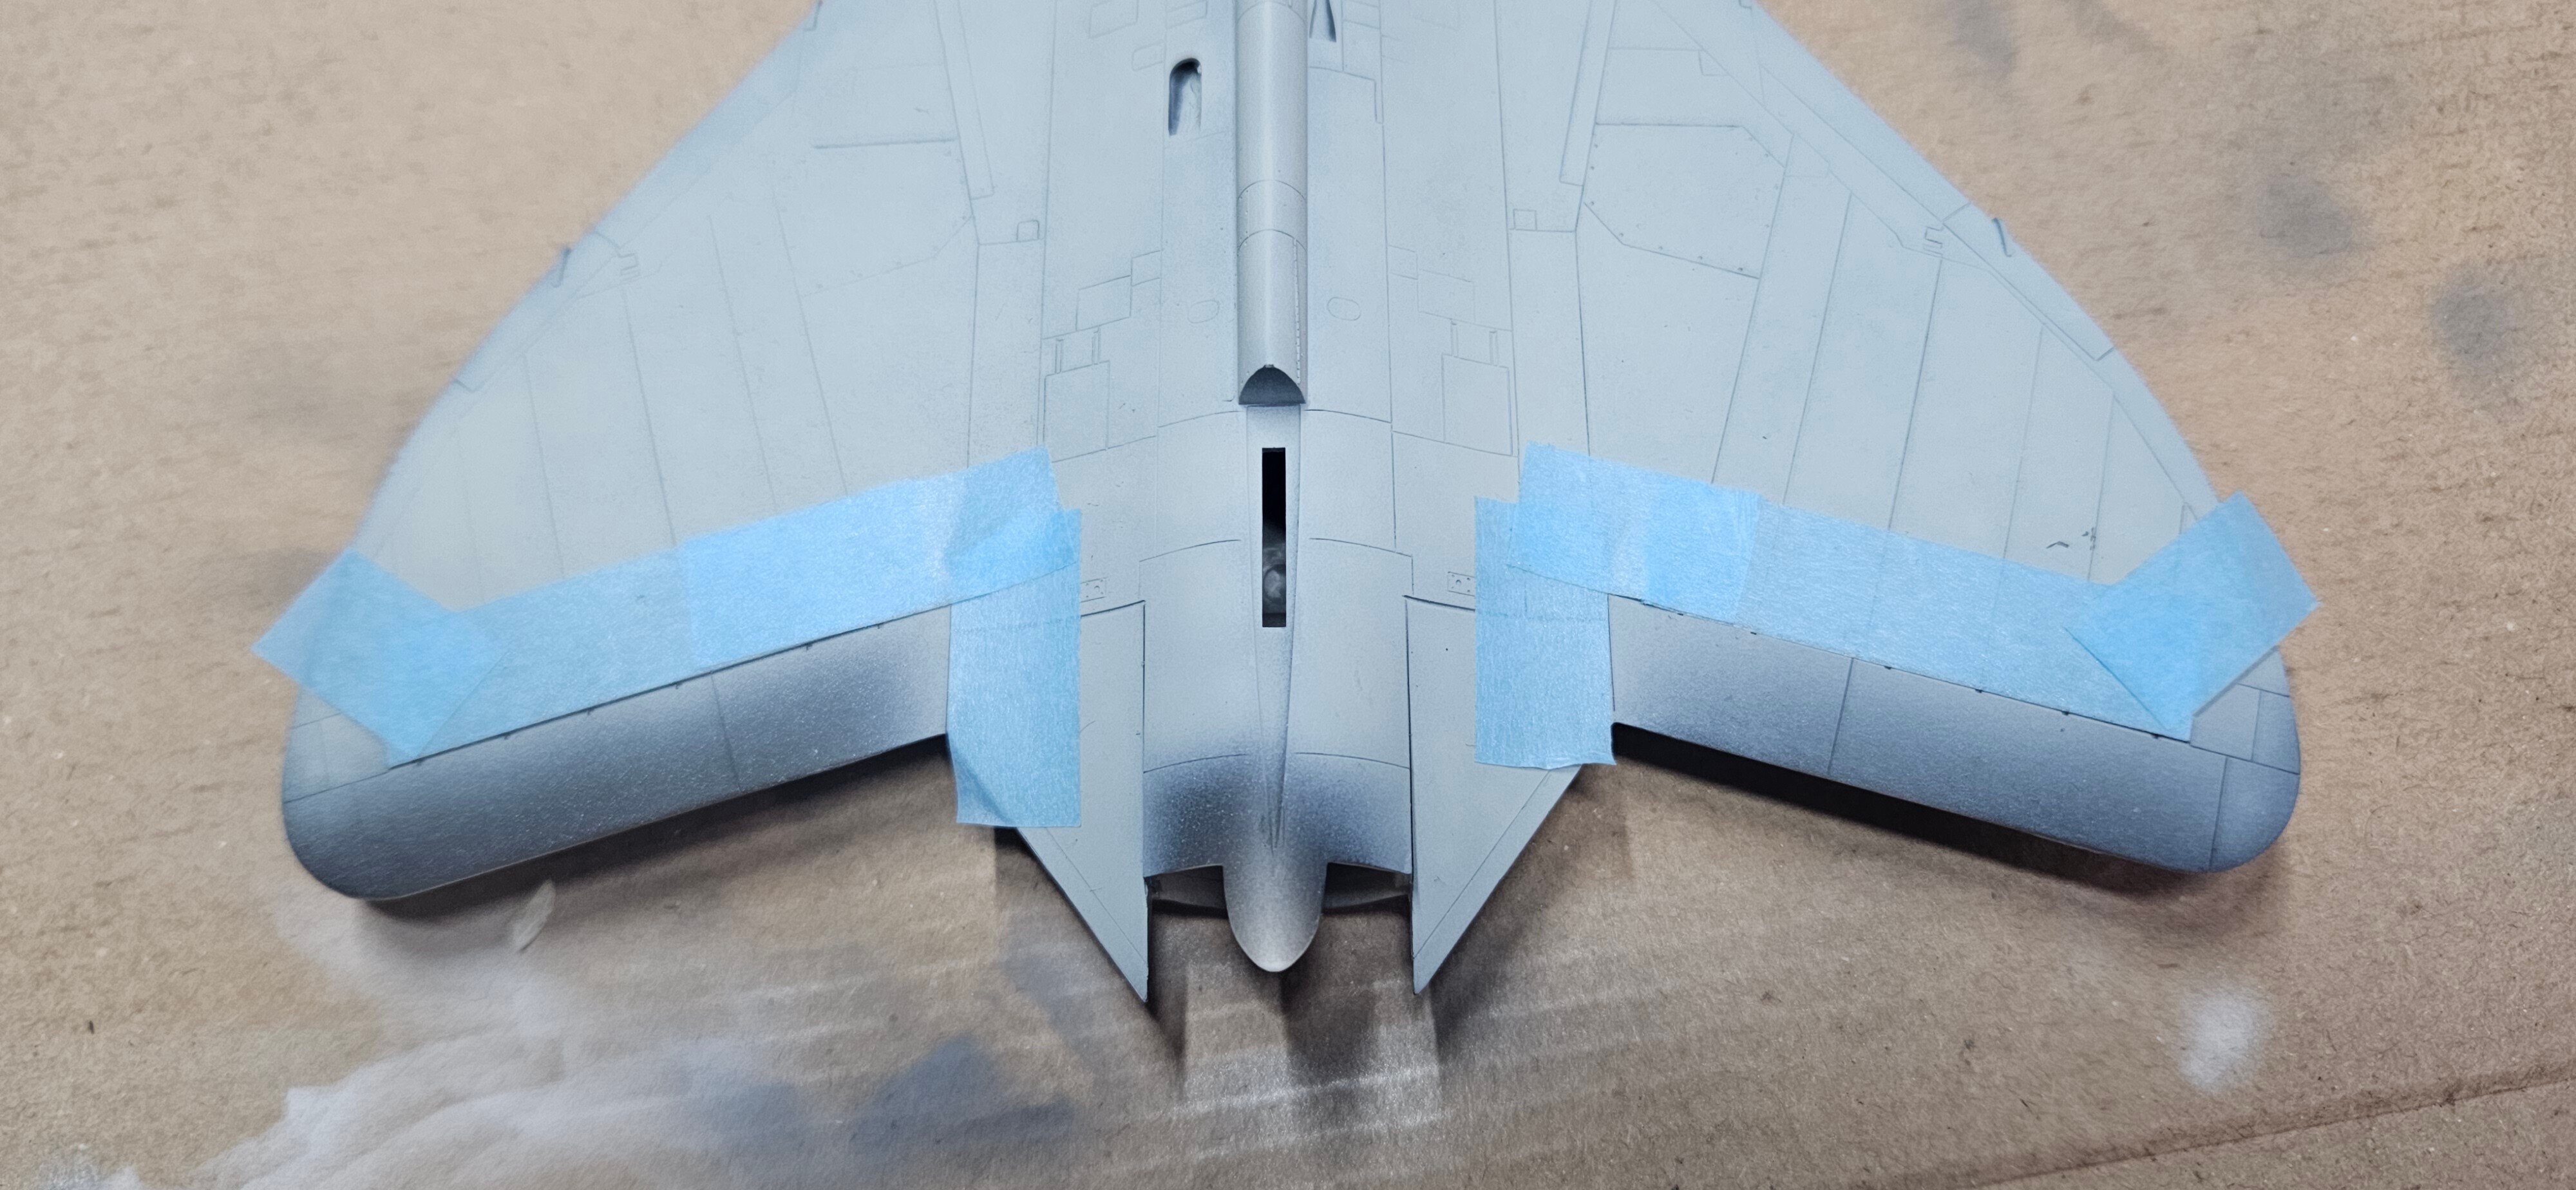
Then I wait for a while and mask the areas around where metallic and Insignia White bottom are to be painted. If you mask weak Vallejo paint too soon it will get removed with the tape, and even if you wait you will have to correct it later.
Then I made another poor solution and primed the bottom with Mr Color Surfacer 1500 Pink. As I had grey, grey would be better. Black could also be used. Pink is not neutral and thus visible on the final color.
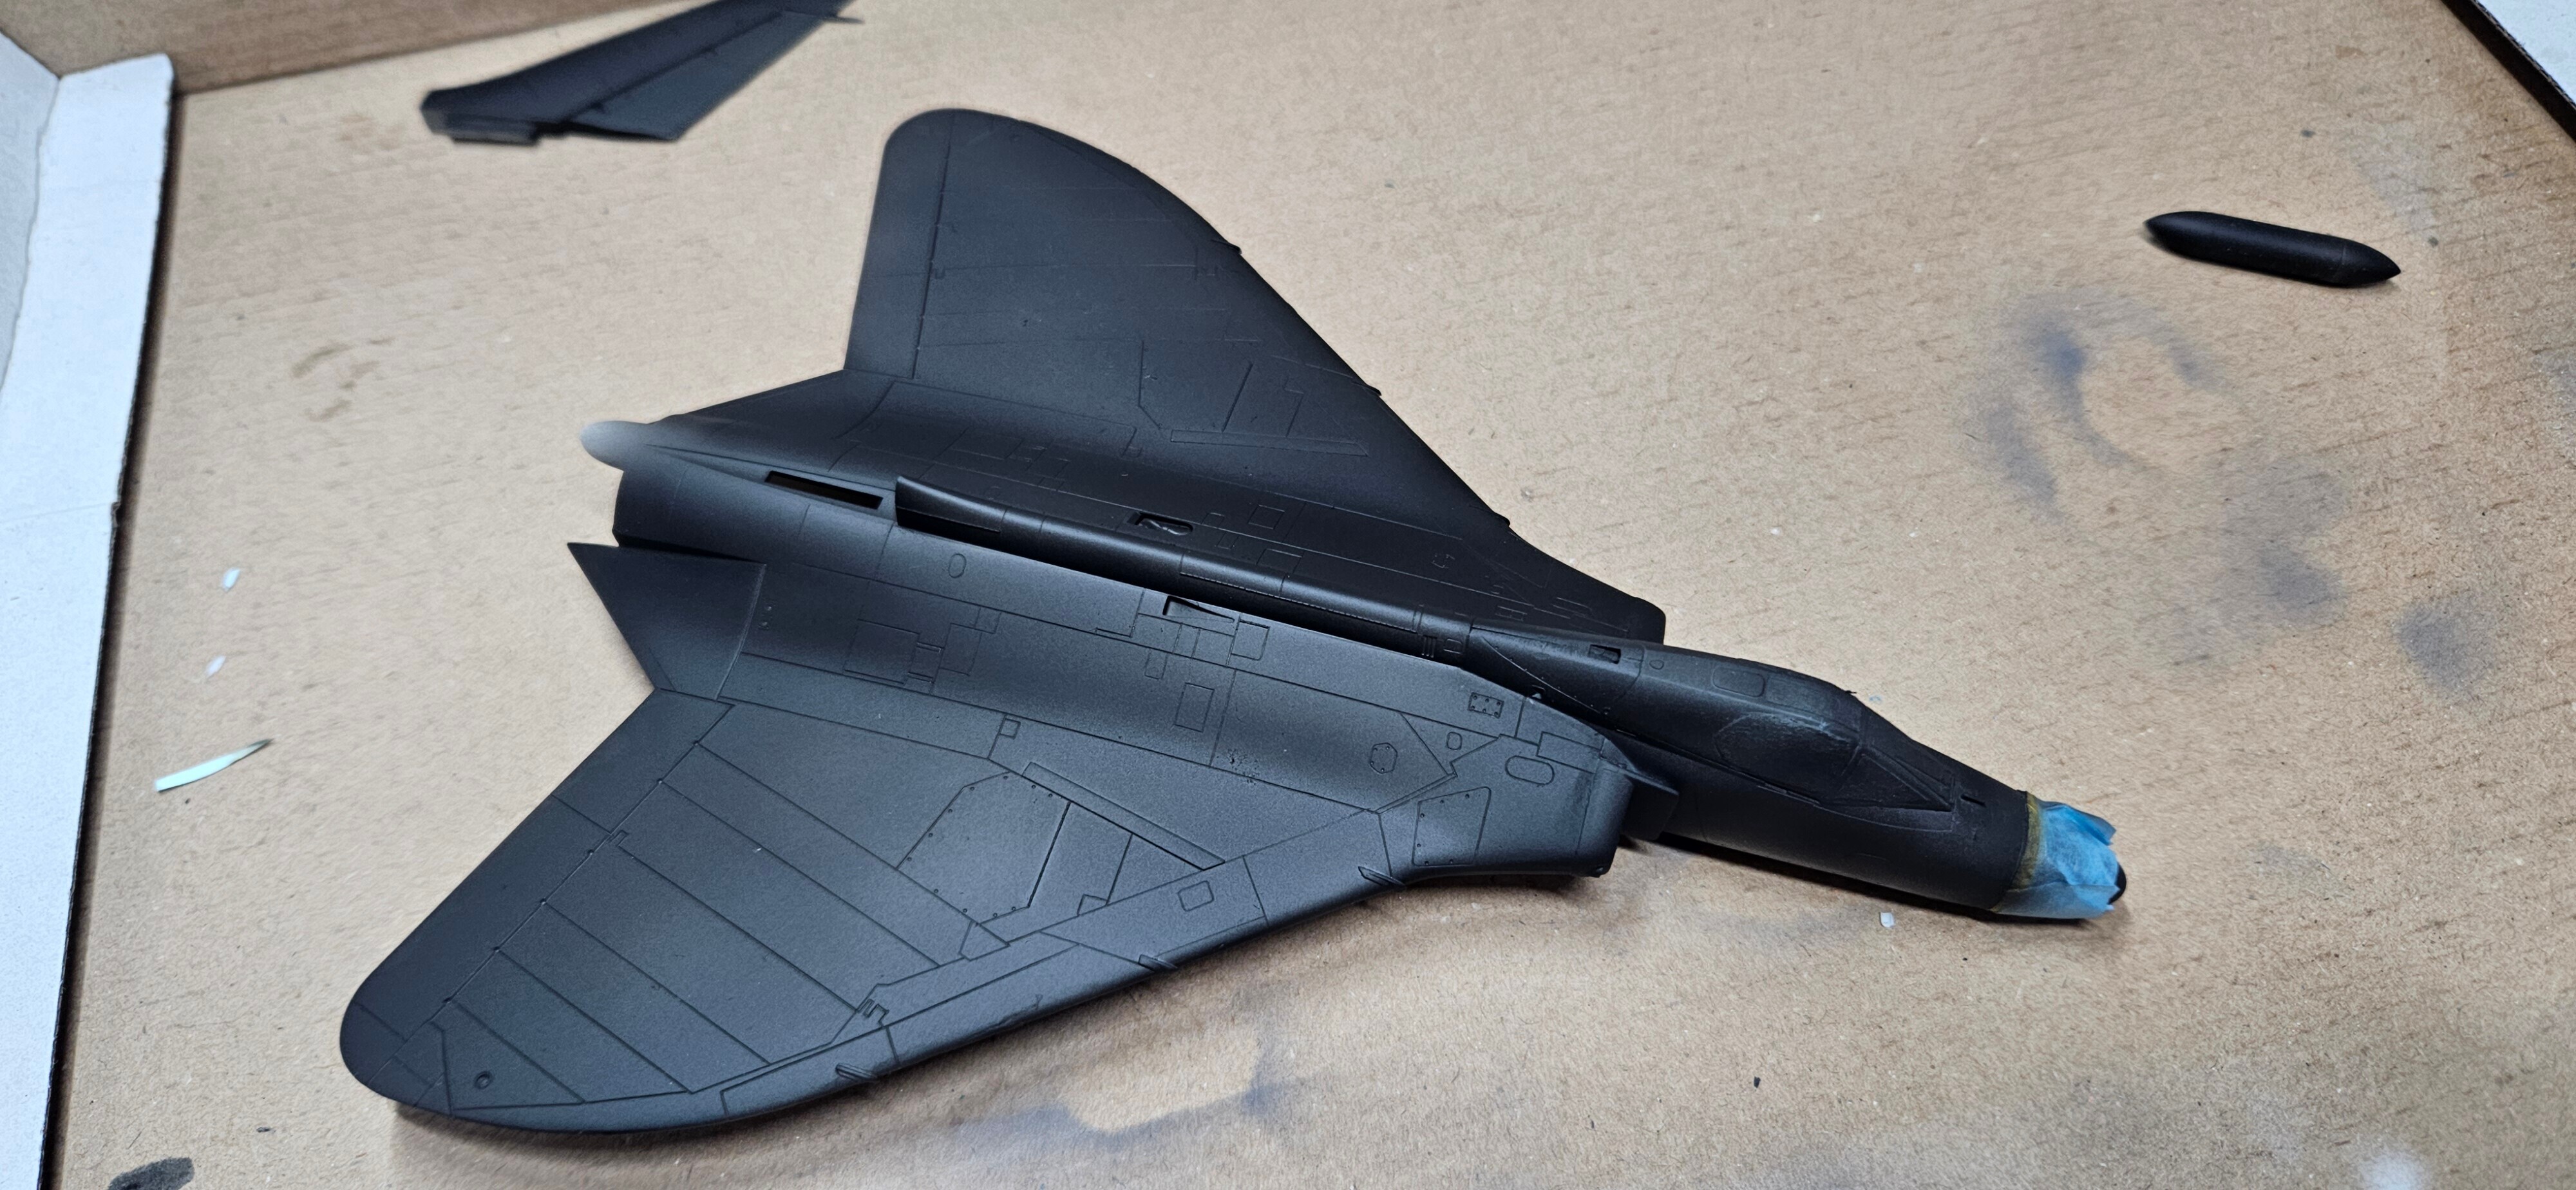
After painting the bottom with Vallejo Insignia White (I suggest you to instead use Mr Color 316 White FS17875) it's time to mask the leading edges of the wing and to mask the area around the engine. The engine itself can finally be separated from the sprue as well. First I painted them with Tamiya X-1 black thinned with MLT, and then Mr Color Super Metallic 2 201 Silver thinned by Mr Color Rapid Thinner.
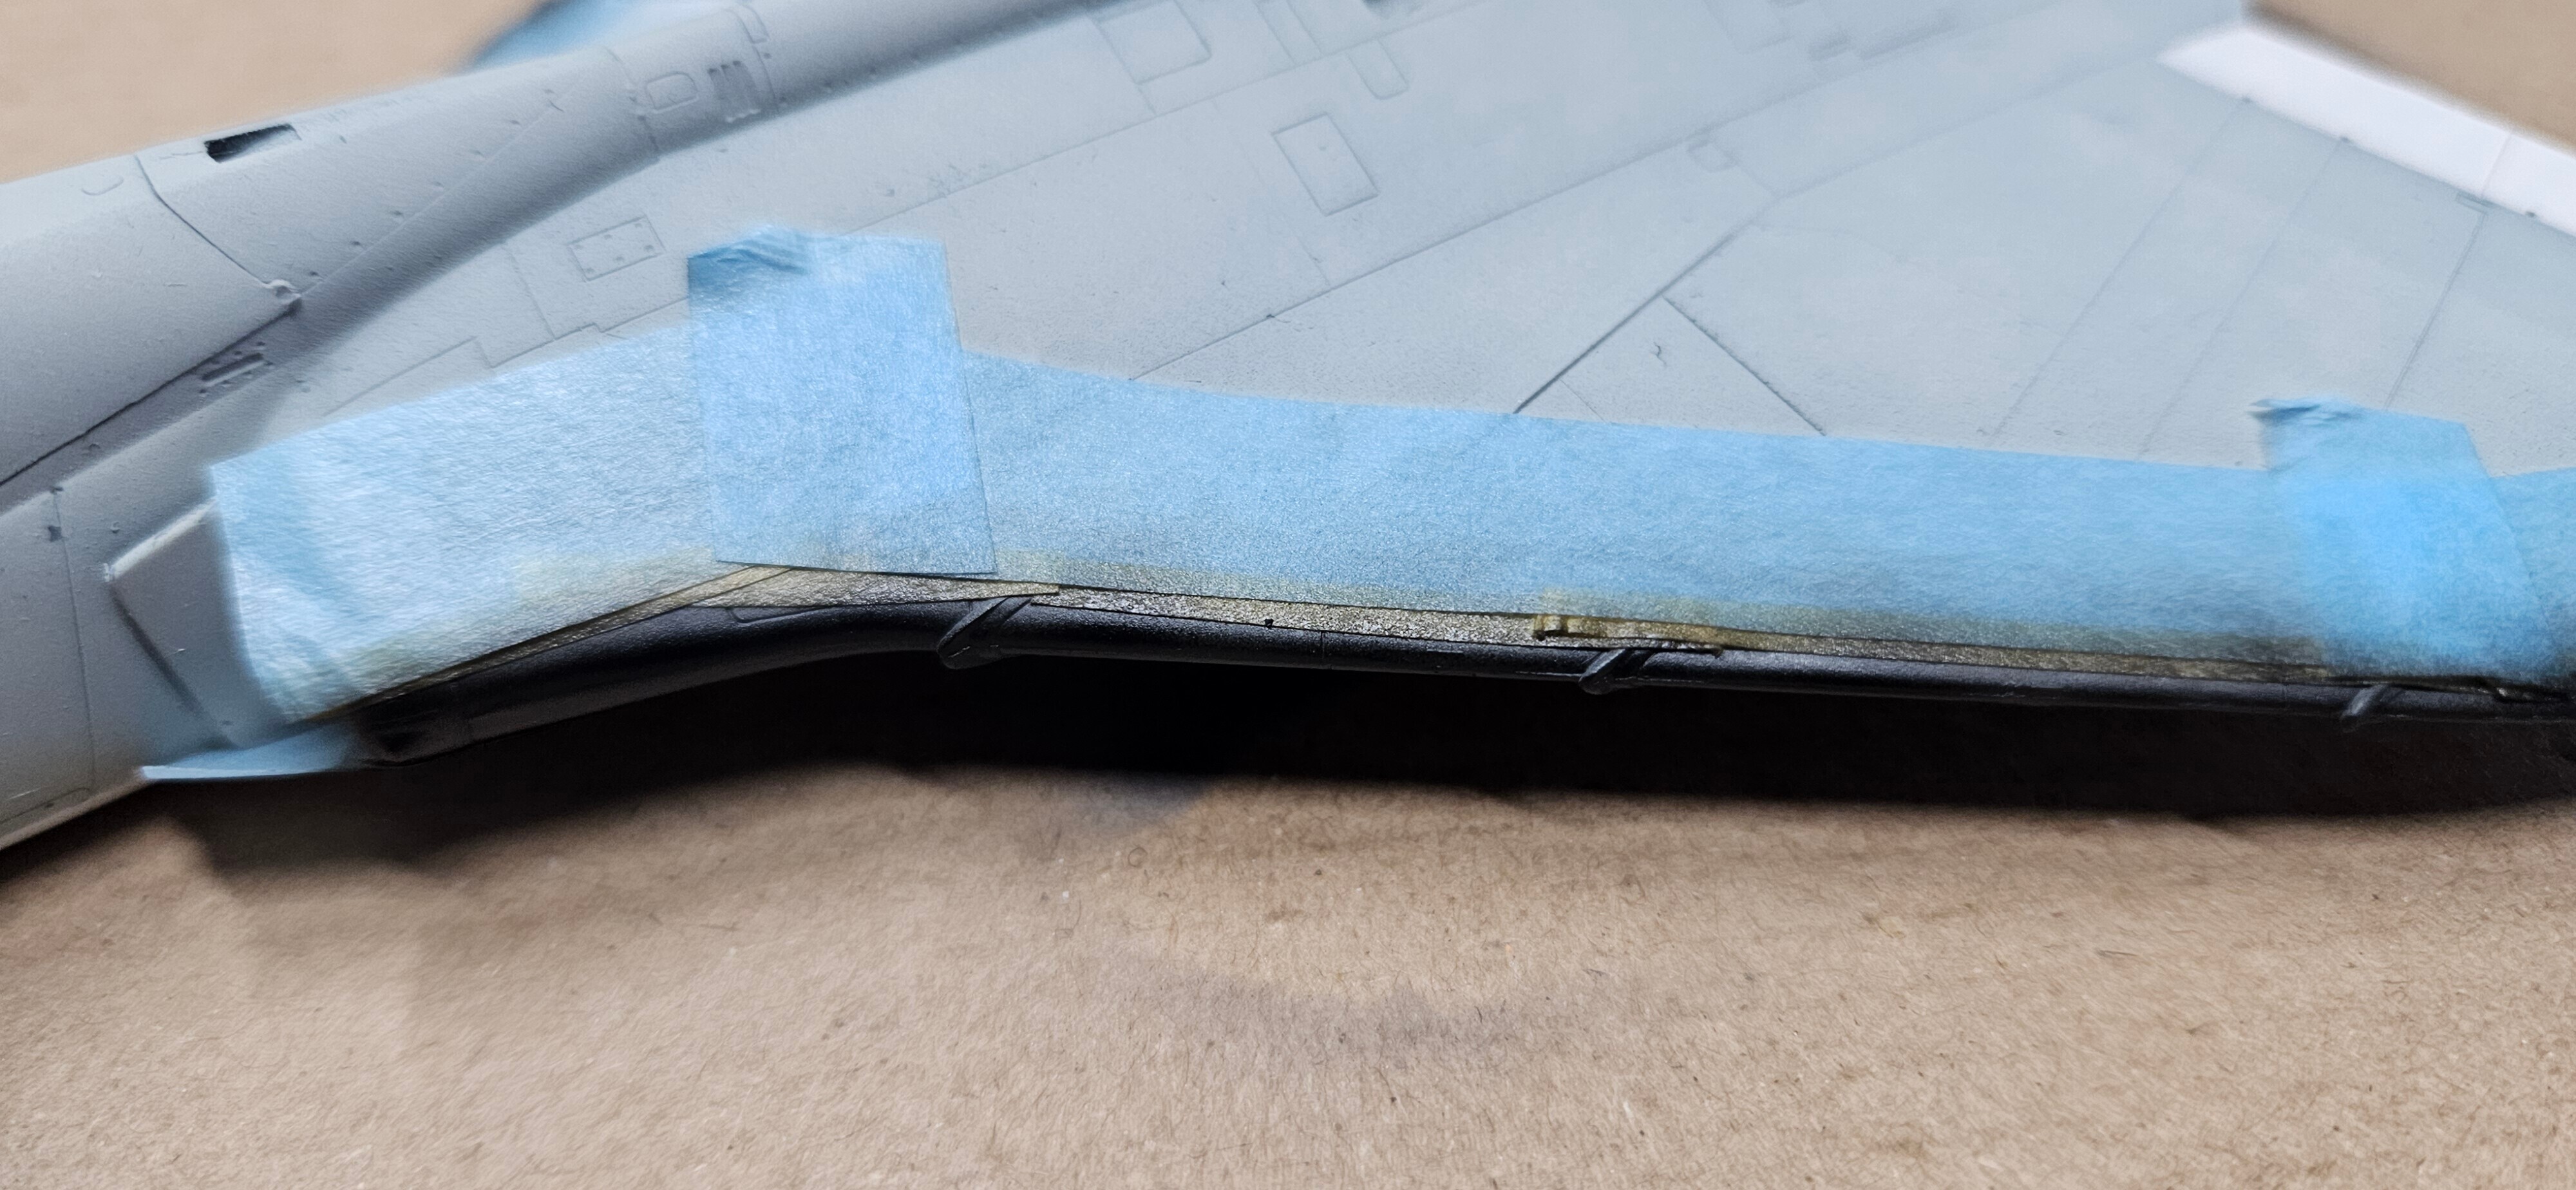
While it all dries I also painted rocket pods with Mr Color 309 Green FS34079. Thinned with rapid as I was holding the part with my fingers and really needed that faster drying time. I also fixed all the lines where some Vallejo paint peeled off due to masking tape or just by itself on the aircraft.
Final assembly, decals weathering
Before applying the decals it's good practice to first coat the model with a gloss varnish. I used a spray can version of Mr Color GX 201.
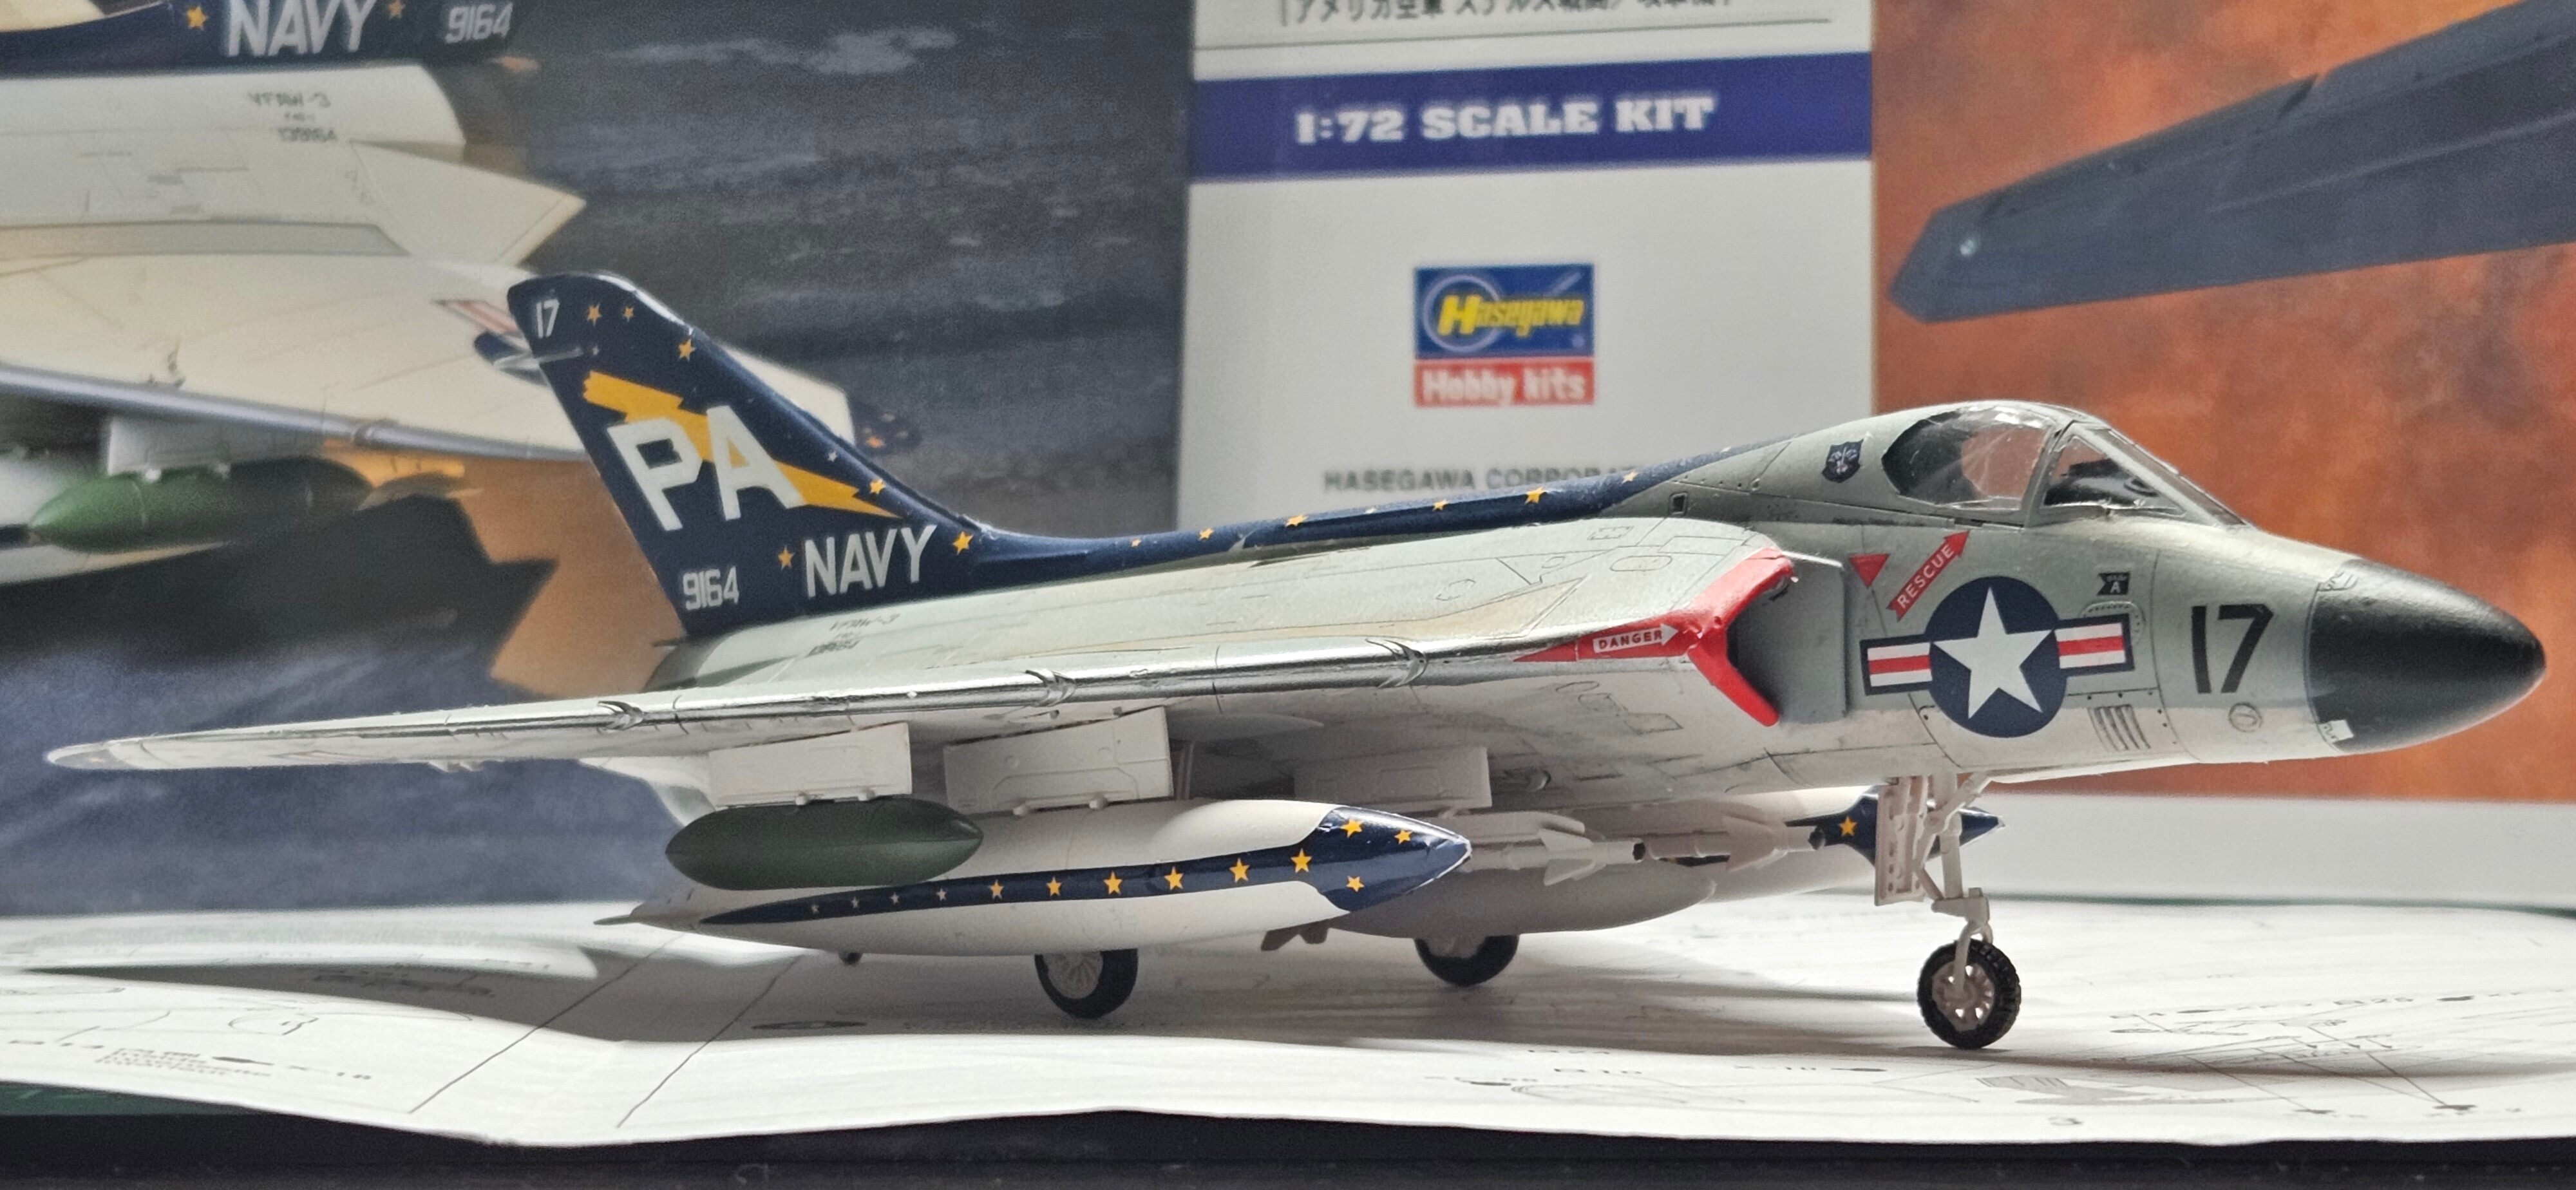
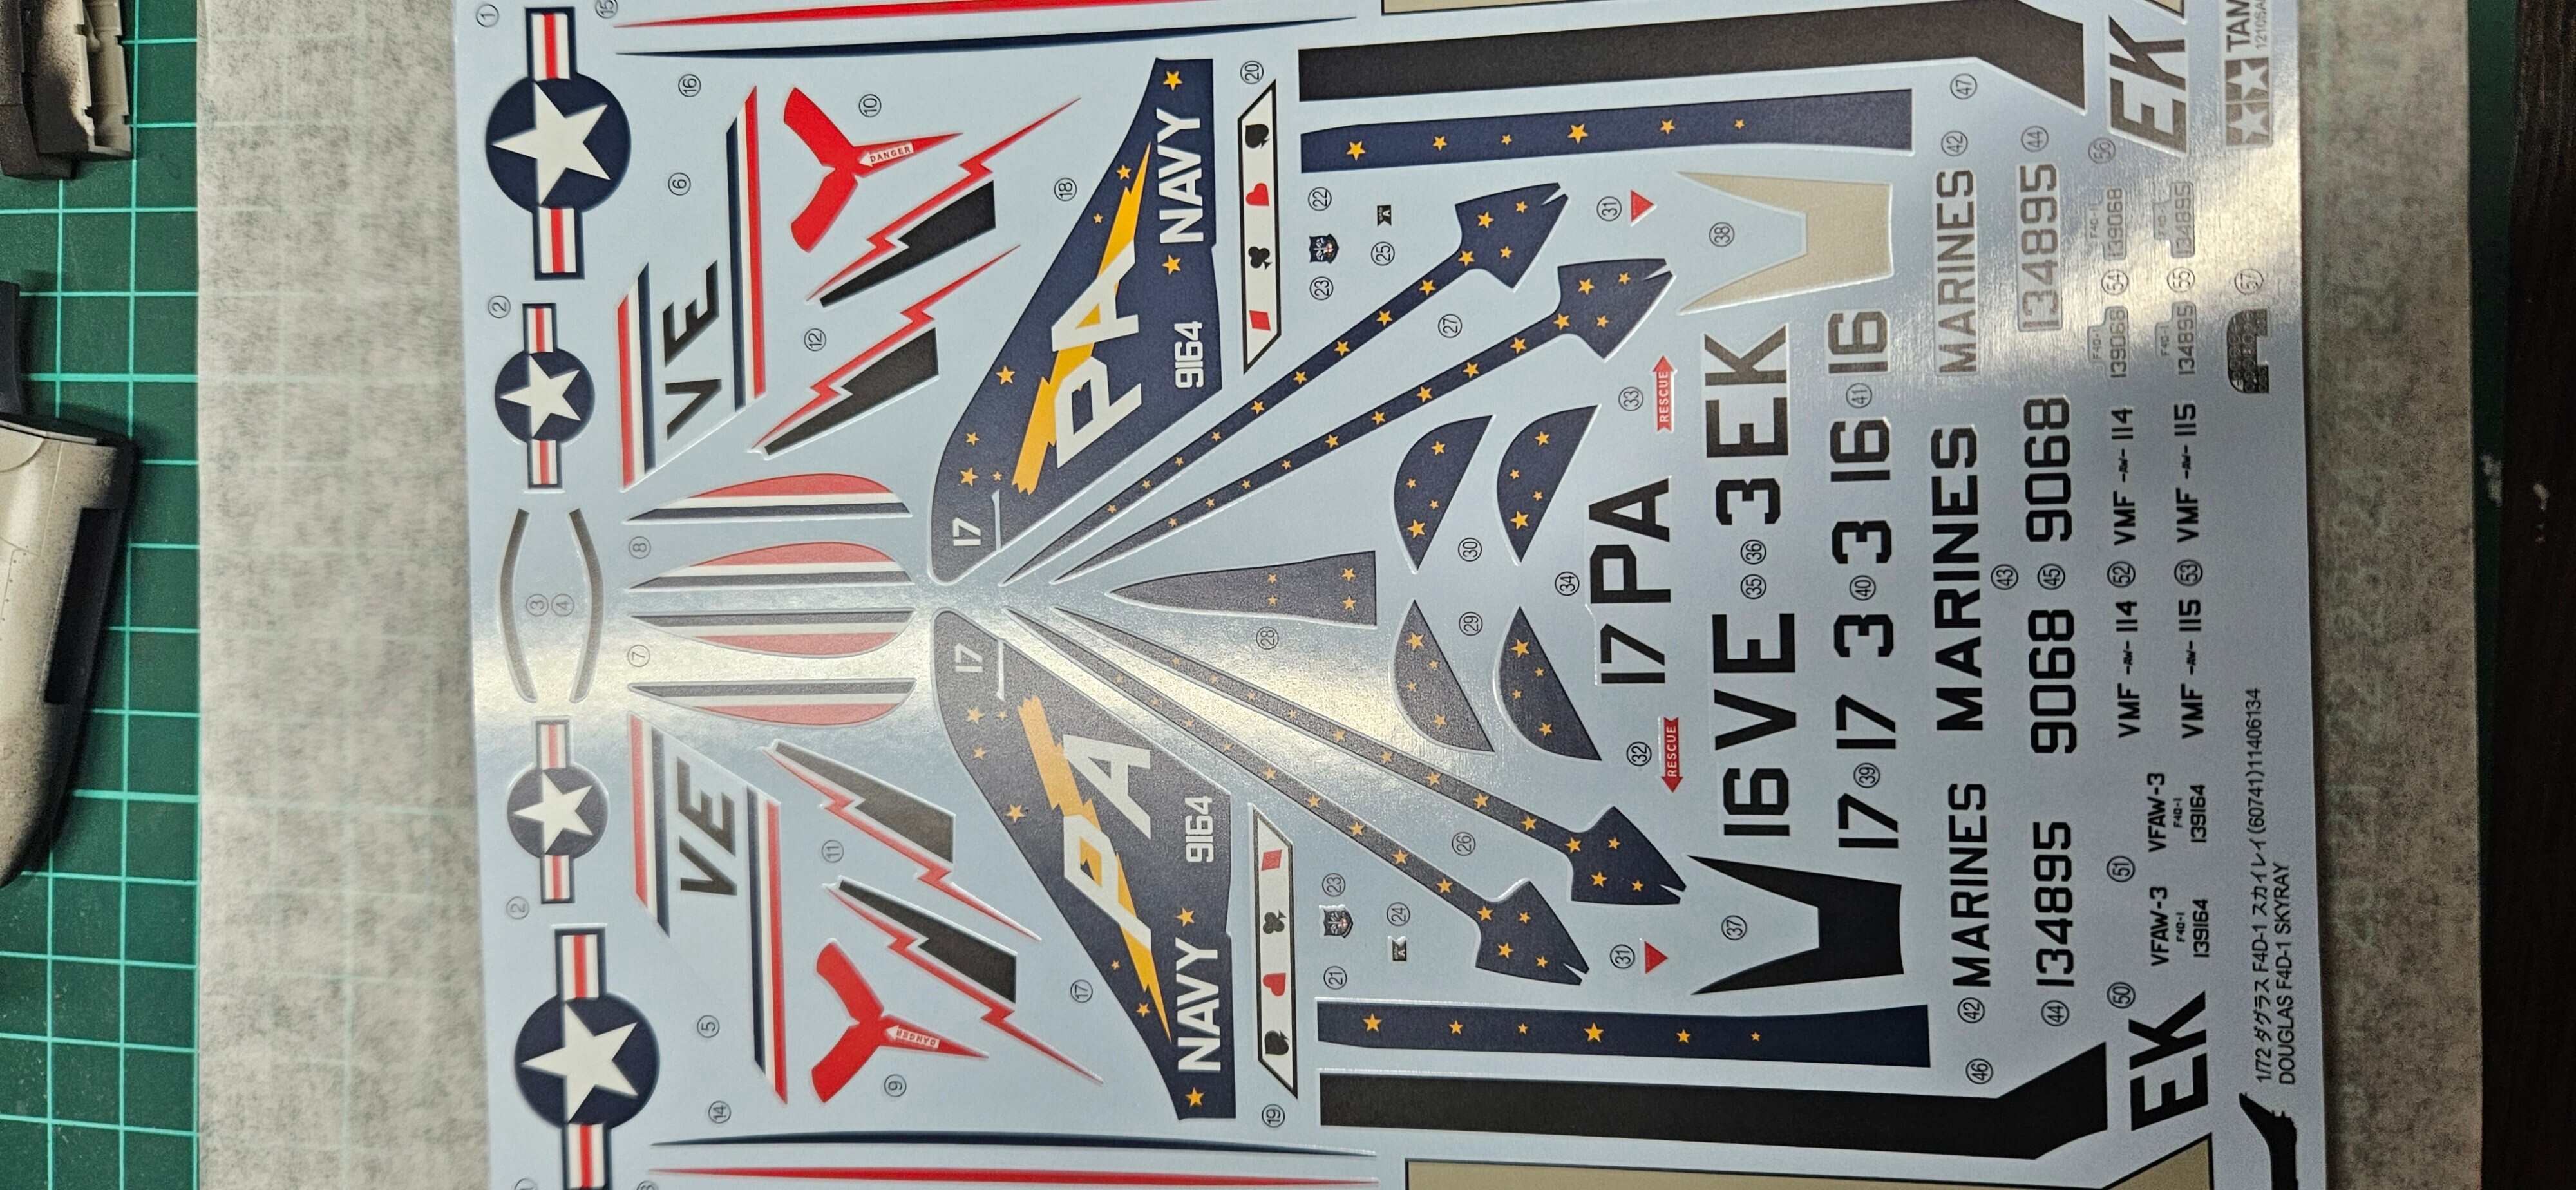
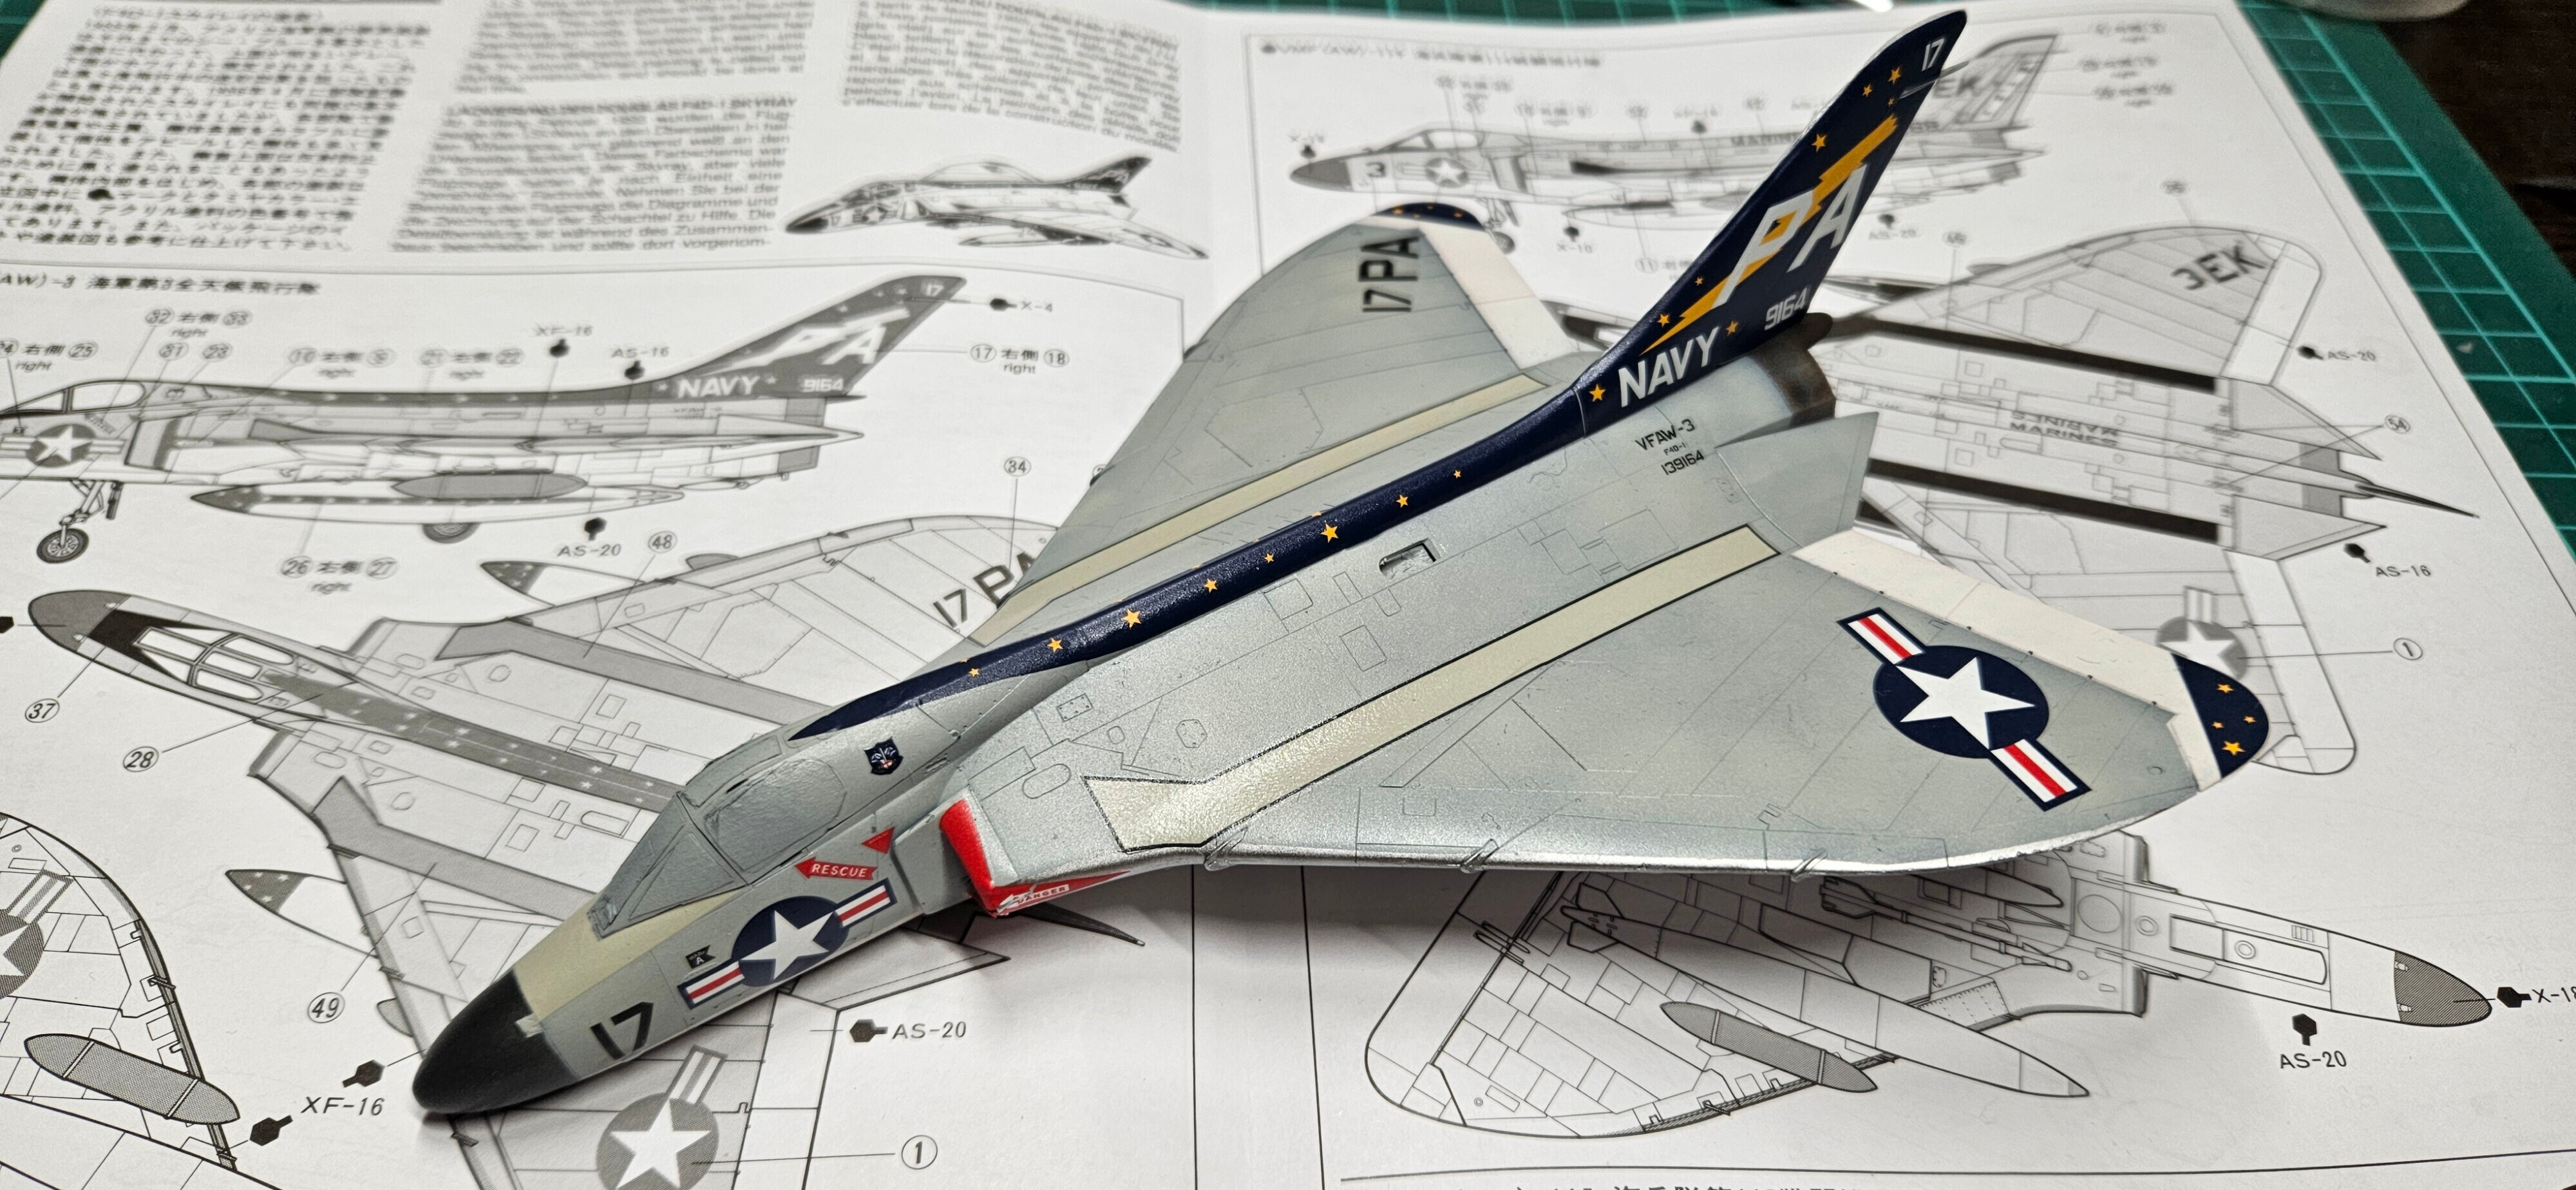
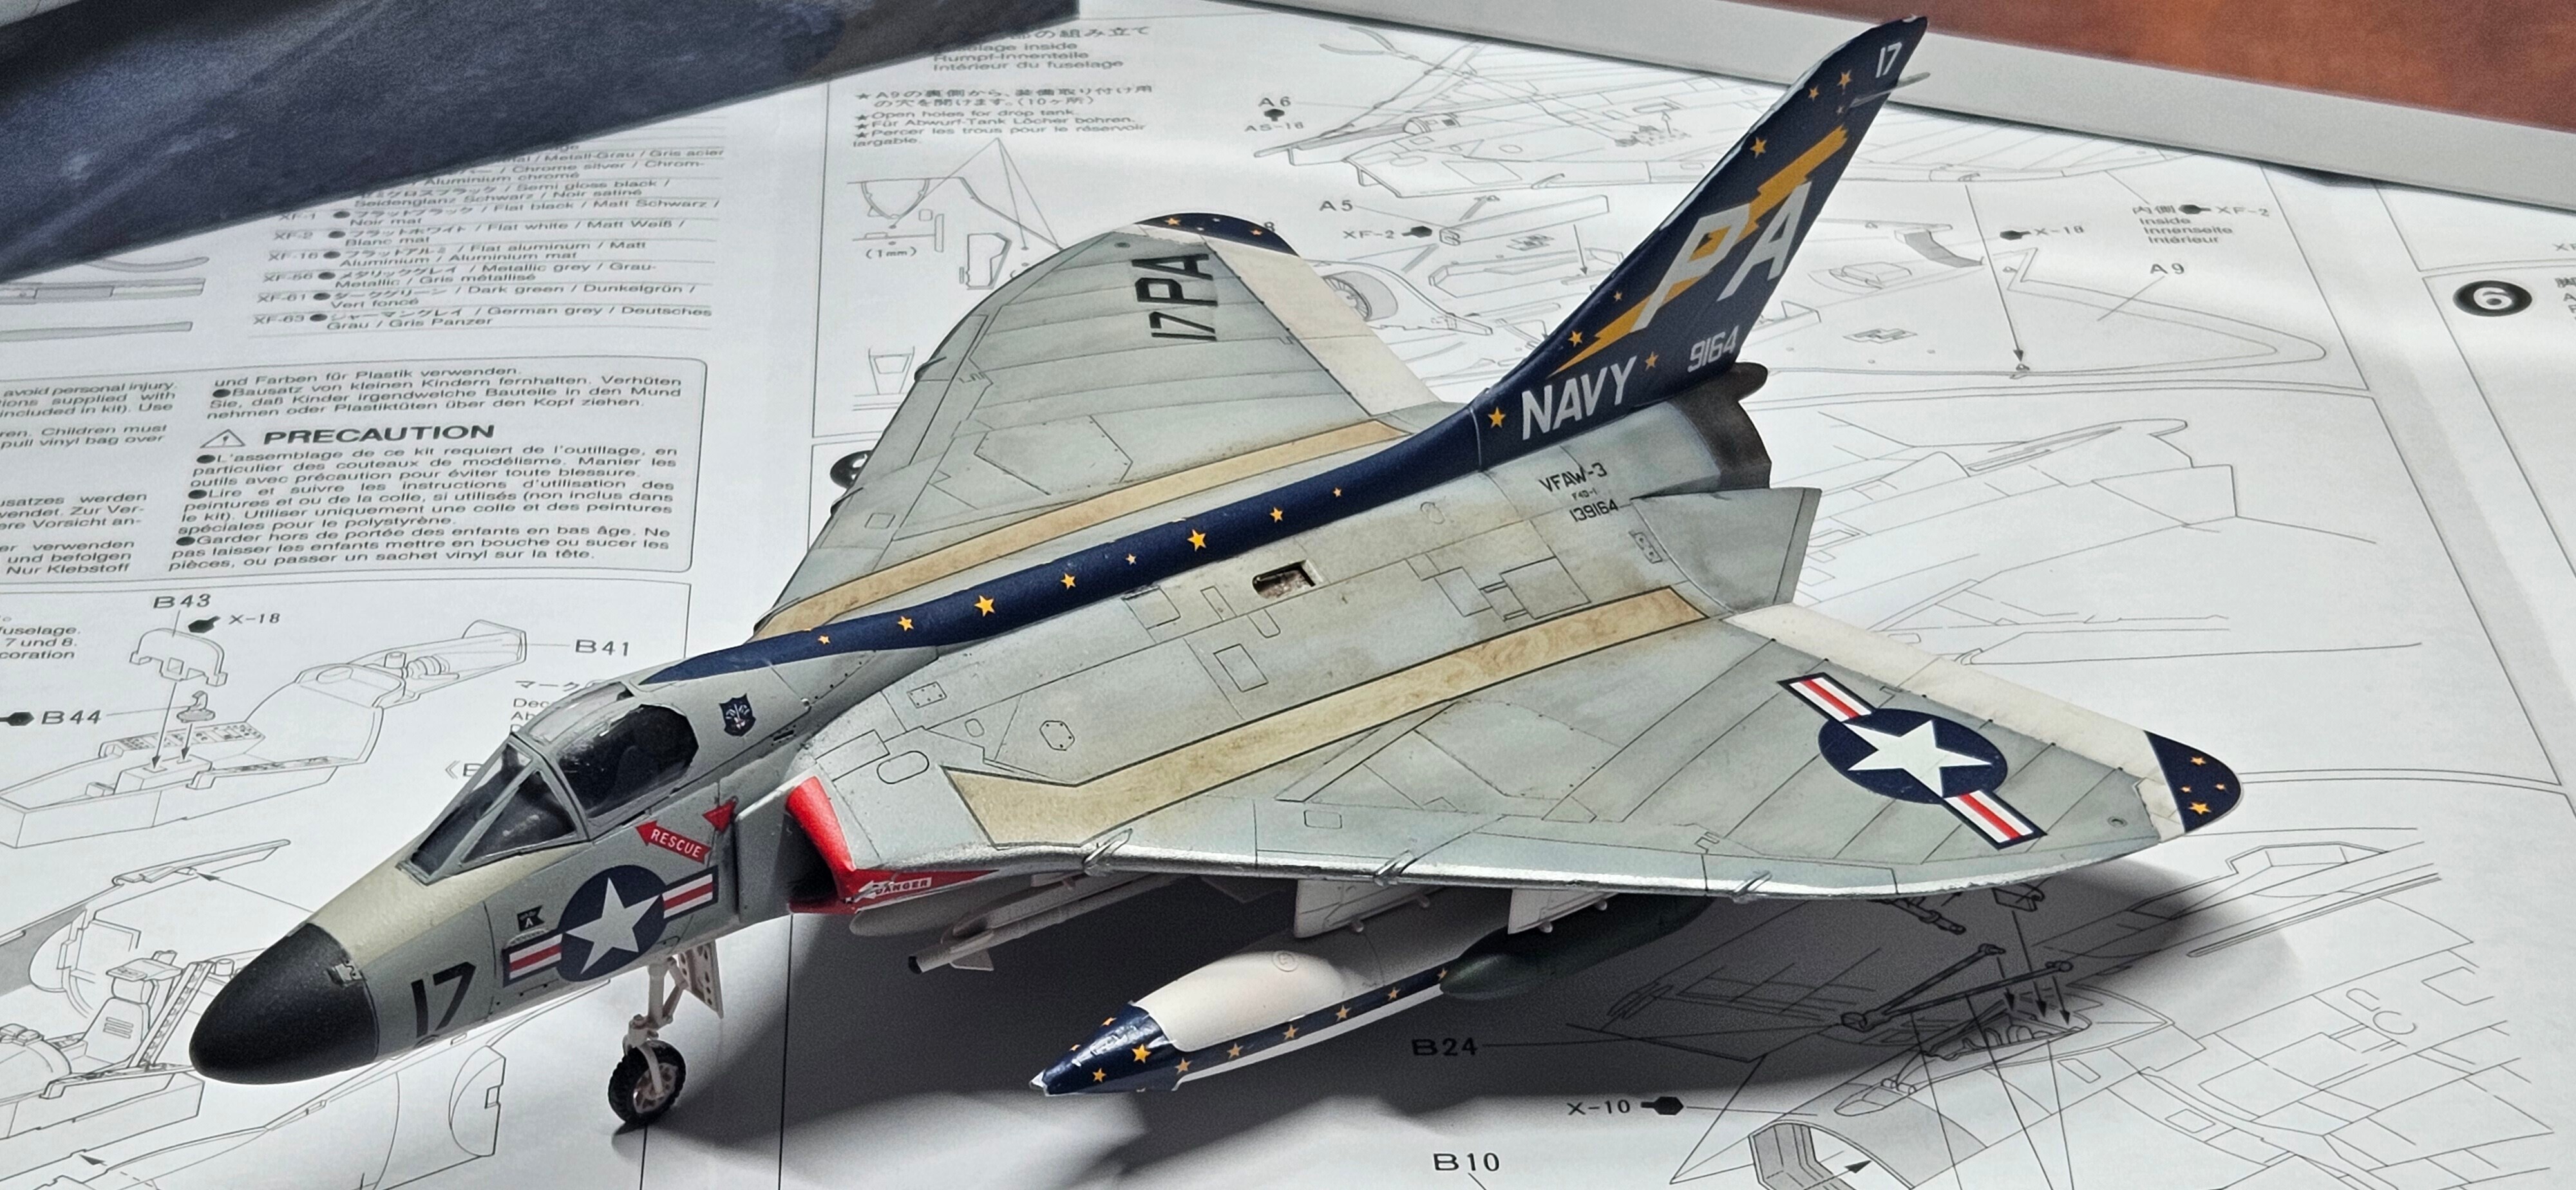
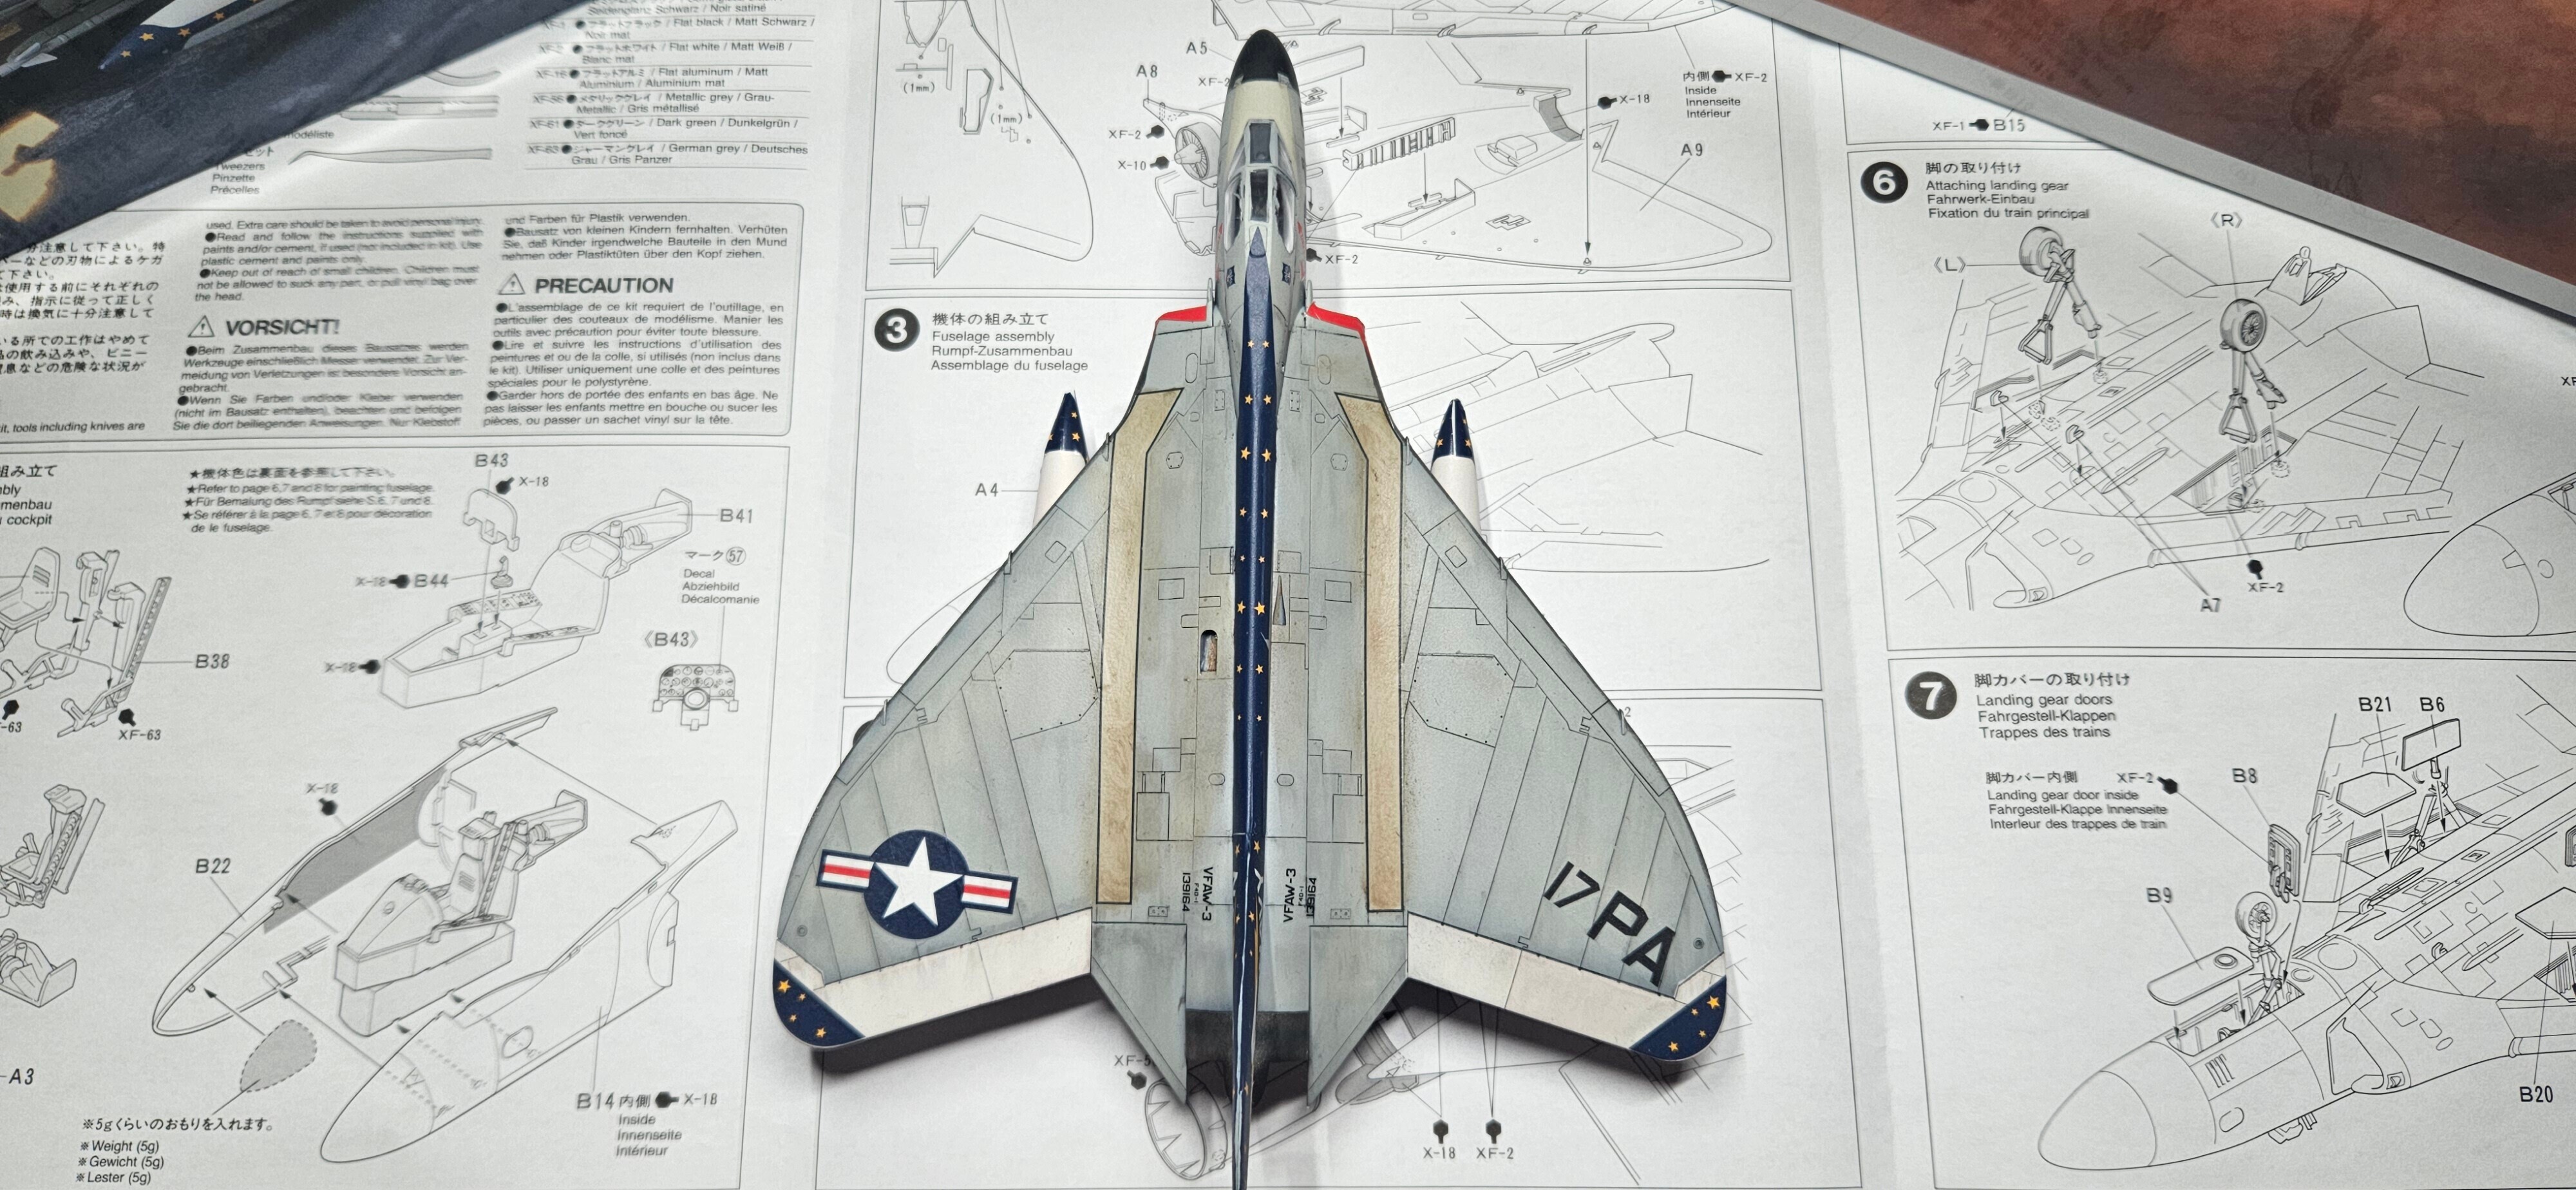
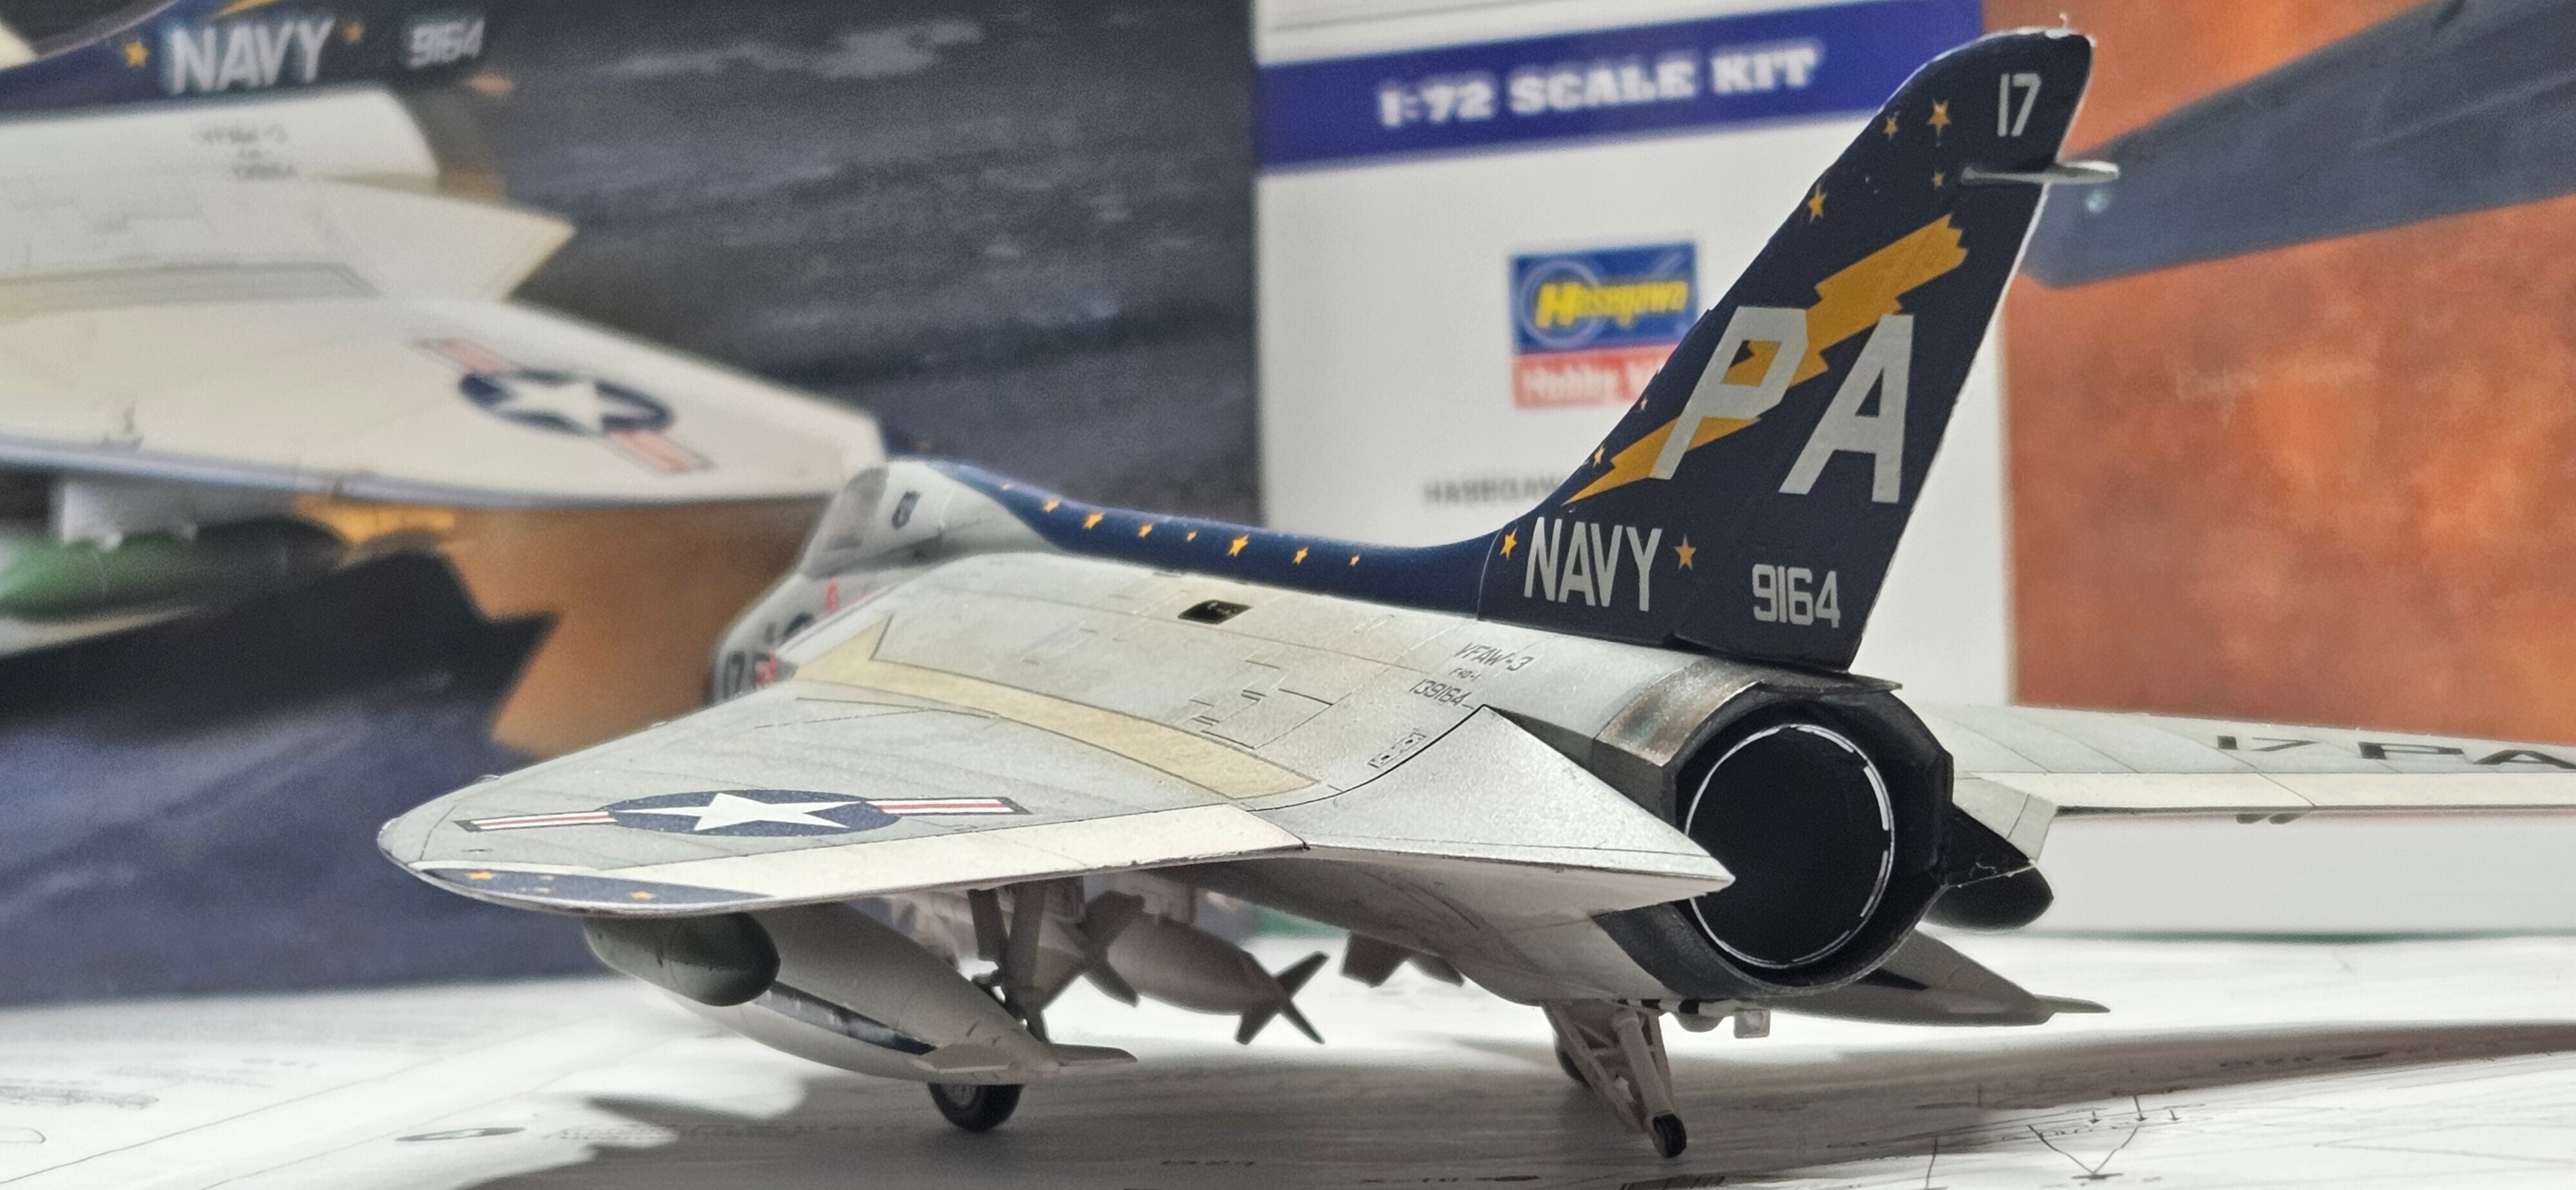
As for the decal scheme, I chose the first one from the Navy. It's the most interesting to do, but keep in mind that Tamiya decals are thick and it is difficult to make it not look fake.
As for how to apply the decals, first cut out the decal you wish, take it with your tweezers and put it in warm water. Wait for around 20-30 seconds (Tamiya decals can take even a bit longer) and then pull it out and try to move it with your finger if it is a big decal. For smaller decals I use a DIY solution called "cocktail stick smashed against the table so that it is dull" and move them like that.
I additionally use Tamiya Mark Fit Strong, but this model and scheme might even require super strong (especially for the tail).
When the decal is on the model I use a cotton swab to get rid of all the bubbles to avoid silvering.
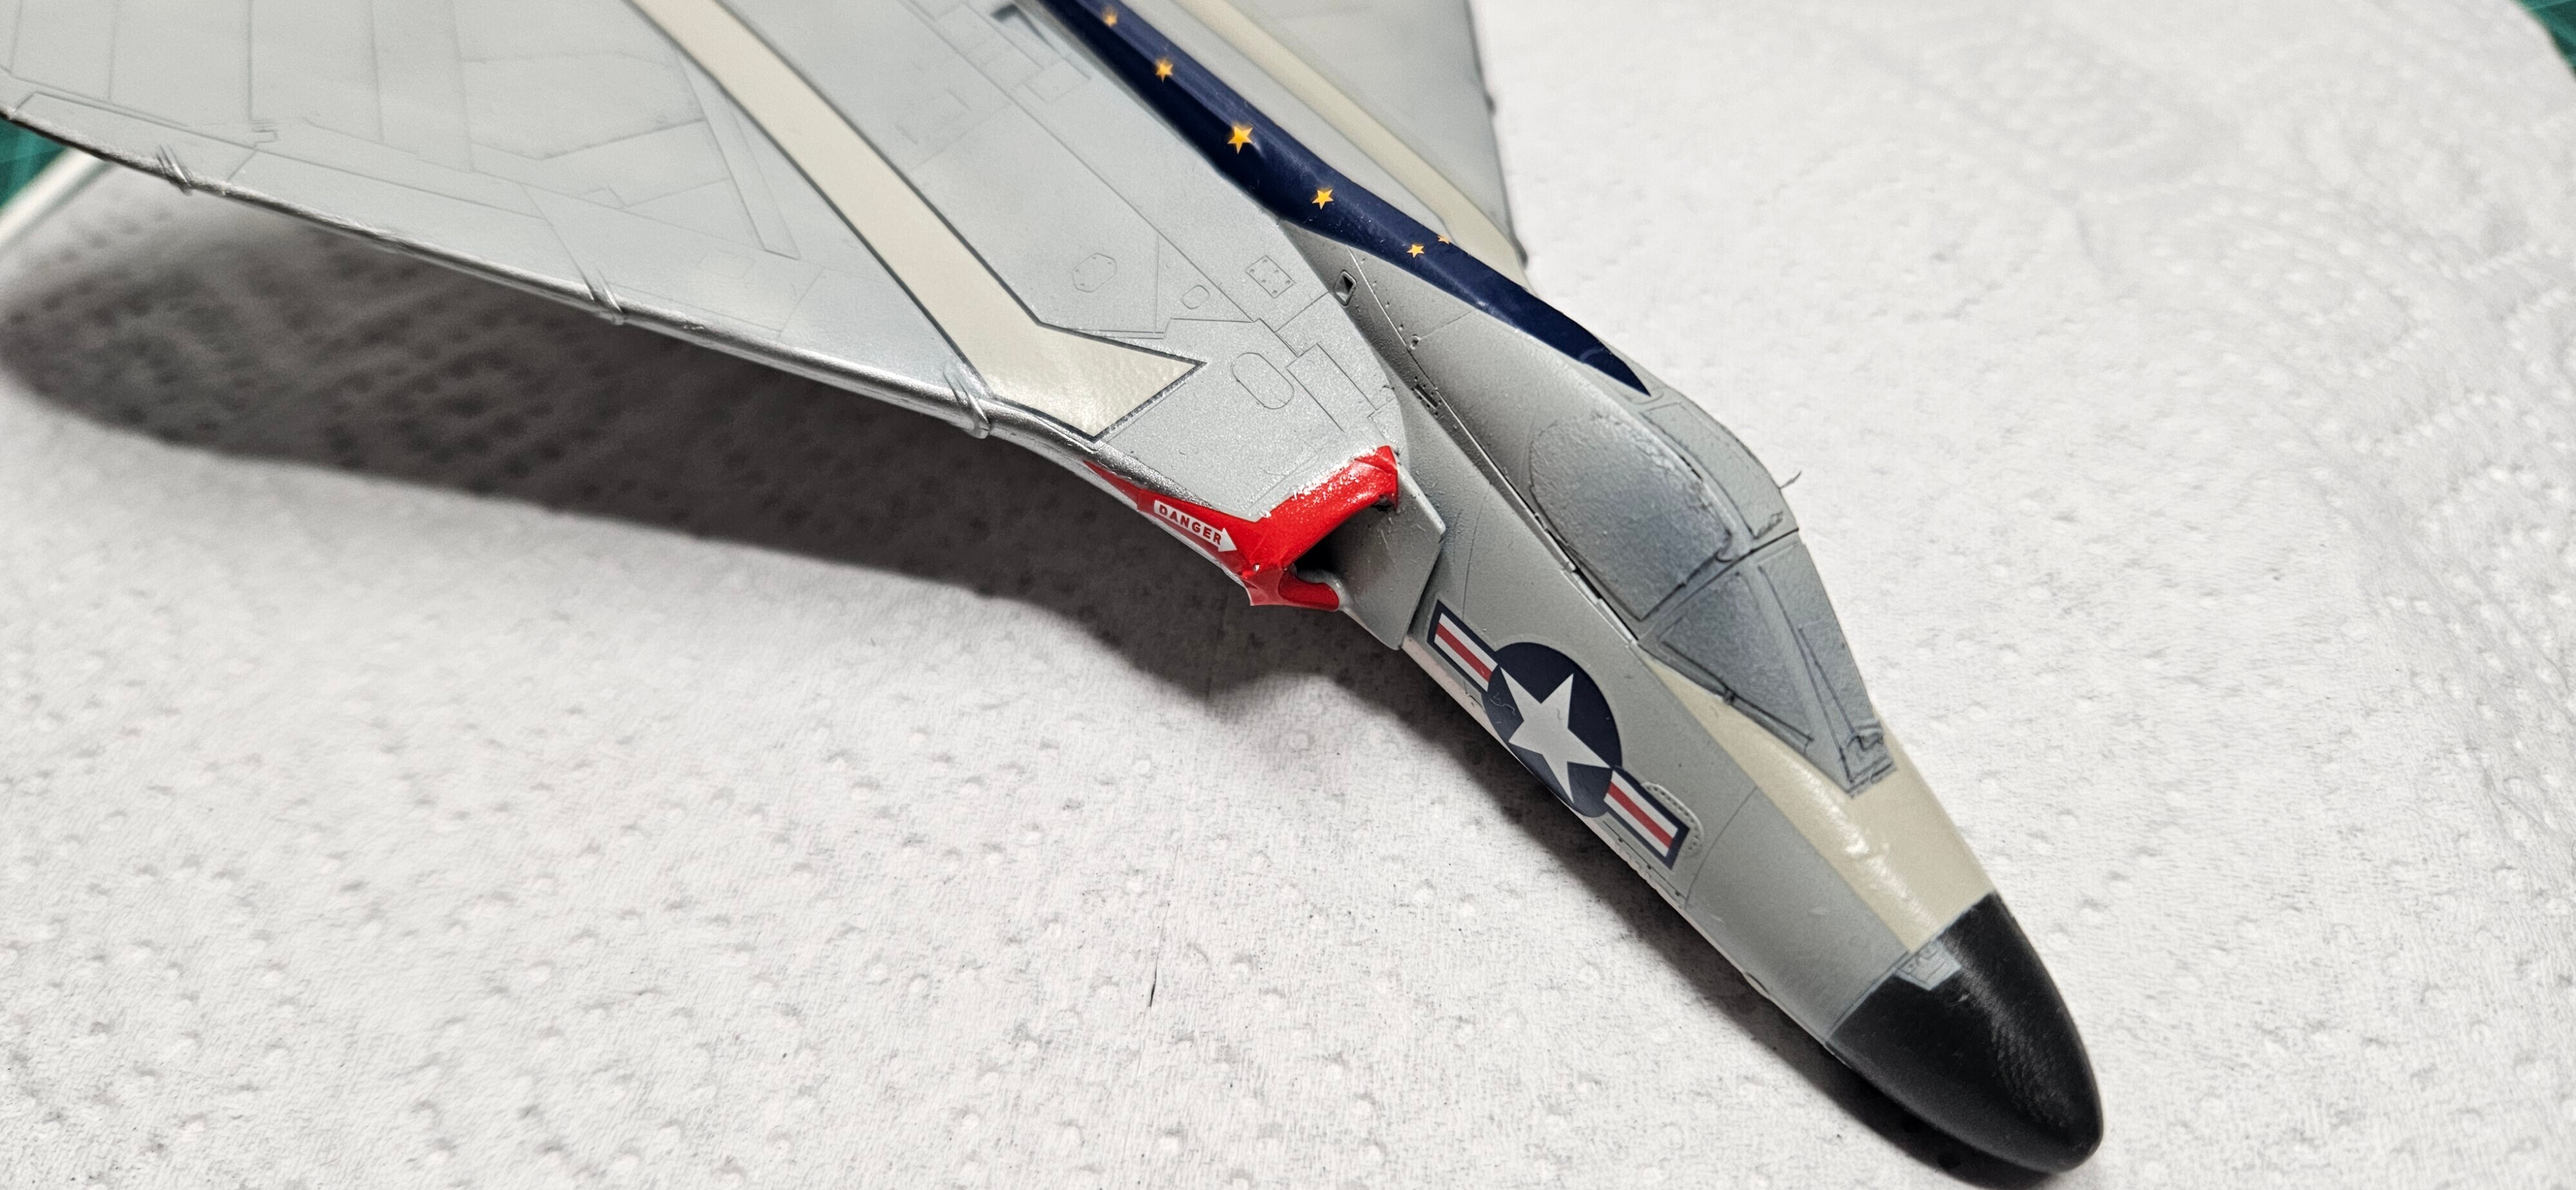
While applying the decals I stumbled into a pretty major issue with air exhaust warning decals. They are thick and hard to bend, but easy to tear. So while trying to put them on I did just that. It would have been much easier to paint the air exhaust correctly and just cut out the "warning" part from the decal.
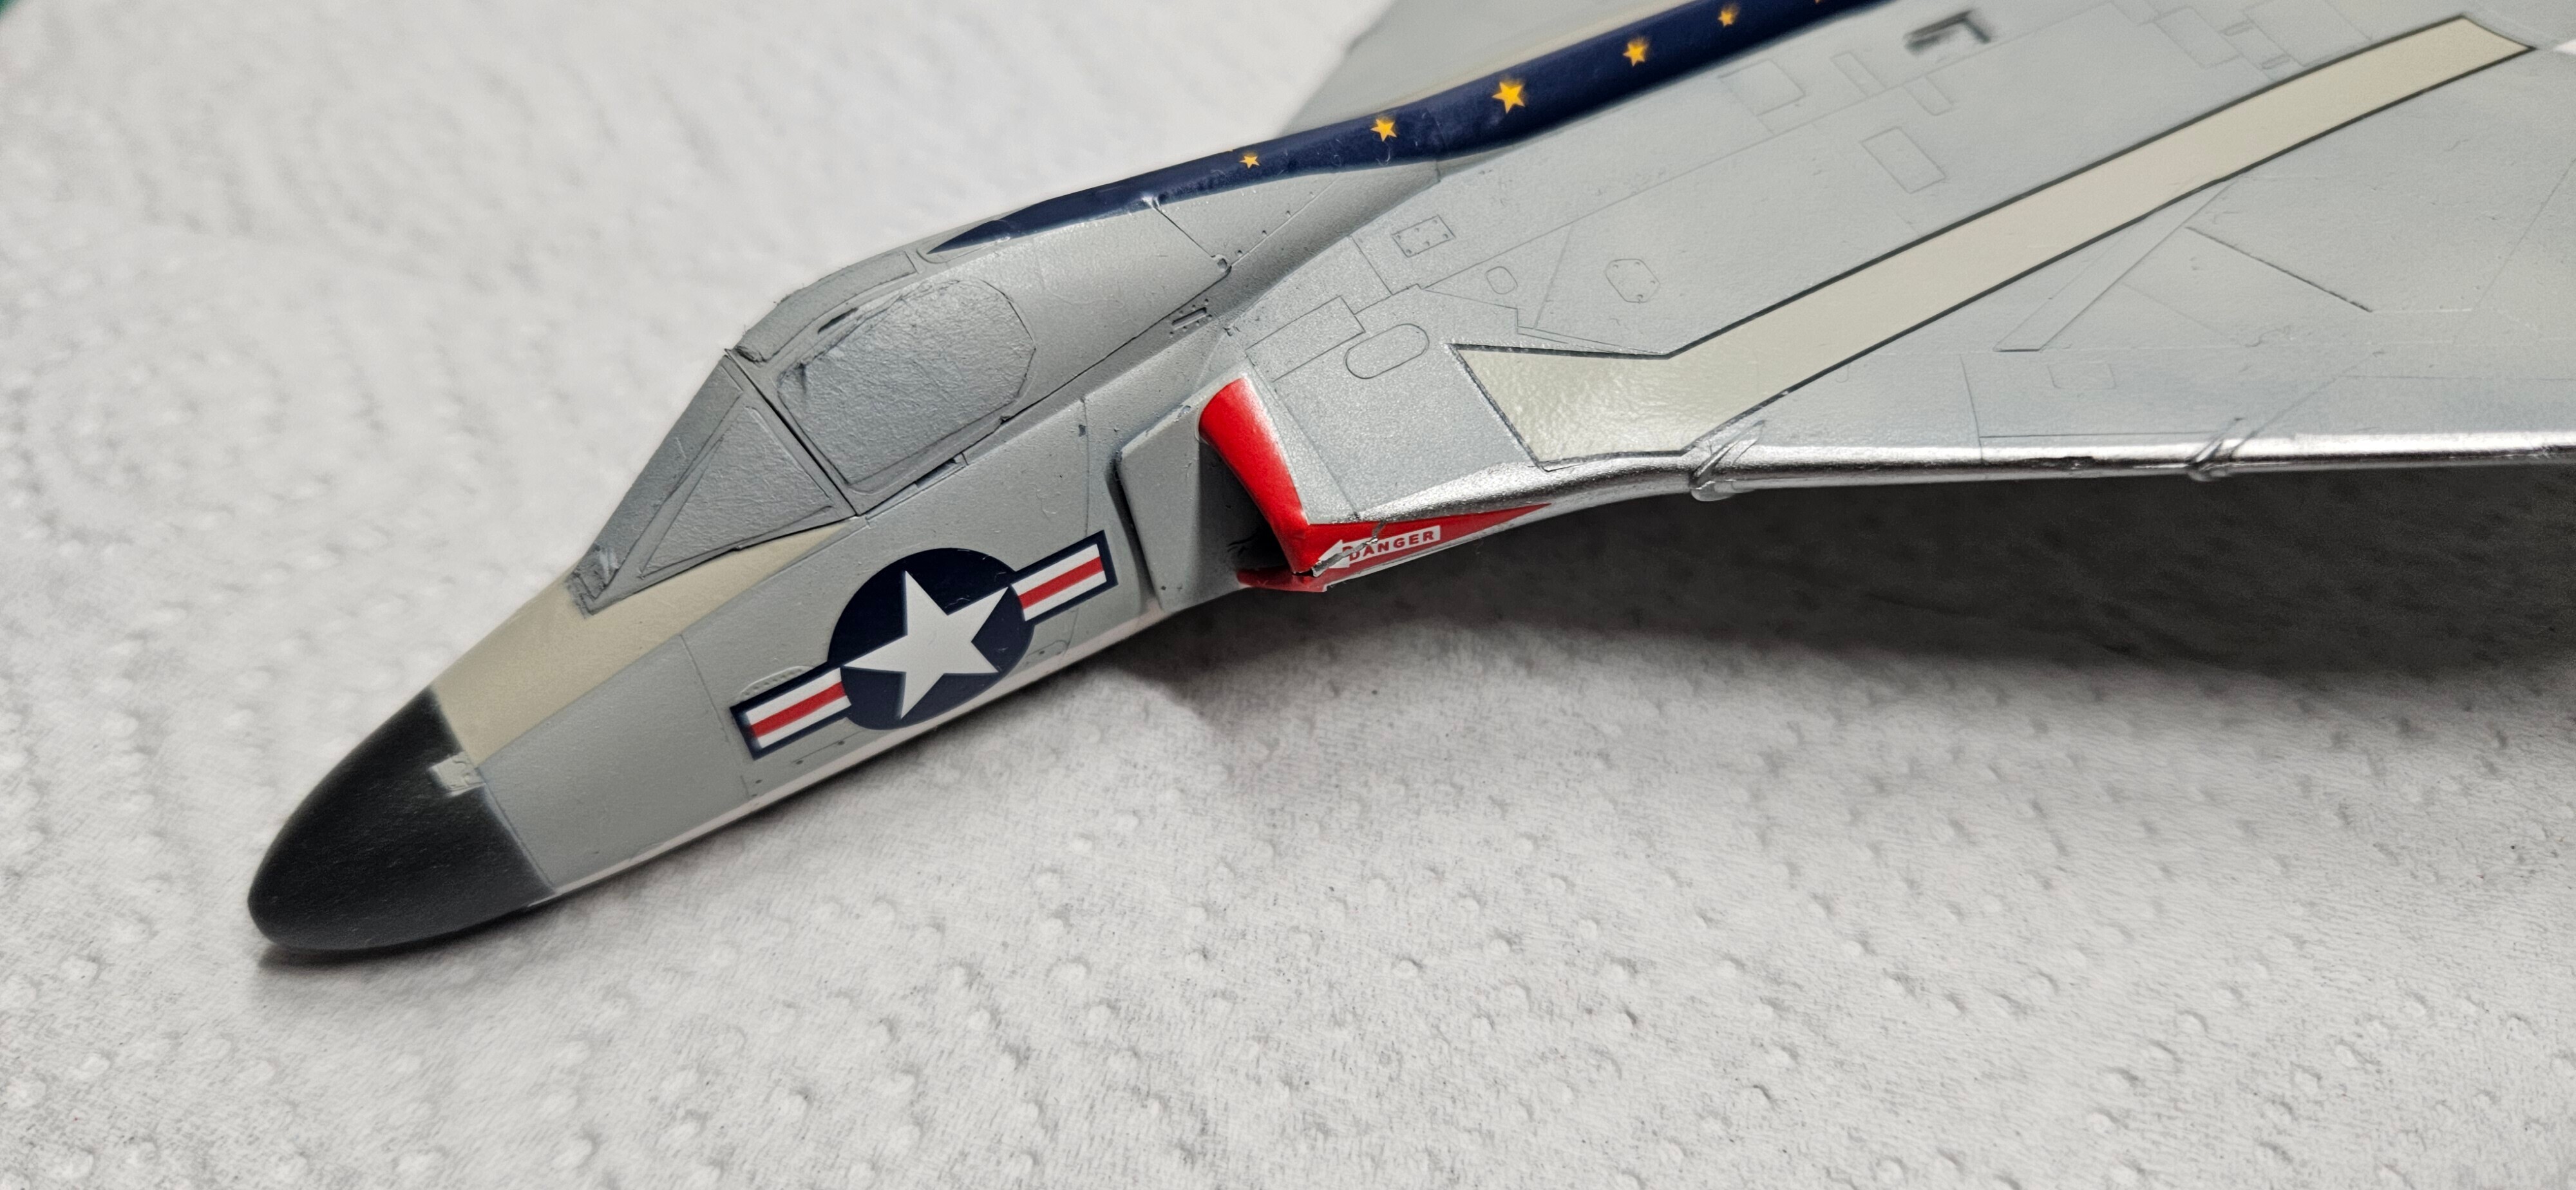
Walkway decal and whole tail decals are also overly thick and noticeable. Nothing I could really do about that as well as Mark Fit Strong wasn't strong enough. Alas, only weathering is left.

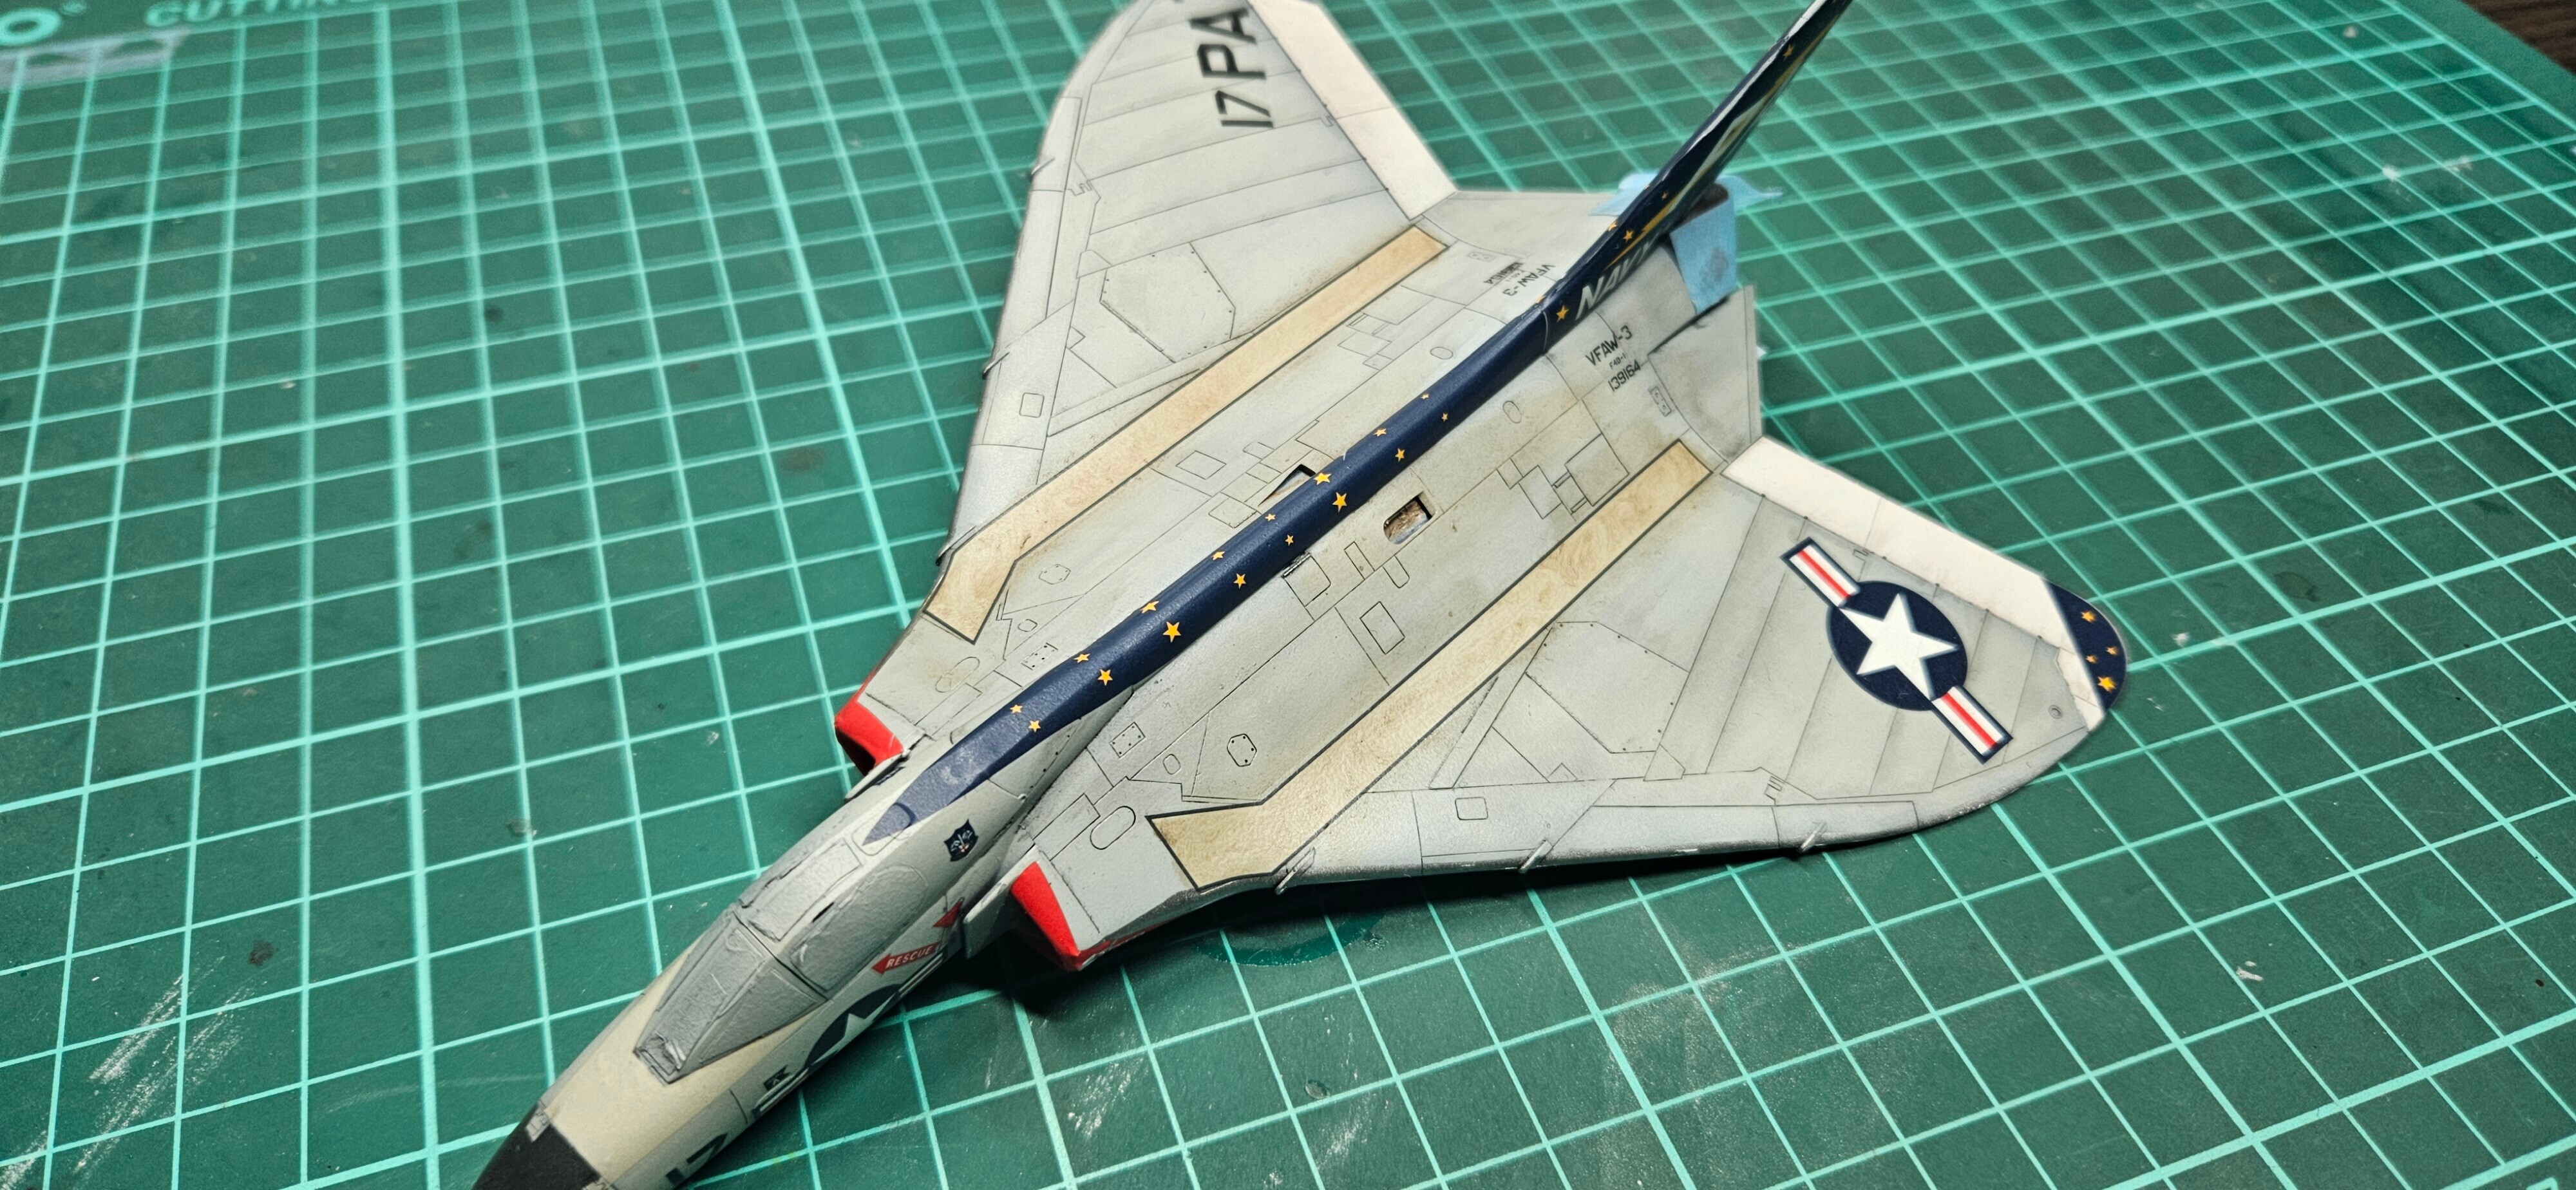
Before doing weathering I gave the model another clear coat of varnish. Then I used Mr Weathering Black enamel panel wash, dipping a pointy brush into it, and then tapping across all the panels. After a couple minutes I wiped it off with a paper towel. As the paint on the bottom was severely uneven, it mixed with the paint almost immediately and I couldnt wipe it or clean it even with some white spirit.
As what appears to be a walkway for the crew (at least for me) was pretty dirty on the real F4Ds and the decal was so thick and fake, I decided to do some oil weathering.
I used two oil paints: Ammo Mig Oilbrusher Starship Filth and Earth Clay. I put two dots near each other, and used a flat-headed brush to give it direction. When the effect seemed too heavy I used dry tapering eye shadow to remove excesses. As it takes days to dry, I left the model away for a day and then put a flat coat over it again and left it for one more day.
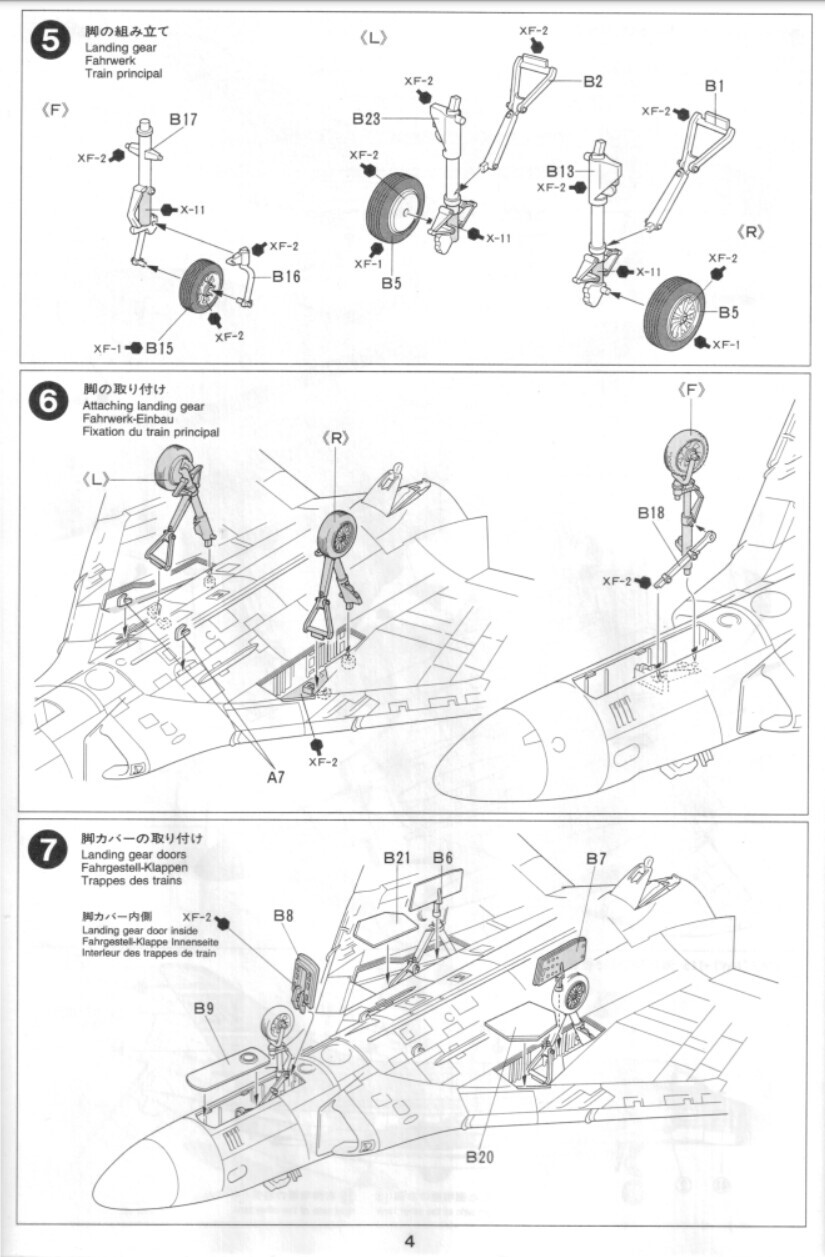
Then all that's left is to put the landing gear according to the manual and attach the pylons.
Done!

Mistakes done and to avoid
- The paint choice was definitely poor. Vallejo paints aren't resilient, tip dry even on Iwata airbrush and require flow improver which I did not have at the time. Since the model is relatively simple in camo scheme, I could've used Mr Color all the way.
- Experiments with bigger distance and higher pressure for faster airbrushing went wrong. The whole bottom is full of uneven paint and mistakes.
- Pink is not a neutral color and will affect the paints over it.
- Air intakes could've been painted red instead of using the decal. Would save time and a lot of nerves.
- Decals are thick. Could've picked a more boring scheme or bought something like Mark fit Super Strong.

