Advance to the Rhine
Contents
Overview
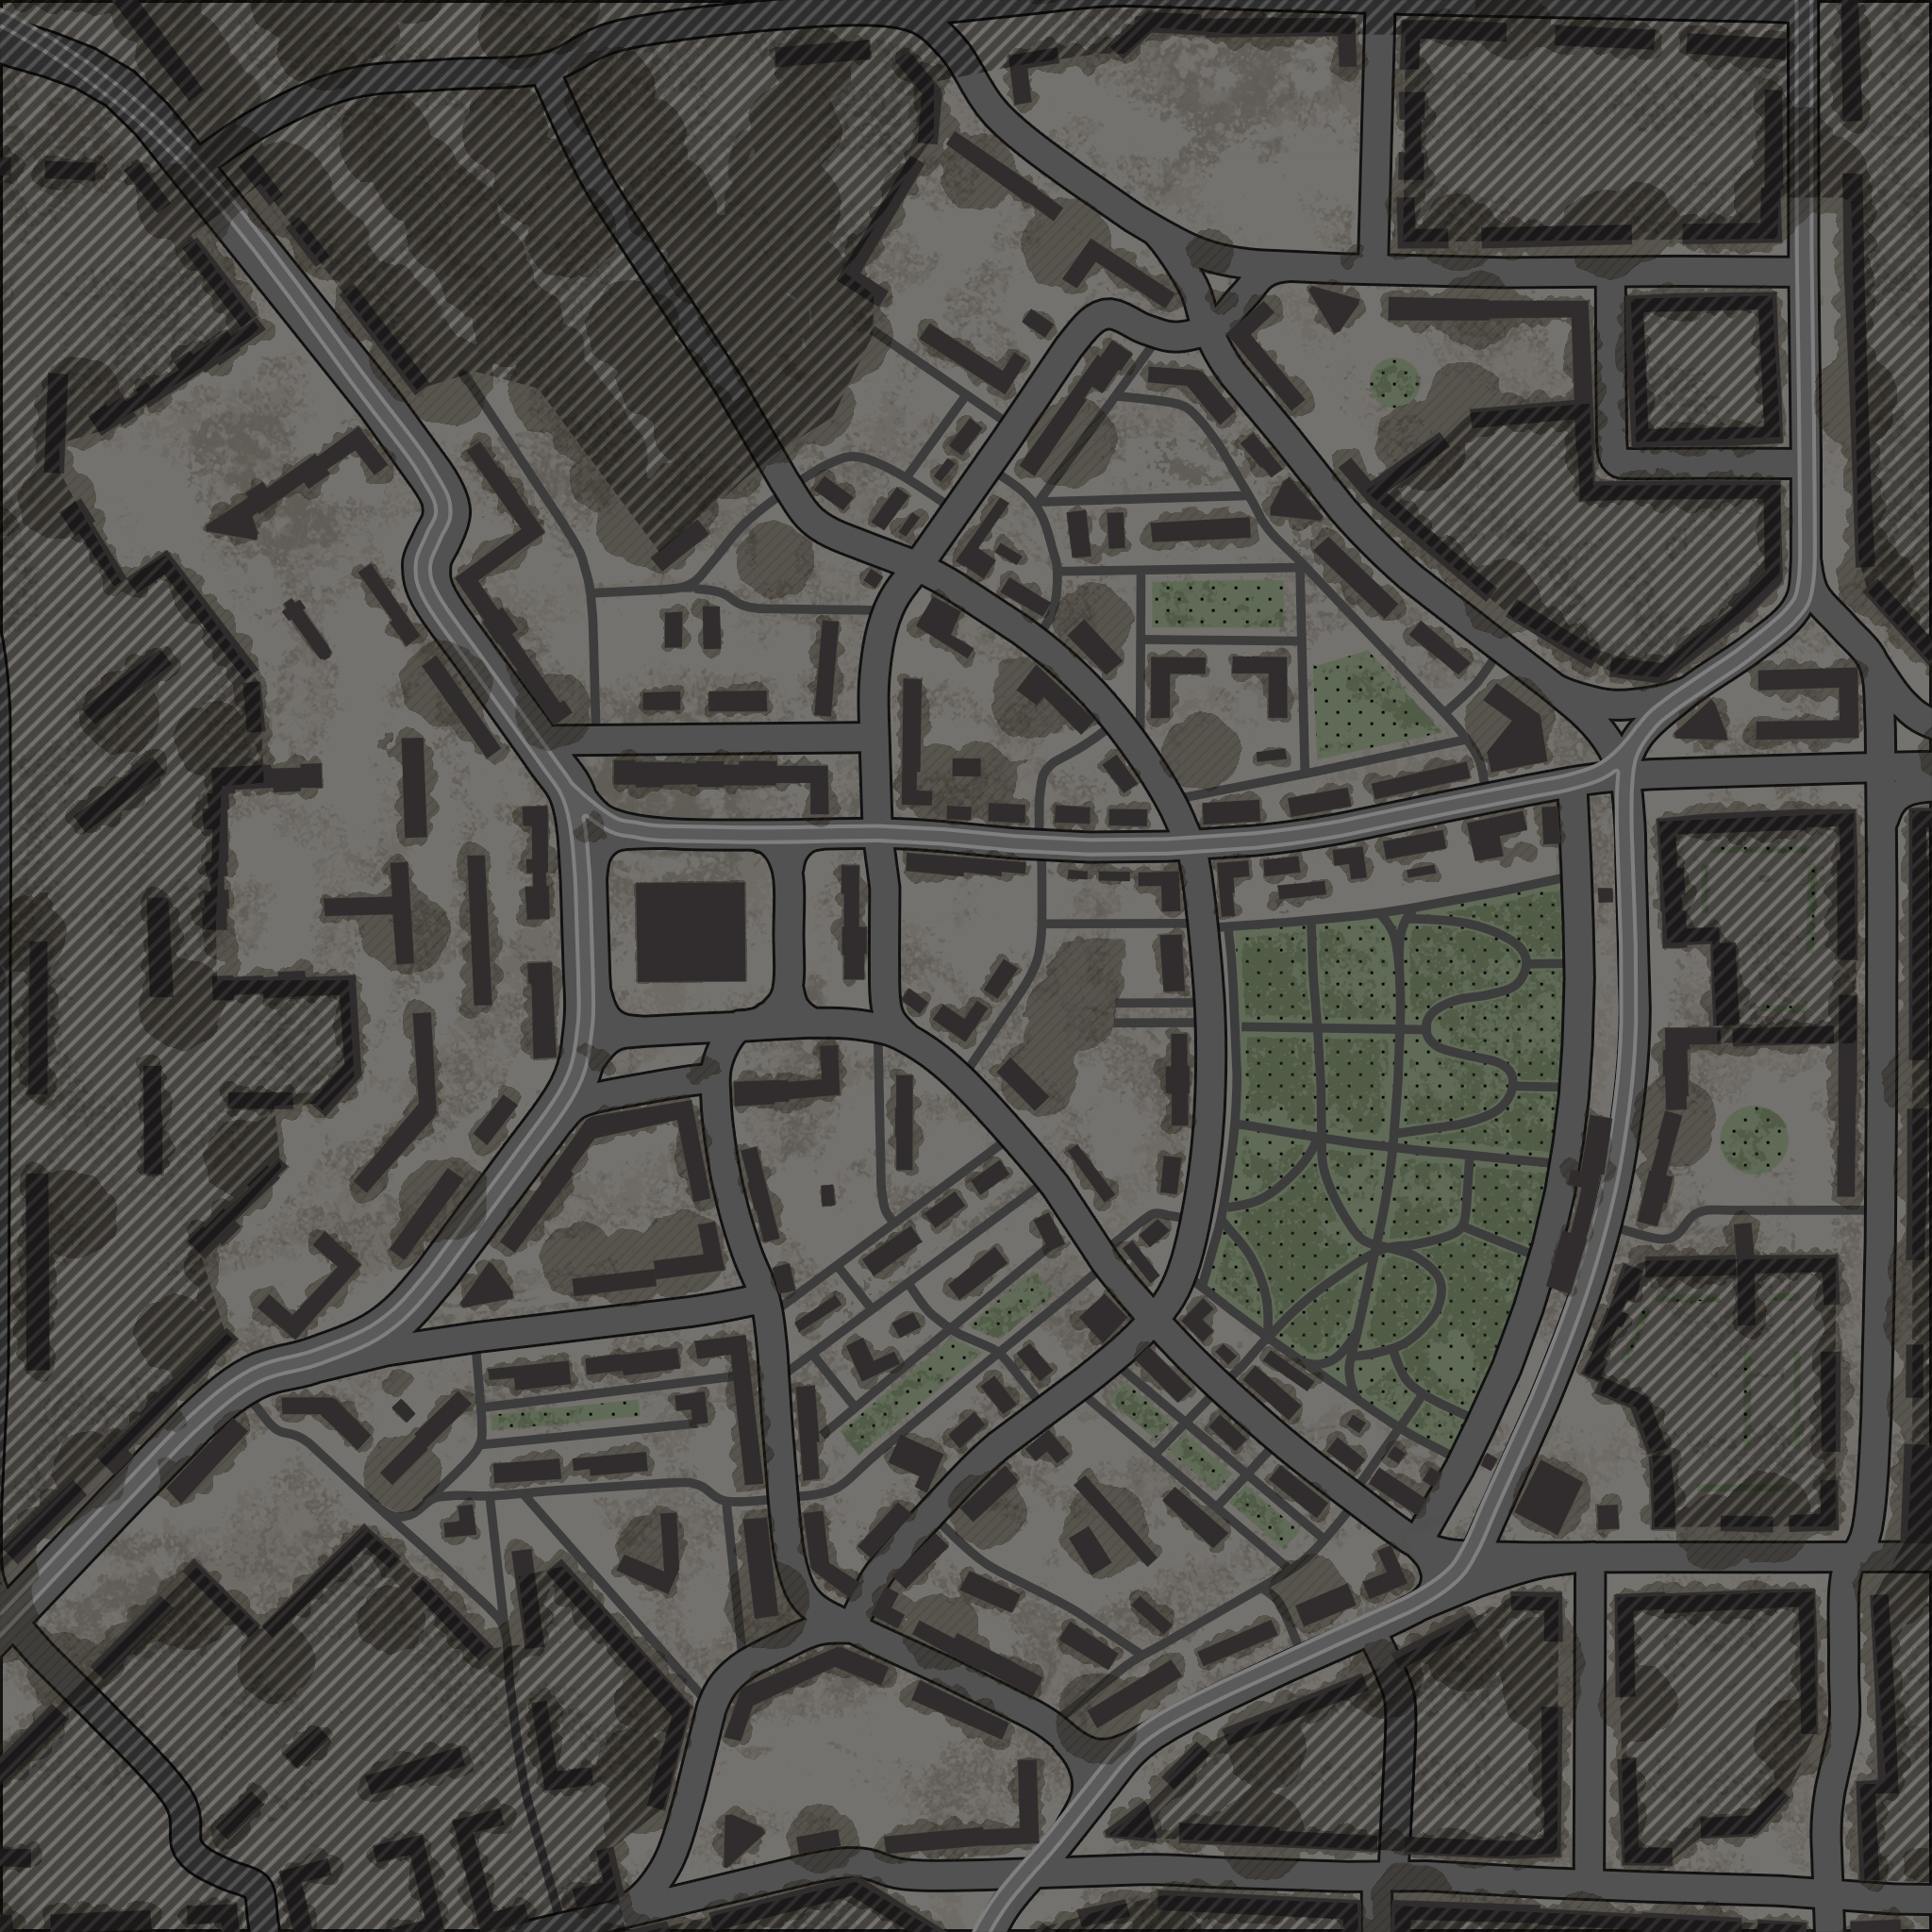
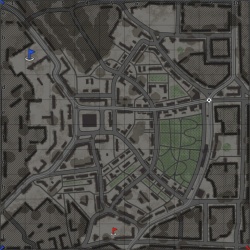
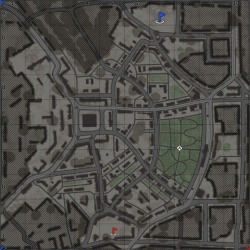
Advance to the Rhine is a ground forces map available in all modes. Being a "generalized recreation" of the city of Cologne, Germany, it was added in Update 1.53 "Fire Storm". The map is very close quarters, with fighting taking place on the city streets of Cologne. The majority of the map is made up of bombed out buildings, with a large tower statue in the west, and a more open park area in the east of the map.
The full tank map is 1.05 km x 1.05 km, making it the smallest tank map in the game. The air battle area is 65km x 65km.
| Game Mode | AB | RB | SB |
|---|---|---|---|
| Domination | 1.05 km x 1.05 km | 1.05 km x 1.05 km | 1.05 km x 1.05 km |
| Conquest #1 | 1.05 km x 1.05 km | 1.05 km x 1.05 km | 1.05 km x 1.05 km |
| Conquest #2 | 1.05 km x 1.05 km | 1.05 km x 1.05 km | 1.05 km x 1.05 km |
| Conquest #3 | 1.05 km x 1.05 km | 1.05 km x 1.05 km | 1.05 km x 1.05 km |
| Conquest #4 | 1.05 km x 1.05 km | 1.05 km x 1.05 km | 1.05 km x 1.05 km |
| Battle | 1.05 km x 1.05 km | 1.05 km x 1.05 km | 1.05 km x 1.05 km |
Game Description
Teams fight for control over the bridges leading to the other side of the Rhine.
Historical Background
The devastated urban environment of "Advance to the Rhine" is based off the conditions of the city Cologne in Germany.
During World War II, Cologne was the Military Area Command Headquarters for the Military District of Münster. The city was subjected to multiple air raids by Western Allies bombers throughout the war. In March 1945, the city was the target of the U.S. First Army in their path towards the Rhine River. It was here that a famous tank encounter occurred that was captured by Signal Corps member Jim Bates. A Panther tank taking position near the Cologne Cathedral gave the Americans heavy resistance, knocking out a M4A1 (76) lead in a tank platoon. Noting the heavy fire from a high-velocity gun, the crew of a M26 Pershing, commandeered by Sergeant Early, maneuvered around the Panther and in a meet-up with both of their guns pointing at each other, the Pershing fired off the first shot, hitting the Panther straight in the hull side. The Pershing fired two more shots as the Panther crew bailed out of their burning tank, ending with a catastrophic explosion of the Panther's ammunition.
The German garrison in Cologne soon surrendered to the Allies around March 7th. This freed up many American soldiers to exploit a new breakthrough discovered at the German city of Remagen, the still-standing Lundendorff Bridge over the Rhine.
Notable Landmarks
- The large tower statue as seen in the map's thumbnail is the landmark in most game modes for a flag point.
Map configuration
| Change Maps by Game Modes | ||
|---|---|---|
| | ||
At present this map has the same layouts in AB, RB and SB.
Domination
| Domination Mode - Map Layouts |
|---|
|
1.05 km x 1.05 km 1.05 km x 1.05 km 1.05 km x 1.05 km |
|
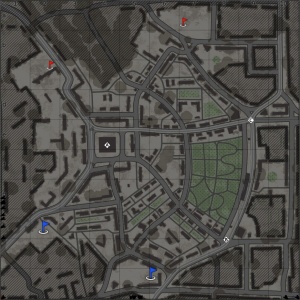
In AB point A is around the statue / column in the west, point B is at the southeast intersection, and C is at the northeast intersection. In RB point A is around the statue / column in the west, point B is at the southeast intersection, and C is at the northeast intersection. In SB point A is around the statue / column in the west, point B is at the southeast intersection, and C is at the northeast intersection. |
Conquest
| Conquest Mode - Map Layouts | |||
|---|---|---|---|
| Conquest #1 | Conquest #2 | Conquest #3 | Conquest #4 |
|
1.05 km x 1.05 km 1.05 km x 1.05 km 1.05 km x 1.05 km |
1.05 km x 1.05 km 1.05 km x 1.05 km 1.05 km x 1.05 km |
1.05 km x 1.05 km 1.05 km x 1.05 km 1.05 km x 1.05 km |
1.05 km x 1.05 km 1.05 km x 1.05 km 1.05 km x 1.05 km |
|
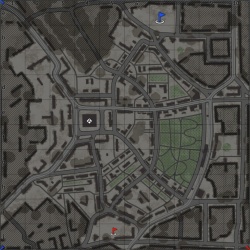
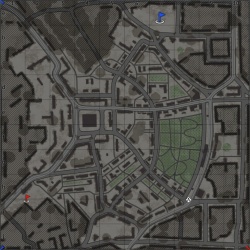
In AB the capture point is around the statue / column in the west. In RB the capture point is around the statue / column in the west. In SB the capture point is around the statue / column in the west. |
In AB the capture point is at the southeast intersection. In RB the capture point is at the southeast intersection. In SB the capture point is at the southeast intersection. |
In AB the capture point is at the northeast intersection. In RB the capture point is at the northeast intersection. In SB the capture point is at the northeast intersection. |
In AB the capture point is in the middle of the park in the east of the map. In RB the capture point is in the middle of the park in the east of the map. In SB the capture point is in the middle of the park in the east of the map. |
Battle
| Battle Mode - Map Layouts |
|---|
|
1.05 km x 1.05 km 1.05 km x 1.05 km 1.05 km x 1.05 km |
|
In AB the capture points are located at the northeast and southeast intersections. In RB the capture points are located at the northeast and southeast intersections. In SB the capture points are located at the northeast and southeast intersections. |
Strategy
The map with its dense urban environment is unfriendly for tank destroyer players, giving them only two options:
- Camping behind strategic corners for long duration of time
- Attempting to advance along the wide and long streets on the far right side of the map and toward the central statue square
Tank destroyers should otherwise always advance in company of medium or heavy tanks, as they can be easily flanked in this map.
The map is a great battlefield for fast, light tanks that can outflank the enemy. Heavy tanks should similarly as tank destroyers beware of being flanked, traveling in groups and using street corners to their advantage.
Airplanes, especially bombers, will have a difficult time in the map against ground targets. The best opportunity for bombers to score hits is when the enemy is capturing a point or when allies designate their location on the mini-map. Flying low to spot enemies is also an option but very dangerous.
The design of the map makes it harder for the team starting in the bottom (south) spawn points.
South Side
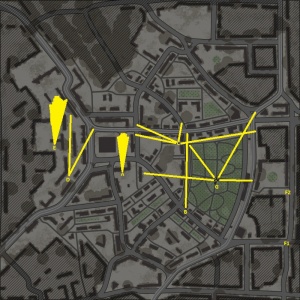
The image on the left showcases key positions that provide many sight lines and can help the South team win the game. Below I will discuss each position:
These are not by any means all available positions. There are dozens others that I haven't included, however most of them are either not applicable to early-mid game or they are too situational, or I've simply forgotten/not known about them.
A: Behind the house that looks past the monument. There are broken windows that you can easily shoot through.
Best fit for lighter vehicles that can occupy this position at the very start of the game.However, it can be taken during a contest at A during mid-game, to try to catch some opponents peeking the angle from behind the monument, or rotating from the right side.
B: Behind the house on the corner of the road crossing the map. You can peek from the building, or if it's destroyed shoot through the rubble.
This is a position for anyone who is driving from the home point and wants to catch some enemies going across the Northern major street. You can also take this position late-game if enemies are likely to go across. Overall, it's safe and can grant you one or two kills in the right situation.
C: At the far corner of the middle section of the map. There are buildings for cover in the front and the right side.
This location can be used by any tanks, but you have to carefully make your way over there, as enemies often push to A using the major road, and you can get flanked from the right. You will sometimes be shot from the front as well, but you are unlikely to receive major damage that way. This position is great, because it allows you to overlook one entrance to A, as well as a big part of the major Northern road and the major road going from North home point to South home point (on the right). Just be attentive.
D: At the corner of the long building in the middle of the passage on the left.
This position is very safe, because it's so close to the spawn. You are overlooking the entrances to A from the left side, although enemies can sneak past you because there is a tram and rubble blocking the sight line slightly. If you have a fast reload, this is a great position for the start of a match.
E: Further than position D, this one is located behind the T-shaped building in the middle of the map.
This position is very common, because it's a point where two teams meet. You can peek around the building, although that is risky, or you can try shooting at the building with medium to large rounds to break it down and shoot through it. Tanks with stabilizers are great here, because you can peek and get your gun ready instantly. Be careful, because enemies will return fire and will try to flank you. If point A is lost, consider retreating to avoid dying from being overrun.
F: These positions are on the very right side of the map, overlooking the long road that's used for flanking.
F1 is safer, but further away than F2. Depending on the situation you can choose either. Overall, these positions are key to stop enemies flanking, but they can be boring to hold because enemies might be unwilling to peek. Well-armoured vehicles (e.g. Ferdinand, Jagdtiger, Ho-Ri Production/Prototype, etc) will find these positions amazing, because you can slowly roll up to the enemy stopping to take shots at those who dare peek you.
G: In the middle and generally around the park in the middle of the map.
This is a very unpopular position, which is surprising because tanks with 10 degrees of depression or more can really take advantage of it. You can peek over the hills, take a shot at an unsuspecting enemy and retreat, perhaps even move to a different position within the park to add confusion. Be careful, though, because you can get flanked from any side, and attack frontally. If you see your teammates dying around you, it's best to retreat to the Southern major road closer to position B.
North Side
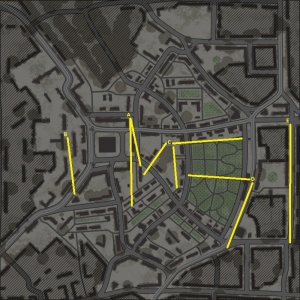
The image on the right showcases key positions that provide many sight lines and can help the South team win the game. Below I will discuss each position:
These are not by any means all available positions. There are dozens others that I haven't included, however most of them are either not applicable to early-mid game or they are too situational, or I've simply forgotten/not known about them.
A: At the corner of the building above A, peeking from the street.
This location is great for any decently fast tank that wants to catch enemies entering into A from the right side. This position can be unsafe during mid-game when enemies have advanced, but before that the only threat comes from the front.
B: At the left side of the map, looking over some rubble with a T-shaped house covering your side.
If you're in a very fast tank you can catch enemies coming from spawn here, although if you're in a slower vehicle you can first go to the left of this position to contest enemies pushing through the far left. Afterwards, you can get into this position to contest enemies respawning and pushing into A again.In this position it's best to have a small tank, or a tank with considerable turret armour, because you're likely to receive fire.
C: At the rubble in the middle of the map, overlooking the middle of the map.
This position is a counter to position C of the South side. You can overlook the major Southern road and the end of the park. If you're confident, you can push across to the line of buildings on the right and shoot into the park or the vertical road. This position is quite exposed, and you should retreat into the Northern houses if opponents push too far.
D: At the building on the major road going past the park on the right side.
This position is risky, but it pressures the enemy. You can shoot into their home point or across the park. You can also drive into the buildings on the right to contest any pushing enemies on the right-most road.
E: The position looking over the long road on the right side.
This position is very popular and it's best for the heaviest vehicles that can take some shots. Usually you would slowly drive up the road to try and take the home point of the Southern side, if there's resistance, help can be requested from teammates who might be at position D. Otherwise, you have to hold it out.
Media
References


