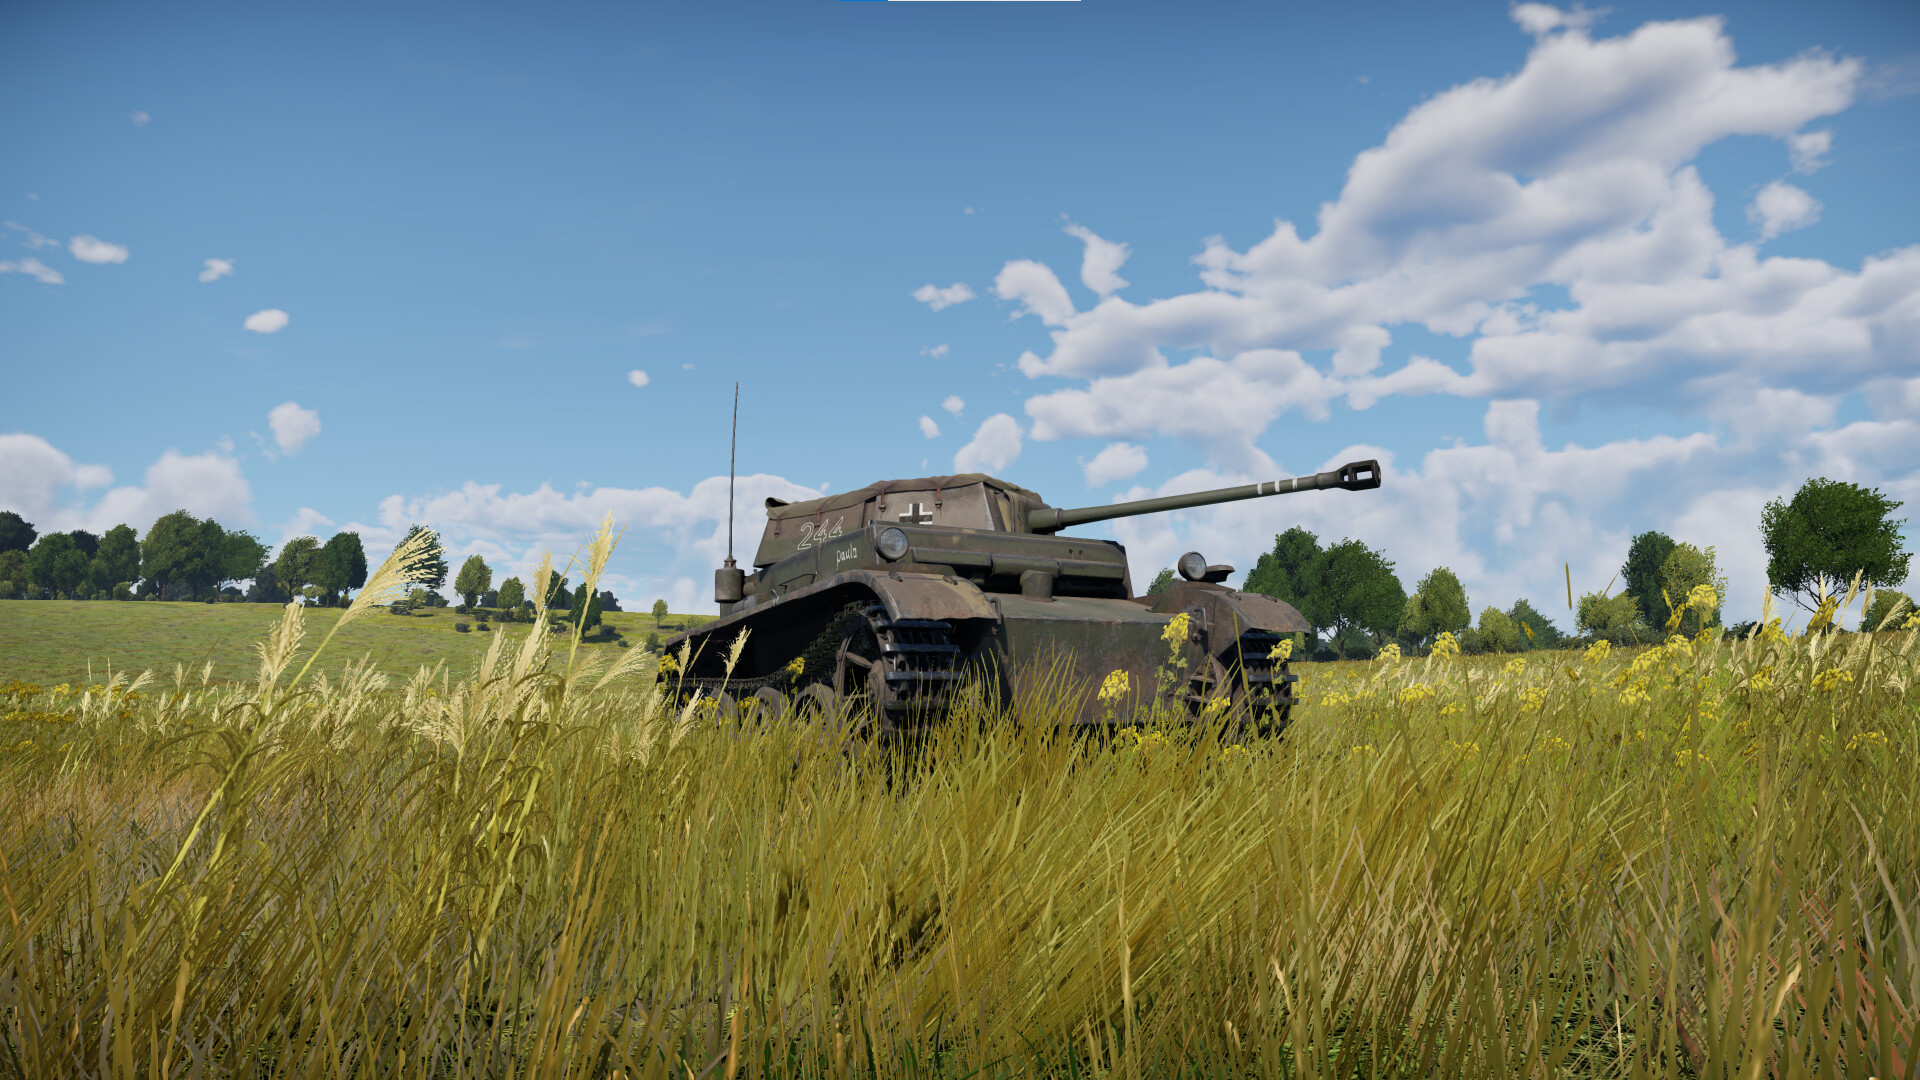
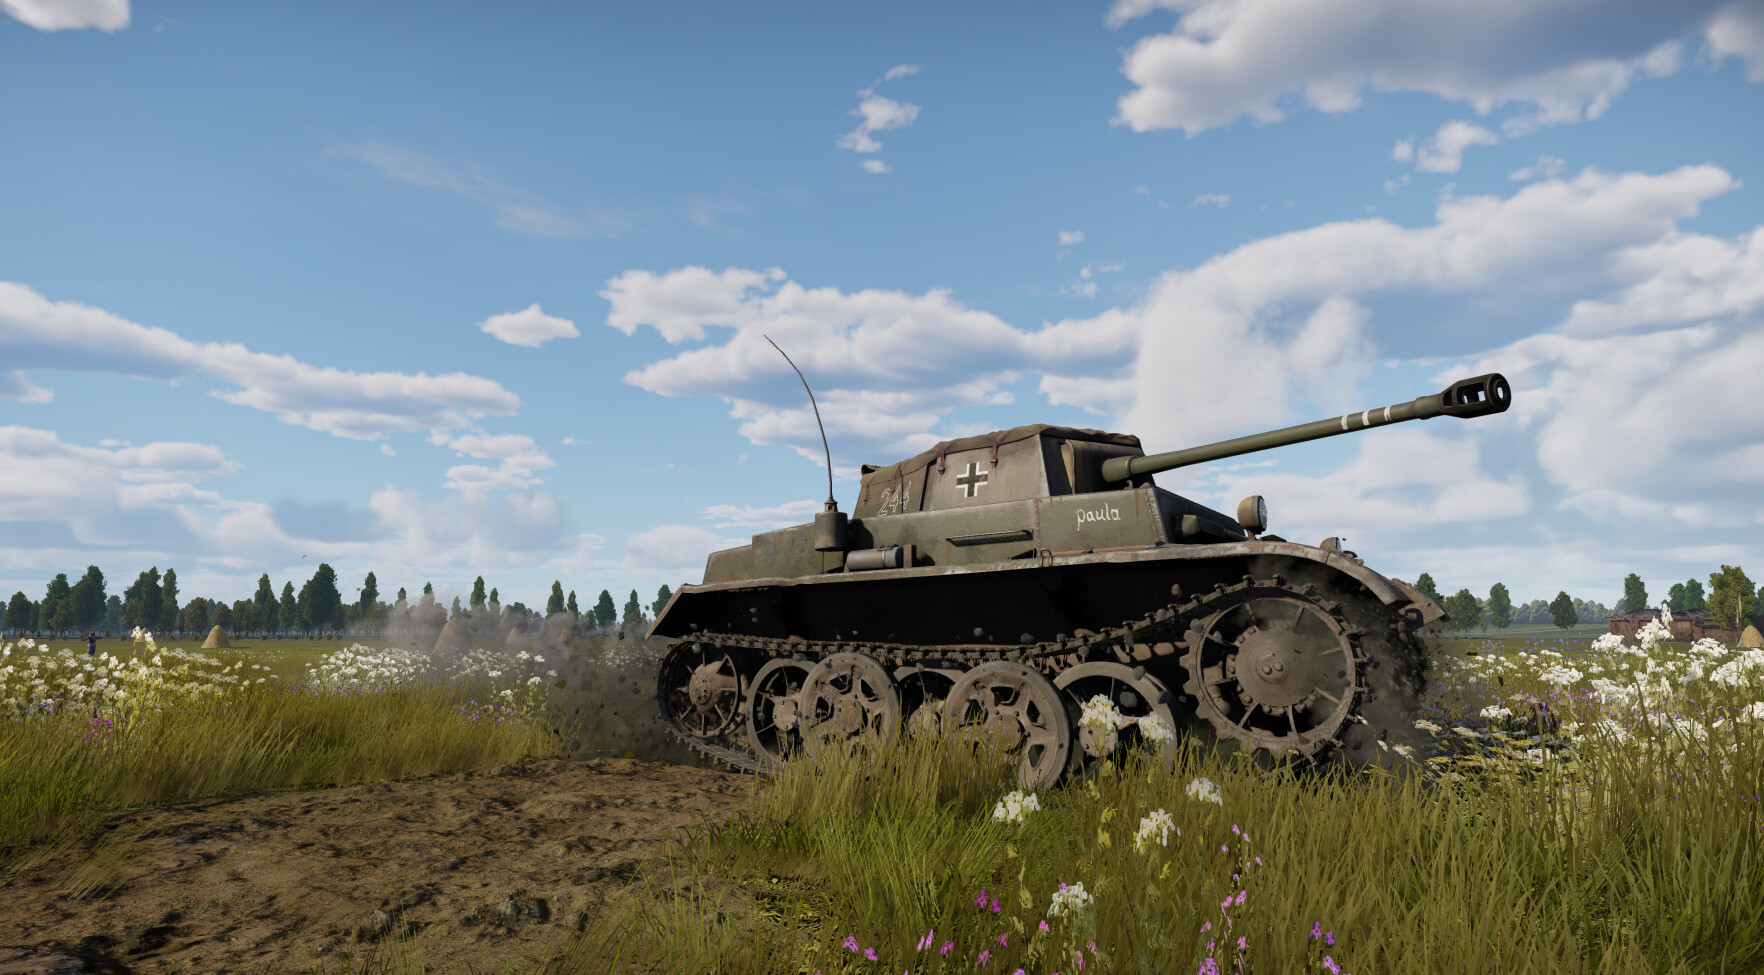
As a fast, nimble yet fragile tank armed with a deadly cannon, the Pz.Sfl.Ic (likely known to veterans under its previous name, the Pz. II H) may prove challenging to master for those used to the more traditional, simpler playstyle of most other tanks at its Battle Rating. Nonetheless, should one put in the effort, they will find this little vehicle to be a true beast, capable of dominating the battlefield and knocking out most targets with a single hit.
| Pros | Cons |
| Powerful armament | Open-top; Poor protection |
| Incredible mobility | No machine gun |
| Scouting available | Poor gun depression of -5 |
The Module Layout
The internal layout of the Pz.Sfl.Ic does not differ too much from other German light and medium tanks at its Battle Rating. Due to its size, the interior of the vehicle is rather spacious, though this should not be interpreted as giving it any notable survivability. The vehicle’s poor armor, combined with the fact that two of its three crew are positioned in the turret means any penetrating hit to the turret will most likely be fatal.
The Pz.Sfl.Ic has three ammo racks, with two racks containing 11 shells each placed on the right side of the central hull, and a third rack containing 20 shells positioned near the engine, but their relatively safe position low in the hull ensures that the vehicle will very rarely be knocked out as a result of their detonation.
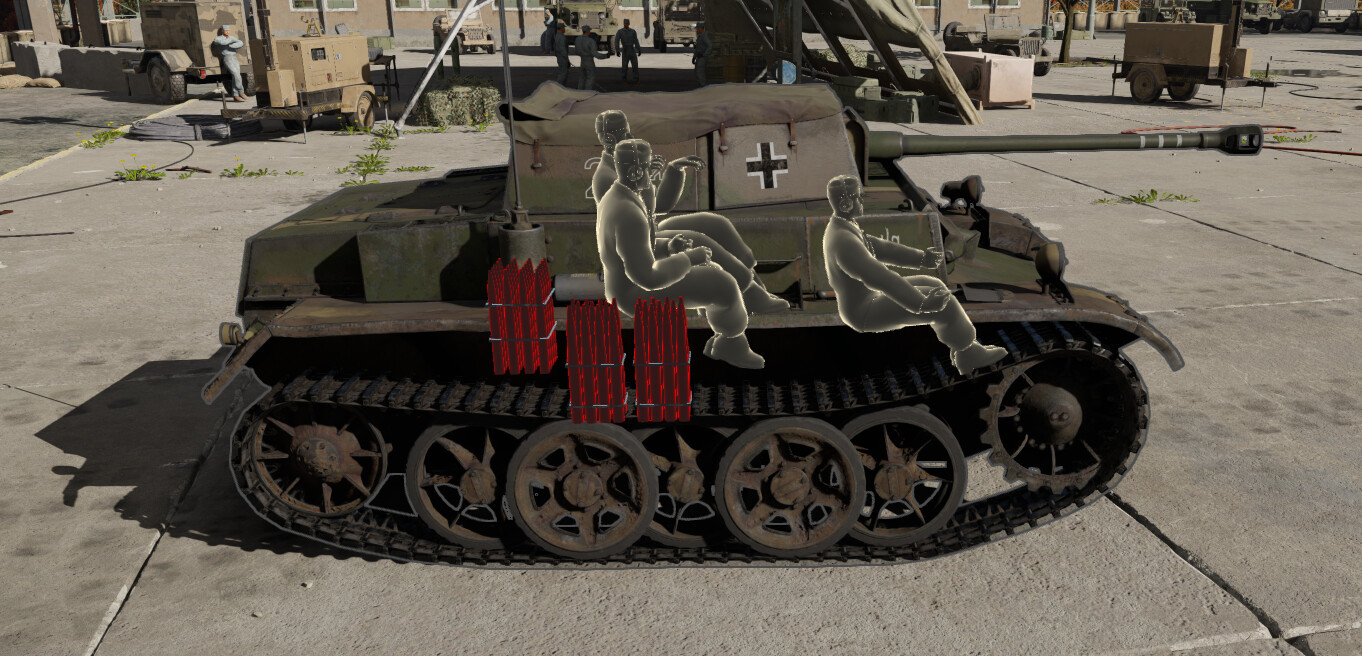
The vehicle’s engine, two radiators and two fuel tanks are concentrated in the rear half of the hull. The transmission is placed at the very front of the hull, and extends throughout the entire length of the vehicle before connecting with the engine in the back. The turret is open at the back, contains no ammunition, and is mostly divided by the rather large gun breech, the size of which will occasionally save one of the two crew members housed in the turret due to it absorbing much of the shrapnel headed towards the second crew member. Do note, however, that one should not rely on enemies not one-shotting you on turret penetration as it is extremely risky with the low crew count of this vehicle.
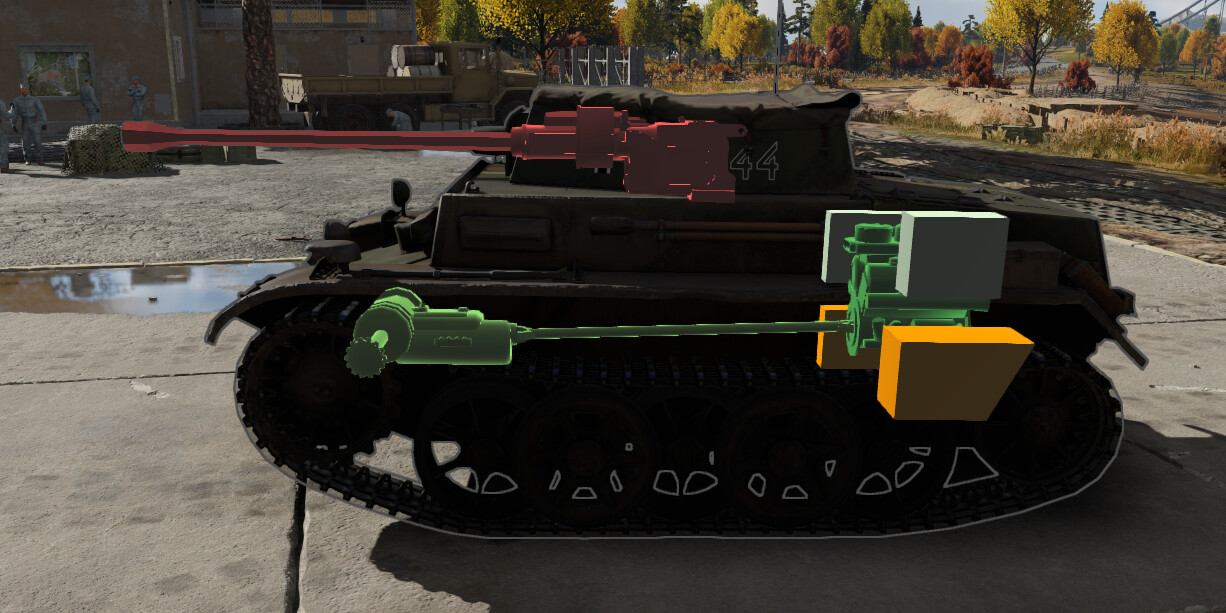
One may also notice an interesting and potentially useful aspect of the Pz.Sfl.Ic’s module layout, that being the large empty space above the transmission and next to the driver’s seat, on the right hand side of the frontal hull, containing no modules and no crew positions.
The player could utilize this absence of modules by baiting enemy players to fire at that portion of the tank (such as by exposing only the right half of the hull from behind cover), which would hopefully result in the enemy shot harmlessly passing through the hull and exiting out the side of the tank, having caused no significan damage. This is a very risky tactic, however, as APHE shells may activate their fuze and detonate inside the tank after penetrating the frontal armor and before managing to exit the tank, very likely resulting in a loss of the vehicle. One should also not attempt this against enemies that are likely to use HE ammunition, as the round will simply detonate on impact with the Pz.Sfl.Ic’s frontal armor and knock out the tank with overpressure.
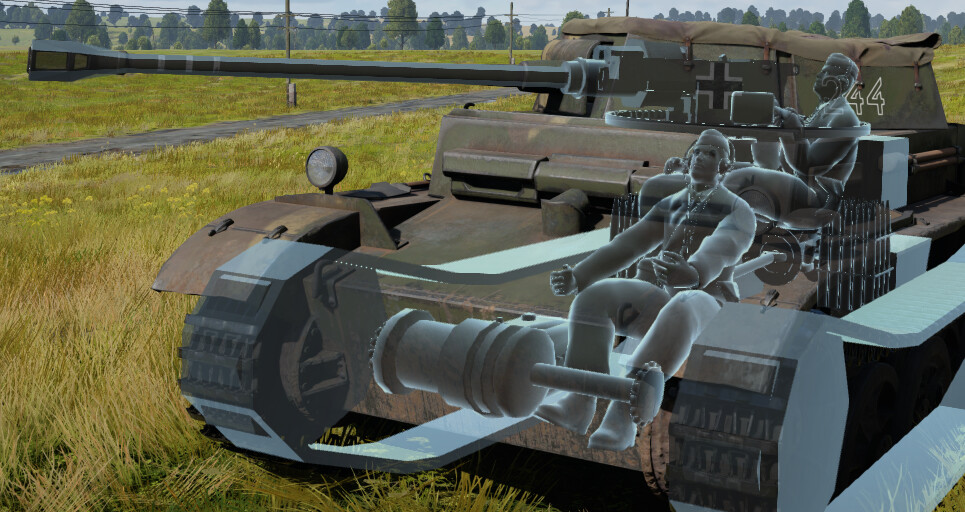
With all these risks, one may question the point of using this strategy, and indeed it is not really worth attempting during regular gameplay. But if one is looking to spice up their playstyle or just to make the game more interesting, it is a fun thing to try and very satisfying to succeed at. It does make baiting shots slightly more doable if you’re looking to do so, although the empty space only being present on the right side of the vehicle makes the vehicle 'right handed' in such encounters (this tactic is only usable if you’re taking a left turn, exposing your right side first), so do take note of what terrain you’re on when attempting this.
The Armor Layout
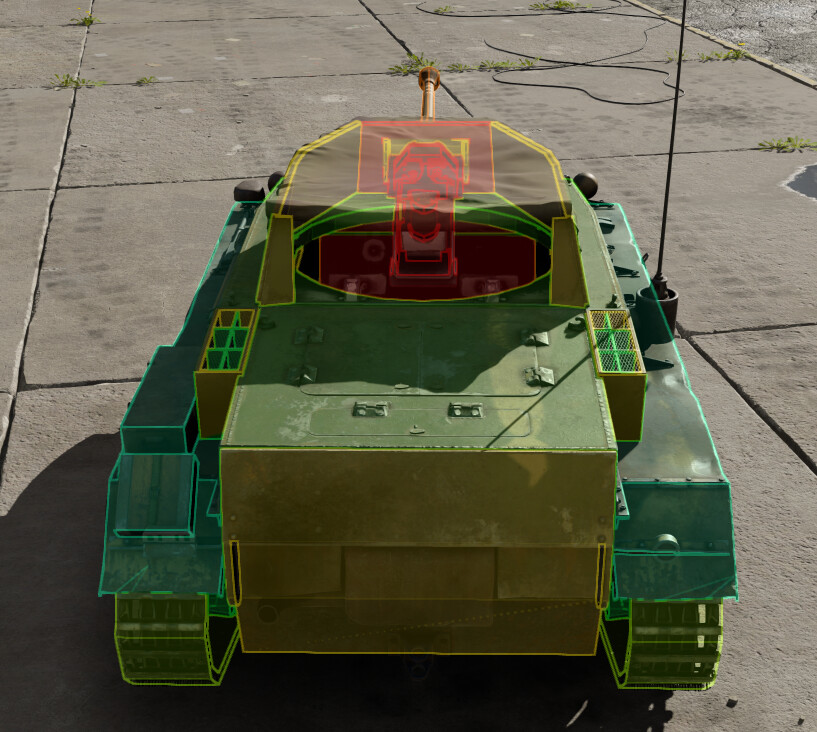
The Pz.Sfl.Ic’s armor protection is generally average for light tanks at low battle ratings, meaning it is generally sufficient for stopping high-caliber machine gun rounds but not much else. The tank overall lacks angled plates, resulting in effective armor values not differing significantly from their base thickness. Frontal armor thickness does not exceed 30mm, and the sides as well as rear of the vehicle are protected by a mere 20mm of armor, barely enough to stop high-caliber machine gun rounds at ranges of around 3-400 or so meters. The roof of the hull is only 10mm thick, leaving the tank vulnerable to strafing attacks, but the vehicle has a second, much larger, vulnerability to strafing which is covered below the following picture.
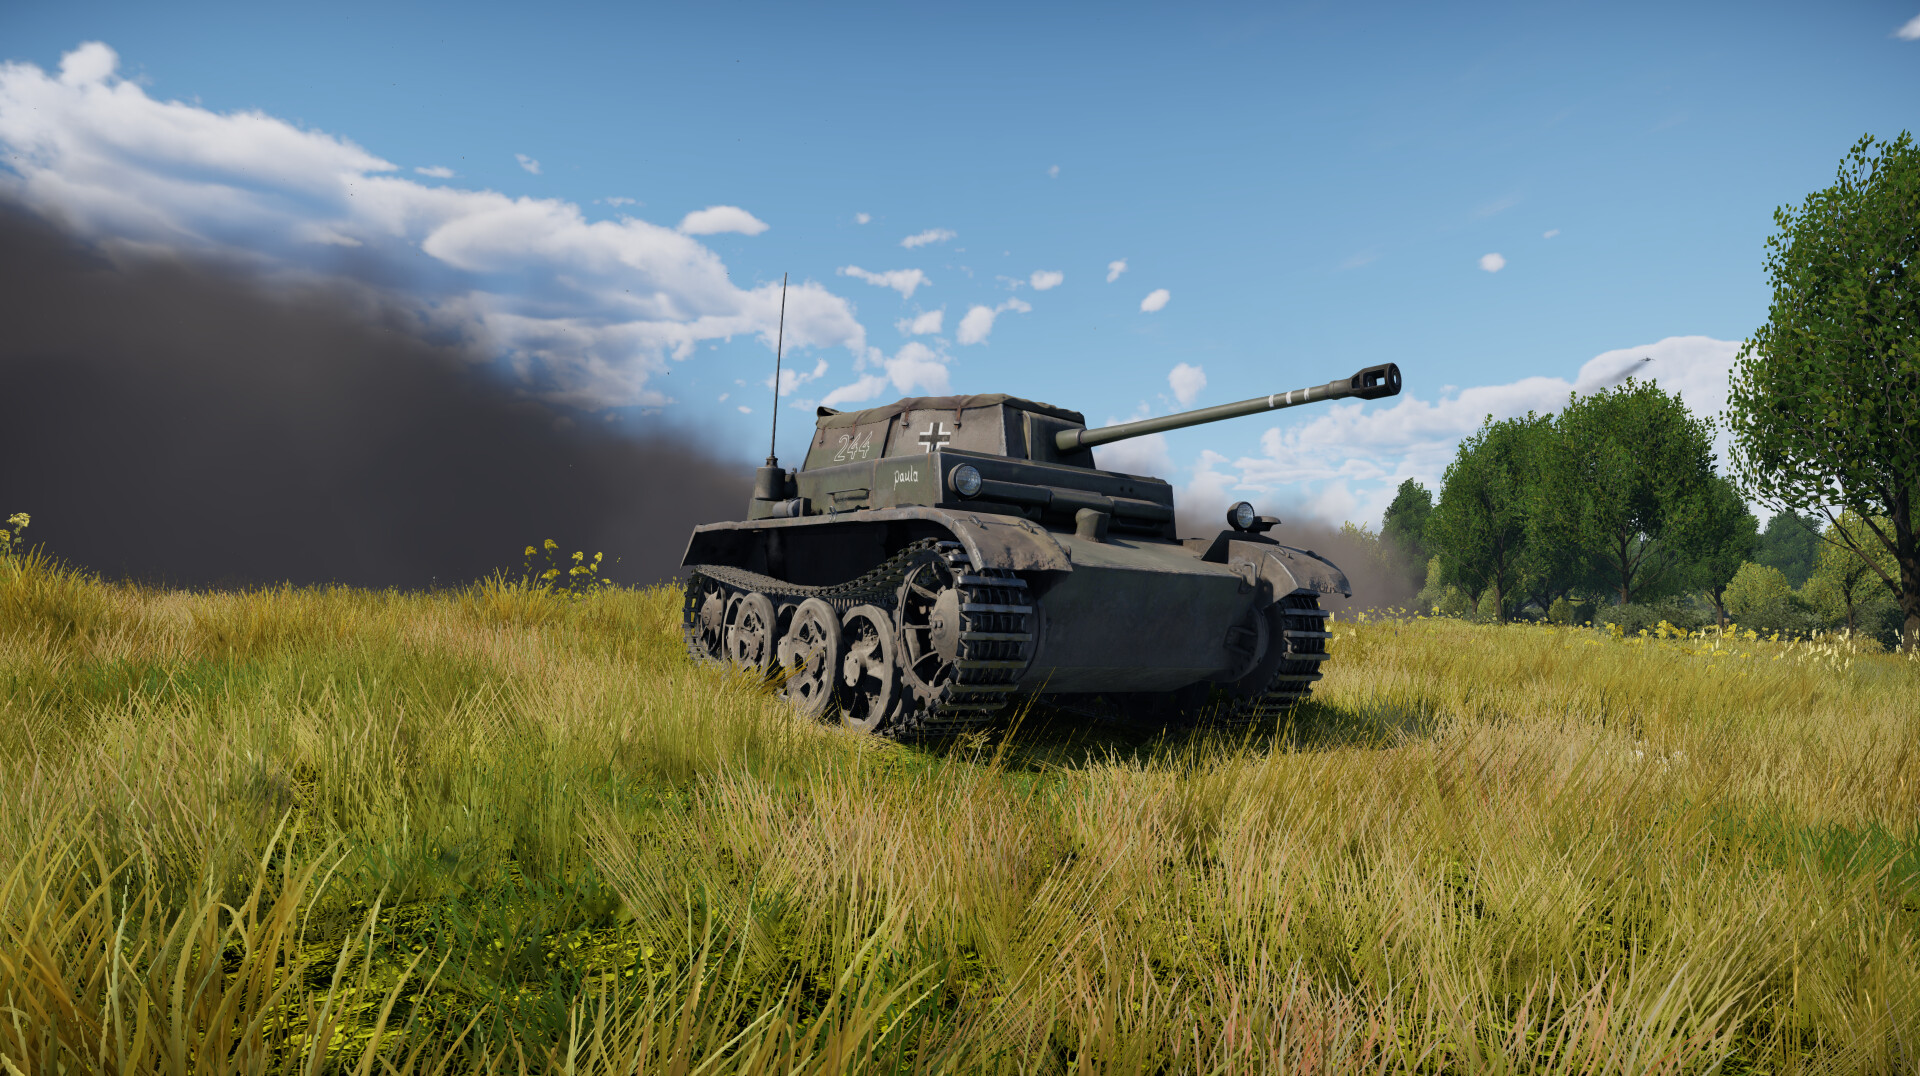
The biggest flaw of the Pz.Sfl.Ic is that the vehicle is open-topped. While open-topped vehicles are not uncommon at the Pz.Sfl.Ic’s Battle Rating, the player may at first glance mistake the tarp on the turret for a roof. While the tarp does provide the crew with safety from the rain, it sadly offers no protection against shrapnel and machine gun rounds, which are easily able to punch straight through. This renders the Pz.Sfl.Ic highly vulnerable to artillery, high-explosive (HE) rounds and strafing from aircraft MGs. A single HE hit anywhere on or near the vehicle will almost always overpressure it, knocking out your unprotected crew in an instant, while aircraft MGs, bombs and especially rockets will easily overpressure you just the same with near misses. The easiest way to think about this is, if you’re being shot at, you are in life-threatening danger and should relocate immediately!
As such, it is highly recommended to always remain on the move and relocate after every kill, as enemy players you knock out will know where you are and may seek to retaliate with artillery or bombs. Relocating often is sure to prevent that, and thus significantly increases your chances of surviving, much to the frustration of the enemy team.
Another thing to keep in mind is that the vehicle’s lack of armor protection at the rear of the turret leaves it vulnerable to machine gun fire from ground vehicles, assuming they can get behind the Pz.Sfl.Ic. Granted, such flanking will rarely be necessary for knocking out a poorly-armored light tank, but the player should nonetheless remain vigilant as even a seemingly disarmed vehicle with a damaged barrel or breech can knock out the Pz.Sfl.Ic by getting behind it and firing its machine gun at the back of the turret.
It is also recommended to keep an eye out for vehicles with .50cal (12.7mm) or heavier MGs, as at close ranges they can go through your side armor (both hull and turret) without much fuss. Some of these vehicles, even when crippled with a penetrating shot, may still be able to fire their .50cals at you in retaliation until their crew finishes swapping out — so make sure to either aim for the kill, or still stay vigilant and avoid return fire if you can’t secure that kill.
The Mobility
The Pz.Sfl.Ic’s mobility can only be described as excellent. Thanks to its high horsepower per tonne (HP/t) ratio of 19, it accelerates very quickly, and is easily able to reach its top speed of 56 km/h on level ground. The turret’s traversal rate is good, ranging from 17.5 to 25 degrees per second depending on the crew’s level. It also has a very fast hull traverse speed, capable of doing a full 360 degree rotation in under five seconds.
Its reverse speed leaves much to be desired, as the vehicle is incapable of exceeding 10 km/h when moving backwards. Nonetheless, the overall excellent mobility makes the Pz.Sfl.Ic well-suited for rapid flanking maneuvers, which is made even easier and more satisfying thanks to its highly potent armament.
The Armament
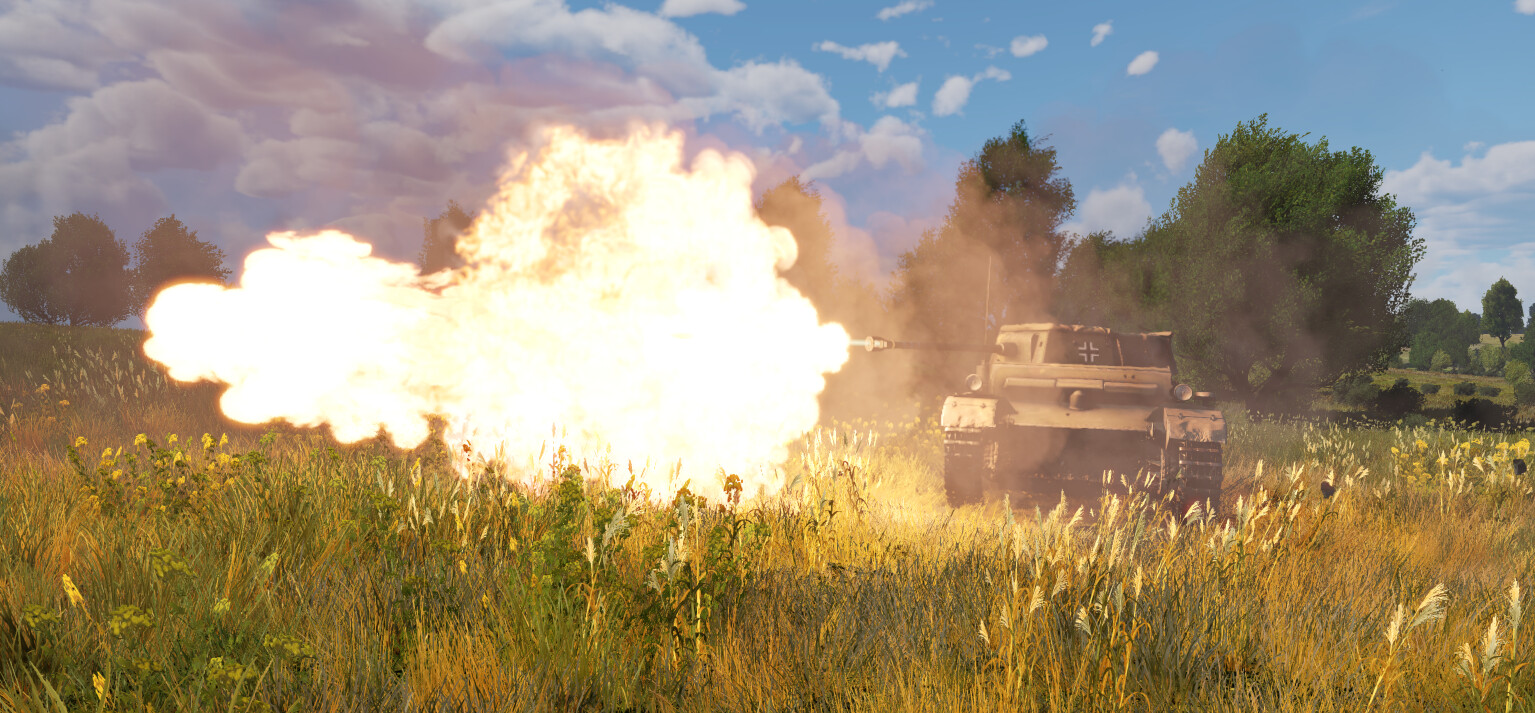
The Pz.Sfl.Ic is equipped with the 50mm PaK38 cannon. It boasts impressive penetration values for its tier, high shell velocity and rather negligible projectile drop (even more so when using APCR rounds), which makes aiming rather simple even at longer ranges. It is equipped with three types of ammunition, that being Armor-Piercing Capped (APC), Armor-Piercing Composite Rigid (APCR) and High Explosive (HE). It is recommended that the player mostly use the PzGr 39 APC shell thanks to its high explosive filler of 28.9 grams and adequate penetration, both of which ensure that most successful hits will result in a kill.
The APCR rounds are admittedly rather underwhelming and largely redundant, as there are extremely few situations in which they would prove in any way superior to the reliable APC rounds. The HE rounds, on the other hand, can prove rather useful due to the Pz.Sfl.Ic’s lack of a machine gun, making it one of the only reliable means of quickly dealing with such vehicles as the Chi-Ha LG. Thus, it is advised that the player bring at least a couple HE rounds in addition to the full APC complement, but bringing any APCR rounds is generally not recommended. You would generally be better off retreating and repositioning if you see a target you can’t deal with frontally, rather than risking exposing your position to take a potshot that might not even do meaningful damage. You can also completely skip the HE complement if you feel that the time wasted when switching shell types is too precious, as taking a second shot will often be just as effective, though if you’re trying to hit a semi-exposed target HE will still be your best pick.
Notable Targets
The Pz.Sfl.Ic can rather easily dispatch most adversaries around its battle rating, but some heavier or more unusual vehicles could prove a challenge for the user. This section thus seeks to name some of those opponents and provide some suggestions for the best way to hand them an express ticket back to the hangar.
The KV-1 (L-11)
While thankfully only encountered in full uptiers, you may occasionally encounter the KV-1(L-11). Rather easy to knock out from the sides and rear, a frontal engagement is entirely different. It may at first be tempting to fire at its neat, tempting flat frontal plate, but that is in fact a major mistake, as the Pz.Sfl.Ic is almost completely incapable of penetrating the front of the KV-1's hull with any shell, including APCR. Instead, should the user find themselves facing the heavy tank frontally, they may aim at the turret instead. Not the smooth, curved area around the gun mantlet though, but the large flat plate surrounding it, as seen in the image below.
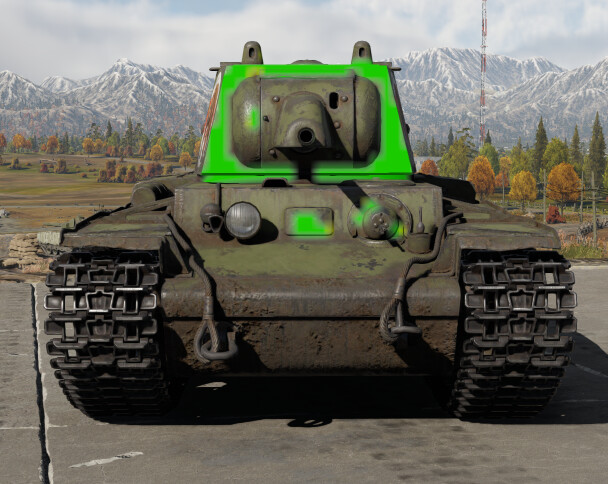
Managing to land a hit on that plate will usually result in a successful penetration and one or two members of the KV-1's turret crew will be knocked out. The Pz.Sfl.Ic is unfortunately rarely capable of knocking out all three of the turret crew, thus the user should try to aim at the right side of the plate, behind which the gunner sits. This ensures the enemy gunner is knocked out with the potential possibility of also knocking out the KV-1's commander. While insufficient to knock out the heavy tank, managing to incapacitate it in this manner will make it a considerably easier target for follow-up shots, or a significantly lesser risk while the Pz.Sfl.Ic retreats.
Additionally, if the user cannot fire at the turret or wants to risk a harder shot for more effect, they can attempt to hit the driver’s observation port on the very front of the KV-1's upper plate. While more challenging to hit, successfully penetrating this area with the PzGr 39 shell will have devastating effect on the KV-1's crew and internal modules, often knocking out 3 or even 4 of the vehicle’s crew, either crippling it or taking it out of the fight entirely. The turret can thus be considered the “safer” target, while the hull vision port should be seen as a high-risk, high-reward alternative.
The M4 Sherman
Another downtier menace to be wary of is the M4 Sherman. More specifically the welded hull variants, including the M4A3 (105), due to their considerably improved protection compared to the earliest cast hull (“round”) versions. This is likely to be a more common enemy than the KV-1, as multiple nations have Sherman variants around the Pz.Sfl.Ic’s Battle Rating and the 105mm howitzer variants are only .3 BR points above it. Similarly to the KV-1, piercing the M4's frontal armor requires some precise aiming at its weak points. The primary weakpoint, as well as likely the one easiest to spot during the heat of battle, is the universal Sherman weakspot of the hull machine gun port, though the user has other options. A more detailed map of where the user can penetrate the M4 with the PzGr 39 shell can be seen below.
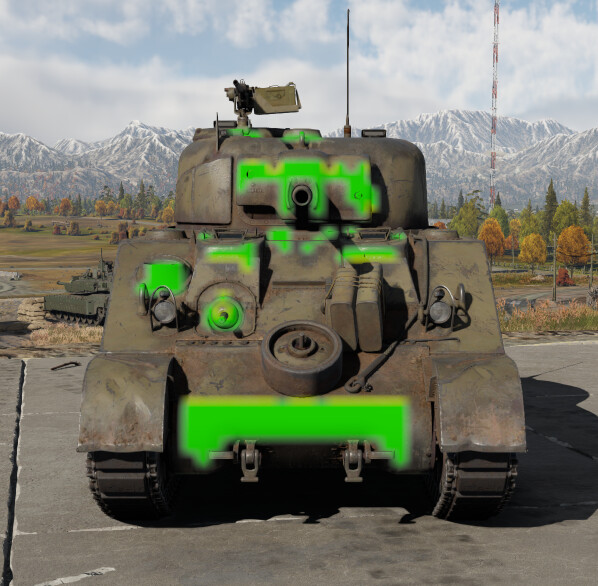
As one can see, aiming at the upper half of the gun mantlet is also a viable option, as doing so is likely to knock out the Sherman’s turret crew or at the very least damage their gun breech, either way rendering it unable to fight back while the player aims their follow-up shots. Aiming at the highlighted area at the bottom of the frontal plate is generally not recommended, as doing so is unlikely to damage anything other than the M4's transmission. This would immobilize the enemy, but they would be able to return fire during your reload. Considering the Pz.Sfl.Ic’s rather squishy nature, this is a risk best avoided.
Another spot you can potentially go for is the hull corners, especially moreso for earlier (M4A1) variants. As the hull corners are rounded and have poor protection, this can often cripple a Sherman. For the later welded hulls, the lower side hull near the front of the vehicle is still a thinly protected part of the tank and if the Sherman is overangling shooting this area at close range can generally send a Sherman packing fairly consistently.
The T-34 (1940)
The T-34 (1940) is the only T-34 variant that the Pz.Sfl.Ic can meet in its own BR range. In a full uptier, of course, which somewhat unsurprisingly appears to be a trend with these difficult targets. Either way, while similar in some ways to the KV-1, the T-34 nonetheless has its own quirks that deserve a mention. The similarities first, however — the turret being the primary weakspot, just like on the KV-1. Indeed, the T-34's turret weakness is even easier to exploit due to the large and thin turret cheeks providing a much easier target than the KV-1's flat plate. Furthermore, the T-34 (1940)'s turret houses only two crew members, as opposed to the KV-1's three, making it more likely for the player to eliminate the entire turret crew with a single shot.

Similarly to the KV-1, the T-34's frontal plate is largely safe from the Pz.Sfl.Ic’s shells, although a notable and consistent weakspot remains — that being the joint between the upper and lower frontal plates, as seen on the image above. This weakspot is difficult to hit as visually it stands out very little from the rest of the tank, making it hard to spot at ranges. Like the KV-1's hull observation port, however, it can be considered a high-risk, high-reward target, as successfully hitting it is likely to result in the T-34 being knocked out from a single shot.
Honorable Mentions
This short section dedicates a few sentences to other vehicles which, while generally not difficult to knock out, have a few particular weakspots that the player would find quite handy. This section is thus less of a guide, and more of a couple tricks for the player to take advantage of in order to knock out the enemy vehicles much faster than otherwise.
The T-28
The mention of this vehicle as a notable enemy may come as a surprise, considering how during its construction the Soviet Union was experiencing a shortage of steel and apparently only cardboard was available. Nonetheless, its machine gun turrets are capable of absorbing the Pz.Sfl.Ic’s shots, occasionally making knocking it out a chore. A simple way of fully incapacitating the entire vehicle in a single hit, however, is to aim at the driver’s position between the machine gun turrets. This will almost always knock out the T-28's driver and the entire main turret crew. The machine gunners will survive, but will be unable to do much except watch as your follow-up shot finishes the job without any risk of return fire.
LVT Family
The LVT’s amphibious capabilities seem to rely on most of the vehicle being empty. While this renders it a large target, it can also make knocking it out a chore for vehicles with lower gun calibers such as the Pz.Sfl.Ic’s 50mm, especially if the LVT is standing sideways to the player. Instead of firing two or even three shots into various areas of the LVT in order to gradually knock out its crew, however, the user may take advantage of the LVT’s very thin armor protection by firing at it with its HE shell. A single HE shot fired roughly at the LVT’s center of mass is very likely to result in an overpressure that knocks out much of the LVT’s crew, often enough to knock it out of action. This proves to be an easy and less headache-inducing method of eliminating these large targets that also does not require precise aiming or knowledge of the LVT’s internal layout.
Summary — Why Buy It?
The Pz.Sfl.Ic’s uniqueness has admittedly somewhat diminished with the recent addition of the Pz.Sp.Wg.P204(f) KwK 39/1 (Wow, that’s a mouthful!), as the niche it previously occupied in its BR bracket is now shared by a tech tree vehicle. Alternatively, it can be looked at as an alternative playstyle to the Pz. III J1 that trades two of its crew members and some of its armor for a significant increase in mobility. For a very long time, it was one of few vehicles at its BR bracket to fulfill the role of what could be called a “fast glass cannon”, boasting excellent mobility and impressive firepower in exchange for being lacking in essentially every other department.
With the arrival of the aforementioned armored car equipped with the same armament, comparable mobility, and a very convoluted name, the Pz.Sfl.Ic has become more of a sidegrade to that vehicle. It has tracks and a considerably stronger engine, granting it better acceleration, offroad mobility, and all other benefits of a fully tracked suspension, but in return it has a notably lower max speed, worse gun depression, and loses more speed when turning. While unfortunate for the Pz.Sfl.Ic, the addition of the Pz.Sp.Wg.P204(f) KwK 39/1 grants the user an excellent opportunity to experiment with the vehicle’s playstyle before deciding whether to purchase it. Players who enjoy that style of gameplay will undoubtedly enjoy the Pz.Sfl.Ic as well.
Regarding the best way to play it, all the aforementioned aspects point towards a single preferred playstyle — that of a flanking, stealthy sniper. The weak armor protection and low crew count make the Pz.Sfl.Ic’s odds of survival rather low after being spotted or caught in the open, but the superb mobility and good firepower give the user all the tools they need to make sure that doesn’t happen. The Pz.Sfl.Ic shines when finding an unexpected flank from which to attack oblivious enemy tanks from a distance, and highly rewards such a strategy.
That is naturally not the only way the vehicle works — the player may find some success in close-quarters urban combat thanks to the PaK38 performing just as well against targets 50 meters away as it does against ones 500 meters away, but pulling off such risky playstyles takes considerable skill and rarely utilizes the Pz.Sfl.Ic’s qualities to their fullest extent. Nonetheless, as a high-risk, high-reward little tank, it offers its user a range of playstyles to choose from and plenty of room to experiment. While this article may recommend the role of a flanking sniper, that is but one of the many ways in which the user can dominate the battlefield while in command of the Pz.Sfl.Ic.