


The Nakajima Ki-43 Hayabusa was a Japanese Army fighter from World War II that was overshadowed by the legendary A6M Zero naval fighter. While the Zero was the most widely produced Japanese fighter and was flown by the Empire of the Rising Sun in the most famous aerial battles, it was exclusively the workhorse of the Imperial Japanese Navy. In contrast, the Hayabusa bore the brunt of the war in the Imperial Army, shedding the blood of Allied pilots on land. However, the Army fighter met an even sadder fate than its naval counterpart: at the start of the war, the Ki-43 was not yet a mass-produced fighter for the Army Air Force. By the end of the war, it had become obsolete and was used only as a flying bomb.
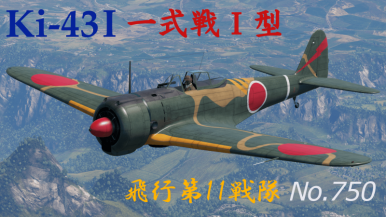
The Ki-43's history began with the Ki-43-I, the first production version of the fighter. Development of the Ki-43-I began in late 1937 as a continuation of the concepts of Nakajima’s previous Army fighter, the Ki-27, but with improved speed and climb rate. The prototype made its first flight on December 12, 1938. Despite nearly meeting the military’s specified flight performance requirements, pilots gave the new aircraft negative reviews. As a result, the fighter, designated Ki-43-I, was not officially adopted for service until early 1941, after extensive refinements and fairly significant design changes. Between 1941 and 1942, approximately 750 Ki-43-I aircraft of several variants were built. While they performed well initially, several shortcomings led to the development of a more advanced version, the Ki-43-II.
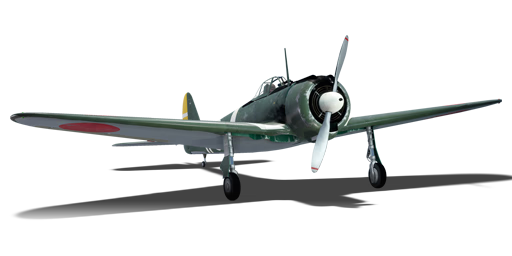
The Ki-43-I was introduced in Update 1.43. In terms of its characteristics and capabilities, the Ki-43-I is rightly considered to be a full-fledged Japanese fighter. It clearly demonstrates all the key features of Japanese fighters, including good—and often excellent—maneuverability. However, this was achieved at the expense of top speed and survivability. The Hayabusa possesses all three of these characteristics, making it one of the best dogfighting aircraft.
flaps
flaps
flaps
brake
| Belt | Belt filling | Armor penetration (mm) at a distance: | |||||
|---|---|---|---|---|---|---|---|
| 10 m | 100 m | 500 m | 1000 m | 1500 m | 2000 m | ||
| T/AP/IAI/AP/I | 13 | 12 | 7 | 3 | 2 | 0 | |
| T/AP/IAI/AP | 13 | 12 | 7 | 3 | 2 | 0 | |
| T/T/T/AP | 13 | 12 | 7 | 3 | 2 | 0 | |
| I/AP/AP/AP/IAI | 13 | 12 | 7 | 3 | 2 | 0 | |
| Belt | Belt filling | Armor penetration (mm) at a distance: | |||||
|---|---|---|---|---|---|---|---|
| 10 m | 100 m | 500 m | 1000 m | 1500 m | 2000 m | ||
| AP-T/AP/HEF-I | 21 | 19 | 13 | 7 | 4 | 3 | |
| AP-T/HEF-I/AP/HEF-I | 21 | 19 | 13 | 7 | 4 | 3 | |
| AP-T/HEF-I/HEF-I/HEF-I | 21 | 19 | 13 | 7 | 4 | 3 | |
| AP-T/AP/AP-T | 21 | 19 | 13 | 7 | 4 | 3 | |
| AP/HEF-I/HEF-I/HEF-I | 21 | 19 | 13 | 7 | 4 | 3 | |
| Belt | Belt filling | Armor penetration (mm) at a distance: | |||||
|---|---|---|---|---|---|---|---|
| 10 m | 100 m | 500 m | 1000 m | 1500 m | 2000 m | ||
| T/AP/IAI/AP/I | 13 | 12 | 7 | 3 | 2 | 0 | |
| T/AP/IAI/AP | 13 | 12 | 7 | 3 | 2 | 0 | |
| T/T/T/AP | 13 | 12 | 7 | 3 | 2 | 0 | |
| I/AP/AP/AP/IAI | 13 | 12 | 7 | 3 | 2 | 0 | |
| Belt | Belt filling | Armor penetration (mm) at a distance: | |||||
|---|---|---|---|---|---|---|---|
| 10 m | 100 m | 500 m | 1000 m | 1500 m | 2000 m | ||
| AP-T/AP/HEF-I | 21 | 19 | 13 | 7 | 4 | 3 | |
| AP-T/HEF-I/AP/HEF-I | 21 | 19 | 13 | 7 | 4 | 3 | |
| AP-T/HEF-I/HEF-I/HEF-I | 21 | 19 | 13 | 7 | 4 | 3 | |
| AP-T/AP/AP-T | 21 | 19 | 13 | 7 | 4 | 3 | |
| AP/HEF-I/HEF-I/HEF-I | 21 | 19 | 13 | 7 | 4 | 3 | |

Flight performance | |
|---|---|
Survivability |
|---|
Weaponry | |
|---|---|
