Difference between revisions of "SU-100Y"
Inceptor57 (talk | contribs) |
|||
| Line 2: | Line 2: | ||
== Description == | == Description == | ||
| − | ''In the description, the first part needs to be about the history of the creation and combat usage of the vehicle, as well as its key features. In the second part, tell the reader about the ground vehicle in the game. Insert the screenshot of the vehicle. If the novice player does not remember the vehicle by name, they will immediately understand what kind of vehicle it is talking about.'' | + | <!--''In the description, the first part needs to be about the history of the creation and combat usage of the vehicle, as well as its key features. In the second part, tell the reader about the ground vehicle in the game. Insert the screenshot of the vehicle. If the novice player does not remember the vehicle by name, they will immediately understand what kind of vehicle it is talking about.''--> |
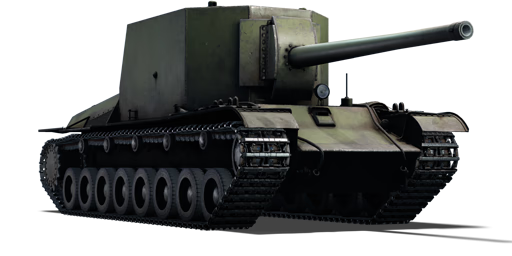
| + | [[File:GarageImage_SU-100Y.jpg|420px|thumb|left]] | ||
| + | {{break}} | ||
| + | The '''SU-100Y''' is a premium Rank III Soviet tank destroyer with a battle rating of 5.3. It was introduced in [[Update 1.51 "Cold Steel"]]. A rather large profile tank destroyer on-par with the [[KV-2]], but with a much more powerful 130 mm naval cannon, it serves well as a defensive vehicle against an offensive force. | ||
== General info == | == General info == | ||
=== Survivability and armour === | === Survivability and armour === | ||
| − | ''Describe armour protection. Note the most well protected and key weak areas. Appreciate the layout of modules as well as the number and location of crew members. Is the level of armour protection sufficient, is the placement of modules helpfull for survival in combat?'' | + | <!--''Describe armour protection. Note the most well protected and key weak areas. Appreciate the layout of modules as well as the number and location of crew members. Is the level of armour protection sufficient, is the placement of modules helpfull for survival in combat?'' |
| − | ''If necessary use a visual template to indicate the most secure and weak zones of the armour.'' | + | ''If necessary use a visual template to indicate the most secure and weak zones of the armour.''--> |
| + | '''Armour type:''' | ||
| + | *Rolled homogeneous armour | ||
| + | *Cast homogeneous armour (Rear hatch) | ||
| + | {| class="wikitable" | ||
| + | |- | ||
| + | ! Armour !! Front !! Sides !! Rear !! Roof | ||
| + | |- | ||
| + | | Hull || 60 mm (46°) ''Front plate'' <br> 60 mm (71°) ''Front glacis'' <br> 25 mm (49,70°) ''Joint plate'' <br> 60 mm (49°) ''Lower glacis''|| 60 mm ''Overall'' <br> 60 mm (27°) ''Engine side deck''|| 60 mm (5-14°) || 20 mm ''Front'' <br> 20 mm (82°) ''Rear deck'' | ||
| + | |- | ||
| + | | Superstructure || 60 mm ''Front'' <br> 50 mm (1-27°) ''Gun mantlet'' <br> 60 + 60 mm ''Gun shield'' || 60 mm || 60 mm (17°) || 20 mm | ||
| + | |- | ||
| + | |} | ||
| + | '''Notes:''' | ||
| + | *Suspension wheels are 20 mm thick while the tracks are 30 mm thick. | ||
| + | *The protection is only 60mm thick at its strongest. So it will not absorb any rounds anytime soon. Weapon calibres exceeding 20mm can pierce the armour, turning SPAAG into a real threat, if close enough. It is a good idea to stay with teammates or remain at distance from the main battle. | ||
=== Mobility === | === Mobility === | ||
| − | ''Write about the mobility of the ground vehicle. Estimate the specific power and maneuverability as well as the maximum speed forward and backward.'' | + | <!--''Write about the mobility of the ground vehicle. Estimate the specific power and maneuverability as well as the maximum speed forward and backward.''--> |
| + | {| class="wikitable" style="text-align:center" | ||
| + | |- | ||
| + | !colspan="3" | Mobility characteristic | ||
| + | |- | ||
| + | ! Weight (tons) | ||
| + | !colspan="1" | Add-on Armor<br>weight (tons) | ||
| + | !colspan="1" | Max speed (km/h) | ||
| + | |- | ||
| + | |rowspan="2" | 64.0 || colspan="1" rowspan="2" | N/A || colspan="1" | 35 (AB) | ||
| + | |- | ||
| + | |32 (RB/SB) | ||
| + | |- | ||
| + | !colspan="3" | Engine power (horsepower) | ||
| + | |- | ||
| + | !colspan="1" | Mode | ||
| + | !Stock | ||
| + | !Upgraded | ||
| + | |- | ||
| + | |''Arcade'' | ||
| + | |1,207 | ||
| + | |1,486 | ||
| + | |- | ||
| + | |''Realistic/Simulator'' | ||
| + | |752 | ||
| + | |850 | ||
| + | |- | ||
| + | !colspan="3" | Power-to-weight ratio (hp/ton) | ||
| + | |- | ||
| + | !colspan="1" | Mode | ||
| + | !Stock | ||
| + | !Upgraded | ||
| + | |- | ||
| + | |''Arcade'' | ||
| + | |18.86 | ||
| + | |23.22 | ||
| + | |- | ||
| + | |''Realistic/Simulator'' | ||
| + | |11.75 | ||
| + | |13.28 | ||
| + | |- | ||
| + | |} | ||
== Armaments == | == Armaments == | ||
=== Main armament === | === Main armament === | ||
| − | ''Give the reader information about the characteristics of the main gun. Assess its effectiveness in a battle based on the reloading speed, ballistics and the power of shells. Do not forget about the flexibilty of the fire, that is how quickly the cannon can be aimed at the target, open fire on it and aim at another enemy. Add a link to the main article on the gun: <code><nowiki>{{main|Name of the weapon}}</nowiki></code>. Describe in general terms the ammunition available for the main gun. Give advice on how to use them and how to fill the ammunition storage.'' | + | <!--''Give the reader information about the characteristics of the main gun. Assess its effectiveness in a battle based on the reloading speed, ballistics and the power of shells. Do not forget about the flexibilty of the fire, that is how quickly the cannon can be aimed at the target, open fire on it and aim at another enemy. Add a link to the main article on the gun: <code><nowiki>{{main|Name of the weapon}}</nowiki></code>. Describe in general terms the ammunition available for the main gun. Give advice on how to use them and how to fill the ammunition storage.''--> |
| + | {{main|B-13 (130 mm)}} | ||
| − | === | + | {| class="wikitable" style="text-align:center" |
| − | '' | + | |- |
| + | ! colspan="6" | [[B-13 (130 mm)|130 mm B-13]] | ||
| + | |- | ||
| + | ! colspan="3" rowspan="1" style="width:5em" |Capacity | ||
| + | ! rowspan="1" | Vertical <br> guidance | ||
| + | ! rowspan="1" | Horizontal <br> guidance | ||
| + | ! rowspan="1" | Stabilizer | ||
| + | |- | ||
| + | | colspan="3" | 30 || -5°/+15° || ±10° || N/A | ||
| + | |- | ||
| + | ! colspan="6" | Turret rotation speed (°/s) | ||
| + | |- | ||
| + | ! style="width:4em" |Mode | ||
| + | ! style="width:4em" |Stock | ||
| + | ! style="width:4em" |Upgraded | ||
| + | ! style="width:4em" |Prior + Full crew | ||
| + | ! style="width:4em" |Prior + Expert qualif. | ||
| + | ! style="width:4em" |Prior + Ace qualif. | ||
| + | |- | ||
| + | | ''Arcade'' || 4.20 || 5.80 || _.__ || __._ || __._ | ||
| + | |- | ||
| + | | ''Realistic'' || 4.20 || 4.90 || _.__ || __._ || __._ | ||
| + | |- | ||
| + | ! colspan="4" | Reloading rate (seconds) | ||
| + | |- | ||
| + | ! colspan="1" style="width:4em" |Stock | ||
| + | ! colspan="1" style="width:4em" |Prior + Full crew | ||
| + | ! colspan="1" style="width:4em" |Prior + Expert qualif. | ||
| + | ! colspan="1" style="width:4em" |Prior + Ace qualif. | ||
| + | |- | ||
| + | | 25.00 || __.__ || __.__ || __.__ | ||
| + | |- | ||
| + | |} | ||
| − | === | + | ===== Ammunition ===== |
| − | '' | + | {| class="wikitable sortable" style="text-align:center" width="100%" |
| + | ! colspan="8" | Penetration statistics | ||
| + | |- | ||
| + | ! rowspan="2" data-sort-type="text" | Ammunition | ||
| + | ! rowspan="2" class="unsortable" | Type of <br /> warhead | ||
| + | ! colspan="6" | '''Penetration''' '''''in mm''''' '''@ 90°''' | ||
| + | |- | ||
| + | ! 10m | ||
| + | ! 100m | ||
| + | ! 500m | ||
| + | ! 1000m | ||
| + | ! 1500m | ||
| + | ! 2000m | ||
| + | |- | ||
| + | | BR-540 || APCBC || 225 || 223 || 200 || 175 || 152 || 142 | ||
| + | |- | ||
| + | | OF-540 || HE || 36 || 36 || 36 || 36 || 36 || 36 | ||
| + | |- | ||
| + | |} | ||
| + | {| class="wikitable sortable" style="text-align:center" width="100%" | ||
| + | ! colspan="11" | Shell details | ||
| + | |- | ||
| + | ! rowspan="2" data-sort-type="text" | Ammunition | ||
| + | ! rowspan="2" class="unsortable" | Type of <br /> warhead | ||
| + | ! rowspan="2" |Velocity <br /> in m/s | ||
| + | ! rowspan="2" |Projectile<br />Mass in kg | ||
| + | ! rowspan="2" | ''Fuse delay'' | ||
| + | ''in m:'' | ||
| + | ! rowspan="2" | ''Fuse sensitivity'' | ||
| + | ''in mm:'' | ||
| + | ! rowspan="2" | ''Explosive Mass in g<br /> (TNT equivalent):'' | ||
| + | ! rowspan="2" | ''Normalization At 30° <br> from horizontal:'' | ||
| + | ! colspan="3" | ''Ricochet:'' | ||
| + | |- | ||
| + | ! 0% | ||
| + | ! 50% | ||
| + | ! 100% | ||
| + | |- | ||
| + | | BR-540 || APCBC || 870 || 34 || 1.2 || 15 || 2,350 || -1° || 48° || 63° || 71° | ||
| + | |- | ||
| + | | OF-540 || HE || 870 || 33 || 1.3 || 0.1 || 3,580 || +0° || 79° || 80° || 81° | ||
| + | |- | ||
| + | |} | ||
| + | |||
| + | ===== [[Ammo Racks|Ammo racks]] ===== | ||
| + | [[File:Ammoracks_SU-100Y.png|thumbnail|right|x250px|Ammo racks of the SU-100Y.]] | ||
| + | {| class="wikitable sortable" style="text-align:center" | ||
| + | |- | ||
| + | ! class="wikitable unsortable" |Full<br />ammo | ||
| + | ! class="wikitable unsortable" |Ammo<br/>Part | ||
| + | ! class="wikitable unsortable" |1st<br />rack empty | ||
| + | ! class="wikitable unsortable" |2nd<br />rack empty | ||
| + | ! class="wikitable unsortable" |3rd<br />rack empty | ||
| + | ! class="wikitable unsortable" |4th<br />rack empty | ||
| + | ! class="wikitable unsortable" |5th<br />rack empty | ||
| + | ! class="wikitable unsortable" |6th<br />rack empty | ||
| + | ! class="wikitable unsortable" |7th<br />rack empty | ||
| + | ! class="wikitable unsortable" |Visual<br /> discrepancy | ||
| + | |- | ||
| + | | '''30''' || style="text-align:right" | ''Projectiles''<br />''Propellants'' || 28 ''(+2)''<br />15 ''(+15)'' || 25 ''(+5)''<br />13 ''(+17)'' || 23 ''(+7)''<br />11 ''(+19)'' || 21 ''(+9)''<br />9 ''(+21)'' || 19 ''(+11)''<br />5 ''(+25)'' || 17 ''(+13)''<br />3 ''(+27)'' || 7 ''(+23)''<br />1 ''(+29)'' || style="text-align:left" | Propellants currently<br />empty after projectiles | ||
| + | |} | ||
| + | |||
| + | 21 shells - right wall empty | ||
== Usage in the battles == | == Usage in the battles == | ||
| − | ''Describe the tactics of playing in the vehicle, the features of using vehicles in the team and advice on tactics. Refrain from creating a "guide" - do not impose a single point of view but give the reader food for thought. Describe the most dangerous enemies and give recommendations on fighting them. If necessary, note the specifics of the game in different modes (AB, RB, SB).'' | + | <!--''Describe the tactics of playing in the vehicle, the features of using vehicles in the team and advice on tactics. Refrain from creating a "guide" - do not impose a single point of view but give the reader food for thought. Describe the most dangerous enemies and give recommendations on fighting them. If necessary, note the specifics of the game in different modes (AB, RB, SB).''--> |
| + | This tank is all about the gun. It defines what being a bonafide tank destroyer is. Bad armour, bad mobility, but amazing firepower. Just park the the tank in a position where you will be difficult to flank. That way when you do fire the gun, you can immediately run and hide while you reload. It can not be emphasized enough, this tank can not let itself get shot at. It just doesn't have the armour. But once your ready to let one of thee 130 mm shells loose, this tank fears few. | ||
=== Pros and cons === | === Pros and cons === | ||
| − | ''Summarize and briefly evaluate the vehicle in terms of its characteristics and combat effectiveness. Mark its pros and cons in a bulleted list. Do not use more than 6 points for each of the characteristics. Avoid using categorical definitions such as "bad", "good" and the like - they have a substitution in the form of softer "inadequate", "effective".'' | + | <!--''Summarize and briefly evaluate the vehicle in terms of its characteristics and combat effectiveness. Mark its pros and cons in a bulleted list. Do not use more than 6 points for each of the characteristics. Avoid using categorical definitions such as "bad", "good" and the like - they have a substitution in the form of softer "inadequate", "effective".''--> |
| − | |||
'''Pros:''' | '''Pros:''' | ||
| − | * | + | * SU-100Y's B-13 cannon is one of the most powerful guns in the game. Able to penetrate ~200 mm of armour at 500 meters. No tank at its BR can reliably bounce a shell from this tank. |
| − | + | * Astounding 2.35 kg of TNT explosive filler in the PB-46A APHE shell. Can reliably one shot any tank in the game, including the Maus. | |
| + | * With 5 degrees of gun depression, SU-100Y has better gun depression than nearly every other Russian TD. | ||
| + | * SU-100Y has a very powerful engine. Accelerating to its top speed and maintaining it even while going up hill is no problem. | ||
| + | * Six man crew gives this tank a decent chance of surviving a penetrating shell. | ||
| + | * Huge fear factor, no tank wants to get shot at by the 130 mm. | ||
| + | * Like with every other premium tank, it has a RP and Lions boost. | ||
'''Cons:''' | '''Cons:''' | ||
| − | * | + | * Skilled players will recognize the threat an SU-100Y poses. Expect to be the center of the enemy's attention. |
| + | * This is a huge tank. Finding decent cover or a good ambush location is difficult at best. | ||
| + | * Sub-par armour for the BR. Every gun that this tank can face poses a serious threat. | ||
| + | * Extremely vulnerable cannon breech and barrel. Problematic as a single hit to them will result in them being in critical condition. | ||
| + | * With terrible maneuverability, horrifying reverse speed, and massive size, dodging enemy fire is nearly impossible. | ||
| + | * Even a good crew will take more than 20 seconds to reload the gun. | ||
== History == | == History == | ||
| − | ''Describe the history of the creation and combat usage of the ground vehicle in more detail than in the introduction. If the historical reference turns out to be too big, take it to a separate article, taking a link to an article about the vehicle and adding a block "/historical reference" (example: https://wiki.warthunder.com/Name-vehicles/historical reference) and add a link to it here using the <code>main</code> template. Be sure to include links to sources at the end of the article.'' | + | <!--''Describe the history of the creation and combat usage of the ground vehicle in more detail than in the introduction. If the historical reference turns out to be too big, take it to a separate article, taking a link to an article about the vehicle and adding a block "/historical reference" (example: https://wiki.warthunder.com/Name-vehicles/historical reference) and add a link to it here using the <code>main</code> template. Be sure to include links to sources at the end of the article.''--> |
== Media == | == Media == | ||
Revision as of 03:49, 26 October 2018
Contents
Description

The SU-100Y is a premium Rank III Soviet tank destroyer with a battle rating of 5.3. It was introduced in Update 1.51 "Cold Steel". A rather large profile tank destroyer on-par with the KV-2, but with a much more powerful 130 mm naval cannon, it serves well as a defensive vehicle against an offensive force.
General info
Survivability and armour
Armour type:
- Rolled homogeneous armour
- Cast homogeneous armour (Rear hatch)
| Armour | Front | Sides | Rear | Roof |
|---|---|---|---|---|
| Hull | 60 mm (46°) Front plate 60 mm (71°) Front glacis 25 mm (49,70°) Joint plate 60 mm (49°) Lower glacis |
60 mm Overall 60 mm (27°) Engine side deck |
60 mm (5-14°) | 20 mm Front 20 mm (82°) Rear deck |
| Superstructure | 60 mm Front 50 mm (1-27°) Gun mantlet 60 + 60 mm Gun shield |
60 mm | 60 mm (17°) | 20 mm |
Notes:
- Suspension wheels are 20 mm thick while the tracks are 30 mm thick.
- The protection is only 60mm thick at its strongest. So it will not absorb any rounds anytime soon. Weapon calibres exceeding 20mm can pierce the armour, turning SPAAG into a real threat, if close enough. It is a good idea to stay with teammates or remain at distance from the main battle.
Mobility
| Mobility characteristic | ||
|---|---|---|
| Weight (tons) | Add-on Armor weight (tons) |
Max speed (km/h) |
| 64.0 | N/A | 35 (AB) |
| 32 (RB/SB) | ||
| Engine power (horsepower) | ||
| Mode | Stock | Upgraded |
| Arcade | 1,207 | 1,486 |
| Realistic/Simulator | 752 | 850 |
| Power-to-weight ratio (hp/ton) | ||
| Mode | Stock | Upgraded |
| Arcade | 18.86 | 23.22 |
| Realistic/Simulator | 11.75 | 13.28 |
Armaments
Main armament
| 130 mm B-13 | |||||
|---|---|---|---|---|---|
| Capacity | Vertical guidance |
Horizontal guidance |
Stabilizer | ||
| 30 | -5°/+15° | ±10° | N/A | ||
| Turret rotation speed (°/s) | |||||
| Mode | Stock | Upgraded | Prior + Full crew | Prior + Expert qualif. | Prior + Ace qualif. |
| Arcade | 4.20 | 5.80 | _.__ | __._ | __._ |
| Realistic | 4.20 | 4.90 | _.__ | __._ | __._ |
| Reloading rate (seconds) | |||||
| Stock | Prior + Full crew | Prior + Expert qualif. | Prior + Ace qualif. | ||
| 25.00 | __.__ | __.__ | __.__ | ||
Ammunition
| Penetration statistics | |||||||
|---|---|---|---|---|---|---|---|
| Ammunition | Type of warhead |
Penetration in mm @ 90° | |||||
| 10m | 100m | 500m | 1000m | 1500m | 2000m | ||
| BR-540 | APCBC | 225 | 223 | 200 | 175 | 152 | 142 |
| OF-540 | HE | 36 | 36 | 36 | 36 | 36 | 36 |
| Shell details | ||||||||||
|---|---|---|---|---|---|---|---|---|---|---|
| Ammunition | Type of warhead |
Velocity in m/s |
Projectile Mass in kg |
Fuse delay
in m: |
Fuse sensitivity
in mm: |
Explosive Mass in g (TNT equivalent): |
Normalization At 30° from horizontal: |
Ricochet: | ||
| 0% | 50% | 100% | ||||||||
| BR-540 | APCBC | 870 | 34 | 1.2 | 15 | 2,350 | -1° | 48° | 63° | 71° |
| OF-540 | HE | 870 | 33 | 1.3 | 0.1 | 3,580 | +0° | 79° | 80° | 81° |
Ammo racks

| Full ammo |
Ammo Part |
1st rack empty |
2nd rack empty |
3rd rack empty |
4th rack empty |
5th rack empty |
6th rack empty |
7th rack empty |
Visual discrepancy |
|---|---|---|---|---|---|---|---|---|---|
| 30 | Projectiles Propellants |
28 (+2) 15 (+15) |
25 (+5) 13 (+17) |
23 (+7) 11 (+19) |
21 (+9) 9 (+21) |
19 (+11) 5 (+25) |
17 (+13) 3 (+27) |
7 (+23) 1 (+29) |
Propellants currently empty after projectiles |
21 shells - right wall empty
Usage in the battles
This tank is all about the gun. It defines what being a bonafide tank destroyer is. Bad armour, bad mobility, but amazing firepower. Just park the the tank in a position where you will be difficult to flank. That way when you do fire the gun, you can immediately run and hide while you reload. It can not be emphasized enough, this tank can not let itself get shot at. It just doesn't have the armour. But once your ready to let one of thee 130 mm shells loose, this tank fears few.
Pros and cons
Pros:
- SU-100Y's B-13 cannon is one of the most powerful guns in the game. Able to penetrate ~200 mm of armour at 500 meters. No tank at its BR can reliably bounce a shell from this tank.
- Astounding 2.35 kg of TNT explosive filler in the PB-46A APHE shell. Can reliably one shot any tank in the game, including the Maus.
- With 5 degrees of gun depression, SU-100Y has better gun depression than nearly every other Russian TD.
- SU-100Y has a very powerful engine. Accelerating to its top speed and maintaining it even while going up hill is no problem.
- Six man crew gives this tank a decent chance of surviving a penetrating shell.
- Huge fear factor, no tank wants to get shot at by the 130 mm.
- Like with every other premium tank, it has a RP and Lions boost.
Cons:
- Skilled players will recognize the threat an SU-100Y poses. Expect to be the center of the enemy's attention.
- This is a huge tank. Finding decent cover or a good ambush location is difficult at best.
- Sub-par armour for the BR. Every gun that this tank can face poses a serious threat.
- Extremely vulnerable cannon breech and barrel. Problematic as a single hit to them will result in them being in critical condition.
- With terrible maneuverability, horrifying reverse speed, and massive size, dodging enemy fire is nearly impossible.
- Even a good crew will take more than 20 seconds to reload the gun.
History
Media
An excellent addition to the article will be video guides, as well as screenshots from the game and photos.
Read also
Links to the articles on the War Thunder Wiki that you think will be useful for the reader, for example,
- reference to the series of the vehicles;
- links to approximate analogues of other nations and research trees.
ETC.
Sources
Paste links to sources and external resources, such as:
- topic on the official game forum;
- other literature.
