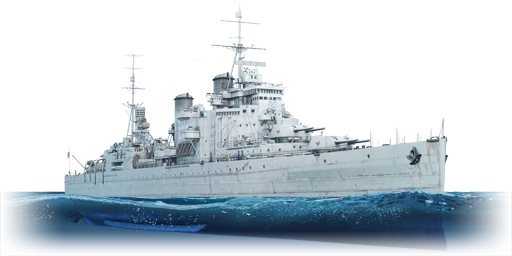
HMS London

Contents
Description
The County-class, HMS London (69), 1945 is a rank IV British heavy cruiser with a battle rating of 5.7 (AB/RB/SB). It was introduced in Update 1.97 "Viking Fury".
General info
Survivability and armour
Compared to her predecessor the Norfolk, the London has a 88.9 mm main belt, compared to the Norfolk's 25 mm. This is a very welcome change, but it doesn't amount to much. The machinery is slightly better protected, but the rest of the hull above the waterline has no armour at all (aside from a tiny 38 mm plate to protect the steering gears), and neither does the enormous superstructure. The London is a massive glass cannon, and should be played with caution. The one saving grace of the London's survivability is the very safe location of the London's magazines. They are well underwater and protected by a 100 mm plate inside the ship. Catastrophic ammunition detonations from cruiser-calibre guns are extremely rare, and even battleships may struggle to slip a shell into the right spot.
Mobility
The mobility on the London is nothing to write home about. Capable of 60 km/h, 1 km/h slower than the Norfolk, the London still has the same top speed of nearly every WW2-era heavy cruiser. The manoeuvrability is also nothing exceptional. She'll get the job done, but she won't do it faster than any other cruiser.
| Mobility Characteristics | |||
|---|---|---|---|
| Game Mode | Upgrade Status | Maximum Speed (km/h) | |
| Forward | Reverse | ||
| AB | |||
| Upgraded | 70 | 29 | |
| RB/SB | |||
| Upgraded | 60 | 25 | |
Modifications and economy
| Seakeeping | Unsinkability | Firepower | ||||||||||||||||||||||||
|---|---|---|---|---|---|---|---|---|---|---|---|---|---|---|---|---|---|---|---|---|---|---|---|---|---|---|
|
|
|
Armament
Primary armament
HMS London retains the 8"/50 Mark VIII guns seen on previous British heavy cruisers. As with the others, the guns are reasonably accurate, although at long ranges the dispersion will start to show itself. The shortest achievable reload time is 12 seconds, which is quite fast by heavy cruiser standards. There is no first-stage ammunition stowage, so the reload rate will always remain quick no matter how much ammunition is remaining.
There are two shells available, an HE shell and a researchable SAPCBC shell. The HE shell performs as can be expected from heavy cruiser HE - solid against light targets, but unable to significantly damage heavier ships. The researchable SAPCBC shell on the other hand is one of the most powerful shells available to any heavy cruiser, possessing a excellent blend of penetration while also having a massive 5.2 kg bursting charge. This, combined with the quick fire rate, means that London's damage output is nothing short of exceptional, and if you are left to your own devices, you can inflict massive damage upon the enemy team. However, the lack of a proper AP shell also means the London will struggle against heavy targets, such as battleships.
HE is used as the stock shell, while SAPCBC can be researched immediately after purchasing the ship. It is recommended to get the SAPCBC quickly, but only after basic survivability modifications.
| Penetration statistics | |||||||
|---|---|---|---|---|---|---|---|
| Ammunition | Type of warhead |
Penetration @ 0° Angle of Attack (mm) | |||||
| 1,000 m | 2,500 m | 5,000 m | 7,500 m | 10,000 m | 15,000 m | ||
| HE | HE | 62 | 62 | 62 | 62 | 62 | 62 |
| Mark I.B. SAPCBC | SAPCBC | 274 | 248 | 209 | 178 | 153 | 119 |
| Shell details | ||||||||||||
|---|---|---|---|---|---|---|---|---|---|---|---|---|
| Ammunition | Type of warhead |
Velocity (m/s) |
Projectile mass (kg) |
Fuse delay (s) |
Fuse sensitivity (mm) |
Explosive mass (TNT equivalent) (kg) |
Ricochet | |||||
| 0% | 50% | 100% | ||||||||||
| HE | HE | 855 | 116.1 | 0 | 0.1 | 10 | 79° | 80° | 81° | |||
| Mark I.B. SAPCBC | SAPCBC | 855 | 116.1 | 0.025 | 9 | 5.2 | 48° | 63° | 71° | |||
Secondary armament
The London has four twin 4" turrets behind the funnels, able to bring two to bear for a broadside. They are the same guns found on the Hunt-class and V-class destroyers. In terms of their ability to damage surface targets, their utility is extremely limited, especially compared to American 5" cruiser secondaries, which will outclass the British 4"s in every way. However, when it comes to downing planes, the London's secondaries will do the job reasonably well. Four shells are available: HE, HE-TF, HE-VT, and SAP. HE is the stock shell, while the rest must be researched. Getting the HE-VT first as a tier III modification to bolster the London's long-range AA is advisable, as the rest are not very useful. After finishing more important modifications, get SAP in case the guns ever must be used against surface targets. Save the HE-TF as one of the last modifications you research, as it is simply redundant when the HE-VT is available.
| Penetration statistics | |||||||
|---|---|---|---|---|---|---|---|
| Ammunition | Type of warhead |
Penetration @ 0° Angle of Attack (mm) | |||||
| 1,000 m | 2,500 m | 5,000 m | 7,500 m | 10,000 m | 15,000 m | ||
| 4 inch HE | HE | 20 | 20 | 20 | 20 | 20 | 20 |
| 4 inch SAP | SAP | 102 | 85 | 64 | 48 | 38 | 30 |
| 4 inch HE-TF | HE-TF | 20 | 20 | 20 | 20 | 20 | 20 |
| 4 inch HE-VT | HE-VT | 20 | 20 | 20 | 20 | 20 | 20 |
| Shell details | ||||||||||||
|---|---|---|---|---|---|---|---|---|---|---|---|---|
| Ammunition | Type of warhead |
Velocity (m/s) |
Projectile mass (kg) |
Fuse delay (s) |
Fuse sensitivity (mm) |
Explosive mass (TNT equivalent) (g) |
Ricochet | |||||
| 0% | 50% | 100% | ||||||||||
| 4 inch HE | HE | 811 | 15.88 | 0 | 0.1 | 1,550 | 79° | 80° | 81° | |||
| 4 inch SAP | SAP | 811 | 17.35 | 0.015 | 5 | 600 | 47° | 60° | 65° | |||
| 4 inch HE-TF | HE-TF | 811 | 15.88 | 0 | 0.1 | 1,550 | 79° | 80° | 81° | |||
| Proximity-fused shell details | ||||||||||||
|---|---|---|---|---|---|---|---|---|---|---|---|---|
| Ammunition | Type of warhead |
Velocity (m/s) |
Projectile mass (kg) |
Fuse delay (m) |
Fuse sensitivity (mm) |
Arming distance (m) |
Trigger radius (m) |
Explosive mass (TNT equivalent) (g) |
Ricochet | |||
| 0% | 50% | 100% | ||||||||||
| 4 inch HE-VT | HE-VT | 811 | 15.88 | 0 | 0.1 | 274 | 18 | 1,550 | 79° | 80° | 81° | |
Anti-aircraft armament
Of the three County-class cruisers in game, the London's AA outshines them all. Compared to her predecessor, the Norfolk, which has just enough AA to protect herself and ward off enemy planes, the London's AA can truly be called fitting for a late-war cruiser. The most powerful guns are the octuple 40 mm Pom-Poms, one located to each side of the forward funnel. These guns output a staggering amount of shells, and can easily mow down any aircraft or light ship. They are supplemented by four 40 mm QF Mk VII guns, two per side. In addition, the London has eight twin 20 mm Oerlikon turrets, and four single Oerlikons. The extensive AA coverage makes the London a very challenging target to bomb.
Additional armament
The London continues to use the 533 mm Mk.IX wet-heater torpedoes seen on other British cruisers, in one quadruple launcher per side. They are a welcome improvement over the antiquated steam turbined Mk.V torpedoes seen on earlier cruisers, but are still unexceptional weapons, with subpar speed and no access to reserves. It's best to retain them as last ditch weapons to expend when being forced into a brawl. Other than those scenarios, you may as well play like you don't have torpedoes.
Usage in battles
The London's main playstyle revolves around its two defining characteristics - its devastating SAP round, its quick reload, and its awful protection. The London is a true glass cannon, and you should play it as such. Position yourself into places where you can continuously pound enemy cruisers and destroyers with firepower, while they either unable to hit you or are preoccupied with an ally. The longer you can fire unmolested by the enemy, the better. However, this does not mean camping is a good strategy - at ranges around 10km, the inaccuracy of the main guns starts to show. Thus, you must figure out how to work your way into closer-range engagements. Playing the London to its fullest requires toeing a careful line - you must keep your guns firing as often and as effectively as possible, while also not dying in the process. Having map knowledge helps a lot when it comes to achieving this. Use cover to get in close, while being aware of where enemies are likely to appear. Find defensive positions near caps, where you can camp while also providing support to your team's frontline. However, do not push into the cap yourself unless it is an emergency and the ownership of the cap will decide the game, or the area is completely clear! By covering your team and letting more durable ships push the cap, you will be far more useful than if you rushed into the cap yourself and were sunk.
It is also useful to have knowledge of your enemies. Know which ships pose the biggest threats, and how you can sink them before they can sink you. When fighting an Omaha, hit their engines and ammunition, if fighting an Admiral Graf Spee, dodge their shells while destroying their turrets and ammunition hoists, when fighting battleships, pray he shoots somebody else, etc. Knowing the ideal way to fight any enemy you face is key to preserving your ship, which allows you to keep your firepower in action for longer.
All in all, the London is a challenging ship to play, as the weak armour, poor gun arcs, and absolutely enormous stature make her a very vulnerable ship. However, in the hands of an experienced captain, her advantages can be pushed, her vulnerabilities diminished, and blow by blow, her firepower will win battles.
Pros and cons
Pros:
- Very effective anti-air defences
- Excellent main battery
- Great fire rate for a heavy cruiser (4-5 RPM, depending on crew skill)
- Devastating SAP shells with high penetration and high bursting charge
- Ammunition is stored under the water line and is well protected
- Carries torpedoes which are useful in close range encounters
- Decent speed for a heavy cruiser
Cons:
- Guns lack AP shells to deal with battlecruisers and battleships
- No bridge protection and enormous superstructure, losing control is very common in this ship
- Armour is hardly present at all
- 89 mm belt armour won't hold up to enemy fire
- Majority of hull is unarmoured
- Lacks deck armour against plunging shells
- Outgunned by battleships, battlecruisers, and some American heavy cruisers
- Mildly inconvenient gun arcs
- Lacks a floatplane, which most other same-rank cruisers have
History
The Treaty Cruiser
The County class, named after regional areas of Great Britain, was the largest class of heavy cruisers of the Royal Navy. Under the 1924 Washington treaty limits, they had a standard load under 10,000 tons and four twin-turrets with eight pieces of 8 inches (203 mm) guns in total. Limited by the regulation, the County class had little protection on the main belt with only 1 inch (25 mm) but a completed armour box (1-4 inches) covering the magazine parts. The 8" gun was new to the Royal Navy; it had a high muzzle velocity of 3,150 ft/sec (960 m/s) and a range of 20 miles (32 km). It was a very accurate gun and was the smallest gun in the RN to require mechanical handling of the shell and charge - the shell weighed 256 lbs (116 kg). The guns could elevate to 65° and under director control could sustain a firing rate of 4 rounds per minute.[1]
Considering the operating environment in remote stations and the duty of being a quick reaction force in hot zones, they had significant autonomy and a large hull for overseas consistency and stability in bad weather, as well as comfort equipment like air conditioning for tropical areas.
Ordered in 1925, HMS London, the first of the second block of County-class heavy cruisers, was laid down on 22 February 1926, launched 14 September the following year and completed 5 February 1929 in Portsmouth. The installed engines were manufactured by Fairfield Shipbuilders and Engineers of Newcastle-upon-Tyne.
Compared to the first block, the Kent class, the London class removed a protective bulge on the waterline, which forced a modified hull design that increased length by 2 feet 8 inches and incorporated internal bulges for torpedo protection. The command superstructure was also moved further back and funnels lengthened to prevent interference from smoke.
The 1930s
Entering service in early 1929, HMS London was sent to the Mediterranean, where she became the flagship of the First Cruiser Squadron and operated until March 1939. Her first notable task was to quell the uprising on Cyprus in 1931. The British had administered the island since 1878, and gave the status of a crown colony in 1925. However, that status irritated the Greek Cypriots who sought for an eventual union with Greece.[2]
In 1931, the local administration decided to raise tax to cover a local budget deficit, which triggered a severe reaction among Greek Cypriots. On 21 October, more than 5,000 Greek Cypriots rallied on the island. They stripped the British flag, besieged Government House and burned it.
The Royal Navy was asked to aid the civil powers. HMS London and her sister ship Shropshire as well as two destroyers were sent to suppress the uprising. On 24 October, London landed groups of Royal Marines and armed sailors to protect government offices. The protestors hurled verbal abuse at London's marines and sailors, waving the Greek flag in their faces and throwing stones, to make the marines and sailors lose their cool and open fire in the hope that Greece might intervene militarily. But the British held fire. On 25 October, the revolt leaders were arrested, and the protests gradually fizzled out in the following days, marking a successful end to London's first mission.
On 18 July 1936, the Fascist General Franco led an uprising by twelve military garrisons on mainland Spain and five in Spanish Morocco, igniting the Spanish Civil War. The Royal Navy was involved from the beginning of the conflict. Soon after the war had started, HMS London with her sister ship Devonshire were on station at Gibraltar. On 22 July, London was tasked with evacuating British civilians in Barcelona.
London stayed at Barcelona until 22 August when HMS Shropshire replace her role for evacuation. During the period, more than 1,800 civilians were evacuated via HMS London. After that, London received a refit in Portsmouth in November, during which four additional high-angle 4-inch guns were fitted. At the end of 1936, HMS London was tasked with hunting down gunrunners in Western Mediterranean. Although her aircraft found a suspicious-looking vessel that might be a gunrunner, the cruiser failed to catch them. In 1937, London was called back to Britain for the coronation of King George VI.
1939 - 1941
With war clouds gathering fast in the late 1930s and naval construction restrictions being discarded equally rapidly, the Admiralty decided to reconstruct the County Class cruisers for better preparations in future combat. HMS London was the first and only one of the County class to rebuild and modernize completely. She entered Chatham in March 1939, and the rebuild proved complex and lasted until February 1941.
Significant modifications were added during the reconstruction. A new 4-inch (102 mm) armour belt was added to the waterline to cover the machinery spaces. A series of radars, including Type 279 for air warning and Type 284/285 for fire control, were installed. Most notably, a brand-new enlarged superstructure with aircraft hangars replaced the original command tower to provide more space and comfort for operations in bad weather. The newly added superstructure also changed the arrangement of funnels from three to only two. Besides, two twin high-angle 4-inch guns and additional 2-pounder AA guns were added to the ship. The significant increase in displacement after modernization resulted in increased structural stresses on the hull. During subsequent service, these stresses, together with the harsh serving environment in the Arctic, were most likely to have been the cause of the leakages in fuel and feed water systems during later service.
During the reconstruction, German bombers targeted Chatham frequently, and air raids often interrupted the work, delaying London's progress. The cruiser was finally commissioned for service with the Home Fleet on 7 February 1941.
On 5 March, HMS London left Chatham, heading north to join the Home Fleet in Scapa Flow. After arriving at Scapa, London participated in fleet exercises for practising main and sub calibre gunnery, air defence, and testing new radar equipment. London also played a role as a simulated cruiser target for battleships of Home Fleet.
On 2 April, London left Scapa Flow with the carrier HMS Argus, which was being used to transport fighter planes to the Mediterranean. The cruiser escorted Argus to a position near Gibraltar, where she handed the duty to HMS Sheffield from Force H.
HMS London spent some time with the battleship King George V keeping watch on Brest to prevent the breakout of German battlecruisers Scharnhorst and Gneisenau. The two German ships had stayed in France since February 1941 and would be there for another year. London's next mission was escorting slow convoys out of Sierra Leone, during which she had to conduct circuitous movements around the six-knot merchant ships to adapt to their slow speed.
On 12 May, London carried 600 Army soldiers from England to Gibraltar. The consistent high speed and plentiful space made the cruiser an ideal ship for transportation, and it would conduct more such operations throughout the rest of the war. After offloading her passengers at Gibraltar, London stayed in port for a few days, as she was due to return to Britain carrying soldiers going home on leave. Together with the cruiser HMS Edinburgh, she provided escort for a UK-bound convoy, carrying evacuees from Gibraltar. During her time in Gibraltar, Italian aircraft tried to bomb the port but missed. London's AA guns went to engage, but the planes were too far away to shoot down. Sailing north from Gibraltar on 23 May, London encountered a Vichy French ship that she stopped and searched.
Shortly before 5 p.m., on 24 May, London received an immediate order to take over shadowing duties, searching the German battleship Bismarck, which was cornered and destroyed on 27 May, leaving HMS London re-ordered to search for German supply ships in the central and southern Atlantic.
On 31 May, HMS London called in at Bathurst, Gambia, to land some of the troops embarked at Gibraltar. HMS London sailed again that afternoon, hunting for German supply ships. On 4 June at 07° 35' N – 31° 29' W, London found the German supply ship Esso Hamburg, a 17,000-ton fuel tanker, which had in fact refuelled the Prinz Eugen on the morning of 28 May. On 5 June, HMS London found another German supply ship, Egerland, flying the Panamanian flag. To prevent her from scuttling herself, London opened fire on her at a very long range, setting the ship on fire. The vessel's crew set scuttling charges and abandoned ship, with several boatloads of Germans taken aboard the already crowded London.
HMS London headed to Sierra Leone to offload her passengers, and for part of the way, she helped escort a convoy heading in the same direction. London left the convoy on 7 June and went ahead.
On 6 July, HMS London left Sierra Leone and four days later came across another Vichy French merchant ship that was boarded and searched. On 24 July, London was suddenly called back to England from Gibraltar for searching for a new German raider in North Atlantic. Soon, London was deployed to Iceland for further operation.
The high seas raider alert proved to be a false alarm and, after loitering off Iceland for a short while, London came down to Scapa Flow, arriving on 23 July. In the following two months, London was assigned to multiple convoy-escorting missions near Home waters until 22 September, when London was selected for VIP transport. Her mission was to carry a group of American and British government officials, military persons, and business tycoons to Archangel in the far north of Russia to discuss the Lend-Lease agreement and other cooperation in the war.
Covered by the bad weather in the Arctic region, London maintained a high speed on her way to Russia to prevent reconnaissance or attacks from German U-boats and Luftwaffe. HMS London deposited her precious cargo at Archangel on 27 September. To hide from being bombed, London left Archangel on 28 September, and waited for the diplomats to return. During this time, she escorted a UK-bound convoy, which had been the first Arctic convoy journey of the war. On 2 October, London returned to Archangel to pick up the VIPs.
1942
HMS London returned to England for another refit from November 1941 to January 1942 to fix the cracks in the upper deck and leaking around the machinery spaces caused by the previous reconstruction.
In early February, London completed her refit, and she sailed for Iceland, from where she would conduct "Patrol White", a series of patrols preventing German raiders in the northern areas, typically the Denmark Strait and Norwegian Sea. For London, it would mean many months in the Arctic. The combination of endlessly severe wind, gale-whipped waves, and extremely low temperature created a difficult environment in the Arctic and pushed London and her crews to their limits. Even with her high freeboard, the icing on the upper deck and superstructure is still a usual sight in the Patrol White.
In mid-February, HMS London became the flagship of the First Cruiser Squadron, including her sister ship HMS Norfolk, the only two available heavy cruisers remaining in Home Fleet. The expanded scale of war meant the Royal Navy had to dispatch the already depleted fleet to the Far East while the new ships were still under construction. Luckily, the US Navy Task Force 39.1, including battleship USS Washington, two heavy cruisers, and a flotilla of destroyers, joined the escort for arctic convoy to relieve the British. At that time, Anglo-American naval operations were frequently mounted to sink the German battleship, Tirpitz.
On 7 March, London returned to Iceland from a Patrol White for refuelling but immediately put to sea under urgent orders of the Admiralty, traveling all night at high speed on action stations as German battleship Tirpitz left Trondheim and headed north early that day in search of convoy PQ12. In the following day, London joined the strike force with the aircraft carrier HMS Victorious, which launched a wave of torpedo bombers to Tirpitz. Unfortunately, none of the torpedoes caused damage to the German battleship. Tirpitz was able to seek refuge in the Vestfjord unharmed. London kept patrolling in the Norwegian Sea until early April when she returned Scapa Flow for supply and fueling.
On 28 April, HMS made a sortie from Scapa to cover the convoy PQ15 and QP11, together with HMS King George V, Nigeria, and Victorious, as well as USS Washington, Wichita, and Tuscaloosa, alongside some destroyers. The Home Fleet Task Force sailed along the convoy between Norway and Iceland: London and three other cruisers closely around the merchant ships, while the battleships guard in the distance for Germany warships.
On April 29, the pocket battleship Admiral Scheer was reported to be at sea, but she turned around without attacking the convoy. On the following day, the Luftwaffe's bombers attacked the convoy. London provided air defence with both her main and secondary batteries. The Luftwaffe continued the attack on May 1, and the cruisers provided essential air defence for the convoy. London, in particular with her radar-guided high angle 4-inch guns, claimed shooting down six Ju 88s.
HMS London was back at Scapa Flow by May 5 and nothing much happened for the following nine days until May 14, when London left Scapa with battleship Duke of York, aircraft carrier Victorious, and a flotilla of destroyers in an attempt to rescue cruiser HMS Trinidad, which was badly damaged by German bombers on her way to Russia. After emergency repairs in Murmansk, Trinidad headed for the Scapa on May 13, accompanied by four destroyers. However, German aircraft spotted Trinidad late in the evening of May 14 and demobilized Trinidad in the following strike. The ship was abandoned and sunk by escorting destroyers on May 15.
On June 27, HMS London, alongside HMS Norfolk, USS Tuscaloosa, and USS Wichita, participated in the escort of the PQ17 convoy from Iceland. Similar to PQ15, the cruisers provided close-range escorts for the convoy. The cruisers were five miles in front, zig-zagging to reduce the risk of being hit by torpedoes. By July 1, although London and other cruisers sent their aircraft for anti-submarine patrol, the convoy was spotted by a U-boat. The Germans were planning a combined offensive involving U-boats, bombers, and surface units. On July 3, battleship Tirpitz and heavy cruiser Admiral Hipper sortied from Altenfjord, pocket battleship Scheer and heavy cruiser Lützow sortied in the far north of Norway.
Meanwhile, PQ17 was under attack from bombers and U-boats. In the early hours of July 4, a single plane shot out of a fog bank and dropped its torpedo, hitting a cargo vessel and damaging her so badly she had to be scuttled. Later the same day, a group of torpedo-bombers attacked and sank another merchant ship. Just under an hour later, more than thirty German aircraft attacked the convoy again. Several were shot down, but two more ships were damaged. London contributed to the air defence with her AA guns, helping to disrupt the torpedo bombers.
By the evening of July 4, the Admiralty was confident that Tirpitz was in the Altenfjord. The increasing volume of German signals traffic seemed to indicate that something was about to happen. In the early hours of July 4, the Admiralty had advised London, the flagship of the cruisers, to stay with the convoy until it was level with North Cape (25° East).
At the Admiralty in London, the latest deciphered German signals revealed the German had mistaken HMS London for a King George V-class battleship, sailing in company with three escorting destroyers. Because of her rebuilt superstructure and the relatively huge hull, London's silhouette was different from any other British cruisers. The foggy weather also made it hard for the scout plane to correctly identify HMS London. The presence of British battleships or aircraft carriers certainly made the Germans cautious. As in the example of PQ12, the airstrike from HMS Victorious halted the engagement of Tirpitz. However, in the Admiralty's view, if the convoy continued on its way, it would be harassed by enemy U-boats and aircraft. Any enemy heavy ships would most likely be encountered east of North Cape, beyond the effective range of Home Fleet. The enemy would need no more than ten hours to reach the convoy, and could return to safety in less than that time. Hence, the decision was made to scatter the convoy, with the intention of minimizing the greater losses anticipated from a surface attack compared with those inflicted by U-boats and aircraft.[3]
In the evening of July 4, the Admiralty sent orders to Admiral Hamilton, who was in charge of First Cruiser Squadron on HMS London.
At 9:11 p.m. on the cruiser's bridge, the first signal arrived. Marked 'MOST IMMEDIATE', it said:[4]
|
CRUISER FORCE WITHDRAW TO THE WESTWARDS AT HIGH SPEED |
Twelve minutes later, another equally alarming signal hit HMS London:
|
IMMEDIATE… OWING TO THREAT FROM SURFACE SHIPS, CONVOY IS TO DISPERSE AND PROCEED TO RUSSIAN PORTS |
This was followed, at 9.36 p.m., by the signal that has gone down as one of the most notorious in naval history:
|
MOST IMMEDIATE. CONVOY IS TO SCATTER |
On the night of 4 July, HMS London and the other warships sped away from the dismissing convoy. The destroyers and cruisers continued a nightmare dash at high speed through the fog and a sea scattered with icebergs. As the cruisers and destroyers sped on, the communicators in London read with mounting horror the signals from PQ17 merchant ships as they were ripped apart by aircraft and U-boats. Captain of HMS London offered to go back, but Rear Admiral Hamilton reminded him that his ships were low on oil and had lost their fuel ship somewhere in the scattered convoy.[5]
The rest was an absolute disaster for the convoy. On 5 July, 14 of 34 merchant ships were sunk or demobilized by air strikes and U-boats. In the following week, nine more merchantmen were sunk or abandoned. Ultimately only eleven merchant ships reached their intended destination – two British, seven American, and two Russian. The destruction of PQ17 triggered a series of consequences in all aspects. For the Royal Navy, the arctic convoy was held until September when a new tactic was planned for escorting convoy.
HMS London returned to Scapa on 8 July and stayed there until September 1942 when the arctic convoys was restarted, then she moved to Hvalfjord. London had departed Hvalfjord on 14 September in company with Norfolk, Sussex, Cumberland, and Sheffield, together with destroyers to escort the convoy PQ18. The British cruiser force patrolled between Bear Island and Spitzbergen, coming to within 700 miles of the North Pole.
PQ18 suffered ten out of forty merchant vessels sunk while QP14, coming the other way, lost three out of fifteen supply ships. Two British warships were also lost. At the same time, the Germans paid a high price, losing forty aircraft and three U-boats. After that, HMS London provided covers for QP15, a convoy returning to the UK.
1943
HMS London kept on her station in the arctic area until 17 November, when she returned Scapa and was nominated for refit in Tyne shipyard. She sailed up the Tyne to Middle Dock at North Shields for another refit. The refit lasted five months and involved considerable strengthening for cracks and repairing leaks of oil tanks. A new surface warning radar, Type 273, and fire control radar, Type 282, for 40 mm cannons were added. The cruiser's aircraft launch gear was removed, and seven additional 20 mm cannons (eight single 20 mm cannons had been fitted during the previous refit, in place of her machine guns). By 4 May 1943, HMS London was back at Scapa Flow and on sea trials before resuming convoy escort work and patrols in the Denmark Strait.
London spent some time in Scapa for training. In early July, she was deployed with HMS Belfast and HMS Kent with destroyers in diversionary moves around Norway to distract attention away from the Allied landings in Sicily by reinforcing Hitler's fear about an invasion of Norway. Around the same time, London took part in Operation Holder, convoying supplies, personnel, and mail to Royal Navy bases in north Russia. On 9 July, London returned to Scapa and resumed interception duties to prevent the breakout of German warships for attacks on Atlantic convoy in the following months.
In October 1943, HMS London was sent on a special mission to waters around the island of Spitzbergen, far to the north of Iceland, where it was suspected the Germans were maintaining a secret radio intercept station. The cruiser sailed around the island but failed to find any such station.
Late in the same month, the cruiser helped escort a convoy of five US-built minesweepers and six metal-hulled motor launches to Murmansk. For London, service in the Arctic was coming to a close as she was about to receive orders for another diplomatic mission, this time carrying members of the Prime Minister's staff to Egypt. In early November, she was tasked to Plymouth to pick up the mission members, ending London's activity in the Arctic.
Arriving at Plymouth on 10 November, HMS London carried members of the Prime Minister's staff, while Churchill himself sailed to Egypt for the Cairo conference in the battlecruiser HMS Renown. London also loaded the 'Stalingrad Sword,' a gift from King George VI to the people of Stalingrad that celebrated the great victory over the Germans. It had been carried from Plymouth to Egypt by HMS London before being put on the plane with the British delegation.
London stayed at Alexandria during the Cairo conference, and in early December, set out on the journey home carrying VIP passengers. Arriving at Gibraltar on 13 December, London left for the UK four days later for troop transportation. On 21 December, she arrived in the Clyde, disembarked her passengers, and two days later sailed for Rosyth to undergo another refit, during which four twin 20 mm guns were fitted to reinforce the AA defence.
1944
In early February 1944, HMS London was back on the Clyde for mail and new drafts of sailors. By then, the Admiralty had decided to deploy her for service in Eastern Fleet. On 13 March, London arrived at Colombo, one of the two major British naval bases in Ceylon, and, four days later, transferred to the other, Trincomalee.
On 21 March, as a member of the British fleet, London participated in Operation Diplomat, which was a naval training operation between Royal Navy and US Navy. The operations aimed to practice operational procedures and tactics that the British Pacific fleet would use. On 27 March, London met the US Task Group 58.5. In the following month, London was assigned to Task Force 70 for Air Rescue duty for aircraft carriers. On 19 April, the task force attacked the island of Sabang with no serious opposition from the Japanese. London provided close covers to carriers during attacks on Sabang. On 24 April, the Task Force returned to Trincomalee for resupply.
On 30 April, HMS London was assigned to Task Force 67 with her sister ship HMS Suffolk. The fleet sailed to Exmouth Bay, Western Australia for Operation Transom, an air raid marking the return of the British fleet in the Pacific. London was reassigned to Task Force 66 on 15 May to provide escorts for aircraft carriers during the airstrike on the Japanese-held Surabaya. She accompanied British aircraft carriers for the rest of May until they returned to Trincomalee.
On 12 September, after a period of fleet exercises, London arrived at Bombay, where she entered dry dock for hull cleaning and essential maintenance. Thirteen days later, London left Bombay, carried out some gunnery practice, and headed for Ceylon. She was to join Task Group 63.2 to escort aircraft carrier for a bombardment mission in mid-October against Car Nicobar in the Nicobar Islands, north of Sumatra. London contributed to air defence on 19 October, when the fleet shot down seven Japanese torpedo bombers in total.
1945
In early 1945, HMS London provided convoy escorts in the Indian ocean. On 8 April 1945, London joined the British East Indies Fleet's Task Force 63 for another bombardment mission. The warships were left in two groups, with London in Group One alongside HMS Queen Elizabeth, the French battleship Richelieu and destroyers. Group Two included the escort carriers Khedive and Emperor, the cruiser Cumberland and the destroyers Virago and Venus.
On 11 April, London and battleships carried out a bombardment on coastal artillery at Sabang. In the following week, London provided close escorts for carrier operations until TF63 returned to Trincomalee on 18 April.
On 13 May, London set sail for Simonstown naval base in South Africa where she was dry-docked for a refit, in which a barrage fire control radar (Type 283) and new surface warning radar (Type 277) were added on the ship. HMS London returned to her duty in early August of 1945, preparing for an amphibious assault in southern Malaya. But the operation was canceled on 15 August, just at the same time when Japan surrendered. After Japan surrendered, on 28 August, HMS London arrived in Sabang to disarm the local Japanese garrison and received charts of the Japanese minefields off Malaya and Singapore from the Japanese delegation.
On 14 October, at Colombo, London embarked around 400 passengers and 200 bags of mail and the following morning set sail for home, arriving at Sheerness three weeks later. By 9 November, HMS London returned her home at Chatham marking the end of her story in WWII.
London might have come through the Second World War unscathed and unnoticed, but ahead lay her sternest test under fire and it would make headlines around the world.
After the war
Prior to joining the Royal Navy Reserve, HMS London was used as troop transport from UK to Colombo (26 Nov 1945), Sydney (19 Jan 1946) and after a brief refit in Devonport, to Singapore (May 1946). She returned to Plymouth in late June that year.
But by the end of 1946, London was refitted for further service in the Far East as she was the only modernized 8-inch gun cruiser in Royal Navy. The refit was completed in 1947. After working up, the cruiser joined the 5th Cruiser Squadron at Royal Navy China Station in Hong Kong to protect British interests and civilians in the Eastern waters.
During her final deployment, the most notable event was the attempt to rescue HM Sloop Amethyst, known as the Yangtze Incident, from 20 April to 21 April 1949.
After World War Two, a Chinese civil war broke out between the nationalists led by Chiang Kai Shek, who were bitter enemies of the Communists led by Mao Tse Tung. By mid-April 1948, the Communists were a short distance from Nanking, the capital of the Nationalist Government, and were building up forces to cross the Yangtze River. To demonstrate protection for British subjects in Chinese waters, the Royal Navy was asked to maintain at least one large ship (cruiser size) with two smaller ships in Shanghai and one small ship at Nanking.
On 17 April 1949, London sailed from Hong Kong to Shanghai. At that time, frigates Amethyst and Black Swan were stationed at Shanghai and destroyer Consort at Nanking. The Naval Attaché at Nanking advised that the Communist army would attempt to cross the Yangtze River on 21 April, and British ships should avoid any involvement. On 20 April, Amethyst came to relieve Consort at Nanking, and at 9:30 a.m., Amethyst was under artillery fire from the north bank. The frigate's bridge and machinery room were hit by shells, causing the frigate to lose control and beached on Rose Island.[6]
On 20 April, HMS London, flying the flag of Vice-Admiral Madden, was approaching the mouth of the Yangtze River bound for Shanghai on a flag-showing visit. During the forenoon, London was receiving information from Amethyst that she was attacked by unexpected fire and demobilized. The Admiral ordered the frigate, Black Swan, to join London and decided to weigh anchor on 21 April and proceed upriver with Black Swan to rescue Amethyst.
In the early morning of the following day, London and Black Swan moved upriver. The British ships anchored off at 8:00 a.m., as Amethyst managed to move out of Rose Island. Admiral Madden called Amethyst to rejoin the fleet. But, due to the death of the navigator and damage to charts, Amethyst was unable to set the correct heading. In this case, London and Black Swan weighed anchor again at 10:26 a.m. and moved up the river. In less than a few minutes, the Communists opened fire on London and Black Swan with large-calibre howitzers and small-calibre cannons. London counterattacked with her main guns and secondary armaments. The large-calibre batteries were easy to spot and destroy, while smaller calibre weapons were well concealed and difficult to hit. At some time before 11:00 a.m., a howitzer shell hit the bridge, injuring the captain. At that time, considering the low possibility of escorting Amethyst under heavy fire and increasing damage on the ship, Admiral Madden decided to withdraw at 11:04 a.m. London and Black Swan turned back and arrived in Shanghai later that day.
London had been under fire for 48 minutes in an overall period of 3 hours.[7] In that period, London fired 155 rounds of 8-inch, 449 rounds of 4-inch, and more than 2,600 small calibre AA guns. Among London's crew, 13 people are dead and 59 people wounded, of whom two died later. Amethyst would make her escape in three months.
After some temporary repairs in Shanghai, HMS London departed on 14 June, heading south to Singapore, where she spent a few weeks. On 18 June, London left Singapore and on her way to the UK. She arrived in Chatham on 8 September. By the end of 1949, she received an inspection to determine if she could serve further after an overall refit. However, London's ageing machinery and construction meant it would be too expensive to keep in service. She was placed on the Disposal List and laid up at Falmouth before sale to BISCO for demolition by T W Ward on 3 January 1950. The ship went to Barrow-in-Furness under tow and arrived at the breaker's yard on 22 January. Work on demolition was completed later that year.
Devblog
The County-class cruisers, also known as the A-Type cruisers, were the first British cruiser vessels to be developed in the interwar period of the 1920s. Their design being heavily influenced by the restrictions imposed by the Washington Naval Treaty, meant that British shipbuilders had to find compromises during development in order to comply with the treaty as well as to meet the requirements of the Royal Navy for a ship capable of trade route protection.
This resulted in the creation of a ship design with good cruising range and adequate firepower, but very light armour protection in order to stay within treaty restrictions. The orders for the first ships were placed in the mid 1920s and construction began in 1924.
HMS London (C69) was laid down in February 1926 and commissioned into service in January 1929 as the lead ship of the second batch of County-class cruisers to be built, known as the London subclass. During the 1930s, HMS London took part in a goodwill visit to Venice and assisted in the evacuation of civilians from Barcelona during the Spanish Civil War, before being sent to drydock for refit in 1939.
In 1941, HMS London took part in the hunt for the battleship Bismarck, after which the ship was once again dry-docked for repairs. The following year, HMS London assisted in escorting several convoys in the Atlantic, after which she was assigned to South African waters in 1943, before joining the Eastern Fleet. HMS London continued serving in the postwar years, during which the ship got involved in an incident in Chinese waters in 1949 which left it heavily damaged. Being deemed uneconomical for repairs, HMS London was sold for scrap in January 1950.
Media
- Skins
- Images


- Videos
See also
Links to articles on the War Thunder Wiki that you think will be useful for the reader, for example:
- reference to the series of the ship;
- links to approximate analogues of other nations and research trees.
External links
References
- Citations
- ↑ Brown, D. K. (2012). Nelson to Vanguard: Warship Design and Development 1923 1945. Seaforth Publishing.
- ↑ Klapsis, A. (2009). Between the Hammer and the Anvil. The Cyprus Question and Greek Foreign Policy from the Treaty of Lausanne to the 1931 Revolt.
- ↑ Vego, M. (2016). The Destruction of Convoy PQ17: 27 June–10 July 1942. Naval War College Review, 69(3), 83-142.
- ↑ Churchill, W. (1951). The Second World War-Volume 4: The Hinge of Fate. Rosetta Book LLC.
- ↑ Ballantyne, I. (2002). HMS London: Warships of the Royal Navy. Casemate Publishers.
- ↑ Hughes, W.R.N..(1979). HMS Amethyst - the Yangtse Incident 1948. Naval Historical Review.
- ↑ Dalrymple, Gordon. & Stewart, Neil. (2011). HMS London in the River Yangtze 20 & 21 April 1949. Monograph No.170.
- Bibliography
- Anderson, P. (2019). British Government Maritime Evacuations in the Spanish Civil War, 1936–1939. War in History, 26(1), 65-85.
- Beesly, P. (1990). Convoy PQ 17: A study of intelligence and decision‐making. Intelligence and National Security, 5(2), 292-322.
- Chen, C. (2007, May). Heavy Cruiser London. Retrieved November 17, 2020, from https://ww2db.com/ship_spec.php?ship_id=326
- Colledge, J. J., & Warlow, B. (2010). Ships of the Royal Navy: The complete record of all fighting ships of the Royal Navy from the 15th century to the present. Casemate/Greenhill.
- Helgason, G. (1995). HMS London (69). Retrieved November 17, 2020, from https://uboat.net/allies/warships/ship/1178.html
- Irving, D. J. C. (1968). The Destruction of Convoy PQ. 17. Cassell.
| Portsmouth Royal Dockyard | |
|---|---|
| Frigates | |
| Leopard-class | HMS Leopard |
| Heavy Cruisers | |
| County-class | HMS London |
| Battleships | |
| Unique ships | HMS Dreadnought |
| Orion-class | HMS Orion |
| Iron Duke-class | HMS Iron Duke |
| Britain heavy cruisers | |
|---|---|
| Hawkins-class | HMS Hawkins |
| York-class | HMS York |
| County-class | HMS Kent · HMS London · HMS Norfolk |
