
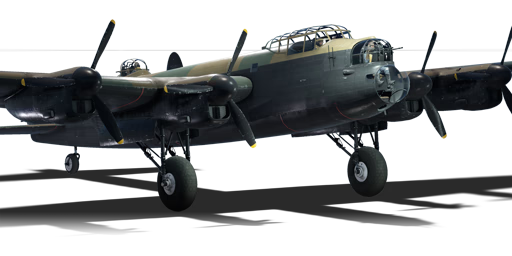


The Lancaster B Mk III was a variant of the Avro Lancaster heavy bomber developed concurrently with the base Mk I variant. Compared to the original, the Mk III utilised a licence-built version of the Rolls-Royce Merlin engines produced by the Packard company. While visually indistinguishable from the base variant, the Mk III utilises Bendix-Stromberg pressure-injection carburettors, resulting in a slightly higher top speed but lower altitude ceiling. After several Lancasters were lost to the Luftwaffe’s heavy fighters in 1942, the RAF realised that the bomber’s original tail turret with four .303 cal (7.7 mm) Browning machine guns was completely inadequate against well-armoured German fighters; as such, a new tail turret, later dubbed the “Rose turret”, featuring a pair of .50 cal (12.7 mm) Browning machine guns, was outfitted onto the Lancaster from late 1944 onwards. Further redesign of the Lancaster to improve its capabilities and defensive armaments, initially designated the “Lancaster B Mk IV”, was later classified as a separate aircraft, designated the Avro Lincoln.
The Lancaster Mk III has been in the game since the start of the Open Beta Test prior to Update 1.27. Compared to its early Mk I version, the Mk III is in the late-war configuration, featuring the “Rose turret” with a pair of .50 Browning machine guns as well as slight performance differences, but is otherwise identical. The upgunned tail turret offers an actual fighting chance against incoming fighters, but the overall defensive capabilities of the Lancaster remain poor. As such, much like the previous version, it is advised to avoid confrontations as much as possible in order to be able to deliver the heavy payload without being intercepted.
flaps
flaps
flaps
brake
| Belt | Belt filling | Armor penetration (mm) at a distance: | |||||
|---|---|---|---|---|---|---|---|
| 10 m | 100 m | 500 m | 1000 m | 1500 m | 2000 m | ||
| T/Ball/Ball/I/AP-I | 26 | 24 | 18 | 12 | 8 | 5 | |
| AP/AP/AP/T/I | 30 | 27 | 20 | 13 | 9 | 6 | |
| AP-I/AP-I/AP-I/T | 26 | 24 | 18 | 12 | 8 | 5 | |
| Belt | Belt filling | Armor penetration (mm) at a distance: | |||||
|---|---|---|---|---|---|---|---|
| 10 m | 100 m | 500 m | 1000 m | 1500 m | 2000 m | ||
| T/AP/AP-I/Ball/Ball/I | 13 | 12 | 7 | 3 | 2 | 0 | |
| T/AP/AP/AP | 13 | 12 | 7 | 3 | 2 | 0 | |
| T/AP-I/AP-I/AP-I | 13 | 12 | 7 | 3 | 2 | 0 | |
8 × M.C. 250 lb Mk.I bomb
6 × M.C. 500 lb Mk.I bomb
2 × M.C. 250 lb Mk.I bomb
6 × 1000 lb M.C. Mk.II bomb
6 × 1000 lb M.C. Mk.II bomb
2 × G.P. 250 lb Mk.IV bomb
6 × G.P. 500 lb Mk.IV bomb

Flight performance | |
|---|---|
Survivability |
|---|
Weaponry | ||
|---|---|---|
