File list
This special page shows all uploaded files.
| Date | Name | Thumbnail | Size | Description | Versions |
|---|---|---|---|---|---|
| 03:24, 6 July 2019 | Vertical ATGM tactics - ambush attack.jpg (file) | 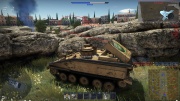 |
863 KB | Screenshot showcases Striker attacking Sheridan over cover, while remaining invisible. Category:In-game screenshots | 1 |
| 03:14, 6 July 2019 | Sniping tactics - Special sniper cave.jpg (file) | 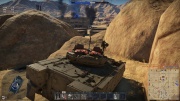 |
657 KB | Screenshot showcases special sniper spot on "middle east" which is useable by east team. It is a haven for scout and sniper tanks, and allows to snipe all three capture points, while being mostly concealed. Category:In-game screenshots | 1 |
| 03:07, 6 July 2019 | Sniping tactics - High ground out of sight.jpg (file) | 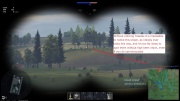 |
421 KB | Screenshot shows hostile Striker using high ground on edge of a map, just far enough away from general sniper spotting directions to not be noticed. Only missiles are visible. It is also far enough for normal tanks to fail spotting it regardless. [[Ca... | 1 |
| 03:01, 6 July 2019 | Sniping tactics - stay out of sight mozdok south team.jpg (file) | 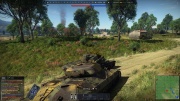 |
830 KB | Scheenshot from single cap mozdok map, which is notorious for being a "shooting range with no cover". This is a sniping spot which allows to hide from most of opponents and reduce the amount of incoming fire for south team. [[Category:In-game screens... | 1 |
| 03:00, 6 July 2019 | Sniping tactics - stay out of sight mozdok north team.jpg (file) |  |
558 KB | Scheenshot from single cap mozdok map, which is notorious for being a "shooting range with no cover". This is a sniping spot which allows to hide from most of opponents and reduce the amount of incoming fire for north team. [[Category:In-game screensh... | 1 |
| 02:49, 6 July 2019 | Wall flank - result.jpg (file) |  |
516 KB | Screenshot showcases the end result of a successfull flank with through-wall attacks. Category:In-game screenshots | 1 |
| 02:41, 6 July 2019 | Wall flank - transfer into normal flank.jpg (file) |  |
432 KB | Screenshot showcases a successfull flank into weakened enemy team, after "wall flank" cleanup. Category:In-game screenshots | 1 |
| 02:32, 6 July 2019 | Wall flank - SPG attacks by keen vision.jpg (file) |  |
427 KB | Screenshot shows Ho-Ri destroying enemy heavy tank through a wall. High keen vision was used instead of "scouting". Category:In-game screenshots | 1 |
| 02:25, 6 July 2019 | Wall flank - Scout supports SPG.jpg (file) | 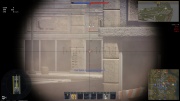 |
350 KB | Screenshot shows Ho-Ri firing through wall with a help of scout. Category:In-game screenshots | 1 |
| 02:17, 6 July 2019 | Wall flank - beginning.jpg (file) | 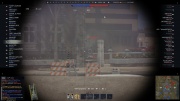 |
370 KB | Screenshot is used in a series. Shows situation in a typical failed flank - Ho-Ri is forced to fight a bunch of tanks it can't really destroy frontally. Category:In-game screenshots | 1 |
| 02:08, 6 July 2019 | Wall flank - scout duel.jpg (file) | 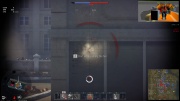 |
291 KB | Screenshot showcases Warrior and OBJ-906 scouting eachother on map of alaska and trying to destroy eachother through a wall. It may look like Warrior won, but any of their allies is free to join the duel at any moment. Category:In-game screenshots | 1 |
| 02:01, 6 July 2019 | General flanking example - avoiding threats.jpg (file) | 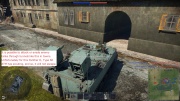 |
823 KB | Screenshot shows Panther II, which managed to avoid entire enemy team for a long time using tunnels and smart movement. Their game is finally over, when the scout tank notices them. Category:In-game screenshots | 1 |
| 01:59, 6 July 2019 | General flanking example - late game flank.jpg (file) | 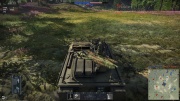 |
738 KB | Screenshot showcases Swingfire using radio communication to freely flank enemy medium tank. Category:In-game screenshots | 1 |
| 01:41, 6 July 2019 | General flanking example - getting to the capture point.jpg (file) | 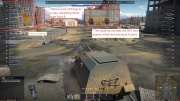 |
807 KB | Self explanatory. Screenshot is supposed to help notice some important details of maps, when you are playing "flanker" Category:In-game screenshots | 1 |
| 01:28, 6 July 2019 | Vision example - smoke set in.jpg (file) | 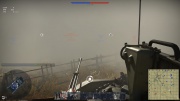 |
266 KB | Screenshot showcases vision and smoke mechanics in arcade battle mode. This screenshot is third in series, to show how enemy looks like with smoke being present. Only the "scouted" target is visible, per rules. Category:In-game screenshots | 1 |
| 01:26, 6 July 2019 | Vision example - smoke didn't set in.jpg (file) | 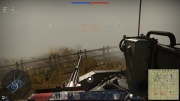 |
336 KB | Screenshot showcases vision and smoke mechanics in arcade battle mode. This screenshot is second in series, to show how enemy looks like with no smoke being present, but not quite setting in yet (5 or 2 second delay still didn't pass) [[Category:In-ga... | 1 |
| 01:23, 6 July 2019 | Vision example - no smoke.jpg (file) | 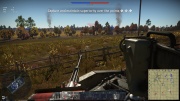 |
544 KB | Screenshot showcases vision and smoke mechanics in arcade battle mode. This screenshot is first in series, to show how enemy looks like with no smoke present. Category:In-game screenshots | 1 |
| 01:20, 6 July 2019 | Maxed out keen vision - wall detection.jpg (file) | 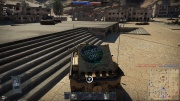 |
793 KB | Screenshot shows at which range away from corner of cover Maxed keen vision will spot enemy tank behind a stone wall. Category:In-game screenshots | 1 |
| 01:18, 6 July 2019 | Maxed out keen vision - wall detection failure.jpg (file) | 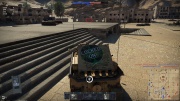 |
793 KB | Tank destroyer is trying to see enemy tank, but despite maximum keen vision possible it cannot. Enemy tank is located in marked area. Category:In-game screenshots | 1 |
| 01:08, 6 July 2019 | Maxed out keen vision - through cover.jpg (file) | 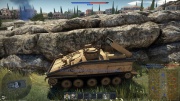 |
739 KB | Tank destroyer is using maximal keen vision while being infront of it's cover, to see enemy over it. This generally requires extremely high skill level, as well as at least "expert" crew. Category:In-game screenshots | 1 |
| 01:03, 6 July 2019 | Maxed out keen vision - over corner.jpg (file) | 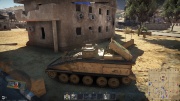 |
589 KB | Tank destroyer is pushing limits of keen vision by trying to spot enemy tank around corner. Category:In-game screenshots | 1 |
| 01:00, 6 July 2019 | Maxed out keen vision - over distance.jpg (file) | 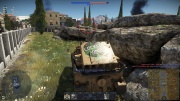 |
878 KB | Maxed out keen vision allows tank destroyer to notice a person behind a building far away. You can tell, that enemy is behind building, because the mark is darkened. Category:In-game screenshots | 1 |
| 00:49, 6 July 2019 | Average keen vision example.jpg (file) | 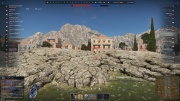 |
684 KB | Screenshot shows, that tank should be visibly exposed to get marked by people with no keen vision. In reality, there is a lot of trees and trash in between two tanks, but for convenience screenshot was taken from another angle. [[Category:In-game scre... | 1 |
| 00:37, 6 July 2019 | General flanking example - flanker overlooks enemy.jpg (file) | 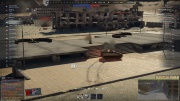 |
602 KB | In this screenshot, flanking tank destroyer fails to notice enemy tank, which stumbled upon it. File:General flanking example - enemy overlooks flanker.jpg | 1 |
| 00:36, 6 July 2019 | General flanking example - enemy overlooks flanker.jpg (file) | 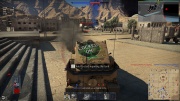 |
611 KB | Enemy tank fails to notice tank destroyer and drives pas it, oblivious to it's demise. Category:In-game screenshots | 1 |
| 15:54, 2 July 2019 | Radio communication AB example.jpg (file) | 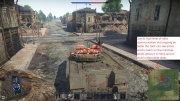 |
847 KB | This screenshot shows the power of the "radio communication" skill combined with air support in arcade mode. Category:In-game screenshots | 1 |
| 23:33, 1 July 2019 | General flanking example - end of the flank.jpg (file) | 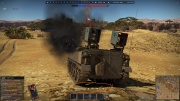 |
757 KB | Screenshot shows overall success of initial flank attack during showcased mission. Type 60 ATM is heavily damaged, but managed to completely ruin a 4 tank attack on B point and even do damage on C. Category:In-game screenshots | 1 |
| 23:28, 1 July 2019 | General flanking example - Flank another capture point.jpg (file) | 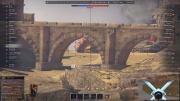 |
522 KB | Screenshot used in combination with other 2 to show, how oblivious enemy can sometimes be to cross-map flanking. Category:In-game screenshots | 1 |
| 23:26, 1 July 2019 | General flanking example - Observation.jpg (file) | 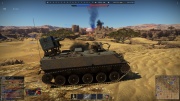 |
580 KB | Screenshot shows the importance of looking around, when player has the time. In this case player noticed an easy target on other capture point. Category:In-game screenshots | 1 |
| 23:17, 1 July 2019 | General flanking example - reason for picking up special tanks.jpg (file) | 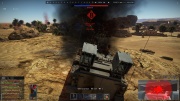 |
568 KB | Screenshot shows that while flanking opponents, you will sometimes meet adequate resistance, and thus specialized tanks should be chosen for flanking instead of just using average vehicles. Category:In-game screenshots | 1 |
| 23:11, 1 July 2019 | General flanking example - opening.jpg (file) | 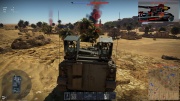 |
590 KB | Type 60 ATM stealth-climbed on top of enemy plateau and unleashed an attack on unsuspecting enemy party. To increase morale damage and to remove risk of being scouted, light tank was targeted first. Category:In-game screenshots | 1 |
| 23:05, 1 July 2019 | General flanking example - sneaking in.jpg (file) | 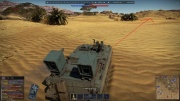 |
757 KB | Type 60 ATM sneaks on top of plateau of El Alamein on enemy side of the map. Player looks towards enemy spawn point to not get caught off guard. Category:In-game screenshots | 1 |
| 23:00, 1 July 2019 | General flanking example - map explanation.jpg (file) | 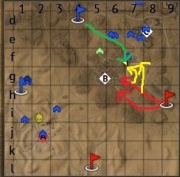 |
36 KB | Flanking explanation for "second battle of of El Alamein" map. Green arrow represents flank route, red arrows represent enemy main push force, yellow arrows represent enemy flank force. Category:In-game screenshots | 1 |
| 23:17, 8 June 2019 | Type 60 ATM american desert AB improvised hulldown.jpg (file) |  |
515 KB | On maps with destructible enviroment, Type 60 ATM can use broken houses as a cover against other tanks. Category:In-game screenshots | 1 |
| 22:58, 8 June 2019 | Normandy AB Type 60 ATM last stand.jpg (file) | 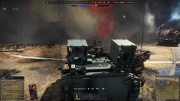 |
445 KB | When a lot of enemies are stalled on type 60 ATM position, or it simply is out of ammo, in arcade one should call-in bomber. Carpet bombing entire street in such conditions can destroy entire tank squads. Category:In-game screenshots | 1 |
| 22:55, 8 June 2019 | Normandy AB Type 60 ATM hulldown.jpg (file) | 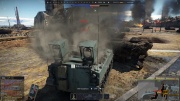 |
547 KB | Risky type 60 ATM defence on a capture point. Hulldown is a main part of this strategy, to give enemy something to fire at, but to scare them enough to stop them from advancing. Category:In-game screenshots | 1 |
| 18:12, 1 June 2019 | 105 mm hesh hullbreaks through addon armour.jpg (file) | 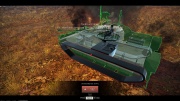 |
652 KB | Self explanatory. | 1 |
| 18:12, 1 June 2019 | 75 mm HE hullbreaks warrior by hitting the track.jpg (file) |  |
600 KB | Self explanatory. Shot was made in such way that only the track is hit. | 1 |
| 18:19, 29 May 2019 | X40 zoom example.jpg (file) | 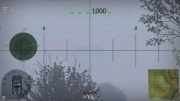 |
312 KB | X40 zoom example for target 1km away. Made with Stormer HMV. Category:In-game screenshots | 1 |
| 21:57, 25 May 2019 | Type 60 atm forward 50 m shot AB.jpg (file) | 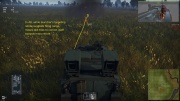 |
777 KB | Screenshot showcases how one should aim close range shot with type 60 ATM in AB. It also kind of displays, that guidance activates much earlier in AB, than in RB. | 1 |
| 21:55, 25 May 2019 | AB indirect melee range L-R shot correction.jpg (file) | 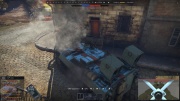 |
468 KB | Screenshot to be used in combo with setup screenshot. In addiion to setup, type 60 ATM operator drags targeting reticle to the right, forcing missile to obey manual input and not only go straight into T64 hull, but also hitting it into weakspot (avoidi... | 1 |
| 21:52, 25 May 2019 | AB indirect melee range L-R shot setup.jpg (file) | 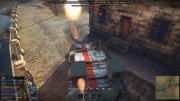 |
510 KB | Combat footage of type 60 ATM trying to nuke T64 with indirect attack. Range is ~30 m. L-R shot. Screenshot shows how operator initially aims at the enemy tank behind wall. The hull placement is also very important. | 1 |
| 21:50, 25 May 2019 | Type 60 atm 50m shot RB angling showcase.jpg (file) | 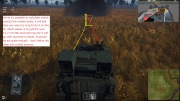 |
857 KB | Screenshot is supposed to be used in pair with other 50m type 60 atm shot screenshot. It shows the heavy difference in missile launch angle. It also shows, that you can calculate the distance of shot (via launcher's reticle) and angle deviation (via lo... | 1 |
| 21:48, 25 May 2019 | Type 60 atm 50 m shot RB.jpg (file) | 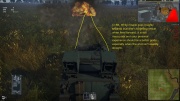 |
741 KB | Showcases where missiles will fly if Type 60 ATM will try to attack something at about 50 m. RB mode. | 1 |
| 21:47, 25 May 2019 | Type 60 atm melee left-left shot RB.jpg (file) | 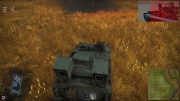 |
767 KB | The closest melee shot one can make with type 60 ATM in RB, without doing any blind guesses. L-L shot. Range is about 35 m. | 1 |
| 21:44, 25 May 2019 | Type 60 atm dead zone range AB.jpg (file) | 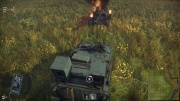 |
1.02 MB | Screenshot showcases dead zone range for type 60 ATM in AB. Note that shot must be made with all the targeting devices in their maximum bottom position for that to land. | 1 |
| 21:43, 25 May 2019 | Type 60 ATM dead zone range RB.jpg (file) |  |
923 KB | Screenshot showcases dead zone range for type 60 ATM in RB. | 1 |
| 21:42, 25 May 2019 | Type 60 atm point blank shot RB.jpg (file) |  |
752 KB | Panic shot with Type 60 ATM. Range is ~6m. Note that both launcher and optics targeting reticle are in their utmost bottom position. | 1 |
| 12:05, 17 May 2019 | A visual bug in italian section.png (file) |  |
68 KB | 1 | |
| 20:27, 6 May 2019 | APHE Fails to penetrate M6A1 front in analysis .jpg (file) |  |
479 KB | A weird spot on M6A1 armour which confuses the scope in AB? | 1 |


