Yak-1B

From War Thunder Wiki
Jump to: navigation, search
VTOL | Rank 5 USA
AV-8A Harrier Pack
This page is about the Soviet fighter Yak-1B. For other versions, see Yak-1 (Family).
Yak-1B
yak-1b.png
GarageImage Yak-1B.jpg
Yak-1B
AB RB SB
3.3 3.0 3.3
Class:
Research:4 600 Specs-Card-Exp.png
Purchase:16 000 Specs-Card-Lion.png
Show in game

Description

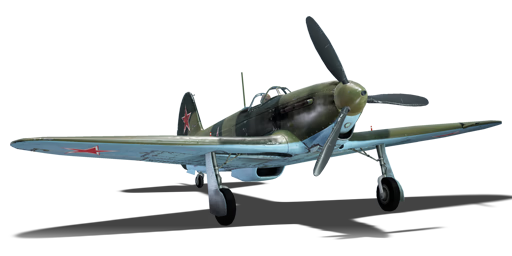
The Yakovlev Yak-1B is the second variant of the Yak-1 fighter aircraft family. The Yak-1B debuted in the autumn of 1942 with a more powerful Klimov M-105P engine with improved low-altitude performance and a single 12.7 mm Berezin UB heavy machine gun instead of two 7.62 mm ShKAS light machine guns. Although this did not significantly enhance the total weight, it did result in a substantial increase in firepower. Other changes were electrical and pneumatic weapon firing instead of the mechanical system, a new control stick based on the Messerschmitt Bf 109's design, a new gunsight, an airtight fuselage, a retractable tailwheel, and enhanced engine cooling. "Yak-1B" was an unofficial designation; all Yak-1s were produced to this specification after October 1942. The first flight (aircraft No. 3560) occurred in June 1942, and manufacture of the Yak-1B began in August. There were 4,188 aircraft manufactured in total.

Introduced in the Open Beta Test prior to Update 1.27, the Yak-1B performs well at low altitudes, while high-altitude performance is still subpar. When compared to the standard Yak-1, structural strength is significantly improved. Despite the increase in firepower, the ammunition available is very limited. To avoid "spraying" the ammunition towards the enemy, the player must use tight trigger control. One significant disadvantage of this plane is the lack of Wartime Emergency Power (WEP); hence, it is critical to keep this in mind during fights to avoid wasting too much energy. Overall, the Yak-1B armament of a 20 mm ShKAS cannon and a single 12.7 mm Berezin UB heavy machine gun will serve as the foundation for several Yak fighter variants in the future.

General info

Flight performance

Max speed
at 4 000 m592 km/h
Turn time18 s
Max altitude10 500 m
EngineKlimov VK-105PF
TypeInline
Cooling systemWater
Take-off weight3 t

This improved Yak-1 features, like most mid-war water-cooled fighters, a 1,210 hp engine. It remains sub-par to the German equivalent. However, at the time this plane was fielded, most enemy vehicles were of heavier weight, meaning that it could further utilize the Yak series' excellent manoeuvrability. However, the aircraft is tiered with earlier vehicles in-game, which shifts the performance spectrum of the Yak-1B towards engine power.

Like other Yakovlev fighters, the Yak-1B is a jack-of-all-trades, having good speed, turning ability, roll rate, and climb. Manoeuvring and vertical energy retention are good, so it does not lose much speed in turns and can perform vertical loops effectively. Energy retention in a straight line is decent. It is slightly heavier than the Yak-1 and the turning ability is negligibly worse. However, the new engine makes it one of the fastest aircraft at low altitudes when flying in a straight line. Under 1,000 meters, it can even outrun some 4.3 aircraft like the Pyörremyrsky by a slim margin.

While the climb rate is good, the engine was designed for low altitudes and the performance drops off drastically at higher altitudes. Power loss is noticeable above 3,000 meters and the aircraft will really start to struggle above 4,000 meters. Another issue is its poor high-speed characteristics. Like many other contemporary Soviet aircraft, the wings are made largely of wood and will rip at relatively low speeds compared to US or German fighters. Even before the rip speed is reached, it suffers from some compression issues. The roll compression starts to become noticeable above ~450 km/h IAS and the elevator suffers significantly above ~600 km/h IAS. While it does not compress as badly as the La-5, combat manoeuvring becomes difficult at these speeds. Even if the wings do not snap, the pilot will easily black out.

The engine tends to run hot and without MEC it will, after quite a while, overheat at 100% throttle. Dialling down the throttle to about 96% will alleviate the issue with minimal performance impact. Alternatively, using MEC and opening the radiators slightly is enough to run it at 100% indefinitely. Note that the Yak-1B does not have a WEP setting in realistic battles.

Characteristics Max Speed
(km/h at 4,000 m)
Max altitude
(metres)
Turn time
(seconds)
Rate of climb
(metres/second)
Take-off run
(metres)
AB RB AB RB AB RB
Stock 575 559 10500 19.3 19.8 13.5 13.5 368
Upgraded 608 592 18.0 18.5 18.7 16.0

Details

Features
Combat flaps Take-off flaps Landing flaps Air brakes Arrestor gear
X X X X
Limits
Wings (km/h) Gear (km/h) Flaps (km/h) Max Static G
Combat Take-off Landing + -
683 320 N/A N/A 280 ~11 ~8
Optimal velocities (km/h)
Ailerons Rudder Elevators Radiator
< 380 < 420 < 490 > 340

Survivability and armour

Crew1 person
Speed of destruction
Structural0 km/h
Gear320 km/h
  • 64 mm Bulletproof glass in cockpit front and rear.
  • 8 mm Steel plate behind the pilot.

Self-sealing fuel tanks are located in the wing roots and wing midsections.

The Yak-1B introduces thick bulletproof glass protecting the pilot and retains the armoured bulkhead behind the pilot's seat from the Yak-1. It is fairly unlikely that the pilot will be knocked out in head-ons as a result. However, the inline, water-cooled engine is very vulnerable to combat damage. The steel plate is enough to protect the pilot from rifle-calibre machine guns from the rear at medium distances, but cannon projectiles and heavy machine guns can still punch right through.

The rest of the airframe has decent constructional strength, though it is still not as hardy as contemporary US aircraft. Cannons and heavy machine guns will do a number on the Yak-1B. The wing fuel tanks are vulnerable to damage in deflection shots and fires will be a common cause of destruction.

Modifications and economy

Repair costBasic → Reference
AB513 → 643 Sl icon.png
RB1 049 → 1 315 Sl icon.png
SB1 556 → 1 951 Sl icon.png
Total cost of modifications8 460 Rp icon.png
9 580 Sl icon.png
Talisman cost640 Ge icon.png
Crew training4 500 Sl icon.png
Experts16 000 Sl icon.png
Aces180 Ge icon.png
Research Aces190 000 Rp icon.png
Reward for battleAB / RB / SB
30 / 70 / 150 % Sl icon.png
118 / 118 / 118 % Rp icon.png
Modifications
Flight performance Survivability Weaponry
Mods aerodinamic fuse.png
Fuselage repair
Research:
560 Rp icon.png
Cost:
630 Sl icon.png
85 Ge icon.png
Mods radiator.png
Radiator
Research:
560 Rp icon.png
Cost:
630 Sl icon.png
85 Ge icon.png
Mods compressor.png
Compressor
Research:
470 Rp icon.png
Cost:
530 Sl icon.png
70 Ge icon.png
Mods aerodinamic wing.png
Wings repair
Research:
700 Rp icon.png
Cost:
790 Sl icon.png
105 Ge icon.png
Mods new engine.png
Engine
Research:
700 Rp icon.png
Cost:
790 Sl icon.png
105 Ge icon.png
Mods armor frame.png
Airframe
Research:
470 Rp icon.png
Cost:
530 Sl icon.png
70 Ge icon.png
Mods armor cover.png
Cover
Research:
1 400 Rp icon.png
Cost:
1 600 Sl icon.png
210 Ge icon.png
Mods ammo.png
ub_belt_pack
Research:
560 Rp icon.png
Cost:
630 Sl icon.png
85 Ge icon.png
Mod arrow 0.png
Mods weapon.png
ub_new_gun
Research:
470 Rp icon.png
Cost:
530 Sl icon.png
70 Ge icon.png
Mods pilon bomb.png
BI-42
Research:
470 Rp icon.png
Cost:
530 Sl icon.png
70 Ge icon.png
Mods ammo.png
shvak_belt_pack
Research:
700 Rp icon.png
Cost:
790 Sl icon.png
105 Ge icon.png
Mod arrow 0.png
Mods weapon.png
shvak_new_gun
Research:
1 400 Rp icon.png
Cost:
1 600 Sl icon.png
210 Ge icon.png

With the Yak line of fighters, always research the engine and performance modules first! Adding power upgrades will help to lower the overheating of the engine. Afterwards, the aircraft modules can be unlocked in any order according to pilot preference. The Survivability modules are recommended next, as they improve the Yak-1B's manoeuvrability and survivability even more. The Armament modules improve the aircraft only by adding ammo belt types available and allowing the usage of 100 kg of bombs.

Armaments

Offensive armament

Ammunition120 rounds
Fire rate800 shots/min
Ammunition200 rounds
Fire rate996 shots/min

The Yak-1B is armed with:

  • 1 x 20 mm ShVAK cannon, nose-mounted (120 rpg)
  • 1 x 12.7 mm Berezin UB machine gun, nose-mounted (200 rpg)

The Yak-1B is equipped with standard armament for most Yakovlev aircraft: one machine gun and one ShVAK cannon. With 200 and 120 rounds respectively, this is nothing out of the ordinary for this series. It's good against enemy light fighters, but larger aircraft like bombers or twin engine fighters will not go down too easily due to the relatively low burst mass. If forced to engage these tougher targets, try to knock out defensive gunners first and then set the engines on fire with a few accurate bursts.

The ShVAK cannon is an inconsistent weapon in terms of damage, and its main positive attributes are high accuracy and rate of fire. The best belts for it are Default or Armoured targets, though some players use Ground, and some Tracers. As of mid 2023, the HEF rounds implementation has been fixed, so it is no longer necessary to avoid belts containing HEF rounds, which used to spark. The Berezin UB heavy machine gun's Cermet-core rounds in the Ground targets belt can rip through enemy aircraft effectively and the Air targets belt is spectacular at starting fires. Air targets is usually the way to go, but feel free to experiment with the others. The ShVAK and Berezin have similar enough ballistics that they can be used together at close to medium range. For harassing targets at somewhat longer distances, use the Berezin in short bursts since it has slightly better ballistics, more ammo to spare, and might start a lucky fire.

If both weapons are fired together, the ShVAK will run out first and the Berezin will be left with around 50 rounds, which is rather insufficient for typical engagements and should indicate that it is time to return to base.

Convergence is generally a non-issue since the guns are mounted tightly in the nose. It is best to either set a relatively high convergence distance (e.g. 600 m) or turn it off entirely.

Suspended armament

List of setups (1)
Setup 12 x 50 kg FAB-50sv (forged) bomb
Main article: FAB-50sv (50 kg)

The Yak-1B can be outfitted with the following ordnance:

  • Without load
  • 2 x 50 kg FAB-50sv bombs (100 kg total)

The Yak-1B cannot use the 100 kg bombs available to the Yak-1. The two 50 kg bombs it does have are very weak and there is generally no reason to equip them at all. They need to be dropped almost directly onto ground targets to cause any damage. For ground attack, other aircraft will do a much better job.

Usage in battles

Arcade Battles

The Yak-1B is simply an upgraded Yak-1. The main features that the Yak-1B has over its counterpart is much-improved cockpit visibility, slightly better durability, and a slightly more resilient engine that still overheats, but it has been changed since the eraly days and you can climb at 100% throttle to 4000m and it will only be yellow. The beauty of the Yakovlev line of fighters lies in two things:

  • Overheating can be fixed by flying at or slighly below 97% throttle.
  • The Yak's performance is not hindered in the slightest by flying at this engine power.

Due to the above two facts, in AB: fly at 95% to 97% power. The Yaks can dogfight just fine at 97%, and will rarely overheat. Even though in Arcade battles all planes get WEP, the WEP on this plane adds almost nothing to its performance while rapidly overheating the engine, thus using WEP is practically unnecessary. If you find yourself in a situation where your aircraft needs more power, throttle up to 100% power, however, remember to throttle back down once you can.

Wait for the dogfight to start, then fly in behind a distracted enemy. Shoot in bursts unless tailing a bomber, in which case you will not last very long against their rear gunners unless you are incredibly accurate with the cannon. If your engine begins to overheat, start flying back to your airfield. Otherwise, your engine will give out after the temperature gauge turns red.

To sum up, this is merely a better version of the Yak-1, with similar tactics and strategy. Just remember that Soviet fighter aircraft in general count heavily on its pilot's accuracy, in this case only have two guns!

Realistic Battles

Overheating has been much decreased since the early implementation. If not using MEC, take off at 100% throttle, then go to 97% after getting to 3000m to 4000m. If using MEC, open the radiators somewhat (~20-30%) and turn up the prop pitch (~90%). This will keep the engine cool, allow you to run the throttle at 100%, and also bring out extra propeller thrust for better climb and acceleration. Stay low at all costs! If you climb too high, four things will happen:

  1. You will have run your engine out trying to climb, so your engine has less time before it overheats than usual. Note: Overheating is much less prevalent now (mid 2023) than it used to be. (You also don't climb as fast as most other planes, in fact, there are better Soviet aircraft for climbing, such as the MiG-3 and the La-5).
  2. You will be highly visible.
  3. You will have reduced manoeuvrability.
  4. You will easily rip your wings upon trying to dive (The Yak's wings, is made of wood, disappear at about 600 km/h).

If you stay below 3,000 m, then you will have more advantages than the enemy, such as:

  1. There is less chance of ripping wings.
  2. You are already at optimal altitude and speed for manoeuvring.
  3. Enemies easily overshoot you or rip wings attempting to dive on you.
  4. You can trick enemies into flying into the ground (make sure you don't do so yourself!).

Flying at 95% to7% throttle setting in Realistic Battles is enough to fight at below 1,000 m (some experienced Yak pilots will even dogfight at 80% throttle!).

While the Yak-1B has stellar performance at very low altitudes, it is still a good idea to climb a bit, perhaps to at least 2,000 meters. This gives you more options when an enemy dives in from above. Dodging them with a hard break is a reliable option, and when performed correctly this will sometimes lead to manoeuvre kills, but the enemy can also escape by zoom climbing up, where you will be unable to follow. Essentially, you will be at their mercy unless they become impatient and attempt to dogfight you. Enemies like Spitfires that combine manoeuvrability and altitude advantage will be difficult opponents even if they engage in a dogfight! If you start with some altitude, you can enter a dive to gain speed once they start to get close, then level out and take advantage of the Yak-1B's excellent low-altitude top speed. If the opponent continues to chase you, they will likely run out of bonus speed from the dive and fall behind, neutralizing their energy advantage. If they wisely break off, you can nose up and return to cruising altitude with little energy lost, waiting for another opportunity. Successfully executing this can take a lot of practice, but it is a very useful skill, and not just for Yaks.

The Yak-1B manoeuvres best at around 400 km/h IAS, where its roll and turn rate are optimal. Descending in a turning spiral is a good way to maintain this manoeuvring speed and drag fights down to lower altitudes, where other Soviet aircraft tend to perform better, but obviously review the situation and see if vertical loops, rolling scissors, or other dogfight manoeuvres would be more suitable. The Yak-1B does well in all of these provided that an eye is kept on the speed. Do not go fast enough that the compression becomes an issue, but also avoid getting extremely slow. Take advantage of the landing flaps and strong rudder as necessary when nosing over from a vertical loop, continuing a climbing spiral, or stall climbing.

It is recommended to avoid firing at ground targets due to the limited ammunition available for use against other planes. Remember that you do not reload in mid-air in Realistic Battle, so ammunition conservation is critical while closing the distance with the enemy before firing. Remember, fire only in short bursts to conserve ammunition and avoid jamming the guns. The great thing about the Yak's guns is that they are centre-line mounted. Guns mounted in the propeller shaft mean that you do not have to worry about convergence points, instead lead the target and snipe. The drawback is that you cannot spray the mark with a hail of bullets like most players tend to do. This plane and all the Yaks afterwards are about accuracy and skill necessary to handle this agile plane. Do not commit to head-ons, as the Yak-1B is rather fragile and the burst mass is not enough to reliably win these engagements.

When landing, slow the aircraft to BELOW 300 km/h before lowering the landing gear! Many Yak pilots have ripped their landing gear when descending too fast with them extended. The last thing all Yak pilots should know in Realistic Battles is preferably not to climb higher than 3,000m to 4000m (at or below 2,000 m is preferred). The Yak line of fighters was not built to fight at the higher altitudes, and the game is filled with much more capable aircraft in this respect. If you like B&Z or you prefer to climb high, but don't want to use the US or German planes, then use the MiG line or the LaGG/La line of fighters, as they have better high altitude engines. The Yak is a dog-fighter.

Tips from the Aces

  • A Yak pilot can nullify all but the last "Cons" below by staying below 2000 m, and keeping the throttle at 90% for AB, and 95% for RB/SB, or using MEC.
  • If the situation allows, using in-cockpit view can often help with accuracy due to no parallax effect... meaning (hopefully) less of your precious shots wasted.
  • Flaps help with hard turns, but against most opponents, flaps will not be utilized much. Use flaps wisely, since flying at ~95% means a tiny bit less engine power to get back to speed after slowing down due to using flaps. However, don't hesitate to use flaps if the fight depends on it, it is easier to regain speed than to pay for a new plane!
  • Everything learned from the Yak-1B applies to all of the later Yaks. Mastering this plane will repay itself in gold later.

Specific enemies worth noting

  • A6M2 Zeroes: They will out turn you, so try to attack in a shallow dive rather than a turn fight. Energy fighting is also okay because the Zero has poor energy retention and terrible high-speed control and handling. Never dogfight a Zero on its terms and be sure to keep a speed/energy advantage at all times. If things go south, break off and run away - the A6M2 is very slow.
  • P-47Ds: They are much faster than you and are excellent at boom and zoom, so avoid them if possible. If you are caught in a fight, try to energy fight them or turn to fight them.
  • Other Yakovlevs: They are slightly slower, so either keep them occupied with manoeuvres such as the scissors and barrel rolls or energy fight them.
  • Spitfires: They are significantly slower but turn nearly as well as Zeros. Their early Hispano cannons, while inconsistent, are still not good to be hit by, and early models can unleash swarms of rifle-calibre bullets that can ignite the Yak-1B easily. Spitfires also tend to have good climb rates and somewhat better high altitude performance, so seeing them diving from high altitudes is not uncommon. Try to drain their speed and avoid letting them get too close to you. It is difficult to shake a Spitfire from your tail if they have already latched on at close or medium range - running away in level flight can result in taking fire, and dodging will drain your speed and make escape difficult.
  • J21A-1: This Swedish pusher-prop has excellent speed and climb in addition to surprisingly good agility and monstrous firepower. Never commit to a head-on against one, doing so usually results in a direct trip to the hangar. The Yak-1B has the advantage in turn time, but not by a large margin. Dodge their attacks as best as possible and try to bait them into turning. The J21 tends to bleed energy in extended or hard manoeuvres and has issues gaining it back. If you can survive the first few turns, the engagement will be more favourable, making it easier for you or your teammates to knock the J21 out. But never let your guard down.

Manual Engine Control

MEC elements
Mixer Pitch Radiator Supercharger Turbocharger
Oil Water Type
Controllable Controllable
Not auto controlled
Controllable
Not auto controlled
Controllable
Not auto controlled
Separate Controllable
2 gears
Not controllable

Pros and cons

Pros:

  • Good speed, excellent at low altitude
  • Great agility overall
  • Good structural strength
  • Hard-hitting and accurate 20 mm ShVAK cannon
  • Good rate of climb at low altitudes

Cons:

  • No WEP in RB/SB
  • Water and oil overheat gradually at 100%
  • Low dive speed limit
  • Poor performance above 5,000 m altitude
  • Low ammo count makes this plane reliant on trigger control by the pilot
  • No combat flaps
  • Easily set afire

History


Archive of the in-game description

The Yak-1 is a Soviet single-engine fighter of the WWII era. It was the first combat aircraft designed by Alexander Yakovlev's construction bureau and was produced from 1940 to 1944, with a total of 8,700 aircraft built. The Yak-1B variant was a culmination of all 1942 efforts to improve the Yak-1. Work began at TsAGI, where research into improving the water and oil radiators took place between 24th May and 10th June 1942, and work to increase the top speed was conducted between 20th and 26th July 1942. Tactical characteristics of the Yak-1 were significantly improved as a result, leading to Yakovlev's request to the Minister of Aviation to mass-produce a test batch of 20 improved aircraft for combat testing at the front.

However, the improvements looked so good on paper that a test batch was skipped, and a Defence Committee Directive dated 11th August 1942 ordered a new and improved Yak-1 into mass production. Improved armament triggers and a cockpit with improved rearward visibility were welcomed by Soviet pilots and became standard on all contemporary Soviet fighter planes.


Notable pilots

  • Soviet female fighter ace Litvyak was flying a Yak-1B in August 1943 when she was shot down by a group of Bf 109s
  • During the transition from the MiG-3 to the P-39, Pokryshkin flew a Yak-1B and scored several victories in this aircraft.

Media

Skins
Videos

See also

Links to the articles on the War Thunder Wiki that you think will be useful for the reader, for example:

  • reference to the series of the aircraft;
  • links to approximate analogues of other nations and research trees.

External links


A.S. Yakovlev Design Bureau (Яковлев Опытное конструкторское бюро)
Fighters 
Yak-1  Yak-1 · Yak-1B
Yak-3  Yak-3 · Yak-3 (VK-107) · Yak-3P · Yak-3T · Yak-3U
Yak-7  Yak-7B
Yak-9  Yak-9 · Yak-9B · Yak-9K · Golovachev's Yak-9M · Yak-9P · Yak-9T · Yak-9U · Yak-9UT
Twin-engine fighters  I-29
Jet fighters 
Yak-15  Yak-15P · Yak-15
Yak-17  Yak-17
Yak-23  Yak-23
Yak-30  Yak-30D
Yak-141  Yak-141
Strike aircraft 
Yak-2  Yak-2 KABB
Yak-38  Yak-38 · Yak-38M
Bombers  Yak-4
Jet bombers  Yak-28B
Foreign use  ▄Yak-3 · Challe's ▄Yak-9T · ◔Yak-9P
Captured  ▀Yak-1B

USSR fighters
I-15  I-15 WR · I-15 M-22 · I-15 M-25 · I-15bis · Krasnolutsky's I-15bis
  I-153 M-62 · Zhukovsky's I-153-M62 · I-153P
I-16  I-16 type 5 · I-16 type 10 · I-16 type 18 · I-16 type 24 · I-16 type 27 · I-16 type 28 · I-180S
I-29  I-29
I-185  I-185 (M-71) · I-185 (M-82)
I-225  I-225
ITP  ITP (M-1)
MiG-3  MiG-3-15 · MiG-3-15 (BK) · MiG-3-34
LaGG  I-301 · LaGG-3-4 · LaGG-3-8 · LaGG-3-11 · LaGG-3-23 · LaGG-3-34 · LaGG-3-35 · LaGG-3-66
La  La-5 · La-5F · La-5FN · La-7 · Dolgushin's La-7 · La-7B-20 · La-9 · La-11
Yak-1/7  Yak-1 · Yak-1B · Yak-7B
Yak-3  Yak-3 · Yak-3P · Yak-3T · Yak-3U · Yak-3 (VK-107)
Yak-9  Yak-9 · Yak-9B · Golovachev's Yak-9M · Yak-9T · Yak-9K · Yak-9U · Yak-9UT · Yak-9P
Other countries  ▂P-40E-1 · ▂P-47D-27 · ▂Hurricane Mk IIB · ▂Fw 190 D-9 · ▂Spitfire Mk IXc
P-39  ▂P-39K-1 · ▂Pokryshkin's P-39N-0 · ▂P-39Q-15
P-63  ▂P-63A-5 · ▂P-63A-10 · ▂P-63C-5