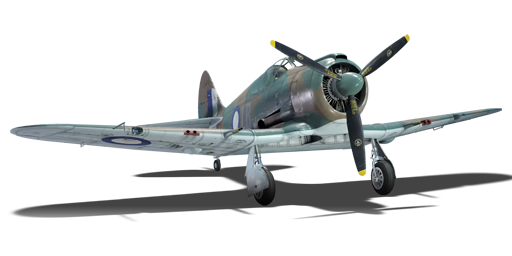


Prior to the outbreak of the Pacific War in 1941, the Australian government was concerned about the potential Japanese invasion due to the distance from Europe making the delivery of new military hardware difficult. Therefore, a decision was made to develop domestic military hardware. One such case is the CAC CA-12 Boomerang, the first fighter aircraft of Australian origin. The Boomerang was originally based on the CAC Wirraway trainer aircraft and was intended to share many of its components, though it ended up being significantly different from its genesis. After the Boomerang made its first flight on 29 May 1942, it was used to deter incoming Japanese bombing raids from attacking Australia. Although the Boomerang served its purpose as a deterrent against Japanese bomber fleets, it was plagued by its slow speed, resulting in it being unable to catch up with Japanese planes. After American-supplied P-40 Kittyhawks became widely available by 1943, the Boomerang was relegated to ground attack, in which it found more success. In total, 105 CA-12s were built before production shifted to the improved version, designated CA-13 Boomerang Mk II. Both versions served until the end of World War II in 1945.
The Boomerang Mk I has been in the game since the start of the Open Beta Test prior to Update 1.27. The Boomerang can out-turn almost any plane it usually faces, save for most Japanese fighters. While it can excel in its intended role, the Boomerang is lacking in the amount of ammo for the 20mm autocannons, therefore trigger discipline is vital when taking out air targets. On the other hand, the plane has a huge amount of ammo for its .303 machine guns, making it ideal for mopping up light ground targets. The main downsides of the Boomerang are that it is rather slow when compared to other aircraft of its tier. Keep in mind that low-altitude fighting is its bread and butter, and the Boomerang will be able to perform nicely.
flaps
flaps
flaps
brake
| Belt | Belt filling | Armor penetration (mm) at a distance: | |||||
|---|---|---|---|---|---|---|---|
| 10 m | 100 m | 500 m | 1000 m | 1500 m | 2000 m | ||
| HEI/SAP-I/T | 22 | 20 | 14 | 9 | 6 | 4 | |
| AP-T/HEI/SAP-I | 37 | 35 | 25 | 16 | 10 | 7 | |
| T/HEI/SAP-I/HEI/SAP-I | 22 | 20 | 14 | 9 | 6 | 4 | |
| AP-T/T/HEI | 37 | 35 | 25 | 16 | 10 | 7 | |
| AP-T/SAP-I/HEI/AP-T | 37 | 35 | 25 | 16 | 10 | 7 | |
| HEI/HEI/SAP-I | 22 | 20 | 14 | 9 | 6 | 4 | |
| Belt | Belt filling | Armor penetration (mm) at a distance: | |||||
|---|---|---|---|---|---|---|---|
| 10 m | 100 m | 500 m | 1000 m | 1500 m | 2000 m | ||
| T/AP/AP-I/Ball/Ball/I | 13 | 12 | 7 | 3 | 2 | 0 | |
| T/AP/AP-I/AP-I/I | 13 | 12 | 7 | 3 | 2 | 0 | |
| IT/AP-I | 13 | 12 | 7 | 3 | 2 | 0 | |
| AP-I/AP-I/I | 13 | 12 | 7 | 3 | 2 | 0 | |


 2 x (55 / 200 / 240) %
 2 x 130 %

Flight performance | |
|---|---|
Survivability |
|---|
Weaponry | |
|---|---|