T-34E STZ

From War Thunder Wiki
Jump to: navigation, search
RANK 6 BRITAIN
Rooikat 105 PACK
This page is about the Soviet medium tank T-34E STZ. For other versions, see T-34 (Family).
T-34E STZ
ussr_t_34e_stz.png
GarageImage T-34E STZ.jpg
T-34E STZ
AB RB SB
4.0 4.0 3.7
Class:
Research:6 900 Specs-Card-Exp.png
Purchase:32 000 Specs-Card-Lion.png
Show in game

Description

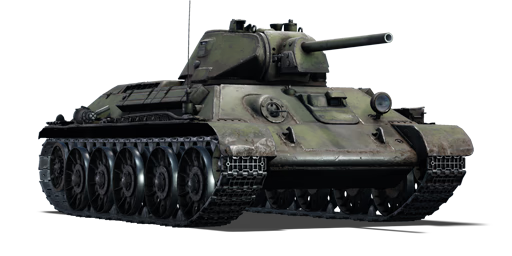
The T-34E STZ is an armoured modification of the T-34 (1941), which is the second variant of the T-34 medium tank family. When the Germans were confronted with the significantly better-protected T-34 medium tanks during Operation Barbarossa, they promptly began improving their current designs to combat it. In response, many early T-34 variations, such as the T-34E STZ ("ehkranami" - screened), had additional armour plates welded to the front in an attempt to improve the tank's protection. The frontal hull protection was significantly increased over the original T-34 (1941) variant. This modification was principally performed in the STZ factory in Stalingrad in January 1942.

Introduced in Update 1.49 "Weapons of Victory", the T-34E STZ is essentially an armoured derivative of the T-34 (1941) variant. It is not a distinct variant in and of itself since nothing was modified from the T-34 (1941) variant, except the addition of a thin armour plate to the frontal hull. The gameplay is nearly identical to those of the other early T-34 variants (1941 and 1942). With the same long-barrelled 76.2 mm F-34 tank gun and an extensive selection of ammunition, players will be glad to discover that the T-34E STZ is significantly better protected against adversaries from the front. While the T-34E STZ's increased armour substantially improves frontal protection, it does slow the tank down.

General info

Survivability and armour

Armourfront / side / back
Hull60 / 45 / 40
Turret45 / 45 / 45
Crew4 people
Visibility83 %

Armour type:

  • Rolled homogeneous armour
  • Cast homogeneous armour (Gun mantlet, Machine gun port)
Armour Front Sides Rear Roof
Hull 45 + 15 mm (60°) Front glacis
45 + 15 mm (52-53°) Lower glacis
100 mm (15-45°) Joint plate
75 mm (56°) Driver's hatch
60 mm (1-73°) Machine gun port
40 mm (38-39°) Top
45 mm (0-2°) Bottom
40 mm (48°) Top
40 mm (45°) Bottom
16 mm
Turret 45 mm (4-75°) Turret front
45 mm (14-58°) Gun mantlet
45 mm (28-30°) 45 mm (31°) 15 mm

Notes:

  • Suspensions wheels and tracks are 20 mm thick.
  • Parts of the front armour have increased armour such as the machine gun port (60 mm) and driver's hatch (75 mm)
  • The applique armour in the front does not cover the entire front hull.

Mobility

Speedforward / back
AB63 / 9 km/h
RB and SB57 / 8 km/h
Number of gears4 forward
1 back
Weight29.5 t
Engine power
AB954 hp
RB and SB500 hp
Power-to-weight ratio
AB32.3 hp/t
RB and SB16.9 hp/t
Game Mode Max Speed (km/h) Weight (tons) Engine power (horsepower) Power-to-weight ratio (hp/ton)
Forward Reverse Stock Upgraded Stock Upgraded
Arcade 63 9 29.5 775 954 26.27 32.34
Realistic 57 8 442 500 14.98 16.95

Modifications and economy

Repair costBasic → Reference
AB856 → 1 101 Sl icon.png
RB1 014 → 1 305 Sl icon.png
SB1 273 → 1 638 Sl icon.png
Total cost of modifications13 840 Rp icon.png
20 150 Sl icon.png
Talisman cost860 Ge icon.png
Crew training9 200 Sl icon.png
Experts32 000 Sl icon.png
Aces270 Ge icon.png
Research Aces250 000 Rp icon.png
Reward for battleAB / RB / SB
50 / 80 / 90 % Sl icon.png
130 / 130 / 130 % Rp icon.png
Modifications
Mobility Protection Firepower
Mods new tank traks.png
Tracks
Research:
690 Rp icon.png
Cost:
1 000 Sl icon.png
100 Ge icon.png
Mods new tank suspension.png
Suspension
Research:
620 Rp icon.png
Cost:
890 Sl icon.png
90 Ge icon.png
Mods new tank break.png
Brake System
Research:
620 Rp icon.png
Cost:
890 Sl icon.png
90 Ge icon.png
Mods new tank filter.png
Filters
Research:
870 Rp icon.png
Cost:
1 300 Sl icon.png
130 Ge icon.png
Mods new tank transmission.png
Transmission
Research:
900 Rp icon.png
Cost:
1 300 Sl icon.png
135 Ge icon.png
Mods new tank engine.png
Engine
Research:
900 Rp icon.png
Cost:
1 300 Sl icon.png
135 Ge icon.png
Mods tank tool kit.png
Improved Parts
Research:
690 Rp icon.png
Cost:
1 000 Sl icon.png
100 Ge icon.png
Mods extinguisher.png
Improved FPE
Research:
620 Rp icon.png
Cost:
890 Sl icon.png
90 Ge icon.png
Mods tank reinforcement ussr.png
Crew Replenishment
Research:
870 Rp icon.png
Cost:
1 300 Sl icon.png
130 Ge icon.png
Mods new tank horizontal aiming.png
Horizontal Drive
Research:
690 Rp icon.png
Cost:
1 000 Sl icon.png
100 Ge icon.png
Mods tank ammo.png
76mm_AP_1942_ammo_pack
Research:
690 Rp icon.png
Cost:
1 000 Sl icon.png
100 Ge icon.png
Mods tank cannon.png
Adjustment of Fire
Research:
620 Rp icon.png
Cost:
890 Sl icon.png
90 Ge icon.png
Mods tank ammo.png
76mm_AP_1941_ammo_pack
Research:
620 Rp icon.png
Cost:
890 Sl icon.png
90 Ge icon.png
Mods new tank vertical aiming.png
Elevation Mechanism
Research:
870 Rp icon.png
Cost:
1 300 Sl icon.png
130 Ge icon.png
Mods tank ammo.png
76mm_APCR_1943_ammo_pack
Research:
870 Rp icon.png
Cost:
1 300 Sl icon.png
130 Ge icon.png
Mods art support.png
Artillery Support
Research:
900 Rp icon.png
Cost:
1 300 Sl icon.png
135 Ge icon.png
Mods tank ammo.png
76mm_HEAT_1944_ammo_pack
Research:
900 Rp icon.png
Cost:
1 300 Sl icon.png
135 Ge icon.png
Mods tank ammo.png
76mm_ussr_Smoke_ammo_pack
Research:
900 Rp icon.png
Cost:
1 300 Sl icon.png
135 Ge icon.png

Armaments

Main armament

Ammunition77 rounds
Reloadbasic crew → aces
9.0 → 6.9 s
Vertical guidance-5° / 30°
Main article: F-34 (76 mm)
76 mm F-34 Turret rotation speed (°/s) Reloading rate (seconds)
Mode Capacity Vertical Horizontal Stabilizer Stock Upgraded Full Expert Aced Stock Full Expert Aced
Arcade 77 -5°/+30° ±180° N/A 23.8 32.9 40.0 44.2 47.1 8.97 7.94 7.31 6.90
Realistic 14.9 17.5 21.3 23.5 25.0

Ammunition

The available ammunition allows for engaging all types of targets:

  • BR-350A (MD-5 fuze): APHEBC; a shell with high explosive mass that will knock out enemies with a single shot but has an average penetration power.
  • BR-350B (MD-8 fuze): APHEBC; increased penetration at the cost of slightly less explosive filler.
  • BR-350SP: APBC; a solid shot with an even better penetration but no explosive filler.
  • BR-354P: APCR; a composite round with the best penetration but no explosive filler and will only penetrate flat vertical surfaces.
  • BP-353A: HEAT; a shaped charge with average penetration but without penetration loss over distance. Only penetrates flat vertical surfaces but the post-penetration damage is very effective on open and lightly armoured vehicles. Very slow shell travelling twice slower than your other projectiles.
  • OF-350M: HE; useful for destroying open and lightly armoured vehicles.
  • Sh-354T: Shrapnel; useful against vehicles that are resistant to the HE shells but too thinly armoured to trigger the fuzes of AP shells.
  • D-350A: Smoke; useful to blind enemy vehicles that are too remote for you to disable so that you can progress towards objectives.

Penetration statistics
Ammunition Type of
warhead
Penetration @ 0° Angle of Attack (mm)
10 m 100 m 500 m 1,000 m 1,500 m 2,000 m
BR-350A (MD-5 fuse) APHEBC 87 85 77 69 62 55
BR-350B (MD-8 fuse) APHEBC 96 94 84 74 64 56
BR-350SP APBC 99 96 87 76 66 58
BR-354P APCR 125 117 87 60 41 28
BP-353A HEAT 80 80 80 80 80 80
OF-350M HE 10 10 10 10 10 10
Sh-354T Shrapnel 35 34 30 26 22 19
Shell details
Ammunition Type of
warhead
Velocity
(m/s)
Projectile
mass (kg)
Fuse delay
(m)
Fuse sensitivity
(mm)
Explosive mass
(TNT equivalent) (g)
Ricochet
0% 50% 100%
BR-350A (MD-5 fuse) APHEBC 662 6.3 1.2 14 150 48° 63° 71°
BR-350B (MD-8 fuse) APHEBC 655 6.5 0.9 14 100.1 48° 63° 71°
BR-350SP APBC 655 6.5 - - - 48° 63° 71°
BR-354P APCR 950 3.02 - - - 66° 70° 72°
BP-353A HEAT 355 3.94 0.05 0.1 600 62° 69° 73°
OF-350M HE 680 6.2 0.05 0.1 621 79° 80° 81°
Sh-354T Shrapnel 618 6.44 1.2 14 85 62° 69° 73°
Smoke shell characteristics
Ammunition Velocity
(m/s)
Projectile
mass (kg)
Screen radius
(m)
Screen deploy
time (s)
Screen hold
time (s)
Explosive mass
(TNT equivalent) (g)
D-350A 680 6.45 13 5 20 50

Ammo racks

Ammo racks of the T-34 (1940) (identical).
Full
ammo
1st
rack empty
2nd
rack empty
3rd
rack empty
4th
rack empty
Visual
discrepancy
77 75 (+2) 72 (+5) 69 (+8) (+76) No

Note:

  • Turret empty: 69 (+8) shells.

Machine guns

Ammunition2 898 rounds
Belt capacity63 rounds
Reloadbasic crew → aces
10.4 → 8.0 s
Fire rate600 shots/min
Main article: DT (7.62 mm)
7.62 mm DT
Mount Capacity (Belt) Fire rate Vertical Horizontal
Coaxial 2,898 (63) 600 N/A N/A

The small calibre of the DT machine gun makes it largely ineffective against all armoured vehicles but the ones with an open compartment. It still can be used to ping targets as a rangefinding help or to mow down minor obstacles blocking your line of sight. The clip capacity is quite poor as it relies on a magazine of 63 bullets instead of a belt like similar machine guns from other nations.

Usage in battles

There are two main ways to utilize this tank. The first is by staying at long range, and using the frontal armour and good gun to pick off enemies. When at long range remember that the front turret is the greatest weakness of this tank so try to not look directly at the enemy during reloading. The second is as a close-range brawler when using the tank in this manner make sure to watch the flanks. Both of these methods are equally viable, at close range seems to be where this tank does a little better.

The first option is to go straight for a cap point and find a good position just outside or just inside the point. Any position that has a good overwatch of the cap point or the approaches to the cap point will do. Once in position try to knock out any tank that tries to approach the point, make sure to properly angle the armour to maximize protection. If aware of where the enemy is coming from, it is easy to maximize the armour protection and engage enemies with an advantage. Always engage in the most favourable conditions, these means don't hesitate to retreat if starting to get overwhelmed. If the enemy follows through while retreating, they could expose themselves to allies to take them out.

The second option is to try to flank around them and approach the enemy from an angle they might not expect. When doing this try to make sure to have a good knowledge of the terrain, since choosing the wrong path means a bad encounter and demise. A good path is one where enemies appear in a predictable location and allow for disengagements with easy withdrawal. Ideal paths have a hill between the T-34E and the enemy, allowing the T-34E to manoeuvre slowly around the hill until the enemy is in sight. Once the enemy is sighted, engage if applicable. If the enemy starts charging, fight a fighting retreat using the hill as cover. However remember if moving around the flanks, it will be harder to receive team support if away from the main body of allies.

  • Urban

Urban settings can be challenging for the T-34E STZ. The reason for this is while the frontal armour is great, in the chaos of urban combat means that no one may know where the enemy is at. Another problem; while the front armour is good it does have a number of weak spots which can be easily targeted at point blank range. With that in mind, play the STZ as in a 1941 or 1942, and do not rely on the armour as with a KV-1. Try to use the flanks and side streets to get into firing position where enemies can come from a predictable path. This will allow maximum usage of the T-34E's mobility and protection to the fullest. The T-34E's agility is its main defence in these settings.

  • Open Field

In this type of environment, tank destroyers will always reign supreme. Their combinations of high-power guns, low profile, and tough frontal armour make them great long range combatants. However, the T-34E's armour allows the tank to play along, but always remember that it is not invulnerable, and while the F-34 gun cannot match those of tank destroyers', it can still get the job done. This means that the T-34E should not position itself in the open and take shots, try to find a location where the tank is protected from most angles and focus on one enemy at a time. By focusing on one tank at a time, it will minimize the odds of a lucky shot hitting weak spots.

  • Hill Country

This is the type of environment where T-34 STZ can really shine. The reason for this is that unlike in urban environments flaking can be a little more difficult. The average distance of engagement is longer, meaning the enhanced armour can do more than in urban environments. The more open nature allows the T-34E to make full use of the tank's mobility. When in this environment, there is a range of options and tactics to take on the enemy.

Some enemies to be concerned about:

  • M4A3 (105) - Treat like a Sherman Firefly, an up-gunned Sherman. Avoid getting hit, as its 105 mm shells can cause major damage and perhaps send the player back to the garage. Try hitting the side or the gun mantlet to OHK or disable the gun respectively.
  • M10 GMC - This tank destroyer will comfortably destroy the T-34E with the 3-inch gun if it gets a chance to. Treat it like the Pz. IV F2, fragile but powerful. Make sure it isn't looking towards the T-34E's way, then shoot it in the main hull and it will, at the very least, fatally incapacitate it.
  • M18 GMC - Fight similarly to the M10 or Pz. IV F2. Be wary of close quarters engagements due to their outstanding mobility. Vulnerable to overpressure, consider using HE or HEAT rounds.
  • M4A3E2 Jumbo - The frontal armour on the Jumbo is difficult to penetrate even with APCR shells, the only weak point being the machine gun port. If encountered, get out of its line of sight and try to flank it if possible. A good location to target is the lower hull side, behind the tracks. This section has not been uparmoured and a good shot below the crew compartment can detonate the ammo racks and send the Jumbo back to the hangar.
  • Pz.IV F2 - Despite its thin armour, the Pz. IV F2 has a gun fully capable of penetrating the T-34E's armour easily. If encountered, move to a safe position where it is still observable. Wait until it is not targeting directly at the T-34E, then shoot it in the main hull. Often one shot is all it takes. Alternatively, if feeling lucky, try to get the first shot off into the front of the tank. It should, if not an instant knock-out, at least disable a few crucial crew members and/or modules.
  • StuG III G / Jagdpanzer 38(t) - You will have trouble frontally penetrating these German tank destroyers. Don't challenge these front on. Try to ambush them if you can, or take out their tracks and go for their vulnerable side. Don't count on your armour to protect you from them, since they can penetrate you almost anywhere.
  • Achilles - An M10 with a more powerful gun. Treat like the M10, except more carefully. However, the poor turret traverse and long reload mean that if it's facing in a different direction or if it just fired, there is the possible risk of exposing the T-34E STZ and taking a shot into the main hull.
  • Sherman Firefly - A Sherman with a more powerful gun. Its frontal armour, like all Shermans, is difficult for the F-34 gun to penetrate. Its gun is also more powerful than the traditional Sherman, making it even more problematic to deal with. If possible, engage from the side and fire into it. Otherwise, treat like the Jumbo and avoid entirely.

Pros and cons

Pros:

  • A smaller turret than the previous T-34 (More difficult to hit flat parts)
  • Turret cheeks have a relatively flat and angled edge compared to the pronounced curve of the 1940/1941 T-34 variants, slightly harder to penetrate
  • Better front armour (60 mm) than the previous T-34
  • Good firepower: adequate penetration and good post-penetration damage for the APHE shells
  • Lots of ammunition variety
  • Good top speed and hull traverse allows it to reposition quickly

Cons:

  • The added armour does not cover all the front armour, machine gun port is still a large weak spot in close quarters engagements
  • Turret armour, especially the cheeks, are still big weak points
  • Weak side armour
  • Slower reload than the 1942 variant
  • Bad gun depression of -5 degrees makes it inferior in hilly maps, especially against US whose tanks all have -10 degrees depression
  • Awkward to place bushes on upper front hull due to the obstruction of MG port and driver's optics

History

The T-34 was beginning to become the main tank of the Soviet Army by 1941, however, the initiation of Operation Barbarossa by the Germans postponed most manufacturing deadlines due to the relocation of various factories to the Ural Mountains to keep them safe from the Germans. During the movement, only the Dzherzhinski Tractor Factory in Stalingrad (STZ) stayed in production and produced most of the T-34s during the relocation.

To increase the survivability of the tanks, the T-34 design in the STZ factory was up-armoured by use of applique armour plates. These applique armour variants of the T-34 were called T-34E, with "E" meaning "ekranami" translates to "with screens" in Russian. These tanks were given applique armour throughout the entire vehicle, on all sides of the turret, one the front, on the sides, and even side skirts on the tracks. Some of the applique armour was placed in a way to act as spaced armour against enemy fire, which proved quite effective against the Panzer III's 50 mm KwK 39 cannon where the armour applied were on areas once vulnerable on the T-34 to the cannon. However, it was found that this additional armour did not help the T-34 against larger calibres such as the 75 mm PaK 40 and the 88 mm FlaK cannons. Due to the gradually growing number of tanks with the 75 mm and 88 mm, such as the up-gunned Panzer IV and the Tiger I that could easily destroy the T-34 even with the armour application, the armour configuration was not placed into mass production and thus only the testing batch of 47 units were made from the design.

However, one armour applique model produced in STZ did see more widespread use in the production line, though it still had the name T-34E as its main nomenclature (called the T-34E STZ in-game). This up-armoured model was more successful than the previous due to not drastically changing the design and only focusing on front armour protection by welding 15 mm of armour onto the front hull, thus minimizing weight gain by only focusing on the area most expected to be hit. The tank also featured redesigned road wheels and track designs. These T-34Es saw more widespread use and have photographs showing it being used in the Leningrad Front.

Media

Skins
Images

See also

Other uparmoured vehicles of the same family

External links

Paste links to sources and external resources, such as:

  • topic on the official game forum;
  • other literature.


Kharkov Design Bureau for Mechanical Engineering named after A. A. Morozov
Light Tanks 
BT-5  BT-5 · RBT-5
BT-7  BT-7 · BT-7M · BT-7A (F-32)
Medium Tanks 
T-34-76  T-34 (Prototype) · T-34 (1940) · T-34 (1941) · T-34 (1st Gv.T.Br.) · T-34 (1942) · T-34E STZ · T-34E
T-34-57  T-34-57 · T-34-57 (1943)
T-34-85  T-34-85 (D-5T) · T-34-85 · T-34-85E
T-34-100  T-34-100
T-44  T-44 · T-44-100 · T-44-122
Main Battle Tanks 
T-54  T-54 (1947) · T-54 (1949) · T-54 (1951)
T-64  T-64A (1971) · T-64B
Export/Captured 
T-34  ▀T 34 747 (r) · ␗T-34 (1943) · ␗Т-34-85 (S-53)
See Also  Uralmashzavod · Uralvagonzavod

USSR medium tanks
T-28  T-28 (1938) · T-28 · T-28E
T-34-76  T-34 (Prototype) · T-34 (1940) · T-34 (1941) · T-34 (1st Gv.T.Br.) · T-34 (1942) · T-34E STZ · T-34E
T-34-57  T-34-57 · T-34-57 (1943)
T-34-85  T-34-85 (D-5T) · T-34-85 · T-34-85E
T-34-100  T-34-100
T-44  T-44 · T-44-100 · T-44-122
T-54  T-54 (1947) · T-54 (1949) · T-54 (1951)
T-55  TO-55 · T-55A · T-55AM-1 · T-55AMD-1
T-62  T-62 · T-62M-1
T-64  Object 435 · T-64A (1971) · T-64B
T-72  T-72A · T-72AV (TURMS-T) · T-72B · T-72B (1989) · T-72B3 · T-72M2 Moderna
T-80  T-80B · T-80U · T-80UD · T-80UK · T-80UM2 · T-80BVM · Object 292
T-90  Т-90А · T-90M
Trophies/Lend-Lease 
Germany  ▂T-III · ▂T-V
Great Britain  ▂МК-IX "Valentine"
USA  ▂M3 Medium · ▂M4A2