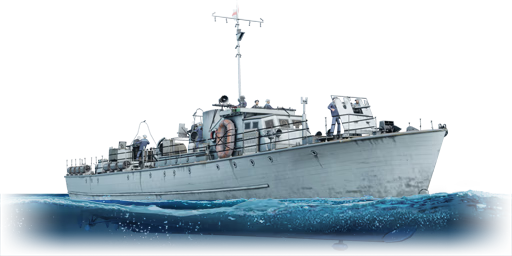
Fairmile B (ML345)

From War Thunder Wiki
Jump to: navigation, search
VTOL | Rank 5 USA
AV-8A Harrier Pack
Fairmile B (ML345)
uk_fairmile_b_ml345.png
GarageImage Fairmile B (ML345).jpg
Fairmile B (ML345)
AB RB SB
2.0 2.0 2.0
Research:9 200 Specs-Card-Exp.png
Purchase:16 000 Specs-Card-Lion.png
Show in game

Description

The Fairmile B (ML345) is a rank II British motor gun boat with a battle rating of 2.0 (AB/RB/SB). It was introduced in Update 1.83 "Masters of the Sea" as part of the British fleet closed beta test. With the split of the naval tech trees in Update "New Power", Fairmile B (ML345) was moved to the coastal fleet tech tree.

General info

Survivability and armour

Armourfront / side / back
Hull28 mm (wood)
Superstructure15 mm (wood)
Number of section4
Displacement65 t
Crew18 people
Fairmile B (ML345) internals (starboard). Note the ammunition storage in the bow.

Fairmile B (ML345) has the following armour layout:

Like most coastal vessels, Fairmile B (ML345) has no practical armour. The gunshields are largely superficial; while they may stop low-calibre machine guns, heavy machine guns and cannons will easily penetrate them at any range. The hull and superstructure are unarmoured and will not stop any sort of gunfire.

The hull is split into four compartments. Starting from the bow and working towards the stern, the first compartment starts at the bow and ends in front of the bridge, just in behind the pumps; the second ends at the funnel, between the radio station and the engines; the third ends in front of the aft 20 mm/70 Oerlikon Mark V twin mount; and the fourth ends at the stern.

Fairmile B (ML345) can be hull-broken by any round with a large enough diameter and explosive mass. In general, this is limited to HE rounds greater with a diameter greater than or equal to 4 inches (102 mm) with an explosive mass greater than 1.5 kg. At Fairmile B (ML345)'s own battle rating, there is only one gun capable of hull-breaking her:

There are two ammunition storages: the first, holding the ammunition for the primary armament, is located well above the waterline in the bow, below and in front of the fore 47 mm 3 pdr QF Hotchkiss cannon; the other ammunition storage, holding the ammunition for both the secondary and the anti-aircraft armament, is located in the stern, just above the waterline in front of the steering gear. Destroying either will instantly destroy Fairmile B (ML345).

Fairmile B (ML345) has a crew complement of 18. With a stock crew, it is knocked out when 11 crew are lost; with an aced crew, this is increased to 13. Overall, the survivability is average.

Mobility

Speedforward / back
AB50 / 19 km/h
RB37 / 14 km/h
Mobility Characteristics
Game Mode Upgrade Status Maximum Speed (km/h) Turn Time (s) Turn Radius (m)
Forward Reverse
AB Stock 37 14 ~55.47 ~68.66
Upgraded 50 19 ~33.67 ~37.21
RB/SB Stock 32 12 ~65.31 ~77.96
Upgraded 37 14 ~48.14 ~57.46

Fairmile B (ML345) has a displacement of 65 tons.

Modifications and economy

Repair costBasic → Reference
AB573 → 735 Sl icon.png
RB820 → 1 052 Sl icon.png
Total cost of modifications8 450 Rp icon.png
9 530 Sl icon.png
Talisman cost640 Ge icon.png
Crew training4 500 Sl icon.png
Experts16 000 Sl icon.png
Aces180 Ge icon.png
Research Aces190 000 Rp icon.png
Reward for battleAB / RB / SB
50 / 60 / 100 % Sl icon.png
118 / 118 / 118 % Rp icon.png
Modifications
Seakeeping Unsinkability Firepower
Mods new ship hull.png
Dry-Docking
Research:
420 Rp icon.png
Cost:
470 Sl icon.png
95 Ge icon.png
Mods new ship rudder.png
Rudder Replacement
Research:
380 Rp icon.png
Cost:
430 Sl icon.png
85 Ge icon.png
Mods new ship screw.png
Propeller Replacement
Research:
530 Rp icon.png
Cost:
600 Sl icon.png
120 Ge icon.png
Mods new ship engine.png
Engine Maintenance
Research:
550 Rp icon.png
Cost:
620 Sl icon.png
125 Ge icon.png
Mods ship damage control crew.png
Damage Control Division
Research:
420 Rp icon.png
Cost:
470 Sl icon.png
95 Ge icon.png
Mods ship fire control crew.png
Fire Division
Research:
380 Rp icon.png
Cost:
430 Sl icon.png
85 Ge icon.png
Mods engine smoke screen system.png
Smokescreen
Research:
380 Rp icon.png
Cost:
430 Sl icon.png
85 Ge icon.png
Mods new ship pumps.png
New Pumps
Research:
550 Rp icon.png
Cost:
620 Sl icon.png
125 Ge icon.png
Mods new aa caliber turrets.png
Anti-Air Armament Targeting
Research:
420 Rp icon.png
Cost:
470 Sl icon.png
95 Ge icon.png
Mods ammo.png
20 mm HE magazines
Research:
420 Rp icon.png
Cost:
470 Sl icon.png
95 Ge icon.png
Mods new aux caliber turrets.png
Auxiliary Armament Targeting
Research:
380 Rp icon.png
Cost:
430 Sl icon.png
85 Ge icon.png
Mods ammo.png
20 mm AP magazines
Research:
380 Rp icon.png
Cost:
430 Sl icon.png
85 Ge icon.png
Mods new main caliber turrets.png
Primary Armament Targeting
Research:
530 Rp icon.png
Cost:
600 Sl icon.png
120 Ge icon.png
Mods ship rangefinder.png
Improved Rangefinder
Research:
530 Rp icon.png
Cost:
600 Sl icon.png
120 Ge icon.png
Mods depth charge.png
Depth Charges
Research:
530 Rp icon.png
Cost:
600 Sl icon.png
120 Ge icon.png
Mod arrow 0.png
Mods ship art support.png
Artillery Support
Research:
550 Rp icon.png
Cost:
620 Sl icon.png
125 Ge icon.png
Mods naval mine.png
Mines
Research:
550 Rp icon.png
Cost:
620 Sl icon.png
125 Ge icon.png
Mods ship mortar.png
Bomb mortar
Research:
550 Rp icon.png
Cost:
620 Sl icon.png
125 Ge icon.png

The recommended modification research order is:

  1. Tool Set
  2. Fire Protection System
  3. 20 mm HE
  4. 20 mm AP
  5. Propeller Replacement
  6. Improved Rangefinder
  7. Artillery Support

After that, research the rest of the seakeeping modifications, followed by the rest of the modifications in whatever order you prefer.

Armament

Primary armament

Turret3 pdr QF Hotchkiss cannon
Ammunition300 rounds
Vertical guidance-10° / 70°

The primary armament consists of a single 47 mm 3 pdr QF Hotchkiss cannon mounted on the bow, with a maximum of 300 rounds of ammunition. Stock, the mount can traverse horizontally at a rate of 34°/s and vertically at a rate of 21°/s; with the "Primary Armament Targeting" modification installed, this is increased to 40°/s and 25°/s respectively. The gun is single-shot with a nominal rate of fire of 30 rounds/min. With a stock crew, it can be reloaded in 2.6 seconds; with an aced crew, it can be reloaded in 2 seconds.

Primary armament guidance
Horizontal Vertical
±180° -10°/+70°

There is only one ammunition type available:

Penetration statistics
Ammunition Type of
warhead
Penetration @ 0° Angle of Attack (mm)
100 m 1,000 m 2,000 m 3,000 m 4,000 m 5,000 m
3 pdr Mk.2 HE HE 4 4 4 4 4 4
Shell details
Ammunition Type of
warhead
Velocity
(m/s)
Projectile
mass (kg)
Fuse delay
(m)
Fuse sensitivity
(mm)
Explosive mass
(TNT equivalent) (g)
Ricochet
0% 50% 100%
3 pdr Mk.2 HE HE 571 1.5 0 0.1 132 79° 80° 81°

Secondary armament

Turret20 mm/70 Oerlikon Mk.II autocannon
Ammunition1800 rounds
Belt capacity60 rounds
Fire rate450 shots/min
Turret2 x 20 mm/70 Oerlikon Mark V autocannon
Ammunition3600 rounds
Belt capacity60 rounds
Fire rate450 shots/min

The secondary armament consists of one 20 mm/70 Oerlikon Mk.II cannon and two 20 mm/70 Oerlikon Mk.V cannons.

The 20 mm/70 Oerlikon Mk.II cannon is fitted in a single mount amidships aft of the funnel, with a maximum of 1,800 rounds of ammunition. Stock, the mount can traverse horizontally at a rate of 64°/s and vertically at a rate of 55°/s; with the "Auxiliary Armament Targeting" modification installed, this is increased to 75°/s and 65°/s respectively. The gun has a magazine capacity of 60 rounds and a cyclic rate of fire of around 450 rounds/min. With a stock crew, the gun can be reloaded in 5.2 seconds; with an aced crew, it can be reloaded in 4 seconds.

The 20 mm/70 Oerlikon Mk.V cannons are fitted in a twin mount aft. There are 3,600 rounds of ammunition available for it, 1,800 rounds per gun. Stock, the mount can traverse horizontally at a rate of 51°/s and vertically at a rate of 43°/s; with the "Auxiliary Armament Targeting" modification installed, this is increased to 60°/s and 50°/s respectively. Each gun has a magazine capacity of 60 rounds and a stated cyclic rate of fire of around 450 rounds/min, though the gun on the gunner's right side fires slightly faster, around 485 rounds/min. With a stock crew, the guns can be reloaded in 10.4 seconds; with an aced crew, they can be reloaded in 8 seconds.

Msg-info.png Turrets are named sequentially, clockwise, starting at the bow
Secondary armament guidance
No.1 Turret (1x 20 mm/70 Oerlikon Mk.II) No.2 Turret (2x 20 mm/70 Oerlikon Mk.V)
Horizontal Vertical Horizontal Vertical
±147° -5°/+60° ±140° -4°/+62°

All of the secondary armament guns share the same ammunition, of which there are three types available:

  • Universal: HEF-T · HEF-I · AP-T
  • 20 mm HE: HEF-T · HEF-I · AP-T · HEF-I
  • 20 mm AP: AP-T · AP-T · AP-T · HEF-I

Penetration statistics
Ammunition Penetration @ 0° Angle of Attack (mm)
10 m 100 m 500 m 1,000 m 1,500 m 2,000 m
HEF-T 2 2 2 2 2 2
AP-T 34 32 24 17 12 8
HEF-I 2 2 2 2 2 2
Shell details
Ammunition Velocity
(m/s)
Projectile
mass (kg)
Fuse delay
(m)
Fuse sensitivity
(mm)
Explosive mass
(TNT equivalent) (g)
Ricochet
0% 50% 100%
HEF-T 830 0.12 0 0.1 6.57 79° 80° 81°
AP-T 830 0.12 - - - 47° 60° 65°
HEF-I 830 0.12 0 0.1 11.17 79° 80° 81°

The best ammunition for general use is the HE belt, due to it having the highest ratio of HE rounds to AP rounds, making it the most effective against both aircraft and the vast majority of surface targets. Because of this, the HE belt should be the main ammunition once it is unlocked. Additionally, the AP belt, with its higher amount of AP rounds, is better for dealing with armoured targets, so take a decent amount of these as well for specialized usage.

Anti-aircraft armament

2 х Turret2 x 7.72 mm Lewis machine gun, pattern 1916
Ammunition3880 rounds
Belt capacity97 rounds
Fire rate551 shots/min
Main article: Lewis 1916 (7.72 mm)

The anti-aircraft armament consists of four 7.72 mm Lewis 1916 machineguns in two twin mounts, one on either side of the bridge. There are 3,880 rounds of ammunition available for each mount, 1,940 rounds per gun, for a total of 7,760 rounds. No horizontal or vertical traverse rates are given in-game, though installing the "Anti-Air Armament Targeting" modification will still increase their traverse rates by 18%. Each gun has a magazine capacity of 97 rounds and a cyclic rate of fire of around 550 rounds/min. With a stock crew, the guns can be reloaded in 18.2 seconds; with an aced crew, they can be reloaded in 14 seconds.

Msg-info.png Turrets are named sequentially, clockwise, starting at the bow
Anti-aircraft armament guidance
No.1 Turret (starboard) No.2 Turret (port)
Horizontal Vertical Horizontal Vertical
-30°/+45° -5°/+50° -45°/+30° -5°/+50°

There are no ammunition options available for this gun on Fairmile B (ML345). Neither belt composition nor penetration statistics are given in-game.

Additional armament

Setup 114 x Mk.VII depth charge
Setup 26 x Y-gun Mk.VII depth charge
Setup 36 x Y-gun Mk.VII depth charge
14 x Mk.VII depth charge
Setup 48 x 1123/1323 lbs Type M Mark I moored contact mine

Fairmile B (ML345) has five possible loadouts:

  1. 14x Mk.VII depth charge
  2. 6x Y-gun Mk.VII depth charge
  3. 14x Mk.VII depth charge, 6x Y-gun Mk.VII depth charge
  4. 8x Type M Mk I mines
  5. Without load

Depth Charges

Mk.VII depth charges numbered according to their drop order.

The Mk.VII depth charges are carried in racks on the stern, seven on either side, with three in front of the aft gun and four behind. The depth charges are dropped one at a time in the following order: foremost to aftmost and alternating port to starboard, starting with the foremost depth charge on the port side.

The Y-gun Mk.VII depth charges are fired from a depth charge thrower mounted in front of the aft gun. The depth charge thrower has two arms, one pointed to either side of the boat, and will launch either the port or starboard depth charge depending on the direction the player is currently looking. These cannot be aimed and will always land approximately 50 m away from the boat. After launching, there is a 20 second reload, although the damage model is actually updated after only 10 seconds. Aside from the two depth charges already on the thrower, there are an additional four stored in reserve on the deck just aft of the thrower, two per side.

Before spawning, the detonation time delay for both types of depth charges can be set anywhere between 3 seconds and 10 seconds.

Depth charge characteristics (Mk.VII depth charge)
Mass (kg) Explosive type Explosive mass (kg) TNT equivalent (kg) HE armour
penetration (mm)
Armoured vehicle
destruction radius (m)
Fragment dispersion
radius (m)
196 TNT 130 130 101 8 122
Depth charge characteristics (Y-gun Mk.VII depth charge)
Mass (kg) Explosive type Explosive mass (kg) TNT equivalent (kg) HE armour
penetration (mm)
Armoured vehicle
destruction radius (m)
Fragment dispersion
radius (m)
196 TNT 130 130 101 8 122

There is almost no practical reason to use depth charges on any naval vessel in the game. Although they usually result in a one-hit kill if used properly, they are extremely situational, requiring the player to close to point-blank ranges to even use them. In almost every case, anytime a depth charge could be used, the guns or torpedoes can be used instead to greater effect. In fact, depth charges tend to actually be a liability in battle, since they essentially act as exposed ammo racks before they're dropped. They can be shot at, and if destroyed, they have a chance to detonate, instantly destroying the boat.

Despite this, some success can be had in dropping them either next to, or in front of a large, slow target. If dropping them next to the target, remember the depth charge drop order, since it's most likely that only the depth charges dropped on the side closest to the enemy will deal any damage. If dropping in front of the target, rush in from the sides as quickly as possible and drop them all at once directly in front of the target. For both cases, set the depth charge time delay to the minimum 3 seconds, since any higher time delay will only allow the depth charge to sink further away from the target, giving them more time to move out of the way. Again, using depth charges is extremely situational, and they will only be a liability the vast majority of the time, so take them at your own discretion.

Mines

Type M Mk I mines numbered according to their drop order.

The Type M Mk I mines are carried amidships, two on either side in front of the aft gun and similarly behind. They are dropped in the following order (see the image): aftmost to foremost and alternating from port to starboard, starting with the aftmost mine on the port side.

Mine characteristics
Mass (kg) Explosive type Explosive mass (kg) TNT equivalent (kg)
600 TNT 227 227

Like depth charges, naval mines are situational weapons that act like exposed ammunition racks if not dropped. However, because they do not automatically detonate, they are much more useful. With mines, Fairmile B (ML345) can play a utility role by using the mines to cut off narrow passageways and block capture points, then returning back to a friendly capture points to reload before repeating the process. This playstyle is still very situational, though, as it requires misplay on the enemy's part. Mines have a marker in all gamemodes an enemy players will receive a warning when too close to one, so most players will destroy the mines with gunfire or will simply sail around them. Additionally, mines will also despawn after some period of time, so complete coverage of the entire map is not possible. This playstyle also forces Fairmile B (ML345) to the front lines, which is undesirable due to her poor gun armament.

Alternatively, mines can also be used in a more proactive role, essentially like a better depth charge as described above, since they have no detonation time delay and have a much larger explosive charge. If using them like this, remember the drop order; it is not the same as the depth charge drop order. All said, mines are still only situationally useful, so take them based on personal preference.

Usage in battles

Fairmile B (ML345) has the same primary armament as the previous Fairmile boat, the Fairmile A (ML100), although with a few differences. Most notably, the gun is now mounted on the bow, which greatly increases its versatility. The gun is also now equipped with a gun shield and can now elevate to 70°, though neither of these really change the gun's effectiveness; the gun shield can easily be penetrated by almost any sort of gunfire and the increased elevation is meaningless without proper anti-aircraft rounds. Arguably, the gun shield actually makes the gun worse as there is now a greater surface area to target to knock out the gun. Unfortunately, the gun's many weaknesses remain the same. The 3 pdr cannon, like all single-shot weapons of this calibre, has an abysmal damage output that is easily outclassed by any autocannon. Additionally, the accuracy is poor, which, together with the low muzzle velocity and projectile mass, limits the cannon's effective range. These same problems are also present in the anti-aircraft armament. The usefulness of the 7.72 mm Lewis 1916 machineguns are limited in the same way by their poor damage output and low maximum range.

In contrast, secondary armament is much more capable. Sporting three 20 mm/70 Oerlikon cannons, just one of these by itself will outperform the 3 pdr QF Hotchkiss cannon in damage output. Because of this, Fairmile B (ML345) should be played while controlling the secondary armament, rather than the primary armament. That said, the secondary guns do have their own downsides. First, neither gun mount can fire directly forwards. Second, and more significantly, neither mount can traverse a full 360°, meaning that there will be several seconds of delay between switching from one side of the boat to the other. To avoid this, preemptively turn the guns to the side you most expect enemies to be and try to keep all enemies on only one side of the boat to avoid having to constantly switch directions. Because of the strong armament, Fairmile B (ML345) can be played more aggressively than most of the previous vessels in the tech tree, although keep in mind that the survivability is essentially the same as the Fairmile A (ML100), so stick with the team and make use of cover whenever possible. As with most autocannons and machine guns, be proactive with the reloads. If there isn't much ammunition left in the magazine after an engagement, fire off any remaining ammunition in the 20 mm/70 Oerlikon cannons to begin reloading in safety, retreating to do so if necessary. For Fairmile B (ML345), consider doing this when there are around 60 rounds or less between the three guns.

One thing of note with Fairmile B (ML345) is the large ammunition storage located in the bow. While it generally doesn't tend to be much of an issue against machine guns and low-calibre autocannons, large-calibre HE can easily set it off. Luckily, this weak spot can be eliminated, albeit at the cost of the 3 pdr cannon, by taking the minimum amount of ammo for that gun and firing all of it off immediately after spawning, emptying the ammo storage. While you do lose use of the 3 pdr cannon, the cannon isn't very useful in and of itself, so if you plan on primarily using the secondary armament anyway, the cost of losing the 3 pdr cannon is outweighed by the increase in survivability.

Lastly, keep in mind that while controlling the secondary armament, there won't be any effective anti-aircraft guns. The 3 pdr cannon is practically useless against aircraft, and the Lewis machine guns only begin firing once a target is within 1 km, so it's important to manually scan the sky for aircraft. Do not rely on either the primary or anti-aircraft armament for AA defense, but rather, use them as a warning indicator. If they start firing, then you know there is an aircraft nearby, at which point you can either shoot it down yourself, or if you're not confident with your aim, switch away from the secondary armament to give the AI gunners control of the cannons.

Pros and cons

Pros:

  • Powerful secondary armament
  • Ability to carry mines

Cons:

  • Very weak primary and anti-air armaments: poor damage output and low effective range
  • Prominent ammunition storage in the bow
  • Below-average top speed and manoeuvrability

History

The Fairmile B motor launch originated as an Admiralty design in mid-1939. At the time, the Admiralty was faced with a severe lack of anti-submarine boats. An existing design by the Fairmile Marine Company, the Fairmile A type, was in the works, but a prototype had yet to be produced. Still, the Admiralty saw many issues with the design, largely stemming from its hard chine hull. The Admiralty created a wooden motor launch design of similar dimensions to the Fairmile A type but with a round bilge hull design instead. This design underwent trials later that year and proved itself to be vastly superior to the Fairmile A type in its seakeeping ability. Impressed by the decentralized production scheme of the Fairmile A type, the contract to mass-produce the new design was awarded to the Fairmile Company with an initial order for 13 vessels placed on 22nd September 1939. Like the Fairmile A type, the new design would be manufactured from prefabricated parts under Fairmile's production scheme. Under this system, parts and materials would be sourced from local companies and assembled at Fairmile factories as near to completion as possible. The parts could then be sent in kit form ready for final assembly to any boatyard around the world.

The new design, now known as the Fairmile B type motor launch, had a length of 112 ft, a beam of 18 ft 3 in, and a draught of around 5 ft. As originally designed, the boats were to be powered by three Hall-Scott Defender petrol engines, 600 bph each, provided under Lend-Lease from America. However, due to a shortage of supply from the American manufacturer, it was reluctantly decided that the boats should instead be powered by only two engines, the loss in speed deemed acceptable if it meant that production could potentially be increased by 50%. With only two engines, the Fairmile B type could achieve a maximum speed of 20 knots. With a fuel capacity of 2,305 gallons, they had a range of 1,500 miles at 12 knots, though above-deck fuel tanks would frequently be added to further increase the operational range.

Unlike the Fairmile A type, the question of the Fairmile B type's armament was decided from the beginning. The Fairmile B type was originally designed for anti-submarine work, specified to be able to carry 12 depth charges and ASDIC sonar equipment. Its intended role was also reflected in its gun armament: one 3-pdr Hotchkiss cannon aft and a pair of Lewis guns forward. Very early on, it was decided that the Fairmile B type should also have the option for variations in its armament. To achieve this, steel strips with tapped holes were installed on the deck onto which any desired armament could be mounted. For the boat to be refitted, all that needed to be done was to unbolt the old armament and swap in the new armament. Because of this, the Fairmile B type could incredibly be entirely refitted in just 48 hours. Due to this modular armament design, the Fairmile B types would often receive many armament refits for a variety of roles — including as minesweepers, minelayers, convoy escorts, submarine chasers, gun boats, air-sea rescue launches, and even as motor torpedo boats — depending on what was needed of them in the areas they were assigned to.

Over the course of World War II, Fairmile B type parts kits would be shipped to various boatyards all throughout the British Empire and Commonwealth. From Jamaica to Singapore, Canada to New Zealand, over 650 Fairmile B types were built from 1940 to 1945. During the war, the Fairmile B types were operated by the Royal Navy, the Royal Canadian Navy, the Royal Australian Navy, the Royal New Zealand Navy, the Royal Indian Navy, the Free French Naval Forces, and the Royal Norwegian Navy. They repeatedly proved their worth, making up for their lack of speed with efficiency, versatility, and reliability. After the war, with the need for so many boats gone, many of the surviving Fairmile B types in Royal Navy service would be scrapped or sold as pleasure boats, though some Fairmile B types were either sold or given to many minor navies, including the Italian Navy, the Royal Netherlands Navy, the South African Navy, the Burmese Navy, the Royal Hellenic Navy, the South African Navy, and the Turkish Navy, which all continued to operate them for many years after the war.

ML-345 was a Fairmile B type motor launch ordered on 21st August 1940. She was built by Diesel Constructors at Isleworth, London and was completed on 30th March 1942. ML-345 survived the war and was eventually sold in 1946.

Media

Skins

See also

External links

References

Bibliography
  • Gaumont British News. (Producer). & White, W. B. (Director). (1941). THE STORY OF THE FAIRMILE PATROL BOAT [Film]. England: Gaumont British News.
  • Konstam, A. (2010). British Motor Gun Boat 1939–45 (pp. 12-15, 40-41). Oxford, England: Osprey Publishing. ISBN 978-1-84908-077-4.
  • Lambert, J., & Ross A. (1990). Allied Coastal Forces of World War II Volume 1: Fairmile Designs and U.S. Submarine Chasers (pp. 9-28). London, England: Conway Maritime Press. ISBN 0-85177-519-5.


Fairmile Marine Company
Motor Launch (ML) 
Fairmile A  Fairmile A (ML100)
Fairmile B  Fairmile B (ML345)
Motor Torpedo/Gun Boat (MTB/MGB) 
Fairmile C  Fairmile C (312) · Fairmile C (332)
Fairmile D  Fairmile D (601) · Fairmile D (617) · Fairmile D (697) · Fairmile D (5001)
Landing Craft Support (LCS) 
Fairmile H  Fairmile H LCS(L)(2)

Britain boats
Motor torpedo boats  Brave Borderer · Dark Aggressor · Dark Aggressor TD · Fairmile D (617) · Fairmile D (697) · Fairmile D (5001) · HMS Gay Archer
  MTB-1(1) · MTB-1(2) · MTB Vosper · MTB Vosper(2) · MTB-422
Motor gun boats  Dark Adventurer · Fairmile A (ML100) · Fairmile B (ML345) · Fairmile C (312) · Fairmile C (332) · Fairmile D (601) · Fairmile H LCS(L)(2)
  HMAS Arrow · MGB-61 · MGB-75 · ML 1383 · SGB Grey Fox · SGB Grey Goose
Gunboats  HMS Spey