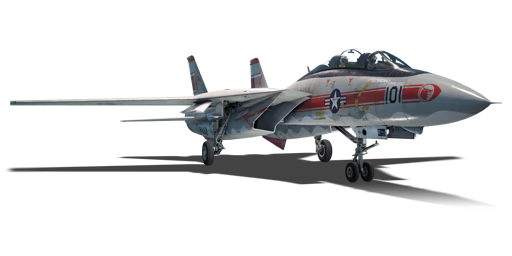
F-14A Early
| This page is about the American jet fighter F-14A Early. For the other version, see F-14B. |


Contents
Description
One of the most iconic US naval fighter jets of the Cold War era, the two-seater F-14A was developed as the US Navy's fleet-defense fighter jet to protect their carrier groups over vast swathes of ocean against Soviet bombers carrying anti-ship missiles. Developed after the US Navy's failed F-111B program, the F-14A was first deployed in 1974 wielding the advanced AN/AWG-9 radar and up to eight missiles, including the iconic Phoenix missile, to target and destroy enemy targets from extremely long ranges. Although it introduced a host of new capabilities, the F-14A suffered from its TF30 engines, which were subject to frequent failures, and other issues with the aircraft's flight characteristics that caused regular accidents.
Introduced in Update "Danger Zone", the F-14A can engage enemy air targets at far greater distances than most enemy aircraft, allowing the F-14A to take the initiative and achieve air superiority by firing first. At long range, Phoenix missiles force enemy fighters to actively monitor the sky even when they cannot yet see or detect the F-14A. While Phoenix missiles may prove too sluggish to target enemy fighters in high-speed merges, its Sparrows can engage manoeuvring targets at short and medium ranges before engaging at closer ranges with Sidewinders and M61 Vulcan cannon fire.
General info
Flight performance
The F-14A might be seen underpowered compared to other aircraft, primarily the F-4J Phantom II and other Phantom variants such as the Phantom FG.1. While it is true that the engines are not as powerful, the F-14A is far superior in terms of top speed and energy management. However, insufficient power can be noticed when zoom climbing or when turning at low speed, and regaining the speed back can take a while. The engines also consume tremendous amounts of fuel: while the F-14A can stay in the air for at least one hour with full fuel tanks, at full afterburner (WEP) the jet can fly for only 7 minutes at sea level.
The F-14A is more of a two-circle dogfighter since it keeps speed very well in hard turns, but might not have as much nose authority as other planes to win one-circle fights (such as scissors and anything similar when you turn into the opponent's nose). Although it can still beat planes like the MiG-23MLD in the instantaneous turn-rate performance, delta-wing fighters like the J35 or MiG-21 could have the advantage during the first seconds of the fight. Like other planes with variable wing geometry, the F-14A reaches its most efficient turn rate performance when wings are swept fully forward (set to 0%) and that can be achieved only by using the manual wing sweep controls. Since it is semi-automatic, the wing will automatically change its position after reaching around ~800 km/h IAS.
The most optimal turning speed is around 900 km/h IAS at sea level (it reaches the highest sustained turn rate there), but the best is actually between 700 and 830 km/h IAS since any faster, and it becomes impossible to maintain the turn without the crew blacking out. At such speeds, the F-14A in a clean configuration with 30 minutes of fuel can reach up to 23 deg/s of sustained turn rate, which is better than any MiG-23, Su-17, or even other more manoeuvrable fighters like the MiG-19. Both the sustained and instantaneous turn rate can be improved by using combat flaps, which can function at speeds up to 850 km/h IAS.
Thanks to the variable wing sweep, the F-14A is able to move its center of mass and thus increase or decrease its roll rate. High sweep allows higher speeds at reduced roll rate and vice versa. Low sweep increases roll rate and energy retention at subsonic speeds.
To get the most of its turn rate performance in Simulator Battles, you should always try to use the manual SAS (Stability Augmentation System) mode. The damping mode severely limits its nose authority, and it is harder to win fights against planes like the MiG-21 or other delta-wing fighters. In general, combat flaps should always be used when you are about to merge with the enemy plane, as they not only increase the sustained turn rate but also improves nose authority. In turn, it becomes easier to get lead on the enemy plane and to control the plane when using manual SAS mode. The player should still be very careful with pulling the stick around 500 km/h IAS. Below that speed, it's very easy to abruptly lose speed, reach the critical AoA, and stall out the plane. Pulling the stick all the way to yourself should be done only when you are going for snap shots. The other downside manual SAS mode is the plane is much more sensitive to controls, especially in pitch. For this reason, it is recommended to use the damping SAS mode during cruising and BVR combat.
While using the manual SAS mode, it is can be easy to stall out the plane when flying below 400 km/h IAS. In this case, after entering the flat spin, the quickest method to recover the plane is to increase the wing sweep angle and then counter the plane rotation with the rudder.
| Characteristics | Max Speed (km/h at 12,192 m) |
Max altitude (metres) |
Turn time (seconds) |
Rate of climb (metres/second) |
Take-off run (metres) | |||
|---|---|---|---|---|---|---|---|---|
| AB | RB | AB | RB | AB | RB | |||
| Stock | 2,202 | 2,191 | 16764 | 24.4 | 25.1 | 178.4 | 170.5 | 750 |
| Upgraded | 2,245 | 2,221 | 23.6 | 24.0 | 231.6 | 203.8 | ||
Details
| Features | |||||
|---|---|---|---|---|---|
| Combat flaps | Take-off flaps | Landing flaps | Air brakes | Arrestor gear | Drogue chute |
| ✓ | ✓ | ✓ | ✓ | ✓ | X |
| Limits | Wings (km/h) | Gear (km/h) | Flaps (km/h) | Max Static G | |||
|---|---|---|---|---|---|---|---|
| Combat | Take-off | Landing | + | - | |||
| Min sweep | 1,359 | 518 | 1,200 | 873 | 416 | ~10 | ~5 |
| Max sweep | 1,555 | ~11 | ~5 | ||||
| Optimal velocities (km/h) | |||
|---|---|---|---|
| Ailerons | Rudder | Elevators | Radiator |
| < 1,200 | < 850 | < 1,800 | N/A |
Engine performance
| Engine | Aircraft mass | ||||||||
|---|---|---|---|---|---|---|---|---|---|
| Engine name | Number | Basic mass | Wing loading (full fuel) | ||||||
| Pratt & Whitney TF30-P-412A | 2 | 18,545 kg | 493 kg/m2 | ||||||
| Engine characteristics | Mass with fuel (no weapons load) | Max Gross Weight | |||||||
| Weight (each) | Type | 18m fuel | 20m fuel | 30m fuel | 45m fuel | 62m fuel | |||
| 1,802 kg | Afterburning low-bypass turbofan | 20,750 kg | 20,905 kg | 22,085 kg | 23,855 kg | 25,895 kg | 30,935 kg | ||
| Maximum engine thrust @ 0 m (RB/SB) | Thrust to weight ratio @ 0 m (WEP) | ||||||||
| Condition | 100% | WEP | 18m fuel | 20m fuel | 30m fuel | 45m fuel | 62m fuel | MGW | |
| Stationary | 4,860 kgf | 8,019 kgf | 0.77 | 0.77 | 0.73 | 0.67 | 0.62 | 0.52 | |
| Optimal | 5,808 kgf (1,555 km/h) |
12,692 kgf (1,555 km/h) |
1.22 | 1.21 | 1.15 | 1.06 | 0.98 | 0.82 | |
Survivability and armour
The F-14A holds 60 countermeasures, which is a decent number of chaff and flares that can let the Tomcat survive multiple missiles. Due to its massive engines, the IR signature of the aircraft is not an easy thing to conceal when fighting heat-seeking missiles. As with other jets around its battle rating, flares alone are generally not enough to defeat IR-guided missiles. To defeat an IR-guided missile (heat-seeker), turn off afterburner and reduce throttle to at least 80-85% while dumping flares and turning away from the missile. This is to ensure that an IR-guided missile will track the flares and not the engines. Due to the massive size compared to other aircraft, the chances of a successful hit from enemies, both missile and cannon, are higher compared to smaller aircraft such as the Harrier or F-5. This should be taken into consideration as proximity fuses will trigger with more ease as the wingspan of the Tomcat is considerably larger than most jets seen in game.
Fuel tanks are housed flatly in both the fuselage and wings. The F-14A will easily catch fire from enemy rounds from above and below the plane. Thankfully, the fuel tanks are well-separated compared to other fighters like the F-4 family, so damage to one part of the plane may not necessarily compromise the whole plane. However, fires will rapidly destroy traction of control surfaces, so they must be immediately extinguished. As long as some control surfaces are usable, the F-14A can survive critical damage (such as losing a wing) and return to base. Its multiple fuel tanks help isolate fuel fires especially on the wings, and the plane can fly on one engine.
Modifications and economy
| Flight performance | Survivability | Weaponry | ||||||||||||||||||||||||
|---|---|---|---|---|---|---|---|---|---|---|---|---|---|---|---|---|---|---|---|---|---|---|---|---|---|---|
|
|
|
Armaments
| Ballistic Computer | ||||
|---|---|---|---|---|
| CCIP (Guns) | CCIP (Rockets) | CCIP (Bombs) | CCRP (Bombs) | EEGS |
| |
|
|
|
|
Offensive armament
The F-14A Early is armed with:
- 1 x 20 mm M61A1 cannon, cheek-mounted (676 rpg)
- 60 x countermeasures
Suspended armament
The F-14A Early can be outfitted with the following ordnance:
| 1 | 2 | 3 | 4 | 5 | 6 | 7 | 8 |  | |
|---|---|---|---|---|---|---|---|---|---|
| 250 lb LDGP Mk 81 bombs | 8* | 6 | |||||||
| 500 lb LDGP Mk 82 bombs | 8* | 6 | |||||||
| 500 lb Mk 82 AIR bombs | 8* | 6 | |||||||
| 1,000 lb LDGP Mk 83 bombs | 2* | 2 | |||||||
| 1,000 lb Mk 83 AIR bombs | 2* | 2 | |||||||
| 2,000 lb LDGP Mk 84 bombs | 2*† | 2 | |||||||
| 2,000 lb LDGP Mk 84 Air bombs | 2*† | 2 | |||||||
| Zuni Mk32 Mod 0 ATAP rockets | 8 | 8 | |||||||
| AIM-7E-2 Sparrow missiles | 1 | 2 | 1 | 1 | |||||
| AIM-7F Sparrow missiles | 1 | 2 | 1, 2* | 1 | |||||
| AIM-9D Sidewinder missiles | 1 | 1 | 1 | 1 | |||||
| AIM-9G Sidewinder missiles | 1 | 1 | 1 | 1 | |||||
| AIM-9H Sidewinder missiles | 1 | 1 | 1 | 1 | |||||
| AIM-54A Phoenix missiles | 1 | 2* | 2† | 1 | |||||
| 280 gal drop tanks | 1 | 1 | |||||||
| * Use of dual Sparrow missiles on hardpoint 4 prevents use of the marked options on hardpoint 3 † The AIM-54A Phoenix missiles on hardpoint 4 cannot be carried in conjunction with 2,000 lb LDGP Mk 84 bombs on hardpoint 3 | |||||||||
| Default weapon presets | |
|---|---|
| |
The F-14A is the first aircraft in game to have access to Active Radar Homing missiles with internal navigation. While it is mostly used for air defense and anti-air duties, it holds decent ground pounding abilities that are nothing new to American pilots. The F-14A has access to a wide variety of weapon selections due to having 'Custom Loadouts' feature. Depending on the needs of the pilot, one can carry different loadouts for different needs.
The F-14A comes with three options for missiles: short-ranged AIM-9H Sidewinders, medium-ranged AIM-7F Sparrows, and long-range AIM-54A Phoenixes.
The AIM-9H Sidewinder is very similar to the previous AIM-9G — having good range but below average manoeuvrability. Its seeker can also be slaved to a radar lock or TWS soft lock. With only 18G maximum overload, the AIM-9H should not be used in high-aspect or hard-turning shots at close ranges. Instead, the AIM-9H's good range should be used to catch enemies off guard. A good way to utilize this range is to position yourself over the battlefield and dive down on enemies. Your dive speed combined with gravity will increase the speed and range of your missiles, your angle to the enemy will give the missiles an easier time locking on to their exhaust, and your unexpected direction will see that many enemies will not notice the missile until they have been destroyed by it.
The AIM-7F Sparrow is a medium-range, SARH (Semi-Active Radar Homing) missile. Pilots of the F-14A are probably familiar with the AIM-7F from the previous F-4J or the premium F-4S. The AIM-7F is one of the best radar-guided missiles in the game, with 25Gs of pull and a very long burn time for the sustainer motor, it has long range and competitive manoeuvrability. (while earlier SARHs such as the AIM-7E-2(DF), Skyflash, R-23R, etc. will stop producing thrust sooner and lose speed during manoeuvres, the AIM-7F maintains its speed and thus manoeuvrability for longer thanks to its sustainer motor.) This should be the F-14A's go-to missile; it can be launched from all aspects and is difficult to dodge without the correct defensive manoeuvres. The AIM-7F can be launched from longer ranges to utilize its long burn time and the F-14A's good radar. Pay attention to your Radar Warning Receiver; if the enemy you are radar locking is also radar locking you, it is likely that they are about to or already have launched a radar-guided missile at you. In this case, do not fly straight; you are going to be hit first. Launch your missile, then crank to one side. To crank means to turn to one side as far as possible without losing radar lock. This makes the enemy's missile travel further at higher angles and thus decreases the chance it will hit you during defensive manoeuvres. If you have Sparrows to spare and an enemy is approaching head-on, you can launch Sparrows in succession (2-3 seconds between launches) to increase your probability of a kill. An enemy can avoid one missile with manoeuvres, but will have bled speed and will have a more difficult time avoiding further missiles.
The AIM-54A Phoenix is a long-range, ARH (Active Radar Homing) missile, and is only found on the F-14. The AIM-54A is a unique missile with unique capabilities. It has an extremely long burn time and thus an extremely long range, as well as a rather large proximity fuse and a large amount of explosives (doesn't have to be as close as other missiles to enemies to explode and cause critical damage). However, its more interesting features come in the form of its behaviour. First, it's an active radar homing missile, meaning it has a small internal radar which at closer ranges it can use to automatically search for, track and guide itself to targets without any input from the parent (the F-14's) radar. Second, it can be guided via the parent (F-14's) radar, but if it loses lock, the missile will fly straight for a while and use the aforementioned internal radar to search for enemies to home in towards. Third, the AIM-54 does not require a hard lock to be launched; when the F-14's radar is in TWS (Track While Scan) mode, you can simply hover the radar cursor over a radar contact to launch the AIM-54. This also means you can launch more than one Phoenix at a time by hovering over a target, launching, and then hovering over another target to launch another Phoenix.
It is important to know that despite these seemingly impressive features, the AIM-54 is not an all-powerful missile and has its downsides; there are many scenarios where it is advisable not to use it. First, some F-14A players may feel tempted to take six AIM-54s, take off, and then launch at six enemy targets very far away. This is not advised, as there is a very high chance none will hit; at such a long-range, and with player behaviour at the start of a match, it is very likely that the missiles will be inadvertently notched, or the missiles will get distracted by enemy and/or friendly AI bots. In addition, the AIM-54A only has 17G overload — less than an AIM-9H — and with its very long burn time, it is easily seen and dodged by enemies. It is worth saving your missiles for a better firing window. Second, the missile should not be used at closer ranges (< 5 km). In addition to having low manoeuvrability, the AIM-54 has a very, very slow acceleration, and it highly likely won't be able to follow the defensive manoeuvres of such a close enemy. For this case, Sparrows are a much better option. Third, the AIM-54 should not be launched in the direction of friendly aircraft. The AIM-54 and its internal radar will go for the first target it sees, regardless if it is friend or foe. And fourth and finally, the AIM-54 is the heaviest air-to-air missile in the game, and they impact aircraft performance significantly. To make use of the AIM-54's advantages, it is advisable to use them at higher altitudes (> 5 km) and at long ranges. The AIM-54 will have time to accelerate to its maximum speed, and due to the low air density at high altitudes as well as the AIM-54's high speed, enemy aircraft will have a hard time evading the missile (even if it is just 17G). The AIM-54 can home in on enemies on its own, so if necessary you can completely turn away from the enemy after launching to avoid enemy missiles. However, the AIM-54 has datalink and thus is it recommended to keep painting the target(s) through TWS radar mode for more reliable missile tracking.
Each of these missiles has its strengths and weaknesses. A mix between long-range weapons and short-range weapons must be used at the pilot's discretion. A maximum of six of a mix of Sparrows or Phoenixes can be taken, two Sidewinders can always be carried on separate hard points, and pilots can choose to substitute up to two Sparrows or Phoenixes for Sidewinders. At the very least one or two sparrows should be taken as they are useful in lots of different engagements at most altitudes. For high altitude engagements, a small number of Phoenixes (1-3) can be taken. Phoenixes are especially useful at enduring confrontation (operation) air battles, where air combat is prevalent at higher altitudes, where the Phoenix will truly shine. While the AIM-9H Sidewinders will seem like nothing new and perhaps a bit outdated, their long-range capability should not be underestimated, and users may prefer to swap out some radar-guided missiles for the Sidewinders.
Usage in battles
Boasting a high top speed, excellent turning characteristics, a large number of excellent missiles, and a powerful radar, the F-14A Early is a potent air superiority fighter and should be used as such.
Flying the F-14A
Despite being a very large aircraft, the F-14A Tomcat's manoeuvrability and energy retention are excellent. With the wings swept out, it's among the best rate fighters in the game, and has excellent instantaneous turn rate. This allows the F-14A to out-dogfight most aircraft in-game. For planes with poor energy retention such as F-4s, MiG-21s, J35s, and JA37s, you can use the F-14's excellent turn rate to enter a prolonged two-circle fight, where the F-14's superior energy retention will drain the energy of these delta-winged fighters. The optimal rate speed of the F-14A is around 750 km/h, though 600 km/h will still allow you to out-rate fighters with poor energy retention. For planes with better energy retention such as F-8s and MiG-23s, you can use F-14A's excellent instantaneous turn rate to force a one-circle fight. It should be noted that when dogfighting in the F-14A, it is critical to always sweep your wings forward to 0% wing sweep. At this wing sweep, you will obtain the optimal energy retention and turn characteristics of the F-14A. Therefore, it is highly recommended to set key binds for manually changing the sweep angle and switching between auto to manual wing sweep. Keep in mind that, although the F-14A has excellent dogfighting characteristics, it is still a very large aircraft with extremely hot engines. Due to this, it is advised to avoid turn-fighting in the Tomcat unless absolutely necessary because, as with all other top-tier jets, doing so will bleed your speed and make you an easy target for enemy aircraft.
The early F-14A with its TF30 engines were historically underpowered, and this shows in-game: while the F-14A has a great top speed with the wings swept back, the acceleration and climb rate is below average. Faster planes such as MiG-23s, Mirage 2000s, F-16s, and MiG-29s will easily out-accelerate you. Even F-4s will accelerate faster at lower speeds. Therefore, it is advisable to keep your speed up in the F-14. Due to this, vertical dogfights are generally not advisable, especially with faster accelerating and climbing opponents such as MiG-23s, MiG-29s and F-16s. In addition, this acceleration is another reason to be careful when engaging in dogfights, as you will have difficulty out-accelerating your opponents should you need to exit.
Wing Sweep
The F-14A has a variable sweep wing, which means the wings can change angle during flight to obtain the desired flight characteristics. As discussed before, when the wings are swept forward (0%), the F-14A obtains high energy retention and excellent instantaneous and sustained turn rate. However, the wings being swept forwards limits the Tomcat's top speed, and therefore should only be used at lower speeds, when dogfighting, or takeoff/landing (especially on carriers). On the other hand, the wings being swept back allows the F-14A to reach its top speed, but at lower speeds, the reduced lift and greater wing loading heavily reduces manoeuvrability. Generally, pilots can keep the wing sweep mode set to automatic (AUTO); this will automatically sweep the wings without player input based on how fast or slow the Tomcat is going. However, when dogfighting, you will want to switch the sweep mode to manual, and use selected key binds to manually sweep the wing completely forward to obtain optimal manoeuvrability.
Fuel Consumption and Engine Heat
It should be noted that the F-14A burns through its fuel supply extremely fast when on full afterburner. This should be taken into consideration as one can use up all their fuel without realizing until it is too late. Due to this, it is advisable to take at the very least 30 minutes of fuel. You can use the mouse scroll wheel to save a lot more fuel by using the first-stage afterburner, which gives a significant power boost from 100% throttle but a little less power than full afterburner. On minimum fuel (18 minutes) the full afterburner can only last about 2 minutes and 30 seconds, but the afterburner (first-stage) can last you 8 minutes.
Something to be aware of when playing the F-14A is the insane heat of its engines. At high throttle and afterburner, its engines emit an unparalleled amount of heat at around 2,100 °F (1,150 °C). For reference, that is around 66% hotter than the F-4J's engines, which are around 1,239 °F (671 °C) at 100% throttle and 1,256 °F (680 °C) during full afterburner. During gameplay, this means that in the F-14A simply just turning off the afterburner and deploying flares may not be enough to avoid an incoming IR missile. It is also recommended to throttle down the engine significantly (at least 80-85%) to make sure that an incoming IR missile goes for the flares. This is especially true for more flare-resistant IR missiles such as the AIM-9L and AIM-9M, Magic 2, and R-73 which may need substantial throttling down to flare off. Keep in mind that throttling down means that you will lose a decent amount of speed in the process, so be prepared.
Radar and Radar Modes
The AN/AWG-9 radar set carried by the F-14A is an extremely potent radar, especially for long-range missile combat. It has great range (a maximum of 185 km tracking and 370 km detecting). For most normal air RB maps, a 37 km or 93 km display range should suffice, while 93 km should be enough for most enduring confrontation air RB maps. A radar lock is necessary to guide Sparrows, while either radar lock or soft lock (selecting targets in TWS) will suffice for a Phoenix launch. The radar has four different modes which have different purposes, capabilities and usages:
- SRC PD HDN (Surveillance Radar Computer, Pulse-Doppler, Head-On): Users of the F-14 are likely at least somewhat aware of what a pulse-Doppler radar is from usage of the previous F-4J. This is a pulse-Doppler mode, meaning it measures an aircraft's Doppler shift (difference in velocity compared to surroundings) in order to "see" targets. Due to the nature of the detection method, this pulse-Doppler mode is most ideal for targets close to the ground, as well as in head-on situations (as the name suggests). However, this pulse-Doppler mode has a weakness: it can be notched; pulse-Doppler measures the target aircraft's velocity change compared to surroundings, so if a target flies perpendicular to the radar (not moving closer or further compared to the surroundings), the radar will not observe a change in velocity and therefore cannot see the aircraft. F-14A pilots must be aware of how the notch works; if an enemy radar is locking you at low altitude, they are likely using a pulse-Doppler mode, and thus notching becomes a defensive option to break radar lock. Provided the target is not at very low altitudes, an enemy notching your pulse-Doppler radar can be countered by switching the radar mode to SRC. Another weakness to be aware of is that pulse-Doppler modes generally have trouble detecting and locking targets travelling away from the radar. In conclusion, the pulse-Doppler mode is good for tracking targets at very low altitudes, but is vulnerable to notching and has difficulty finding targets moving away.
- SRC (Surveillance Radar Computer): This is the standard radar mode. It is not a pulse-Doppler mode and does not have its weaknesses; it cannot be notched like pulse-Doppler can, and has an easier time tracking targets moving away. Therefore, if an enemy is attempting to notch your pulse-Doppler mode, you can switch the radar lock from a pulse-Doppler one to standard SRC. However, due to the radar return from ground clutter, it has great trouble locking targets at very low altitude, though it can still lock higher targets. It's worth noting that the SRC mode on the AN/AWG-9 is more resistant to ground clutter than previous radars; while you still cannot detect or lock a target very close to the ground, it can sometimes detect targets as little as 1 km from the ground. In conclusion, SRC is generally more reliable at finding and tracking targets than pulse-Doppler mode, but cannot see targets at very low altitudes like pulse-Doppler can.
- TWS HDN (Track While Scan, Head-On): This mode allows targets to be detected and "tracked" simultaneously. By hovering your radar cursor over detected targets, you can "soft lock" them; their position is marked in third-person view, and their general speed, heading, and height are displayed. With a soft lock, the radar return is not strong enough to trigger the RWR, so enemies will not know you are soft locking them. AIM-54A Phoenixes can be launched via a soft lock, and after launching a Phoenix, you can hover over another enemy to launch another Phoenix. Using onboard electronics, the Phoenixes will guide themselves to the target after this. In addition, AIM-9G/H Sidewinders can be slaved to the soft lock. However, for a Sparrow launch, you will need to "hard lock" the target. This can be done simply by locking the target the cursor is hovering over (as with other radar modes). In addition, track while scan uses pulse-Doppler, so it can detect targets close to the ground as well. Unfortunately, this also means it has the same weaknesses as pulse-Doppler mode (vulnerable to notching or targets flying away). The capabilities of the track while scan mode are potent and allows pilots great situational awareness, and therefore should generally be your go-to radar mode, only switching to SRC to overcome pulse-Doppler's weaknesses.
- SRC PDV HDN (Surveillance Radar Computer, Pulse-Doppler Velocity, Head-On): This radar mode is very similar to pulse-Doppler, but instead displays the velocity of the aircraft on the radar screen rather than the range. This is the only radar mode on the AN/AWG-9 which does not utilize IFF (Identification Friend or Foe), so in simulator mode, be careful.
- The AN/AWG-9 has two acquisition modes, ACM PD HDN and ACQ, and two track modes, TRK PD HDN and TRK.
- SRC PD HDN, TWS HDN and SRC PDV HDN radar modes all use ACM PD HDN (Air Combat Maneuvering, Pulse-Doppler, Head-On) as the acquisition mode, and TRK PD HDN (Track, Pulse-Doppler, Head-On) as the lock mode. These are pulse-Doppler search and lock methods, and as such have the same strengths and weaknesses. SRC uses ACQ and TRK as acquisition and lock modes, respectively, which are the non pulse-Doppler counterparts to ACM PD HDN and TRK PD HDN.
- When in these acquisition modes, you can press your keybind for "Change Radar/IRST Search Mode" to change the scope of the acquisition search area. Clicking it once changes it from a square to a vertically long rectangle, clicking it twice moves this rectangle to an upper position (to lock enemies above you), and clicking it a third time changes it back to a square.
- A nice and very useful feature of the F-14's radar is that, if you have a target radar locked, you can switch between pulse-Doppler and normal SRC tracking without breaking lock (most other radars will require the lock to be broken before switching radar mode to reattempt a lock). This allows you to quickly and easily switch to TRK (SRC) if the target is notching, or switch to TRK PD HDN (Pulse-Doppler) if the target is going close to the ground.
Realistic Battles
In realistic battles, the F-14A is a powerful air superiority fighter. With a maximum of six medium-range AIM-7F or very long range AIM-54A missiles and a powerful radar, it is among the best BVR (Beyond Visual Range) fighters in the game, and it is advisable to exploit this advantage. In air realistic battles, players can side climb to high altitudes (>5 km) and search for targets to engage with the long-range Sparrows or Phoenixes. Once higher altitude is swept of enemy fighters, pilots can dive down on lower altitude enemies and use the energy advantage to obtain missile kills from an unexpected angle. If necessary, the Tomcat's excellent manoeuvrability can be used to dogfight any remaining enemy aircraft.
In ground realistic battles, the F-14A can use its long-range missiles to clear the sky of enemy strike aircraft. With its excellent Sparrow and Phoenix missiles, the F-14A will be especially potent at destroying enemy strike aircraft at high altitudes who are using guided munitions to attack your team outside of SAM range. While the F-14A gets access to some air-to-ground bombs and rockets, these are all unguided and thus are very risky to use in the presence of SAMs. Therefore, unless a ground strike is absolutely necessary, a Tomcat is much better off in the air-to-air role guarding the skies.
Enemies Worth Noting
- F-16A: These planes have excellent acceleration and decent top speed. In addition, they are equipped with AIM-9Ls (and Python 3's for the Israeli Netz), which can be difficult to flare with the F-14's two very hot engines running on full afterburner, as well as AIM-7Ms (except the US F-16A Block 10 and Israeli Netz), that perform similarly to the F-14's AIM-7Fs. One weakness of the F-16 is its angle of attack limiter which effectively bricks the F-16 at high speeds. This means it will have trouble dodging the F-14's AIM-7Fs at higher speeds. In a dogfight, the F-16 outturns the F-14 with it's excellent maneuverability, but the angle of attack limiter can be exploited in a merge with an F-16, where air braking, down-throttling and pulling hard into the F-16 may let you park yourself on his tail. The F-16's excellent acceleration in contrast with the F-14's poor acceleration makes it ill-advised to engage in a vertical dogfight with the F-16. It is generally best to avoid dogfighting the F-16, but if needed, a rate fight is favoured by the F-14,
- MiG-29: The MiG-29 has excellent acceleration and top speed. Though the R-60M on the 9.13 is a far cry from the F-16's AIM-9Ls, future variants carry the supermanouevring, IRCCM equipped R-73, and all MiG-29s posses the extremely dangerous R-27ER long range SARH missile. These missiles are faster accelerating and more manoeuvrable than the F-14's AIM-7Fs while having the same listed maximum range of 100 km. However, the MiG-29 can only carry two of them. They can be outranged by your AIM-54s, but at closer ranges, even a single missile can mean death for you, so you will have to use missile jousting strategies to beat the R-27ER with your AIM-7Fs. In a dogfight, it's mostly the same story as with the F-16: the MiG-29 has excellent maneuverability, and while the F-14 can certainly keep up, vertical dogfights should be avoided due to the stark difference in acceleration between the MiG-29 and F-14A. The best way to dogfight the MiG-29 in the F-14 is to utilize the F-14's excellent turn rate in a rate fight; staying at around 750 km/h will let the F-14 slowly out-rate the MiG-29.
- Mirage 2000C: Mirage 2000s have excellent acceleration and top speed, as well as powerful missiles. Like AIM-9Ls, the Magic 2 can be difficult to flare, and the Super 530D is comparable to the AIM-7F, but it should be noted that the Mirage 2000C only has two of each of these missiles. In a dogfight, the Mirage 2000 has excellent instantaneous turn rate, but due to its delta wing design bleeds speed quickly; in this case the F-14A's excellent rate speed should be used to drain the Mirage 2000 of energy and outrate it.
- F-4J, F-4S, F-4EJ Kai, Kurnass 2000: These Phantoms can very easily be beaten in a dogfight by the F-14A, but beware that they can also use the AIM-7F (except the Kurnass 2000), and in the case of the EJ Kai and Kurnass 2000, they have significantly upgraded radars, can use the AIM-9L, and for the Kurnass 2000 specifically, the even deadlier Python 3.
- MiG-23ML/MLA/MLD: These MiG-23s boast good R-24s which can compete with the AIM-7F, as well as dangerous R-24Ts which can lock on to the F-14's hot heat signature and stealthily destroy it. Good situational awareness is key to defeating these missiles. On curves that follow the same direction indefinitely, be careful. When it comes to high-speed turns, the F-14A has the advantage. However, when it comes to continuous curves at low speed, without changing direction, the Mig 23 (especially the MLD) has an advantage. In a dogfight, MiG-23s have a surprisingly good rate speed which can keep up with the F-14. However, their instantaneous turn rate is poor, so a one circle or scissors can be used with the F-14A to easily gain an advantage over MiG-23s.
- F-5E: The F-5 series have a surprisingly good turn rate that can rival even the F-14A. However, it has slow acceleration, its guns are mediocre, and it only has short-range infrared missiles. Therefore, they can be engaged with Sparrows and Phoenixes without retaliation, and in a dogfight, the vertical can be used on the F-5 to stall them out and gain the advantage. Beware however that the squadron premium F-5E FCU can enter battle with two different all-aspect infrareds at the same time. Two AIM-9P4s, and two Python 3s. Though the AIM-9P4 isn't as much of a threat as an AIM-9L due to only being able to pull 20G like a regular AIM-9P, it carries the AIM-9L's seeker, meaning it's just as difficult to flare off in rear aspect.
Simulator Battles - Enduring Confrontation
Before you take the F-14A to battle you need to figure out what weapons you want to use. All the available IR missiles have almost identical turn performance, the range is almost the same too. The D version cannot be slaved to the locked target, the G can be and the H works exactly like the G, but has a higher tracking rate. Taking at least two of them is highly recommended since they almost do not affect the flight performance.
There are also two options for radar-guided missiles. The AIM-7F works very well at close and medium ranges (3-20 km) and can hit a target which is pulling lots of G. They are harder to dodge in Simulator Battles, though you need to keep your lock all the time. The AIM-54A is an active radar-guided missile, it does not require the radar lock when it is launched 16 km from the target (or when it gets that close, then you can break your lock), but it can pull only up to 17G which is quite easy to dodge, both these missiles can also be avoided by just simply notching when the F-14 uses the pulse-Doppler radar mode.
Loadout recommendations:
- 4x AIM-9H + 4x AIM-7F - Works very well in almost any scenario, and does not affect the flight performance that much.
- 4x AIM-9H + 2x AIM-54A + 2x AIM-7F - A well-balanced loadout, allows for a variety of gameplay styles.
To make full use of the F-14A's manoeuvrability it is best to buy the expert crew and the ace crew if it is possible, since the plane pulls around 8G at 750 km/h IAS in a sustained turn and that increases even further when the player decided to pull it even more, though you need to keep in mind that the G limit is ~11G.
Outside of combat - As a start, keep in mind that the F-14A really likes to burn through its fuel reserves when the afterburner is used, (at low altitudes it can only fly up to 7 minutes with max fuel) so it is recommended to fly either with 45 minutes of fuel (on 64x64 km maps like Ruhr, Port Moresby) or full fuel tanks (128x128 km maps like Vietnam, Denmark). WEP should not be used while cruising and only during combat or while chasing someone, flying with the throttle set to 85-90% should be fine too. There are a few tactics that can be used in the F-14 in SB, but it mostly depends on what map you play. On more open maps like Denmark you can at 1,000-3,000 m alt while looking for targets, though some planes can still sneak up to you if you are not paying enough attention to your surroundings, doing so you are mostly vulnerable to attack from below and behind, especially when the enemy has access to all-aspect missiles. The other tactic is just simply hugging the ground, in most cases it is the safest one and should be used on maps with hills and mountains where you can break the enemy's line of sight by flying between them. It is more difficult and requires lots of focus. The player needs to keep looking around all the time to find the target, the radar is less useful in this scenario, though the TWS mode can be helpful on maps like Vietnam to check the enemy plane direction and ambush them while you are flying in areas where it is hard to spot the planes due to the ground colour and many objects like trees. To make cruising easier the damping SAS mode can be used, which limits the angle of attack (AoA) so much that the G limit cannot be reached at any speed, the automatic wing sweep control also can be activated. About the radar modes, the PDV should not really be used since it is the only one which does not have any kind of IFF and it is as good at detecting targets as the normal PD mode. Since the PD radar cannot track targets that are flying perpendicular to your plane switching between modes is very important, even the normal Pulse (SRC) mode can detect targets against the ground up to 15-20 km and even further when it is above the horizon. To be safe from enemy missiles it is best to stay around 20-30 km away from enemy planes.
During combat - When both sides have similar missiles in BVR combat, it is critical to accelerate to high speed before launching your missile and to launch the missile before the enemy. The AIM-54A can be useful in such scenarios, even when the F-14 will be forced to break away the missile will still be tracking the target, then the enemy will be forced to dodge it and when that happens you can launch another missile to force the enemy into an even more defensive position. When the distance between planes is around 10 km, the radar mode should be switched to either BST or VSL since they offer an instant radar lock after pointing at the targets, locking on manually can sometimes take a few seconds and a few failed attempts. Those two modes can also be used when the player in the F-14A is trying to be sneaky, then when the enemy is not aware of being tracked by TWS mode on maps like Vietnam the F-14 can switch to them when the enemy gets close from the front and then right after that launch the AIM-7F. Overall learning quick switching between radar modes depending on the situation is very important.
Within a visual range of 10 km, players are strongly advised to employ a proactive defensive strategy to enhance their chances of survival during head-on encounters. To achieve this, it is recommended to pre-flare while maintaining heightened situational awareness and anticipating potential threats from any direction. In a scenario where you may have to engage the enemy, it is best to use the AIM-7F missiles. By launching them, the adversary will be forced to notch and will not be able to safely reengage, as at that point you hold a significant advantage.
During a dogfight, it is recommended to switch the SAS mode to manual. The damping limits the manoeuvrability too much and can put the F-14 in a worse position, especially against delta wing planes, though using it makes the plane harder to control. The other thing to remember is switching the wing sweep controls to manual, then reducing it to 0% for the best manoeuvrability. The last thing is using the combat flaps, but overusing them and doing it in the wrong situation can lead to being shot down faster. Before the merge between both planes happens the speed should be around 800 km/h IAS and 900 km/h (450-500 kn IAS), it will make starting a two-circle fight (where the F-14 excels) easier. The combat flaps in the F-14 improve both the sustained and instantaneous turn rate, the only downside is that they work effectively only up to 900 km/h IAS and make reaching speed above that harder. The one-circle fight can be done only with planes like the MiG-23, Su-17/22 or the Japanese Phantoms; against other planes, especially the delta wing planes, it is not very safe, although the F-14 can sometimes pull a very tight turn (takeoff flaps have a speed limit up to 800 km/h and can help with that). Generally, the safest way to win the fight is to keep your speed around 800 km/h IAS in a two-circle fight, there is not a single plane that can win it. There are a few planes which can give a hard time in close-range fights, the MiG-23MLD, J35s, MiG-21bis, J-7E, Chinese F-5E, the player should be very careful while engaging any of these.
Basic mistakes - Ignoring the IFF and teamkilling are the biggest mistakes happening in SB, it is always important to check if the target is a friendly plane or not (one line - unknown/enemy, two lines - friendly). Also, launching the AIM-54 into a direction with a few friendly planes can end really badly, just like launching any kind of missile into furballs. Ignoring the IFF readouts will lead to being kicked from the session and the team performing worse because they will also need to worry about dodging friendly missiles.
Pros and cons
Pros:
- Very effective two-circle fighter at any speed with its variable wing sweep which gives it great energy retention
- Variable sweep wings can help to accelerate faster when fully swept back, and turn more tightly when fully unswept forwards
- Elevators behave like ailerons, maintaining a high roll rate at all speeds
- High structural limit (can max out at 1500 km/h IAS at sea level before disintegrating)
- The M61 Vulcan cannon has an extremely fast fire rate, good velocity, and deals great damage
- Can carry up to 8 missiles maximum, with options of AIM-7s, AIM-9s, and AIM-54s for versatile use
- The AIM-54 has insane range (100 km max), its rocket booster lasts for a very long time, and it's an active radar homing missile (at closer ranges, it can automatically guide itself towards enemies using its own radar)
- Multi-mode radar makes it effective in any situation (the TWS mode allows launching AIM-54s at multiple aircraft at once and provides amazing situational awareness)
- Same RWR as F-4J and F-4S:
- Has launch detection
- Covers frequency bands E-J
- Detects a wide variety of targets:
- AI LO, AI HI, AAA/AI
- SAM LO, SAM MID, SAM HI
- The AIM-9H has much better flare resistance than previous AIM-9s (such as the G or J variants)
Cons:
- Easy target to hit due to its sheer size
- The afterburner's fuel consumption is extremely high; constant usage of it requires carrying a lot of fuel that can hamper the plane's performance and manoeuvrability earlier in the match
- Massive wing and fuselage fuel tanks, of which the majority are non-self sealing makes it especially prone to catching fire
- Cannot pull sustained Gs when above 1,000 km/h IAS (11-13 G) in RB or the wings will rip
- The TF30 is one of, if not the hottest running engine in-game, requiring the need to throttle down (and massively lose speed and energy retention) to reliably flare off infrared missiles
- 60 countermeasures may be a bit lacking considering the extremely high engine temperature
- The AIM-54A only has 17G overload and is sluggish due to high weight, and thus is rather easy to dodge
- The AIM-54A's rocket motor burns for a very long time, giving enemies plenty of time to spot it early and evade
- Requires lots of work and control binds related to the radar and variable wing sweep angle to make the most of the aircraft
- The Damping SAS mode limits the AoA so much that it performs abysmally in one-circle fights (scissors, split-S, etc.) thus forcing the player to use the much more difficult Manual SAS mode (SB with full-real controls)
- RWR:
- Lacks IFF
- Lacks tracking detection
- Cannot show target name
- A significant number of targets are shown as "?"
History
Early Development
In 1967, the U.S. Navy wanted a long-range fleet defence fighter to boost their naval plane capabilities with the "VFX" program. The USN first started with a redesigned F-111 Aardvark named the F-111B (basically an F-111 designed around the TF30 engine and AIM-54 Phoenix missiles), they soon found out that the F-111 was too big for practical reasons so the F-111B plan never came to fruition. Fast forward to 1969, the USN gave the contract to Grumman to build the new fleet defence fighter named the F-14 Tomcat (Grumman Model G-303), its first variants were built around the TF30 engines found on the F-111B and to use the AN/AWG-9 radar set and the airframe was specifically built to carry the AIM-54 Phoenix missile.
Deployment
In December 1970, a significant milestone in aviation history was achieved when the F-14 Tomcat, a supersonic twin-engine fleet defense fighter, made its maiden flight. This marked the beginning of a remarkable journey for the F-14 Tomcat, which would go on to become one of the most iconic fighter aircraft in the United States Navy. The successful maiden flight of the F-14 Tomcat in December 1970 paved the way for its subsequent development and delivery to the United States Navy. Just eighteen months later, in June 1972, the Navy received its first batch of F-14 aircraft, signaling the official introduction of this advanced fighter into service. However, it wasn't until 1974 that the culmination of tireless efforts and unwavering dedication became a reality. The Navy achieved operational deployment of the F-14 Tomcat, representing a major milestone for this cutting-edge aircraft. Two carrier squadrons played a pivotal role in this achievement: VF-1 "Wolfpack" and VFA-2 "Bounty Hunters"
In service
The illustrious legacy of the F-14 Tomcat can be traced back to its inception during the Vietnam War. It was during this turbulent period that carrier squadrons of the United States Navy were deployed to help evacuate Saigon as part of Operation Frequent Wind. In the midst of this critical operation, the F-14 emerged as an awe-inspiring symbol of unmatched aerial power and groundbreaking technological innovation. The F-14 Tomcat, throughout its service life, consistently demonstrated its exceptional capabilities in diverse theaters of operation. From the skies over Vietnam to the Persian Gulf and beyond, the F-14 played a pivotal role in safeguarding American interests and ensuring the security of its allies. During conflicts such as Operation Desert Storm, the F-14 Tomcat showcased its remarkable versatility and combat effectiveness. With its state-of-the-art weapons systems and advanced avionics, the jet provided unparalleled air superiority and contributed significantly to the success of the coalition forces. Moreover, the F-14's impressive presence was felt during the Gulf of Sidra incidents, where it boldly defended American naval forces against hostile encounters. Its manoeuvrability, formidable arsenal, and avionics, served as a powerful deterrent, firmly establishing the F-14's reputation as a force to be reckoned with.
Retirement

The F-14 Tomcat, although iconic, was officially retired from active service in 2006, marking the end of an era for this formidable war machine. Proudly serving the United States Navy for over three decades, the F-14 Tomcat succumbed to evolving technological advancements and changing strategic needs. Factors such as soaring maintenance costs and the introduction of the more advanced F/A-18E/F Super Hornet propelled the decision to retire this legendary aircraft. However, even in its final missions, the F-14 Tomcat showcased the indomitable spirit that defined its existence. The momentous culmination of its operational flights bore witness to VFA-311, the last squadron to drop a bomb in battle, and VF-213, the vessel that became its final resting place. These significant events forever imprinted upon the tapestry of military aviation, solidifying the illustrious history of the F-14 Tomcat.
Devblog
In 1968, five aircraft building companies entered the Pentagon's competition for a new carrier-based interceptor fighter. The commission's preference was given to Grumman's design, a twin-engine jet fighter with a variable-swept wing. Work on the F-14A fighter began in February 1969, and in December of the next year, the new aircraft took her maiden flight. The main weapon of the F-14A was the AIM-54 Phoenix long-range missiles controlled by the newest to date weapon control system. Instead of building prototypes, Grumman immediately switched to the production of an experimental series, and already on December 31, 1972, the first batch of jet fighters were put into service with the VF-124 Fleet Replacement Squadron . Pilot training took place on the deck of the USS Enterprise aircraft carrier, and during the withdrawal of US troops from Vietnam, combat sorties were also made from the deck. In total 557 F-14A fighters were delivered to the US Navy until 1987, and another 80 aircraft were built for Iran. Tomcats were used in all military conflicts where US aircraft took part until the very decommissioning. Iranian F-14s took an active part in the Iran-Iraq war, scoring dozens of air kills.
Media
- Skins
- Images


- Videos
See also
- Other jet planes with variable sweep wings
External links
- [Devblog] F-14A Tomcat: Into the Danger Zone!
- Official data sheet - more details about the performance
| Grumman Aircraft Engineering Corporation | |
|---|---|
| Fighters | |
| F3F | F3F-2 · Galer's F3F-2 |
| F4F Wildcat | F4F-3 · F4F-4 |
| XF5F Skyrocket | XF5F · XP-50 |
| F6F Hellcat | F6F-5 · F6F-5N |
| F7F Tigercat | F7F-1 · F7F-3 |
| F8F Bearcat | F8F-1 · F8F-1B |
| Jet Fighters | |
| F9F Panther/Cougar | F9F-2 · F9F-5 · F9F-8 |
| F-11 Tiger | F11F-1 |
| F-14 Tomcat | F-14A Early · F-14B |
| Jet Strike Aircraft | |
| A-6 Intruder | A-6E TRAM |
| Bombers | TBF-1C |
| Export | ▄Martlet Mk IV · ▄F6F-5 · ▄F6F-5N · ▄F8F-1B · ▄Avenger Mk II · ▄Hellcat Mk II |
| USA jet aircraft | |
|---|---|
| Fighters | |
| F-4 | F-4C Phantom II · F-4E Phantom II · F-4J Phantom II · F-4S Phantom II |
| F-5 | F-5A · F-5C · F-5E · F-20A |
| F-8 | F8U-2 · F-8E |
| F-80 | F-80A-5 · F-80C-10 |
| F-84 | F-84B-26 · F-84F · F-84G-21-RE |
| F-86 | F-86A-5 · F-86F-25 · F-86F-2 · F-86F-35 |
| F-89 | F-89B · F-89D |
| F-100 | F-100D |
| F-104 | F-104A · F-104C |
| F-14 | F-14A Early · F-14B |
| F-15 | F-15A |
| F-16 | F-16A · F-16A ADF · F-16C |
| F9F | F9F-2 · F9F-5 · F9F-8 |
| Other | P-59A · F2H-2 · F3D-1 · F3H-2 · F4D-1 · F11F-1 |
| Strike Aircraft | |
| FJ-4 | FJ-4B · FJ-4B VMF-232 |
| A-4 | A-4B · A-4E Early |
| A-6 | A-6E TRAM |
| A-7 | A-7D · A-7E · A-7K |
| AV-8 | AV-8A · AV-8C |
| A-10 | A-10A · A-10A Late |
| B-57 | B-57A · B-57B |
| F-105 | F-105D |
| F-111 | F-111A |
