Difference between revisions of "ZTZ96A"
Alexstrasza (talk | contribs) m (Add historical description entry) (Tag: Visual edit) |
(Edits. Possible translation-plagiarism from https://baike.baidu.com/item/ZTZ-96A%E5%9E%8B%E5%9D%A6%E5%85%8B, replaced with devblog) |
||
| Line 7: | Line 7: | ||
The '''{{Specs|name}}''' is a rank {{Specs|rank}} Chinese medium tank {{Battle-rating}}. It was introduced in [[Update 1.97 "Viking Fury"]]. | The '''{{Specs|name}}''' is a rank {{Specs|rank}} Chinese medium tank {{Battle-rating}}. It was introduced in [[Update 1.97 "Viking Fury"]]. | ||
| − | A much-improved tank over ZTZ96 makes it more competitive especially at higher tier battles. The ZTZ-96A features a strong turret that is impenetrable to many APFSDS rounds, added ERA on upper glacis that can resist hits (both kinetic and chemical-based hits) and much needed thermal sights. | + | A much-improved tank over ZTZ96 makes it more competitive especially at higher tier battles. The ZTZ-96A features a strong turret that is impenetrable to many APFSDS rounds, added ERA on upper glacis that can resist hits (both kinetic and chemical-based hits) and much needed thermal sights. |
== General info == | == General info == | ||
=== Survivability and armour === | === Survivability and armour === | ||
| − | <!--''Describe armour protection. Note the most well protected and key weak areas. Appreciate the layout of modules as well as the number and location of crew members. Is the level of armour protection sufficient, is the placement of modules helpful for survival in combat? If necessary use a visual template to indicate the most secure and weak zones of the armour.'' | + | <!-- ''Describe armour protection. Note the most well protected and key weak areas. Appreciate the layout of modules as well as the number and location of crew members. Is the level of armour protection sufficient, is the placement of modules helpful for survival in combat? If necessary use a visual template to indicate the most secure and weak zones of the armour.'' --> |
| − | -->{| class="wikitable" | + | |
| + | {| class="wikitable" | ||
!Armour | !Armour | ||
!Front (Slope angle) | !Front (Slope angle) | ||
| Line 21: | Line 22: | ||
|Hull | |Hull | ||
|___ mm | |___ mm | ||
| − | |___ | + | |___ mm ''Top'' |
| − | ___ | + | ___ mm ''Bottom'' |
|45 mm (10°) | |45 mm (10°) | ||
|20-30 mm | |20-30 mm | ||
|- | |- | ||
|Turret | |Turret | ||
| − | |___ - ___ | + | |___ - ___ mm ''Turret front'' |
| − | ___ | + | ___ mm ''Gun mantlet'' |
|___ - ___ mm | |___ - ___ mm | ||
|5 mm | |5 mm | ||
| Line 39: | Line 40: | ||
|30 mm | |30 mm | ||
|} | |} | ||
| − | The design of the ZTZ96A's turret is a further drastic departure from previous the Chinese and Soviet dome turret design. It has an angular arrow shape design reminiscent of the German Leopard 2A5; however, the armour stops short at the coaxial gun port, providing a weak spot for the enemy to exploit. Shooting this area does not usually result in an instant knock-out as it will only disable the gun breech and take out the commander or gunner (depending on which side is shot). On the sides of the turret, a noticeable addition is a row of FY-4 ERA on the bustle rack. In | + | The design of the ZTZ96A's turret is a further drastic departure from previous the Chinese and Soviet dome turret design. It has an angular arrow shape design reminiscent of the German Leopard 2A5; however, the armour stops short at the coaxial gun port, providing a weak spot for the enemy to exploit. Shooting this area does not usually result in an instant knock-out as it will only disable the gun breech and take out the commander or gunner (depending on which side is shot). On the sides of the turret, a noticeable addition is a row of FY-4 ERA on the bustle rack. In-game, this additional armour doesn't yield much use as most of the time shots are not from the sides of the turret but rather on the side of the hull where the carousel style autoloader is a well known weak spot that will result in instant ammo explosion. |
| − | As for the hull, the added FY-4 ERA on the upper glacis increases the survivability of the tank. Even a direct shot from most APFSDS can be resisted. | + | As for the hull, the added FY-4 ERA on the upper glacis increases the survivability of the tank. Even a direct shot from most APFSDS can be resisted. |
| − | The {{PAGENAME}} has a much-improved armour layout over its predecessor due to strengthened armour in critical areas of the tank. Survivability is improved but the vehicle still suffers from the same weaknesses as its predecessor and similar Soviet tanks. | + | The {{PAGENAME}} has a much-improved armour layout over its predecessor due to strengthened armour in critical areas of the tank. Survivability is improved but the vehicle still suffers from the same weaknesses as its predecessor and similar Soviet tanks. |
=== Mobility === | === Mobility === | ||
<!-- ''Write about the mobility of the ground vehicle. Estimate the specific power and manoeuvrability, as well as the maximum speed forwards and backwards.'' --> | <!-- ''Write about the mobility of the ground vehicle. Estimate the specific power and manoeuvrability, as well as the maximum speed forwards and backwards.'' --> | ||
| − | {{tankMobility|abMinHp= 1,240|rbMinHp= 708}} | + | {{tankMobility|abMinHp=1,240|rbMinHp=708}} |
== Armaments == | == Armaments == | ||
| Line 55: | Line 56: | ||
{{main|Type 88C (125 mm)}} | {{main|Type 88C (125 mm)}} | ||
| − | The ZTZ96A makes up for its drawbacks in mobility with a superb gun. The 125 mm Type 88C smoothbore gun is capable of firing APFSDS, HE and HEAT-FS ammunition. For its battle rating, the 125-I shell performs very well, offering 466 mm of flat penetration at point-blank and dropping only to 434 mm at 2 kilometres. | + | The ZTZ96A makes up for its drawbacks in mobility with a superb gun. The 125 mm Type 88C smoothbore gun is capable of firing APFSDS, HE and HEAT-FS ammunition. For its battle rating, the 125-I shell performs very well, offering 466 mm of flat penetration at point-blank and dropping only to 434 mm at 2 kilometres. Its angled performance is exceptionally good at 269 mm at 60 degrees, outperforming even the best Soviet APFSDS round, 3BM42 whose angled penetration is only 248 mm. For reference, the 125-I performs comparably to Western long-rod sabot rounds such as DM33. The HEAT-FS round is nothing special with a standard 480 mm of penetration that is only really effective at destroying lightly armoured vehicles such as SPAA. The HE round is of the Soviet-style, packing a whopping 5.4 kg of TNT equivalent that can deal devastating damage against Western tanks' weak spots of the hull and turret roof and turret ring. It's recommended to entirely ditch the HEAT-FS for HE as it arguably performs better in the anti-tank role, ironically. |
Although the ZTZ96A uses a similar autoloader system to the T-72, its reload time of 7.5 seconds is slightly longer than the T-72's 7.1 seconds. | Although the ZTZ96A uses a similar autoloader system to the T-72, its reload time of 7.5 seconds is slightly longer than the T-72's 7.1 seconds. | ||
| Line 68: | Line 69: | ||
|- | |- | ||
! ''Arcade'' | ! ''Arcade'' | ||
| − | | rowspan="2" | 40 || rowspan="2" | -5°/+12° || rowspan="2" | ±180° || rowspan="2" | Two-plane || __.__ || __.__ || __.__ || __.__ || __.__ || rowspan="2" | | + | | rowspan="2" | 40 || rowspan="2" | -5°/+12° || rowspan="2" | ±180° || rowspan="2" | Two-plane || __.__ || __.__ || __.__ || __.__ || __.__ || rowspan="2" | 7.50 || rowspan="2" | 7.50 || rowspan="2" | 7.50 || rowspan="2" | 7.50 |
|- | |- | ||
! ''Realistic'' | ! ''Realistic'' | ||
| Line 106: | Line 107: | ||
! 0% !! 50% !! 100% | ! 0% !! 50% !! 100% | ||
|- | |- | ||
| − | | DTP-125 || HEATFS || 905 || 18 | + | | DTP-125 || HEATFS || 905 || 18 || 0.05 || 1 || 2,190 || 65° || 72° || 77° |
|- | |- | ||
| − | | DTB-125 || HE || 850 || 23 | + | | DTB-125 || HE || 850 || 23 || 0.1 || 0.1 || 5,460 || 79° || 80° || 81° |
|- | |- | ||
| 125-I || APFSDS || 1,730 || 4.02 || N/A || N/A || N/A || 78° || 80° || 81° | | 125-I || APFSDS || 1,730 || 4.02 || N/A || N/A || N/A || 78° || 80° || 81° | ||
| Line 133: | Line 134: | ||
=== Machine guns === | === Machine guns === | ||
<!-- ''Offensive and anti-aircraft machine guns not only allow you to fight some aircraft but also are effective against lightly armoured vehicles. Evaluate machine guns and give recommendations on its use.'' --> | <!-- ''Offensive and anti-aircraft machine guns not only allow you to fight some aircraft but also are effective against lightly armoured vehicles. Evaluate machine guns and give recommendations on its use.'' --> | ||
| − | {{main|QJC88A (12.7 mm)}} | + | {{main|QJC88A (12.7 mm)|Type 86 (7.62 mm)}} |
{| class="wikitable" style="text-align:center" width="50%" | {| class="wikitable" style="text-align:center" width="50%" | ||
| Line 141: | Line 142: | ||
! Mount !! Capacity (Belt) !! Fire rate !! Vertical !! Horizontal | ! Mount !! Capacity (Belt) !! Fire rate !! Vertical !! Horizontal | ||
|- | |- | ||
| − | | | + | | Commander's cupola || 500 (150) || 700 || -5°/+60° || ±180° |
|- | |- | ||
|} | |} | ||
| − | |||
| − | |||
| − | |||
{| class="wikitable" style="text-align:center" width="50%" | {| class="wikitable" style="text-align:center" width="50%" | ||
|- | |- | ||
| Line 158: | Line 156: | ||
== Usage in battles == | == Usage in battles == | ||
| − | <!-- Describe the tactics of playing in the vehicle, the features of using vehicles in the team and advice on tactics. Refrain from creating a "guide" - do not impose a single point of view but instead give the reader food for thought. Describe the most dangerous enemies and give recommendations on fighting them. If necessary, note the specifics of the game in different modes (AB, RB, SB). --> | + | <!-- ''Describe the tactics of playing in the vehicle, the features of using vehicles in the team and advice on tactics. Refrain from creating a "guide" - do not impose a single point of view but instead give the reader food for thought. Describe the most dangerous enemies and give recommendations on fighting them. If necessary, note the specifics of the game in different modes (AB, RB, SB).'' --> |
The ZTZ96A has a different playstyle than most MBTs do. Instead of being a king of mobility, this tank trades speed for improved armour protection. The tank's mobility is improved from that of the [[ZTZ96]], but it is still below average for this battle rating. It can keep up with some IFVs, but against MBTs, this tank can't match their speed and acceleration. It also has a poor reverse speed, which can make getting out of sticky situations difficult. This lack of mobility means that the ZTZ96A can't rush objectives or favourable locations at the beginning of battle like faster vehicles can. Additionally, it takes longer to relocate around the map to deal with enemies or to attack and defend capture zones. Flanking manoeuvres are also difficult. However, the ZTZ96A's below-average speed doesn't hinder its abilities to brawl in close quarters situations or to snipe from afar. | The ZTZ96A has a different playstyle than most MBTs do. Instead of being a king of mobility, this tank trades speed for improved armour protection. The tank's mobility is improved from that of the [[ZTZ96]], but it is still below average for this battle rating. It can keep up with some IFVs, but against MBTs, this tank can't match their speed and acceleration. It also has a poor reverse speed, which can make getting out of sticky situations difficult. This lack of mobility means that the ZTZ96A can't rush objectives or favourable locations at the beginning of battle like faster vehicles can. Additionally, it takes longer to relocate around the map to deal with enemies or to attack and defend capture zones. Flanking manoeuvres are also difficult. However, the ZTZ96A's below-average speed doesn't hinder its abilities to brawl in close quarters situations or to snipe from afar. | ||
| Line 172: | Line 170: | ||
===Assault mode=== | ===Assault mode=== | ||
| − | For players grinding the APFSDS in assault mode, it is recommended to bring full ammo, with around half HEAT and half HE. As the countdown goes at the start of the match, quickly find a spot where you will not get shot from every direction and stay there until you run out of ammo or get destroyed. The HEAT is great at one-shotting weakly | + | For players grinding the APFSDS in assault mode, it is recommended to bring full ammo, with around half HEAT and half HE. As the countdown goes at the start of the match, quickly find a spot where you will not get shot from every direction and stay there until you run out of ammo or get destroyed. The HEAT is great at one-shotting weakly armoured (relatively) cold war tanks, while the HE is capable of destroying those heavily protected top tier MBT. Given that you do not have APFSDS therefore lacking the ability to knock out some AI frontally, you will have to rely on assists to get scores. Firing HEAT / HE at tracks, roof mounted MG, turret ring, cannon barrel, etc can at least immobile / disarm the AI, granting you an assist. The 7.5 second reload will be quite slow when facing a huge wave of AI so you must aim each shot carefully, but other times it is generally fast enough. The ZTZ96's armour can take quite some beating but is also prone to ammo rack explosion, or penetrating shots from the lower front plate and gun mantlet. |
'''Enemies worth noting:''' | '''Enemies worth noting:''' | ||
| − | * Leopard 2 A5: this is the most protected Leopard you will see in assault, usually in Mozdok and Fulda. When facing it frontally or with slight angles, load HE and aim for its turret ring where the crosshair is green. It is very likely to destroy it instantly. When facing its side, load HEAT and aim for its central hull. Don't expect to block any of its shells as its APFSDS can easily go through the ZTZ96's frontal | + | * Leopard 2 A5: this is the most protected Leopard you will see in assault, usually in Mozdok and Fulda. When facing it frontally or with slight angles, load HE and aim for its turret ring where the crosshair is green. It is very likely to destroy it instantly. When facing its side, load HEAT and aim for its central hull. Don't expect to block any of its shells as its APFSDS can easily go through the ZTZ96's frontal armour, or the AI can just target your weakspots. |
* M1A2: you will see it mostly in Fulda and Ardennes. When facing it frontally or with slight angles, load HEAT and aim for its turret ring where the crosshair is green. It is very likely to destroy it instantly. HE might not work here since it cannot effectively hurt the turret crew. But HE works great when aiming at the M1's turret roof. Items like the MG and the optics will all detonate the HE, causing the downward shrapnel to knock out all the crew. When facing its side, load HEAT and aim for its central hull. | * M1A2: you will see it mostly in Fulda and Ardennes. When facing it frontally or with slight angles, load HEAT and aim for its turret ring where the crosshair is green. It is very likely to destroy it instantly. HE might not work here since it cannot effectively hurt the turret crew. But HE works great when aiming at the M1's turret roof. Items like the MG and the optics will all detonate the HE, causing the downward shrapnel to knock out all the crew. When facing its side, load HEAT and aim for its central hull. | ||
| − | * Challenger 2F: you will see it mostly in Sands of Sinai. It is one of the toughest AI to destroy, especially when there are waves of them. When facing it frontally or with slight angles, load HE and aim for the hull side above the tracks where the crosshair is green. It is very likely to detonate random ammo inside. When facing its side, still load HE and aim for its central hull for an ammo detonation. The | + | * Challenger 2F: you will see it mostly in Sands of Sinai. It is one of the toughest AI to destroy, especially when there are waves of them. When facing it frontally or with slight angles, load HE and aim for the hull side above the tracks where the crosshair is green. It is very likely to detonate random ammo inside. When facing its side, still load HE and aim for its central hull for an ammo detonation. The Challenger 2F's sides are covered with ERA blocks thus HEAT will get absorbed. |
=== Modules === | === Modules === | ||
| Line 222: | Line 220: | ||
=== Pros and cons === | === Pros and cons === | ||
| − | <!-- Summarise and briefly evaluate the vehicle in terms of its characteristics and combat effectiveness. Mark its pros and cons in a bulleted list. Try not to use more than 6 points for each of the characteristics. Avoid using categorical definitions such as "bad", "good" and the like - use substitutions with softer forms such as "inadequate" and "effective". --> | + | <!-- ''Summarise and briefly evaluate the vehicle in terms of its characteristics and combat effectiveness. Mark its pros and cons in a bulleted list. Try not to use more than 6 points for each of the characteristics. Avoid using categorical definitions such as "bad", "good" and the like - use substitutions with softer forms such as "inadequate" and "effective".'' --> |
| − | '''Pros:''' | + | '''Pros:''' |
* Same powerful gun with access to high-penetrating APFSDS as ZTZ96 | * Same powerful gun with access to high-penetrating APFSDS as ZTZ96 | ||
| Line 230: | Line 228: | ||
* HE shell is currently the most powerful available to any high-rank MBT, can cripple or outright destroy enemies with a good shot | * HE shell is currently the most powerful available to any high-rank MBT, can cripple or outright destroy enemies with a good shot | ||
* Low profile | * Low profile | ||
| − | * Strong turret cheeks armour | + | * Strong turret cheeks armour |
* Strong upper glacis armour | * Strong upper glacis armour | ||
* Combinations of strong armour and very fast and high penetrating APFSDS makes it a good sniper | * Combinations of strong armour and very fast and high penetrating APFSDS makes it a good sniper | ||
* Roof-mounted heavy machine gun is useful against aircraft and light targets | * Roof-mounted heavy machine gun is useful against aircraft and light targets | ||
* Relatively-faster turret rotation speed, compared to contemporary Soviet tanks | * Relatively-faster turret rotation speed, compared to contemporary Soviet tanks | ||
| − | * Thermal | + | * Thermal sights |
| − | * Improved mobility over predecessor | + | * Improved mobility over predecessor ZTZ96 |
'''Cons:''' | '''Cons:''' | ||
| Line 247: | Line 245: | ||
* No ATGM capability, unlike the T-64B and T-72B | * No ATGM capability, unlike the T-64B and T-72B | ||
* Relatively slow reload compared to other MBT | * Relatively slow reload compared to other MBT | ||
| − | * ERA and thickened | + | * ERA and thickened armour is a great improvement over the previous model, but some shells are still able to penetrate |
* Lower plate is very weak, with penetrating shells killing crew or exploding ammo | * Lower plate is very weak, with penetrating shells killing crew or exploding ammo | ||
== History == | == History == | ||
| − | '' | + | <!-- ''Describe the history of the creation and combat usage of the vehicle in more detail than in the introduction. If the historical reference turns out to be too long, take it to a separate article, taking a link to the article about the vehicle and adding a block "/History" (example: <nowiki>https://wiki.warthunder.com/(Vehicle-name)/History</nowiki>) and add a link to it here using the <code>main</code> template. Be sure to reference text and sources by using <code><nowiki><ref></ref></nowiki></code>, as well as adding them at the end of the article with <code><nowiki><references /></nowiki></code>. This section may also include the vehicle's dev blog entry (if applicable) and the in-game encyclopedia description (under <code><nowiki>=== In-game description ===</nowiki></code>, also if applicable).'' --> |
| − | + | Development of the ZTZ96A began in the early 2000s, once it became clear that the introduction of the ZTZ99 MBT would be delayed due to issues surrounding its development. As a result, Chinese engineers developed an improved version of the existing ZTZ96, in order to counter the threat of the most advanced fighting vehicles of other nations, such as the USA, Russia, Japan, Korea or India. | |
| − | + | Two different prototypes were built as part of the development work, of which one was chosen for further development and eventually entered production as the ZTZ96A. With the ZTZ96A, Chinese engineers addressed two of the biggest shortcomings of the original ZTZ96 - mobility and protection - by installing additional ERA packages to the turret and hull front as well as fitting a more powerful engine. | |
| − | + | The ZTZ96A was first revealed in 2006 and served as the basis for the development of more advanced versions of the vehicle. The ZTZ96A is still in service and makes for the most widely used main battle tank in service with the PLA today. | |
| + | |||
| + | - ''From [[wt:en/news/6630-development-ztz96a-can-take-a-punch-en|Devblog]]'' | ||
== Media == | == Media == | ||
| Line 264: | Line 264: | ||
== See also == | == See also == | ||
''Links to the articles on the War Thunder Wiki that you think will be useful for the reader, for example:'' | ''Links to the articles on the War Thunder Wiki that you think will be useful for the reader, for example:'' | ||
| − | |||
* ''reference to the series of the vehicles;'' | * ''reference to the series of the vehicles;'' | ||
* ''links to approximate analogues of other nations and research trees.'' | * ''links to approximate analogues of other nations and research trees.'' | ||
== External links == | == External links == | ||
| − | <!--Paste links to sources and external resources, such as: | + | <!-- ''Paste links to sources and external resources, such as:'' |
* ''topic on the official game forum;'' | * ''topic on the official game forum;'' | ||
* ''encyclopedia page on the tank;'' | * ''encyclopedia page on the tank;'' | ||
| − | * ''other literature.''--> | + | * ''other literature.'' --> |
* [[wt:en/news/6630-development-ztz96a-can-take-a-punch-en|[Devblog] ZTZ96A: Can take a punch!]] | * [[wt:en/news/6630-development-ztz96a-can-take-a-punch-en|[Devblog] ZTZ96A: Can take a punch!]] | ||
{{China medium tanks}} | {{China medium tanks}} | ||
Revision as of 20:53, 9 October 2020
Contents
Description

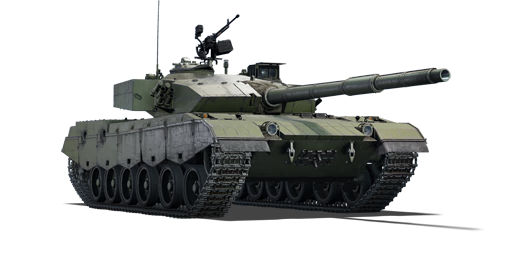
The ZhuangJia Tanke ZhuZhan 96A is a rank VII Chinese medium tank
with a battle rating of 10.0 (AB/RB/SB). It was introduced in Update 1.97 "Viking Fury".
A much-improved tank over ZTZ96 makes it more competitive especially at higher tier battles. The ZTZ-96A features a strong turret that is impenetrable to many APFSDS rounds, added ERA on upper glacis that can resist hits (both kinetic and chemical-based hits) and much needed thermal sights.
General info
Survivability and armour
| Armour | Front (Slope angle) | Sides | Rear | Roof |
|---|---|---|---|---|
| Hull | ___ mm | ___ mm Top
___ mm Bottom |
45 mm (10°) | 20-30 mm |
| Turret | ___ - ___ mm Turret front
___ mm Gun mantlet |
___ - ___ mm | 5 mm | 20-30 mm |
| Cupola | 30 mm | 30 mm | 30 mm | 30 mm |
The design of the ZTZ96A's turret is a further drastic departure from previous the Chinese and Soviet dome turret design. It has an angular arrow shape design reminiscent of the German Leopard 2A5; however, the armour stops short at the coaxial gun port, providing a weak spot for the enemy to exploit. Shooting this area does not usually result in an instant knock-out as it will only disable the gun breech and take out the commander or gunner (depending on which side is shot). On the sides of the turret, a noticeable addition is a row of FY-4 ERA on the bustle rack. In-game, this additional armour doesn't yield much use as most of the time shots are not from the sides of the turret but rather on the side of the hull where the carousel style autoloader is a well known weak spot that will result in instant ammo explosion.
As for the hull, the added FY-4 ERA on the upper glacis increases the survivability of the tank. Even a direct shot from most APFSDS can be resisted.
The ZTZ96A has a much-improved armour layout over its predecessor due to strengthened armour in critical areas of the tank. Survivability is improved but the vehicle still suffers from the same weaknesses as its predecessor and similar Soviet tanks.
Mobility
| Game Mode | Max Speed (km/h) | Weight (tons) | Engine power (horsepower) | Power-to-weight ratio (hp/ton) | |||
|---|---|---|---|---|---|---|---|
| Forward | Reverse | Stock | Upgraded | Stock | Upgraded | ||
| Arcade | 66 | 7 | 42.8 | 1,240 | 1,526 | 28.97 | 35.65 |
| Realistic | 60 | 6 | 708 | 800 | 16.54 | 18.69 | |
Armaments
Main armament
The ZTZ96A makes up for its drawbacks in mobility with a superb gun. The 125 mm Type 88C smoothbore gun is capable of firing APFSDS, HE and HEAT-FS ammunition. For its battle rating, the 125-I shell performs very well, offering 466 mm of flat penetration at point-blank and dropping only to 434 mm at 2 kilometres. Its angled performance is exceptionally good at 269 mm at 60 degrees, outperforming even the best Soviet APFSDS round, 3BM42 whose angled penetration is only 248 mm. For reference, the 125-I performs comparably to Western long-rod sabot rounds such as DM33. The HEAT-FS round is nothing special with a standard 480 mm of penetration that is only really effective at destroying lightly armoured vehicles such as SPAA. The HE round is of the Soviet-style, packing a whopping 5.4 kg of TNT equivalent that can deal devastating damage against Western tanks' weak spots of the hull and turret roof and turret ring. It's recommended to entirely ditch the HEAT-FS for HE as it arguably performs better in the anti-tank role, ironically.
Although the ZTZ96A uses a similar autoloader system to the T-72, its reload time of 7.5 seconds is slightly longer than the T-72's 7.1 seconds.
| 125 mm Type 88C | Turret rotation speed (°/s) | Reloading rate (seconds) | |||||||||||
|---|---|---|---|---|---|---|---|---|---|---|---|---|---|
| Mode | Capacity | Vertical | Horizontal | Stabilizer | Stock | Upgraded | Full | Expert | Aced | Stock | Full | Expert | Aced |
| Arcade | 40 | -5°/+12° | ±180° | Two-plane | __.__ | __.__ | __.__ | __.__ | __.__ | 7.50 | 7.50 | 7.50 | 7.50 |
| Realistic | __.__ | __.__ | __.__ | __.__ | __.__ | ||||||||
Ammunition
| Penetration statistics | |||||||
|---|---|---|---|---|---|---|---|
| Ammunition | Type of warhead |
Penetration @ 0° Angle of Attack (mm) | |||||
| 10 m | 100 m | 500 m | 1,000 m | 1,500 m | 2,000 m | ||
| DTP-125 | HEATFS | 480 | 480 | 480 | 480 | 480 | 480 |
| DTB-125 | HE | 45 | 45 | 45 | 45 | 45 | 45 |
| 125-I | APFSDS | 466 | 464 | 458 | 450 | 442 | 434 |
| Shell details | |||||||||
|---|---|---|---|---|---|---|---|---|---|
| Ammunition | Type of warhead |
Velocity (m/s) |
Projectile Mass (kg) |
Fuse delay (m) |
Fuse sensitivity (mm) |
Explosive Mass (TNT equivalent) (g) |
Ricochet | ||
| 0% | 50% | 100% | |||||||
| DTP-125 | HEATFS | 905 | 18 | 0.05 | 1 | 2,190 | 65° | 72° | 77° |
| DTB-125 | HE | 850 | 23 | 0.1 | 0.1 | 5,460 | 79° | 80° | 81° |
| 125-I | APFSDS | 1,730 | 4.02 | N/A | N/A | N/A | 78° | 80° | 81° |
Ammo racks
| Full ammo |
1st rack empty |
2nd rack empty |
3rd rack empty |
4th rack empty |
5th rack empty |
6th rack empty |
Visual discrepancy |
|---|---|---|---|---|---|---|---|
| 40 | __ (+__) | __ (+__) | __ (+__) | __ (+__) | __ (+__) | __ (+__) | __ |
Machine guns
| 12.7 mm QJC88A | ||||
|---|---|---|---|---|
| Mount | Capacity (Belt) | Fire rate | Vertical | Horizontal |
| Commander's cupola | 500 (150) | 700 | -5°/+60° | ±180° |
| 7.62 mm Type 86 | ||||
|---|---|---|---|---|
| Mount | Capacity (Belt) | Fire rate | Vertical | Horizontal |
| Coaxial | 2,500 (250) | 700 | N/A | N/A |
Usage in battles
The ZTZ96A has a different playstyle than most MBTs do. Instead of being a king of mobility, this tank trades speed for improved armour protection. The tank's mobility is improved from that of the ZTZ96, but it is still below average for this battle rating. It can keep up with some IFVs, but against MBTs, this tank can't match their speed and acceleration. It also has a poor reverse speed, which can make getting out of sticky situations difficult. This lack of mobility means that the ZTZ96A can't rush objectives or favourable locations at the beginning of battle like faster vehicles can. Additionally, it takes longer to relocate around the map to deal with enemies or to attack and defend capture zones. Flanking manoeuvres are also difficult. However, the ZTZ96A's below-average speed doesn't hinder its abilities to brawl in close quarters situations or to snipe from afar.
Both of these playstyles benefit from the tank's strong armour protection, which features ERA on the front of the hull and turret. The turret cheeks and upper glacis are especially well-defended--even a direct APFSDS shell can't always penetrate. In general, the tank is hard to damage from the front. This does not mean that it has no weakpoints, though: the gun breech is exposed and unprotected, and a shot there can do great damage inside the turret compartment. In addition, the vehicle sports an ammunition carousel in the bottom of the hull; a side shot here will very often detonate the ammo storage, causing immediate destruction of the tank. And finally, the ZTZ96A only has three crew members, so long-term endurance is lacking. Even one crew member being knocked out makes taking any more damage much riskier.
The ZTZ96A also makes up for its mobility drawbacks with its powerful cannon. Its APFSDS shell has high penetration against both flat and angled armour, and can perform even at long ranges. The gun also makes use of a very powerful HE shell which can deal devastating damage if fired at the roofs of enemy tanks. This gun is reloaded by an autoloading system, which can get a new shell in the breech every 7.5 seconds. The reload speed is worse than that of many MBTs, and skilled players will be able to take advantage of this to destroy the ZTZ96A. It is important to try to destroy the enemy in one shot, or else there may not be enough time to try again. And, the slow reload means that dealing with multiple enemies in quick succession is more difficult than normal. Be careful about the gun's poor turret elevation speed. It can take longer than expected to get sights on a target. The ZTZ96A is equipped with thermal sights which help visibility in night battles.
This vehicle is armed with a roof machine gun for use against aircraft and lightly-armoured ground targets.
This tank is a good sniper thanks to its strong frontal armour and powerful gun. When sniping, poor mobility is not an issue and the long reload rate doesn't overly hurt the ZTZ96A's performance. If firing from behind ridgelines, remember that the gun depression is below average, at only -6 degrees.
The ZTZ96A is also effective in close-quarters brawls, where its armour provides a great advantage against the enemy.
Assault mode
For players grinding the APFSDS in assault mode, it is recommended to bring full ammo, with around half HEAT and half HE. As the countdown goes at the start of the match, quickly find a spot where you will not get shot from every direction and stay there until you run out of ammo or get destroyed. The HEAT is great at one-shotting weakly armoured (relatively) cold war tanks, while the HE is capable of destroying those heavily protected top tier MBT. Given that you do not have APFSDS therefore lacking the ability to knock out some AI frontally, you will have to rely on assists to get scores. Firing HEAT / HE at tracks, roof mounted MG, turret ring, cannon barrel, etc can at least immobile / disarm the AI, granting you an assist. The 7.5 second reload will be quite slow when facing a huge wave of AI so you must aim each shot carefully, but other times it is generally fast enough. The ZTZ96's armour can take quite some beating but is also prone to ammo rack explosion, or penetrating shots from the lower front plate and gun mantlet.
Enemies worth noting:
- Leopard 2 A5: this is the most protected Leopard you will see in assault, usually in Mozdok and Fulda. When facing it frontally or with slight angles, load HE and aim for its turret ring where the crosshair is green. It is very likely to destroy it instantly. When facing its side, load HEAT and aim for its central hull. Don't expect to block any of its shells as its APFSDS can easily go through the ZTZ96's frontal armour, or the AI can just target your weakspots.
- M1A2: you will see it mostly in Fulda and Ardennes. When facing it frontally or with slight angles, load HEAT and aim for its turret ring where the crosshair is green. It is very likely to destroy it instantly. HE might not work here since it cannot effectively hurt the turret crew. But HE works great when aiming at the M1's turret roof. Items like the MG and the optics will all detonate the HE, causing the downward shrapnel to knock out all the crew. When facing its side, load HEAT and aim for its central hull.
- Challenger 2F: you will see it mostly in Sands of Sinai. It is one of the toughest AI to destroy, especially when there are waves of them. When facing it frontally or with slight angles, load HE and aim for the hull side above the tracks where the crosshair is green. It is very likely to detonate random ammo inside. When facing its side, still load HE and aim for its central hull for an ammo detonation. The Challenger 2F's sides are covered with ERA blocks thus HEAT will get absorbed.
Modules
| Tier | Mobility | Protection | Firepower | |||
|---|---|---|---|---|---|---|
| I | Tracks | Parts | Horizontal Drive | |||
| II | Suspension | Brake System | FPE | NVD | Adjustment of Fire | Laser rangefinder |
| III | Filters | Crew Replenishment | Smoke grenade | Elevation Mechanism | 125-I | |
| IV | Transmission | Engine | ESS | Artillery Support | ||
Pros and cons
Pros:
- Same powerful gun with access to high-penetrating APFSDS as ZTZ96
- Autoloader reloads the cannon even when putting out fires or replacing crew members
- HE shell is currently the most powerful available to any high-rank MBT, can cripple or outright destroy enemies with a good shot
- Low profile
- Strong turret cheeks armour
- Strong upper glacis armour
- Combinations of strong armour and very fast and high penetrating APFSDS makes it a good sniper
- Roof-mounted heavy machine gun is useful against aircraft and light targets
- Relatively-faster turret rotation speed, compared to contemporary Soviet tanks
- Thermal sights
- Improved mobility over predecessor ZTZ96
Cons:
- Mobility is below average at its rank
- Autoloader carousel is a giant ammo rack
- Poor reverse speed
- Below average gun depression (-6°)
- Only 3 crew members
- No ATGM capability, unlike the T-64B and T-72B
- Relatively slow reload compared to other MBT
- ERA and thickened armour is a great improvement over the previous model, but some shells are still able to penetrate
- Lower plate is very weak, with penetrating shells killing crew or exploding ammo
History
Development of the ZTZ96A began in the early 2000s, once it became clear that the introduction of the ZTZ99 MBT would be delayed due to issues surrounding its development. As a result, Chinese engineers developed an improved version of the existing ZTZ96, in order to counter the threat of the most advanced fighting vehicles of other nations, such as the USA, Russia, Japan, Korea or India.
Two different prototypes were built as part of the development work, of which one was chosen for further development and eventually entered production as the ZTZ96A. With the ZTZ96A, Chinese engineers addressed two of the biggest shortcomings of the original ZTZ96 - mobility and protection - by installing additional ERA packages to the turret and hull front as well as fitting a more powerful engine.
The ZTZ96A was first revealed in 2006 and served as the basis for the development of more advanced versions of the vehicle. The ZTZ96A is still in service and makes for the most widely used main battle tank in service with the PLA today.
- From Devblog
Media
Excellent additions to the article would be video guides, screenshots from the game, and photos.
See also
Links to the articles on the War Thunder Wiki that you think will be useful for the reader, for example:
- reference to the series of the vehicles;
- links to approximate analogues of other nations and research trees.
External links
| China medium tanks | |
|---|---|
| ZTZ59 | Type 59 · ZTZ59A · ZTZ59D1 |
| ZTZ69 | Type 69 · Type 69-IIa · T-69 II G |
| ZTZ88/96 | ZTZ88A · ZTZ88B |
| ZTZ96 · ZTZ96A · ZTZ96A (P) | |
| ZTZ99 | ZTZ99-II · ZTZ99-III |
| ZTZ99A | ZTZ99A · WZ1001(E) LCT |
| Export series | MBT2000 · VT-4A1 |
| ROC | CM11 |
| Other | Т-34-85 Gai · Object 122MT "MC" |
| Japan | ␗Chi-Ha · ␗Chi-Ha Kai |
| USA | ␗M4A4 · ␗M4A4 (1st PTG) · ␗M4A1 (75) W · ␗M48A1 · ␗M60A3 TTS |
| USSR | ␗T-34 (1943) · ␗Т-34-85 (S-53) · T-34-85 No.215 · Т-62 №545 |
