Difference between revisions of "Yak-17"
(Edits) |
HeyItsAdam (talk | contribs) (grammar / readability/ YT link, some formatting updates in ''usage in battles'') |
||
| (13 intermediate revisions by 8 users not shown) | |||
| Line 1: | Line 1: | ||
| − | {{Specs-Card | + | {{Specs-Card|code=yak-17}} |
| − | |code=yak-17 | ||
| − | |||
| − | }} | ||
== Description == | == Description == | ||
<!-- ''In the description, the first part should be about the history of and the creation and combat usage of the aircraft, as well as its key features. In the second part, tell the reader about the aircraft in the game. Insert a screenshot of the vehicle, so that if the novice player does not remember the vehicle by name, he will immediately understand what kind of vehicle the article is talking about.'' --> | <!-- ''In the description, the first part should be about the history of and the creation and combat usage of the aircraft, as well as its key features. In the second part, tell the reader about the aircraft in the game. Insert a screenshot of the vehicle, so that if the novice player does not remember the vehicle by name, he will immediately understand what kind of vehicle the article is talking about.'' --> | ||
| − | [[File: | + | [[File:GarageImage_{{PAGENAME}}.jpg|420px|thumb|left]] |
| − | The | + | {{break}} |
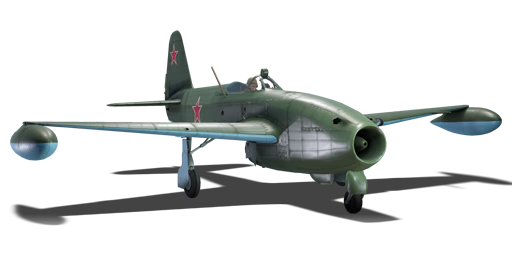
| + | The '''{{Specs|name}}''' is a rank {{Specs|rank}} Russian jet fighter {{Battle-rating}}. It was introduced in [[Update 1.33]]. | ||
| − | + | Similar to its hybrid predecessors, the Yak-17 is arguably one of the most underestimated aircraft in the game. Although its stat card reveals what would be considered "sub-par" performance and armament, the Yak-17 is both a unique and deadly fighter. Unlike its propeller-driven counterparts, this first generation jet aircraft wields the ability to hold on to energy in a straight line, whereas prop aircraft will slowly lose speed. This, coupled with its good rate of turn, allows the Yak-17 to defend itself against both propeller and jet-powered aircraft, which is what it will normally face in all game modes. | |
| + | |||
| + | The Yak-17's major faults include a low top speed, poor acceleration, little armor protection, and small ammunition pool. These collectively make this aircraft harder to use than other first-generation jet aircraft such as the [[He_162_A-2|He 162 A-2]], the [[Meteor_F_Mk_3|Meteor F. Mk.3]], and the [[F-80A-5]]. Although it is driven by a jet engine, it is important to recognize the faults and oddities within this aircraft series, as they are not representative of the traditional "jet fighter" at all. The Yak-17 is most easily viewed as a late-war [[Yak-3]] powered by a jet engine and with different armament. The Yak-17 differs from the previous [[Yak-15]] and [[Yak-15P]] in that it has a different cockpit layout, a different gun sight, and tricycle landing gear. The Yak-17 also carries two fuel pods on the end of each wing, similar to the [[MiG-9_/L|MiG-9/Late]]. Having a tricycle landing gear set instead of the previous two-wheeled design allows the Yak-17 to slow down easily when landing due to the drag of the extra wheel, and land easier, as there is no chance of the aircraft flipping from excessive braking. Thus, the Yak-17 performs almost identically to the Yak-15 and Yak-15P as its "stat card" shows. | ||
== General info == | == General info == | ||
| − | === Flight | + | === Flight Performance === |
| − | + | ''Describe how the aircraft behaves in the air. Speed, manoeuvrability, acceleration and allowable loads - these are the most important characteristics of the vehicle.'' | |
| − | |||
| − | |||
| − | {| class="wikitable" style="text-align:center" | + | {| class="wikitable" style="text-align:center" |
| − | ! | + | |- |
| + | ! colspan="8" | Characteristics | ||
| + | |- | ||
| + | ! colspan="8" | ''Stock'' | ||
| + | |- | ||
! colspan="2" | Max Speed<br>(km/h at 4,000 m) | ! colspan="2" | Max Speed<br>(km/h at 4,000 m) | ||
| − | ! rowspan="2" | Max altitude<br>( | + | ! rowspan="2" | Max altitude<br>(meters) |
! colspan="2" | Turn time<br>(seconds) | ! colspan="2" | Turn time<br>(seconds) | ||
| − | ! colspan="2" | Rate of climb<br>( | + | ! colspan="2" | Rate of climb<br>(meters/second) |
| − | ! rowspan="2" | Take-off run<br>( | + | ! rowspan="2" | Take-off run<br>(meters) |
|- | |- | ||
| − | ! AB | + | ! AB |
| + | ! RB | ||
| + | ! AB | ||
| + | ! RB | ||
| + | ! AB | ||
| + | ! RB | ||
|- | |- | ||
| − | + | | 720 || 700 || {{Specs|ceiling}} || 19.3 || 20.2 || 19.9 || 19.4 || 366 | |
| − | | 720 || 700 | | ||
|- | |- | ||
| − | ! Upgraded | + | ! colspan="8" | ''Upgraded'' |
| − | | | + | |- |
| + | ! colspan="2" | Max Speed<br>(km/h at 4,000 m) | ||
| + | ! rowspan="2" | Max altitude<br>(meters) | ||
| + | ! colspan="2" | Turn time<br>(seconds) | ||
| + | ! colspan="2" | Rate of climb<br>(meters/second) | ||
| + | ! rowspan="2" | Take-off run<br>(meters) | ||
| + | |- | ||
| + | ! AB | ||
| + | ! RB | ||
| + | ! AB | ||
| + | ! RB | ||
| + | ! AB | ||
| + | ! RB | ||
| + | |- | ||
| + | | ? || ? || {{Specs|ceiling}} || ??.? || ??.? || ??.? || ??.? || ??? | ||
|- | |- | ||
|} | |} | ||
| − | ==== Details ==== | + | ====Details==== |
| − | {| class="wikitable" style="text-align:center | + | {| class="wikitable" style="text-align:center" |
|- | |- | ||
| − | ! colspan=" | + | ! colspan="5" | Features |
|- | |- | ||
| − | ! Combat flaps | + | ! Combat flaps |
| + | ! Take-off flaps | ||
| + | ! Landing flaps | ||
| + | ! Air brakes | ||
| + | ! Arrestor gear | ||
|- | |- | ||
| − | | X || X || ✓ || X || X | + | | X || X || ✓ || X || X <!-- ✓ --> |
|- | |- | ||
|} | |} | ||
| − | {| class="wikitable" style="text-align:center | + | {| class="wikitable" style="text-align:center" |
|- | |- | ||
| − | ! colspan=" | + | ! colspan="5" | Limits |
|- | |- | ||
| − | ! rowspan="2" | | + | ! rowspan="2" | Wing-break speed<br>(km/h) |
| − | ! rowspan="2" | Gear (km/h) | + | ! rowspan="2" | Gear limit<br>(km/h) |
| − | ! | + | ! rowspan="2" | Combat flap<br> (km/h) |
! colspan="2" | Max Static G | ! colspan="2" | Max Static G | ||
|- | |- | ||
| − | + | ! + | |
| + | ! - | ||
|- | |- | ||
| − | | | + | | {{Specs|destruction|constructions}} || {{Specs|destruction|chassis}} || 520 || ~26 || ~20 |
|- | |- | ||
|} | |} | ||
| Line 63: | Line 88: | ||
{| class="wikitable" style="text-align:center" | {| class="wikitable" style="text-align:center" | ||
|- | |- | ||
| − | ! colspan="4" | Optimal velocities | + | ! colspan="4" | Optimal velocities |
|- | |- | ||
| − | ! Ailerons | + | ! Ailerons<br>(km/h) |
| + | ! Rudder<br>(km/h) | ||
| + | ! Elevators<br>(km/h) | ||
| + | ! Radiator<br>(km/h) | ||
|- | |- | ||
| − | | < 380 || < 420 || < 500 || | + | | < 380 || < 420 || < 500 || > 250 |
|- | |- | ||
|} | |} | ||
| − | |||
{| class="wikitable" style="text-align:center" | {| class="wikitable" style="text-align:center" | ||
|- | |- | ||
| − | ! colspan="3" | | + | ! colspan="3" | Compressor (RB/SB) |
| − | |||
|- | |- | ||
| − | ! | + | ! colspan="3" | Setting 1 |
| − | |||
|- | |- | ||
| − | + | ! Optimal altitude | |
| − | + | ! 100% Engine power | |
| + | ! WEP Engine power | ||
|- | |- | ||
| − | + | | 0 m || 910 kgf || No WEP | |
| − | |||
|- | |- | ||
| − | ! | + | <!--! colspan="3" | Setting 2 |
| − | |||
|- | |- | ||
| − | + | ! Optimal altitude | |
| − | + | ! 100% Engine power | |
| + | ! WEP Engine power | ||
|- | |- | ||
| − | + | | ?,??? m || ?,??? hp || ?,??? hp | |
| − | |||
|- | |- | ||
| − | ! | + | ! colspan="3" | Setting 3 |
| − | |||
|- | |- | ||
| − | + | ! Optimal altitude | |
| − | + | ! 100% Engine power | |
| − | + | ! WEP Engine power | |
| − | |||
| − | |||
|- | |- | ||
| + | | ?,??? m || ?,??? hp || ?,??? hp | ||
| + | |- --> | ||
|} | |} | ||
=== Survivability and armour === | === Survivability and armour === | ||
| − | |||
<!-- ''Examine the survivability of the aircraft. Note how vulnerable the structure is and how secure the pilot is, whether the fuel tanks are armoured, etc. Describe the armour, if there is any, and also mention the vulnerability of other critical aircraft systems.'' --> | <!-- ''Examine the survivability of the aircraft. Note how vulnerable the structure is and how secure the pilot is, whether the fuel tanks are armoured, etc. Describe the armour, if there is any, and also mention the vulnerability of other critical aircraft systems.'' --> | ||
* 55 mm Bulletproof glass in cockpit front. | * 55 mm Bulletproof glass in cockpit front. | ||
* 8.5 mm Steel plate in pilot's seat. | * 8.5 mm Steel plate in pilot's seat. | ||
| − | |||
| − | |||
| − | |||
| − | |||
| − | |||
== Armaments == | == Armaments == | ||
| − | |||
=== Offensive armament === | === Offensive armament === | ||
| − | |||
<!-- ''Describe the offensive armament of the aircraft, if any. Describe how effective the cannons and machine guns are in a battle, and also what belts or drums are better to use. If there is no offensive weaponry, delete this subsection.'' --> | <!-- ''Describe the offensive armament of the aircraft, if any. Describe how effective the cannons and machine guns are in a battle, and also what belts or drums are better to use. If there is no offensive weaponry, delete this subsection.'' --> | ||
{{main|NS-23 (23 mm)}} | {{main|NS-23 (23 mm)}} | ||
| Line 130: | Line 145: | ||
== Usage in battles == | == Usage in battles == | ||
| − | <!-- ''Describe the tactics of playing in | + | <!-- ''Describe the tactics of playing in an aircraft, the features of using vehicles in a team and advice on tactics. Refrain from creating a "guide" - do not impose a single point of view, but instead, give the reader food for thought. Examine the most dangerous enemies and give recommendations on fighting them. If necessary, note the specifics of the game in different modes (AB, RB, SB).'' --> |
=== Arcade Battles === | === Arcade Battles === | ||
| − | In | + | In arcade battles, the Yak-17 is capable of breaking up a "furball" due to its impressive turn time. This, coupled with its hard-hitting cannons, makes any Yak-17 pilot an indispensable asset to any arcade team. |
=== Realistic Battles === | === Realistic Battles === | ||
| − | In | + | In realistic battles, climbing with this aircraft at the start of a match is not always the best course of action, considering how poor the Yak-17's rate of climb is. Instead of the traditional slow angled climb, the Yak-17 is best used in a "zoom climb", where once enough energy has been built up at a low altitude, the Yak-17 pilot will quickly pitch up, thus gaining a lot of altitude quickly. This way, if attacked during the first few minutes of the match, the Yak-17 still wields some energy, whereas had the Yak-17 been slowly climbing, it would have had to face another aircraft's guns. |
| − | In order to shake an enemy, especially one that is propeller driven, dive low to the ground to ensure your assailant's speed only decreases. This is called a "speed trap", and can either be followed by a "hammerhead" attack or a continuation of the escape. This tactic of utilizing the Yak-17's ability to hold on to energy in a straight line is negated when facing other jet aircraft who wield the same ability. This is where the Yak-17's | + | In order to shake an enemy, especially one that is propeller driven, dive low to the ground to ensure your assailant's speed only decreases. This is called a "speed trap", and can either be followed by a "hammerhead" attack or a continuation of the escape. This tactic of utilizing the Yak-17's ability to hold on to energy in a straight line is negated when facing other jet aircraft who wield the same ability. This is where the Yak-17's dog fighting abilities come into play. Because it is so similar to the Yak-3 and the previous Yakovlev jets, the Yak-17 retains some of their maneuverability characteristics, namely their turn times. This facet often proves an indispensable one, as other first generation jets will not be able to maintain a tight enough turn circle. |
=== General Usage === | === General Usage === | ||
| − | Like its predecessors, the Yak-17 is severely hampered in its damage output due to its reliance on a single set of 23 mm NS-23 cannons, with 120 shells total. It is possible to expend this pool in seconds. The Yak-17 shares this downfall with aircraft like the [[Ki-200]] and the [[Me_163_B|Me 163]]. Firing in small, accurate bursts negates this problem, and is the most efficient way of destroying enemies. The 23 mm shells these cannons fire are extremely deadly when they hit, often ripping enemies apart on impact. | + | Like its predecessors, the Yak-17 is severely hampered in its damage output due to its reliance on a single set of 23 mm NS-23 cannons, with 120 shells total. It is possible to expend this pool in seconds. The Yak-17 shares this downfall with aircraft like the [[Ki-200|Ki-200]] and the [[Me_163_B|Me-163]]. Firing in small, accurate bursts negates this problem, and is the most efficient way of destroying enemies. The 23 mm shells these cannons fire are extremely deadly when they hit, often ripping enemies apart on impact. |
To use the cannons most effectively, only fire when you are close to your target. The reason for this is twofold: First, the limited ammo means you want your shots to count. Being close to your target will give your cannons the highest chance of hitting. The second reason is because of the ballistics of the 23 mm shells - their muzzle velocity is not very high, meaning you have to lead your targets by quite a bit. If you are closer to your target, you won't have to lead them by quite as much, though it will still have to be more than other cannons. | To use the cannons most effectively, only fire when you are close to your target. The reason for this is twofold: First, the limited ammo means you want your shots to count. Being close to your target will give your cannons the highest chance of hitting. The second reason is because of the ballistics of the 23 mm shells - their muzzle velocity is not very high, meaning you have to lead your targets by quite a bit. If you are closer to your target, you won't have to lead them by quite as much, though it will still have to be more than other cannons. | ||
With some practice, it is possible to consistently get 3 fighter kills with one load of ammunition in realistic battles. Using the Air Targets belt is the most effective. However, attacking bombers is best left to other planes with more firepower, since the Yak-17 does not have the firepower or ammunition to reliably kill heavy bombers without sustaining heavy damage. Heavy fighters such as the [[F7F-1]] may also take longer to destroy than other fighters. | With some practice, it is possible to consistently get 3 fighter kills with one load of ammunition in realistic battles. Using the Air Targets belt is the most effective. However, attacking bombers is best left to other planes with more firepower, since the Yak-17 does not have the firepower or ammunition to reliably kill heavy bombers without sustaining heavy damage. Heavy fighters such as the [[F7F-1]] may also take longer to destroy than other fighters. | ||
| + | |||
| + | ===Manual Engine Control=== | ||
| + | {| class="wikitable" style="text-align:center" | ||
| + | |- | ||
| + | ! colspan="7" | MEC elements | ||
| + | |- | ||
| + | ! rowspan="2" | Mixer | ||
| + | ! rowspan="2" | Pitch | ||
| + | ! colspan="3" | Radiator | ||
| + | ! rowspan="2" | Supercharger | ||
| + | ! rowspan="2" | Turbocharger | ||
| + | |- | ||
| + | ! Oil | ||
| + | ! Water | ||
| + | ! Type | ||
| + | |- | ||
| + | | Not controllable || rowspan="2" | Not controllable || rowspan="2" | Not controllable || rowspan="2" | Not controllable || rowspan="2" | Separate || rowspan="2" | Not ontrollable || rowspan="2" | Not controllable | ||
| + | |- | ||
| + | |} | ||
| + | |||
| + | ===Modules=== | ||
| + | {| class="wikitable" | ||
| + | ! colspan="1" | Tier | ||
| + | ! colspan="2" | Flight performance | ||
| + | ! colspan="1" | Survivability | ||
| + | ! colspan="1" | Weaponry | ||
| + | |- | ||
| + | | I | ||
| + | | Fuselage Repair | ||
| + | | | ||
| + | | | ||
| + | | Offensive 23 mm | ||
| + | |- | ||
| + | | II | ||
| + | | | ||
| + | | Compressor | ||
| + | | Airframe | ||
| + | | | ||
| + | |- | ||
| + | | III | ||
| + | | Wing Repair | ||
| + | | | ||
| + | | | ||
| + | | New 23 mm Cannons | ||
| + | |- | ||
| + | | IV | ||
| + | | | ||
| + | | Engine | ||
| + | | Cover | ||
| + | | | ||
| + | |- | ||
| + | |} | ||
| + | |||
| + | *Obtaining the "Offensive 23 mm" modification is the best choice for your first module, as it allows for more flexibility in armament. Next, try to obtain the "compressor" and "engine" upgrades, as they both increase engine thrust which is essential in escaping from a dogfight turned sour. Finally, obtain the rest of the performance upgrades as they will all collectively increase top speed, turn time, and rate of climb. | ||
=== Pros and cons === | === Pros and cons === | ||
| − | <!-- '' | + | <!-- ''Summarize and briefly evaluate the vehicle in terms of its characteristics and combat effectiveness. Mark its pros and cons in the bulleted list. Try not to use more than 6 points for each of the characteristics. Avoid using categorical definitions such as "bad", "good" and the like - use substitutions with softer forms such as "inadequate" and "effective".'' --> |
'''Pros:''' | '''Pros:''' | ||
| Line 162: | Line 231: | ||
* Poor rate of climb | * Poor rate of climb | ||
* Poor acceleration | * Poor acceleration | ||
| − | * Minimal | + | * Minimal armor protection |
* Inability to carry a payload | * Inability to carry a payload | ||
== History == | == History == | ||
| − | + | ''Describe the history of the creation and combat usage of the aircraft in more detail than in the introduction. If the historical reference turns out to be too big, take it to a separate article, taking a link to the article about the vehicle and adding a block "/ History" (example: <nowiki>https://wiki.warthunder.com/(Vehicle-name)/History</nowiki>) and add a link to it here using the <code>main</code> template. Be sure to reference text and sources by using <code><nowiki><ref></nowiki></code>, as well as adding them at the end of the article. This section may also include the vehicle's dev blog entry (if applicable) and the in-game encyclopedia description (under <code><nowiki>=== Encyclopedia Info ===</nowiki></code>, also if applicable).'' | |
| − | |||
| − | |||
| − | |||
| − | |||
| − | |||
| − | |||
| − | |||
== Media == | == Media == | ||
| − | + | ''Excellent additions to the article would be video guides, screenshots from the game, and photos.'' | |
| − | |||
| − | |||
| − | |||
| − | |||
| − | |||
{{Youtube-gallery|zfACMogNw7w|War Thunder Realistic: Yak-17 [Extreme!]}} | {{Youtube-gallery|zfACMogNw7w|War Thunder Realistic: Yak-17 [Extreme!]}} | ||
| Line 192: | Line 249: | ||
== External links == | == External links == | ||
| − | + | ''Paste links to sources and external resources, such as:'' | |
| + | |||
* ''topic on the official game forum;'' | * ''topic on the official game forum;'' | ||
| − | * ''other literature.'' | + | * ''encyclopedia page on the aircraft;'' |
| − | + | * ''other literature.'' | |
| − | |||
| − | |||
{{USSR jet aircraft}} | {{USSR jet aircraft}} | ||
Revision as of 23:50, 31 October 2019
Contents
Description

The Yak-17 is a rank V Russian jet fighter
with a battle rating of 6.7 (AB/RB) and 7.0 (SB). It was introduced in Update 1.33.
Similar to its hybrid predecessors, the Yak-17 is arguably one of the most underestimated aircraft in the game. Although its stat card reveals what would be considered "sub-par" performance and armament, the Yak-17 is both a unique and deadly fighter. Unlike its propeller-driven counterparts, this first generation jet aircraft wields the ability to hold on to energy in a straight line, whereas prop aircraft will slowly lose speed. This, coupled with its good rate of turn, allows the Yak-17 to defend itself against both propeller and jet-powered aircraft, which is what it will normally face in all game modes.
The Yak-17's major faults include a low top speed, poor acceleration, little armor protection, and small ammunition pool. These collectively make this aircraft harder to use than other first-generation jet aircraft such as the He 162 A-2, the Meteor F. Mk.3, and the F-80A-5. Although it is driven by a jet engine, it is important to recognize the faults and oddities within this aircraft series, as they are not representative of the traditional "jet fighter" at all. The Yak-17 is most easily viewed as a late-war Yak-3 powered by a jet engine and with different armament. The Yak-17 differs from the previous Yak-15 and Yak-15P in that it has a different cockpit layout, a different gun sight, and tricycle landing gear. The Yak-17 also carries two fuel pods on the end of each wing, similar to the MiG-9/Late. Having a tricycle landing gear set instead of the previous two-wheeled design allows the Yak-17 to slow down easily when landing due to the drag of the extra wheel, and land easier, as there is no chance of the aircraft flipping from excessive braking. Thus, the Yak-17 performs almost identically to the Yak-15 and Yak-15P as its "stat card" shows.
General info
Flight Performance
Describe how the aircraft behaves in the air. Speed, manoeuvrability, acceleration and allowable loads - these are the most important characteristics of the vehicle.
| Characteristics | |||||||
|---|---|---|---|---|---|---|---|
| Stock | |||||||
| Max Speed (km/h at 4,000 m) |
Max altitude (meters) |
Turn time (seconds) |
Rate of climb (meters/second) |
Take-off run (meters) | |||
| AB | RB | AB | RB | AB | RB | ||
| 720 | 700 | 13250 | 19.3 | 20.2 | 19.9 | 19.4 | 366 |
| Upgraded | |||||||
| Max Speed (km/h at 4,000 m) |
Max altitude (meters) |
Turn time (seconds) |
Rate of climb (meters/second) |
Take-off run (meters) | |||
| AB | RB | AB | RB | AB | RB | ||
| ? | ? | 13250 | ??.? | ??.? | ??.? | ??.? | ??? |
Details
| Features | ||||
|---|---|---|---|---|
| Combat flaps | Take-off flaps | Landing flaps | Air brakes | Arrestor gear |
| X | X | ✓ | X | X |
| Limits | ||||
|---|---|---|---|---|
| Wing-break speed (km/h) |
Gear limit (km/h) |
Combat flap (km/h) |
Max Static G | |
| + | - | |||
| 520 | ~26 | ~20 | ||
| Optimal velocities | |||
|---|---|---|---|
| Ailerons (km/h) |
Rudder (km/h) |
Elevators (km/h) |
Radiator (km/h) |
| < 380 | < 420 | < 500 | > 250 |
| Compressor (RB/SB) | ||
|---|---|---|
| Setting 1 | ||
| Optimal altitude | 100% Engine power | WEP Engine power |
| 0 m | 910 kgf | No WEP |
Survivability and armour
- 55 mm Bulletproof glass in cockpit front.
- 8.5 mm Steel plate in pilot's seat.
Armaments
Offensive armament
The Yak-17 is armed with:
- 2 x 23 mm NS-23 cannons, nose-mounted (60 rpg = 120 total)
Usage in battles
Arcade Battles
In arcade battles, the Yak-17 is capable of breaking up a "furball" due to its impressive turn time. This, coupled with its hard-hitting cannons, makes any Yak-17 pilot an indispensable asset to any arcade team.
Realistic Battles
In realistic battles, climbing with this aircraft at the start of a match is not always the best course of action, considering how poor the Yak-17's rate of climb is. Instead of the traditional slow angled climb, the Yak-17 is best used in a "zoom climb", where once enough energy has been built up at a low altitude, the Yak-17 pilot will quickly pitch up, thus gaining a lot of altitude quickly. This way, if attacked during the first few minutes of the match, the Yak-17 still wields some energy, whereas had the Yak-17 been slowly climbing, it would have had to face another aircraft's guns.
In order to shake an enemy, especially one that is propeller driven, dive low to the ground to ensure your assailant's speed only decreases. This is called a "speed trap", and can either be followed by a "hammerhead" attack or a continuation of the escape. This tactic of utilizing the Yak-17's ability to hold on to energy in a straight line is negated when facing other jet aircraft who wield the same ability. This is where the Yak-17's dog fighting abilities come into play. Because it is so similar to the Yak-3 and the previous Yakovlev jets, the Yak-17 retains some of their maneuverability characteristics, namely their turn times. This facet often proves an indispensable one, as other first generation jets will not be able to maintain a tight enough turn circle.
General Usage
Like its predecessors, the Yak-17 is severely hampered in its damage output due to its reliance on a single set of 23 mm NS-23 cannons, with 120 shells total. It is possible to expend this pool in seconds. The Yak-17 shares this downfall with aircraft like the Ki-200 and the Me-163. Firing in small, accurate bursts negates this problem, and is the most efficient way of destroying enemies. The 23 mm shells these cannons fire are extremely deadly when they hit, often ripping enemies apart on impact.
To use the cannons most effectively, only fire when you are close to your target. The reason for this is twofold: First, the limited ammo means you want your shots to count. Being close to your target will give your cannons the highest chance of hitting. The second reason is because of the ballistics of the 23 mm shells - their muzzle velocity is not very high, meaning you have to lead your targets by quite a bit. If you are closer to your target, you won't have to lead them by quite as much, though it will still have to be more than other cannons.
With some practice, it is possible to consistently get 3 fighter kills with one load of ammunition in realistic battles. Using the Air Targets belt is the most effective. However, attacking bombers is best left to other planes with more firepower, since the Yak-17 does not have the firepower or ammunition to reliably kill heavy bombers without sustaining heavy damage. Heavy fighters such as the F7F-1 may also take longer to destroy than other fighters.
Manual Engine Control
| MEC elements | ||||||
|---|---|---|---|---|---|---|
| Mixer | Pitch | Radiator | Supercharger | Turbocharger | ||
| Oil | Water | Type | ||||
| Not controllable | Not controllable | Not controllable | Not controllable | Separate | Not ontrollable | Not controllable |
Modules
| Tier | Flight performance | Survivability | Weaponry | |
|---|---|---|---|---|
| I | Fuselage Repair | Offensive 23 mm | ||
| II | Compressor | Airframe | ||
| III | Wing Repair | New 23 mm Cannons | ||
| IV | Engine | Cover | ||
- Obtaining the "Offensive 23 mm" modification is the best choice for your first module, as it allows for more flexibility in armament. Next, try to obtain the "compressor" and "engine" upgrades, as they both increase engine thrust which is essential in escaping from a dogfight turned sour. Finally, obtain the rest of the performance upgrades as they will all collectively increase top speed, turn time, and rate of climb.
Pros and cons
Pros:
- Excellent turn time for a jet fighter
- Good armament
- Very good roll rate
- Fairly responsive at higher speeds
Cons:
- Slow compared to other jet fighters in BR
- Low ammunition count
- Poor rate of climb
- Poor acceleration
- Minimal armor protection
- Inability to carry a payload
History
Describe the history of the creation and combat usage of the aircraft in more detail than in the introduction. If the historical reference turns out to be too big, take it to a separate article, taking a link to the article about the vehicle and adding a block "/ History" (example: https://wiki.warthunder.com/(Vehicle-name)/History) and add a link to it here using the main template. Be sure to reference text and sources by using <ref>, as well as adding them at the end of the article. This section may also include the vehicle's dev blog entry (if applicable) and the in-game encyclopedia description (under === Encyclopedia Info ===, also if applicable).
Media
Excellent additions to the article would be video guides, screenshots from the game, and photos.
See also
Links to the articles on the War Thunder Wiki that you think will be useful for the reader, for example:
- reference to the series of the aircraft;
- links to approximate analogues of other nations and research trees.
External links
Paste links to sources and external resources, such as:
- topic on the official game forum;
- encyclopedia page on the aircraft;
- other literature.
| USSR jet aircraft | |
|---|---|
| Bereznyak-Isayev | BI |
| Yakovlev | Yak-15 · Yak-15P · Yak-17 · Yak-23 · Yak-28B · Yak-30D · Yak-38 · Yak-38M · Yak-141 |
| Mikoyan-Gurevich | MiG-9 · MiG-9 (l) · MiG-15 · MiG-15bis · MiG-15bis ISH · MiG-17 · MiG-17AS · MiG-19PT |
| MiG-21F-13 · MiG-21PFM · MiG-21S (R-13-300) · MiG-21SMT · MiG-21bis | |
| MiG-23M · MiG-23ML · MiG-23MLD · MiG-27M · MiG-27K | |
| MiG-29 · MiG-29SMT | |
| Lavochkin | La-174 · La-15 · La-200 |
| Sukhoi | Su-9 · Su-11 |
| Su-7B · Su-7BKL · Su-7BMK · Su-17M2 · Su-17M4 · Su-22M3 | |
| Su-25 · Su-25BM · Su-25K · Su-25T · Su-25SM3 · Su-39 | |
| Su-27 | |
| Ilyushin | IL-28 · IL-28Sh |
| Tupolev | Tu-14T |
