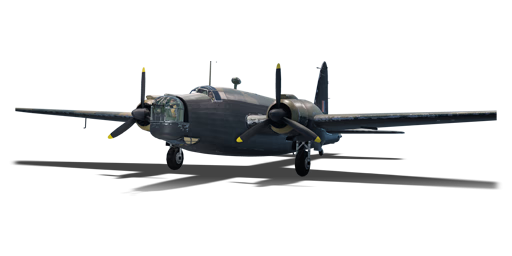
Wellington Mk X
| This page is about the British bomber Wellington Mk X. For other versions, see Wellington (Family). |

Contents
Description
The Wellington Mk X is a rank II British bomber with a battle rating of 3.3 (AB/RB) and 4.0 (SB). It has been in the game since the start of the Open Beta Test prior to Update 1.27.
General info
Flight performance
| Characteristics | Max Speed (km/h at 4,053 m) |
Max altitude (metres) |
Turn time (seconds) |
Rate of climb (metres/second) |
Take-off run (metres) | |||
|---|---|---|---|---|---|---|---|---|
| AB | RB | AB | RB | AB | RB | |||
| Stock | 392 | 377 | 6500 | 36.3 | 37.5 | 3.2 | 3.2 | 650 |
| Upgraded | 431 | 410 | 33.8 | 35.0 | 8.0 | 5.3 | ||
Details
| Features | ||||
|---|---|---|---|---|
| Combat flaps | Take-off flaps | Landing flaps | Air brakes | Arrestor gear |
| ✓ | ✓ | ✓ | X | X |
| Limits | ||||||
|---|---|---|---|---|---|---|
| Wings (km/h) | Gear (km/h) | Flaps (km/h) | Max Static G | |||
| Combat | Take-off | Landing | + | - | ||
| 530 | 264 | 315 | 264 | 223 | ~5 | ~3 |
| Optimal velocities (km/h) | |||
|---|---|---|---|
| Ailerons | Rudder | Elevators | Radiator |
| < 275 | < 275 | < 310 | > 320 |
Survivability and armour
- 9 mm Steel plate in the pilot's seat.
When being attacked, the points of concern will be the engines, which are relatively easy to be set on fire. The 7.7 mm machine guns can be sufficient for some harassing fire against enemies so that they do not stay in one location and open fire, affecting their accuracy as they manoeuvre around. But against a determined enemy, the Wellington Mk X would otherwise be a sitting duck.
Modifications and economy
| Flight performance | Survivability | Weaponry | ||||||||||||||||||||||||
|---|---|---|---|---|---|---|---|---|---|---|---|---|---|---|---|---|---|---|---|---|---|---|---|---|---|---|
|
|
|
The default bomb load is a meagre 10 x 250 lb (117 kg) so upgrading to 18 x 250 or 9 x 500 "pounders" (500 lb (226 kg)) should be task number one. In order: unlock the Turret 7 mm ammo first, then the TC mk.I (torpedo) rack, and then the LBC mk.I.
Unlocking the 7 mm ammo gives access to the "Universal" AP-I belt as one works up to the bomb racks for 18 x 250 lb or 9 x 500 lb. After that, you can pursue your choice of upgrades.
Upgrades to the turret should also be considered. The different belts do not have a considerable effect, but the upgraded turrets allow for a longer fire at a greater rate, which is very important for the small rifle calibre machine guns.
However, speed and climb rate is also a necessity and the unlocks help the sluggish Wellington a lot. The decision should depend on the pilot's flying style. When rushing in, better armament will help in the retreat, but better performance will aid in returning to friendly zones quickly.
The sneaky approach, on the other hand, relies less on speed, but on surviving the random combat encounters. Turret upgrades are the way to go for this playstyle.
Armaments
Suspended armament
The Wellington Mk X can be outfitted with the following ordnance:
- 10 x 250 lb G.P. Mk.IV bombs (2,500 lb total)
- 18 x 250 lb G.P. Mk.IV bombs (4,500 lb total)
- 9 x 500 lb G.P. Mk.IV bombs (4,500 lb total)
- 2 x 1,000 lb G.P. Mk.I bombs + 6 x 250 lb G.P. Mk.IV bombs (3,500 lb total)
- 2 x 18 inch Mark XII torpedoes
- 1 x 4,000 lb H.C. Mk.II bomb (4,000 lb total)
Defensive armament
The Wellington Mk X is defended by:
- 2 x 7.7 mm Browning machine guns, nose turret (1,000 rpg = 2,000 total)
- 4 x 7.7 mm Browning machine guns, tail turret (2,500 rpg = 10,000 total)
- 1 x 7.7 mm Browning machine gun, 2 x side turret (600 rpg)
Usage in battles
Air battles
In Air Battles, the winning tactic is to climb high and bomb your targets. If you don't want to climb the Wellington Mk X, is a great low flying bomber, offering great speed and manoeuvrability. However, it lacks any armour and only offers limited protection with turrets in the front, side and rear. It lacks armour plates, unlike other bombers of the other nations. A few well placed shots will see Wellington Mk X, getting torn apart to any aircraft which drop down to engage it from the top or belly. However, its rear gun turret offers four 7.7 mm machine guns which are able to shoot down the enemy aircraft with a few well placed shots.
Ground battles
The Wellington Mk X should be used as a strategic bomber, that is what it excels at in this game mode. It is too big to be used in the ground attack role, making it an easy target for enemy tankers. To use the Wellington Mk X, load up on 500 lbs or the single 4,000 lb cookie bomb. The 500 lbs, offer 65.5 Kg of HE filler and the cookie offers 1,339 Kg of HE filler.
Fly around the map, waiting for the enemy to cap the cap zones, when they start capping the zone - head towards it, gain altitude do not come in low or a single shot fired from a tank can knock you out of the game. Once at a good altitude, line up on the cap zone and drop the bombs. Any tank in the zone will be destroyed.

All of the Wellington bombers are well suited for the naval warfare, The Wellington Mk X being one of the best of them provides improved Browning turrets, more speed and two supreme payloads that will allow you to change the tides of a naval war in both Arcade and Realistic battles.
Those are:
- 2 х 18 inch Mark XII torpedoes
- 1 x 4,000 lb H.C. Mk.II bomb
With the torpedoes, the strategy goes in finding a good approach angle to successfully deliver both torpedoes to preferably gunboats and destroyers as they will have a tougher time evading them. Beware of anti-aircraft fire and swiftly turn back to safety while preparing the next drop.
Using the 4,000 lb bomb, the scenario takes place a bit higher. Way above the enemies' short and medium anti-aircraft guns that reach around 3,000 - 4,500 m altitude. Here you will be able to spot the biggest of the fishes. Those will be your targets and with some developed practice in predicting the drops you will decimate the entire enemy destroyers population in a short time, tanks to this extremely lethal bomb.
Just be alert of enemy planes that will be eager to take you down, using the Armoured targets belt provides some of the boost in defence you need as it cripples engines and pierces through metal.
Manual Engine Control
| MEC elements | ||||||
|---|---|---|---|---|---|---|
| Mixer | Pitch | Radiator | Supercharger | Turbocharger | ||
| Oil | Water | Type | ||||
| Not controllable | Controllable Not auto controlled |
Not controllable Not auto controlled |
Controllable Not auto controlled |
Combined | Controllable 2 gears |
Not controllable |
Pros and cons

Pros:
- Airframe itself is very durable
- Regular payload stock, but greatly improves roles when upgraded
- Extreme horizontal firing arc on front and rear turret of just over 180 degrees
- Good gunner ammunition supply
- The 4,000 lb bomb is devastating for ground and naval targets
Cons:
- Hopelessly outclassed by enemy fighters of similar rank
- Defensive turrets are easy to take out
- Defensive armament is very limited: Turrets only on the, Front, sides and rear
- Slow speed
- Bad climb rate, largely due to the combination of the heavy airframe with only average engines
- Lack of armour makes engines, crew, fuel tanks, etc noticeably vulnerable
- Control stiffening becomes a serious issue at airspeeds over 450 km/h
- Very clumsy in vertical manoeuvres
History
Performance-wise the Wellington was not notably remarkable, its strength lay on the inside. Devised by one of the greatest innovative thinkers in history, Sir Barnes Neville Wallis devised a geodesic structure resulting in an exceptionally strong airframe. Together with Reginald Kirshaw "Rex" Pierson, they designed their record-making "Vickers Wellesley", paving the way for the "Wellington" and larger "Warwick".
With high aspect ratio wings and a spacious fuselage, it proved capable of handling a myriad of missions including early airborne radar and robust enough to absorb severe damage and fly home. Although the bomb bay configuration limited bomb size, its payload was slightly more than the Heinkel He 111 H-3 and with greater range. It is also one of the first aircraft to have a powered turret in the extreme tail with a very wide arc; however, it was still inadequate to defend itself against attacking fighters and early models lacked self-sealing fuel tanks. Still, this aircraft was admired by crews and affectionately called "Wimpy" after Popeye's hamburger loving friend and sidekick whose full name is J. Wellington Wimpy.
Over 11,000 made, it equipped many RAF squadrons including those comprised of foreign crews like the Polish (4 squadrons), New Zealand (No. 75), and Czech (No. 311), one of which was captured by the Germans who used it for intelligence and training. "Viking", a passenger transport variant, became the world's first pure jet transport prototype aircraft in 1948.
| Archive of the in-game description | |
|---|---|
|
A twin-engine medium bomber, the Wellington Mk.X became the last production variant used by RAF Bomber Command. Its design was based on the Mk.III's airframe, and it featured similar armament and equipment. The main difference was a new 1,675 hp Bristol Hercules Mk.VI (though some planes featured the Hercules Mk.XVI) fourteen-cylinder double-row air-cooled engine. There was also a difference less noticeable but no less important than the replaced engine: the switch to newly developed light alloys with a better strength-to-specific gravity ratio. Using this alloy in the aircraft's structure allowed a higher take-off weight while preserving the Mk.III's flight characteristics. Full-scale production of the Mk.X (Type 448) model started in the autumn of 1942 and it became the most numerous variant of the Wellington, with a combined total of 3,803 aircraft built. After initial heavy losses in daylight bombing raids at the beginning of the war, the Wellington saw more success after changing role to night bombing. The aircraft also began serving in North Africa in September 1940 and in the Far East in April 1942. By 1942-43, the Wellington became the RAF Bomber Command's primary medium bomber; it was faster than the Armstrong Whitworth Whitley and it had a longer range than the Handley Page Hampden, even though its payload was just as great. In the first "1,000 bomber raid" on Cologne on May 30th 1942, 599 of the 1,043 aircraft were Wellingtons. The Wellington bombers' last operational sortie with Bomber Command in Western Europe was on the night of October 8, 1943. The Wellington was succeeded by heavy four-engine aircraft such as the Short Stirling, the Handley Page Halifax, and the Avro Lancaster, as the RAF Bomber Command increased its pressure on Germany. However, variants of the Wellington Mk.X continued to serve with RAF Coastal Command for the remainder of the war; the Mks.XI through to XIV were all maritime versions of the Mk.X, fitted with ASV radar. And a variety of armaments. Coastal Command Wellingtons were employed in protecting allied shipping in the South West Approaches from enemy submarines. Notable successes were scored by 172 Squadron, operating from RAF Chivenor, who were the first unit to attack a U-Boat at night using a combination of radar and a special carbon arc searchlight. October 1945 saw the construction of the last of 11,461 Wellingtons, and the aircraft was withdrawn from service in March 1953 after finishing its RAF career as a pilot and navigator trainer. | |
Media
- Skins
- Images

Gunner inside the Wellington handles his .303 Browning MG

- Videos
See also
External links
Paste links to sources and external resources, such as:
- topic on the official game forum;
- other literature.
| Vickers-Armstrongs Aircraft Limited | |
|---|---|
| Bombers | Wellington Mk Ic · Wellington Mk Ic/L · Wellington Mk III · Wellington Mk X |
| Captured | ▀Wellington Mk Ic |
| Britain bombers | |
|---|---|
| Torpedo | Swordfish Mk I · Swordfish Mk II · ▄Avenger Mk II |
| Dive | V-156-B1 |
| Hydroplanes | ▄Catalina Mk IIIa · Sunderland Mk IIIa · Sunderland Mk V |
| Light | Blenheim Mk IV · Beaufort Mk VIII · ▄Hudson Mk V · Brigand B 1 |
| Based on A20 | ▄Havoc Mk I · ▄Boston Mk I · ▄DB-7 |
| Hampden | Hampden Mk I · Hampden TB Mk I |
| Wellington | Wellington Mk Ic · Wellington Mk Ic/L · Wellington Mk III · Wellington Mk X |
| Halifax | Halifax B Mk IIIa |
| Stirling | Stirling B Mk I · Stirling B Mk III |
| Lancaster | Lancaster B Mk I · Lancaster B Mk III |
| Lincoln | Lincoln B Mk II |
| Shackleton | Shackleton MR.Mk.2 |
