Difference between pages "Wellington Mk X" and "SAu 40"
(Restored page from version archived 10-12-18.) |
Inceptor57 (talk | contribs) (→History: Replaced history section with detailed one from WT devblog) |
||
| Line 1: | Line 1: | ||
| − | {{Specs-Card|code= | + | {{Specs-Card|code=fr_somua_sau40}} |
| − | + | ||
== Description == | == Description == | ||
| − | <!--''In the description, the first part needs to be about the history of | + | <!--''In the description, the first part needs to be about the history of the creation and combat usage of the vehicle, as well as its key features. In the second part, tell the reader about the ground vehicle in the game. Insert the screenshot of the vehicle. If the novice player does not remember the vehicle by name, they will immediately understand what kind of vehicle it is talking about.''--> |
| + | [[File:GarageImage_{{PAGENAME}}.jpg|420px|thumb|left]] | ||
| + | {{break}} | ||
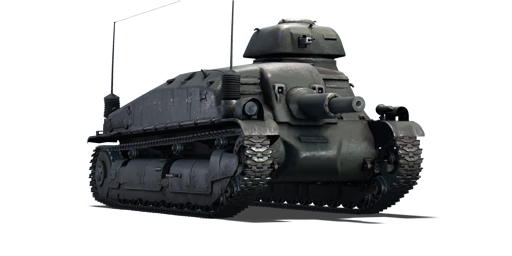
| + | The '''{{specs|name}}''' (DE 75 mm Self-Propelled Gun SAu 40) is a Rank {{specs|rank}} French tank destroyer {{Battle-rating|1}}. It was introduced in [[Update 1.75 "La Résistance"]]. It distinguish itself by its very tall cupola and thick gun barrel. This tank is equipped with APHE rounds, a rare feature in the French tech tree. | ||
| + | |||
| + | As it was developped from the French [[S.35]], this tank shares many of its characteristics such as ~40 mm cast hull bolted onto the chassis, which is barely a widened version of its original. The track system is mostly the same as on the [[S.35]], with 25 mm plates covering the roller wheels. As for the hull, its two 8 mm ''grilles'' over the engine compartment and doors on the side reinforces the impression that it's just a widened [[S.35]] hull. | ||
| + | |||
| + | As this tank is based off the [[S.35]], it shares many of its attributes when it comes to armour. A slight angle can defeat most shots this tank will take at this BR, this is useful to know when getting into position: from a distance and not showing neither side nor front to the enemy, you should be safe. As for frontal armour, its 40 mm overall thickness is not strong enough to withstand anything bigger than AA fire. But, a thing to consider with this weird pattern is its "bouncy" behaviour, principally around the gun mantlet: complex angles may just bounce some shots, making them loose some energy before hitting the main armour, this feature is peculiarly distinctive at gun's height. | ||
| + | |||
| + | The main weakness of this tank is its ''very tall'' commander's cupola, which makes it quite easy to spot and destroy, as it is thinner than the main armour. Any APHE penetrating this area will kill the tank's commander, thus disabling its only MG and some shrapnels may even damage or kill the driver, disabling this tank for good. A way to avoid getting spotted too easily is buying camouflage for the front cupola area, making it look more like a bush popping out a hill than a tank's turret. Try to hide the tank's lower hull part as it is only 35 mm thick. | ||
| + | |||
| + | While being mounted on a widened [[S.35]] hull, this heavier tank has about 70 HP less than its predecessor, making it quite slow and unwieldy. In order to fulfill the task of getting into position, one should choose its route wisely and avoid risky spots as this tank's ''awful'' reverse speed and hull turning rate makes it quite bad at hasty retreats. Mobility with the Somua 40 is an issue. It is arguably what makes this tank hard to master as it does not allow for good map placement. | ||
| + | |||
| + | As any casemate SPG, this tank's main feature is its main gun...kind of. With average penetration rates for this BR with a maximum of 73 mm at point-blank ranges (comparably, the Russian [[SU-76M]] penetrates 80 mm with its basic APHE shell and up to 135 mm with APCR shots). While being one of the rare French tank shooting APHE shells, increasing its one-shot potential, this round noticeably fails to explode when flanking enemies as this round takes 25 mm of steel to detonate. Another concern being its slow horizontal traverse, which makes it hard to react to fast-paced situations. This gun placement makes this tank quite vulnerable: being low, it exposes the SOMUA 40 to enemy fire when popping up a hill. | ||
| + | |||
| + | As for the turreted MAC 31 MG, it does not helps at anything more than taking down truck-mounted guns. This turret is slow, which negates the possibility of chasing planes with it. It also has poor rate of fire and is low calibre, so even if you manage to hit a plane, it will not do much to it. | ||
| − | |||
| − | |||
| − | |||
== General info == | == General info == | ||
| − | === | + | === Survivability and armour === |
| − | <!--''Describe | + | <!--''Describe armour protection. Note the most well protected and key weak areas. Appreciate the layout of modules as well as the number and location of crew members. Is the level of armour protection sufficient, is the placement of modules helpfull for survival in combat?'' |
| + | |||
| + | ''If necessary use a visual template to indicate the most secure and weak zones of the armour.''--> | ||
| + | '''Armour type:''' | ||
| + | |||
| + | * Cast homogeneous armour | ||
| + | |||
| + | {| class="wikitable" | ||
| + | |- | ||
| + | ! Armour !! Front (Slope angle) !! Sides !! Rear !! Roof | ||
| + | |- | ||
| + | | Hull || 40 mm (0-73°) ''Front glacis'' <br> 34 mm (1-54°) ''Lower glacis'' <br> 60 mm (0-53°) ''Gun mantlet'' || 40 mm (0-24°), 34 mm (43-63°) ''Top'' <br> 40 (1-3°) + 25 mm (0-89°) ''Bottom'' || 34 mm (20-49°) ''Top'' <br> 34 mm (4-71°) ''Bottom'' || 20 mm <br> 8 mm ''Engine grille'' | ||
| + | |- | ||
| + | | Turret || 38 mm (5-48°) <br> 25 mm ''Gun mantlet'' || 38 mm (16-38°) || 38 mm (11-38°) || 20 mm <br> 34 mm ''Dome'' | ||
| + | |- | ||
| + | |} | ||
| + | '''Notes:''' | ||
| + | |||
| + | * Suspension wheels are 15 mm thick while tracks are 20 mm thick. | ||
| + | * Turret underside is 20 mm thick. | ||
| + | * Turret ring is 30 mm thick. | ||
| + | * Turret base is 34 mm thick. | ||
| + | |||
| + | === Mobility === | ||
| + | <!--''Write about the mobility of the ground vehicle. Estimate the specific power and maneuverability as well as the maximum speed forward and backward.''--> | ||
{| class="wikitable" style="text-align:center" | {| class="wikitable" style="text-align:center" | ||
|- | |- | ||
| − | ! colspan=" | + | ! colspan="3" | Mobility characteristic |
|- | |- | ||
| − | ! colspan=" | + | ! Weight (tons) |
| + | ! colspan="1" | Add-on Armour<br>weight (tons) | ||
| + | ! colspan="1" | Max speed (km/h) | ||
|- | |- | ||
| − | + | | rowspan="2" | 24.0 || colspan="1" rowspan="2" | N/A || colspan="1" | 40 (AB) | |
| − | |||
| − | |||
| − | |||
| − | |||
|- | |- | ||
| − | + | |37 (RB/SB) | |
| − | |||
| − | |||
| − | |||
| − | |||
| − | |||
|- | |- | ||
| − | + | ! colspan="3" | Engine power (horsepower) | |
|- | |- | ||
| − | ! colspan=" | + | ! colspan="1" | Mode |
| + | !Stock | ||
| + | !Upgraded | ||
|- | |- | ||
| − | + | |''Arcade'' | |
| − | + | |270 | |
| − | + | |___ | |
| − | |||
| − | |||
|- | |- | ||
| − | + | |''Realistic/Simulator'' | |
| − | + | |168 | |
| − | + | |190 | |
| − | |||
| − | |||
| − | |||
|- | |- | ||
| − | | | + | ! colspan="3" | Power-to-weight ratio (hp/ton) |
|- | |- | ||
| − | + | ! colspan="1" | Mode | |
| − | + | !Stock | |
| − | + | !Upgraded | |
| − | |||
| − | |||
| − | ! | ||
|- | |- | ||
| − | + | |''Arcade'' | |
| − | + | |11.25 | |
| − | + | |__.__ | |
| − | |||
| − | |||
|- | |- | ||
| − | | | + | |''Realistic/Simulator'' |
| + | |7.00 | ||
| + | |7.92 | ||
|- | |- | ||
|} | |} | ||
| + | |||
| + | == Armaments == | ||
| + | === Main armament === | ||
| + | <!--''Give the reader information about the characteristics of the main gun. Assess its effectiveness in a battle based on the reloading speed, ballistics and the power of shells. Do not forget about the flexibilty of the fire, that is how quickly the cannon can be aimed at the target, open fire on it and aim at another enemy. Add a link to the main article on the gun: <code><nowiki>{{main|Name of the weapon}}</nowiki></code>. Describe in general terms the ammunition available for the main gun. Give advice on how to use them and how to fill the ammunition storage.''--> | ||
| + | {{main|APX (75 mm)}} | ||
{| class="wikitable" style="text-align:center" | {| class="wikitable" style="text-align:center" | ||
|- | |- | ||
| − | ! colspan=" | + | ! colspan="6" | [[APX (75 mm)|75 mm APX]] |
| + | |- | ||
| + | ! colspan="3" rowspan="1" style="width:5em" |Capacity | ||
| + | ! rowspan="1" | Vertical <br> guidance | ||
| + | ! rowspan="1" | Horizontal <br> guidance | ||
| + | ! rowspan="1" | Stabilizer | ||
|- | |- | ||
| − | + | | colspan="3" | 102 || -10°/+30° || -7°/+7.6° || N/A | |
| − | |||
| − | |||
| − | |||
|- | |- | ||
| − | ! | + | ! colspan="6" | Turret rotation speed (°/s) |
| − | |||
|- | |- | ||
| − | | | + | ! style="width:4em" |Mode |
| + | ! style="width:4em" |Stock | ||
| + | ! style="width:4em" |Upgraded | ||
| + | ! style="width:4em" |Prior + Full crew | ||
| + | ! style="width:4em" |Prior + Expert qualif. | ||
| + | ! style="width:4em" |Prior + Ace qualif. | ||
|- | |- | ||
| − | | | + | | ''Arcade'' || 3.6 || __.__ || __.__ || __.__ || __.__ |
| − | + | |- | |
| − | + | | ''Realistic'' || 3.6 || __.__ || __.__ || __.__ || __.__ | |
|- | |- | ||
| − | ! colspan="4" | | + | ! colspan="4" | Reloading rate (seconds) |
|- | |- | ||
| − | ! | + | ! colspan="1" style="width:4em" |Stock |
| − | ! | + | ! colspan="1" style="width:4em" |Prior + Full crew |
| − | ! | + | ! colspan="1" style="width:4em" |Prior + Expert qualif. |
| − | ! | + | ! colspan="1" style="width:4em" |Prior + Ace qualif. |
|- | |- | ||
| − | | | + | | 7.2 || __.__ || __.__ || __.__ |
|- | |- | ||
|} | |} | ||
| − | {| class="wikitable" style="text-align:center" | + | ===== Ammunition ===== |
| + | {| class="wikitable sortable" style="text-align:center" width="100%" | ||
| + | ! colspan="8" | Penetration statistics | ||
|- | |- | ||
| − | ! colspan=" | + | ! rowspan="2" data-sort-type="text" | Ammunition |
| + | ! rowspan="2" class="unsortable" | Type of <br /> warhead | ||
| + | ! colspan="6" | '''Penetration''' '''''in mm''''' '''@ 90°''' | ||
|- | |- | ||
| − | ! | + | ! 10m |
| + | ! 100m | ||
| + | ! 500m | ||
| + | ! 1000m | ||
| + | ! 1500m | ||
| + | ! 2000m | ||
|- | |- | ||
| − | + | | Mle1910M || APHE || 73 || 71 || 61 || 50 || 43 || 36 | |
| − | |||
| − | |||
|- | |- | ||
| − | | | + | | Mle1917 || HE || 10 || 10 || 10 || 10 || 10 || 10 |
| − | |- | + | |- |
| − | + | |} | |
| − | + | {| class="wikitable sortable" style="text-align:center" width="100%" | |
| − | + | ! colspan="11" | Shell details | |
| − | |||
| − | ! | ||
|- | |- | ||
| − | | | + | ! rowspan="2" data-sort-type="text" | Ammunition |
| + | ! rowspan="2" class="unsortable" | Type of <br /> warhead | ||
| + | ! rowspan="2" |Velocity <br /> in m/s | ||
| + | ! rowspan="2" |Projectile<br />Mass in kg | ||
| + | ! rowspan="2" | ''Fuse delay'' | ||
| + | ''in m:'' | ||
| + | ! rowspan="2" | ''Fuse sensitivity'' | ||
| + | ''in mm:'' | ||
| + | ! rowspan="2" | ''Explosive Mass in g<br /> (TNT equivalent):'' | ||
| + | ! rowspan="2" | ''Normalization At 30° <br> from horizontal:'' | ||
| + | ! colspan="3" | ''Ricochet:'' | ||
|- | |- | ||
| − | + | ! 0% | |
| + | ! 50% | ||
| + | ! 100% | ||
|- | |- | ||
| − | + | | Mle1910M || APHE || 570 || 6.4 || 1.2 || 25 || 90 || ° || 47° || 60° || 65° | |
| − | |||
| − | |||
|- | |- | ||
| − | | | + | | Mle1917 || HE || 577 || 6.1 || 0.4 || 0.1 || 675 || +0° || 79° || 80° || 81° |
| − | |- | + | |- |
|} | |} | ||
| − | === | + | ===== [[Ammo racks|Ammo racks]] ===== |
| − | + | [[File:Ammoracks {{PAGENAME}}.png|right|thumbnail|x250px|[[Ammo racks|Ammo racks]] of the {{PAGENAME}}.]] | |
| − | + | {| class="wikitable sortable" style="text-align:center" | |
| − | |||
| − | |||
| − | |||
| − | |||
| − | |||
| − | |||
| − | |||
| − | |||
| − | |||
| − | |||
| − | |||
| − | |||
| − | |||
| − | |||
| − | |||
| − | |||
| − | |||
| − | |||
| − | |||
| − | |||
| − | |||
| − | |||
| − | |||
| − | |||
| − | |||
| − | |||
| − | |||
| − | |||
| − | |||
| − | |||
| − | |||
| − | |||
| − | |||
| − | |||
| − | |||
| − | |||
| − | |||
| − | |||
| − | |||
| − | |||
| − | |||
| − | |||
| − | |||
| − | |||
| − | |||
| − | |||
| − | |||
| − | |||
| − | {| class="wikitable" style="text-align:center" | ||
| − | |||
| − | |||
|- | |- | ||
| − | ! | + | ! class="wikitable unsortable" |Full<br /> ammo |
| − | ! | + | ! class="wikitable unsortable" |1st<br /> rack empty |
| − | ! | + | ! class="wikitable unsortable" |2nd<br /> rack empty |
| − | ! | + | ! class="wikitable unsortable" |3rd<br /> rack empty |
| − | ! | + | ! class="wikitable unsortable" |4th<br /> rack empty |
| + | ! class="wikitable unsortable" |5th<br /> rack empty | ||
| + | ! class="wikitable unsortable" width="10%" |Recommendations | ||
| + | ! class="wikitable unsortable" |Visual<br /> discrepancy | ||
|- | |- | ||
| − | + | || '''102''' || 84 ''(+18)'' || 66 ''(+36)'' || 42 ''(+60)'' || 18 ''(+84)'' || 1 ''(+83)'' || style="text-align:left" | Floor only: 18 (+83) || style="text-align:left" | no | |
| − | |||
| − | |||
| − | | | ||
| − | | | ||
|- | |- | ||
|} | |} | ||
| − | === | + | === Machine guns === |
| − | {| | + | <!--''Offensive and anti-aircraft machine guns not only allow you to fight some aircraft, but also are effective against lightly armoured vehicles. Evaluate machine guns and give recommendations on its use.''--> |
| − | + | {{main|MAC 31 (7.5 mm)}} | |
| − | + | ||
| − | + | {| class="wikitable" style="text-align:center" | |
| − | |||
|- | |- | ||
| − | | | + | ! colspan="7" | [[MAC 31 (7.5 mm)|7.5 mm MAC 31]] |
| − | |||
| − | |||
| − | |||
| − | | | ||
|- | |- | ||
| − | | | + | ! colspan="7" | ''Cupola mount'' |
| − | |||
| − | |||
| − | |||
| − | |||
|- | |- | ||
| − | | | + | ! colspan="4" rowspan="1" style="width:5em" |Capacity (Belt capacity) |
| − | | | + | ! rowspan="1" | Fire rate <br> (shots/minute) |
| − | + | ! rowspan="1" | Vertical <br> guidance | |
| − | | | + | ! rowspan="1" | Horizontal <br> guidance |
| − | | | ||
|- | |- | ||
| − | | | + | | colspan="4" | 3,250 (150) || 1,350 || -9°/+20° || N/A |
| − | | | ||
| − | | | ||
| − | | | ||
| − | | | ||
|- | |- | ||
|} | |} | ||
| − | |||
| − | + | == Usage in the battles == | |
| + | <!--''Describe the tactics of playing in the vehicle, the features of using vehicles in the team and advice on tactics. Refrain from creating a "guide" - do not impose a single point of view but give the reader food for thought. Describe the most dangerous enemies and give recommendations on fighting them. If necessary, note the specifics of the game in different modes (AB, RB, SB).''--> | ||
| + | The Somua 40 behaves as a classical casemate SPG as it should provide its teammates with superior firepower from medium to far distance, behind the frontlines where it will be harder to flank. As this is its purposed role, this tank has some issues accomplishing it. The first being its relatively low penetration and shell velocity, which makes long range engagements (>750 m)a bit hard to manage. The second being bad mobility, which complicates the task of positioning. | ||
| − | + | Act as a classical SPG while keeping in mind your slow pace. There is nothing very much interesting nor special you can do with this tank. | |
| − | + | === Pros and cons === | |
| + | <!--''Summarize and briefly evaluate the vehicle in terms of its characteristics and combat effectiveness. Mark its pros and cons in a bulleted list. Do not use more than 6 points for each of the characteristics. Avoid using categorical definitions such as "bad", "good" and the like - they have a substitution in the form of softer "inadequate", "effective".''--> | ||
| + | '''Pros:''' | ||
| − | + | * Firepower | |
| − | |||
| − | + | :* Decent 75mm cannon with explosive filler gives it good one-shot potential. | |
| + | :* "Terrific" MAC 31 gun mounted in cupola. | ||
| + | :* Competitive reload time | ||
| + | :* Good HE shells for dealing with SPAAs at the BR. | ||
| + | :* Depression and elevation angles are acceptable. | ||
| − | * | + | * Armour is quite thick on all sides. |
| − | + | * Gun mantlet area is strong | |
| − | |||
| − | |||
| − | * | ||
'''Cons:''' | '''Cons:''' | ||
| − | * | + | * Commander's cupola is badly designed. |
| − | * | + | |
| − | * | + | :* Tall commander’s cupola. |
| − | * | + | :* Turret-mounted 7.5 mm MG does not allow for shooting down planes. |
| − | * | + | :* Weak, unslopped armour makes it a shot trap |
| − | * | + | :* Makes it easy to spot while bringing no tactical advantage. |
| − | * | + | |
| + | * Slow in all domains. | ||
| + | |||
| + | :* Engine is underpowered | ||
| + | :* Turret is slow | ||
| + | :* Guns feels "lazy" | ||
| + | |||
| + | * Rather weak frontal armour due to bad sloping | ||
| + | * Three crew members can quickly lead to combat efficiency loss. | ||
| + | * Huge ammo rack near gunner makes it easy to one-shot. | ||
== History == | == History == | ||
| − | <!-- Describe the history of the creation and combat usage of the | + | <!--''Describe the history of the creation and combat usage of the ground vehicle in more detail than in the introduction. If the historical reference turns out to be too big, take it to a separate article, taking a link to an article about the vehicle and adding a block "/historical reference" (example: https://wiki.warthunder.com/Name-vehicles/historical reference) and add a link to it here using the <code>main</code> template. Be sure to include links to sources at the end of the article.''--> |
| − | + | The SAu 40 self-propelled gun was developed by the SOMUA company between 1935 and 1937 as part of the same order the French cavalry placed for the S35 tank. | |
| + | |||
| + | The two tanks combined were intended to equip light mechanized divisions of the French army and support the larger “battle tanks” (chars de bataille). The vehicle inherited the S35’s characteristic chassis with a redesigned front section of the hull to accommodate the 75mm APX cannon. In addition, the rotating turret on top of the fighting compartment was redesigned to a commander’s cupola and moved to the side of the vehicle, but the turret’s 47mm cannon was replaced with a single 7.5mm machine gun. | ||
| + | |||
| + | The body of the SAu 40 was ready by 1937, but it couldn’t be immediately completed. Because the cannon was not yet ready to be installed on the chassis, SOMUA engineers had to wait nearly 2 years before the cannon was finally made available. It wasn’t until 1939 that the fully assembled prototype was completed, and orders for mass production were received in October of the same year. | ||
| + | |||
| + | Whether or not any additional vehicles other than the prototype were built or if the vehicle took part in active fighting is unknown. | ||
| + | |||
| + | ''-Excerpt from [https://warthunder.com/en/news/5169-development-sau-40-the-ugly-duckling-en Devblog]'' | ||
== Media == | == Media == | ||
| Line 262: | Line 265: | ||
== Read also == | == Read also == | ||
| − | |||
| − | * | + | * [https://warthunder.com/en/news/5169-development-sau-40-the-ugly-duckling-en [Devblog<nowiki>]</nowiki> SAu 40 - The Ugly Duckling] |
| − | |||
| − | |||
== Sources == | == Sources == | ||
| Line 272: | Line 272: | ||
* ''topic on the official game forum;'' | * ''topic on the official game forum;'' | ||
| − | |||
* ''other literature.'' | * ''other literature.'' | ||
| − | {{ | + | {{France tank destroyers}} |
Revision as of 02:44, 13 February 2019
Contents
Description

The Canon Automoteur DE 75 mm SAu 40 (DE 75 mm Self-Propelled Gun SAu 40) is a Rank I French tank destroyer
with a battle rating of 1.7 (AB/RB/SB). It was introduced in Update 1.75 "La Résistance". It distinguish itself by its very tall cupola and thick gun barrel. This tank is equipped with APHE rounds, a rare feature in the French tech tree.
As it was developped from the French S.35, this tank shares many of its characteristics such as ~40 mm cast hull bolted onto the chassis, which is barely a widened version of its original. The track system is mostly the same as on the S.35, with 25 mm plates covering the roller wheels. As for the hull, its two 8 mm grilles over the engine compartment and doors on the side reinforces the impression that it's just a widened S.35 hull.
As this tank is based off the S.35, it shares many of its attributes when it comes to armour. A slight angle can defeat most shots this tank will take at this BR, this is useful to know when getting into position: from a distance and not showing neither side nor front to the enemy, you should be safe. As for frontal armour, its 40 mm overall thickness is not strong enough to withstand anything bigger than AA fire. But, a thing to consider with this weird pattern is its "bouncy" behaviour, principally around the gun mantlet: complex angles may just bounce some shots, making them loose some energy before hitting the main armour, this feature is peculiarly distinctive at gun's height.
The main weakness of this tank is its very tall commander's cupola, which makes it quite easy to spot and destroy, as it is thinner than the main armour. Any APHE penetrating this area will kill the tank's commander, thus disabling its only MG and some shrapnels may even damage or kill the driver, disabling this tank for good. A way to avoid getting spotted too easily is buying camouflage for the front cupola area, making it look more like a bush popping out a hill than a tank's turret. Try to hide the tank's lower hull part as it is only 35 mm thick.
While being mounted on a widened S.35 hull, this heavier tank has about 70 HP less than its predecessor, making it quite slow and unwieldy. In order to fulfill the task of getting into position, one should choose its route wisely and avoid risky spots as this tank's awful reverse speed and hull turning rate makes it quite bad at hasty retreats. Mobility with the Somua 40 is an issue. It is arguably what makes this tank hard to master as it does not allow for good map placement.
As any casemate SPG, this tank's main feature is its main gun...kind of. With average penetration rates for this BR with a maximum of 73 mm at point-blank ranges (comparably, the Russian SU-76M penetrates 80 mm with its basic APHE shell and up to 135 mm with APCR shots). While being one of the rare French tank shooting APHE shells, increasing its one-shot potential, this round noticeably fails to explode when flanking enemies as this round takes 25 mm of steel to detonate. Another concern being its slow horizontal traverse, which makes it hard to react to fast-paced situations. This gun placement makes this tank quite vulnerable: being low, it exposes the SOMUA 40 to enemy fire when popping up a hill.
As for the turreted MAC 31 MG, it does not helps at anything more than taking down truck-mounted guns. This turret is slow, which negates the possibility of chasing planes with it. It also has poor rate of fire and is low calibre, so even if you manage to hit a plane, it will not do much to it.
General info
Survivability and armour
Armour type:
- Cast homogeneous armour
| Armour | Front (Slope angle) | Sides | Rear | Roof |
|---|---|---|---|---|
| Hull | 40 mm (0-73°) Front glacis 34 mm (1-54°) Lower glacis 60 mm (0-53°) Gun mantlet |
40 mm (0-24°), 34 mm (43-63°) Top 40 (1-3°) + 25 mm (0-89°) Bottom |
34 mm (20-49°) Top 34 mm (4-71°) Bottom |
20 mm 8 mm Engine grille |
| Turret | 38 mm (5-48°) 25 mm Gun mantlet |
38 mm (16-38°) | 38 mm (11-38°) | 20 mm 34 mm Dome |
Notes:
- Suspension wheels are 15 mm thick while tracks are 20 mm thick.
- Turret underside is 20 mm thick.
- Turret ring is 30 mm thick.
- Turret base is 34 mm thick.
Mobility
| Mobility characteristic | ||
|---|---|---|
| Weight (tons) | Add-on Armour weight (tons) |
Max speed (km/h) |
| 24.0 | N/A | 40 (AB) |
| 37 (RB/SB) | ||
| Engine power (horsepower) | ||
| Mode | Stock | Upgraded |
| Arcade | 270 | ___ |
| Realistic/Simulator | 168 | 190 |
| Power-to-weight ratio (hp/ton) | ||
| Mode | Stock | Upgraded |
| Arcade | 11.25 | __.__ |
| Realistic/Simulator | 7.00 | 7.92 |
Armaments
Main armament
| 75 mm APX | |||||
|---|---|---|---|---|---|
| Capacity | Vertical guidance |
Horizontal guidance |
Stabilizer | ||
| 102 | -10°/+30° | -7°/+7.6° | N/A | ||
| Turret rotation speed (°/s) | |||||
| Mode | Stock | Upgraded | Prior + Full crew | Prior + Expert qualif. | Prior + Ace qualif. |
| Arcade | 3.6 | __.__ | __.__ | __.__ | __.__ |
| Realistic | 3.6 | __.__ | __.__ | __.__ | __.__ |
| Reloading rate (seconds) | |||||
| Stock | Prior + Full crew | Prior + Expert qualif. | Prior + Ace qualif. | ||
| 7.2 | __.__ | __.__ | __.__ | ||
Ammunition
| Penetration statistics | |||||||
|---|---|---|---|---|---|---|---|
| Ammunition | Type of warhead |
Penetration in mm @ 90° | |||||
| 10m | 100m | 500m | 1000m | 1500m | 2000m | ||
| Mle1910M | APHE | 73 | 71 | 61 | 50 | 43 | 36 |
| Mle1917 | HE | 10 | 10 | 10 | 10 | 10 | 10 |
| Shell details | ||||||||||
|---|---|---|---|---|---|---|---|---|---|---|
| Ammunition | Type of warhead |
Velocity in m/s |
Projectile Mass in kg |
Fuse delay
in m: |
Fuse sensitivity
in mm: |
Explosive Mass in g (TNT equivalent): |
Normalization At 30° from horizontal: |
Ricochet: | ||
| 0% | 50% | 100% | ||||||||
| Mle1910M | APHE | 570 | 6.4 | 1.2 | 25 | 90 | ° | 47° | 60° | 65° |
| Mle1917 | HE | 577 | 6.1 | 0.4 | 0.1 | 675 | +0° | 79° | 80° | 81° |
Ammo racks

| Full ammo |
1st rack empty |
2nd rack empty |
3rd rack empty |
4th rack empty |
5th rack empty |
Recommendations | Visual discrepancy |
|---|---|---|---|---|---|---|---|
| 102 | 84 (+18) | 66 (+36) | 42 (+60) | 18 (+84) | 1 (+83) | Floor only: 18 (+83) | no |
Machine guns
| 7.5 mm MAC 31 | ||||||
|---|---|---|---|---|---|---|
| Cupola mount | ||||||
| Capacity (Belt capacity) | Fire rate (shots/minute) |
Vertical guidance |
Horizontal guidance | |||
| 3,250 (150) | 1,350 | -9°/+20° | N/A | |||
Usage in the battles
The Somua 40 behaves as a classical casemate SPG as it should provide its teammates with superior firepower from medium to far distance, behind the frontlines where it will be harder to flank. As this is its purposed role, this tank has some issues accomplishing it. The first being its relatively low penetration and shell velocity, which makes long range engagements (>750 m)a bit hard to manage. The second being bad mobility, which complicates the task of positioning.
Act as a classical SPG while keeping in mind your slow pace. There is nothing very much interesting nor special you can do with this tank.
Pros and cons
Pros:
- Firepower
- Decent 75mm cannon with explosive filler gives it good one-shot potential.
- "Terrific" MAC 31 gun mounted in cupola.
- Competitive reload time
- Good HE shells for dealing with SPAAs at the BR.
- Depression and elevation angles are acceptable.
- Armour is quite thick on all sides.
- Gun mantlet area is strong
Cons:
- Commander's cupola is badly designed.
- Tall commander’s cupola.
- Turret-mounted 7.5 mm MG does not allow for shooting down planes.
- Weak, unslopped armour makes it a shot trap
- Makes it easy to spot while bringing no tactical advantage.
- Slow in all domains.
- Engine is underpowered
- Turret is slow
- Guns feels "lazy"
- Rather weak frontal armour due to bad sloping
- Three crew members can quickly lead to combat efficiency loss.
- Huge ammo rack near gunner makes it easy to one-shot.
History
The SAu 40 self-propelled gun was developed by the SOMUA company between 1935 and 1937 as part of the same order the French cavalry placed for the S35 tank.
The two tanks combined were intended to equip light mechanized divisions of the French army and support the larger “battle tanks” (chars de bataille). The vehicle inherited the S35’s characteristic chassis with a redesigned front section of the hull to accommodate the 75mm APX cannon. In addition, the rotating turret on top of the fighting compartment was redesigned to a commander’s cupola and moved to the side of the vehicle, but the turret’s 47mm cannon was replaced with a single 7.5mm machine gun.
The body of the SAu 40 was ready by 1937, but it couldn’t be immediately completed. Because the cannon was not yet ready to be installed on the chassis, SOMUA engineers had to wait nearly 2 years before the cannon was finally made available. It wasn’t until 1939 that the fully assembled prototype was completed, and orders for mass production were received in October of the same year.
Whether or not any additional vehicles other than the prototype were built or if the vehicle took part in active fighting is unknown.
-Excerpt from Devblog
Media
An excellent addition to the article will be video guides, as well as screenshots from the game and photos.
Read also
Sources
Paste links to sources and external resources, such as:
- topic on the official game forum;
- other literature.
| France tank destroyers | |
|---|---|
| Lorraine 40t derivatives | CA Lorraine · Lorraine 155 Mle.50 |
| ATGM | MEPHISTO · AMX-10M |
| Other | AMR.35 ZT3 · Lorraine 37L · SAu 40 · ARL-44 · ELC bis · AMX-50 Foch · AuF1 |
| USA | ▄M10 GMC · ▄M36B2 |
